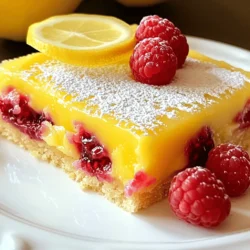
Get ready to savor the bright flavors of summer with my Raspberry Lemonade Bars! These sweet and tangy treats are the perfect balance of tartness and sweetness. You’ll love how easy they are to make and how fresh they taste.Let’s dive into this delicious dessert together!You need a mix of simple ingredients. These bars have a buttery crust and a fruity filling. Every bite is a burst of flavor.
Detailed List of Ingredients
Here’s what you need to make these delicious bars:
– 1 cup all-purpose flour
– 1/4 cup powdered sugar
– 1/2 cup unsalted butter, softened
– 1/4 teaspoon salt
– 2 large eggs
– 1 cup granulated sugar
– 1/4 cup fresh lemon juice (about 2 lemons)
– Zest of 1 lemon
– 1 cup fresh raspberries (or thawed frozen raspberries)
– 1 teaspoon baking powder
– Extra powdered sugar for dusting
Possible Ingredient Substitutions
You can swap some ingredients if needed. Use whole wheat flour for a healthier crust. Coconut sugar can replace granulated sugar. If you want a dairy-free option, use coconut oil instead of butter. For a twist, try lime juice in place of lemon juice. These changes keep the bars tasty and fun!
Step-by-Step Instructions
Preparatory Steps
First, gather all your ingredients. Make sure you have everything you need:
– 1 cup all-purpose flour
– 1/4 cup powdered sugar
– 1/2 cup unsalted butter, softened
– 1/4 teaspoon salt
– 2 large eggs
– 1 cup granulated sugar
– 1/4 cup fresh lemon juice (about 2 lemons)
– Zest of 1 lemon
– 1 cup fresh raspberries (or thawed frozen raspberries)
– 1 teaspoon baking powder
– Extra powdered sugar for dusting
Next, preheat your oven to 350°F (175°C). Grease an 8×8-inch baking pan. You can also line it with parchment paper. This makes it easy to remove the bars later.
Baking the Crust
In a mixing bowl, combine the flour, powdered sugar, and salt. Add the softened butter. Mix everything until it’s crumbly. Now, press this mixture firmly into the bottom of your prepared baking pan. Make sure it covers the whole bottom. Bake it for 15-20 minutes. You want it to turn lightly golden.
Making the Raspberry Lemon Filling
While the crust bakes, grab another bowl. Whisk together the eggs, granulated sugar, lemon juice, lemon zest, and baking powder. Make sure everything is smooth and well mixed. Now, gently fold in the raspberries. Be careful not to mash them too much. Once mixed, pour this filling over the crust.
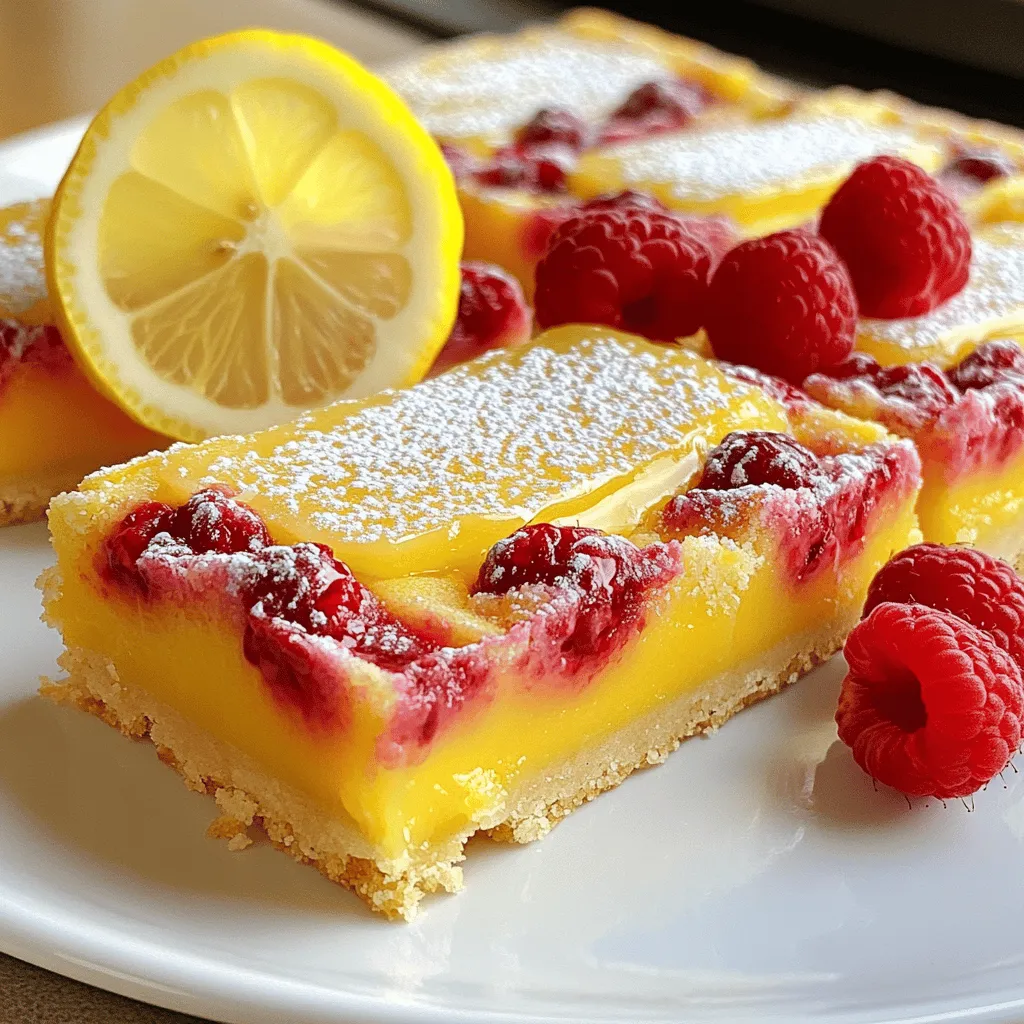
Bake the whole thing for another 20-25 minutes. The filling should be set and slightly firm to the touch. When done, remove it from the oven. Let it cool completely in the pan on a wire rack. Once cool, dust the top with extra powdered sugar. Then, cut into bars and enjoy your sweet and tangy treat!
Tips & Tricks
Achieving the Perfect Crust
To make the best crust, use cold butter. It helps create a flaky texture. Mix flour, powdered sugar, and salt first. Then, add the butter. Use a fork or your fingers to blend until crumbly. Press the mix into the pan firmly. This step is key to a strong base. Bake until lightly golden, which takes about 15-20 minutes. Let it cool before adding the filling for the best results.
Flavors & Sweetness Tips
Balance is key in these bars. The tartness of lemon pairs well with sweet raspberries. Use fresh lemon juice for a vibrant flavor. If you want more sweetness, add a bit more sugar to the filling. Keep the zest in; it adds a lovely aroma. I recommend tasting the filling before baking. Adjust sweetness if needed, as flavors change when baked.
Common Mistakes to Avoid
One common mistake is overmixing the filling. This can make the bars tough. Mix just until combined, and fold in the raspberries gently. Another mistake is not cooling the crust properly. If it’s too warm, the filling can melt and mix in. Lastly, don’t skip dusting with powdered sugar. It adds a nice finish and extra sweetness to each bite.
Variations
Fruit Variations: Other Berries
You can switch raspberries for other berries. Blueberries, strawberries, or blackberries work great. Each berry adds its own taste. Blueberries give a mild flavor, while strawberries bring sweetness. Blackberries add a tangy twist. Use the same amount as the raspberries in the recipe. This keeps the texture and flavor balanced.
Gluten-Free Options
If you want gluten-free bars, swap the all-purpose flour. Use almond flour or coconut flour instead. Both options give a nice texture. Almond flour adds a nutty taste, while coconut flour gives a slight sweetness. Remember to adjust the amount of sugar, if needed, to match the new flour’s flavor.
Adjusting Sweetness Levels
You can change the sweetness of your bars easily. If you like it less sweet, cut back on the granulated sugar. Start with half a cup instead of a full cup. For more sweetness, add a bit more sugar. You can also use honey or maple syrup. Just remember, they add moisture, so adjust the other wet ingredients slightly.
Storage Info
Storing Raspberry Lemonade Bars
To keep your raspberry lemonade bars fresh, store them in an airtight container. Place parchment paper between layers to prevent sticking. These bars taste best when cool, so keep them in the fridge. They will stay fresh for about a week this way.
Freezing for Later Use
You can freeze these bars if you want to save some for later. First, cut the bars into squares. Then, wrap each square in plastic wrap. Place the wrapped squares in a freezer-safe bag. They can last for up to three months in the freezer. When you’re ready to eat them, just thaw them in the fridge overnight.
Shelf Life and Serving Recommendations
Raspberry lemonade bars have a shelf life of about five to seven days in the fridge. For serving, enjoy them chilled or at room temperature. You can dust them with powdered sugar right before serving for a beautiful touch. Pair them with lemonade or tea for a refreshing treat.
FAQs
Can I use frozen raspberries?
Yes, you can use frozen raspberries in your bars. Just make sure to thaw them first. Drain any extra juice to keep the filling from getting too wet. Using frozen raspberries can still give you that bright flavor and beautiful color. I often use them when fresh ones are out of season. They work great in the filling.
How do I know when the bars are done baking?
You can tell the bars are done when the filling is set. It should feel slightly firm to the touch. A good test is to gently shake the pan. If the center is not jiggly, it’s ready. The edges might also look a bit golden. Remember, they will firm up more as they cool, so don’t over-bake them.
What can I serve with raspberry lemonade bars?
These bars are great on their own, but you can serve them with a few tasty sides. Consider a scoop of vanilla ice cream or a dollop of whipped cream for a rich touch. Fresh mint leaves can add a nice pop of color and flavor. A cup of tea or lemonade pairs perfectly with these sweet and tangy treats. Enjoy them at a picnic or a summer party!
You learned how to make delicious raspberry lemonade bars. We explored the ingredients, steps, and tips to perfect your recipe. Remember, you can swap ingredients and adjust flavors to fit your taste. Storing and freezing your bars is easy, so you can enjoy them later.
In the end, these bars are versatile and fun to make. Happy baking!