S’mores Brownie Bars Irresistible Dessert Delight

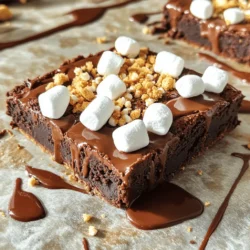
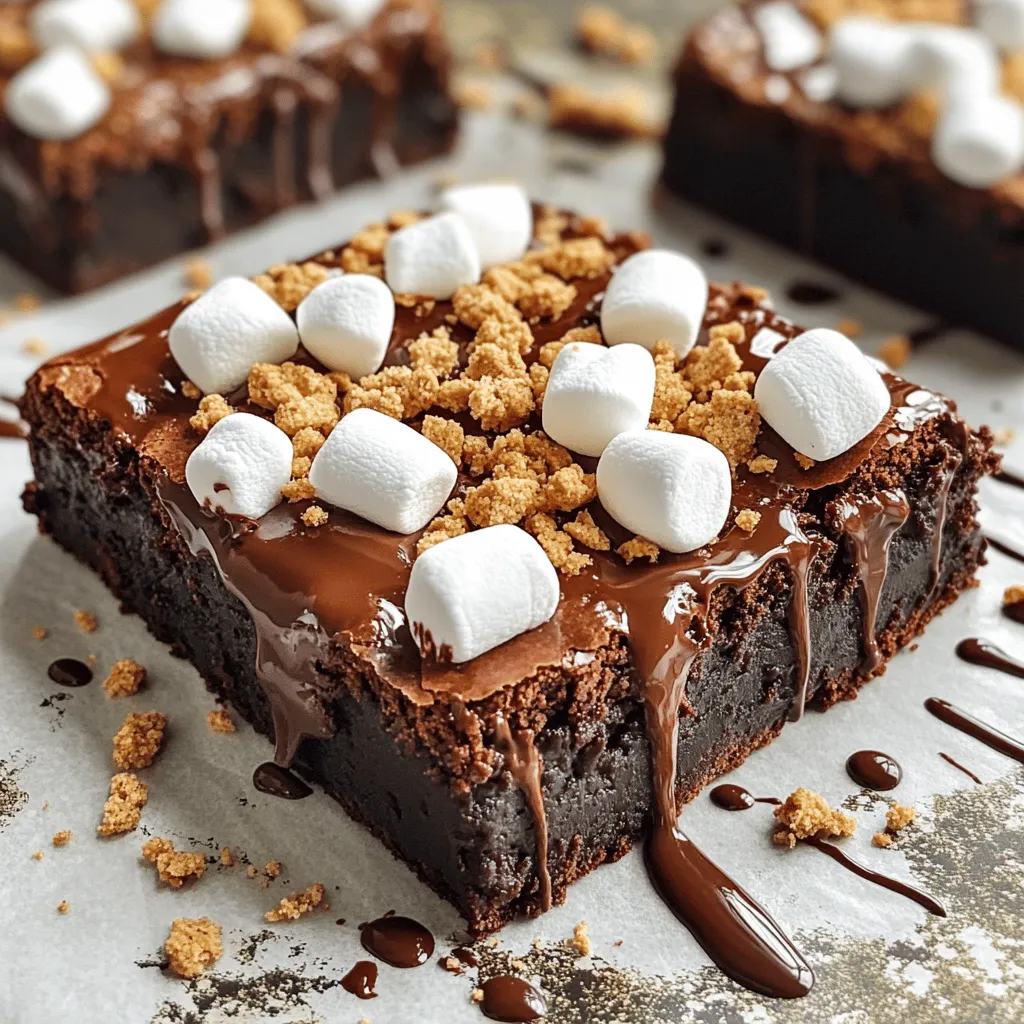
Who can resist the combination of rich brownies, gooey marshmallows, and crispy graham crackers? In this post, I’ll guide you through making S’mores Brownie Bars that are easy and fun to bake. You’ll wow your friends and family with this tasty treat. Let’s dive into the ingredients, tips, and tricks to create this irresistible dessert delight that you won’t soon forget!

Ingredients

List of Ingredients

To make S’mores Brownie Bars, you need the following ingredients:

– 1 cup unsalted butter, melted

– 2 cups granulated sugar

– 1 cup packed brown sugar

– 4 large eggs

– 1 teaspoon vanilla extract

– 1 1/2 cups all-purpose flour

– 1 cup unsweetened cocoa powder

– 1/2 teaspoon baking powder

– 1/2 teaspoon salt

– 1 cup semi-sweet chocolate chips

– 1 cup mini marshmallows

– 1 cup crushed graham crackers

– Additional mini marshmallows and chocolate pieces for topping

Ingredient Notes and Substitutions

You can make a few changes if needed. For butter, use coconut oil for a dairy-free option. You can swap granulated sugar with coconut sugar for a less sweet treat. If you want a gluten-free version, use almond flour instead of all-purpose flour. You can also use dairy-free chocolate chips if you want to avoid dairy completely. Marshmallows can be replaced by vegan marshmallows for a plant-based treat.

Importance of Quality Ingredients

Quality ingredients make a big difference in any recipe. Use fresh eggs for a rich flavor and better texture. Choose high-quality cocoa powder for a deep chocolate taste. Good chocolate chips add a sweet touch and gooey texture. Fresh graham crackers give a nice crunch and flavor. Using the best ingredients ensures your S’mores Brownie Bars taste amazing and look great. When you use quality items, every bite feels special, which is what we want. For the full recipe, check out the entire guide.

Step-by-Step Instructions

Preparation and Preheating

Start by preheating your oven to 350°F (175°C). This step is key for even baking. Grease a 9×13-inch baking pan or use parchment paper. Parchment makes it easy to lift out the bars later.

Mixing Dry and Wet Ingredients

In a large bowl, mix melted butter, granulated sugar, and brown sugar. Whisk them until they blend well. Next, add the eggs one by one. Mix well after each egg. Then, stir in the vanilla extract for flavor. In a different bowl, sift the flour, cocoa powder, baking powder, and salt. Combine the dry mix into the wet mix slowly. Stir until just combined. Do not overmix; this keeps the bars soft.

Layering the Brownie Bars

Pour half of your brownie batter into the prepared pan. Spread it evenly with a spatula. Next, sprinkle mini marshmallows over this layer. Then, add the rest of the brownie batter on top. Spread it gently to cover the marshmallows. For a gooey finish, top with more marshmallows and chocolate pieces. Bake in the oven for 25-30 minutes. A toothpick should come out with a few moist crumbs. Let the bars cool fully before cutting into squares. For the full recipe, refer to the earlier section.

Tips & Tricks

Achieving the Perfect Fudgy Texture

To get that perfect fudgy texture, don’t overbake your bars. Bake them just until a toothpick shows a few moist crumbs. This keeps them soft and gooey. Use high-quality cocoa powder for deep flavor. It can make a big difference in taste.

Common Mistakes to Avoid

One common mistake is mixing too much. When you combine wet and dry ingredients, mix just until blended. Overmixing can make the bars tough. Another mistake is skipping the cooling step. Letting them cool fully helps them set. This way, they cut cleanly and hold their shape.

Best Tools for Baking

Use a good 9×13-inch pan for even baking. A silicone spatula works well for spreading the batter. A whisk is great for blending the sugars and butter. Measuring cups and spoons help ensure accuracy. For the best results, invest in a high-quality kitchen scale. This can help you measure ingredients more precisely. You can find the full recipe for these S’mores Brownie Bars to guide you through.

Variations

Creative Add-Ins for Flavor

You can play with flavors in these S’mores Brownie Bars. Add nuts like walnuts or pecans for crunch. You might also try peanut butter chips for a rich taste. For a tropical twist, mix in some shredded coconut. Each of these add-ins makes the bars unique and tasty.

Alternate Toppings and Mix-ins

Toppings can change your dessert game. Instead of mini marshmallows, use caramel bits for a sweet surprise. You can also top with crushed peppermint candy for a fun holiday treat. Drizzle some salted caramel or chocolate sauce on top for extra flavor. Don’t be afraid to mix and match!

Dietary Modifications (Gluten-Free, Vegan Options)

You can easily adapt this recipe for different diets. Swap all-purpose flour for gluten-free flour to make it gluten-free. For a vegan version, use flax eggs instead of real eggs and coconut oil instead of butter. Dairy-free chocolate chips work well too. These changes keep the delicious taste while fitting your diet!

For the full recipe, check out the detailed steps and ingredients.

Storage Info

How to Store the Brownie Bars

To keep your S’mores brownie bars fresh, place them in an airtight container. You can store them at room temperature for up to three days. If you want them to last longer, put them in the fridge. They will stay good for about a week when chilled. Make sure to layer parchment paper between bars to avoid sticking.

Reheating Instructions for Leftovers

When you want to enjoy a brownie bar again, reheating is easy. Just take a bar and place it on a microwave-safe plate. Heat it for about 15 seconds. This will warm it up nicely. If you prefer a crispier edge, pop it in a preheated oven at 350°F (175°C) for 5-7 minutes.

Freezing Tips for Long-Term Storage

If you want to save some bars for later, freezing works great. First, cut the brownie bars into squares. Wrap each square in plastic wrap. Then, place them in a freezer-safe bag or container. They can stay frozen for up to three months. When you’re ready to eat one, just thaw it in the fridge overnight. Enjoy your delicious treat anytime!

For the full recipe, check out the detailed instructions and tips.

FAQs

How long do S’mores Brownie Bars last?

S’mores Brownie Bars last about 3 to 5 days at room temperature. Store them in an airtight container to keep them fresh. You might notice that the marshmallows can get a bit hard over time, but they still taste great!

Can I make S’mores Brownie Bars in advance?

Yes, you can make S’mores Brownie Bars in advance. They taste even better after a day or two as the flavors meld. Just make sure to cool them completely before storing. Wrap them well to keep them fresh.

What can I serve with S’mores Brownie Bars?

You can serve S’mores Brownie Bars with a scoop of vanilla ice cream. The cold ice cream pairs well with the warm brownie. You could also add whipped cream and drizzle some chocolate sauce on top. For extra fun, serve with fresh berries or a side of milk! For the full recipe, check out the details above.

In this article, we explored the key ingredients and step-by-step instructions for making delicious S’mores Brownie Bars. We discussed tips for achieving the perfect texture, common mistakes to avoid, and tools you need. We also shared fun variations and storage tips to keep your treats fresh.

Remember, quality ingredients make a big difference. Experiment with flavors and toppings. Enjoy your baking journey!

To make S'mores Brownie Bars, you need the following ingredients: - 1 cup unsalted butter, melted - 2 cups granulated sugar - 1 cup packed brown sugar - 4 large eggs - 1 teaspoon vanilla extract - 1 1/2 cups all-purpose flour - 1 cup unsweetened cocoa powder - 1/2 teaspoon baking powder - 1/2 teaspoon salt - 1 cup semi-sweet chocolate chips - 1 cup mini marshmallows - 1 cup crushed graham crackers - Additional mini marshmallows and chocolate pieces for topping You can make a few changes if needed. For butter, use coconut oil for a dairy-free option. You can swap granulated sugar with coconut sugar for a less sweet treat. If you want a gluten-free version, use almond flour instead of all-purpose flour. You can also use dairy-free chocolate chips if you want to avoid dairy completely. Marshmallows can be replaced by vegan marshmallows for a plant-based treat. Quality ingredients make a big difference in any recipe. Use fresh eggs for a rich flavor and better texture. Choose high-quality cocoa powder for a deep chocolate taste. Good chocolate chips add a sweet touch and gooey texture. Fresh graham crackers give a nice crunch and flavor. Using the best ingredients ensures your S'mores Brownie Bars taste amazing and look great. When you use quality items, every bite feels special, which is what we want. For the full recipe, check out the entire guide. Start by preheating your oven to 350°F (175°C). This step is key for even baking. Grease a 9x13-inch baking pan or use parchment paper. Parchment makes it easy to lift out the bars later. In a large bowl, mix melted butter, granulated sugar, and brown sugar. Whisk them until they blend well. Next, add the eggs one by one. Mix well after each egg. Then, stir in the vanilla extract for flavor. In a different bowl, sift the flour, cocoa powder, baking powder, and salt. Combine the dry mix into the wet mix slowly. Stir until just combined. Do not overmix; this keeps the bars soft. Pour half of your brownie batter into the prepared pan. Spread it evenly with a spatula. Next, sprinkle mini marshmallows over this layer. Then, add the rest of the brownie batter on top. Spread it gently to cover the marshmallows. For a gooey finish, top with more marshmallows and chocolate pieces. Bake in the oven for 25-30 minutes. A toothpick should come out with a few moist crumbs. Let the bars cool fully before cutting into squares. For the full recipe, refer to the earlier section. To get that perfect fudgy texture, don’t overbake your bars. Bake them just until a toothpick shows a few moist crumbs. This keeps them soft and gooey. Use high-quality cocoa powder for deep flavor. It can make a big difference in taste. One common mistake is mixing too much. When you combine wet and dry ingredients, mix just until blended. Overmixing can make the bars tough. Another mistake is skipping the cooling step. Letting them cool fully helps them set. This way, they cut cleanly and hold their shape. Use a good 9x13-inch pan for even baking. A silicone spatula works well for spreading the batter. A whisk is great for blending the sugars and butter. Measuring cups and spoons help ensure accuracy. For the best results, invest in a high-quality kitchen scale. This can help you measure ingredients more precisely. You can find the full recipe for these S'mores Brownie Bars to guide you through. {{image_2}} You can play with flavors in these S'mores Brownie Bars. Add nuts like walnuts or pecans for crunch. You might also try peanut butter chips for a rich taste. For a tropical twist, mix in some shredded coconut. Each of these add-ins makes the bars unique and tasty. Toppings can change your dessert game. Instead of mini marshmallows, use caramel bits for a sweet surprise. You can also top with crushed peppermint candy for a fun holiday treat. Drizzle some salted caramel or chocolate sauce on top for extra flavor. Don’t be afraid to mix and match! You can easily adapt this recipe for different diets. Swap all-purpose flour for gluten-free flour to make it gluten-free. For a vegan version, use flax eggs instead of real eggs and coconut oil instead of butter. Dairy-free chocolate chips work well too. These changes keep the delicious taste while fitting your diet! For the full recipe, check out the detailed steps and ingredients. To keep your S'mores brownie bars fresh, place them in an airtight container. You can store them at room temperature for up to three days. If you want them to last longer, put them in the fridge. They will stay good for about a week when chilled. Make sure to layer parchment paper between bars to avoid sticking. When you want to enjoy a brownie bar again, reheating is easy. Just take a bar and place it on a microwave-safe plate. Heat it for about 15 seconds. This will warm it up nicely. If you prefer a crispier edge, pop it in a preheated oven at 350°F (175°C) for 5-7 minutes. If you want to save some bars for later, freezing works great. First, cut the brownie bars into squares. Wrap each square in plastic wrap. Then, place them in a freezer-safe bag or container. They can stay frozen for up to three months. When you're ready to eat one, just thaw it in the fridge overnight. Enjoy your delicious treat anytime! For the full recipe, check out the detailed instructions and tips. S'mores Brownie Bars last about 3 to 5 days at room temperature. Store them in an airtight container to keep them fresh. You might notice that the marshmallows can get a bit hard over time, but they still taste great! Yes, you can make S'mores Brownie Bars in advance. They taste even better after a day or two as the flavors meld. Just make sure to cool them completely before storing. Wrap them well to keep them fresh. You can serve S'mores Brownie Bars with a scoop of vanilla ice cream. The cold ice cream pairs well with the warm brownie. You could also add whipped cream and drizzle some chocolate sauce on top. For extra fun, serve with fresh berries or a side of milk! For the full recipe, check out the details above. In this article, we explored the key ingredients and step-by-step instructions for making delicious S'mores Brownie Bars. We discussed tips for achieving the perfect texture, common mistakes to avoid, and tools you need. We also shared fun variations and storage tips to keep your treats fresh. Remember, quality ingredients make a big difference. Experiment with flavors and toppings. Enjoy your baking journey!

S'mores Brownie Bars

Indulge in the deliciousness of S'mores Brownie Bars with this easy-to-follow recipe! Combining rich chocolate, gooey marshmallows, and crunchy graham crackers, these treats are perfect for any occasion. Discover how to achieve the ideal fudgy texture and presentation tips to impress your guests. Ready to satisfy your sweet tooth? Click through to explore the complete recipe and bake these delightful bars today!

Ingredients
  

1 cup unsalted butter, melted

2 cups granulated sugar

1 cup packed brown sugar

4 large eggs

1 teaspoon vanilla extract

1 1/2 cups all-purpose flour

1 cup unsweetened cocoa powder

1/2 teaspoon baking powder

1/2 teaspoon salt

1 cup semi-sweet chocolate chips

1 cup mini marshmallows

1 cup crushed graham crackers

Additional mini marshmallows and chocolate pieces for topping

Instructions
 

Preheat your oven to 350°F (175°C) and grease a 9x13-inch baking pan or line it with parchment paper for easy removal.

    In a large mixing bowl, combine melted butter, granulated sugar, and brown sugar. Whisk until well combined.

      Add the eggs one at a time, mixing after each addition, then stir in the vanilla extract until smooth.

        In a separate bowl, sift together the flour, cocoa powder, baking powder, and salt. Gradually add the dry ingredients to the wet ingredients, mixing until just combined.

          Fold in the chocolate chips and crushed graham crackers until evenly distributed in the batter.

            Pour half of the brownie batter into the prepared baking pan and spread evenly with a spatula.

              Sprinkle the mini marshmallows over the brownie layer, then dollop the remaining brownie batter on top, spreading gently to cover the marshmallows.

                Top the batter with additional mini marshmallows and chocolate pieces for extra gooeyness.

                  Bake in the preheated oven for 25-30 minutes, or until a toothpick inserted into the center comes out with a few moist crumbs. Avoid overbaking for a fudgy texture.

                    Allow the bars to cool completely in the pan before cutting into squares.

                      Prep Time: 15 minutes | Total Time: 45 minutes | Servings: 12-16 bars

                        - Presentation Tips: Serve the brownie bars warm with a drizzle of chocolate sauce on top and a few extra crushed graham crackers for added texture. A dollop of whipped cream on the side adds a nice touch!

                          Leave a Comment

                          Recipe Rating