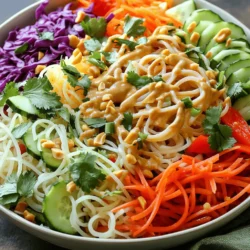
Looking for a fresh and tasty dish that’s easy to make? Thai Peanut Noodle Salad is your answer! With colorful veggies, rich peanut dressing, and a crunchy finish, it’s the perfect meal for warm days. I’ll share simple steps, tips, and variations so you can customize it to your taste. Dive in and discover how to create this delightful salad at home!
Ingredients
Here’s what you need to make a Thai Peanut Noodle Salad that’s fresh and tasty:
– 8 oz rice noodles
– 1 cup shredded carrots
– 1 cup red cabbage, thinly sliced
– 1 cup cucumber, julienned
– 1 bell pepper (red or yellow), sliced
– 1/4 cup green onions, chopped
– 1/4 cup fresh cilantro, chopped
– 1/4 cup peanuts, chopped (for garnish)
– 1/2 cup peanut butter
– 2 tablespoons soy sauce
– 2 tablespoons sesame oil
– 2 tablespoons lime juice
– 1 tablespoon maple syrup
– 1 tablespoon grated fresh ginger
– 1 clove garlic, minced
– Crushed red pepper flakes (optional, to taste)
This list covers everything you need for a bright and flavorful dish. The mix of fresh veggies adds crunch. The peanut dressing brings a creamy, rich taste. You can adjust the flavors to suit your taste.
Step-by-Step Instructions
Cooking the Noodles
To start, boil a large pot of water. Add 8 oz of rice noodles and cook them for about 3-5 minutes. They should be tender but firm, known as al dente. Once cooked, drain the noodles and rinse them under cold water. This stops the cooking process and cools the noodles down.
Preparing the Vegetables
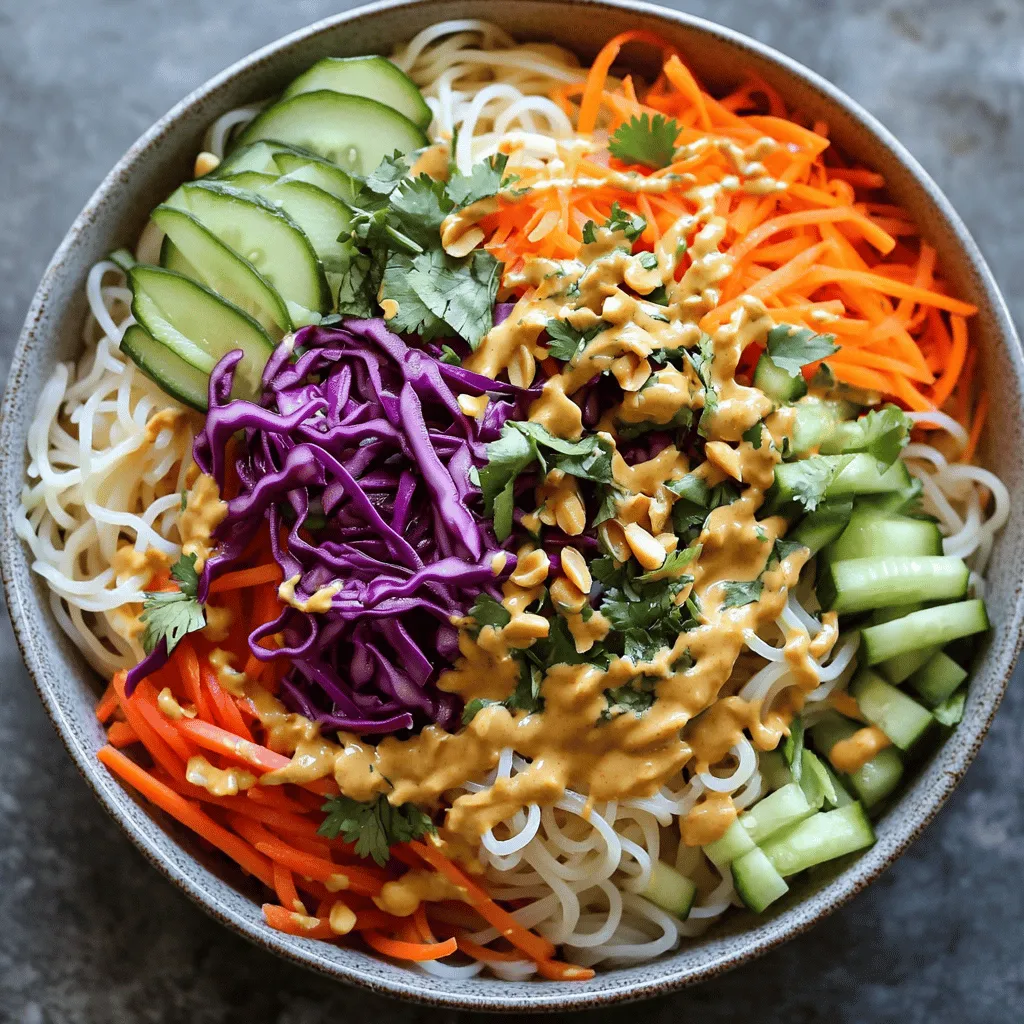
While the noodles cook, wash and chop your fresh veggies. Use 1 cup of shredded carrots, 1 cup of thinly sliced red cabbage, 1 cup of julienned cucumber, and 1 sliced bell pepper. Make your cuts even and neat. This makes the salad look pretty and helps each bite be full of flavor. Set all the veggies aside in a large bowl.
Making the Peanut Dressing
Next, grab a separate bowl. In it, mix together 1/2 cup peanut butter, 2 tablespoons soy sauce, 2 tablespoons sesame oil, 2 tablespoons lime juice, 1 tablespoon maple syrup, 1 tablespoon grated fresh ginger, and 1 clove of minced garlic. If you like a bit of heat, add crushed red pepper flakes to taste. Whisk until smooth. If the dressing is too thick, add a bit of water to make it pourable.
Combining Ingredients
Add the cooled rice noodles to the bowl of chopped veggies. Pour the peanut dressing over everything. Now, gently toss the noodles and veggies together. Make sure each piece gets coated in that tasty dressing.
Serving Suggestions
Place the salad on a serving platter or in individual bowls. Top it off with chopped green onions, fresh cilantro, and a sprinkle of chopped peanuts. This adds a nice crunch and boosts flavor too.
Optional Chilling
You can eat the salad right away, but chilling it in the fridge for 15-30 minutes enhances the flavors. It allows the ingredients to blend well. If you choose to chill, cover it well to keep it fresh.Enjoy your fresh and flavorful Thai peanut noodle salad!
Tips & Tricks
Making it More Flavorful
To enhance the taste of your Thai peanut noodle salad, spice adjustments work wonders. Start with crushed red pepper flakes if you like it hot. You can add more or less based on your taste. For a fresh kick, toss in chopped green onions or cilantro. These herbs brighten up the dish and add a nice crunch.
Authenticity Enhancements
For an authentic touch, consider traditional ingredients like Thai basil or bean sprouts. These add unique flavors common in Thai cuisine. You could also try variations based on regional recipes. For instance, some regions use different nuts or dressings. Explore these options to find your favorite mix.
Preparing Ahead of Time
Meal prepping this salad is easy. You can cook the noodles and chop the vegetables a day in advance. Just keep everything in separate containers to stay fresh. When you’re ready to eat, mix it all together with the peanut dressing. Store any leftovers in the fridge for up to three days. For best taste, eat it within two days.
Variations
Protein Additions
You can add protein to your Thai Peanut Noodle Salad in many ways. Grilled chicken is a great choice if you want a classic twist. Shrimp also works well, bringing a sweet flavor. If you prefer a plant-based option, tofu is perfect. Just pan-fry or bake it until golden. These additions make the salad hearty and filling. You can also marinate your protein in a bit of soy sauce for extra taste.
Different Noodle Alternatives
While rice noodles are the star, there are other options. You can use soba noodles for a nutty flavor. If you like a chewier texture, try udon noodles. For gluten-free needs, look for rice or zucchini noodles. Zucchini noodles are great in summer when they are fresh. Each noodle type changes the dish’s feel and taste, making it fun to experiment.
Seasonal Vegetable Changes
When making this salad, think about the season. In spring, add snap peas or asparagus for a fresh crunch. Summer is great for ripe tomatoes or bell peppers. In fall, roasted squash or pumpkin adds warmth. Winter can benefit from hearty greens like kale. Using seasonal veggies not only boosts flavor but also supports local farming. Each season brings a new twist to your salad, making it exciting and fresh.
Storage Info
Optimal Storage Conditions
To keep your Thai peanut noodle salad fresh, place it in an airtight container. Glass or plastic containers work well. Make sure to cool the salad before sealing it. This helps prevent moisture build-up. Store it in the fridge for best results. If you have dressing left, keep it separate until serving. This keeps the noodles from getting mushy.
Shelf Life
Your salad will last about 3 to 5 days in the fridge. After that, it may lose taste and texture. Look for signs of spoilage, such as a sour smell or slimy noodles. If you see any mold, throw it away immediately. Freshness is key for enjoying this tasty dish.
Freezing Information
While I don’t recommend freezing the salad, you can freeze the dressing. Just pour it into a freezer-safe bag. When it’s time to use it, thaw it overnight in the fridge. For the noodles and veggies, freezing may change their texture. It’s best to prepare them fresh for the best taste.
FAQs
How do I make Thai Peanut Noodle Salad vegan?
To make this salad vegan, swap the ingredients with plant-based options. Use maple syrup instead of honey. Check the soy sauce to ensure it is vegan-friendly. You can also use coconut aminos for a different taste. Replace peanut butter with almond butter if desired.
Can I use different types of noodles?
Yes, you can use various noodles! Try whole wheat spaghetti, soba, or even zucchini noodles. Rice noodles are great for the classic taste. Each noodle brings a unique texture and flavor. Experiment to find your favorite!
What is the best way to serve this salad?
Serve this salad chilled or at room temperature. This allows all the flavors to shine. Pair it with grilled chicken, shrimp, or tofu for extra protein. It goes well as a side with spring rolls or a light soup.
How can I make this salad spicier?
To add heat, include crushed red pepper flakes in the dressing. You can also use sriracha or chili paste for extra zing. Fresh jalapeños or Thai bird chilies can bring heat as well. Adjust the spice to match your taste!
Can I make this salad in advance?
Yes, you can prepare this salad ahead of time! Make the dressing and chop the veggies a day before. Toss everything together just before serving. This keeps the noodles and veggies fresh. Enjoy the flavors after they have time to meld!
In this article, we covered how to make a tasty Thai Peanut Noodle Salad. We explored the key ingredients like rice noodles and fresh vegetables, along with a rich peanut dressing. I shared step-by-step instructions, helpful tips, and variations to suit your taste. Remember, you can make it your own with protein options and seasonal veggies.
Enjoy your salad fresh or chilled, and store any leftovers properly for later. With these tips, you’ll create a dish that’s both delicious and satisfying every time!