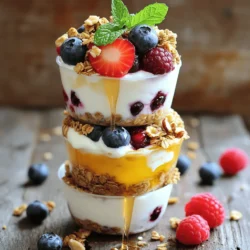
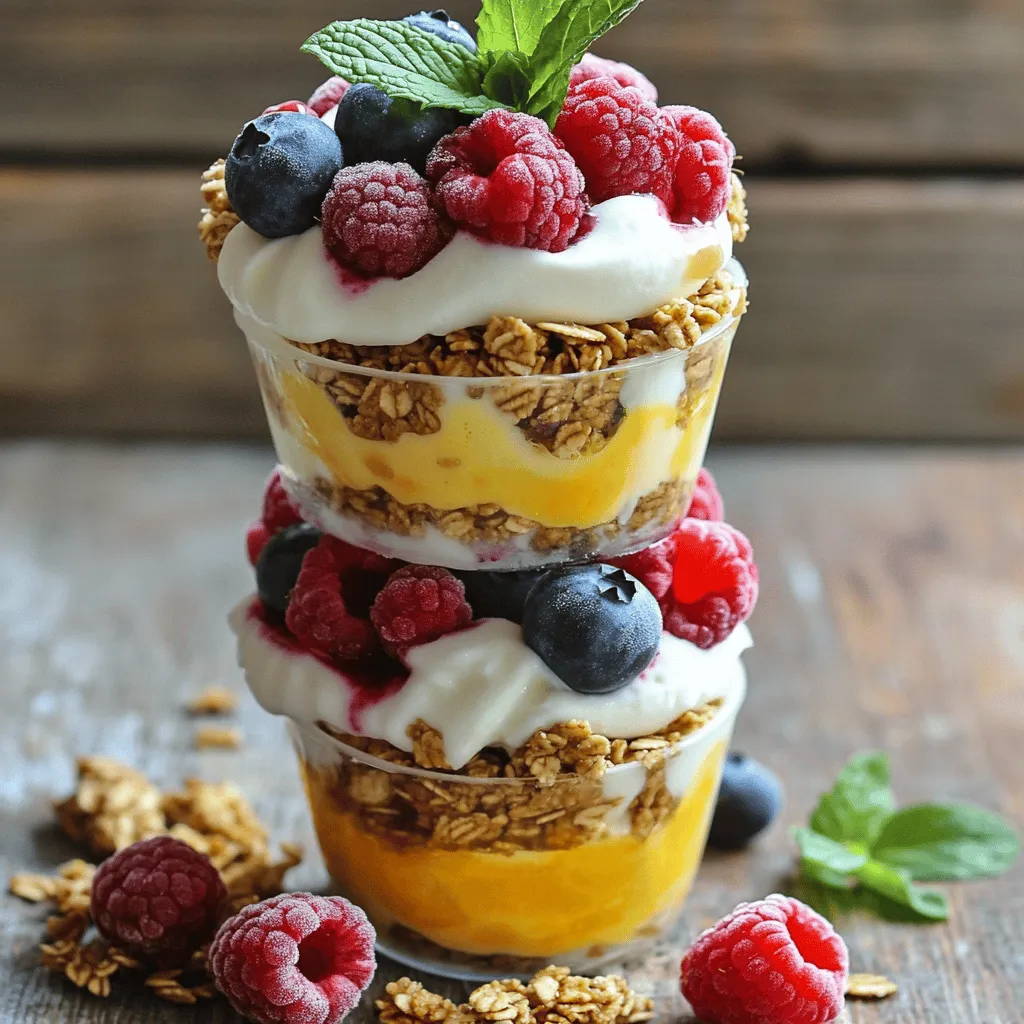
Looking for a cool and tasty treat? Frozen yogurt granola cups are the answer! These delightful snacks blend creamy yogurt with crunchy granola and fresh fruit. Not only are they fun to make, but they’re also healthy and customizable. Whether you want a quick breakfast or a sweet dessert, these cups can fit the bill. Join me as we dive into the ingredients and steps to make your own perfect frozen yogurt granola cups!
Ingredients
List of Ingredients for Frozen Yogurt Granola Cups
To make Frozen Yogurt Granola Cups, you need these ingredients:
– 2 cups Greek yogurt (plain or flavored)
– 1 cup granola (your choice of flavor)
– 1 cup mixed berries (strawberries, blueberries, raspberries)
– 2 tablespoons honey or maple syrup
– 1 teaspoon vanilla extract
– 1/4 cup chopped nuts (almonds, walnuts, or pecans)
– Fresh mint leaves for garnish (optional)
Comparison of Ingredient Options
When choosing Greek yogurt, opt for plain for a lower sugar option. Flavored yogurts can add sweetness but may have more sugar. For granola, select a brand that has whole grains and minimal added sugars. You can also make your own granola at home for the best taste and health. Nuts add crunch and healthy fats. Almonds and walnuts work great, but pecans add a nice sweetness.
Notes on Fresh vs. Frozen Berries
Fresh berries taste great, but frozen berries are just as good. Frozen berries are often picked at their peak ripeness, so they can be just as flavorful. If you use frozen berries, let them thaw slightly before adding them to the cups. This helps them blend better with the yogurt and granola.
Step-by-Step Instructions
Detailed Preparation Steps
To make Frozen Yogurt Granola Cups, start by gathering your ingredients. You need Greek yogurt, granola, mixed berries, honey, vanilla, and nuts. In a mixing bowl, combine the Greek yogurt, honey, and vanilla extract. Stir until the mix is smooth. This smooth mixture is key for a tasty cup.
Next, take a muffin tin and line it with cupcake liners. This helps with easy removal later. Spoon about one tablespoon of your yogurt mix into each liner. Spread it evenly across the bottom. Then, add about one tablespoon of granola on top. Press down slightly to secure it in place.
Now, add a layer of mixed berries. You can use whole berries or slice larger ones. Top each cup with another tablespoon of the yogurt mix to cover the berries. Finish by sprinkling chopped nuts over the top. Finally, place the muffin tin in the freezer for at least four hours.
Tips for Ensuring Smooth Yogurt Mixture
To get a smooth yogurt mixture, make sure your yogurt is at room temperature. Cold yogurt can clump up, making it hard to mix. Stir the honey and vanilla extract in well. If you want an extra creamy texture, try using full-fat Greek yogurt. It blends better and tastes richer.
Proper Layering Techniques for Best Results
Layering is key to great Frozen Yogurt Granola Cups. Start with yogurt, then granola, and finish with berries. Make sure to press each layer down lightly. This helps hold everything together when you take a bite. If you want more crunch, add more nuts on top. They add a nice texture. When you serve, peel away the liners carefully to keep the shape.
Tips & Tricks
How to Customize Your Frozen Yogurt Granola Cups
You can make your granola cups special. Try different yogurts, like fruit-flavored or vanilla. You can also switch granola. Use chocolate or cinnamon granola for a twist. Want to add some extra fun? Mix in your favorite nuts or seeds. You can even swap berries for other fruits. Kiwi and mango are great choices!
Enhancing Flavor with Additions or Swaps
To boost flavor, consider adding a pinch of salt. It makes sweet flavors pop! You can also add spices. Cinnamon or nutmeg gives a warm touch. Want a creamy texture? Fold in a bit of nut butter. Almond or peanut butter works well. For a sweet zing, add a few drops of lemon or orange juice.
Common Mistakes to Avoid
One common mistake is overfilling the cups. Leave some space at the top. This helps them freeze well. Another mistake is not pressing the granola down. Press it firmly to hold the layers together. Lastly, don’t forget to freeze long enough. Four hours is the least you should aim for. If you skip this, your cups will be too soft.
Variations
Exploring Flavor Combinations (tropical, chocolate, etc.)
You can have fun with flavors in your frozen yogurt granola cups. Try tropical flavors by adding coconut and pineapple. Mix in some mango for a fresh twist. If you love chocolate, use chocolate yogurt and add cocoa powder. You could even sprinkle chocolate chips on top for extra richness. The key is to play with what you like. Each flavor brings a new joy.
Using Different Nut and Fruit Options
Switch up the nuts and fruits to change the taste. Almonds, walnuts, or pecans work great. You can use any nut you prefer. For fruits, try bananas, peaches, or apples. Each fruit adds its own sweetness and texture. You can even mix different berries for a burst of flavor. The more you experiment, the more fun you will have.
Vegan or Dairy-Free Alternatives
If you want a vegan option, use coconut yogurt or almond yogurt. These give a creamy texture without dairy. For sweetening, try agave syrup instead of honey. You can also use dairy-free granola. Make sure to check the labels for any hidden dairy. With these swaps, you can enjoy these treats without dairy while keeping them tasty.
Storage Info
Best Practices for Freezing and Storing Cups
To keep your frozen yogurt granola cups fresh, store them in an airtight container. Line the container with parchment paper for extra protection. This helps avoid freezer burn and keeps them tasty. If you have extra cups, consider wrapping each one in plastic wrap before placing them in the container. This way, they stay fresh and easy to grab.
Shelf Life and How to Re-Serve
Your frozen yogurt granola cups can last up to three months in the freezer. When you’re ready to enjoy them, take out as many as you want. Let them sit at room temperature for about five to ten minutes. This makes them easier to remove from the liners. You can also use a warm knife to help pop them out if they stick.
Signs of Spoilage
Always check your cups for signs of spoilage. If you see ice crystals or a weird smell, it’s best to throw them away. If they look dry or have a change in texture, these are signs they are no longer good. Enjoy your frozen yogurt granola cups while they are fresh for the best taste!
FAQs
What are the nutritional benefits of Frozen Yogurt Granola Cups?
Frozen Yogurt Granola Cups are a great snack. They provide protein, fiber, and vitamins. Greek yogurt offers probiotics, which help gut health. Granola adds whole grains and healthy fats. Berries bring antioxidants and natural sweetness. Overall, these cups are a balanced treat.
Can I make these cups ahead of time?
Yes, you can make these cups ahead. They freeze well and stay fresh for weeks. Prepare them one day and freeze for later. Just pull them out when you want a snack. This makes them a perfect option for busy days.
How can I make these dairy-free?
To make these cups dairy-free, use coconut yogurt instead of Greek yogurt. Check for a brand that has good taste and texture. You can also try almond or cashew yogurt. These options still provide creaminess and flavor.
What other toppings can be added to Frozen Yogurt Granola Cups?
You can get creative with toppings! Try using seeds like chia or flax. You can also add shredded coconut or dark chocolate chips. For more fruit, consider banana slices or kiwi. The options are endless, so mix and match!
How do I adjust the sweetness in the recipe?
Adjusting sweetness is easy! If you prefer less sugar, use less honey or maple syrup. You can also try adding mashed banana or applesauce for natural sweetness. Taste the yogurt mixture and add more if needed.
In this blog post, we explored making frozen yogurt granola cups. We covered ingredient choices, preparation steps, and tips for a smooth mix. You learned how to customize flavors and avoid common mistakes. We also shared ideas for variations and proper storage techniques.
Frozen yogurt granola cups are versatile and easy to make. They offer a healthy treat for you and your family. With these simple steps, you can enjoy a delicious snack at home!