Are you craving a tasty snack that won’t ruin your diet? Look no further! My No-Bake Peanut Butter Chocolate Protein Balls pack a punch of flavor and nutrition. They’re easy to make and perfect for a quick energy boost. With just four main ingredients, you can whip these up in no time. Let’s dive into the fun of making these delightful treats that satisfy your sweet tooth and keep you on track!
Ingredients
Key Ingredients
To make No-Bake Peanut Butter Chocolate Protein Balls, you need some key ingredients. Here’s what you’ll need:
– 1 cup rolled oats
– 1/2 cup natural peanut butter
– 1/4 cup honey or maple syrup
– 1/2 cup chocolate protein powder
These ingredients form the base of your protein balls. The rolled oats add a chewy texture. Natural peanut butter gives a rich flavor and creaminess. Honey or maple syrup adds sweetness. Chocolate protein powder packs in the protein.
Optional Ingredients
You can enhance your protein balls with some optional ingredients:
– 1/4 cup mini dark chocolate chips
– 1/4 cup ground flaxseed
– 1 teaspoon vanilla extract
– A pinch of salt
These add extra taste and nutrition. Mini dark chocolate chips bring a sweet crunch. Flaxseed adds healthy fats and fiber. Vanilla extract gives a warm aroma. A pinch of salt balances the sweetness.
Nutritional Information
Each serving of these protein balls is a nutritious snack. On average, one ball contains about:
– Calories: 100
– Protein: 4 grams
– Fat: 5 grams
– Carbohydrates: 10 grams
These numbers can vary based on ingredient choices. They provide a quick energy boost. Enjoy them as a post-workout snack or a tasty treat!
Step-by-Step Instructions
Preparing the Dry Mixture
First, I grab a large mixing bowl. I add 1 cup of rolled oats, 1/2 cup of chocolate protein powder, 1/4 cup of ground flaxseed, and a pinch of salt. I mix these dry ingredients well. This step is key for even distribution. It helps every bite taste great.
Combining Wet Ingredients
Next, I add 1/2 cup of natural peanut butter, 1/4 cup of honey (or maple syrup), and 1 teaspoon of vanilla extract to the dry mix. I stir until the mixture becomes thick and sticky. This consistency is important. It helps the balls hold together when I roll them.
Forming and Refrigerating the Balls
Now, I scoop about a tablespoon of the mixture. Using my hands, I roll it into a ball. I repeat this until I use all the mixture. I place the balls on a lined baking sheet. After forming them, I refrigerate the balls for at least 30 minutes. This helps them firm up and makes them easier to eat.
Tips & Tricks
Perfecting the Texture
If your mixture is too dry, add a splash of water or more peanut butter. This will help bind the ingredients. If it’s too wet, add a few more oats or flaxseed. These changes will help your protein balls hold shape.
Flavor Enhancements
To boost flavor, you can add a pinch of cinnamon or a dash of cocoa powder. You might also try mixing in nuts or seeds like chia or sunflower seeds. For a tropical twist, dried fruits like raisins or cranberries can add sweetness and texture.
Presentation Tips
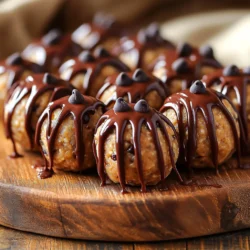
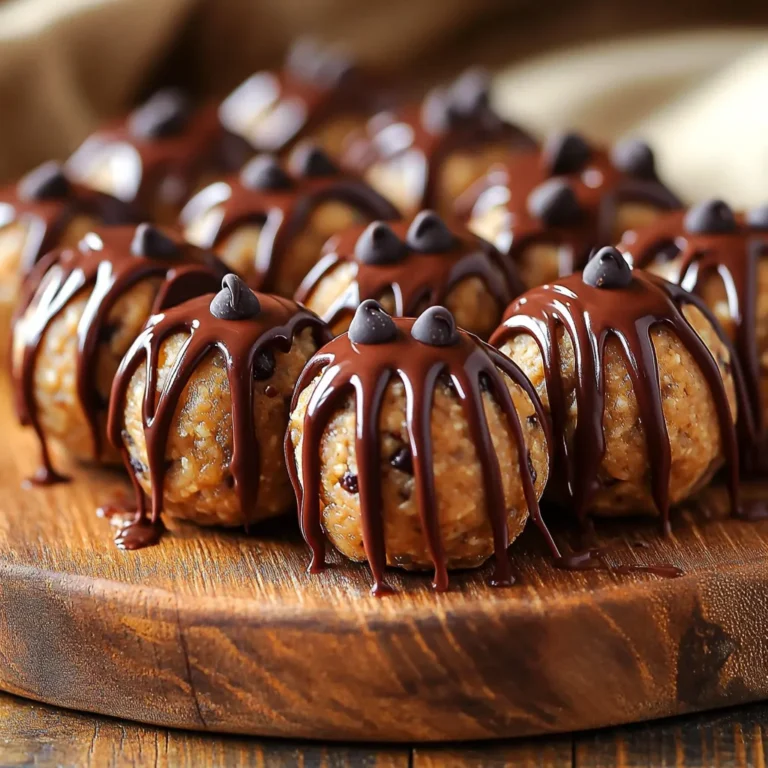
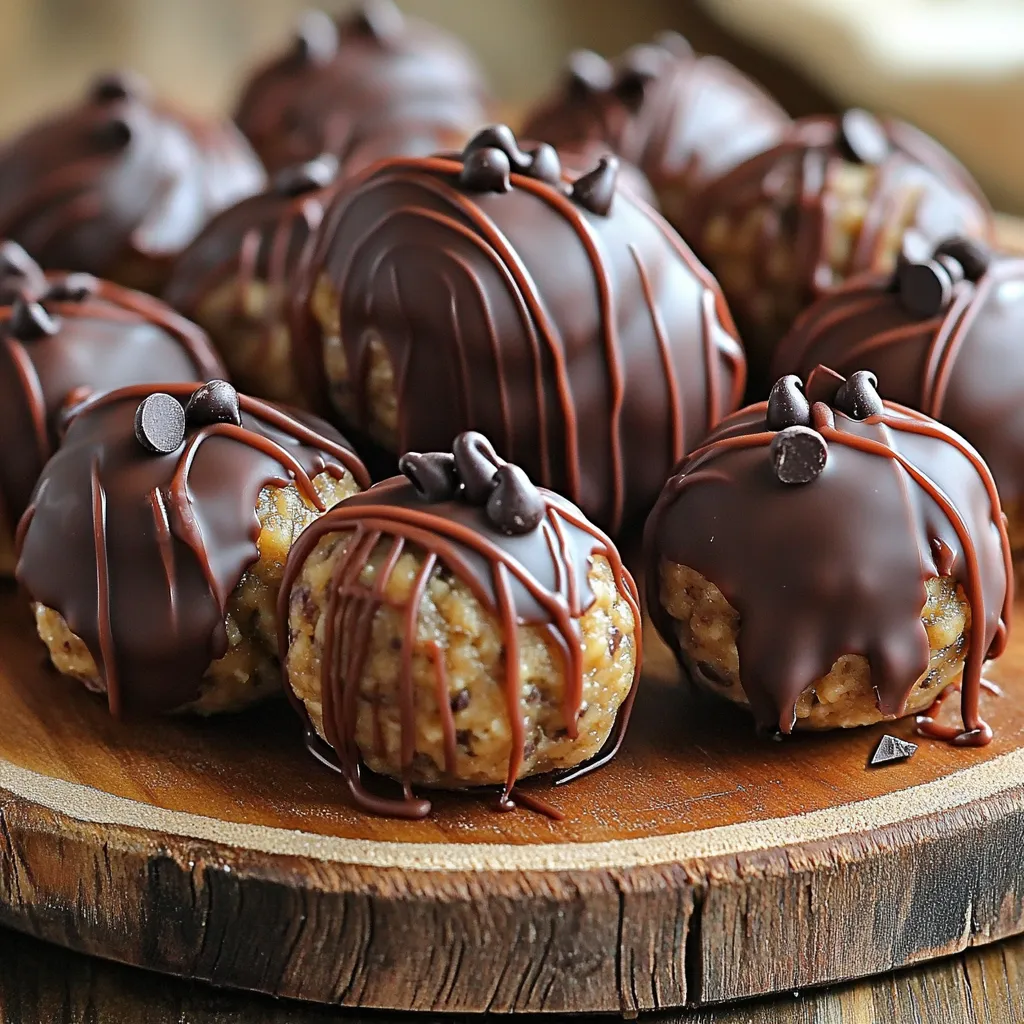
Arrange the protein balls on a clean platter for a nice look. Drizzle melted dark chocolate on top for extra flair. You can also sprinkle a few extra chocolate chips around to make it more inviting. This small touch makes your snack feel special and appealing.
Variations
Different Nut Butters
You can switch peanut butter for other nut butters. Almond butter works great and adds a nice flavor. Cashew butter is creamy and adds a different taste. Sunflower seed butter is a good choice for nut-free diets. Each option brings its own unique flavor and texture to the protein balls.
Add-ins for Extra Nutrients
Want to boost nutrition? Consider adding seeds or dried fruits. Chia seeds or pumpkin seeds add crunch and healthy fats. Dried cranberries or raisins can bring sweetness and chewiness. Superfoods like hemp hearts or spirulina can also enhance nutrition. These add-ins make your protein balls even more fun and healthy.
Adjusting Sweetness Levels
You can control how sweet your protein balls are. If you want less sugar, try using sugar-free sweeteners like stevia or erythritol. Maple syrup can be swapped for a low-calorie syrup. This way, you keep the taste you love but cut down on calories. Adjust sweetness to fit your taste and health goals.
Storage Info
Best Storage Practices
To keep your no-bake peanut butter chocolate protein balls fresh, use airtight containers. I recommend glass or BPA-free plastic. These containers will block air and moisture. This way, your tasty treats stay soft and delicious.
Shelf Life
In the fridge, these protein balls last about a week. Store them in the airtight container. If you notice any changes in texture or smell, it’s best to toss them. Always check before eating.
Freezing Options
You can freeze these protein balls for later enjoyment. To freeze, place them in a single layer on a baking sheet. Once frozen, transfer them to an airtight container or freezer bag. This helps prevent them from sticking together. Thaw them in the fridge overnight when you’re ready to enjoy.
FAQs
Can I make these protein balls vegan?
Yes, you can make these protein balls vegan. To do this, substitute honey with maple syrup. This keeps the sweetness without using animal products. You can also switch out the chocolate protein powder for a plant-based protein powder. Look for options like pea or brown rice protein. These changes make the recipe vegan-friendly while keeping it tasty.
How long do the protein balls last?
These protein balls last about a week when stored properly. Keep them in an airtight container in the fridge. This helps keep them fresh and tasty. If you want to store them longer, consider freezing them. They can stay in the freezer for up to three months. Just thaw them in the fridge before you eat.
What can I substitute for protein powder?
If you want to skip protein powder, try using ground oats. They add texture and fiber. You can also use nut flour, like almond flour, for added flavor. Another option is to use a mix of seeds, like hemp or chia seeds, for protein. These swaps keep the protein balls nutritious and yummy without losing their form.
These protein balls are easy to make and packed with nutrients. You start with oats, peanut butter, and a sweetener. Then, you mix, roll, and chill. Feel free to add your favorite flavors or substitute ingredients. Store them in airtight containers to keep them fresh. Enjoy these tasty bites as a quick snack anytime. With the right tips and variations, you can make them just how you like. Now, it’s time for you to try making your own protein balls!