Skip to content
DisclaimerTerms Of UseGDPR PolicyCookie Policy

easycookingbite

  • Home
  • Drinks
  • Appetizers
  • Dinner
  • Dessert
  • About
  • Contact
  • Privacy Policy
DisclaimerTerms Of UseGDPR PolicyCookie Policy

Lily

Here is what you need to make banana oatmeal pancakes: - 1 cup rolled oats - 1 ripe banana, mashed - 1 cup milk (dairy or plant-based) - 1 large egg - 1 teaspoon baking powder - 1/2 teaspoon vanilla extract - 1/4 teaspoon cinnamon - A pinch of salt - 1 tablespoon honey or maple syrup (optional) - Cooking spray or butter for the pan These ingredients come together to create a warm, fluffy pancake that is both simple and tasty. Each item plays a role. The oats provide a hearty base, while the banana adds sweetness and moisture. Milk helps blend everything smoothly, making the batter easy to pour. The egg binds the mixture and gives it structure. Baking powder ensures the pancakes rise well, giving them a light texture. Vanilla and cinnamon add flavor depth, making each bite delightful. The optional honey or syrup can enhance sweetness to your liking. When you gather these ingredients, you set yourself up for a delicious breakfast. This recipe is not only easy but also healthy. You can enjoy these pancakes guilt-free. For the full recipe, check out the details above. - Combine rolled oats, milk, mashed banana, egg, baking powder, vanilla, cinnamon, and salt in a blender. - Blend until smooth or mix until you have some oat texture. - Let the batter rest for 5-10 minutes for better consistency. This resting time helps the pancakes rise nicely. The oats absorb some liquid, which makes a thicker batter. You want a batter that holds together but is still pourable. - Preheat a skillet over medium heat with cooking spray or butter. - Pour about 1/4 cup of batter onto the skillet for each pancake. - Cook pancakes for 2-3 minutes until bubbles form on the surface. The edges should look set. - Flip the pancakes carefully and cook for another 1-2 minutes until golden brown. Make sure not to rush the cooking. If the heat is too high, the pancakes might burn. A perfect pancake should be fluffy and brown on both sides. - Serve pancakes warm with your favorite toppings. Sliced bananas, syrup, or a sprinkle of cinnamon work well. - Stack them high for a beautiful presentation. A drizzle of honey or maple syrup adds sweetness. When serving, let your creativity shine with toppings. You can mix and match to find your favorite combination! To make your pancakes fluffy, use a good blender. Blend the oats, banana, and milk well. Letting the batter rest is key. This helps the pancakes rise and become light. If you want denser pancakes, blend less. Just mix until combined. This gives a chunkier look and feel. For the best pancakes, use a non-stick skillet or griddle. A cast-iron pan also works well. Preheat it before pouring in the batter. Use cooking spray or butter to prevent sticking. If you prefer natural options, coconut oil is great. Just make sure to grease the pan lightly. You can top your pancakes with many fun things! Sliced bananas are a classic choice. Try adding nuts for extra crunch. Berries add color and a fresh taste. For sweetness, drizzle honey or maple syrup. To impress guests, stack pancakes high on a plate. Dust with powdered sugar for a nice touch. {{image_2}} You can easily make this recipe your own. If you want to go gluten-free, you can use gluten-free oats. They work just as well and taste great. For milk, try almond, soy, or oat milk. Each gives a unique flavor. Plant-based milk can make the pancakes lighter but still tasty. Adding chocolate chips or nuts makes the pancakes even better. You can mix in dark chocolate chips for a sweet kick or walnuts for crunch. Also, don’t shy away from spices! A pinch of nutmeg or ginger adds warmth and depth to your pancakes. Just a little can change everything. You can easily make this dish vegan or dairy-free. Use flaxseed or chia seeds instead of an egg. For low-sugar options, skip the honey or maple syrup. You can also use mashed dates for sweetness. Low-carb fans can swap oats with almond flour. This will give you a different texture, but still, be delicious. For the full recipe, check out the main article. After making banana oatmeal pancakes, store any leftovers in the fridge. Place them in an airtight container. They will stay fresh for up to three days. If you want to save them longer, freeze the pancakes. Layer them with parchment paper to prevent sticking. Then, place them in a freezer-safe bag. They can last up to three months in the freezer. To reheat pancakes, use a microwave or stovetop. For the microwave, place a pancake on a plate and cover it with a damp paper towel. Heat for about 20-30 seconds. This keeps them soft. On the stovetop, warm a skillet over low heat. Add a little butter or cooking spray, then heat each pancake for about a minute on each side. This method keeps them crispy on the outside. Can I make banana oatmeal pancakes without eggs? Yes, you can make these pancakes without eggs. You can use 1/4 cup of applesauce or 1 tablespoon of flaxseed meal mixed with 3 tablespoons of water as a substitute. These options will help bind the ingredients together and keep the pancakes moist. How do I prevent pancakes from sticking to the pan? To prevent sticking, preheat your skillet over medium heat. Use a non-stick skillet or add a little cooking spray or butter before pouring the batter. Make sure the pan is hot enough; this helps create a nice crust on the pancakes, making them easier to flip. Caloric content per pancake. Each pancake contains about 100 calories. This number can vary slightly based on the specific ingredients you use, like the type of milk or if you add any sweeteners. Health benefits of the ingredients used. These pancakes are packed with nutrition. Rolled oats provide fiber, which is great for digestion. Bananas add potassium and natural sweetness. Milk gives you calcium and protein, making these pancakes a balanced meal. How long do banana oatmeal pancakes take to cook? Cooking these pancakes takes about 5-7 minutes total. Each side cooks for about 2-3 minutes until golden brown. Look for bubbles on the surface to know when to flip. What is the best temperature for cooking pancakes? The best temperature is medium heat. This setting ensures the pancakes cook evenly without burning. Too high of a temperature will cook the outside too fast, leaving the inside raw. This blog post covered how to make delicious banana oatmeal pancakes. You learned the key ingredients and step-by-step instructions for perfect pancakes. I shared tips for texture and cooking equipment, plus creative variations to try. Don't forget to store leftovers properly for later enjoyment. Experiment with flavors and toppings to find your favorites. Enjoy cooking and serving these tasty pancakes that everyone will love!

Banana Oatmeal Pancakes Simple and Tasty Recipe

Are you ready to make breakfast a little more exciting? Banana oatmeal pancakes are simple, tasty, and pack a nutritious

- 2 ripe avocados - 1 cup cherry tomatoes, halved - 1 cup fresh mozzarella balls, halved or diced - 1/4 cup fresh basil leaves, chopped - 2 tablespoons balsamic glaze - 1 tablespoon extra virgin olive oil - Salt and pepper to taste When I create Caprese stuffed avocados, I focus on fresh, quality ingredients. The ripe avocados are the star of the dish. They add creaminess and a nice green color. The cherry tomatoes bring bright flavor and sweetness. I love using fresh mozzarella for that delightful texture. Basil adds freshness and aroma. I always chop it finely to release its full flavor. Balsamic glaze gives a sweet tang that ties it all together. Extra virgin olive oil adds richness and depth. I finish with salt and pepper to enhance all the flavors. This recipe is simple but offers a lot of taste. You can find the full recipe in the main article. Remember, using fresh ingredients is key to making this dish shine! Begin by slicing the avocados in half. Remove the pit carefully. Use a spoon to scoop out some flesh and create a larger space for the filling. Set this flesh aside. You can use it later for guacamole or another dish. In a mixing bowl, gather the halved cherry tomatoes and fresh mozzarella. Add the chopped basil next. Drizzle the olive oil and balsamic glaze over the mix. Season it all with salt and pepper. Toss gently to coat all the ingredients well. You want every bit to be flavorful. Now, take the avocado halves and fill them with the Caprese mixture. Make sure each half gets a good amount. Drizzle a bit more balsamic glaze on top for extra flavor. If you like, add a few whole basil leaves for a nice touch. Serve these fresh or chill for up to 30 minutes before enjoying. For the full recipe, check out the details above! When picking avocados, look for ones that feel slightly soft. Gently press the skin with your fingers. If it yields a bit, it is ripe and ready to use. Avoid hard avocados, as they are not ripe yet. Overly soft ones may be too mushy. Aim for a perfect balance. If you find avocados that are too firm, leave them on the counter for a day or two. They will ripen nicely. Caprese stuffed avocados make a great snack or light meal. Serve them on a colorful plate to impress your guests. Pair them with crusty bread or a green salad for a complete meal. You can also serve them as a starter at a dinner party. Add a sprinkle of extra basil or a drizzle of balsamic glaze on top just before serving. This adds a fresh touch and enhances the flavor. To balance flavors, use fresh ingredients. Fresh mozzarella and ripe tomatoes give the best taste. Balsamic glaze adds sweetness, while salt and pepper enhance the dish. When mixing the filling, be gentle. You want to keep the texture light. If you like it spicy, add a pinch of red pepper flakes. This will give your stuffed avocados a nice kick. For a twist, try adding a squeeze of lemon juice. It brightens the dish and adds freshness. For more detailed steps, check the Full Recipe. {{image_2}} You can easily add protein to your Caprese stuffed avocados. Grilled chicken or shrimp makes a great choice. You could also use chickpeas for a hearty twist. Just chop your protein and mix it with the tomato and mozzarella. This change boosts flavor and nutrition. Switching up the dressings can change the taste. Instead of balsamic glaze, try a lemon vinaigrette. This gives a bright flavor that pairs well with the avocados. You can also sprinkle some Italian seasoning or garlic powder for a fun kick. Experiment with what you love! To make this dish vegan, skip the mozzarella. Instead, use marinated tofu or a vegan cheese. You can still enjoy the fresh basil and tomatoes. Drizzle with your favorite vegan dressing, like tahini or avocado dressing. This way, everyone can savor the deliciousness! For the full recipe, check out the Caprese Stuffed Avocados 🥑 section above. To keep your Caprese stuffed avocados fresh, wrap them tightly in plastic wrap. This helps keep air away from the avocado. Place the wrapped avocados in an airtight container. You can store them in the fridge for about one day. The longer they sit, the more they brown. To maintain the flavor and color, use lemon juice on the cut surfaces. This slows down browning. Keep the filling separate from the avocado halves if you plan to store them. Assemble them just before serving for the best taste and look. You can freeze some of the ingredients. For example, cherry tomatoes freeze well. However, avoid freezing the stuffed avocados. The texture changes too much. If you want to prepare in advance, freeze the mozzarella and basil. Just remember to let them thaw in the fridge before using. Enjoy the full recipe for more tips on making this dish shine! Yes, you can make Caprese stuffed avocados ahead of time. However, I recommend filling them just before serving. If you fill them too early, the avocado may turn brown. To slow this process, squeeze some lemon juice on the avocado flesh. This helps keep the color bright. You can prepare the filling in advance and store it in the fridge. Just scoop it into the avocados when you're ready to eat. If you need a mozzarella substitute, try using feta cheese. Feta adds a nice tangy flavor. You can also use goat cheese for a creamy texture. Vegan cheese is another option if you want a dairy-free choice. Just ensure it melts well if you plan to warm the dish. Each option will change the flavor slightly, so pick what you like best. To choose ripe avocados, gently press the skin. If it yields to pressure, it's ripe and ready to eat. Look for avocados with dark green skin. Avoid those with large dark spots or deep indentations. You can also check the stem. If it comes off easily and you see green underneath, the avocado is ripe. If it’s brown, it may be overripe. Always pick avocados that feel firm but not hard. This will help ensure your Caprese stuffed avocados turn out perfect. Caprese stuffed avocados blend fresh ingredients into a tasty dish. We covered how to choose ripe avocados, prepare them, and assemble the filling with tomatoes and mozzarella. Remember, you can add protein or switch dressings to fit your taste. Store leftovers well to keep them fresh. This dish is simple and fun to make, and it can wow your friends. Enjoy experimenting with different flavors and variations. Happy cooking!

Caprese Stuffed Avocados Fresh and Flavorful Delight

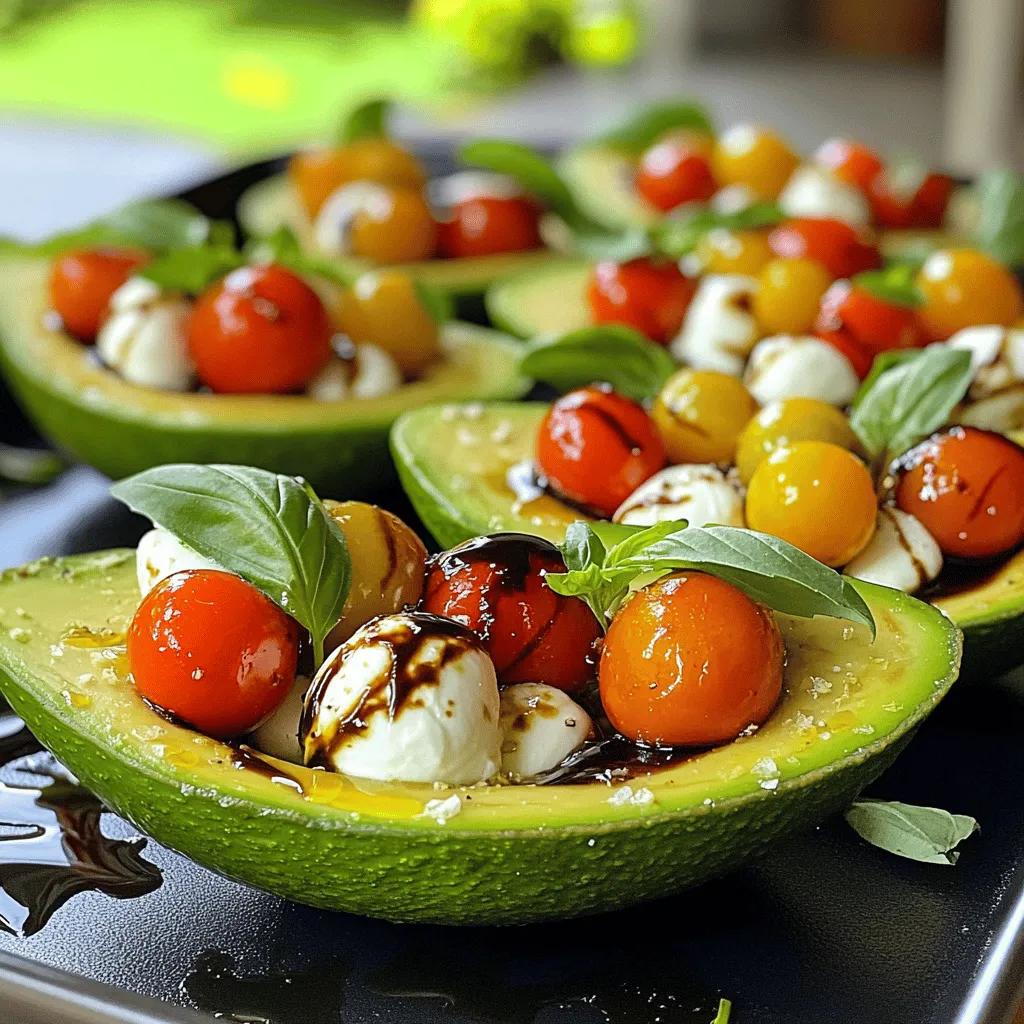
Are you ready to elevate your snacking game? These Caprese Stuffed Avocados offer a perfect blend of fresh flavors. With

- 8 oz farfalle pasta (or any pasta of your choice) - 1 cup cherry tomatoes, halved - 1 cucumber, diced - 1/2 red onion, finely chopped - 1 cup fresh basil leaves, torn - 1/2 cup feta cheese, crumbled (optional) - 1/4 cup olive oil - 3 tablespoons fresh lemon juice - Zest of 1 lemon - 1 teaspoon honey (or maple syrup) - Salt and pepper to taste To make Lemon Basil Pasta Salad, you need a few key ingredients. First, choose your pasta. I love farfalle, but penne works well too. Next, gather fresh produce. You will need cherry tomatoes, cucumber, and red onion. These add color and crunch. Now, let’s talk dressing. You will need olive oil, fresh lemon juice, and lemon zest. Honey adds a touch of sweetness. Remember to season with salt and pepper. You can also add optional ingredients for extra flavor. Feta cheese gives a creamy touch. Additional herbs can boost the taste even more. For the full recipe, check out the detailed instructions. To cook pasta al dente, bring a large pot of salted water to a boil. Add 8 oz of farfalle pasta. Stir occasionally and follow the package instructions. Usually, this takes about 8-10 minutes. Check the pasta a minute early. It should be firm but not hard. Once cooked, drain the pasta and rinse it under cold water. This stops the cooking process and cools the pasta quickly. Set it aside for later. For this salad, you need fresh produce. Start with cherry tomatoes, cucumber, and red onion. Use a sharp knife and a cutting board. Cut the tomatoes in half, dice the cucumber, and finely chop the onion. Make sure all pieces are even. This helps them mix well and taste great together. After chopping, add the vegetables to a large mixing bowl. Now, let's make the dressing. In a small bowl, whisk together 1/4 cup olive oil, 3 tablespoons fresh lemon juice, and the zest of 1 lemon. Add 1 teaspoon of honey for sweetness. Season with salt and pepper to taste. If you want it sweeter, just add a bit more honey. Whisk until everything is combined and smooth. Add the cooled pasta to the bowl with the mixed vegetables. Pour the dressing over the pasta and veggies. Use a large spoon to toss gently. This ensures all ingredients get coated. Be careful when mixing in the torn basil leaves. Fold them in gently to keep them intact. If you're using feta cheese, sprinkle it on top and mix carefully. Once everything is combined, cover the bowl with plastic wrap. Refrigerate the salad for at least 30 minutes. This chilling time lets the flavors blend nicely. You can serve the salad cold or at room temperature. It tastes even better after it sits. Enjoy your fresh and flavorful Lemon Basil Pasta Salad! For the complete recipe, check out the Full Recipe section. To enhance the dressing, add more lemon zest. This boosts the fresh taste. You can also mix in a pinch of red pepper flakes for some heat. This little kick makes the salad exciting. Always use fresh ingredients for the best flavor. Choose bright tomatoes and crisp cucumbers. Wash everything well before use. Store leftovers in an airtight container in the fridge. This keeps your salad fresh for up to three days. For garnishing, sprinkle extra feta on top. Add a few basil leaves for a pop of green. You can serve this salad in a large bowl or in individual dishes. It works great for picnics or family gatherings. Check out the Full Recipe for more ideas on serving! {{image_2}} You can easily boost the protein in your Lemon Basil Pasta Salad. For a meat option, grilled chicken or shrimp adds a tasty twist. Simply cook the chicken or shrimp on the grill, slice, and mix it in. This change makes the dish more filling and hearty. If you prefer a vegetarian choice, try adding chickpeas. They are easy to add and provide great texture. Rinse and drain a can of chickpeas and fold them into the salad. This way, you'll get a protein punch without meat. Switching up the dressing can change the whole flavor. Instead of the lemon dressing, you can use balsamic vinegar or a simple vinaigrette. This adds a sweet and tangy taste that complements the pasta. For those who want a dairy-free or vegan-friendly option, skip the feta cheese. You can also use a vegan mayo mixed with lemon juice. This keeps the creaminess without any dairy. Adjusting the salad with seasonal ingredients makes it fresh and exciting. In summer, add sweet corn or bell peppers. In fall, consider roasted squash or pumpkin. These changes keep the dish vibrant all year. You can also use fresh herbs beyond basil. Try parsley, cilantro, or even mint for a unique flavor. These herbs can brighten the dish and add layers of taste. You can find the Full Recipe above. To keep your Lemon Basil Pasta Salad fresh, use airtight containers. Glass or plastic containers work well. The salad stays good in the fridge for about three days. If the pasta seems dry, add a splash of olive oil before serving. You can freeze pasta salad, but some veggies may lose crunch. To freeze, place the salad in a freezer-safe container. When you want to eat it, thaw it overnight in the fridge. Refresh the salad by adding fresh basil and a little lemon juice. Check for off smells or color changes to know if the salad is bad. If you see mold or if it feels slimy, throw it away. Always practice food safety by washing your hands and using clean utensils. You can use many types of pasta for this salad. Farfalle is my favorite because its shape holds the dressing well. Penne and rotini are also great choices. If you're gluten-free, try using brown rice or quinoa pasta. These options keep the taste and texture while being friendly to your diet. Whole grain pasta adds fiber and nutrients. Specialty pasta, like spinach or beet pasta, can add color and flavor to the dish. Yes, you can make this salad ahead of time. It helps the flavors blend better. I suggest prepping it a few hours before serving. You can even make it the day before. Just cover it and chill in the fridge. I recommend chilling it for at least 30 minutes before serving. This allows the dressing to soak into the pasta and veggies. Lemon Basil Pasta Salad pairs well with many dishes. Grilled chicken, shrimp, or fish make great mains. You can also serve it with roasted vegetables for a lighter option. For side dishes, think about garlic bread or a fresh green salad. To enhance your meal, I suggest a crisp white wine, like Sauvignon Blanc. If you prefer non-alcoholic options, try sparkling water with lemon. These drinks will complement the fresh flavors of the salad. This blog post covered the essentials for making a delicious Lemon Basil Pasta Salad. We explored the key ingredients, including various pasta types and fresh veggies. You learned how to cook pasta perfectly and prepare vegetables for the best flavor. We also discussed tips for enhancing your dressing, presenting your salad, and storing any leftovers. Remember, this recipe can adapt to your taste and seasonal ingredients. Enjoy experimenting with proteins and dressings to make it your own. Your pasta salad journey can be fresh and exciting!

Lemon Basil Pasta Salad Fresh and Flavorful Dish

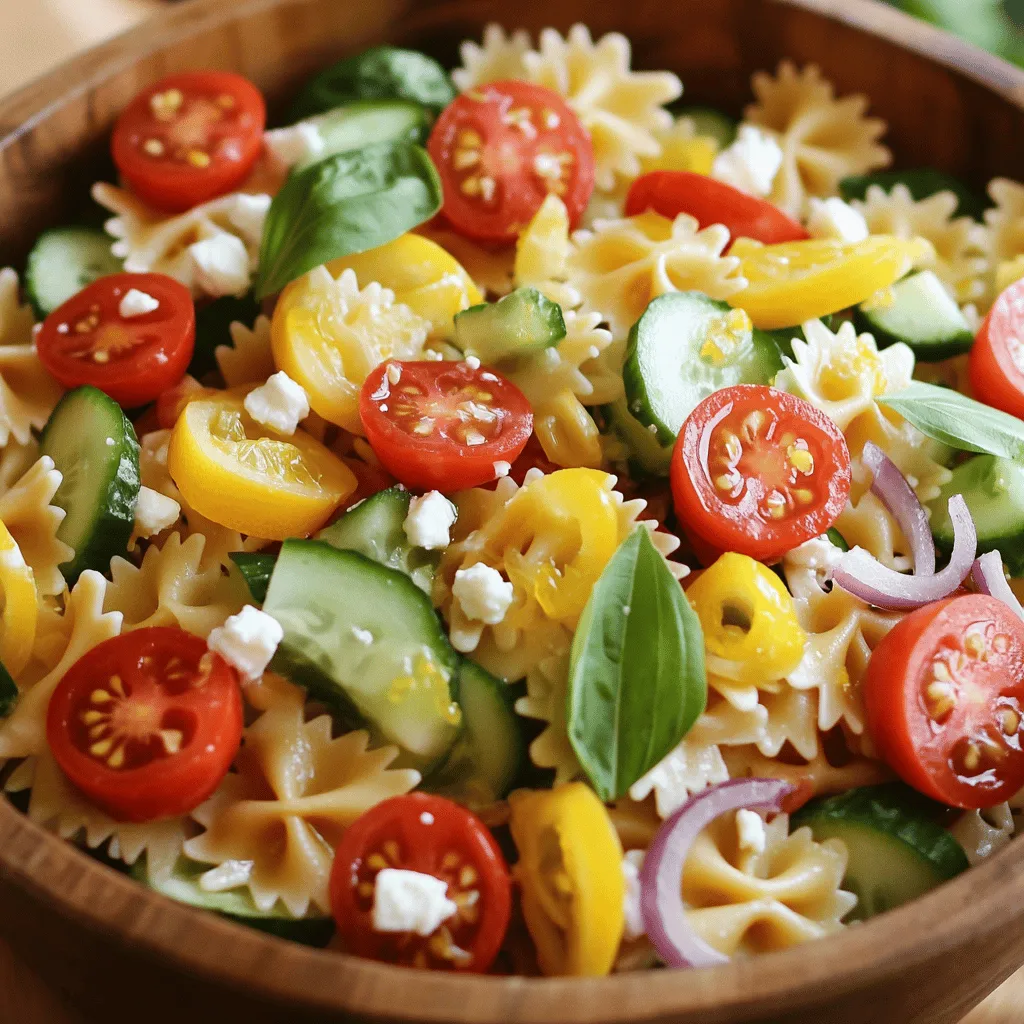
Looking for a fresh and tasty dish that’s easy to make? Try my Lemon Basil Pasta Salad! This vibrant meal

- 6 large eggs - 3 tablespoons mayonnaise - 1 teaspoon Dijon mustard - 1 teaspoon apple cider vinegar - 1/2 teaspoon garlic powder - 1/4 teaspoon smoked paprika - Salt and pepper to taste - Chives or parsley for garnish To make classic deviled eggs, gather these simple ingredients. Each one plays a key role in the flavor and texture. The eggs are the base, while the mayonnaise adds creaminess. Dijon mustard brings a nice tang, and apple cider vinegar adds brightness. Garlic powder gives depth, while smoked paprika adds a hint of smokiness. Finally, season with salt and pepper to your taste. Chives or parsley add a fresh touch and color. - Saucepan for boiling eggs - Mixing bowl - Fork for mashing - Spoon or piping bag for filling Having the right tools makes cooking easier. A saucepan is essential for boiling the eggs. A mixing bowl helps combine the ingredients smoothly. Use a fork to mash the yolks well. To fill the egg whites, use a spoon or a piping bag for a neat finish. These tools help create a dish that looks and tastes great. - Boil the eggs: Place 6 large eggs into a saucepan. Cover them with water. Heat over medium-high heat until the water boils. Once boiling, cover the pot and take it off the heat. Let the eggs sit for 12 to 15 minutes. This method gives you perfect hard-boiled eggs. - Transfer to ice water to cool: After the eggs sit, carefully move them to a bowl of ice water. Let them cool for about 5 minutes. This step helps you peel the eggs easily. - Peeling the eggs: Take the cooled eggs and tap them gently on a hard surface. Start peeling them under running water. The water helps remove the shell and keeps the eggs smooth. Pat them dry with a paper towel when done. - Mixing the yolks with other ingredients: Slice the eggs in half lengthwise. Use a spoon to scoop out the yolks into a mixing bowl. Add 3 tablespoons of mayonnaise, 1 teaspoon of Dijon mustard, 1 teaspoon of apple cider vinegar, 1/2 teaspoon of garlic powder, and 1/4 teaspoon of smoked paprika to the yolks. Season with salt and pepper to taste. Use a fork to mash the yolk mixture until it is smooth and creamy. - Filling the egg whites: Take the yolk mixture and spoon or pipe it back into the egg whites. Be generous when filling. Each bite should be creamy and flavorful. - Garnishing with smoked paprika and herbs: Finally, sprinkle a bit of smoked paprika on top. You can also add finely chopped chives or parsley for color and taste. This adds a nice touch to your deviled eggs. Make sure to check the Full Recipe for all the details. Enjoy your delicious classic deviled eggs! To get perfect hard-boiled eggs, boil them for 12-15 minutes. This time gives you firm yolks and whites. To avoid gray rings around the yolks, cool the eggs quickly. Transfer them to ice water right after boiling. This stops the cooking process and keeps the color bright. Peeling boiled eggs can be tricky. The best method is to crack the shells gently and peel them under running water. The water helps remove the shells easily. Cooling is crucial for easy peeling. The ice bath firms the egg white and separates it from the shell. To boost flavor, add extra spices like cayenne pepper or paprika. You can mix in fresh herbs for a fresh touch. Chopped chives or dill add brightness. For a twist, try adding some crispy bacon bits or a splash of hot sauce. These small changes will make your deviled eggs pop with flavor. For the full recipe, check out the details above. {{image_2}} To add heat, try using hot sauce or diced jalapeños. A few drops of your favorite hot sauce can wake up the flavors. If you love spice, mix in chopped jalapeños with the yolk filling. This gives your deviled eggs a nice kick. Adjust the heat to suit your taste. Get creative with toppings! Instead of the usual garnish, try bacon bits or crumbled feta cheese. Bacon adds a crunchy texture and a savory flavor. Feta brings a tangy twist. You can also use pickled onions or fresh herbs for a fresh touch. These toppings can make your deviled eggs stand out at any gathering. For a lighter version, swap out mayonnaise. You can use Greek yogurt or mashed avocado instead. Greek yogurt gives a creamy texture with fewer calories. Avocado adds healthy fats and a rich flavor. Both options keep your deviled eggs tasty and nutritious. With these swaps, you can enjoy a guilt-free snack. Explore these variations and make your deviled eggs your own! For the full recipe, check out the Devilishly Good Deviled Eggs. To keep deviled eggs fresh, store them in the fridge. Place them in an airtight container. If you do not have a container, cover them with plastic wrap. This will help prevent them from drying out. Keep your deviled eggs in the coldest part of the fridge. This helps maintain their creamy texture and flavor. Deviled eggs can last about 3 to 4 days in the fridge. After that, they may spoil. Check for any off smells or changes in texture. If they look or smell bad, it’s best to toss them. Always remember to keep them chilled until you are ready to serve. You should not freeze deviled eggs. Freezing can change their texture and flavor. The filling may separate or become watery when thawed. If you want to prepare ahead, make the filling and store it separately. You can freeze the egg whites, but they won’t taste as good when thawed. For best results, always serve deviled eggs fresh. Check out the Full Recipe for tips on making the perfect filling. You can use Greek yogurt, avocado, or hummus instead of mayonnaise. Each option adds its own flavor and texture. Greek yogurt gives a creamy touch with a tangy taste. Avocado provides richness and a slight green hue. Hummus adds a unique taste and smoothness. Mix in mustard and spices for flavor. This way, you can enjoy deviled eggs while keeping it light and healthy! Fresh eggs are great for cooking, but older eggs peel easier. When eggs age, the pH level changes, making the shells less sticky. If you want smooth peels, buy your eggs a week in advance. You’ll find that they come off cleanly! For the best results, use eggs that are about a week old. Yes, you can make deviled eggs ahead of time! Prepare the eggs and filling separately. Store the whites and filling in the fridge. Fill the eggs just before serving to keep them fresh. Use an airtight container to protect them from odors. This method saves time when hosting or enjoying a meal. This blog post shared a simple guide to make delicious deviled eggs. We covered all the key ingredients and tools you need. I walked you through cooking the eggs, preparing the filling, and assembling the dish. I also shared tips for perfect boiling and easy peeling. With flavor variations and storage info, you can easily customize your deviled eggs. Remember, these tasty bites are perfect for any gathering. Now, grab your ingredients and make some deviled eggs that everyone will love!

Classic Deviled Eggs Easy and Flavorful Recipe

Are you ready to whip up a crowd-pleaser? Classic deviled eggs are a delicious, easy snack that everyone loves. With

This no-bake chocolate oatmeal cookie recipe is simple and fun. You only need a few ingredients to whip up a batch of these delicious treats. The best part? You don't need an oven! This recipe takes about 10 minutes to prep and 30 minutes to chill in the fridge. You can make about 12 cookies with one batch. - Old-fashioned oats: These oats give the cookies a hearty texture. They are rich in fiber, which helps keep you full. - Creamy peanut butter: This adds creaminess and protein. It also makes the cookies taste great! - Honey or maple syrup: These natural sweeteners offer a sweet touch and add moisture. - Unsweetened cocoa powder: This ingredient gives the cookies their chocolaty flavor without extra sugar. - Coconut oil: It helps bind the mixture and adds a subtle flavor. It's also a healthy fat! - Vanilla extract: This adds warmth and enhances the cookie’s flavor. - Sea salt: A pinch of salt balances the sweetness and boosts flavor. - Mini chocolate chips (optional): These add extra chocolatey goodness and a fun texture. You can easily modify this recipe for allergies: - Peanut butter: Use almond butter or sunflower seed butter. - Honey: Swap it for agave syrup or brown rice syrup for a vegan option. - Coconut oil: You can use butter or a different oil like canola. - Oats: If gluten is a concern, choose certified gluten-free oats. These options help you enjoy the cookies even with dietary needs! To make No-Bake Chocolate Oatmeal Cookies, start with the dry mix. In a large bowl, add 1 cup of old-fashioned oats and 1/4 cup of unsweetened cocoa powder. Stir these two together well. Next, take another bowl for the wet mix. Whisk together 1/2 cup of melted coconut oil, 1/2 cup of creamy peanut butter, 1/2 cup of honey (or maple syrup), 1 teaspoon of vanilla extract, and 1/4 teaspoon of sea salt. Mix until it's nice and smooth. Now, pour the wet mix into the dry mix. Use a spatula to combine everything until the oats are coated and the mix is even. Make sure your coconut oil is melted but not too hot. If it’s hot, it can cook the oats. Stir gently to avoid breaking the oats too much. If you want a sweeter cookie, add more honey or maple syrup. For a chocolate boost, fold in 1/4 cup of mini chocolate chips at this stage. They add great texture and flavor, making your cookies even more delicious. Now comes the fun part—forming the cookies! Line a baking sheet with parchment paper. Use a spoon or a cookie scoop to drop heaping tablespoons of the mixture onto the sheet. Leave about 1 inch between each cookie. Once you’ve scooped them out, flatten each one slightly with the back of the spoon. This gives them a nice, round shape. Finally, refrigerate the cookies for at least 30 minutes to firm them up. After they set, they are ready to eat! For more detailed instructions, refer to the Full Recipe. To get the best texture in your no-bake cookies, follow these steps: - Use old-fashioned oats. They give a chewy texture. - Mix the wet and dry ingredients well. This ensures even flavor. - Let the mixture chill in the fridge for at least 30 minutes. This helps the cookies firm up nicely. Here are some mistakes to watch out for: - Skipping the chilling time can lead to soft cookies. - Adding too much liquid can make your cookies mushy. - Not mixing well can cause uneven flavors. Make sure everything is blended. To keep your cookies from sticking, follow these tips: - Use parchment paper on your baking sheet. This creates a non-stick surface. - Allow the cookies to set in the fridge before moving them. - For extra insurance, lightly oil your spatula when shaping the cookies. These tips will help you make perfect no-bake chocolate oatmeal cookies every time! For the full recipe, check out the section above. {{image_2}} You can switch up flavors in your no-bake cookies. Try adding almond butter instead of peanut butter. This gives a nutty twist. If you love coconut, mix in shredded coconut. You can also add a splash of orange or peppermint extract for a fresh taste. Experiment with different nut butters for unique flavors. Boost the nutrition of your cookies by adding fun ingredients. Chia seeds add fiber and omega-3s. A scoop of protein powder can help with muscle recovery. You can also add dried fruits like raisins or cranberries. These add sweetness and chewiness. Nuts like walnuts or almonds provide crunch and healthy fats. Making these cookies vegan is easy. Use maple syrup instead of honey. This keeps the recipe plant-based. For gluten-free cookies, ensure you use certified gluten-free oats. This way, everyone can enjoy your treats. Consider using almond flour instead of oats for a low-carb option. These variations keep the spirit of the recipe while catering to different diets. For the complete recipe, check out the Full Recipe section. To keep your no-bake chocolate oatmeal cookies fresh, store them in an airtight container. This helps lock in moisture and flavor. Place parchment paper between layers of cookies to avoid sticking. Make sure to keep them in a cool, dry place, away from direct sunlight. If you live in a warm area, the fridge is your best friend. These cookies can last up to one week when stored properly. If you keep them in the fridge, they stay fresh longer. Check for any signs of spoilage, like off smells or changes in texture. If they look good, they should taste great! You can freeze these cookies for later enjoyment. Once they are fully set, wrap each cookie in plastic wrap. Then, place them in a freezer-safe bag. They can last up to three months in the freezer. When you want to eat them, just thaw them in the fridge overnight. Enjoy your no-bake chocolate oatmeal cookies anytime! For the complete recipe, check the Full Recipe section. Yes, you can use quick oats. They will make the cookies softer. However, old-fashioned oats give a better texture. They hold together well and have a nice chew. If you use quick oats, the cookies may not be as sturdy. To make the cookies less sweet, reduce the honey or maple syrup. You can cut it down by a quarter cup. You can also add a pinch of sea salt. This will help balance the sweetness. Another option is to use dark cocoa powder, which has a richer taste. If you need a peanut butter substitute, try almond butter or sunflower seed butter. Both options work well in the recipe. Almond butter has a nice flavor, while sunflower seed butter is great for nut allergies. Just keep the same amount as in the recipe. To firm up the cookies, chill them longer in the fridge. If they are still too soft, add more oats. You can mix in an extra half cup of oats to the recipe. This will help them hold their shape better. Make sure the mixture is well combined before chilling. For the full recipe, check out the detailed steps above. This blog post covered how to make delicious no-bake cookies. You learned the key ingredients and their benefits. I shared tips for mixing and shaping, plus tricks to avoid common mistakes. We also explored variations for different tastes and dietary needs. In closing, with these steps and tips, you can confidently create tasty no-bake cookies that everyone will enjoy. Happy baking!

No-Bake Chocolate Oatmeal Cookies Easy and Quick Treat

Looking for a quick and easy treat that satisfies your sweet tooth? These No-Bake Chocolate Oatmeal Cookies are just what

- 1 pound ground beef - 1 cup long-grain white rice - 2 cups beef or vegetable broth - 1 onion, finely chopped - 2 cloves garlic, minced - 1 bell pepper (any color), diced - 1 cup frozen peas and carrots mix - 2 tablespoons soy sauce - 1 tablespoon Worcestershire sauce (optional) - 1 teaspoon smoked paprika - Salt and pepper to taste - 2 tablespoons olive oil - Fresh parsley, chopped (for garnish) These ingredients come together to create a hearty dish. The ground beef gives a rich taste. Rice serves as a filling base. Broth adds flavor and moisture. Onions and garlic provide a strong aroma. Bell pepper adds color and crunch. The peas and carrots bring sweetness and nutrition. - Worcestershire sauce - Fresh parsley for garnish Worcestershire sauce enhances the umami flavor. Fresh parsley brings a bright touch. Both are nice but not needed. - Ground beef can be replaced with turkey or chicken. - Long-grain white rice can be swapped for brown rice or quinoa. - Beef broth can be changed to vegetable broth for a lighter taste. - Frozen peas and carrots can be substituted with any frozen mixed veggies. These substitutions keep the dish tasty while accommodating different diets. You can easily adjust based on what you have at home. {{ingredient_image_1}} Start by heating 2 tablespoons of olive oil in a large skillet over medium heat. Once the oil is hot, add 1 finely chopped onion and 2 minced garlic cloves. Sauté these for 2-3 minutes, until they smell good and the onion turns soft. Next, add 1 pound of ground beef to the skillet. Break it apart with a spatula as it cooks. Let it brown for about 5-7 minutes. Season the beef with salt, pepper, and 1 teaspoon of smoked paprika for extra flavor. After the beef is browned, stir in 1 diced bell pepper. Cook this mixture for another 4-5 minutes, until the pepper softens. Now it’s time to add 1 cup of long-grain white rice to the skillet. Stir it in well with the beef and veggies. Pour in 2 cups of beef or vegetable broth, along with 2 tablespoons of soy sauce. If you like, you can add 1 tablespoon of Worcestershire sauce for depth. Bring the mixture to a boil. Once boiling, reduce the heat to low and cover the skillet. Let it simmer for about 18-20 minutes. This will cook the rice and allow it to soak up most of the liquid. When the rice is done, gently fold in 1 cup of frozen peas and carrots. Cover the skillet again and let it sit for another 5 minutes. This warms up the veggies. After that, fluff the mixture with a fork. Taste it and add more salt or pepper if needed. For serving, you can either keep the skillet on the table for a rustic look or serve portions on plates. Garnish with fresh chopped parsley for color. Enjoy your meal with some crusty bread or a fresh salad! To make your ground beef and rice skillet shine, focus on seasoning. Use salt and pepper to enhance flavors. Smoked paprika adds a nice touch. You can also try adding a dash of hot sauce for heat. Fresh herbs like parsley brighten up the dish. Mix them in right before serving for the best taste. One-pan meals are all about timing. Start with ingredients that take longer to cook. Onions and garlic should go in first, as they build a flavor base. When adding rice, stir it well with the beef and veggies. This helps each grain soak up flavors. Lastly, don't skip the lid when simmering. This keeps moisture in and cooks the rice evenly. For a great presentation, serve the skillet right from the pan. This gives a warm, rustic look. If you prefer plates, scoop the mixture onto them. A sprinkle of fresh parsley adds color. Pair it with crusty bread or a fresh salad for a complete meal. Enjoy this dish warm for the best experience. Pro Tips Use Lean Ground Beef: Opt for lean ground beef to reduce excess grease, making your dish healthier and more flavorful. Broth for Extra Flavor: Using beef broth instead of water adds depth and richness to the rice, enhancing the overall taste of the dish. Customize Veggies: Feel free to mix in your favorite vegetables or whatever you have on hand to make this dish your own. Rest Before Serving: Let the skillet sit for a few minutes after cooking. This helps the flavors meld together and improves the dish’s texture. {{image_2}} You can easily make this dish meat-free. Swap the ground beef for lentils or black beans. They add great protein and taste. Use vegetable broth instead of beef broth. For a rich flavor, add a splash of liquid smoke or smoked paprika. Toss in extra vegetables like zucchini or mushrooms for more texture. This gives you a hearty meal that is still filling and full of flavor. If you like heat, add spices like cayenne pepper or crushed red pepper flakes. Stir these in while cooking the beef. You can also mix in jalapeños or serrano peppers for fresh heat. A few dashes of hot sauce at the end can bring it all together. This spicy version keeps the same comfort but adds a kick to your meal. Want to switch up the grains? Try quinoa or farro instead of rice. These grains cook well and add a nutty flavor. Adjust the liquid amounts since they may vary. Quinoa cooks faster, while farro takes longer. Barley is another great choice, providing a chewy texture. Each option brings its own taste, making the dish unique every time you prepare it. Store any leftovers in an airtight container. Let the skillet cool down first. Place it in the fridge within two hours of cooking. This keeps it safe to eat later. You can enjoy it for up to three days. Make sure to check for any off smells before eating. You can freeze this dish for later use. Allow it to cool completely. Divide it into portions for easy thawing. Use freezer-safe bags or containers. Label them with the date. You can freeze it for up to three months. When ready to eat, thaw in the fridge overnight. To reheat, use a microwave or stovetop. If using the microwave, place it in a safe dish. Heat in short bursts, stirring in between. If using the stovetop, add a splash of broth to keep it moist. Heat over low until warmed through. Always check the temperature before serving. Enjoy your meal again! Yes, you can use brown rice instead of white rice. Brown rice takes longer to cook, so adjust the cooking time. You will need about 45 minutes to fully cook brown rice. Add more liquid too, about 2 ½ cups of broth for 1 cup of brown rice. To keep the rice from sticking, rinse it before cooking. This removes extra starch. Use enough broth and stir the mix well. Cover the skillet while it cooks, as steam helps the rice cook evenly. Let it rest after cooking. This helps the rice settle and prevents sticking. This dish is great on its own! You can serve it with a fresh green salad or crusty bread. Try adding a side of roasted vegetables for more flavor. A dollop of sour cream or a sprinkle of cheese can also make it special. Enjoy your meal with friends or family! In this article, we covered everything needed for a tasty ground beef and rice skillet. You learned about the key ingredients and optional swaps. We explained step-by-step cooking methods and shared tips to enhance flavor. You can enjoy many variations, like vegetarian options or adding spice. Plus, we discussed storage tips to keep your meal fresh. Remember, this dish is flexible and simple. Experiment with it and find your favorite way to make it. Happy cooking!

Ground Beef and Rice Skillet Simple One-Pan Meal

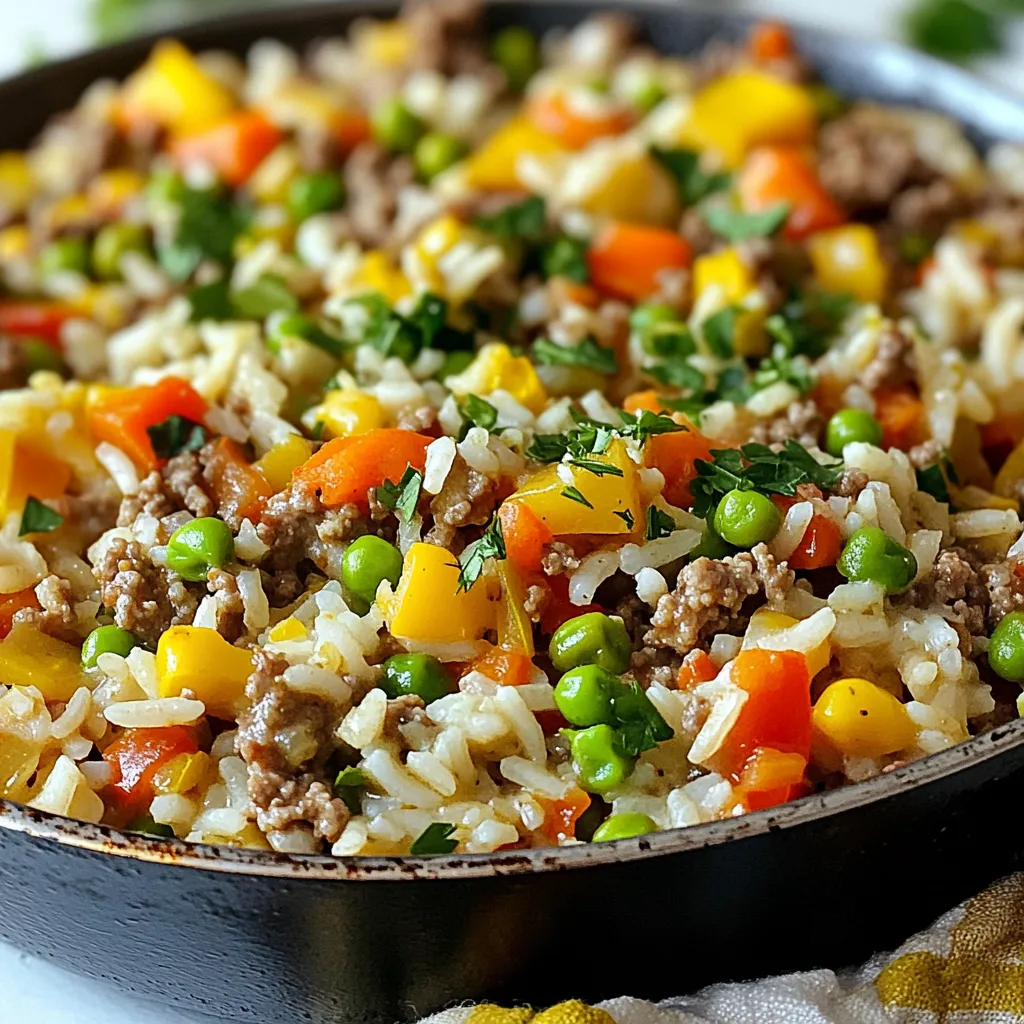
Are you tired of the same old meals? Let’s spice things up with a Ground Beef and Rice Skillet! This

- 2 large heads of broccoli - 4 cloves garlic, minced - 3 tablespoons olive oil - 1/2 cup grated Parmesan cheese - 1 teaspoon lemon zest - 1/2 teaspoon red pepper flakes (optional) - Salt and freshly ground black pepper - Fresh parsley, chopped for garnish To make Garlic Parmesan Roasted Broccoli, gather your main ingredients first. Broccoli is the star here. Use two large heads, cut into florets. This ensures even cooking and easy eating. Next, chop four cloves of garlic. Fresh garlic adds a punch of flavor. Don’t forget the olive oil! You need three tablespoons for roasting. For extra flavor, we add some seasonings. Grate half a cup of Parmesan cheese. The cheese melts beautifully and creates a savory crust. Grate some lemon zest too; it brightens the dish. If you like a little heat, add red pepper flakes. Finally, for garnishing, use salt and freshly ground black pepper to taste. Chopped fresh parsley adds color and freshness to your dish. You can find the full recipe in the article. It’s a simple way to create a tasty side that shines at any meal. - Preheat your oven to 425°F (220°C). This heat helps the broccoli roast well. - Cut the broccoli into small florets. Make sure they are all about the same size. This helps them cook evenly. - In a large mixing bowl, add the broccoli florets, minced garlic, and olive oil. Toss them together until the broccoli is fully coated. This step adds flavor. - Sprinkle in salt, freshly ground black pepper, and red pepper flakes if you like a kick. Toss again to mix everything well. - Spread the broccoli mixture on a large baking sheet. Make sure it is in one layer. This helps it roast, not steam. - Roast in the preheated oven for 15 minutes. Halfway through, stir the broccoli to ensure even cooking. - After 15 minutes, take the baking sheet out. Sprinkle the grated Parmesan cheese and lemon zest over the broccoli. - Pop the baking sheet back in the oven for an extra 5 to 7 minutes. Look for the cheese to melt and turn golden. - Once done, remove it from the oven. Let it cool for a bit before serving. Adjust seasoning to taste. For a full recipe, check the detailed section above. Oven temperature plays a big role in roasting broccoli. I always set my oven to 425°F (220°C). This temperature lets the broccoli cook fast and get crispy. If the oven is too cool, the veggies can turn mushy. Stirring the broccoli halfway through cooking is key. It helps the florets cook evenly and prevents burning. I recommend using a spatula to toss the broccoli gently. This small step makes a big difference. Want to add more zest? You can try a few optional ingredients. A teaspoon of lemon zest brightens the dish. If you like heat, sprinkle in red pepper flakes. They add a nice kick without overpowering the garlic. Choosing quality Parmesan cheese is also important. Freshly grated cheese melts better than pre-packaged. A good Parmesan has a rich, nutty flavor that enhances the broccoli. It is worth the extra effort. Knowing when your broccoli is done is simple. Look for vibrant green color and a slight char. The florets should be tender yet still crisp. Check the cheese for the right melt. It should be bubbly and slightly golden. If the cheese browns too much, it can become hard. Keep an eye on it during the last few minutes of roasting. For the full details on making this delicious dish, check out the Full Recipe. {{image_2}} You can switch up the cheese in this dish for a new taste. Asiago adds a nutty flavor. Pecorino brings a salty kick. Both work great with broccoli. If you're vegan, you can use plant-based cheese. Look for brands that melt well. This way, you keep the creamy texture while keeping it dairy-free. Feel free to add more veggies. Carrots give a sweet crunch. Bell peppers add a pop of color. You can even mix in cauliflower. It roasts well and tastes great with garlic. Just cut all veggies to the same size for even cooking. This makes your dish colorful and more nutritious. For a quick twist, use garlic powder instead of fresh garlic. It still gives you that garlic flavor. You can also try adding spices like cumin or paprika. These spices add warmth and depth. Just a pinch can change the whole dish. Experiment and find what you love best! For the complete recipe, check out the Full Recipe. To keep Garlic Parmesan Roasted Broccoli fresh, store it in the fridge. Place the broccoli in an airtight container. This helps it stay crisp and tasty. You can also wrap it tightly in plastic wrap. It will last for about 3 to 4 days this way. When reheating, the oven is best to keep the texture. Preheat your oven to 350°F (175°C). Then, place the broccoli on a baking sheet and heat for about 10 minutes. Stir it halfway through. If you're in a hurry, you can use a microwave. Just heat it for 30 seconds at a time until warm. But know that it may lose some crunch. You can freeze Garlic Parmesan Roasted Broccoli for later use. First, let it cool completely. Then, place it in a freezer-safe bag. Remove as much air as you can. It will stay good for about 2 to 3 months. When you're ready to eat it, thaw the broccoli in the fridge overnight. Reheat it in the oven for the best results. Garlic Parmesan Roasted Broccoli can last about 3 to 4 days in the fridge. To store it, put it in an airtight container. This keeps it fresh and tasty, ready for your next meal. If you notice any moisture, pat it dry with a towel before sealing. This helps avoid sogginess. Yes, you can make this recipe ahead of time! To do this, prepare the broccoli and season it as directed. Instead of roasting it right away, cover the bowl and place it in the fridge. You can keep it there for up to 24 hours. When you are ready, roast the broccoli as usual. This saves time and lets the flavors soak in. Absolutely! To make Garlic Parmesan Roasted Broccoli vegan, simply swap the Parmesan cheese for a vegan cheese alternative. Nutritional yeast is a great option too. It gives a cheesy flavor without dairy. You can also use a bit more lemon zest for added flavor. These swaps keep the dish tasty while fitting a vegan diet. In this post, we covered how to make Garlic Parmesan Roasted Broccoli. We looked at key ingredients like broccoli and garlic, plus the best seasonings. I provided step-by-step instructions for prep, mixing, and roasting. You learned tips for making this dish perfect and ways to add your twist. We also discussed how to store leftovers and answered common questions. This delicious dish is simple and can fit any meal. Enjoy trying it out!

Garlic Parmesan Roasted Broccoli Flavorful Side Dish

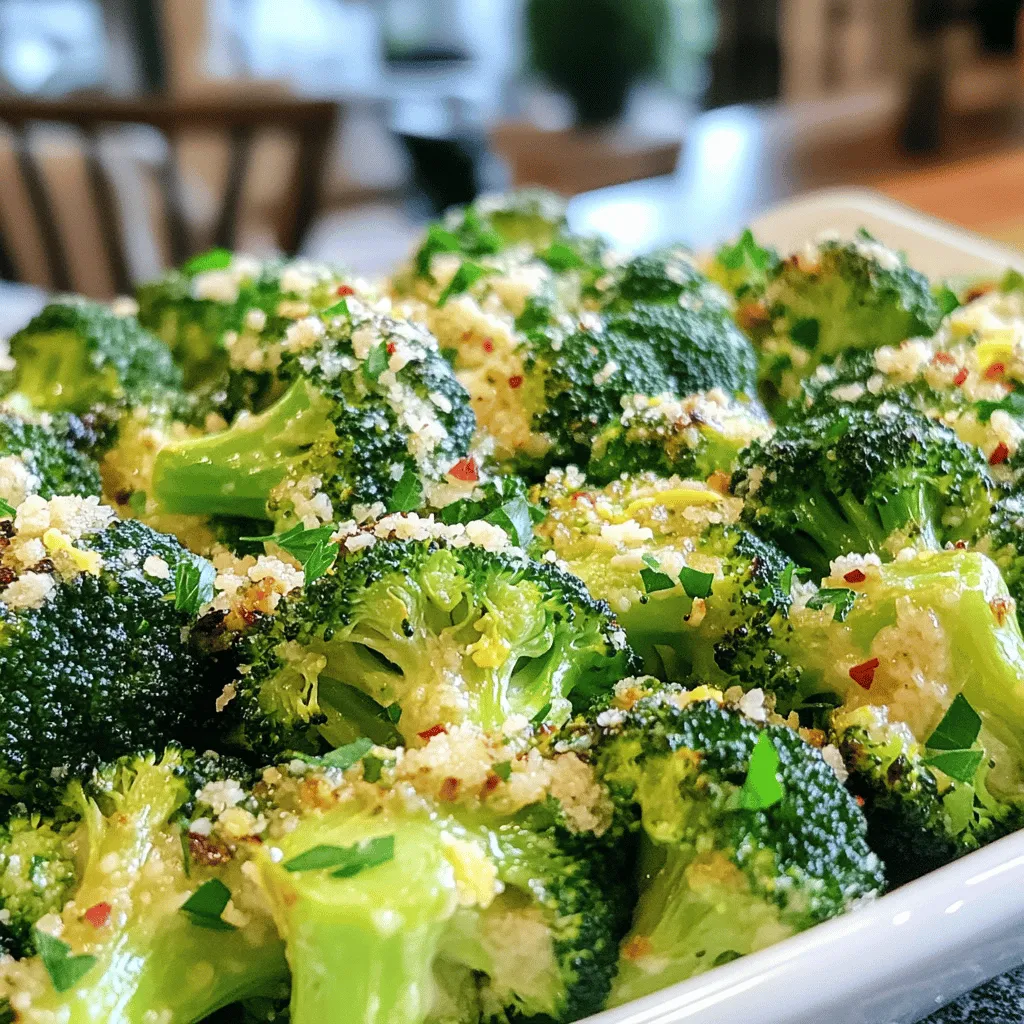
Looking for a tasty and easy side dish? Garlic Parmesan Roasted Broccoli is just what you need! This dish is

To make creamy avocado pasta, you need a few simple ingredients. Here’s what you’ll need: - 2 ripe avocados, pitted and peeled - 2 cups cooked pasta (spaghetti or linguine) - 2 tablespoons olive oil - 2 tablespoons fresh lemon juice - 2 garlic cloves, minced - 1/4 cup fresh basil leaves - Salt and pepper to taste - 1/4 teaspoon red pepper flakes (optional) - Grated Parmesan cheese (optional for garnish) Each ingredient plays a key role in creating a rich and tasty sauce. The ripe avocados bring creaminess and healthy fats. Olive oil adds smoothness and flavor. Fresh lemon juice balances the dish with a zesty touch. Garlic and basil enhance the taste, making every bite delightful. You can adjust salt and pepper to fit your taste. If you like a bit of heat, use red pepper flakes. Grated Parmesan cheese on top adds a nice savory touch. For the full recipe, be sure to check out the detailed instructions. Enjoy this fresh and flavorful dish! - Begin by cooking the pasta according to package instructions until al dente. - Drain and set aside, reserving a 1/2 cup of pasta water. Cooking pasta is easy. Just follow the package directions. Al dente means the pasta is firm yet cooked through. This texture is perfect for our creamy avocado sauce. When you drain the pasta, keep some water. It helps adjust the sauce later. - In a blender or food processor, combine the ripe avocados, olive oil, lemon juice, minced garlic, and fresh basil. - Blend until smooth and creamy. For the sauce, use ripe avocados. They should be soft to the touch. Add olive oil for richness, lemon juice for brightness, garlic for flavor, and basil for freshness. Blend until you have a smooth and creamy sauce. This step is quick, and you'll love the vibrant green color. - In a large mixing bowl, toss the cooked pasta with the creamy avocado sauce until fully coated. - Adjust consistency with reserved pasta water if too thick. Now, it’s time to mix things up! In a large bowl, combine the pasta and sauce. Toss gently until the pasta is fully coated. If the sauce is too thick, add a little reserved pasta water. This step makes the dish creamy and smooth. Enjoy your delicious creation! To boost the taste of your creamy avocado pasta, think about using fresh herbs. Basil adds a nice touch, while parsley can brighten the dish. You can also adjust the seasoning. Try adding more salt or a pinch of pepper to enhance the flavors. Balancing creaminess with acidity is key. A squeeze of fresh lemon juice brings out the best in the avocado. It adds a zesty kick that cuts through the richness, making each bite refreshing. Serving style matters. You can use a large bowl or individual plates. Drizzle a bit of olive oil on top for shine. For a pop of color, add cherry tomatoes or extra avocado slices. These garnishes make your dish look inviting and fun. Cooking pasta well is vital. Always boil it until al dente. This means it should be firm when bitten. After cooking, drain it but save some pasta water. This water helps adjust the sauce later. When blending the avocado sauce, make sure to blend until it's really smooth. If it feels too thick, slowly add the reserved pasta water. This way, you can get the creamy texture just right. {{image_2}} You can easily change up your creamy avocado pasta by adding proteins or veggies. For protein, try grilled chicken or shrimp. Both options add great flavor and nutrition. Simply cook the protein separately and toss it in with the pasta. For veggies, spinach or peas work wonders. Spinach adds a nice green color and a boost of vitamins. Frozen peas bring a sweet pop to each bite. Just stir them in during the last minute of cooking the pasta. This keeps them bright and fresh. If you need gluten-free options, there are many pasta types available. Brown rice or chickpea pasta are great choices. They give you the same texture without the gluten. For those avoiding dairy, dairy-free cheese can replace Parmesan. There are many brands that taste great. Nutritional yeast is another option. It adds a cheesy flavor without the dairy. You can switch up the flavor of your creamy avocado pasta with simple tweaks. Adding lime juice can give a bright, zesty taste. It pairs well with the creaminess of the avocado. Using different herbs can also change the dish. Try cilantro for a fresh twist, or oregano for an Italian flair. You can even mix in some sun-dried tomatoes for a burst of flavor. Each change makes this dish fun and unique. For the full recipe, check the earlier section! To store creamy avocado pasta, place it in an airtight container. This helps keep the flavors fresh. Make sure to cool the pasta to room temperature first. If you want to keep it for more than a day, add a little lemon juice. This keeps the avocado from browning. Glass containers work great as they do not absorb odors. When you want to reheat, use a gentle method. Heat the pasta in a pan over low heat. Add a splash of olive oil or water. This keeps the sauce creamy. Stir often to warm it evenly. You can also use a microwave. Warm it in short bursts, stirring in between. This way, you avoid overcooking the sauce. Freezing creamy avocado pasta is not ideal, but possible. If you choose to freeze, use a freezer-safe container. Leave some space at the top for expansion. Thaw the pasta in the fridge overnight. Once thawed, reheat as mentioned above. Expect slight changes in texture, but the taste will still shine. To make creamy avocado pasta, blend ripe avocados, olive oil, lemon juice, garlic, and fresh basil. Toss this sauce with cooked pasta. For the full recipe, check the [Full Recipe]. Yes, you can use frozen avocados. They work as a great option. Frozen avocados are often picked at peak ripeness. This means they still have good flavor. However, fresh avocados bring a brighter taste and creamier texture. If you choose frozen, let them thaw first. Then mash or blend them with the other ingredients. Creamy avocado pasta is quite healthy! Avocados are rich in healthy fats, vitamins, and minerals. They contain fiber, which aids digestion. The fats in avocados can help lower bad cholesterol levels. This dish is also filling, which helps with portion control. Overall, it offers a tasty way to enjoy nutritious ingredients. This blog post explains how to make creamy avocado pasta. You learned the key ingredients, from ripe avocados to olive oil. I shared tips for flavor and presentation. You can boost this dish with proteins or veggies too. Storing and reheating your leftovers is easy, ensuring you enjoy it later. Incorporating these insights will help you create a delicious and satisfying meal. Enjoy experimenting with different flavors and variations to find your perfect recipe twist.

Creamy Avocado Pasta Simple Flavorful Delight

If you crave a simple yet flavorful dish, creamy avocado pasta is your answer. This easy recipe blends ripe avocados

- 1 lb chicken breast, cut into 1-inch cubes - 2 tablespoons honey - 2 tablespoons Dijon mustard - 1 tablespoon olive oil - 1 teaspoon garlic powder - 1 teaspoon onion powder - Salt and pepper to taste - 1 bell pepper, cut into 1-inch pieces - 1 red onion, cut into wedges - Skewers (wooden or metal) You need fresh chicken breast for these skewers. Cut the chicken into 1-inch cubes. This size helps it cook well and stay juicy. Honey and Dijon mustard create a sweet and tangy marinade. Olive oil keeps the chicken moist while grilling. Garlic powder and onion powder add depth of flavor. Don’t forget the salt and pepper! They bring out the taste of the meat and veggies. Bell pepper and red onion add a nice crunch. Cut them into 1-inch pieces for easy grilling. - Additional spices (paprika, cumin) - Fresh herbs (parsley, cilantro) If you want more flavor, add spices like paprika or cumin. These spices give a warm touch. Fresh herbs like parsley or cilantro can brighten the dish. You can sprinkle them on at the end for a fresh taste. - Grilled vegetables - Rice or quinoa salad - Fresh green salad For a complete meal, think about side dishes. Grilled vegetables pair well with the skewers. A rice or quinoa salad adds texture and nutrition. A fresh green salad brings a crisp element to your plate. These sides balance the flavors and make your meal more colorful. You can find the full recipe to make these Honey Mustard Chicken Skewers easily. To start, grab a medium bowl. In it, mix together the following: - 2 tablespoons honey - 2 tablespoons Dijon mustard - 1 tablespoon olive oil - 1 teaspoon garlic powder - 1 teaspoon onion powder - Salt and pepper to taste Whisk these ingredients until they blend well. This marinade gives your chicken a sweet and tangy flavor. Next, take your chicken breast, cut into 1-inch cubes. Add the chicken to the bowl with your marinade. Make sure the chicken is well-coated. Cover the bowl with plastic wrap. Let the chicken marinate in the fridge for at least 30 minutes, but up to 2 hours works best. This step enhances the flavor. When your chicken is ready, it’s time to grill. Preheat your grill to medium-high heat. Now, take skewers, either wooden or metal. Start threading the marinated chicken onto the skewers. Alternate with pieces of bell pepper and onion. Once you have your skewers ready, place them on the grill. Cook for 10-12 minutes, turning them occasionally. The chicken should reach an internal temperature of 165°F (75°C). This ensures it is safe to eat and juicy. For the full recipe, check out the Honey Mustard Chicken Skewers section above. To grill perfect honey mustard chicken skewers, start with medium-high heat. This allows the chicken to cook evenly and get a nice char. If your grill has a lid, close it while cooking. This keeps the heat in and cooks the chicken faster. Be sure to use a thermometer. The chicken should reach 165°F (75°C) to be safe. Prevent sticking by oiling your grill grates. Use a paper towel soaked in oil and a pair of tongs. Wipe the grates before placing the skewers on them. You can also use non-stick spray on the grates. This makes flipping and removing the skewers much easier. To keep your chicken juicy, avoid overcooking it. Check the internal temperature often. If you cook it too long, it becomes dry. Let the skewers rest for a few minutes after grilling. This helps the juices redistribute, making each bite flavorful and tender. Enjoy this easy yet delicious dish with my full recipe! {{image_2}} You can swap chicken for other proteins. Shrimp works great, adding a sweet and delicate taste. Tofu is a fantastic choice for a vegan option. It absorbs flavors well, enhancing the dish. Beef also makes for a hearty skewer. Just remember to adjust cooking times. Shrimp cooks fast, while beef needs a bit longer to reach a safe temperature. While honey mustard shines in this recipe, other marinades can add new flavors. Teriyaki sauce brings a sweet and savory twist. Barbecue sauce adds a rich, smoky taste. A lemon herb blend can brighten your skewers with fresh notes. Feel free to experiment with your favorite sauces. Each will create a unique take on this dish. Using seasonal vegetables can elevate your skewers. Zucchini adds a crisp texture and mild flavor in summer. Cherry tomatoes burst with sweetness and color. Mushrooms provide a savory depth that pairs well with the honey mustard. Mix and match your favorite veggies to keep things interesting. This not only enhances flavors but also adds nutrition to your meal. For a full recipe, check the [Full Recipe]. To store leftover skewers, allow them to cool first. Place them in an airtight container. Cover the container tightly. Store it in the fridge for up to three days. This keeps the chicken and veggies fresh and tasty. To reheat your skewers, use an oven or a skillet. Preheat your oven to 350°F. Place the skewers on a baking sheet. Cover them with aluminum foil. Heat for about 10-15 minutes. If using a skillet, add a little oil to prevent sticking. Heat on medium-low, turning gently. This keeps them moist and prevents drying out. For freezing, marinate the chicken as usual. Place the marinated chicken in a freezer bag. Remove excess air before sealing. You can also freeze pre-cooked skewers. Place them on a baking sheet first, then freeze until solid. Once frozen, transfer them to a freezer bag. Label the bags and store for up to three months. When ready to use, thaw in the fridge before grilling or reheating. For more details, check the Full Recipe. Yes, but proper thawing is recommended before marinating. To thaw chicken safely, place it in the fridge overnight or use the defrost setting on your microwave. This keeps the chicken safe and helps it absorb flavors well during marination. If you lack skewers, you can make a grill-friendly dish without them. Simply place the marinated chicken and veggies directly on the grill. Use a grill basket to hold smaller pieces. You can also cook everything in a grill pan. Just remember to turn them often for even cooking. To check if the chicken is done, use a meat thermometer. The internal temperature should reach 165°F (75°C). You can also look for clear juices running from the chicken. It should no longer be pink inside. These steps will help ensure your chicken skewers are safe and tasty. In this article, we covered how to make honey mustard chicken skewers. You learned about the required and optional ingredients, plus suggested side dishes. We shared step-by-step instructions for marinating and grilling, along with tips for perfect skewers. You now know about variations and how to store leftovers too. These skewers are easy, tasty, and fun to make. Enjoy sharing them with friends and family!

Honey Mustard Chicken Skewers Flavorful Grilling Recipe

Looking to spice up your grilling game? Try my Honey Mustard Chicken Skewers! This easy, flavorful recipe combines juicy chicken

- 1 cup semisweet chocolate chips - 1 cup mini marshmallows - 1/2 cup graham cracker crumbs - 2 tablespoons unsalted butter, melted - 1 teaspoon vanilla extract - Pinch of sea salt - Graham crackers and fresh fruit for dipping When making S'mores Dip, the ingredients matter. You need high-quality chocolate chips for the best taste. I love using semisweet chocolate chips because they melt perfectly. Mini marshmallows add that fluffy texture we all crave. You’ll also need graham cracker crumbs for that classic S'mores flavor. Melted butter helps bind everything together. A dash of vanilla extract boosts the flavor. The sea salt adds a nice contrast to the sweetness. - Dark chocolate chips for richer flavor - Coconut or almond extract for a twist You can change things up a bit. For a deeper taste, dark chocolate chips work great. If you want a flavor surprise, try coconut or almond extract instead of vanilla. These options can make your dip stand out even more. - Chocolate syrup - Crushed nuts - Sliced fruit Toppings can elevate your S'mores Dip. Drizzling chocolate syrup adds extra sweetness. Crushed nuts give a nice crunch. Sliced fruit, like strawberries or bananas, can add freshness. Feel free to mix and match! For the full recipe, don’t forget to check the details in the main section. First, gather your ingredients and tools. You will need: - 1 cup semisweet chocolate chips - 1 cup mini marshmallows - 1/2 cup graham cracker crumbs - 2 tablespoons unsalted butter, melted - 1 teaspoon vanilla extract - Pinch of sea salt - Graham crackers and fresh fruit for dipping Next, prepare your baking dish. A 9-inch pie dish works well, but an oven-safe skillet is great too. Now, preheat your oven to 350°F (175°C). This step is key to getting the right melt. In a medium bowl, mix the chocolate chips, melted butter, vanilla extract, and sea salt. Stir until everything blends well. Transfer this yummy mixture into your prepared dish. Spread it evenly across the bottom. Next, sprinkle the graham cracker crumbs over the chocolate. Make sure to cover it all. Now, top with mini marshmallows. Spread them out to cover the surface beautifully. Place your dish in the preheated oven. Bake for 10-12 minutes. Watch closely! You want the marshmallows to turn golden brown. The chocolate should be melted but not burning. When it looks perfect, take it out and let it cool for a minute. Now, it's ready to enjoy! You can serve it warm with graham crackers and fresh fruit for dipping. For the full recipe, check out the ingredients list above! To get that perfect marshmallow toastiness, bake it until golden brown. Keep an eye on it. The marshmallows will puff up as they cook. For the best result, check often after the 8-minute mark. If you see any burnt edges, you need to lower the oven temperature or take it out sooner. Aim for a rich golden color, not dark brown. For the best dipping, graham crackers are a must. Fresh fruit like strawberries or bananas adds a fun twist. You can also try pretzels for a salty crunch. For parties, arrange the dip with colorful fruit skewers. This makes it look inviting and fun. Consider adding chocolate syrup on top for extra flair. Yes, you can prep S'mores dip ahead of time! Follow the steps but skip baking. Cover it and store it in the fridge for up to 2 days. When you’re ready, just bake it until hot and bubbly. To reheat without losing texture, use the oven. Microwaving can make it too gooey. Enjoy this easy treat with friends or family! Don't forget to check the Full Recipe for all the details! {{image_2}} You can make this dip even more tasty by adding flavors. Try mixing in peanut butter or Nutella. Just add a few spoonfuls to the chocolate mix before baking. This gives the dip a rich and creamy texture. You can also switch up the chocolate. Use dark chocolate chips for a deeper flavor. Milk chocolate will make it sweeter. Each choice will change the taste, so feel free to experiment! You can adapt the dip base for other flavors too. Try adding some crushed cookies or caramel for a twist. These choices can offer a new taste experience. Seasonal fruits are also great for dipping. Strawberries, bananas, and apple slices work well. They add freshness and balance the sweetness of the dip. You can even use pretzels for a salty crunch! If you need gluten-free options, swap the graham crackers. Use gluten-free graham crackers or rice cakes instead. This way, everyone can enjoy the dip! For vegan-friendly modifications, replace the chocolate chips with dairy-free ones. Use coconut whipped cream for the marshmallow layer. These small changes will still keep the dip delicious and fun! After you enjoy S'mores Dip, store any leftovers in an airtight container. Glass or plastic containers work well. Make sure to cool the dip to room temperature before sealing. This helps keep the dip fresh. Place it in the fridge for up to three days. Keep it away from strong-smelling foods to prevent flavor changes. To enjoy the dip again, you need to reheat it properly. The best way to maintain its creamy texture is to use the oven. Preheat your oven to 350°F (175°C). Place the dip in an oven-safe dish and heat for about 10 minutes. Watch it closely to prevent burning. You can also use a microwave. Heat in short bursts, about 30 seconds at a time. Stir between each burst until warm. Yes, you can freeze S'mores Dip! To do this, let it cool completely. Then, transfer it to a freezer-safe container. Leave space at the top as it may expand. Seal tightly and freeze for up to two months. When you are ready to eat it, thaw it overnight in the fridge. Reheat as mentioned above. This keeps the flavors and texture close to fresh. Enjoy the deliciousness again! S'mores Dip is best fresh but lasts for a few days. In the fridge, it can stay good for 3-4 days. Store it in an airtight container. If you want to keep it longer, you can freeze it. In the freezer, it can last up to 2 months. Just thaw it in the fridge before reheating. Yes, you can! While semisweet chocolate works great, dark chocolate adds a rich touch. Milk chocolate offers a sweeter taste. You can also try white chocolate for a different flavor. Mix and match to find your favorite blend! For a fun presentation, drizzle chocolate syrup over the dip. You can also add colorful berries around the dish. Use whole graham crackers or berry skewers for dipping. This makes it look delicious and inviting! You can use standard marshmallows, but mini marshmallows melt faster. They create a nice, even layer on top. If you use large marshmallows, cut them into smaller pieces. This helps with even melting, but it may take longer. Absolutely! If you don’t have an oven, you can use a microwave. Just layer the ingredients in a microwave-safe bowl. Heat it in short bursts until the chocolate melts and the marshmallows puff up. You can also use a stovetop in a skillet. Graham crackers are classic, but you can try other options too. Fruit slices like apples or bananas add a fresh touch. Pretzels give a nice salty crunch. Even cookies can be fun for dipping! Yes, kids will love this recipe! It’s simple and fun to make. Just supervise them when using the oven or microwave. Let them help with mixing and layering. It’s a great way for kids to learn cooking skills! This article covered how to make a delicious S'mores Dip. We explored the ingredients, including chocolate, marshmallows, and graham crackers. You learned about variations, tips for perfecting your dip, and how to store leftovers. S'mores Dip is fun, easy, and great for gatherings. Use creativity with flavors and toppings to make it your own. Enjoy this treat with friends or family, and get ready for smiles all around!

S’mores Dip in the Oven Easy and Fun Dessert Recipe

If you love the classic taste of s’mores, you’ll adore this easy oven-baked s’mores dip. It combines melted chocolate and

Older posts
Newer posts
← Previous Page1 … Page100 Page101 Page102 … Page137 Next →

dsad

© 2025 easycookingbite • Built with GeneratePress

Our Policies

  • Copyright Policy
  • Cookie Policy
  • GDPR Policy
  • Privacy Policy
  • Disclaimer
  • Terms Of Use

More Information

  • Home
  • About
  • Contact
  • Appetizers
  • Dessert
  • Dinner
  • Drinks
©2025, easycookingbite About Back To Top