Skip to content
DisclaimerTerms Of UseGDPR PolicyCookie Policy

easycookingbite

  • Home
  • Drinks
  • Appetizers
  • Dinner
  • Dessert
  • About
  • Contact
  • Privacy Policy
DisclaimerTerms Of UseGDPR PolicyCookie Policy

Lily

- 2 cups all-purpose flour - 1 teaspoon active dry yeast - 3/4 cup warm water (110°F) - 1 teaspoon sugar - 1 teaspoon salt - 1 tablespoon olive oil - 1 cup tomato sauce - 8 ounces fresh mozzarella cheese, sliced - Fresh basil leaves - Sea salt and black pepper - Red pepper flakes (optional) To make a classic Margherita pizza, you need fresh and simple ingredients. The base starts with all-purpose flour and active dry yeast that gives the dough its rise. Warm water activates the yeast, while sugar feeds it. Salt adds flavor, and olive oil gives the dough a nice texture. For the toppings, tomato sauce is key. I love using homemade sauce or quality canned San Marzano tomatoes for the best taste. Fresh mozzarella cheese melts beautifully and tastes amazing. Fresh basil leaves bring a fragrant aroma. Finally, you can sprinkle sea salt and black pepper for extra flavor. If you like heat, add red pepper flakes. This recipe shows that you can create something delicious with just a few quality ingredients. You can find the full recipe above. Enjoy making your pizza! Dissolving Yeast and Sugar Start by taking a small bowl. Add warm water and sprinkle yeast and sugar into it. Let this mix sit for about five minutes. It should get foamy, which means the yeast is active. Forming the Dough In a large bowl, mix two cups of flour with one teaspoon of salt. Make a well in the center of the flour. Pour in the yeast mixture and one tablespoon of olive oil. Stir this until it forms a dough that holds together. Kneading the Dough Now, put the dough on a floured surface. Knead it for about eight to ten minutes. You want it to become smooth and elastic. This step is key for a great texture. First Rise Process After kneading, place the dough in a lightly oiled bowl. Cover it with a damp cloth. Let it rise in a warm spot for one to two hours. It should double in size, showing it’s ready for the next step. Preheating the Oven While the dough is rising, preheat your oven to its highest setting, usually around 475°F. If you have a pizza stone, place it in the oven to heat up. Shaping the Dough Once the dough has risen, punch it down to release air. Move it to a floured surface and divide it into two equal parts. Shape each piece into a round disc, stretching it to about 10 to 12 inches wide. Adding Sauce and Toppings Spread a thin layer of tomato sauce on each dough, leaving a small edge. Next, place sliced fresh mozzarella evenly over the sauce. This will melt beautifully while baking. Baking Instructions Carefully transfer the pizza onto the hot stone or a baking sheet. Bake for about 10 to 12 minutes. Look for a golden crust and bubbling cheese. These signs mean it’s ready. For the full recipe, check the details above for all the steps. Enjoy this classic dish! Ideal Kneading Techniques Kneading dough helps develop gluten. This gives your pizza a nice, chewy texture. To knead, push the dough away with your palm. Fold it back, then turn it. Repeat this motion for 8-10 minutes. The dough should feel smooth and elastic when done. Ensuring Proper Rise After kneading, let the dough rise. Place it in a lightly oiled bowl. Cover it with a damp cloth. Find a warm spot, like near an oven. The dough should double in size in about 1-2 hours. This rise helps create a light crust. Recommendations for Tomato Sauce Use high-quality tomato sauce for the best taste. I recommend homemade sauce or San Marzano tomatoes. These tomatoes are sweet and rich. Spread a thin layer on the dough, leaving a small edge. Selecting the Right Mozzarella Fresh mozzarella is key for Margherita pizza. It melts beautifully and adds great flavor. Look for mozzarella packed in water. Slice it into even pieces to ensure even melting. Using a Pizza Stone vs Baking Sheet A pizza stone gives you a crispier crust. It retains heat better than a baking sheet. Preheat your stone in the oven for at least 30 minutes at the highest setting. If you don’t have a stone, a heavy baking sheet works too. Achieving the Perfect Crust Bake your pizza at a high temperature, around 475°F (245°C). This heat cooks the crust quickly, making it crispy. Keep an eye on it while baking. Once the crust is golden and the cheese is bubbly, it’s ready! For more flavor tips and a full recipe, check out the Classic Margherita Pizza recipe! {{image_2}} You can change up your Margherita pizza in many ways. One great option is adding protein. Grilled chicken or prosciutto can make it heartier. These toppings add flavor and texture. You can also explore different cheeses. Burrata brings a creamy twist. Its rich texture pairs well with the fresh basil and tomato sauce. Seasonal vegetables can elevate your pizza. Try zucchini or bell peppers in summer. In fall, roasted squash adds a sweet touch. These veggies bring fresh flavor and color. Infused oils or dried herbs can also enhance your pizza. A drizzle of garlic oil adds a nice kick. You could use rosemary or oregano for a fragrant twist. If you need gluten-free options, don’t worry! Many recipes now offer gluten-free pizza crusts. You can find premade options at stores or make your own. The cauliflower crust method is also popular. Simply blend cauliflower, cheese, and egg to form a dough. This creates a low-carb, tasty base for your pizza. These variations help you explore new flavors. Each option invites you to create your own perfect Margherita pizza. For the classic version, check the Full Recipe. Best Practices for Refrigeration To keep your leftover Margherita pizza fresh, wrap each slice in plastic wrap. You can also use an airtight container. Make sure to store the pizza in the fridge. It will stay good for about 3 days in the fridge. Reheating Tips When you’re ready to enjoy your pizza again, preheat your oven to 375°F. Place the slice on a baking sheet. Heat it for about 10 minutes. This keeps the crust nice and crispy. You can also heat it in a skillet on medium heat. This method warms it fast and keeps it crispy. How to Freeze Pizza If you want to save pizza for later, freezing is a great option. Wrap each slice tightly in plastic wrap. Then, place the wrapped slices in a freezer bag. Make sure to remove as much air as possible. Your pizza will stay good for about 2 months in the freezer. Thawing Instructions To thaw frozen pizza, move it to the fridge overnight. If you need it fast, you can reheat it directly from the freezer. Increase your oven time to about 15 minutes. This will make sure it heats through completely. Enjoy your pizza whenever you want! Margherita pizza comes from Italy. It was made in 1889 for Queen Margherita of Savoy. A chef in Naples created it using the colors of the Italian flag: green basil, white mozzarella, and red tomato sauce. This simple dish became a classic. Today, it is loved worldwide for its fresh taste. Yes, you can still make great pizza without a stone. Use a baking sheet instead. Preheat your oven with the baking sheet inside. When ready, place the pizza on the hot sheet. This method gives you a nice crust, too. Just make sure to keep an eye on it while baking. To help your dough rise quicker, try these tips: - Use warm water, around 110°F. - Add a teaspoon of sugar to the yeast mix. - Place the dough in a warm, draft-free spot. - Cover it with a damp cloth to keep moisture in. These steps will help activate the yeast faster. Margherita pizza pairs well with many side dishes. Here are a few ideas: - A fresh green salad with vinaigrette. - Garlic bread for extra crunch. - Roasted vegetables for added flavor. - A light soup, like minestrone. These sides complement the pizza well and make a complete meal. For the full recipe, check out the details above. Making Margherita pizza at home is fun and easy. We covered key ingredients, step-by-step dough preparation, and baking tips. Don't forget to try different toppings and crusts for your own twist. Storing leftovers can keep the pizza fresh for later. With these tips, you can create a delicious meal that impresses anyone. Enjoy your pizza journey and let your creativity shine!

Classic Margherita Pizza Simple and Delicious Recipe

Are you ready to make a pizza that’s simple, delicious, and a true classic? In this guide, I’ll share my

To create the perfect meringue cookies, you need a few key ingredients. Here’s what you will need: - 4 large egg whites, at room temperature - 1 cup granulated sugar - 1/2 teaspoon cream of tartar - 1 teaspoon vanilla extract - A pinch of salt These ingredients combine to make a light and crispy treat. The egg whites provide structure, while the sugar adds sweetness. Adding fruit gives your meringue cookies a fun twist. I love using: - 1/2 cup mixed dried fruits (like cranberries, apricots, and mango) - 1/2 cup fresh berries (like strawberries and blueberries) Dried fruits add texture and chewiness. Fresh berries bring a burst of flavor and color. You can mix and match based on your favorites. Choosing the best ingredients makes a big difference. Here are my tips: - Eggs: Use fresh eggs for the best volume. Room temperature eggs whip better. - Sugar: Granulated sugar is key. Avoid powdered sugar as it won’t work well. - Fruits: Look for dried fruits without added sugar. Fresh berries should be firm and colorful. By using quality ingredients, you’ll ensure your meringue cookies taste amazing. For the complete recipe, refer to the Full Recipe section. First, you need to get your oven ready. Preheat it to 225°F (110°C). This low heat helps the meringues dry out slowly. Next, line a baking sheet with parchment paper. This keeps the cookies from sticking. Gather your ingredients: 4 large egg whites, 1 cup of sugar, 1/2 teaspoon of cream of tartar, 1 teaspoon of vanilla extract, and a mix of fruits. You will use 1/2 cup of mixed dried fruits and 1/2 cup of fresh berries. Now it’s time to whip the egg whites. Use a clean, dry bowl for this step. Pour in the egg whites and add a pinch of salt. Start mixing on medium speed. Beat the egg whites until they look frothy, which takes about 2-3 minutes. Then add the cream of tartar. Keep beating until you see soft peaks. This means the egg whites hold a shape but still look soft. Next, slowly add the sugar one tablespoon at a time. Keep mixing on high speed. After about 5-7 minutes, the egg whites should look glossy and form stiff peaks. This is key for a great meringue. After you reach those perfect peaks, it’s time to add flavor. Gently fold in the vanilla extract and the mixed dried fruits. Use a spatula for this. Be light-handed to keep the air in the meringue. If you mix too hard, you lose the fluffiness. Finally, you can dollop or pipe the meringue onto the baking sheet. Make small rounds, about 1.5 inches wide, and leave space between them. Top each meringue with fresh berries for extra flavor and a pop of color. Now, you’re ready to bake! Check out the Full Recipe for all the steps. When making meringue cookies, avoid a few key mistakes. First, ensure your bowl and tools are clean. Any grease can ruin your meringue. Second, don’t rush the egg whites. Beat them until they form soft peaks before adding sugar. If you add sugar too soon, the meringue won't whip up well. Lastly, don’t open the oven door while baking. This causes sudden changes in temperature and can crack your cookies. To get the perfect meringue texture, look for glossy peaks. Once you add sugar, continue to beat until the meringue is stiff. The flavor comes from good ingredients. Use fresh vanilla extract and quality dried fruits. These add depth to every bite. Be gentle when folding in fruits. Overmixing can deflate the meringue, leading to a less airy cookie. Baking meringue requires patience. Set your oven to 225°F (110°C). Bake the cookies for 1.5 to 2 hours. The low temperature ensures the cookies dry out. They should lift easily off the parchment when done. After baking, turn off the oven. Leave the cookies inside with the door slightly open. This helps them cool slowly and prevents cracks. Remember, a little care during baking leads to delightfully crisp meringue cookies. For the full recipe, check out Cloud Nine Meringue Cookies with a Fruity Twist. {{image_2}} You can mix your meringue cookies with many fruits. Try using bananas, peaches, or even kiwi. Each fruit brings its unique taste. For example, bananas add creaminess, while peaches offer a juicy bite. Just remember to chop any fresh fruit into small pieces. This will help them blend well with the meringue. Dried fruits like figs or cherries also work great. They add a chewy texture and rich flavor. If you want a healthier treat, swap regular sugar for other sweeteners. You can use coconut sugar or agave syrup. These options add a different taste while cutting down on calories. Remember, if you use liquid sweeteners, adjust your egg whites. You may need to add a bit more to keep the right texture. Adding color to your meringue cookies makes them more fun. You can use gel food coloring for vibrant shades. Start with just a drop or two. Mix it in gently to keep the light texture. You can also create swirls by adding color to different parts of the bowl. This will give your cookies a beautiful, marbled look. It’s a great way to impress guests or brighten up any dessert table! For the full recipe, check out Cloud Nine Meringue Cookies with a Fruity Twist. To keep your meringue cookies fresh, store them in an airtight container. Line the bottom with parchment paper. This prevents them from sticking and keeps them dry. Place a layer of cookies in the container. Add parchment paper between layers if you stack them. This helps avoid breakage. Keep the container in a cool, dry place away from sunlight. Avoid areas with high humidity, as moisture can ruin their crisp texture. Meringue cookies stay fresh for about one week if stored properly. You can also add a small packet of silica gel to absorb moisture. This simple trick can help maintain their crunch. If you notice them getting soft, it’s best to eat them quickly. If you see any signs of moisture, do not eat them. You can freeze meringue cookies for longer storage. Start by letting them cool completely. Then, place them in a single layer on a baking sheet. Freeze them for about an hour until firm. Once frozen, transfer them to a freezer-safe container with layers separated by parchment paper. They can last in the freezer for up to three months. When ready to enjoy, thaw them at room temperature. Do not refreeze once thawed. For the best taste and texture, eat them fresh after thawing. You can find the full recipe for these delightful cookies in the earlier sections. Meringue cookies are light, airy treats made from whipped egg whites and sugar. They have a crisp outside and a soft inside. You can flavor them with vanilla or even lemon. They are often topped with fruits for a tasty twist. If your meringue is watery, check your egg whites. Make sure they are clean and dry. Any fat can ruin the mix. If it still seems watery, beat it longer until it forms stiff peaks. You can also add a bit more sugar to help. Yes, you can use fresh fruit in meringue cookies. Fresh berries add great flavor and color. Just remember to pat them dry to avoid adding moisture. This helps keep your meringues crisp. Try mixing in strawberries or blueberries for extra fun! For the complete recipe, check out the Full Recipe. Meringue cookies are simple yet delightful. We covered key ingredients, like egg whites and fruits, for flavor. I shared tips for preparing and baking perfect meringue. You learned common mistakes and how to store your cookies. Try different flavors and sweeteners to make these treats your own. Keep experimenting, and enjoy the process. The joy of baking meringue cookies lies in their creativity and taste. Happy baking!

Meringue Cookies with Fruit Easy and Delicious Recipe

Are you ready to impress your friends with a light and sweet treat? In this post, I’ll guide you through

This berry smoothie bowl is colorful and tasty. It uses frozen mixed berries, bananas, and yogurt. The recipe takes just 10 minutes. You can enjoy two servings of this healthy treat. Here are the ingredients you need: - 1 cup frozen mixed berries (strawberries, blueberries, raspberries) - 1 banana, sliced - 1 cup unsweetened almond milk (or any milk of choice) - ½ cup Greek yogurt (or plant-based yogurt) - 1 tablespoon chia seeds - 1 tablespoon honey or maple syrup (optional) - Toppings: sliced fresh fruits, granola, shredded coconut, and a few whole berries Choose ripe bananas for sweetness. Use high-quality frozen berries for the best flavor. Greek yogurt adds creaminess and protein. If you prefer plant-based options, check for unsweetened yogurt. Fresh toppings make your bowl look amazing and taste great. To make your berry smoothie bowl, start with the right ingredients. Gather these items: - 1 cup frozen mixed berries (strawberries, blueberries, raspberries) - 1 banana, sliced - 1 cup unsweetened almond milk (or any milk of choice) - ½ cup Greek yogurt (or plant-based yogurt) - 1 tablespoon chia seeds - 1 tablespoon honey or maple syrup (optional) - Toppings: sliced fresh fruits, granola, shredded coconut, and a few whole berries Now, follow these steps: 1. In a high-speed blender, add the frozen mixed berries, sliced banana, almond milk, Greek yogurt, and chia seeds. 2. If you like it sweet, add honey or maple syrup. 3. Blend on high until the mixture is creamy and smooth. 4. If it’s too thick, add more milk. Scrape down the sides as needed. 5. Once ready, pour the smoothie into a large bowl. For the best texture, use frozen berries. They make the smoothie thick and cold. If your blender struggles, add a splash of almond milk. Blend in short bursts. This helps mix everything evenly. The goal is to achieve a smooth consistency. Don’t rush; blending well makes a huge difference. Now comes the fun part: serving! Pour the smoothie into a bowl. Use your toppings to create a beautiful design. Place sliced fresh fruits in a circle. Sprinkle granola for crunch. Add shredded coconut for a tropical touch. Finally, place a few whole berries on top. This makes your bowl look colorful and inviting. Enjoy it right away with a spoon for the best taste! You can make your smoothie bowl unique. Start by swapping berries. Use strawberries, blueberries, or even mango. Try adding a spoonful of nut butter for creaminess. For extra flavor, add a dash of cinnamon or vanilla. You can also use different milks like coconut or oat. If you like sweetness, drizzle honey or maple syrup on top. The look of your smoothie bowl matters. Pour the smoothie into a wide, shallow bowl. Make it colorful! Place your toppings in rows or patterns. Use bright fruits like kiwi or mango. Sprinkle granola for crunch. A little shredded coconut adds a tropical touch. Finish with a few whole berries for flair. It’s all about making it inviting and fun. Berries are small but mighty! They are low in calories and high in fiber. This helps with digestion and keeps you full. Berries are packed with vitamins C and K. These vitamins help your skin stay healthy and strong. Chia seeds add omega-3s, which are good for your heart. Greek yogurt gives you protein for energy. Together, these ingredients make a healthy breakfast or snack. Enjoy the benefits while you savor the taste! {{image_2}} You can switch up flavors with different fruits. Try mango, pineapple, or peaches. These fruits blend well and add a tropical twist. You can also use spinach or kale for extra nutrients. They blend in easily and give a nice green color. Berries taste best when they are in season. In spring and summer, use fresh strawberries, blueberries, and raspberries. In fall, you might find blackberries and cranberries. Winter is great for frozen fruits, which are often picked at their peak ripeness. Using seasonal berries makes your smoothie bowl fresh and tasty. If you need dairy-free options, swap Greek yogurt for plant-based yogurt. Almond milk can be replaced with oat or coconut milk. For a vegan option, make sure to use maple syrup instead of honey. Adjust these ingredients to fit your diet while keeping the flavors vibrant. To keep your berry smoothie bowl fresh, store it in an airtight container. Use glass or plastic containers that seal tightly. If you plan to eat it later, store it in the fridge. It tastes best within 24 hours. This way, the berries and yogurt stay nice and creamy. If you wait too long, the texture may change. You can freeze your leftover smoothie bowl if you have some. Pour it into ice cube trays or freezer-safe bags. This makes it easy to blend into a new smoothie later. When you want to eat it, just thaw it overnight in the fridge. You can also blend the frozen leftovers directly into a new smoothie with some added milk. Smoothie bowls are best cold and creamy. If you want to warm it up, do it gently. You can microwave it for just a few seconds. Be careful not to overheat it, as this can change the flavor. I recommend adding a splash of almond milk to bring back some creaminess if you reheat it. For the full recipe, check out the Berry Bliss Smoothie Bowl! Yes, you can use fresh berries. Fresh berries will give your smoothie bowl a lighter taste. The texture might differ since frozen berries make the mix thicker and colder. If you use fresh berries, add ice to keep it chilled. Blend until smooth, and enjoy the vibrant flavors! To make your smoothie bowl thicker, add more frozen fruit or Greek yogurt. This gives it a rich, creamy texture. If it’s too thick, add more almond milk a little at a time. Blend again until you reach your desired consistency. Play with the amounts until it feels just right for you. You have many options for toppings! Try sliced bananas, kiwi, or nuts for crunch. Granola adds a great texture too. You can also use seeds, like pumpkin or sunflower seeds. Shredded coconut gives a tropical twist. Get creative and mix different toppings for a fun look and taste. This blog post covered how to make a delicious smoothie bowl. We looked at the best ingredients and why quality matters. You learned tips for blending and serving to impress. We also explored fun ways to customize your bowl. Freshness and storage tips keep your smoothie bowl tasty. Remember, feel free to experiment with flavors and toppings. The goal is to enjoy every bite. Smoothie bowls can be personal and full of life. Happy blending!

Berry Smoothie Bowl Delightful and Healthy Recipe

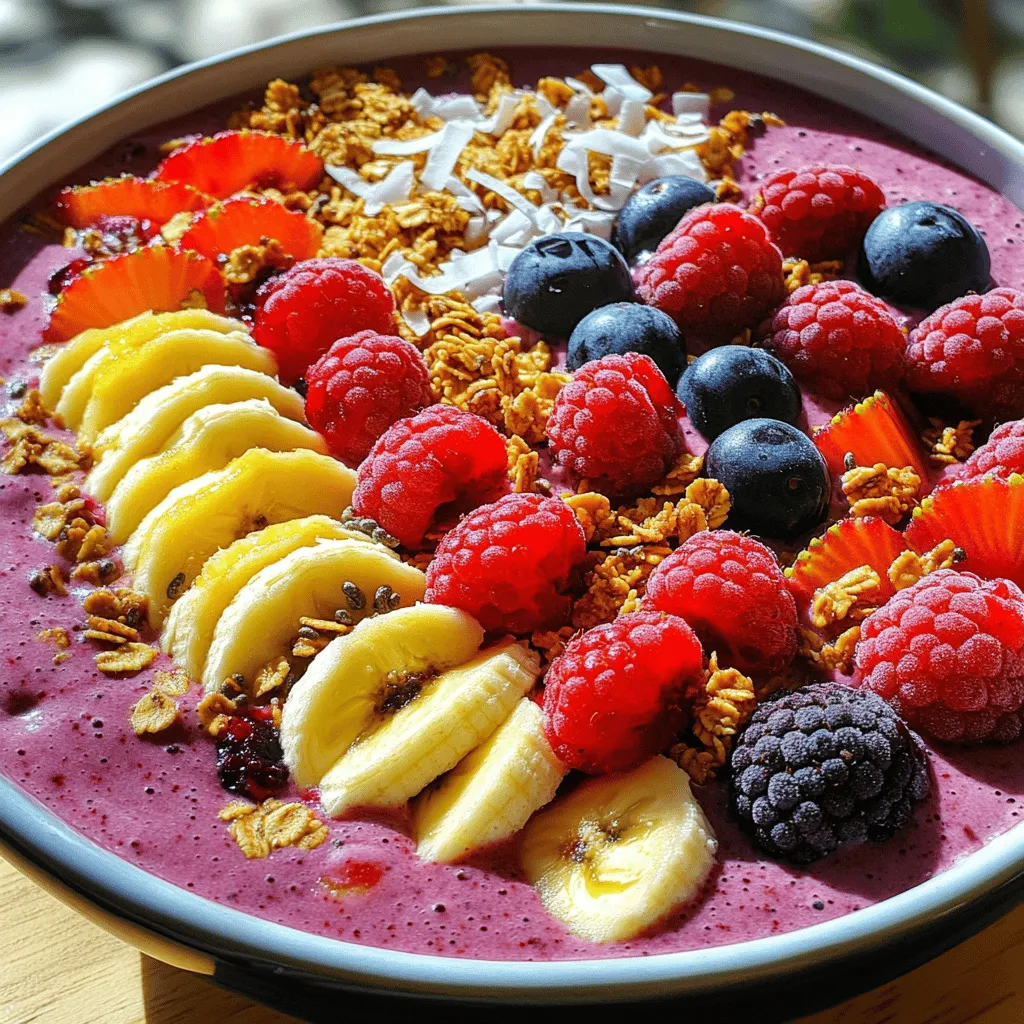
Are you ready to whip up a Berry Smoothie Bowl that’s both delightful and healthy? This recipe is packed with

To make zesty cilantro lime rice, gather these items: - 1 cup jasmine rice - 2 cups vegetable broth (or water) - 1 tablespoon olive oil - 1 lime (zested and juiced) - 1/2 cup fresh cilantro, chopped - 1/2 teaspoon garlic powder - 1/2 teaspoon onion powder - Salt, to taste - Optional: 1 jalapeño, finely chopped (for added heat) I love using jasmine rice for this dish. It has a lovely floral smell and a soft texture. You can also use basmati rice if you like. The vegetable broth adds depth, but water works too. Olive oil brings richness and helps toast the rice. Lime juice and zest give that bright, zesty flavor. Fresh cilantro adds a fresh taste. Garlic and onion powders give a nice, mild flavor. Finally, a little salt brings all the flavors together. If you want heat, the jalapeño is a great choice. If you need options, you can swap jasmine rice for brown rice or quinoa. Use chicken broth for a different flavor. Instead of olive oil, try butter for a richer taste. If you don’t have fresh cilantro, parsley can work in a pinch. Lime juice can be replaced with lemon juice if needed. You can skip the jalapeño if you prefer a milder dish. For a different twist, add some corn or black beans for extra texture and flavor. Check out the Full Recipe for more details! To make zesty cilantro lime rice, you start by rinsing the rice. This step is key. Rinsing removes excess starch. It helps keep the rice fluffy. After rinsing, heat olive oil in a medium pan. Add the rinsed rice and sauté it for 2-3 minutes. This toasting gives the rice a nutty flavor. Next, pour in vegetable broth or water. Bring it to a boil. Add garlic powder, onion powder, and salt. Then, lower the heat. Cover the pan and let it simmer for 15-20 minutes. When the liquid is gone, your rice is done. To achieve perfect rice texture, avoid lifting the lid while it cooks. This keeps the steam inside. After the cooking time, let the rice sit for 5 more minutes. This step helps the rice absorb any leftover moisture. Fluff the rice with a fork before serving. This keeps the grains separate and light. Rinsing rice is very important. It helps remove extra starch, which can make rice gummy. Toasting the rice adds flavor and depth. It gives a slightly crunchy texture at first. This method enhances the overall taste of the dish. For a full recipe, check out my detailed instructions above. You can make your cilantro lime rice even better! Try adding a chopped jalapeño. This gives a nice kick. You could also mix in black beans for protein. Another great option is to add corn. Sweet corn pairs well with lime and cilantro. If you like a different flavor, toss in some diced bell peppers. They add color and crunch. Serve your zesty cilantro lime rice warm. It makes a great side dish for grilled chicken or shrimp. You can also use it as a base for burrito bowls. Add your favorite toppings like avocado or salsa. For a simple meal, serve it with a fried egg on top. This adds protein and makes it filling. This rice goes well with many dishes. Pair it with tacos for a fun meal. You can also serve it with stir-fried veggies for a light dinner. If you have curry, this rice can balance the spices. Try it with roasted meats like chicken or pork. The fresh flavors of lime and cilantro complement rich dishes perfectly. {{image_2}} You can easily add heat to your cilantro lime rice. Just mix in one finely chopped jalapeño. This adds a nice kick. If you want it spicier, leave in the seeds. You can also use a pinch of cayenne pepper. This gives a warm flavor without changing the rice's texture. For a tropical twist, try coconut-infused rice. Replace the vegetable broth with coconut milk. This gives the rice a creamy texture and a rich taste. When you mix in the lime, the fresh flavor shines through. You can also toast some shredded coconut and add it on top for extra crunch. If you prefer brown rice, you can make this dish with it. Use the same amount of brown rice and double the cooking time. Brown rice has more fiber and nutrients. It adds a nutty flavor that pairs well with the lime and cilantro. Just follow the same steps in the Full Recipe. To store leftover rice, let it cool to room temperature first. Place the rice in an airtight container. You can keep it in the fridge for up to four days. Make sure to label the container with the date. This helps you track how long it has been stored. When you're ready to eat the rice, take it out of the fridge. Use the microwave or stovetop to reheat. If using a microwave, add a splash of water and cover the bowl. Heat for 1-2 minutes, stirring halfway through. On the stovetop, add a bit of water to a pan. Heat it on low, stirring until warm. You can freeze leftover rice for up to three months. Divide it into meal-sized portions before freezing. Use freezer-safe bags or containers for best results. When you want to use it, thaw it overnight in the fridge. Reheat it using the instructions above for tasty results. For the full recipe, check out the Zesty Cilantro Lime Rice recipe! You can use water if you don't have vegetable broth. Water will keep the rice simple. Chicken broth is another option if you want a richer taste. Just remember, both options will change the flavor slightly. Yes, you can make this dish ahead of time. Cook the rice and let it cool. Then, store it in an airtight container in the fridge. It will stay fresh for about three days. When ready to eat, just reheat it in a pan or microwave. To make more rice, simply double or triple the ingredients. For every cup of rice, use two cups of broth. Adjust the lime juice and cilantro based on your taste. This way, you will keep the flavor balanced. You can find the Full Recipe for the correct ratios. This blog post covered important aspects of making cilantro lime rice. We discussed the ingredients, cooking steps, and tips to enhance flavor. You learned about variations to suit your taste and how to store leftovers. Remember, the right rice preparation is key to great texture and taste. Don’t forget those substitutions if you need them. Cooking should be fun and flexible. Enjoy making your dish, and share it with others!

Zesty Cilantro Lime Rice Quick and Flavorful Dish

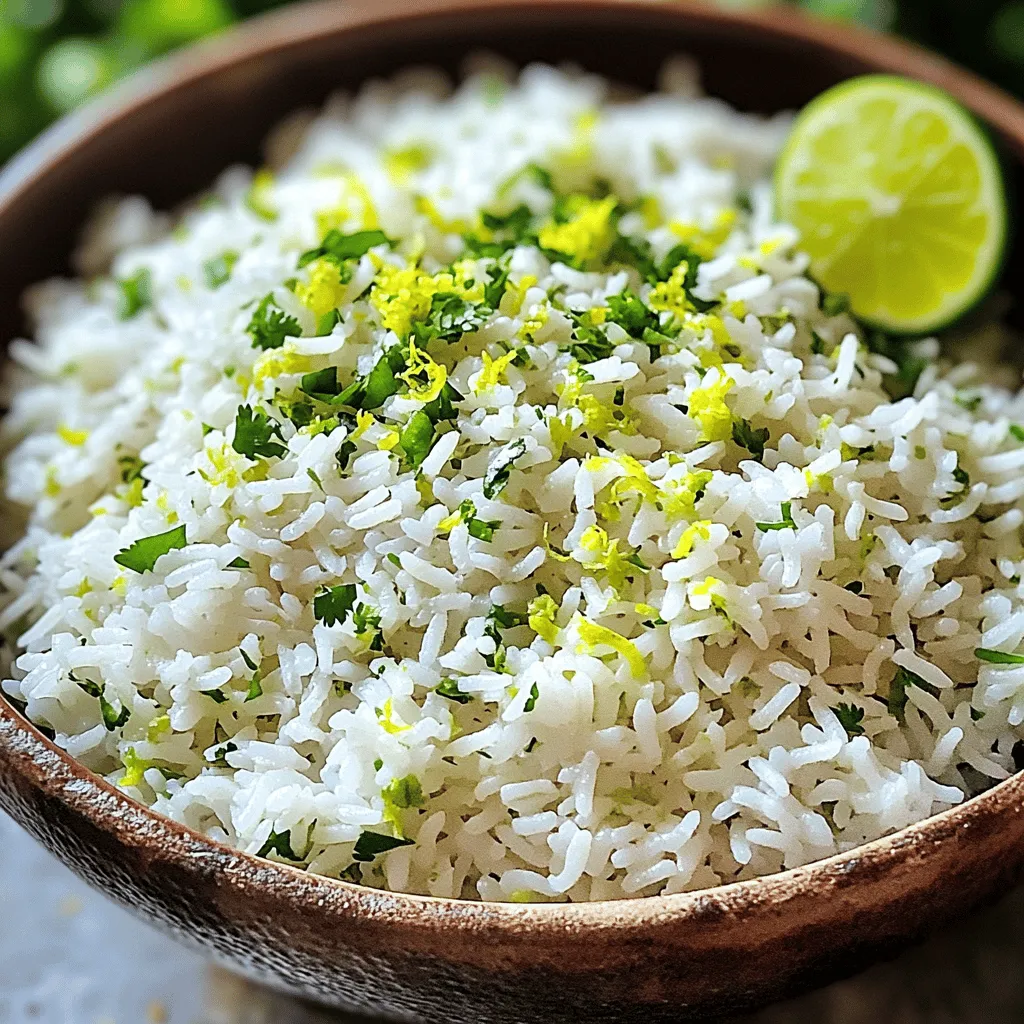
Are you ready to add a burst of flavor to your meals? My Zesty Cilantro Lime Rice recipe is quick,

To make a delicious Quinoa Vegetable Pilaf, gather these simple ingredients: - 1 cup quinoa, rinsed - 2 cups vegetable broth - 1 medium onion, diced - 2 garlic cloves, minced - 1 medium carrot, diced - 1 bell pepper (any color), diced - 1 zucchini, diced - 1 cup frozen peas - 1 teaspoon cumin - 1 teaspoon turmeric - 2 tablespoons olive oil - Salt and pepper to taste - Fresh parsley, chopped (for garnish) This list includes wholesome items. Quinoa is a protein powerhouse. The vegetables provide color and crunch. Spices add depth and warmth. Olive oil gives a rich flavor, while parsley brightens the dish. For the full recipe, check the section above. 1. First, boil the vegetable broth in a medium saucepan. 2. Rinse the quinoa under cold water to remove its natural coating. 3. Add the rinsed quinoa to the boiling broth. 4. Cover the pot, reduce the heat, and simmer for 15 minutes. 5. Once done, fluff the quinoa with a fork and set it aside. 1. In a large skillet, heat the olive oil over medium heat. 2. Add the diced onion. Cook for 3 to 4 minutes until it turns translucent. 3. Stir in the minced garlic and cook for one more minute. 4. Next, add the diced carrot, bell pepper, and zucchini to the skillet. 5. Cook the veggies for 5 to 6 minutes. Stir occasionally until they become tender. 1. Sprinkle in the cumin, turmeric, salt, and pepper. Mix well to blend the spices. 2. Once the veggies are ready, add the frozen peas and cooked quinoa to the skillet. 3. Stir gently to combine all the ingredients. Heat for another 2 to 3 minutes. 4. Taste the pilaf and adjust the seasoning if needed. 5. Garnish with fresh chopped parsley before serving. You can find the full recipe details in the [Full Recipe]. - Rinsing quinoa properly: Rinse quinoa under cold water before cooking. This step removes the natural coating, called saponin, which can make quinoa taste bitter. Use a fine mesh strainer for the best results. - Adjusting water ratio: The water-to-quinoa ratio is key. Use 2 cups of liquid for every cup of quinoa. This helps achieve a fluffy texture. Too much water can make it mushy, so stick to the right measure. - Suggestions for additional spices: Spice it up! Add a pinch of smoked paprika or a dash of cayenne for a kick. You can also try a sprinkle of coriander for a fresh twist. - Using fresh herbs: Fresh herbs can brighten the dish. Add chopped cilantro, basil, or dill right before serving. It will enhance the meal with vibrant flavors. - Variations on sautéing methods: You can use a wok for an even cooking process. The high sides help toss the ingredients well. This method allows flavors to mix and develop nicely. - Alternative cooking equipment: If you have a rice cooker, use it! Just follow the same water-to-quinoa ratio. It makes cooking easy and hassle-free. Just set it and forget it until it’s done. These tips will help you create a quinoa vegetable pilaf that is not only tasty but also packed with nutrients. For the full recipe, check out the Quinoa Veggie Delight Pilaf 🥗 section. {{image_2}} You can make this pilaf vegan by choosing non-dairy alternatives for garnish. Use avocado or nuts like almonds for a creamy touch. If you want more protein, add beans or tofu. Both options work great and keep the dish hearty. You don't have to stick with quinoa. Try brown rice or couscous instead. Both grains add a nice twist to the dish. You can also blend quinoa with other grains for texture. Mixing gives a unique bite and makes it more interesting. Choosing the right vegetables can enhance your pilaf. In spring, use asparagus and peas. Summer's best options include zucchini and bell peppers. For fall, think about squash and carrots. You can use frozen veggies too. They work well and save time, but fresh offers the best flavor. For the complete dish, refer to the Full Recipe. To keep your quinoa vegetable pilaf fresh, use airtight containers. Glass or plastic containers work well. Make sure to let the pilaf cool before sealing. This helps prevent moisture buildup. Store in the fridge for up to five days. Label your containers with the date to keep track. For longer storage, freezing is a great option. Place the pilaf in freezer-safe bags or containers. Remove as much air as possible to prevent freezer burn. You can freeze it for up to three months. When you're ready to eat, thaw the pilaf in the fridge overnight. This keeps it safe and tasty. To reheat your pilaf, you have several options. You can use the microwave, stovetop, or oven. For the microwave, place it in a bowl and cover it. Heat on medium for 1-2 minutes. For stovetop, add a splash of broth and heat in a pan. Stir often to avoid sticking. If using the oven, cover it with foil and heat at 350°F for about 15 minutes. These methods help keep the flavor and texture intact. Enjoy your meal! Quinoa is a tiny seed that acts like a grain. It is rich in protein and fiber. Quinoa has all nine essential amino acids. This makes it a complete protein source. Other grains, like rice, lack some amino acids. Quinoa also contains many vitamins and minerals, such as magnesium and iron. It is gluten-free, making it safe for those with gluten allergies. To make your pilaf more filling, add beans or chickpeas. They provide extra protein and fiber. Nuts and seeds can also add healthy fats. Try adding avocado on the side for creaminess. Serve the pilaf with a salad or roasted vegetables for balance. This way, you create a hearty meal. One common mistake is not rinsing quinoa. Rinsing removes a bitter coating called saponin. Another mistake is cooking it with too little water. Always use a 2-to-1 ratio of water to quinoa. If your quinoa ends up mushy, you may have overcooked it. To fix overcooked quinoa, try adding it to a salad or stir-fry. For the full recipe, check out the Quinoa Veggie Delight Pilaf. This blog post offers a detailed guide to making quinoa vegetable pilaf. You learned about the key ingredients, step-by-step cooking methods, and storage tips. I shared useful tricks to enhance flavor and suggested variations for personalizing your dish. Remember, cooking quinoa can be simple and rewarding. With fresh ingredients and a few techniques, you can create a healthy meal. I hope you feel inspired to try this recipe and make it your own!

Quinoa Vegetable Pilaf Flavorful and Nutritious Dish

Welcome to a tasty journey with my Quinoa Vegetable Pilaf! This dish is not only packed with flavor but also

- 2 ripe avocados, pitted and flesh scooped - 3 cloves garlic, minced - 2 tablespoons lemon juice - 1/4 cup fresh basil leaves - 1/4 cup extra-virgin olive oil - 12 ounces whole wheat pasta (spaghetti or linguine) These main ingredients create a creamy and rich sauce. Ripe avocados give the best flavor and texture. Garlic adds a nice kick, while lemon juice brightens the dish. Fresh basil brings a lovely herbal note. Whole wheat pasta adds heartiness and nutrition. - 1/4 cup grated Parmesan cheese - Cherry tomatoes, halved (for garnish) - Red pepper flakes (for garnish, optional) Adding grated Parmesan gives extra creaminess. Cherry tomatoes add color and freshness. A sprinkle of red pepper flakes can give a spicy touch if you like heat. - Salt and freshly cracked black pepper These are key for enhancing flavors. Use enough salt in the pasta water. Always season the sauce to make every bite delicious. For the full recipe, check the section above. Start by boiling a large pot of salted water. This step is key for great flavor. Once the water is bubbling, add your whole wheat pasta. Cook it until it is al dente, which means it should be firm but not hard. This usually takes about 8 to 10 minutes, depending on the type of pasta you pick. Before draining, remember to reserve about one cup of pasta water. This water is starchy and helps to make the sauce creamy. Next, grab a food processor. Add the scooped avocados, minced garlic, lemon juice, fresh basil, and olive oil. Blend all of these ingredients until the mixture is smooth and creamy. If the sauce feels too thick, don’t worry! Just add a bit of the reserved pasta water, one tablespoon at a time, until it reaches the right consistency. Once your pasta is ready and your sauce is smooth, it's time to combine them. Place the hot, drained pasta into a large mixing bowl. Pour the avocado sauce over the pasta and mix it well to coat every strand. Taste your dish and adjust the seasoning with salt and black pepper as needed. If you like, stir in some grated Parmesan cheese for an extra touch of creaminess. Enjoy your creamy avocado pasta! For the complete instructions, check the [Full Recipe]. To make creamy avocado pasta, you need ripe avocados. Look for ones that yield slightly when you press them gently. They should feel soft but not mushy. If they are hard, they are not ripe yet. You can speed up ripening by placing them in a paper bag with an apple or banana. Store your avocados at room temperature until they ripen. Once ripe, move them to the fridge to slow down the spoiling process. This can keep them fresh for a few more days. To take your avocado pasta to the next level, think about herbs and spices. Fresh basil adds a nice touch. You can also try adding parsley or cilantro for a different flavor. For a kick, a pinch of red pepper flakes works great. Using fresh ingredients always gives the best taste. However, dried herbs can work in a pinch. Just remember that dried herbs are stronger, so use less. Getting the sauce just right is key. If your sauce is too thick, add some reserved pasta water. Start with a tablespoon at a time until you get the texture you want. For a creamy finish, blend your avocado mixture well. Make sure to mix it really smooth. This will help it coat the pasta evenly. For the full recipe, check out Creamy Avocado Pasta. {{image_2}} If you want to make this dish vegan, it's easy! You can replace the Parmesan cheese with nutritional yeast. Nutritional yeast gives a cheesy flavor without any dairy. You can also try toppings like fresh herbs, nuts, or seeds for extra crunch. These options bring a fun twist to the creamy avocado pasta. Want to add some protein? There are great choices! You can toss in cooked chicken, shrimp, or even beans. Each option keeps the dish tasty and filling. If you choose chicken or shrimp, cook them simply with salt and pepper. If you prefer beans, black beans or chickpeas work well. They add a nice texture and keep the avocado flavor front and center. For gluten-free needs, use gluten-free pasta. Many brands offer options that taste great. You can also make a low-carb version by using zucchini noodles. This keeps it light and fresh. The creamy avocado sauce still works perfectly with these choices. It’s a great way to enjoy this meal while sticking to your diet goals. For the full recipe, check out the detailed steps and ingredients to make this dish! To keep your creamy avocado pasta fresh, store it in an airtight container. Make sure the lid fits tightly. This keeps moisture in and air out. To avoid browning of the avocado sauce, add extra lemon juice before storing. The acid in the juice slows down browning. Reheat your pasta gently. Use a microwave or a pan on low heat. Add a splash of olive oil or a bit of reserved pasta water. This helps to restore the creamy texture. To refresh flavors, stir in a pinch of fresh basil or more lemon juice while reheating. You can freeze creamy avocado pasta, but it may change in texture. To freeze, place the pasta in a freezer-safe container. Leave some space at the top for expansion. When ready to eat, thaw it in the fridge overnight. Reheat gently to avoid making it mushy. You can use a fork or a potato masher. First, scoop the avocado into a bowl. Then, mash it until smooth. Add minced garlic, lemon juice, and olive oil. Stir well with a fork. If it gets too thick, add some pasta water. This method works well for a creamy texture. Yes, but with a few tips. Cook your pasta and make the sauce separately. Store them in airtight containers in the fridge. Mix them just before serving to keep the pasta fresh. Add a bit of lemon juice to the avocado sauce to slow browning. This keeps your dish bright and tasty. This pasta pairs well with many sides. Try a simple green salad with lemon vinaigrette. Garlic bread is another great option. You could also add roasted vegetables for a colorful plate. For a protein boost, serve with grilled chicken or shrimp. These sides make your meal even more delicious. You can make a delicious creamy avocado pasta using simple, fresh ingredients. Start with ripe avocados, garlic, lemon juice, and whole wheat pasta. Blend the sauce, mix it with hot pasta, and adjust as needed. Remember to choose avocados wisely and enhance flavor with spices. This dish offers many variations, from vegan options to adding protein. Store leftovers properly to keep them fresh. Enjoy this easy and tasty meal that fits many diets!

Creamy Avocado Pasta Simple and Delicious Meal

Are you ready to try a meal that’s creamy, delicious, and simple? This Creamy Avocado Pasta is perfect for busy

To make these tasty wings, you need: - 1 large head of cauliflower, cut into bite-sized florets - 1 cup all-purpose flour (or chickpea flour for gluten-free) - 1 cup plant-based milk (like almond or soy) - 1 teaspoon garlic powder - 1 teaspoon onion powder - 1 teaspoon smoked paprika - Salt and pepper, to taste - 1 cup buffalo sauce (vegan-friendly) - 2 tablespoons olive oil - Fresh parsley, chopped (for garnish) - Celery sticks (for serving) - Vegan ranch or blue cheese dressing (for dipping) These main ingredients give a great base for flavor and texture. The cauliflower provides a perfect canvas. The flour and plant-based milk create a nice batter that sticks. The spices add depth and heat. You can add more fun flavors with these options: - 1 teaspoon cayenne pepper for extra heat - 1 tablespoon nutritional yeast for a cheesy flavor - 1 tablespoon lemon juice for brightness - Fresh herbs like thyme or oregano for added freshness These additions can elevate your wings. They let you customize based on your taste. Feel free to experiment and find your perfect blend. Pair your wings with these tasty sauces: - Vegan ranch dressing - Vegan blue cheese dressing - Sriracha for a spicy kick - Honey mustard for a sweet touch These dips work great with the wings. Each dip adds a different layer of flavor. You can mix and match to find your favorites. Check out the Full Recipe for more details on making these delicious vegan cauliflower buffalo wings! Start by preheating your oven to 450°F (230°C). This high heat gives the wings a great crunch. While the oven heats, take a large head of cauliflower. Cut it into bite-sized florets. Aim for even sizes so they cook the same. Place the florets in a bowl and set them aside. In a mixing bowl, combine 1 cup of all-purpose flour and 1 cup of plant-based milk. You can use almond or soy milk, whatever you prefer. Add in 1 teaspoon each of garlic powder, onion powder, and smoked paprika. Season with salt and pepper to taste. Mix until you have a smooth batter. Dip each cauliflower floret into the batter. Make sure each piece is well coated. This helps the flavors stick. Once coated, place the florets on a lined baking sheet. Bake the cauliflower in your preheated oven for 20-25 minutes. Flip them halfway through to ensure they brown evenly. The wings should turn golden and crispy. After baking, mix 1 cup of buffalo sauce with 2 tablespoons of olive oil in another bowl. Toss the baked cauliflower wings in this mix, making sure they are evenly coated. Return the wings to the oven for an extra 10-15 minutes. This step caramelizes them and adds depth to the flavor. Finally, take them out and sprinkle with fresh chopped parsley for a nice touch. Serve these hot with celery sticks and your favorite vegan ranch or blue cheese dressing for dipping. This is how you create delicious Vegan Cauliflower Buffalo Wings. For the full recipe, check out the instructions above. To get your cauliflower wings crispy, follow a few simple tips. First, make sure your oven is hot. Preheat it to 450°F (230°C). Use a parchment-lined baking sheet for easy cleanup. Space the florets apart. This helps them crisp instead of steam. Flip the wings halfway through baking. This ensures even browning. For an extra crunch, bake them a little longer. Just watch them closely! If you own an air fryer, you can make these wings even faster. Preheat your air fryer to 400°F (200°C). Place the coated florets in a single layer. Cook for about 15-20 minutes. Shake the basket halfway through. If you prefer frying, heat oil in a pan. Fry the wings until golden brown. This method adds a great flavor, but it’s a bit messier. To elevate the taste of your cauliflower wings, experiment with different seasonings. Try adding smoked paprika for a deep flavor. A pinch of cayenne pepper can bring heat. You can also mix in some nutritional yeast for a cheesy taste. For a zesty kick, add lemon zest or a splash of lime juice. Feel free to get creative with spices and find your favorite mix. For the full recipe, take a look at the Vegan Cauliflower Buffalo Wings recipe. {{image_2}} You can switch up the flavor of your wings with different sauces. Try barbecue sauce for a sweet twist. A tangy teriyaki sauce works well too. You can even use a spicy sriracha sauce for heat. For a creamy option, ranch dressing or a vegan aioli can add richness. Mix and match sauces to find your favorite! To make these wings gluten-free, use chickpea flour instead of all-purpose flour. This flour adds protein and flavor. For a nut-free option, choose soy or oat milk. Be sure to check your sauces too. Some brands have gluten or nuts. Always read labels to keep it safe. These wings fit many diets. If you want them oil-free, bake without olive oil. You can also add spices like cumin or chili powder for extra flavor. For a spicy kick, toss them in hot sauce after baking. These wings please everyone, whether you are vegan or just looking for healthy snacks. To keep your leftover vegan cauliflower buffalo wings fresh, place them in an airtight container. This helps avoid drying out. If you have sauce left over, store it separately. It keeps the wings crispy. When reheating, the oven is your best friend. Preheat it to 375°F (190°C). Place the wings on a baking sheet. Bake them for about 10-15 minutes. This method helps them regain their crunch. You can also use an air fryer. Just heat them for about 5-7 minutes at 350°F (175°C). You can freeze your wings for later use. First, let them cool completely. Then, place them in a freezer-safe bag. Remove as much air as possible. They can last up to three months in the freezer. When ready to eat, thaw them overnight in the fridge. Reheat as mentioned above for the best results. For the complete recipe, check out the Full Recipe. To make the batter gluten-free, use chickpea flour instead of all-purpose flour. Chickpea flour gives a nice flavor and crunch. Mix it with plant-based milk, garlic powder, onion powder, and smoked paprika. This will keep the wings light and crispy while being gluten-free. Yes, you can bake the wings! In fact, baking is a healthier option. Preheat your oven to 450°F (230°C). Coat the cauliflower in batter and place it on a baking sheet. Bake for 20-25 minutes, flipping halfway. Then, toss with buffalo sauce and bake again for about 10-15 minutes. Serve your wings with crunchy celery sticks and a side of vegan ranch or blue cheese dressing. You can also add carrot sticks for a fresh crunch. A simple salad or some sweet potato fries would pair well too. They all balance the flavor and heat of the wings. These wings can be quite spicy, depending on the buffalo sauce you use. Most store-bought sauces have a kick, but you can control the heat. For milder wings, choose a less spicy buffalo sauce or mix it with a bit of plant-based yogurt. If you want an alternative to buffalo sauce, try barbecue sauce or teriyaki sauce. You can mix hot sauce with maple syrup for a sweet and spicy twist. Experiment with different flavors to find what you enjoy best. Each sauce will give the wings a unique taste. For the full recipe, check out the detailed steps to make your Vegan Cauliflower Buffalo Wings! You learned how to make delicious vegan cauliflower buffalo wings. We covered key ingredients, easy steps, and useful tips. Remember, achieving the perfect crunch is key. You can try different sauces to find what you love. Store leftovers properly to keep them tasty. Experiment with alternative cooking methods for fun meals. Enjoy your cooking journey and impress your friends with your vegan skills!

Vegan Cauliflower Buffalo Wings Flavorful and Easy Recipe

Are you ready to spice up your snack game with a healthy twist? These Vegan Cauliflower Buffalo Wings are not

- 2 cups fresh strawberries, hulled and sliced - 1/4 cup granulated sugar - 1 tablespoon lemon juice - 1 pound vanilla sponge cake or pound cake, cut into cubes - 2 cups heavy whipping cream - 1/4 cup powdered sugar - 1 teaspoon vanilla extract - Fresh mint leaves for garnish (optional) The key to a great Strawberry Shortcake Trifle is fresh ingredients. Start with ripe strawberries. They should be bright red and sweet. The sugar helps to draw out their juice. Lemon juice adds a fresh zing. It balances the sweetness perfectly. Next, choose your cake. I love using vanilla sponge cake for its light texture. A pound cake adds richness, so pick what you prefer. Cut the cake into cubes for easy layering. Whipped cream is the star here. Use cold heavy whipping cream for the best results. It whips up fluffy and light. Adding powdered sugar and vanilla gives it a sweet flavor. Mint leaves are optional but add a nice touch. They bring a pop of color and fresh taste. For the full recipe, check the details above. Enjoy creating your trifle delight! Start by hulling and slicing 2 cups of fresh strawberries. Place them in a medium bowl. Add 1/4 cup of granulated sugar and 1 tablespoon of lemon juice. Mix gently to combine. Let the strawberries sit for about 15 to 20 minutes. This process is called macerating. It helps the strawberries release their juices and become sweeter. Next, take 2 cups of heavy whipping cream and pour it into a large mixing bowl. Use an electric mixer on high speed to whip the cream. After about 2 minutes, slowly add 1/4 cup of powdered sugar and 1 teaspoon of vanilla extract. Keep whipping until you see soft peaks form. Be careful not to over-whip the cream. You want it fluffy but not too stiff. Now, it's time to build your trifle. In a large glass trifle bowl or individual cups, start with a layer of sponge cake cubes. Use about 1/3 of the cake. Then, add a layer of your macerated strawberries, including their juices. Follow this with a layer of whipped cream. Repeat these layers until you run out of ingredients. For the last layer, make sure to finish with a generous dollop of whipped cream on top. Cover the trifle with plastic wrap. Place it in the refrigerator for at least 2 hours. This chilling time helps the flavors blend well. Your Strawberry Shortcake Trifle will be ready to enjoy after it cools! For the complete recipe, check the [Full Recipe]. For this trifle, I recommend using vanilla sponge cake. It has a light texture that soaks up the strawberry juices well. Pound cake is a great choice too. It adds a rich flavor and holds its shape nicely. No matter what cake you pick, make sure it is fresh. Stale cake will not taste good in your trifle. Whipped cream is the star of this dessert. To get it just right, start with cold heavy cream. Beat it on high speed until soft peaks form. This takes about two minutes. Be careful not to over-whip. If you whip too long, it turns into butter. To sweeten the cream, add powdered sugar while mixing. You can also add a splash of vanilla for extra flavor. Presentation makes this dessert special. Use clear glass bowls or cups to show off the layers. This way, everyone can see the beautiful colors of the strawberries and cream. For a fun touch, add a whole strawberry on top. You can also sprinkle fresh mint leaves for a pop of green. This adds freshness and color to your trifle. For a detailed guide on making this delightful treat, check out the Full Recipe. {{image_2}} You can switch up the fruit in your trifle. Raspberries and blueberries add a lovely color and taste. They make your dessert pop with flavor, too. You can even mix different fruits for a fun tropical twist. Try adding mango or kiwi for a bright, fresh vibe. This keeps your trifle exciting and new every time. If you want a lighter trifle, you can use whipped cream alternatives. For a fluffy texture, try using Greek yogurt. It gives a creamy feel with less fat. If you’re looking for vegan options, coconut cream works great. It adds a rich flavor and is dairy-free. Just whip it up like regular cream for a smooth finish. Want to take your trifle to the next level? Infuse the cake with liqueurs like amaretto or orange liqueur. This adds a hint of warmth and depth to your dessert. You can also add chocolate shavings or nuts for extra flavor and crunch. These add-ins make your trifle unique and delicious. Don't forget, you can find the full recipe [here](#). To keep your strawberry shortcake trifle fresh, you should store it in the fridge. Use a tight lid or cover it with plastic wrap. This helps keep it moist and tasty. The trifle will stay good for up to 3 days in the refrigerator. After that, the cake might get too soggy. You can freeze the trifle, but it's not the best choice. Freezing can change the texture of the whipped cream and cake. If you decide to freeze it, store it in a freezer-safe container. To thaw, move it to the fridge for a few hours. Avoid using a microwave, as it can ruin the layers. Enjoy your lovely trifle while it’s fresh for the best taste! Strawberry Shortcake Trifle lasts about 3 days in the fridge. Keep it covered to keep it fresh. The layers may get a bit soggy after a couple of days, but it still tastes good. I recommend enjoying it within this time for the best flavor and texture. Yes, you can make your trifle a day ahead of time. This lets the flavors mix well and makes it even tastier. Just make sure to keep it in the fridge, covered with plastic wrap. It will save you time on the day you want to serve it. Serve your trifle in clear glass bowls or cups. This way, everyone can see the pretty layers. Add a few whole strawberries or mint leaves on top for a nice touch. It makes the dessert look extra special and inviting. You can use frozen strawberries if fresh ones are not available. Just thaw them and drain excess juice before using. The taste may be different, but frozen strawberries can still work well in the trifle. They are a great option when fresh strawberries are out of season. In this post, we explored how to make a delicious Strawberry Shortcake Trifle. We covered important ingredients, step-by-step instructions, and helpful tips. You learned about choosing the right cake and perfecting the whipped cream. Plus, we shared fun variations to try. A trifle is simple but lets your creativity shine. Whether for a party or family night, this dessert always impresses. Enjoy making your own tasty trifle!

Strawberry Shortcake Trifle Delightful Layered Treat

Are you ready to impress your family and friends with a stunning dessert? This Strawberry Shortcake Trifle is a fun,

To make a tasty garlic butter chicken, gather these fresh and simple ingredients: - 4 boneless, skinless chicken breasts - 1/2 cup unsalted butter, divided - 6 cloves garlic, minced - 1 teaspoon dried Italian herbs (oregano, basil, thyme) - 1 teaspoon smoked paprika - Salt and pepper to taste - Fresh parsley, chopped (for garnish) - Juice of 1 lemon - Zest of 1 lemon With these items in hand, you can create a dish that bursts with flavor. Each ingredient plays a role in making the chicken juicy and delicious. The garlic gives it a strong kick, while the butter adds richness. The herbs and spices bring harmony to the mix. Plus, the lemon juice and zest brighten up the whole meal. When you choose your chicken, look for fresh, high-quality cuts. This makes a big difference in taste. Fresh garlic will give your dish that strong aroma. Use unsalted butter to control the saltiness. This way, you can adjust the flavor to your liking. Next, let’s get cooking! {{ingredient_image_1}} First, pat the chicken breasts dry with paper towels. This helps to remove any excess moisture. Next, season both sides with salt, pepper, smoked paprika, and dried Italian herbs. The herbs give the chicken a nice flavor. In a large skillet, melt 1/4 cup of butter over medium heat. Make sure the heat is not too high. This helps the butter melt evenly without burning. You want it bubbling but not brown. Once the butter is melted, add the chicken breasts to the skillet. Cook for about 6-7 minutes on each side. You want them to be golden brown. Check the internal temperature; it must reach 165°F (74°C). This ensures the chicken is fully cooked. After removing the chicken, lower the heat. Add the remaining 1/4 cup of butter and minced garlic. Sauté for 1-2 minutes. Be careful not to brown the garlic. Browned garlic can taste bitter, and we want a nice, rich flavor. Stir in the lemon juice and zest. This step brightens the dish and adds freshness. Return the chicken to the skillet, spooning the garlic butter sauce over it. Let it soak in for 1-2 minutes for extra flavor. Remove the skillet from heat. Sprinkle chopped fresh parsley over the chicken for a pop of color. For a complete meal, serve it on a bed of fluffy rice or alongside roasted vegetables. Drizzle any leftover garlic butter sauce over the top. Add extra lemon wedges for a lovely touch. To get that nice golden brown color, use high heat. This sears the chicken well and locks in moisture. Start with a hot skillet and add your butter. When the butter bubbles, it’s time to add the chicken. Cook each side for 6-7 minutes. This timing gives you that crispy outer layer. For better color, make sure not to overcrowd the pan. This lets the chicken brown evenly. If you add too many pieces, they will steam instead of sear. Always check the internal temperature with a meat thermometer. It should reach 165°F (74°C) for safe eating. You can boost the flavor of your garlic butter sauce. Try adding fresh herbs like rosemary or thyme for a fresh taste. You can also sprinkle in some red pepper flakes for heat. If you want more depth, use a splash of white wine or chicken broth. This adds richness and makes the sauce more complex. Remember to sauté the garlic gently. It should be fragrant but not brown. Browning the garlic can make it bitter. When plating your garlic butter chicken, think about how it looks. You can serve it on a bed of fluffy rice or with roasted veggies. Drizzle the garlic butter sauce over the chicken for a flavorful touch. For extra flair, add lemon wedges on the side. This makes the dish pop with color and adds a fresh taste. Pair with a light salad or some crusty bread to complete your meal. Enjoy the beauty and taste of your creation! Pro Tips Rest the Chicken: After cooking, let the chicken rest for 5 minutes before slicing. This allows the juices to redistribute, keeping the meat moist. Use Fresh Herbs: For a more vibrant flavor, consider using fresh herbs instead of dried. A mix of fresh basil, thyme, and parsley can elevate the dish. Customize the Sauce: Feel free to add a splash of white wine or chicken broth to the garlic butter sauce for an extra layer of flavor. Perfect Pairings: This garlic butter chicken pairs beautifully with creamy mashed potatoes or a fresh green salad for a balanced meal. {{image_2}} Using fresh herbs can make your garlic butter chicken taste bright and lively. Fresh herbs pack more flavor compared to dried ones. If you prefer dried herbs, just use less. You can try mixing different herbs too. Basil, rosemary, and thyme work well together. Each adds a unique twist to the dish. Grilling your chicken gives it a smoky flavor that many love. To grill, season your chicken as usual. Preheat your grill to medium-high heat. Cook each side for about 6-7 minutes. You can also bake the chicken if you want a hands-off method. Set your oven to 375°F (190°C). Place the chicken in a baking dish and bake for 25-30 minutes. Want to jazz up your dish? Add nutritional yeast for a cheesy flavor without cheese. Shredded cheese can also be mixed in for extra richness. You can throw in some vegetables too. Carrots, broccoli, or bell peppers roast nicely with the chicken. Just add them to the pan while cooking. They will soak up all that delicious garlic butter flavor! To keep your garlic butter chicken fresh, cool it quickly after cooking. Let it sit at room temperature for no more than two hours. Store the chicken in airtight containers. This will help retain moisture and flavor. Glass or plastic containers work well. Make sure to label the containers with the date. You can freeze garlic butter chicken if you won’t eat it soon. First, let it cool completely. Wrap each piece in plastic wrap. Then, place the wrapped chicken in a freezer bag. Remove as much air as you can before sealing. For quick reheating, thaw chicken overnight in the fridge. You can also use the microwave in a defrost setting. Your garlic butter chicken can last in the fridge for about three to four days. Check for any signs of spoilage before eating. If it smells off or has a strange color, it’s best to throw it away. Always trust your senses! You can serve garlic butter chicken with many tasty sides: - Fluffy white rice or brown rice - Roasted vegetables like carrots or broccoli - A fresh green salad with lemon vinaigrette - Mashed potatoes or creamy polenta These sides will soak up the garlic butter sauce well. You can also drizzle some extra sauce over your sides for more flavor. Yes, you can prepare garlic butter chicken ahead of time: - Cook the chicken and let it cool. - Store it in airtight containers in the fridge for up to three days. This dish is perfect for meal prep. Just reheat it in a skillet or microwave when you're ready to eat. To check if the chicken is done, use a meat thermometer: - Insert it into the thickest part of the chicken. - The internal temperature should reach 165°F (74°C). You can also check for doneness by looking at the chicken. It should be golden brown, and the juices should run clear when you cut into it. Yes, you can lighten up garlic butter chicken with a few swaps: - Use olive oil instead of butter for cooking. - Choose skinless chicken thighs for a leaner option. You can also grill or bake the chicken instead of pan-searing it. These methods cut down on fat while keeping the flavor. This blog post covered how to make Garlic Butter Chicken. We discussed the key ingredients, like chicken, butter, garlic, and lemon. You learned step-by-step instructions for preparing, cooking, and creating a rich garlic butter sauce. Tips on searing and presentation enhanced your skills. Variations provided fresh ideas for flavor and cooking methods. Lastly, I shared storage tips for preserving your dish. Enjoy experimenting with these recipes and make your meals tasty and fun!

Garlic Butter Chicken Delightful and Easy Recipe

Looking for a quick and tasty dinner? You’re in the right place! This Garlic Butter Chicken recipe is simple and

- 1 cup rolled oats - 1 cup unsweetened coconut milk - 1 ripe mango, diced - 1 tablespoon chia seeds - 2 tablespoons honey or maple syrup - 1 teaspoon vanilla extract - 1/4 teaspoon ground cinnamon - A pinch of salt - Optional toppings: shredded coconut, sliced almonds, fresh mint leaves To make Mango Coconut Overnight Oats, you need simple and fresh ingredients. Rolled oats form the base of your dish. They soak up the coconut milk, creating a creamy texture. Unsweetened coconut milk adds a rich flavor and keeps it light. A ripe mango brings sweetness and vibrant color. You can use a fresh mango or even frozen pieces if you prefer. Chia seeds are a great addition. They help thicken your oats and add some healthy fiber. Honey or maple syrup sweetens your oats. You can adjust the amount to suit your taste. Vanilla extract gives a lovely aroma to your dish. Ground cinnamon adds warmth and depth. A pinch of salt helps balance all the flavors. For extra flair, consider toppings. Shredded coconut adds texture and sweetness. Sliced almonds give a nice crunch. Fresh mint leaves provide a refreshing touch. With these ingredients, you create a tasty and healthy breakfast. It’s easy to prepare and perfect for busy mornings. Each bite will remind you of sunny days. {{ingredient_image_1}} To start, mix your dry ingredients. In a bowl, add 1 cup of rolled oats, 1 tablespoon of chia seeds, and a pinch of salt. Stir them together until they blend well. This mix gives your oats great texture. Next, combine your wet ingredients. In a separate bowl, whisk together 1 cup of unsweetened coconut milk, 2 tablespoons of honey or maple syrup, 1 teaspoon of vanilla extract, and 1/4 teaspoon of ground cinnamon. This mixture adds sweet and rich flavor. Now, it's time to combine the oats and the wet mix. Pour the coconut milk mixture over the oats. Stir gently until all the oats are coated. This ensures every bite is flavorful. Now, fold in your diced mango. Use 1 ripe mango, diced into small pieces. Keep a few pieces aside for topping if you want. This adds a fresh burst of flavor. Cover the bowl with plastic wrap or use mason jars for individual servings. Place your oats in the fridge overnight, or for at least 4 hours. This allows the oats to soak up the liquid and thicken nicely. In the morning, stir your oats well. If they are too thick, add a splash of coconut milk to reach your desired consistency. Enjoy your delicious Mango Coconut Overnight Oats! To get the best texture for your mango coconut overnight oats, choose rolled oats. They soak up the coconut milk well, creating a creamy mix. You want them to be soft but not mushy. Let them sit overnight in the fridge. This helps them soften just right. If you want your oats sweeter, add honey or maple syrup. Start with two tablespoons, then taste it. You can always add more to fit your sweet tooth. For extra flavor, top your oats with shredded coconut and sliced almonds. They add crunch and taste. Fresh mint leaves can brighten the dish and bring a pop of freshness. For a complete breakfast, pair your oats with a side of fresh fruit or yogurt. A glass of fresh juice also works well, making your meal balanced and satisfying. These oats last well in the fridge. Store them in mason jars for easy grab-and-go meals. They can last up to three days without losing taste or texture. When meal prepping, portion out your oats into jars. This makes them easy to take with you. Just remember to add your toppings fresh each morning for the best taste. Pro Tips Use Ripe Mango: Choose a ripe mango for the best sweetness and flavor. A mango that gives slightly when pressed is perfect! Customize Sweetness: Adjust the amount of honey or maple syrup according to your taste preferences. Start with less and add more if needed! Thickening Tip: If the oats seem too thick after refrigerating, simply add a splash of coconut milk and stir to achieve your desired consistency. Make it Ahead: Prepare multiple servings at once in mason jars for a quick grab-and-go breakfast throughout the week! {{image_2}} You can change the flavors of your mango coconut overnight oats for a fun twist. Try adding a diced pineapple for a bright, tropical taste. You could also use ripe bananas for added sweetness. These fruits mix well with coconut milk and oats, making every bite special. If you want to use different nut milks, there are great options. Almond milk or cashew milk can work nicely. Each type of milk adds its own flavor and creaminess. You can choose based on what you like best. This recipe is very flexible for different diets. If you need a vegan option, replace honey with maple syrup. This keeps it sweet and plant-based. You can also use agave syrup if you prefer. For those who need gluten-free options, rolled oats are often safe. Just check that they are certified gluten-free. This way, you can enjoy your oats worry-free. Using seasonal fruits can make your oats even more exciting. In summer, try berries like strawberries or blueberries. In the fall, add pumpkin puree and spices like nutmeg for a cozy feel. This keeps your breakfast fresh and in tune with the seasons. You can also bring in holiday flavors. Consider adding a touch of nutmeg or ginger around the winter holidays. These spices can turn a simple dish into a festive treat. Experiment with what you have, and enjoy the variety! Storing your mango coconut overnight oats is easy. First, keep them in a sealed container. You can use a bowl covered with plastic wrap or individual mason jars. This keeps the oats fresh and prevents them from drying out. The oats will stay good in the fridge for about 3 to 5 days. After this time, they may lose some flavor and texture. If you notice any odd smell or change in color, it’s best to toss them out. You want to enjoy your oats at their best! Freezing is a great way to keep your oats for longer. To freeze individual servings, scoop the mixture into freezer-safe containers or bags. Make sure to leave some space for expansion. When you want to eat them, take a serving out of the freezer. Thaw it overnight in the fridge. If you need it faster, you can use a microwave. Heat it in short bursts until warm. If the oats seem thick, just add a little coconut milk to reach the right consistency. This way, you can enjoy your tasty mango coconut oats any time! Can I use rolled oats instead of quick oats? Yes, you can use rolled oats. They are great for overnight oats. Rolled oats absorb liquid well, giving a nice texture. Quick oats may turn too mushy. How long can overnight oats last in the fridge? Overnight oats can last for up to five days in the fridge. They stay fresh when stored in a sealed container. Just remember to stir before serving. Can I make these oats without chia seeds? Yes, you can skip the chia seeds. They add texture and nutrition, but the oats will still be tasty. Feel free to add extra fruit or nuts instead. Caloric breakdown per serving Each serving of mango coconut overnight oats has about 300 calories. This can vary based on your toppings. The oats, coconut milk, and honey provide a good balance of carbs and fats. Health benefits of the ingredients - Rolled oats: High in fiber, they help with digestion. - Coconut milk: Offers healthy fats and adds creaminess. - Mango: Packed with vitamins A and C, supports immune health. - Chia seeds: Provide omega-3s and protein. How to adapt the recipe for larger servings? To make more servings, simply double or triple the ingredients. Use a larger mixing bowl and container. Adjust the sweetener based on your taste. What are the best substitutes for coconut milk? You can use almond milk, soy milk, or oat milk. Each will change the flavor slightly. Choose unsweetened options for the best results. You now have a simple way to make tasty overnight oats. We went over the key ingredients, step-by-step instructions, and helpful tips. You can mix, match, and store your oats easily. With variations for different tastes and diets, there's something for everyone. Remember, you can freeze them too! I hope you feel inspired to try this easy breakfast. Enjoy the process and make it your own!

Mango Coconut Overnight Oats Savory Breakfast Delight

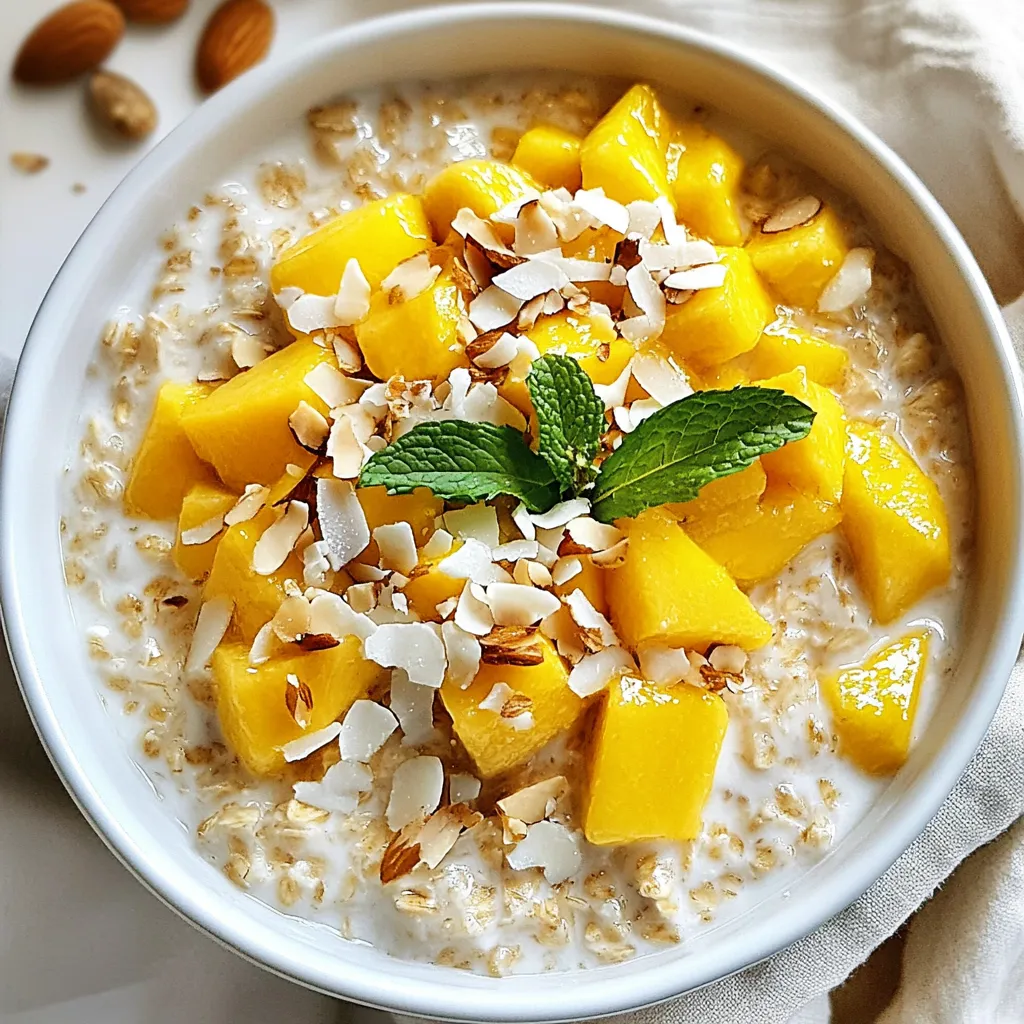
Start your day right with my Mango Coconut Overnight Oats. This delicious breakfast is easy to make and full of

Older posts
Newer posts
← Previous Page1 … Page106 Page107 Page108 … Page137 Next →

dsad

© 2025 easycookingbite • Built with GeneratePress

Our Policies

  • Copyright Policy
  • Cookie Policy
  • GDPR Policy
  • Privacy Policy
  • Disclaimer
  • Terms Of Use

More Information

  • Home
  • About
  • Contact
  • Appetizers
  • Dessert
  • Dinner
  • Drinks
©2025, easycookingbite About Back To Top