
Mango Salsa Fish Tacos Flavorful and Easy Recipe
Get ready to tantalize your taste buds with my Mango Salsa Fish Tacos! This flavorful and easy recipe brings summer
Get ready to tantalize your taste buds with my Mango Salsa Fish Tacos! This flavorful and easy recipe brings summer
![- 1 can (15 oz) chickpeas, rinsed and drained - 1 cup cherry tomatoes, halved - 1 cucumber, diced - 1/2 red onion, finely chopped - 1/2 bell pepper (any color), diced - 1/3 cup Kalamata olives, pitted and halved - 1/4 cup feta cheese, crumbled - 2 tablespoons fresh parsley, chopped - 2 tablespoons olive oil - 1 tablespoon lemon juice - 1 teaspoon dried oregano - Salt and pepper to taste This Mediterranean Chickpea Salad combines fresh flavors and vibrant colors. You can easily swap some ingredients if you want. For example, use green olives instead of Kalamata olives. You can also skip the feta cheese to make it dairy-free. Want to add some crunch? Toss in some diced bell pepper or radishes. Chickpeas are the star of this dish. They offer protein and fiber, making this salad filling. Fresh tomatoes and cucumber bring a juicy taste. The red onion adds a nice zing. Always choose fresh herbs for the best flavor. If you can't find parsley, try cilantro or mint. Lemon juice brightens the salad, while olive oil adds richness. For the full recipe and step-by-step instructions, check out the [Full Recipe]. To make the Mediterranean chickpea salad, start by gathering your ingredients. Here’s how to prepare it: 1. In a large bowl, add the rinsed chickpeas. This gives a nice base. 2. Next, add the halved cherry tomatoes. Their sweetness adds great flavor. 3. Chop the cucumber and add it to the bowl. It brings a cool crunch. 4. Finely chop the red onion. Its sharpness balances the salad well. 5. Dice the bell pepper and toss it in. Use any color you like. 6. Add the Kalamata olives. They offer a briny taste that’s key in this dish. 7. Crumble the feta cheese over the mix. It adds creaminess and saltiness. 8. Gently toss everything together. Be careful not to mash the chickpeas. For dressing, whisk together olive oil, lemon juice, oregano, salt, and pepper in a small bowl. Pour this over the salad and toss again. Lastly, sprinkle the fresh parsley on top for color and a burst of flavor. This salad is fresh and bright, perfect for many occasions. You can serve it on its own as a light meal. It also pairs well with grilled chicken or fish. For a bigger feast, try it with pita bread or hummus. It’s a fun side for any Mediterranean dish. Enjoy it chilled or at room temperature. For the complete recipe, refer to [Full Recipe]. To make your Mediterranean chickpea salad really tasty, use fresh ingredients. Fresh veggies add crunch and bright flavors. Rinse your chickpeas well to remove any canning liquid. This helps the salad taste clean and fresh. Here are some common mistakes to avoid: - Don’t skip the lemon juice. It brightens the flavors. - Avoid over-mixing. You want the salad to look pretty. - Don’t forget to taste the salad before serving. Adjust salt and pepper as needed. To prep in advance, you can chop the veggies a day before. Store them in an airtight container in the fridge. This saves time on busy days. You can also make the dressing ahead. Just keep it separate until you’re ready to serve. For the best results, store your salad in a sealed container. This keeps it fresh and crisp. If you have leftovers, eat them within three days for the best taste. {{image_2}} You can easily swap some ingredients in the Mediterranean chickpea salad. If you want a vegan dish, skip the feta cheese. You can add avocado instead for creaminess. If you have allergies, replace olives with artichoke hearts. For a crunch, try adding radishes or carrots. Seasonal produce can make your salad shine. In summer, use ripe peaches or strawberries. In fall, consider adding roasted butternut squash. These swaps keep the dish fresh and exciting. To make your salad pop, try adding spices like cumin or smoked paprika. Fresh herbs like dill or mint can give it a bright taste. You can mix in some chili flakes for heat if you like spice. For dressing, olive oil and lemon juice are classic, but you can switch things up. Try balsamic vinegar for a tangy twist. You can also use tahini or yogurt for a creamier option. These enhancements can take your Mediterranean chickpea salad to the next level! To keep your Mediterranean Chickpea Salad fresh, store it in the fridge. Use an airtight container. This helps prevent air from getting in and keeps the salad crisp. If you have leftovers, try to eat them within a few days. For best taste, do not add dressings until you are ready to serve. This keeps the veggies crunchy and tasty. The salad lasts about 3 to 5 days in the fridge when stored well. Always check for signs of spoilage. If the salad smells off or the veggies look soggy, it’s time to toss it. Freshness is key to enjoying this vibrant dish. Can I use dried chickpeas instead of canned? Yes, you can use dried chickpeas. Just soak them overnight. Cook them until soft before using. This adds a nice texture to your salad. Is this salad vegan-friendly? This salad is mostly vegan. To make it fully vegan, skip the feta cheese. You can replace it with avocado or a vegan cheese. How can I make Mediterranean Chickpea Salad gluten-free? This salad is already gluten-free. All ingredients are naturally gluten-free. Just make sure your feta cheese is gluten-free if you use it. The Mediterranean Chickpea Salad is packed with nutrients. Here’s a quick look at its benefits: - Chickpeas provide protein and fiber, keeping you full. - Cherry tomatoes offer vitamins A and C, boosting your immune system. - Cucumbers are hydrating and low in calories, making them great for weight loss. - Olive oil is heart-healthy and rich in good fats. On average, one serving has about 250 calories. This makes it a healthy choice for lunch or a side dish. For the complete Mediterranean Chickpea Salad recipe, check the [Full Recipe]. Mediterranean Chickpea Salad is easy to make and enjoy. You now have the ingredients, preparation steps, and serving ideas to create this dish. Remember to try different swaps and flavors to suit your taste. Store leftovers properly to keep them fresh. With these tips, you can serve a tasty, healthy salad any time. Give it a try! You will love how simple and delicious it is.](https://easycookingbite.com/wp-content/uploads/2025/05/849871e3-94cb-4ae4-9e2c-95e74250a023.webp)
Looking for a quick, healthy meal that bursts with flavor? Try this Mediterranean Chickpea Salad! Packed with fresh veggies and
![- 1 cup quinoa, rinsed - 2 cups vegetable broth or water - 1 red bell pepper, chopped - 1 yellow bell pepper, chopped - 1 zucchini, diced - 1 cup cherry tomatoes, halved - 1 red onion, chopped - 2 tablespoons olive oil - 1 teaspoon smoked paprika - Salt and pepper to taste - 1/4 cup feta cheese, crumbled (optional) - Fresh parsley, chopped, for garnish - 2 tablespoons balsamic vinegar - Each serving has about 250 calories. - The salad packs 8 grams of protein, 10 grams of fat, and 36 grams of carbs. - Quinoa provides complete protein and fiber. Roasted veggies add vitamins and minerals. The key ingredients in this dish create a burst of flavor and nutrition. Quinoa is a super grain, rich in protein and fiber. The vibrant bell peppers, zucchini, and cherry tomatoes bring freshness and color. Each bite offers a delightful mix of textures. The olive oil and balsamic vinegar add a smooth finish. Smoked paprika gives a warm, smoky taste. If you want a creamy touch, sprinkle feta on top. Fresh parsley not only looks nice but also adds a pop of flavor. This Roasted Vegetable Quinoa Salad is a great choice for a healthy meal. You can enjoy it warm or cold. Each ingredient plays a role in making this dish both tasty and nutritious. For the full recipe, check out the link above. To start, chop your vegetables. Cut the red and yellow bell peppers into bite-sized pieces. Dice the zucchini into small cubes. Halve the cherry tomatoes and chop the red onion. This size helps them roast evenly. Next, season the vegetables. In a large bowl, add your chopped veggies. Drizzle with olive oil. Sprinkle on smoked paprika, salt, and pepper. Toss until all the pieces are coated. This step adds flavor and helps with caramelization. Preheat your oven to 425°F (220°C). This high heat helps the veggies get that nice roasted flavor. Spread the seasoned vegetables on a baking sheet. Make sure they are in a single layer. This allows them to roast properly. Roast the veggies for about 20-25 minutes. Halfway through, stir them to ensure even cooking. They are done when they are tender and have a golden color. Rinse the quinoa before cooking. Place it in a fine mesh strainer and rinse under cold water. This removes any bitter coating called saponin. In a medium saucepan, combine the rinsed quinoa and vegetable broth or water. Bring this to a boil. Then reduce the heat to low, cover, and let it simmer for about 15 minutes. The liquid should be absorbed. After cooking, let it sit for 5 minutes, then fluff it with a fork. In a large mixing bowl, combine the roasted vegetables and cooked quinoa. Drizzle balsamic vinegar over the top. Toss gently to mix everything. This adds a tangy flavor that brightens the dish. If you like, sprinkle crumbled feta cheese on top. Fresh parsley adds a nice touch as well. Enjoy your colorful and tasty roasted vegetable quinoa salad! For the full recipe, check the recipe section above. To get the best flavor, aim for caramelization. First, cut your veggies into even pieces. This step helps them roast at the same rate. Next, spread them out on the baking sheet. Give them space; crowded veggies steam instead of roast. Drizzle olive oil over them. This oil helps with browning and adds flavor. Sprinkle on salt and smoked paprika for extra taste. Stir halfway through. This will help them cook evenly. You can switch up the veggies, too. Try carrots, broccoli, or sweet potatoes. Each adds a unique taste and texture. To avoid mushy quinoa, rinse it well before cooking. This step removes the natural coating, called saponin, which can make quinoa taste bitter. Use a fine mesh strainer for the best results. Then, cook it in vegetable broth instead of water. This adds flavor and richness. Bring it to a boil, then lower the heat and cover. Let it simmer for about 15 minutes. When it's done, fluff it with a fork and let it sit for a few minutes. For flavoring quinoa, consider adding herbs or spices. A bay leaf or some garlic can elevate the taste. You can also stir in lemon juice or zest after cooking. Pair this roasted vegetable quinoa salad with grilled chicken or fish for a complete meal. It also goes well with a slice of crusty bread. For a boost of flavor, add a dollop of yogurt or a sprinkle of nuts. You can serve the salad warm or cold. Warm salad is comforting, while cold salad can be refreshing. Both ways are delicious! Enjoy this dish as a light lunch or a hearty side. For the full recipe, check out the section above. {{image_2}} You can boost the protein in your roasted vegetable quinoa salad in many ways. Grilled chicken adds a savory touch. It pairs well with the salad's fresh flavors. If you prefer a plant-based option, try adding chickpeas. They are rich in protein and fiber. Just toss them in with the quinoa and veggies for a hearty mix. To change the taste, use spices like cumin or chili powder. These spices add warmth and depth to your salad. You might also try different vinegars. Apple cider vinegar offers a tangy twist. Balsamic vinegar adds sweetness. Experiment with dressings too. A lemon vinaigrette can brighten the dish. You can adjust this recipe based on the season. In summer, add corn, fresh herbs, or even avocado. These ingredients bring a light and refreshing taste. In winter, use hearty vegetables like butternut squash or Brussels sprouts. They add warmth and richness to the salad. Adapting the recipe keeps it exciting all year round. To keep your roasted vegetable quinoa salad fresh, store it in an airtight container. Place it in the fridge right after serving. This helps to lock in flavors and keep the salad safe to eat. To maintain its texture, avoid mixing in dressing until you are ready to serve. Keeping the dressing separate helps the veggies stay crisp. Yes, you can freeze roasted vegetable quinoa salad, but it’s best to freeze it without the dressing. Portion it into freezer-safe bags or containers. Make sure to remove as much air as possible before sealing. When you’re ready to eat it, thaw it in the fridge overnight. Reheat gently on the stove or in the microwave, but watch it closely to avoid mushy quinoa. In the fridge, this salad lasts about 3 to 5 days. Always check for signs of spoilage. If you see mold or the salad smells off, it's best to toss it. Fresh vegetables will lose their crunch over time. If the quinoa looks mushy or clumpy, it’s a sign to throw it away. Enjoy your meal safely! Remember to check the [Full Recipe] for all the delicious details! To make this salad, first, you need to roast the vegetables. Preheat your oven to 425°F (220°C). Chop your favorite vegetables, like bell peppers, zucchini, and onion. Toss them in olive oil, smoked paprika, salt, and pepper. Spread them on a baking sheet. Roast for 20 to 25 minutes until they are tender and caramelized. While the veggies roast, cook the quinoa. Rinse 1 cup of quinoa under cold water. In a pot, combine it with 2 cups of vegetable broth or water. Bring it to a boil, then reduce the heat, cover, and cook for 15 minutes. Once done, fluff the quinoa with a fork. In a large bowl, mix the roasted vegetables with the cooked quinoa. Drizzle with balsamic vinegar and toss everything together. If you like, sprinkle crumbled feta cheese on top and garnish with parsley. For the full recipe, check out the earlier section. Yes, quinoa is gluten-free. It is a great choice for people with gluten sensitivity or celiac disease. Quinoa is a seed that is high in protein and fiber. It has all nine essential amino acids, making it a complete protein. This makes quinoa a nutritious option for salads and bowls. Its texture is fluffy and slightly nutty, adding a great bite to dishes. Absolutely! This salad keeps well, making it perfect for meal prep. You can roast the vegetables and cook the quinoa a day in advance. Store them separately in airtight containers in the fridge. When you’re ready to eat, simply combine them with the balsamic vinegar. You can also add the feta cheese just before serving to keep it fresh. You can use many vegetables in this salad. Carrots, broccoli, or asparagus work well. Each adds a unique flavor and texture. Sweet potatoes give it a heartier feel, while spinach or kale add greens. Feel free to mix and match based on what you like. Roasting enhances their natural sweetness and brings out rich flavors, making each bite delightful. This recipe for roasted vegetable quinoa salad provides a tasty and healthy meal option. You learned about the key ingredients and helpful tips for prep, cooking, and serving. This dish allows for many variations and is simple to store. Experiment with different proteins and spices to make it your own. Enjoy this nutrient-packed salad warm or cold, and share it with friends. Your kitchen can become a hub of creativity with this recipe!](https://easycookingbite.com/wp-content/uploads/2025/05/576f62fc-a6f5-46b4-abf2-8e50805e27d0.webp)
Looking for a fresh, flavorful meal that’s easy to make? This Roasted Vegetable Quinoa Salad is your answer! Packed with

Are you ready to bake something delicious? Today, I’m excited to share my easy and tasty Chocolate Chip Banana Bread

Are you ready to bring the bold flavors of Thailand to your kitchen? Spicy Thai Basil Chicken is not just
![- 2 cans (12.4 oz each) refrigerated cinnamon rolls - 6 large eggs - 1 cup milk The base of this casserole is the refrigerated cinnamon rolls. They create a soft and sweet texture. Use two cans for a hearty dish. Eggs add richness and bind the ingredients. They will puff up the casserole. Milk adds creaminess and moisture. - 1 teaspoon vanilla extract - 1 teaspoon ground cinnamon - 1/2 teaspoon nutmeg Vanilla extract gives a warm, sweet flavor. Ground cinnamon boosts the classic cinnamon taste. Nutmeg adds a hint of spice that makes each bite special. These flavors blend well and enhance your casserole. - 1/4 cup maple syrup - 1/2 cup chopped pecans - 1/2 cup powdered sugar (for icing) - 1-2 tablespoons milk (for icing consistency) Maple syrup adds sweetness and a hint of flavor. Chopped pecans give a nice crunch. For a sweet finish, make icing with powdered sugar and milk. You can drizzle this over the warm casserole for extra delight. Try adding these optional ingredients to make your dish unique. For the complete recipe, check the [Full Recipe]. 1. Preheat your oven to 350°F (175°C). Grease a 9x13 inch baking dish with cooking spray or butter. 2. Open the cans of cinnamon rolls. Cut each roll into quarters. Arrange the pieces evenly in the baking dish. 1. In a large bowl, whisk together: - 6 large eggs - 1 cup milk - 1 teaspoon vanilla extract - 1 teaspoon ground cinnamon - 1/2 teaspoon nutmeg - 1/4 cup maple syrup 2. Pour the egg mixture evenly over the cinnamon roll pieces. Make sure they all get coated. Gently press down with a spatula so they soak up the liquid. 1. Bake in the preheated oven for 25-30 minutes. Check for doneness by inserting a toothpick in the center. It should come out clean. 2. While the casserole bakes, prepare the icing. In a small bowl, whisk together: - 1/2 cup powdered sugar - 1-2 tablespoons milk Mix until smooth and reach your desired icing thickness. 3. Once the casserole is done, let it cool for about 5 minutes. Drizzle the icing over the top while it’s still warm. For a full recipe, refer to the detailed instructions above. Enjoy your delicious cinnamon roll casserole! To ensure even soaking of cinnamon rolls, cut each roll into quarters. Spread them out in the baking dish. Pour the egg mixture evenly over the pieces. Press down gently with a spatula. This helps the rolls soak up all the goodness. Bake at 350°F for 25 to 30 minutes. This temperature gives a nice golden brown color. For a lovely presentation, serve the casserole warm. Top it with a sprinkle of cinnamon. Add whole pecans for a nice touch. Accompany it with fresh fruit. A dollop of whipped cream adds a nice flair too. These simple additions make the dish feel special. Want to mix it up? Try different flavorings like almond extract or orange zest. You can also add fruit like apples or berries. They add a fresh taste. Nuts like walnuts or hazelnuts can give a nice crunch. Let your creativity shine! Experiment and find your favorite twist on this delightful dish. Check out the full recipe for more ideas! {{image_2}} To keep your cinnamon roll casserole fresh, store it in an airtight container. Place the casserole in the fridge within two hours of cooking. This helps prevent spoilage. When stored correctly, it stays fresh for about three to four days. If you plan to eat it later, don’t wait too long! For the best results, reheat your casserole in the oven. Preheat it to 350°F (175°C). Place the casserole in a baking dish, cover it with foil, and heat for about 15-20 minutes. This method keeps the texture soft and fluffy. You can also use the microwave, but it may make the edges tough. If you choose the microwave, heat it in short bursts of 30 seconds. If you want to freeze leftovers, start by letting the casserole cool completely. Cut it into pieces and wrap each piece tightly in plastic wrap. Place them in a freezer-safe bag. This way, they will stay fresh for up to three months. When you’re ready to eat, thaw the casserole in the fridge overnight. After that, reheat it in the oven or microwave. This keeps the delicious flavors intact. Enjoy this tasty treat anytime! Can I use homemade cinnamon rolls? Yes, you can use homemade cinnamon rolls. Fresh rolls add a nice touch. Just make sure they are soft and fluffy. Cut them into quarters like the store-bought ones. This helps them soak up the egg mixture well. How can I make it gluten-free? To make this dish gluten-free, use gluten-free cinnamon rolls. Many brands offer good options. Check your local store. You can also make your own rolls using gluten-free flour. Just follow your favorite gluten-free recipe. Dairy-free alternatives for milk and eggs For a dairy-free version, use almond milk or oat milk. They work well in this recipe. For eggs, try flaxseed meal or a commercial egg replacer. Mix one tablespoon of flaxseed meal with three tablespoons of water for each egg. Suggested replacements for sweeteners If you want to switch sweeteners, use honey or agave syrup instead of maple syrup. Both add a sweet flavor. You can also try coconut sugar for a lower glycemic index option. How to adjust servings for larger groups To serve more people, double the recipe. Use a larger baking dish, like a 12x18 inch pan. This will help ensure even cooking. Keep an eye on the baking time; it may take a bit longer. Modifying baking times for different dish sizes If you change the dish size, you may need to adjust baking times. A smaller dish may cook faster. Check for doneness by inserting a toothpick. If it comes out clean, your casserole is ready! - 2 cans (12.4 oz each) refrigerated cinnamon rolls - 6 large eggs - 1 cup milk - 1 teaspoon vanilla extract - 1 teaspoon ground cinnamon - 1/2 teaspoon nutmeg - 1/4 cup maple syrup - 1/2 cup chopped pecans (optional) - 1/2 cup powdered sugar (for icing) - 1-2 tablespoons milk (for icing consistency) 1. Preheat your oven to 350°F (175°C). Grease a 9x13 inch baking dish with cooking spray or butter. 2. Open the cans of cinnamon rolls and cut each roll into quarters. Arrange the pieces evenly in the baking dish. 3. In a large bowl, whisk together the eggs, milk, vanilla extract, ground cinnamon, nutmeg, and maple syrup until well combined. 4. Pour the egg mixture evenly over the cinnamon roll pieces, making sure they are all coated. Gently press down with a spatula to ensure they soak up the liquid. 5. If using, sprinkle the chopped pecans evenly on top of the mixture. 6. Bake in the preheated oven for 25-30 minutes, or until the casserole is puffed and lightly golden brown. A toothpick inserted in the center should come out clean. 7. While the casserole is baking, prepare the icing by whisking together the powdered sugar and milk in a small bowl until smooth and desired consistency is achieved. 8. Once the casserole is done, let it cool for about 5 minutes, then drizzle the icing over the top while it’s still warm. This recipe serves 8 people. Each serving is rich and satisfying. For nutrition, consider that this dish offers a balance of protein, carbs, and some healthy fats if you add nuts. Enjoy it warm, and feel free to add fresh fruit or whipped cream for a special touch! This casserole is simple to make and full of flavor. We explored the main ingredients like cinnamon rolls, eggs, and milk. Flavor enhancers added depth with vanilla, cinnamon, and nutmeg. You learned step-by-step instructions, helpful tips, and serving ideas. In the end, this dish is versatile and fun. Try different nuts or fruits to mix it up. Don't forget to store leftovers right and enjoy them later. Bake it, share it, and enjoy this delicious meal!](https://easycookingbite.com/wp-content/uploads/2025/05/f951db18-21ad-4f0b-9289-89d99c96ef69.webp)
Are you ready to transform your breakfast routine? This Cinnamon Roll Casserole is a warm, gooey delight that turns a
![To make delicious lemon blueberry overnight oats, gather these key items: - 1 cup rolled oats - 1 cup almond milk (or any milk of choice) - 1/2 cup Greek yogurt (vanilla or plain) - 1 tablespoon chia seeds - Zest of 1 lemon - 2 tablespoons lemon juice - 2 tablespoons honey or maple syrup (adjust to taste) - 1 cup fresh blueberries (plus extra for garnish) - A pinch of salt These ingredients work together to create a creamy, tasty breakfast. The oats soak up the milk and flavor, giving you a filling meal. You can change your overnight oats to suit your taste! Here are some optional ingredients: - Almonds or walnuts for crunch - Flax seeds for added fiber - Vanilla extract for more flavor - Other fruits like strawberries or bananas Feel free to mix and match these options. This lets you create a dish you will love every time. When it is time to serve, add some tasty toppings! Try these: - Extra fresh blueberries - A sprinkle of lemon zest - A drizzle of honey or maple syrup - A dollop of yogurt These toppings add a nice touch and make your oats look great. They also boost flavor and nutrition! Don't forget to explore the full recipe for more tips. Making lemon blueberry overnight oats is quick and easy. You only need ten minutes for prep. Gather all your ingredients first. This way, you stay organized. You will love how simple this is! 1. Begin with a medium bowl. Add the rolled oats and milk. 2. Next, mix in Greek yogurt and chia seeds. 3. Zest the lemon and add it to the bowl. 4. Pour in the lemon juice and honey. Add a pinch of salt. 5. Stir everything well until it combines. 6. Now, gently fold in the fresh blueberries. Make sure they spread evenly. 7. Take two mason jars or containers. Divide the mix between them. 8. Seal the jars and place them in the fridge overnight. Keep your overnight oats in the fridge. They stay fresh for up to five days. Use airtight containers to keep them sealed. You can add toppings like nuts or seeds before serving. If you want to change the texture, add a splash of milk before eating. Enjoy your delicious lemon blueberry overnight oats! For the full recipe, check out the details above. To make the best lemon blueberry overnight oats, use rolled oats. They soak up the liquid well and stay soft. Combine all your ingredients in a bowl before putting them in jars. This step ensures even mixing. Make sure to let the oats soak for at least four hours. Overnight is best for a creamy texture. Store your oats in the fridge for up to four days. Use airtight containers to keep them fresh. If you have leftovers, stir them well before serving. You might need to add a splash of milk to loosen the oats. This keeps the texture just right. Add more fruits to boost flavor. Try bananas or strawberries for a new twist. Adding nuts or seeds increases the protein and healthy fats. You can also switch honey for maple syrup for a different taste. For a zestier bite, add more lemon juice or zest. This makes your oats even more refreshing. For the full recipe, you can refer to the Lemon Blueberry Bliss Overnight Oats. {{image_2}} If you want to make your lemon blueberry overnight oats nut-free, it's easy! Swap almond milk for oat milk or coconut milk. Both options add creaminess without nuts. You can also use sunflower seed butter instead of nut butter. It gives a nice flavor and keeps it safe for school lunches. For a dairy-free twist, skip the Greek yogurt. Use coconut yogurt or a dairy-free yogurt of your choice. This keeps the oats creamy and tasty. The almond milk can also be replaced with soy or oat milk for a smooth texture. These options ensure you still enjoy the creamy goodness without dairy. Change up your fruit based on the season. In spring, try strawberries or raspberries. In summer, peaches or cherries work well. Fall calls for apples or pears, and in winter, you might enjoy dried fruits like cranberries or figs. Each fruit adds a unique flavor and keeps your oats fresh and exciting. For the complete recipe, check out the [Full Recipe]. You can keep lemon blueberry overnight oats in the fridge for up to five days. This makes them a great meal prep option. Store them in airtight containers to keep them fresh. Check for any off smells or changes in texture before eating. You can freeze overnight oats if you want to save some for later. Place the oats in freezer-safe containers or bags. They will last for about three months in the freezer. When you're ready to eat, just thaw them in the fridge overnight. You can enjoy your overnight oats cold or warm them up. If you choose to heat them, scoop the oats into a bowl. Add a splash of milk to keep them creamy. Microwave for about 30-60 seconds. Stir well and enjoy! Yes, you can use steel-cut oats, but they need more time to soak. Steel-cut oats are chewier and less creamy than rolled oats. If you choose them, let the mixture sit longer. Aim for at least 12 hours in the fridge. This gives the oats time to soften. To adjust sweetness, you can add more honey or maple syrup. Start with a small amount, about a teaspoon, and taste. If you want it sweeter, add a bit more. You can also use mashed banana or a splash of vanilla extract for a different flavor. These ingredients offer many health benefits. Oats provide fiber, which aids digestion. Blueberries are packed with antioxidants, helping to fight inflammation. Greek yogurt adds protein and probiotics for gut health. Chia seeds boost Omega-3 fatty acids, which are good for your heart. Lemon adds vitamin C, which supports your immune system. Yes, it is safe to eat overnight oats for up to three days in the fridge. After that, the oats may lose texture and flavor. Always check for signs of spoilage, like an off smell or mold. If they look and smell good, enjoy them! For the full recipe, check the earlier section. Lemon blueberry overnight oats offer a tasty, quick breakfast. We discussed the key ingredients, step-by-step instructions, and helpful tips for great results. You can customize your oats with various toppings and ingredients, creating a mix that suits you. Remember to store any leftovers properly to enjoy later. This meal is not only simple but also healthy. Dive into this recipe and enjoy a fun way to start your day!](https://easycookingbite.com/wp-content/uploads/2025/05/c069cd58-bb87-420e-b00b-df899806f4c8.webp)
Looking for a quick and easy breakfast? Try my Lemon Blueberry Overnight Oats! This vibrant meal is packed with flavor
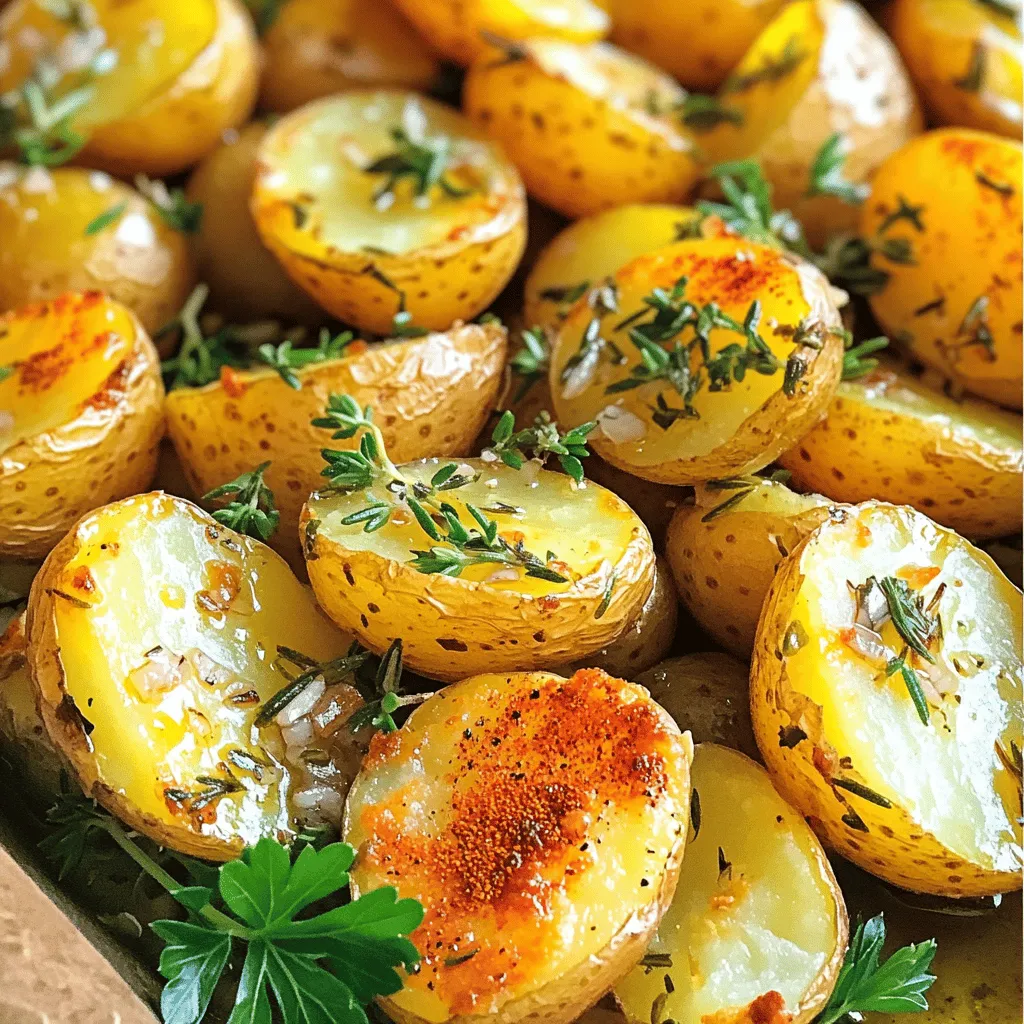
If you’re looking for a tasty side dish, Garlic Herb Roasted Potatoes are your answer! These flavorful potatoes are easy
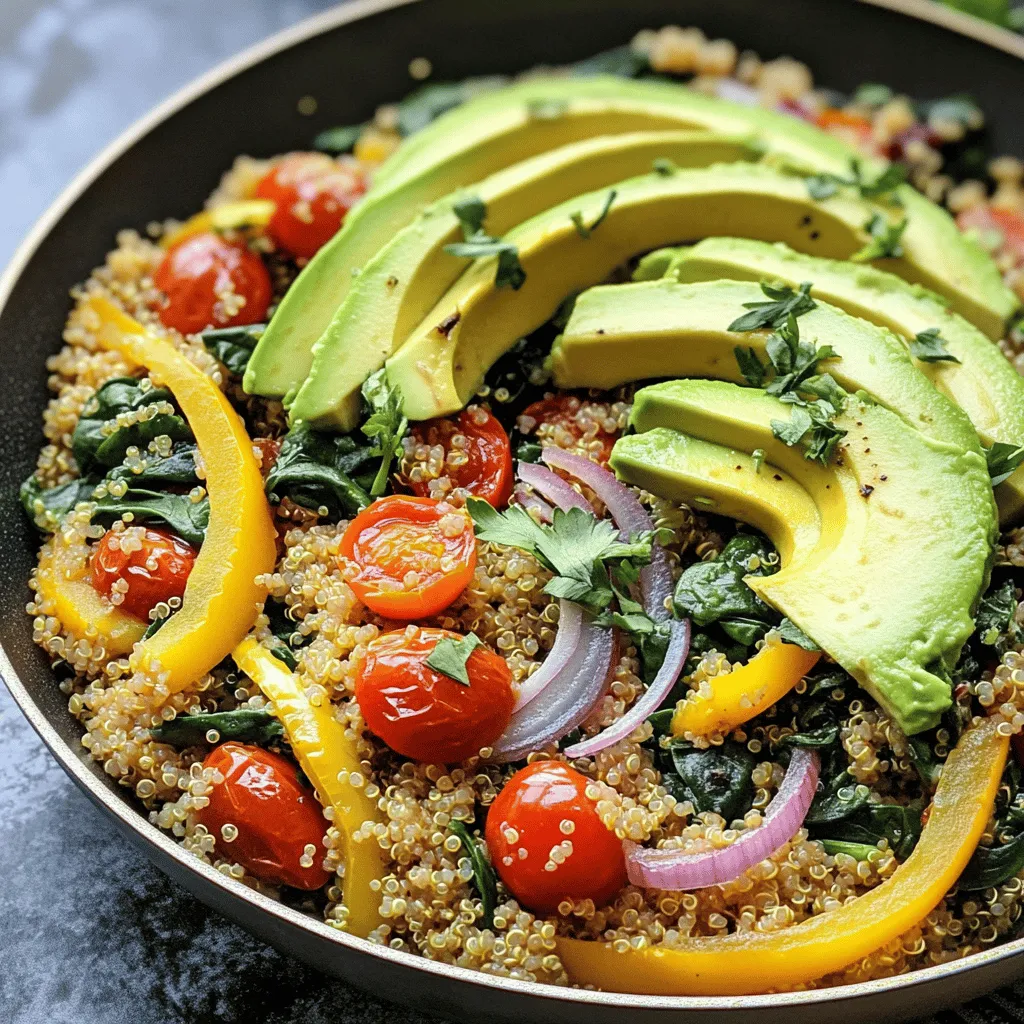
Looking for a quick, tasty breakfast that packs a nutrition punch? Savory breakfast quinoa is your answer! This dish combines
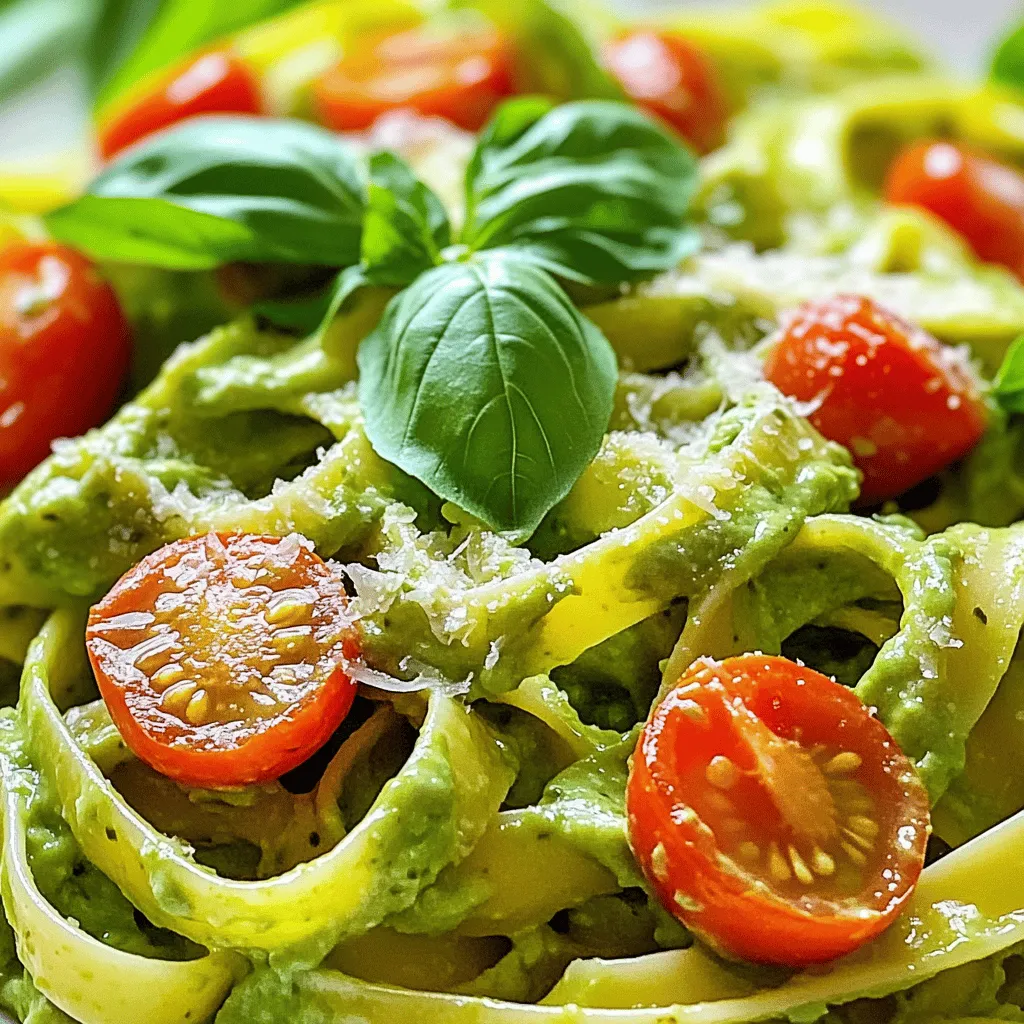
Looking for a quick and delicious weeknight meal? Creamy Avocado Pasta fits the bill! This tasty dish uses ripe avocados,
