Skip to content
DisclaimerTerms Of UseGDPR PolicyCookie Policy

easycookingbite

  • Home
  • Drinks
  • Appetizers
  • Dinner
  • Dessert
  • About
  • Contact
  • Privacy Policy
DisclaimerTerms Of UseGDPR PolicyCookie Policy

Lily

To make a delicious eggnog cake, gather these key items: - 2 cups all-purpose flour - ½ cup unsalted butter - 1 cup granulated sugar - 1 cup eggnog (non-alcoholic) These ingredients form the base of your cake. The flour gives structure, while butter and sugar add richness. Eggnog provides moisture and flavor, making the cake unique. Next, you need some spices to enhance the taste: - 1 teaspoon ground nutmeg - 1 teaspoon ground cinnamon - 1 teaspoon vanilla extract Nutmeg and cinnamon bring warmth and holiday cheer. Vanilla adds a sweet note that ties everything together. These flavors make your cake feel festive and special. To frost your cake, you will need: - 1 cup powdered sugar - 2 tablespoons unsalted butter - 2 tablespoons eggnog This simple frosting is creamy and sweet. It balances the spices in the cake. You will mix these ingredients until smooth for a perfect finish. For the complete recipe, you can check the Full Recipe. Enjoy your holiday baking! Start by preheating your oven to 350°F (175°C). Grease and flour two 9-inch round cake pans. This helps the cake release easily later. Next, in a medium bowl, whisk together the dry ingredients: - 2 cups all-purpose flour - 1 ½ teaspoons baking powder - ½ teaspoon baking soda - ½ teaspoon salt - 1 teaspoon ground nutmeg - 1 teaspoon ground cinnamon Set this mixture aside. It is important to mix well so the flavors blend. In a large mixing bowl, cream ½ cup of softened unsalted butter with 1 cup of granulated sugar. Beat them together until light and fluffy, which takes about 3-4 minutes. This step adds air to the batter. Then, add 3 large eggs one at a time. Mix well after each egg. Finally, stir in 1 teaspoon of vanilla extract for extra flavor. Now, gradually add the dry ingredients to the butter mixture. Alternate this with 1 cup of eggnog. Start and end with the flour mixture. Mix until just combined; overmixing can make the cake tough. Divide the batter evenly between the prepared pans. Smooth the tops with a spatula. Bake for 25-30 minutes. The cake is done when a toothpick inserted in the center comes out clean. Let the cakes cool in the pans for about 10 minutes. Then, turn them out onto wire racks to cool completely. For the full recipe, you can check the earlier section. To make your eggnog cake perfect, focus on the texture. Use room temperature butter. This helps the butter blend well with sugar. Beat the butter and sugar until fluffy. This adds air, making your cake light. Mix the dry ingredients well before adding them to the wet ones. For flavor, use fresh spices. Fresh ground nutmeg and cinnamon add warmth. You can also add a splash more of eggnog. This gives extra moisture and flavor. Frosting can be tricky, but it doesn’t have to be messy. Start with a crumb coat. This is a thin layer of frosting that seals in crumbs. Spread it evenly over the cake and chill for 15 minutes. After that, apply the final coat. For a festive look, sprinkle nutmeg on top. You can also use a zester to create fun designs. One big mistake is overmixing the batter. This can make your cake tough. Mix just until combined. Another common error is not checking for doneness. Use a toothpick to test the center. If it comes out clean, your cake is ready. By following these tips, you can create a delightful eggnog cake this holiday season. For the detailed steps, check the Full Recipe. {{image_2}} You can change the pan type for a new look. Use a bundt pan instead of round ones. Bake it for about 40 to 50 minutes. Check with a toothpick; it should come out clean. The bundt shape gives a nice design. You can also add a glaze on top for extra flair. To make a cheesecake, you need to change a few ingredients. Use cream cheese instead of some butter. Add sour cream for creaminess. You still want to use eggnog but reduce it a bit. This keeps the filling thick. You can also add spices like nutmeg and cinnamon to the mix. If you need a gluten-free cake, swap all-purpose flour for a gluten-free blend. Look for a blend that has xanthan gum for best results. You can also use almond or coconut flour. Just remember, these flours absorb more liquid. You might need to adjust the eggnog amount to keep the batter moist. For the full recipe, click [here](#). To keep your eggnog cake fresh, use an airtight container. This helps maintain moisture and flavor. You can also wrap the cake tightly with plastic wrap. Make sure to place it in a cool, dry spot. If you cut the cake, cover the exposed areas well to prevent drying out. Want to keep your eggnog cake for later? You can freeze slices for up to three months. First, let the cake cool completely. Next, wrap each slice in plastic wrap. Then, place the wrapped slices in a freezer bag. Label it with the date. When you're ready to enjoy, thaw it in the fridge overnight. How long can you keep eggnog cake? If stored properly, it lasts about three days at room temperature. In the fridge, it can stay fresh for about a week. Always check for any signs of spoilage before serving. Keeping it sealed will help maintain its taste and texture. Yes, you can use store-bought eggnog. It saves time and still tastes great. Just pick a quality brand to enhance the flavor. If you prefer homemade eggnog, that works too. The key is to ensure it is fresh and creamy. You can use applesauce or mashed bananas as an egg substitute. Use 1/4 cup for each egg. Flaxseed meal is another option. Mix 1 tablespoon of flaxseed with 2.5 tablespoons of water. Let it sit for a few minutes until it thickens. These options keep your cake moist and delicious. To add an alcohol flavor, use rum or bourbon. Replace some eggnog with your chosen alcohol. For example, if the recipe calls for 1 cup of eggnog, use 3/4 cup eggnog and 1/4 cup alcohol. This gives the cake a festive kick without overpowering it. Yes, you can make the cake in advance. Bake it a day or two ahead. Store the layers in an airtight container. Frost it the day you plan to serve it. This keeps the cake fresh and tasty. You can also freeze the layers for up to three months. Just thaw them in the fridge before frosting. For the [Full Recipe], check the details on how to prepare the cake. Eggnog cake is a festive treat you can make with ease. We covered key ingredients, from flour to spices and frosting. The steps to prepare, bake, and decorate this cake are simple. Remember the tips to enhance flavor and avoid common mistakes. You can even try variations like bundt cake or cheesecake. Proper storage ensures your cake stays fresh. Whether you want to serve it right away or save it for later, it’s a delightful dessert everyone will love. Enjoy baking and sharing this special holiday treat!

Eggnog Cake Delightful Holiday Dessert Recipe

If you’re looking for a holiday dessert that will impress everyone, try this Eggnog Cake! It’s moist, flavorful, and perfectly

- 1.5 pounds baby potatoes, halved - 4 cloves garlic, minced - 1/2 cup grated Parmesan cheese - 3 tablespoons olive oil - 1 teaspoon dried oregano - 1 teaspoon paprika - Salt and black pepper to taste - Fresh parsley, chopped (for garnish) The key to great crispy garlic Parmesan potatoes is in the ingredients. Choose small, firm baby potatoes for the best texture. Their smooth skin helps retain moisture while roasting, leading to a tender inside and a crispy outside. - Alternatives for Baby Potatoes: If you can’t find baby potatoes, you can use fingerling or Yukon gold potatoes. Just cut them into similar sizes to ensure even cooking. - Vegan Parmesan Options: For a dairy-free version, use vegan Parmesan cheese. Nutritional yeast also adds a cheesy flavor without dairy. - Olive Oil vs. Other Oils: Olive oil adds richness, but you can use avocado oil or canola oil if you prefer. Both will work well for roasting. How to Preheat and Prepare Baking Sheet Start by preheating your oven to 425°F (220°C). This high heat will help the potatoes get crispy. While the oven warms, line a baking sheet with parchment paper. This step makes for easy cleanup later. Mixing Seasoned Potatoes Instructions In a large bowl, take 1.5 pounds of halved baby potatoes. Add 4 cloves of minced garlic and 3 tablespoons of olive oil. Next, sprinkle in 1 teaspoon of dried oregano, 1 teaspoon of paprika, and salt and black pepper to taste. Toss everything well to coat the potatoes evenly. You want each potato to get a taste of those yummy flavors. Roasting Potatoes Explained Spread the seasoned potatoes in a single layer on the baking sheet. Place the tray in the preheated oven. Roast them for about 25 minutes. Keep an eye on them to ensure they don’t burn. Adding Parmesan Cheese for Crispiness After 25 minutes, take the baking sheet out. Sprinkle 1/2 cup of grated Parmesan cheese over the potatoes. The cheese will melt and create a crispy layer on top. It’s the secret to that delicious crunch. Tips for Achieving Perfect Crispiness To get that perfect crispiness, make sure the potatoes are in a single layer. If they are crowded, they will steam instead of roast. You can also flip the potatoes halfway through the roasting time. This helps them cook evenly and get golden brown all over. For a complete guide, check the Full Recipe for more details and tips. Best Practices for Even Roasting For the best results, cut your baby potatoes into equal halves. This helps them cook at the same speed. Spread them out on the baking sheet so they don’t touch. This allows hot air to circulate around each potato, making them crispy. Remember to flip the potatoes halfway through cooking. This ensures both sides get that lovely golden color. Ensuring Potatoes are Lightly Coated When mixing the potatoes, use just enough olive oil to coat them lightly. Too much oil can make them soggy instead of crispy. Toss them well with the garlic and spices to ensure every bite is full of flavor. The key is to see a light sheen on the potatoes, not puddles of oil. How to Present Crispy Garlic Parmesan Potatoes For a great presentation, serve the crispy potatoes in a rustic wooden bowl or on a stylish platter. Drizzle a little extra olive oil on top and add a sprinkle of more Parmesan cheese. This makes them look even more appetizing. Garnish with chopped parsley for a fresh pop of color. Pairing Ideas with Main Dishes These crispy garlic Parmesan potatoes go well with many main dishes. Try them alongside grilled chicken or baked salmon. They also pair nicely with a fresh green salad. For a hearty meal, serve them with a juicy steak or roasted veggies. They make any dinner feel special! {{image_2}} You can easily change the flavor of these crispy garlic Parmesan potatoes. Here are some great ideas: - Adding Herbs and Spices: Mix in fresh herbs like rosemary or thyme. Dried herbs work well too. You can also add some heat with red pepper flakes. This can give your potatoes a warm kick. - Incorporating Other Cheese Types: While Parmesan is tasty, you can use other cheeses. Try using cheddar for a sharper taste or feta for a tangy twist. Mixing cheeses can create a new flavor profile in each bite. You can adjust this recipe to meet different dietary needs. Here are some options to consider: - Gluten-Free Adaptations: This recipe is naturally gluten-free. Just ensure that any seasoning blends you use are also gluten-free. You can enjoy these potatoes without worry. - Low-Carb Version Suggestions: If you want a low-carb dish, use cauliflower instead of potatoes. Cut cauliflower into small pieces and follow the same cooking steps. It gives you a similar texture with fewer carbs. You can explore these variations to create your perfect crispy garlic Parmesan potatoes. Each change adds a new twist to this easy and flavorful treat. For the full recipe, check the detailed instructions earlier in the article. To keep your crispy garlic Parmesan potatoes fresh, follow these steps: - Best Storage Practices: Place leftover potatoes in an airtight container. This helps keep moisture out and preserves crispiness. If you have a lot of leftovers, separate them into smaller portions. This way, you can take out only what you need. - Time Frame for Refrigeration and Freezing: You can store these potatoes in the fridge for up to 3 days. If you need to keep them longer, freeze them in a freezer-safe bag for up to 2 months. Just remember, freezing might change their texture slightly. To enjoy your potatoes again, reheating is key: - Methods to Reheat for Best Quality: The oven is the best way to reheat these potatoes. Preheat your oven to 375°F (190°C). Spread the potatoes on a baking sheet and heat for about 10-15 minutes. This method keeps them crispy. - Avoiding Soggy Potatoes: To prevent sogginess, don’t cover the potatoes while reheating. This allows steam to escape and keeps them crispy. If using a microwave, heat in short bursts and check often. However, the microwave may not keep them as crispy. For the full recipe and to enjoy these crispy treats, check the [Full Recipe]. Can I use larger potatoes? Yes, you can use larger potatoes. Just cut them into smaller pieces. Aim for bite-sized chunks. This helps them cook evenly and become crispy. How do I make these potatoes spicier? To spice things up, add red pepper flakes. You can also toss in some cayenne pepper. Start with a small amount and adjust to your taste. What can I serve with Crispy Garlic Parmesan Potatoes? These potatoes pair well with grilled chicken, steak, or fish. They also go great with salads or roasted veggies. Consider serving them with a creamy dip too. What is the cooking time for different potato sizes? Smaller potatoes take about 25 to 30 minutes. Medium potatoes need around 35 to 40 minutes. Larger potatoes may take 45 minutes or more. Always check for doneness. Can I make this recipe in an Air Fryer? Yes, you can use an Air Fryer! Cook them at 400°F for about 20 to 25 minutes. Shake the basket halfway to ensure even cooking. Is it possible to make these potatoes in advance? You can prep the potatoes ahead of time. Season and cut them, then store in the fridge. Roast them just before serving to keep them crispy. Check out the Full Recipe for more details. In this post, we explored how to make Crispy Garlic Parmesan Potatoes. We started with the key ingredients and talked about easy substitutes. The step-by-step guide helped you prepare and roast these tasty bites. I shared tips for perfect crispiness and fun variations to try. Remember, cooking should be enjoyable. Experiment with flavors and adjust to your taste. With these tips, you’ll make a dish everyone will love. Enjoy your cooking and the compliments that follow!

Crispy Garlic Parmesan Potatoes Easy Flavorful Treat

Are you ready for a flavor explosion? Crispy Garlic Parmesan Potatoes are simple to make and packed with taste! These

When making Cheese Pizza Monkey Bread, gather the following ingredients. Each one adds a burst of flavor to this fun dish. - 2 cans refrigerated biscuit dough (16 oz each) - 1 cup mozzarella cheese, shredded - 1 cup pizza sauce (plus extra for dipping) - 1/2 cup pepperoni slices (optional) - 1 teaspoon Italian seasoning - 1/4 teaspoon garlic powder - 1/4 cup unsalted butter, melted - 1/4 cup grated Parmesan cheese - Fresh basil leaves for garnish (optional) These ingredients come together to create a cheesy, savory treat. The biscuit dough forms the base, while the mozzarella cheese melts into gooey goodness. You can add pepperoni for a classic pizza taste. Italian seasoning and garlic powder enhance the flavor, making every bite delicious. The melted butter and Parmesan cheese provide a rich, buttery finish. Feel free to use fresh basil leaves for a bright touch at the end. For the complete cooking steps, check the Full Recipe. - Preheat oven to 350°F (175°C) and grease a bundt pan. - Open the cans of biscuit dough and cut each biscuit into quarters. - In a large bowl, toss the biscuit pieces with shredded mozzarella, pepperoni, Italian seasoning, and garlic powder. - In a separate bowl, mix melted butter with grated Parmesan cheese. - Dip each biscuit piece into the butter mixture. Layer the pieces in the bundt pan. Pour the pizza sauce evenly over the dough. - Bake for 30-35 minutes until golden brown and the dough is fully cooked. - Let it cool for about 5 minutes. Invert the bundt pan onto a serving platter before serving. This Cheese Pizza Monkey Bread is so fun to make! It’s great for parties or family nights. You can find the full recipe above, ready for you to try. - Ensure even coating of biscuit pieces. This helps each bite taste great. - Press dough gently for better layering. This keeps the monkey bread from falling apart. - Serve warm with additional pizza sauce. The sauce adds extra flavor and fun. - Pair with a simple salad or garlic bread. These sides balance the meal well. - Adding different cheeses or toppings can change the taste. Try cheddar or feta for new flavors. - Adjusting spices for flavor variations is easy. Add more garlic powder or red pepper flakes for a kick. {{image_2}} When making Cheese Pizza Monkey Bread, you can switch things up. Here are some fun ideas to try. You can add vegetables like bell peppers and onions for a tasty twist. These veggies give a nice crunch and fresh flavor. You can also use alternative meats such as sausage or ham. These add a savory depth that makes it even more enjoyable. If you need a gluten-free choice, use gluten-free biscuit dough. This allows everyone to enjoy the dish, no matter their diet. Just follow the same steps as the regular recipe. You’ll get the same great taste without the gluten. To make a vegetarian version, simply omit the meat. You can add spinach or mushrooms instead. These ingredients bring a rich taste and extra nutrients. They also pair well with the cheese and sauce. Whether you choose different toppings, go gluten-free, or make it vegetarian, Cheese Pizza Monkey Bread stays delicious. It’s all about what you love! For the full recipe, check out the full recipe section. To keep your cheese pizza monkey bread fresh, place it in an airtight container. You can also wrap it tightly in plastic wrap or aluminum foil. Store it in the fridge for up to three days. This will help maintain its soft texture and flavor. For the best results, reheat the monkey bread in the oven. Preheat your oven to 350°F (175°C). Place the monkey bread on a baking sheet for about 10-15 minutes. This method keeps the bread warm and crispy. If you're in a hurry, the microwave works too. Heat it on high for 30 seconds to 1 minute. Just know it may get a bit soggy. You can freeze cheese pizza monkey bread for later enjoyment. Cut it into portions and wrap each piece in plastic wrap. Then, place the wrapped pieces in a freezer bag. This way, it lasts for up to three months. When you're ready to eat, let it thaw in the fridge overnight. Reheat it in the oven or microwave as mentioned above. Enjoy your delicious treat whenever you desire! Cheese Pizza Monkey Bread is a fun, pull-apart dish that combines flavors of pizza and bread. It features soft biscuit pieces layered with gooey mozzarella, zesty pizza sauce, and savory spices. The textures are delightful; the outside is crispy while the inside is fluffy and cheesy. Each bite offers a mix of flavors, making it a crowd-pleaser for kids and adults alike. Yes, you can prepare Cheese Pizza Monkey Bread ahead of time. To do this, assemble the monkey bread in the bundt pan but do not bake it yet. Cover it tightly with plastic wrap and store it in the fridge for up to 24 hours. When you are ready to bake, simply remove it from the fridge and allow it to sit at room temperature for about 30 minutes before baking. This helps it cook evenly. If you want to switch things up, you can use pizza dough or bread dough instead of biscuit dough. Make sure to roll out the dough and cut it into small pieces. You can also try using crescent roll dough for a flakier texture. Just adjust your baking time, as these alternatives may cook differently. To check if your Cheese Pizza Monkey Bread is done, look for a golden brown top. You can also insert a toothpick into the center. If it comes out clean and the biscuit pieces feel firm, it’s ready. The internal temperature should reach about 190°F (88°C). Trust your senses; the smell alone will guide you! This blog post shared a fun recipe for Cheese Pizza Monkey Bread. You learned the ingredients, simple steps, and helpful tips for great results. I also covered tasty variations and storage options. By making this dish, you can enjoy a delicious snack that's easy to share. Try it with your favorite toppings and impress your friends. Cooking should be fun, and this recipe makes it simple. Enjoy your baking experience!

Cheese Pizza Monkey Bread Flavorful and Fun Dish

Are you ready for a dish that’s both fun and tasty? Cheese Pizza Monkey Bread combines all your favorite pizza

- 1 package (8 oz) refrigerated crescent roll dough - 1 cup fresh or frozen wild blueberries - 2 tablespoons granulated sugar - 1 teaspoon lemon juice - 1/2 teaspoon ground cinnamon - 4 oz cream cheese, softened - 1/4 cup powdered sugar - 1 teaspoon vanilla extract - 1 egg, beaten (for egg wash) - 1 tablespoon butter, melted (for drizzling) The essential ingredients create a tasty treat. The refrigerated crescent roll dough gives a perfect base. Wild blueberries add a burst of flavor and color. Cream cheese brings creaminess and richness to each bite. Sweeteners like granulated and powdered sugar balance the flavors well. - Variations in sweeteners (like honey or maple syrup) - Additions like lemon zest or almond extract You can swap sweeteners for honey or maple syrup if you prefer. Lemon zest adds a fresh zing to the filling. Almond extract brings a nice nutty taste to the cream cheese. Feel free to mix and match! These options help you personalize the danishes to your liking. For a full recipe, check out the details above. - Preheat the oven to 375°F (190°C). - Prepare a baking sheet by lining it with parchment paper. - In a bowl, mix together the blueberries, sugar, lemon juice, and cinnamon. - If you use frozen blueberries, thaw and drain them before mixing. This helps avoid excess juice. - Open the crescent roll dough on a floured surface. Roll it out and pinch the seams together. - Cut the dough into 4 squares. You will have 8 squares after folding. - Place a dollop of the cream cheese mixture in the center of each square. - Add a spoonful of the blueberry filling on top. - Fold the corners of each square towards the center to create a pocket. Pinch the edges to seal them well. - Place the assembled danishes on the prepared baking sheet. - Brush the tops with the beaten egg to give a golden finish. - Bake in the preheated oven for 15 to 20 minutes. Look for puffed and golden brown danishes. - After baking, drizzle melted butter over the warm danishes for added flavor. - Let them cool slightly before you serve. Enjoy these delights warm! For the Full Recipe, follow the detailed instructions above. To get the best results with your Wild Blueberry Coffee Cake Danishes, handle the dough gently. Refrigerated crescent roll dough can be delicate. Keep it cold to help it puff up nicely. When you cut the dough, make sure to pinch the seams well. Sealing the danishes properly prevents leaks during baking. This helps keep the filling inside and the dough crisp outside. Pair these danishes with a hot cup of coffee or tea. The warm flavors mix well with the blueberries. For a sweet touch, try serving them with whipped cream or a scoop of vanilla ice cream. You can also enjoy them with a side of fresh fruit. Sliced strawberries or raspberries can add a nice contrast in flavor and texture. One common mistake is overfilling the danishes. Too much filling can make them hard to seal. It can also lead to a messy baking process. Always leave some room for the filling to expand. Another mistake is not baking them long enough. Underbaking will leave the dough raw inside. On the other hand, overbaking can dry them out. Watch for a golden-brown color to know they are done. {{image_2}} You can mix things up by swapping wild blueberries with other fruits. Raspberries and cherries work great too. They add a unique taste and keep the danishes exciting. You can also add nuts like almonds or pecans for a crunchy twist. A sprinkle of nutmeg or a dash of cardamom can deepen the flavor and make each bite fun. If you need gluten-free options, look for gluten-free crescent roll dough. Many brands offer tasty alternatives that bake well. For cream cheese, try using dairy-free options like cashew or almond cream cheese. These swaps let everyone enjoy this treat, no matter their dietary needs. You can change the filling based on the season. In fall, add pumpkin spice or fresh apples. In winter, try cranberries or even a touch of peppermint. For holidays, you might add festive sprinkles or a glaze to match the occasion. Seasonal ingredients keep this recipe fresh and exciting year-round. To keep your danishes fresh, place them in an airtight container. You can store them in the fridge for up to three days. This way, they stay soft and tasty. If they dry out, you can warm them for a few seconds in the microwave. This restores some of their original texture. You can freeze these danishes both before and after baking. To freeze unbaked danishes, assemble them, then place them on a baking sheet. Put the baking sheet in the freezer until they are firm. After they freeze, transfer them to a freezer bag. For baked danishes, let them cool completely first. Wrap them tightly in plastic wrap and then foil. They can last up to three months in the freezer. For reheating, simply bake frozen danishes at 375°F (190°C) for about 20-25 minutes. If they are thawed, bake them for 15-20 minutes. This gives you a warm treat anytime you crave it. Enjoy the full recipe to create these delightful treats! To make these danishes from scratch, you can create your dough. You will use flour, yeast, milk, and sugar. This method takes time, but it gives a great taste. Store-bought dough is easy and fast. It cuts prep time in half, making it great for busy days. I often use refrigerated crescent roll dough. It’s soft, flaky, and delicious. You can find it in any grocery store. For the best results, follow the full recipe closely. Yes, you can prepare these danishes ahead of time! You can make the filling and dough the night before. Store them separately in the fridge. When you are ready to bake, just assemble and bake them. This method saves time in the morning. You can also freeze the assembled danishes. Just remember to thaw them in the fridge before baking. This way, you will have fresh danishes any time you want! If you want to swap wild blueberries, you have many choices. Raspberries, strawberries, or chopped apples work well. Each fruit gives a unique taste. You can even mix fruits for a fun twist! Just adjust the sugar based on the fruit's sweetness. Keep in mind that some fruits release more juice than others. If you use juicy fruit, be careful not to overfill your danishes. If your danishes do not puff up, check a few things. First, make sure your oven is hot enough. Preheat it to 375°F (190°C) before baking. Next, roll out your dough properly. If it’s too thick, it won’t rise well. Lastly, ensure you seal the edges well. If they are not sealed, the filling can leak out, causing them to flatten. Follow these tips for perfect danishes every time! In this article, we explored the steps to make delicious wild blueberry danishes from start to finish. We discussed essential ingredients like crescent roll dough and blueberries, and how to prepare them. I shared tips to avoid common mistakes and variations to try. Remember, using quality ingredients and following instructions can lead to great results. These danishes are perfect for breakfast or dessert. Enjoy experimenting with flavors and sharing them with others. Simple, fun, and tasty!

Wild Blueberry Coffee Cake Danishes Irresistible Treat

Are you ready to indulge in a sweet treat that’s hard to resist? Wild Blueberry Coffee Cake Danishes combine tender

To make delicious pistachio filled croissants, gather these ingredients: - 1 batch of puff pastry (store-bought or homemade) - 1 cup pistachios, shelled and unsalted - 1/4 cup powdered sugar - 2 tablespoons unsalted butter, softened - 1 teaspoon vanilla extract - 1 egg (for egg wash) - 1 tablespoon milk (for egg wash) - A pinch of salt Each ingredient plays an important role. The puff pastry gives a flaky base. The pistachios bring a rich and nutty flavor. Butter and vanilla add creaminess and warmth. The egg wash helps the croissants shine and brown nicely. Pistachio filled croissants are a treat that combines taste and nutrition. Here’s a quick look at the nutritional facts per croissant: - Calories: Approximately 200 - Protein: 4g - Fat: 12g - Carbohydrates: 20g - Fiber: 1g - Sugar: 2g They offer a balance of carbs and healthy fats, thanks to the pistachios. Enjoying these in moderation can fit well into a balanced diet. To make this recipe easier, gather these tools: - Food processor - Rolling pin - Baking sheet - Parchment paper - Small bowl (for egg wash) - Wire rack (for cooling) Using the right tools helps you work efficiently. A food processor makes the filling smooth. A rolling pin shapes the pastry perfectly. Enjoy making these croissants with ease! To make the pistachio filling, start by gathering your ingredients. You need one cup of shelled, unsalted pistachios, a quarter cup of powdered sugar, two tablespoons of softened butter, one teaspoon of vanilla extract, and a pinch of salt. Place the pistachios, powdered sugar, butter, vanilla, and salt in a food processor. Pulse until you create a smooth paste. If it feels too dry, add a tiny bit of water or milk. This paste will be the star of your croissants. Next, prepare your puff pastry. Lightly dust your work surface with flour. Roll out the pastry to about one-eighth inch thick. If you use store-bought pastry, you might need to roll it a bit to make it even. This step helps create those lovely layers in the croissants. Now it’s time to cut and fill. Cut the rolled pastry into triangles. For each triangle, make a small cut at the base. This cut will help the pastry roll up smoothly. Take about a teaspoon of the pistachio filling and place it near the base of each triangle. Roll the triangle from the base to the tip, gently pressing the edges to seal them. Make sure they are closed tight to hold the filling inside. Before baking, preheat your oven to 400°F (200°C). Make an egg wash by beating one egg with a tablespoon of milk. Brush this mixture on the tops of each croissant. This step gives them a nice, shiny finish. Line a baking sheet with parchment paper and arrange the croissants, leaving space between them. Bake for 15 to 20 minutes, or until they puff up and turn golden brown. Allow them to cool on a wire rack for about 5 to 10 minutes before serving. Enjoy your delicious pistachio-filled croissants! For the complete recipe, check out the Full Recipe. To make great croissants, you need perfect puff pastry. If you buy it, choose a good brand. Look for one with high butter content. This gives you that nice flaky texture. When you roll it out, keep the thickness even. If it gets too warm, chill it for a bit. This helps it puff up in the oven. Sometimes you may have extra pistachio filling. You can store it easily. Place the filling in an airtight container. Keep it in the fridge for up to a week. If you want to keep it longer, freeze it. Just make sure to thaw it before using again. To enjoy your croissants fully, serve them warm. A light dusting of powdered sugar adds a nice touch. You can also pair them with fresh fruits. Slices of fresh strawberries or raspberries work great. For a drink, a cup of coffee or tea complements them well. For the full recipe, check the detailed steps earlier. {{image_2}} You can change the filling to suit your taste. Consider using almond paste for a nutty twist. Chocolate hazelnut spread adds a sweet touch. For a fruity option, try using fresh berries or jam. These fillings keep the steps the same. Just swap out the pistachio filling. You can make these croissants vegan with a few easy swaps. Use vegan butter instead of regular butter. Substitute the egg wash with plant milk for a golden look. The filling can stay the same, or you can use agave syrup instead of powdered sugar. These changes keep the flavor while meeting vegan needs. Adding other flavors can make your croissants even better. Mix cocoa powder into the pistachio filling for a chocolatey taste. A sprinkle of cinnamon can add warmth and spice. You can also try adding a hint of orange zest for a fresh twist. These small additions can really change the dish and surprise your taste buds. To keep your baked croissants fresh, place them in an airtight container. This method helps maintain their flaky texture. Store them at room temperature for up to two days. If you need to keep them longer, refrigeration is not the best choice. It can dry them out too quickly. Freezing is a great way to save croissants for later. First, allow them to cool completely. Then, wrap each croissant tightly in plastic wrap. Next, place the wrapped croissants in a freezer-safe bag or container. They can last for up to three months in the freezer. When you’re ready to enjoy them, simply thaw them overnight in the fridge. To reheat croissants, preheat your oven to 350°F (175°C). Place the croissant on a baking sheet. Heat for about 10-15 minutes until warm and crispy. You can also use an air fryer for a quicker method. Set it to 300°F (150°C) and heat the croissant for about 5-7 minutes. This way, they stay delicious and flaky. For more detailed steps, check out the Full Recipe. Yes, you can use homemade puff pastry. Making your own can be fun and rewarding. Just remember, it takes time to prepare. Homemade pastry can taste fresher than store-bought. You can store pistachio filled croissants for up to three days. Keep them in an airtight container. For longer storage, freeze them. Just wrap them well to prevent freezer burn. You can substitute the pistachios with almonds or hazelnuts. You can also try a mix of nuts. For a sweeter twist, add chocolate or fruit preserves. Cream cheese can work well too for a creamy filling. You can find pistachio filled croissants at local bakeries. Many grocery stores also sell them. If you want a special treat, check gourmet shops or online bakeries. For a fresh experience, try making them at home using the Full Recipe. Pistachio-filled croissants are a delightful treat. We explored everything from ingredients to baking tips. You learned how to prepare the filling and roll out the puff pastry. We covered storage tips and variations to suit any taste. In the end, these croissants can be a fun kitchen project. Enjoy the process and share your creations with friends and family! Happy baking!

Pistachio Filled Croissants Tasty and Simple Recipe

If you’re craving a delightful treat, pistachio-filled croissants are a must-try! This simple recipe combines buttery flaky pastry with creamy,

- 1 pound large shrimp, peeled and deveined - 4 cloves garlic, minced - 1 lemon, zested and juiced - 2 tablespoons olive oil - 1 teaspoon smoked paprika - 1 teaspoon dried oregano - Salt and pepper to taste The main ingredients form the base of this dish. Large shrimp bring a sweet taste. Garlic adds a strong, savory kick. Fresh lemon gives a bright, zesty flavor. Olive oil helps mix the spices and keeps shrimp moist. Smoked paprika and oregano add depth and warmth to each bite. Season with salt and pepper to balance the flavors. - 2 cups cherry tomatoes, halved - 1 bell pepper, sliced (red or yellow) Cherry tomatoes burst with juiciness and sweetness when roasted. They complement the shrimp perfectly. The bell pepper adds crunch and color. You can use either red or yellow. Both options work well and taste great! - Fresh parsley, chopped (for garnish) Fresh parsley is the finishing touch. It adds a pop of green and freshness. Just sprinkle it over the dish before serving. This small step makes your meal look even better! {{ingredient_image_1}} 1. Preheat your oven to 400°F (200°C). This heat makes the shrimp cook perfectly. 2. In a large bowl, mix the shrimp, minced garlic, lemon zest, lemon juice, olive oil, smoked paprika, oregano, salt, and pepper. Toss well so the shrimp get coated in all those tasty flavors. 1. On a large sheet pan, spread the halved cherry tomatoes and sliced bell pepper evenly. Drizzle a little olive oil over them. Add a pinch of salt and pepper to bring out their natural taste. 2. Next, arrange the marinated shrimp over the vegetables on the sheet pan. This helps the shrimp soak up the flavor from the veggies as they cook. 1. Roast the dish in the preheated oven for 10-12 minutes. You’ll know it’s done when the shrimp turn pink and the veggies become tender. 2. Check for doneness by cutting into a shrimp. If it’s opaque and firm, it’s perfect! Remove the pan from the oven and sprinkle with fresh parsley for a pop of color and flavor before serving. Choosing the right shrimp Select large shrimp for this dish. They cook quickly and hold flavor well. Fresh shrimp is best, but frozen works too. Just thaw them safely before cooking. Look for shrimp that have a firm texture and a mild sea scent. Importance of marinating Marinating shrimp is key to great taste. The lemon juice and garlic add flavor. Let the shrimp soak for at least 15 minutes. This gives them time to absorb all the delicious flavors. Don't skip this step! Oven temperature Set your oven to 400°F (200°C). This high heat helps the shrimp cook fast. It also gives the veggies a nice char. Make sure your oven is fully preheated before putting in the sheet pan. Timing for best results Cook the shrimp for 10-12 minutes. Keep an eye on them. They turn pink when done. Overcooking makes them tough, so check early if you're unsure. Remember, the shrimp cook quickly! Pairing with sides Serve this dish with rice or crusty bread. Both soak up the tasty juices. A fresh salad is also a great side. It adds crunch and balances the meal. Presentation ideas Garnish with fresh parsley for color. Serve right from the sheet pan for a rustic look. You can also use lemon wedges for a zesty touch. This makes the meal look inviting and fresh! Pro Tips Fresh Shrimp is Best: Always choose the freshest shrimp you can find for the best flavor and texture. Look for shrimp that smell like the ocean and have a firm texture. Marinate for More Flavor: If you have time, let the shrimp marinate for up to 30 minutes before cooking. This allows the flavors to penetrate the shrimp for a more delicious dish. Use a Hot Oven: Make sure your oven is fully preheated before putting the sheet pan in. A hot oven helps to achieve that perfect roast and caramelization on the vegetables. Add a Kick with Spice: For an extra layer of flavor, consider adding a pinch of red pepper flakes or a drizzle of hot sauce to the shrimp mixture before roasting. {{image_2}} You can swap the bell pepper and tomatoes with other veggies. Try zucchini, asparagus, or broccoli for a new taste. Seasonal options like squash or green beans work well too. Use what you have on hand. Fresh, colorful veggies make your dish pop! Want to spice things up? Add red pepper flakes for heat. If you like a smoky taste, try adding chipotle powder. You can also switch herbs. Fresh thyme or dill can bring a new twist. Experiment with flavors that you love! This recipe is easy to adapt for different diets. For a gluten-free meal, ensure your spices are gluten-free. Low-carb? Skip the tomatoes and use leafy greens like spinach. Feel free to adjust ingredients to fit your needs. This dish remains delicious no matter how you change it! - Place the shrimp in an airtight container. - Add any leftover vegetables to the container. - Store in the fridge for up to three days. - Make sure to cool the dish before sealing. - You can use a microwave or oven to reheat. - For the microwave, place the shrimp in a bowl. - Heat in 30-second bursts until warm. - For the oven, preheat to 350°F (175°C). - Place the shrimp on a baking sheet. - Heat for about 5-7 minutes. - This method keeps shrimp tender and juicy. - To freeze, place leftovers in a freezer-safe bag. - Remove as much air as possible before sealing. - Label the bag with the date before freezing. - To thaw, place the bag in the fridge overnight. - You can also thaw in cold water for quicker results. Cooking shrimp takes about 10 to 12 minutes. You want them to turn pink. When they curl up, they are done. This quick cooking time keeps shrimp juicy and tender. Yes, you can use frozen shrimp. Just thaw them first. Place them in cold water for about 15 minutes. Pat them dry before marinating. This helps the flavors stick better. You can serve lemon garlic shrimp with rice or pasta. A fresh salad pairs well too. Some crusty bread is great for soaking up the juices. You can even add more veggies for a colorful plate. You can prepare the shrimp and marinade ahead. Store them in the fridge for a few hours. Just cook them when you are ready. This makes your meal quick and easy. Cooked shrimp should be pink and opaque. They should also feel firm to the touch. If they are still gray or translucent, they need more time. Yes, feel free to swap vegetables. Zucchini, asparagus, or broccoli work well. Just make sure they cook in the same time frame as the shrimp. You can add red pepper flakes for heat. A dash of cayenne pepper is great too. Just a little will enhance the flavor without overpowering it. Yes, this dish is healthy! Shrimp is low in calories and high in protein. The vegetables add vitamins and fiber. Plus, olive oil is a good fat that supports heart health. This dish features shrimp, vegetables, and bold flavors. We explored main ingredients like shrimp, garlic, and olive oil. I shared tips to ensure perfect cooking. You learned how to easily roast this meal step by step. I also offered variations and storage ideas. In the end, making lemon garlic shrimp is simple and fun. Enjoy experimenting with your favorite flavors and veggies!

Sheet Pan Lemon Garlic Shrimp Quick and Tasty Meal

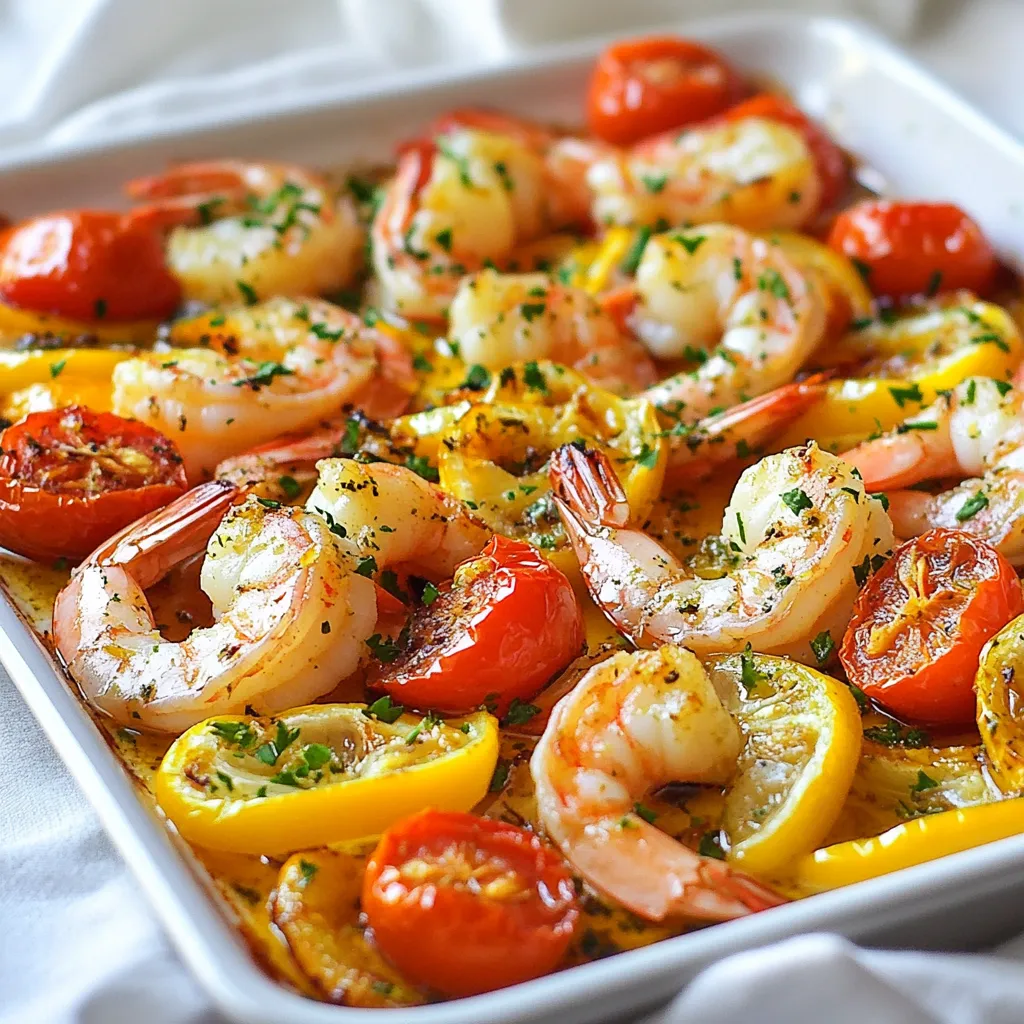
Looking for a quick and tasty meal? You’ve found it! This Sheet Pan Lemon Garlic Shrimp dish is easy to

- 1 can (15 oz) chickpeas, drained and rinsed - 4 cups mixed greens (e.g., spinach, arugula, and lettuce) - 1 cup cherry tomatoes, halved - 1 cucumber, diced - ½ red onion, thinly sliced - ½ avocado, diced - 2 tablespoons olive oil - 1 teaspoon smoked paprika - 1 teaspoon garlic powder - Salt and pepper to taste - Juice of 1 lemon - 2 tablespoons tahini - 1 tablespoon water (to thin the dressing) - Fresh parsley, chopped (for garnish) When I make this crispy chickpea salad, I focus on fresh ingredients. The chickpeas form the base of the dish. They offer protein and fiber. I use a can of chickpeas. Just drain and rinse them. This step is key to getting rid of excess salt. Mixed greens bring crunch and color. I love using a blend of spinach, arugula, and lettuce. Each green adds its own flavor. Cherry tomatoes provide sweetness. I slice them in half for easy bites. The cucumber adds freshness. Diced, it pairs well with other veggies. I slice the red onion thinly for a mild kick. Finally, I add avocado for creaminess. It balances the salad's texture perfectly. For the dressing, I mix olive oil, lemon juice, and tahini. I love the creamy texture tahini gives. Smoked paprika and garlic powder add depth. Adjust salt and pepper to taste. Garnish with chopped parsley for added color. This salad is not just healthy; it’s filling and delicious. You can explore the [Full Recipe](#) for detailed steps and tips! - Preheat the oven to 400°F (200°C). - In a mixing bowl, combine 1 can of drained chickpeas with 2 tablespoons of olive oil, 1 teaspoon of smoked paprika, 1 teaspoon of garlic powder, salt, and pepper. Toss until the chickpeas are well-coated. - Spread the chickpeas evenly on a baking sheet lined with parchment paper. Bake for 20-25 minutes. Shake the pan halfway through baking. This helps them crisp well. - While the chickpeas bake, prepare the salad base. In a large bowl, mix 4 cups of mixed greens, 1 cup of halved cherry tomatoes, 1 diced cucumber, ½ a thinly sliced red onion, and ½ a diced avocado. - In a small bowl, whisk together the juice of 1 lemon, 2 tablespoons of tahini, and 1 tablespoon of water until smooth. This is your tasty tahini dressing. - Once the chickpeas are crispy, remove them from the oven. Let them cool slightly. - Pour the tahini dressing over the salad and toss gently to combine. Top with the crispy chickpeas. - Garnish the salad with freshly chopped parsley before serving. Enjoy your crispy chickpea salad! You can find the full recipe for more details. - Use a clean, dry baking sheet for optimal crispiness. - Shake the pan halfway through baking for even crisping. To make the best crispy chickpeas, it’s vital to dry them well. If they are wet, they won’t crisp up nicely. After rinsing, pat them dry with a towel. A dry baking sheet helps them get that golden crunch. When you shake the pan during baking, you let the heat move around. This helps all sides of the chickpeas cook evenly. - Experiment with different spices (like cumin or chili powder). - Add nuts or seeds for added crunch. Adding spices can change the taste of your salad. Try cumin for warmth, or chili powder for heat. You can even mix different spices for a unique flavor. Nuts and seeds are also great! They give an extra crunch and boost the nutrition of your salad. Think about adding sunflower seeds or chopped almonds for a delightful twist. - Serve with crusty bread or pita on the side. - Pair with a light white wine for a refreshing meal. For a complete meal, serve this salad with crusty bread or warm pita. The bread adds texture and makes it feel more filling. A light white wine can enhance the flavor. It refreshes your palate and makes the meal even more enjoyable. If you want a cozy dinner, this pairing will surely delight! Be sure to check out the Full Recipe for all the steps to create this dish at home! {{image_2}} - Substitute kale or romaine for the mixed greens. - Use olive oil alternatives, such as avocado or sesame oil. You can change up the greens to suit your taste. Kale adds a nice crunch, while romaine gives a fresh bite. Both options work well in this salad. If you want a different flavor, try avocado or sesame oil instead of olive oil. These oils can add a unique twist to the dish. - Add grilled chicken or tofu for extra protein. - Incorporate feta or goat cheese for creaminess. To make your salad even heartier, consider adding grilled chicken or tofu. Both are great ways to boost protein. If you want a creamy touch, feta or goat cheese can work wonders. These ingredients not only add richness but also enhance the overall flavor. - Opt for a yogurt-based dressing for a tangy twist. - Try balsamic vinaigrette instead of tahini dressing. If you're looking for a different dressing, a yogurt-based option adds a tangy flavor. This can lighten the salad and offer a refreshing taste. Alternatively, balsamic vinaigrette is a popular choice, bringing a sweet and tart balance. Both options can elevate your crispy chickpea salad to new heights. For the full recipe, be sure to check the details above! Store leftover salad in an airtight container for up to 2 days. Keeping it sealed helps maintain freshness. Always keep the crispy chickpeas separate. This keeps them crunchy and avoids sogginess. Reheat the chickpeas in the oven for 5-10 minutes. This restores their crispiness. Avoid using the microwave. It can make the chickpeas soft and chewy. You can freeze prepared chickpeas for up to 3 months. Place them in a freezer-safe bag or container. When you're ready to use them, thaw in the fridge overnight. Re-crisp them in the oven before adding to your salad. Enjoy a delicious meal even days later! For the Full Recipe, check out the complete process. To make your chickpeas crispier, ensure they are completely dried before seasoning. After rinsing the canned chickpeas, pat them down with a clean towel. This step removes excess moisture, which helps them crisp better in the oven. Yes, canned chickpeas are perfect for convenience. They save time and still taste great! Just be sure to drain and rinse them well before using. This will enhance their flavor and texture in the salad. Absolutely! It's great for make-ahead meals. You can store the components separately to keep things fresh. Store the crispy chickpeas in a separate container for the best crunch when you’re ready to eat. Yes, tahini is vegan, and you can substitute other plant-based ingredients as needed. For example, use lemon juice or a splash of vinegar to add zing. These options keep the flavor bright and fresh without dairy. This salad is high in fiber and protein, making it filling and great for weight management. The chickpeas provide plant-based protein, while the veggies add vitamins and minerals. It's a wholesome choice for a healthy meal. For the complete recipe, check the Full Recipe section! This salad combines healthy ingredients, easy steps, and tasty flavors. You learned how to make crispy chickpeas, mix the dressing, and assemble a vibrant salad. Remember, you can swap ingredients and add proteins for variety. Enjoy making this meal for yourself and your family. It's not just good for you; it's fun to prepare! Embrace the healthy choices and get creative. You’ll find new favorites in no time.

Crispy Chickpea Salad Healthy and Filling Delight

Looking for a tasty salad that’s both healthy and filling? Your search ends here! This Crispy Chickpea Salad combines crunchy

To make these tasty granola bars, gather the following items: - 2 cups rolled oats - 1 cup mixed nuts (almonds, cashews, walnuts, roughly chopped) - 1/2 cup honey or maple syrup - 1/4 cup peanut butter or almond butter - 1/2 cup dried fruits (cranberries, apricots, or raisins) - 1/4 cup mini dark chocolate chips (optional for a touch of sweetness) - 1/2 teaspoon vanilla extract - 1/4 teaspoon sea salt - 1/4 teaspoon cinnamon You will need a few tools to make this recipe: - An 8x8 inch baking dish - Parchment paper - Mixing bowls - A spatula - A microwave-safe bowl You can easily swap some ingredients. Here are a few ideas: - Use agave syrup instead of honey or maple syrup. - Sunflower seed butter is a great option in place of peanut butter. - For nut-free bars, skip the nuts and add seeds like pumpkin or sunflower seeds. - You can replace dried fruits with chocolate chips or seeds for different flavors. Feel free to mix and match based on what you like! These swaps keep your homemade granola bars fun and tasty. Check the Full Recipe for more details. Start by preheating your oven to 350°F (175°C). Grab an 8x8 inch baking dish. Line the dish with parchment paper. Leave some paper hanging over the sides. This helps you lift the bars out later. In a large bowl, add 2 cups of rolled oats. Toss in 1 cup of mixed nuts. I like almonds, cashews, and walnuts. Add 1/4 teaspoon of sea salt and 1/4 teaspoon of cinnamon. Mix these dry ingredients well. This blend gives your bars flavor and crunch. Next, take a microwave-safe bowl. Add 1/2 cup of honey or maple syrup and 1/4 cup of peanut butter or almond butter. Heat these together for about 30 seconds. Stir until the mixture is smooth. Then, add 1/2 teaspoon of vanilla extract. This adds a lovely scent and flavor. Pour the wet mixture over the dry ingredients. Mix everything until the dry ingredients are well-coated. Fold in 1/2 cup of dried fruits and 1/4 cup of mini dark chocolate chips, if you want some sweetness. Transfer this mixture to the lined baking dish. Press it down firmly using the back of a spatula or your damp hands. Bake for 20 to 25 minutes until the edges turn golden. Let the bars cool completely in the dish. Once cool, lift them out using the parchment paper. Cut them into bars or squares. You can find the Full Recipe to guide you through this process. Store the bars in an airtight container at room temperature for about a week. To get the best texture in your granola bars, stick to the right mix. Use rolled oats for chewiness. Chopped nuts add crunch. The honey or maple syrup acts as glue, holding everything together. Want chewier bars? Add more nut butter or honey. This keeps them soft. For crunchier bars, bake them a bit longer. You can also use less nut butter. The choice is yours! Pressing the mixture is key. Use damp hands or a spatula to pack it down. Make sure it is even across the dish. A tight press helps the bars stay together. If they’re loose, they may crumble when cut. {{image_2}} If you or someone you know has nut allergies, don't worry! You can still make tasty granola bars. Replace the mixed nuts with seeds like pumpkin or sunflower seeds. These seeds add crunch and good nutrients. You could also use puffed rice or oats for extra texture. This nut-free version keeps the bars safe and delicious. Want to mix things up? You can add fun flavors! For a chocolate twist, stir in mini chocolate chips. They melt and add a sweet touch. If you love coconut, add shredded coconut. This gives your bars a tropical flavor. You can even blend the two! Try half chocolate and half coconut for a fun treat. Need more protein in your snack? Add protein powder to the mix. A scoop of vanilla or chocolate protein powder works well. You can also use additional nut or seed butters. This gives the bars a creamy texture and boosts protein. Another option is to include hemp seeds or chia seeds. They are small but pack a protein punch! For a complete guide, check out the Full Recipe. After you bake your granola bars, let them cool completely. Once cool, cut them into bars or squares. Place them in an airtight container. This keeps them fresh for up to one week. You can store them at room temperature. If your kitchen is warm, the fridge is a good option. Freezing is a great way to keep granola bars longer. Wrap each bar in plastic wrap. Then, place them in a freezer-safe bag. This helps keep out air and moisture. You can freeze them for up to three months. When you want a bar, take one out and let it thaw. You can enjoy it cold or heat it for a few seconds in the microwave. Check your granola bars for signs of spoilage. If they smell off or look moldy, it's best to toss them. If they feel very hard or crumbly, they may not taste good anymore. Always trust your nose and eyes. Fresh bars should be chewy and smell yummy. Homemade granola bars last about one week at room temperature. If you store them in the fridge, they can stay fresh for two weeks. Use an airtight container to keep them safe from air. This helps maintain their taste and texture. Yes, you can use maple syrup or agave syrup. Both options add sweetness and work well in the recipe. If you are vegan, these sweeteners are great choices. Just remember that the flavor might change a bit based on what you choose. Making your own granola bars has many benefits. You control the ingredients, which means no hidden sugars or additives. Homemade bars are often healthier than store-bought ones. They can also fit your taste and dietary needs. Plus, they are easy to make and fun to customize. To customize for dietary needs, swap out nuts for seeds if you have a nut allergy. Use gluten-free oats for a gluten-free option. You can also choose different sweeteners or add protein powder. Dried fruits can be replaced with seeds or fresh fruits. This makes the bars fit your diet perfectly. Making homemade granola bars is easy and fun. We covered the basic ingredients, equipment, and how to substitute items. I shared detailed steps for mixing and baking, plus tips for texture and flavor. You can try many variations, from nut-free options to protein-packed bars. Remember to store them well for freshness. Homemade granola bars are tasty and offer many health benefits. Enjoy creating your own unique snacks!

Homemade Granola Bars Easy Recipe for Healthy Snacks

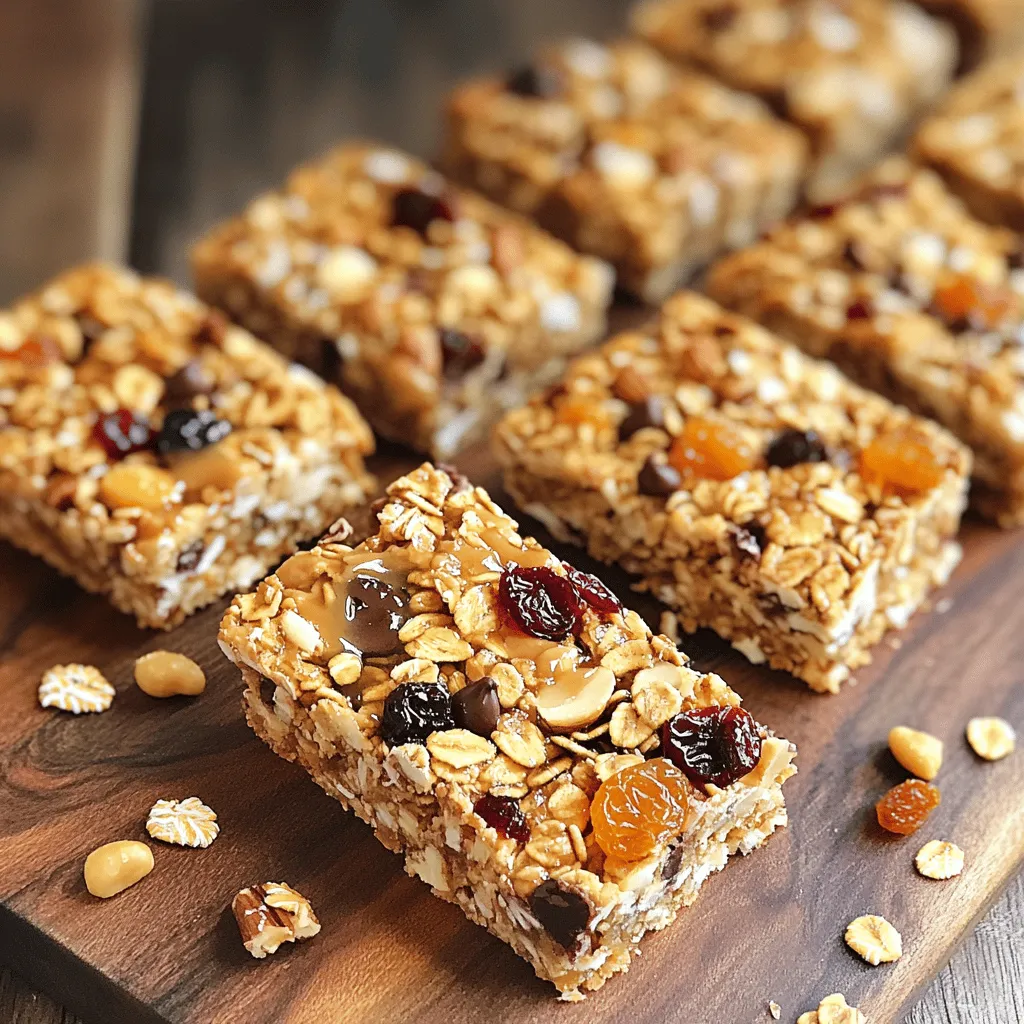
Are you ready to make your own healthy snacks? In this blog post, I’ll share an easy homemade granola bar

- 2 medium sweet potatoes, peeled and diced - 1 can (15 oz) black beans, rinsed and drained - 1 can (14 oz) diced tomatoes (with juices) - 1 medium onion, chopped - 2 cloves garlic, minced - 1 bell pepper (any color), chopped - 1 tablespoon chili powder - 1 teaspoon cumin - 1 teaspoon smoked paprika - 1/2 teaspoon cinnamon - 2 cups vegetable broth - 1 tablespoon olive oil - Salt and pepper to taste Sweet potatoes bring a natural sweetness and creamy texture. Black beans add protein and fiber, making this chili hearty. Diced tomatoes offer acidity and balance. Onions and garlic provide a base of flavor that makes every bite satisfying. Bell peppers add a crunch and sweetness that complements the other ingredients. The spices, like chili powder and cumin, create warmth and depth. - Fresh cilantro - Sour cream or Greek yogurt - Tortilla chips or crusty bread Garnishing your chili adds a pop of color and flavor. Fresh cilantro brightens each bowl. A dollop of sour cream or Greek yogurt adds creaminess and cuts through the spice. Pairing with tortilla chips or crusty bread gives you that satisfying crunch. For the full recipe, refer to the earlier section. Start by gathering your ingredients. You will need sweet potatoes, black beans, diced tomatoes, onion, garlic, and bell pepper. - Sweet Potatoes: Peel and dice two medium sweet potatoes into small cubes. - Onion and Garlic: Chop one medium onion and mince two cloves of garlic. - Bell Pepper: Chop one bell pepper. You can choose any color you like. - Spices: Measure out chili powder, cumin, smoked paprika, and cinnamon. This preparation helps your cooking flow smoothly. 1. Heat the Oil: In a large pot, heat one tablespoon of olive oil over medium heat. 2. Sauté Onion and Garlic: Add the chopped onion. Cook until it is soft and translucent, about five minutes. Then, stir in the minced garlic and chopped bell pepper. Cook for another two to three minutes until fragrant. 3. Add Sweet Potatoes and Spices: Next, add your diced sweet potatoes, chili powder, cumin, smoked paprika, and cinnamon. Stir everything well so that the sweet potatoes get coated with the spices. 4. Combine with Tomatoes and Broth: Pour in one can of diced tomatoes with their juices and two cups of vegetable broth. Stir to mix. Bring this mixture to a boil. 5. Simmer Until Tender: Once it boils, lower the heat. Cover the pot and let it simmer for about 25 minutes. Check the sweet potatoes; they should be tender. 1. Stir in Black Beans: After the sweet potatoes are done, add one can of rinsed and drained black beans. 2. Adjust Seasonings: Taste your chili. Add salt and pepper as needed to enhance the flavor. 3. Presentation Recommendations: Serve your chili in bowls. Garnish with fresh cilantro. A dollop of sour cream or Greek yogurt adds creaminess. Pair it with crusty bread or tortilla chips for some extra crunch. This recipe makes a warm, comforting meal that you and your loved ones will enjoy. For the full recipe, check out Sweet Potato & Black Bean Chili. To make your sweet potato and black bean chili even tastier, try adjusting the spices. If you like more heat, add a pinch of cayenne pepper or some diced jalapeños. For a richer taste, use smoked paprika instead of regular paprika. Fresh herbs can also boost flavor. Fresh cilantro adds zest, while fresh lime juice brightens every bite. When it comes to ingredients, using fresh veggies will give your chili a vibrant taste. However, canned black beans and diced tomatoes save time and still work well. Rinse the beans well to remove excess salt. This helps keep the chili balanced. For the best chili, choose a heavy-bottomed pot or a Dutch oven. These pots heat evenly, preventing burning. Start by sautéing your onions and garlic until soft. This step adds depth to your chili. After adding your sweet potatoes and spices, remember to stir well. Simmering is key to blending flavors. Let the chili cook slowly over low heat. This allows the sweet potatoes to soften and the spices to infuse. Don't rush this step—good chili takes time! Meal prep can make cooking easier. Chop your sweet potatoes, onions, and peppers ahead of time. Store them in the fridge for quick access. You can also cook a larger batch and freeze half for later. Using a slow cooker or Instant Pot can save time too. Just toss all ingredients in and let them cook while you do other things. This method also makes the flavors meld beautifully. For a full recipe, check out the Sweet Potato & Black Bean Chili. {{image_2}} You can easily make this Sweet Potato and Black Bean Chili vegan. The recipe is already plant-based. Just skip any dairy toppings. Instead, try avocado or lime juice for added flavor. For gluten-free options, this chili is perfect as is. All the ingredients are naturally gluten-free. Just ensure your vegetable broth is also gluten-free. Feel free to swap out black beans for other beans like kidney or pinto beans. Each bean adds its own flavor and texture. You can also add more vegetables. Corn, zucchini, or carrots work well. Changing spices can boost your chili’s taste. Add cayenne for heat or oregano for earthiness. Experiment with fresh herbs like basil or thyme for a twist. This chili pairs well with crusty bread or tortilla chips. These options add great crunch and flavor. You can also serve it over rice or quinoa for a hearty meal. If you have leftovers, think outside the bowl. Use the chili as a filling for tacos or burritos. You can even mix it into scrambled eggs or on top of baked potatoes. For the full recipe, check out the earlier section. It will guide you through making this delicious chili step-by-step. Store your chili in an airtight container. This keeps it fresh and tasty. You can keep it in the fridge for up to five days. If you want it to last longer, consider freezing it. To freeze your chili, let it cool completely first. Then, use freezer-safe containers or bags. Remove as much air as possible before sealing. This helps prevent freezer burn. When you're ready to eat, thaw it overnight in the fridge. You can reheat chili on the stovetop or in the microwave. For the stovetop, pour it into a pot and heat over medium. Stir often to keep it from sticking. For the microwave, use a microwave-safe bowl. Heat in one-minute bursts, stirring in between. This keeps the texture nice and smooth. Enjoy your Sweet Potato and Black Bean Chili warm and flavorful! You can serve this chili with many sides. Here are some great options: - Crusty bread or rolls - Tortilla chips - Rice or quinoa - A fresh green salad - Cornbread These sides add texture and balance the flavors of the chili. Yes, you can make this chili ahead of time. It's a great meal prep option. The flavors deepen as it sits. Store it in the fridge for up to four days. You can also freeze it for up to three months. Just thaw and reheat before serving. Meal prepping makes busy nights easier. To add heat, try these options: - Add diced jalapeños to the pot. - Stir in cayenne pepper. - Use hot chili powder instead of regular. - Top with spicy salsa or hot sauce. These adjustments will give your chili a nice kick. Yes, you can use fresh black beans. However, cooking dried beans takes longer. Soak them overnight and boil until tender. Canned beans are quicker and easier. They are already cooked, just rinse and add them to the chili. This chili can be kid-friendly. To adjust the flavors: - Reduce the spice level by using less chili powder. - Serve it with toppings like cheese or sour cream. - Pair it with mild sides like bread or rice. These tips help make it more appealing to children. Sweet potato and black bean chili is nourishing and easy to make. We covered main ingredients, prep, and cooking steps, plus tips to enhance flavor. You can adapt the recipe for your diet and store leftovers well. Enjoy this chili alone or with toppings like sour cream or fresh cilantro. With simple swaps and additions, this dish can fit any palate. Dive in and make this chili today; it's a warm hug in a bowl.

Sweet Potato and Black Bean Chili Flavorful Comfort Food

Craving a hearty meal that warms your soul? Sweet Potato and Black Bean Chili is the perfect comfort food. It’s

- 1 pound ground turkey - 1/2 cup bread crumbs - 1/4 cup grated Parmesan cheese - 1/4 cup fresh parsley, chopped - 1 egg, beaten - 2 cloves garlic, minced - 1 teaspoon onion powder - 1 teaspoon Italian seasoning - 2 cups marinara sauce (store-bought or homemade) - 1 tablespoon olive oil When making turkey meatballs, I start with fresh, quality ground turkey. It gives the meatballs a nice flavor and keeps them moist. I mix in bread crumbs for texture. This helps the meatballs hold their shape. Next, I add grated Parmesan cheese. It adds a salty, nutty taste. Fresh parsley brings a bright note. I always use a beaten egg to bind everything together. For seasoning, I use minced garlic for a rich aroma. Onion powder gives depth, while Italian seasoning brings classic flavor notes. Salt and pepper enhance all the tastes. Don’t forget the marinara sauce! You can use store-bought or homemade. Olive oil adds a nice finish. When I drizzle it over the meatballs before baking, it helps them brown beautifully. For the full recipe, check out the complete guide. Enjoy your cooking! 1. Preheat the oven to 400°F (200°C). This step ensures the meatballs cook evenly. 2. In a large bowl, combine: - 1 pound ground turkey - 1/2 cup bread crumbs - 1/4 cup grated Parmesan cheese - 1/4 cup fresh parsley, chopped - 1 egg, beaten - 2 cloves garlic, minced - 1 teaspoon onion powder - 1 teaspoon Italian seasoning - Salt and pepper to taste Mix until just combined. Don’t overwork the meat; this keeps them tender. 3. Form the mixture into 1-inch meatballs using your hands. Place them on a baking sheet. 1. Arrange the meatballs on the baking sheet, giving them space. 2. Drizzle with 1 tablespoon of olive oil. This helps them get golden brown. 3. Bake the meatballs for about 20 minutes. They should be cooked through and lightly browned. 1. While the meatballs bake, heat 2 cups of marinara sauce in a saucepan over medium heat. Stir occasionally. 2. Once the meatballs are ready, add them to the sauce. Gently stir to coat them well. Let them simmer for 5 minutes. This method creates a rich flavor in the meatballs and sauce. You can find the Full Recipe to guide you through each step. - Avoid overmixing: Mix just until combined. Overmixing makes meatballs tough. - Best baking temperature and time: Bake at 400°F (200°C) for about 20 minutes. This gives a nice brown color. - Meatball size recommendations: Aim for 1-inch meatballs. This size cooks evenly and is easy to eat. - Homemade vs. store-bought sauce: Homemade sauce is great, but store-bought saves time. Both can be tasty. - Enhancing jarred marinara: Add garlic, herbs, or red pepper flakes to boost flavor. A splash of wine can also add depth. For the full details on making these meatballs shine, check the Full Recipe. {{image_2}} You can give your turkey meatballs a unique twist by adding different spices or herbs. For a warm kick, try adding red pepper flakes. If you want a fresh taste, use chopped basil or thyme. These small changes can make a big difference in flavor. Cheese-stuffed meatballs are another fun idea. To make these, take a small piece of mozzarella cheese and wrap the meat around it. When you bake them, the cheese melts and adds a creamy center. This makes each bite a tasty surprise! When it comes to serving turkey meatballs, you have plenty of choices. For pasta, you can use spaghetti, penne, or even zoodles for a low-carb option. Each type of pasta can change the meal's feel and texture. If you're in the mood for something different, try serving the meatballs on sub rolls. Top them with marinara sauce and melted cheese for a hearty sandwich. This makes a great lunch or dinner option. You can find the full recipe to help you create these delicious meals. To keep your turkey meatballs fresh, store them in the fridge. Place them in an airtight container. This way, they stay moist and tasty. You can store them for up to three days. If you want to keep them longer, consider freezing. Just make sure they cool down first. This helps prevent ice crystals. When it’s time to enjoy your leftovers, reheating is easy. The best way is to use the oven. Preheat it to 350°F (175°C). Place the meatballs on a baking sheet and cover them with foil. Heat for about 15 minutes. If you prefer the microwave, use a microwave-safe dish. Heat in short bursts, checking often to avoid overcooking. For longer storage, freeze your meatballs. Place them in a freezer-safe bag or container. They can last up to three months. When you're ready to eat, thaw them overnight in the fridge. Then follow the reheating steps above. Enjoy your Easy Turkey Meatballs with Marinara from the Full Recipe! To keep your turkey meatballs moist, use these tips: - Add ingredients: Use bread crumbs, cheese, and egg to bind and add moisture. - Don’t overmix: Mix gently. Overworking the meat makes it tough. - Use fat: Add olive oil to the mixture for richness. - Bake properly: Bake at 400°F (200°C) for 20 minutes to keep them juicy. - Simmer in sauce: After baking, let the meatballs sit in marinara. This adds moisture and flavor. Yes, you can use chicken! Here’s what to know: - Flavor: Chicken has a milder taste. You might want to add more spices. - Texture: Ground chicken may be softer than turkey. Adjust your cooking time. - Cooking: Follow the same steps in the recipe. Just swap the turkey for chicken. Serving turkey meatballs can be fun and creative. Here are some ideas: - Pasta: Serve over spaghetti or your favorite pasta with marinara. - Sub rolls: Place meatballs in a sub roll, top with melted cheese for a meatball sub. - Salad: Add meatballs to a salad for a protein boost. - Skewers: Make meatball skewers for a fun appetizer at parties. For the full recipe, check out the Zesty Turkey Meatballs with Marinara. Enjoy cooking! Making turkey meatballs is simple and fun. You can create moist, tasty meatballs with just a few ingredients. We covered everything from the main ingredients to tips for perfect cooking. Don’t forget to try some variations to keep it exciting. You can easily store leftovers for later. Enjoy delicious meals by following these steps and tricks. Now you have all you need to impress with your cooking skills!

Easy Turkey Meatballs with Marinara Flavor Boost

If you’re looking for a simple and tasty meal, you’ve come to the right place! These easy turkey meatballs with

Older posts
Newer posts
← Previous Page1 … Page124 Page125 Page126 … Page164 Next →

dsad

© 2026 easycookingbite • Built with GeneratePress

Our Policies

  • Copyright Policy
  • Cookie Policy
  • GDPR Policy
  • Privacy Policy
  • Disclaimer
  • Terms Of Use

More Information

  • Home
  • About
  • Contact
  • Appetizers
  • Dessert
  • Dinner
  • Drinks
©2026, easycookingbite About Back To Top