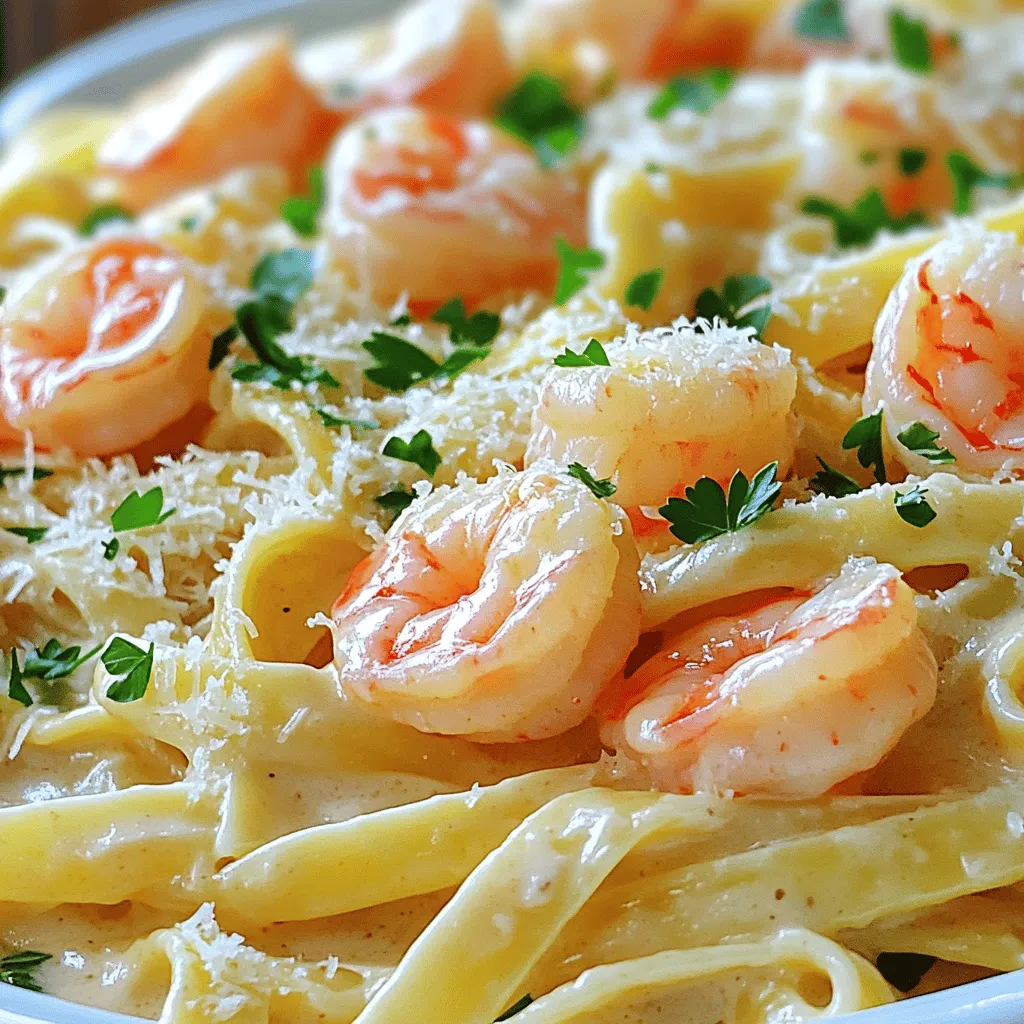
Creamy Shrimp Pasta Delightful and Simple Recipe
Are you ready to impress with a dish that’s both simple and delightful? This Creamy Shrimp Pasta recipe is a
Are you ready to impress with a dish that’s both simple and delightful? This Creamy Shrimp Pasta recipe is a
![To make your hot honey chicken bowls, gather these ingredients: - 1 lb boneless, skinless chicken thighs - 2 tablespoons olive oil - 1 teaspoon paprika - 1 teaspoon garlic powder - 1 teaspoon onion powder - 1 teaspoon salt - 1/2 teaspoon black pepper - 1/4 teaspoon cayenne pepper (adjust to taste) - 1/3 cup hot honey (store-bought or homemade) - 2 cups cooked brown rice or quinoa - 1 cup corn kernels (fresh or canned) - 1 cup black beans, rinsed and drained - 1/2 cup diced bell pepper (red or yellow) - 1/4 cup chopped fresh cilantro - Juice of 1 lime - Sliced jalapeños (for garnish, optional) - Avocado slices (for garnish, optional) You will need a few essential tools to make this dish: - Large mixing bowl - Skillet or frying pan - Spatula or tongs - Measuring spoons and cups - Knife and cutting board - Serving bowls Choosing fresh ingredients makes a big difference. Here are my tips: - Chicken Thighs: Look for thighs that are pink and moist. Avoid any that look dull or slimy. - Vegetables: Choose bright bell peppers and firm corn. Fresh veggies add crunch and flavor. - Cilantro: Pick cilantro with bright green leaves. Avoid any with wilting or yellowing. - Hot Honey: If buying, check the label for natural ingredients. If making, use quality honey and your favorite hot sauce. Using fresh ingredients ensures your hot honey chicken bowls taste great! For the full recipe, check out the Hot Honey Chicken Bowls section above. Marinating the chicken adds great flavor. Start with a mixing bowl. Combine the olive oil, paprika, garlic powder, onion powder, salt, black pepper, and cayenne pepper. Mix well until smooth. Add the chicken thighs and coat them evenly. Cover the bowl and let it sit for at least 30 minutes. You can also refrigerate it for up to 2 hours. This step makes the chicken juicy and tasty. To cook the chicken, heat a large skillet over medium-high heat. Add the marinated chicken thighs to the skillet. Cook them for about 6-7 minutes on each side. Look for a golden brown color. The chicken is done when it reaches 165°F inside. In the last few minutes, drizzle the hot honey over the chicken. This creates a sweet glaze. Turn the chicken to coat it well in the hot honey. Now it’s time to prepare the bowl base. In a separate bowl, mix the cooked brown rice or quinoa with the corn, black beans, diced bell pepper, lime juice, and chopped cilantro. Stir everything together. Taste it and add salt if needed. This bowl base is colorful and nutritious. It pairs nicely with the glazed chicken. For the full recipe, check out the [Full Recipe]. To get the best flavor from hot honey, choose quality honey. Look for honey that has a kick from chili peppers. You can also make your own hot honey. Just mix regular honey with crushed red pepper flakes. Heat it gently to blend the flavors. Let it sit for a while to develop the heat. This will give your chicken an exciting taste. Cooking time is key for juicy chicken. Start by marinating your chicken for at least 30 minutes. This helps it absorb flavor. Heat your skillet on medium-high before adding the chicken. Cook each side for 6-7 minutes. Use a meat thermometer to check the chicken. It should reach an internal temperature of 165°F. This will ensure it's safe to eat and still juicy. Serving is as fun as cooking! Use deep bowls to give your meal a hearty look. Start with a base of brown rice or quinoa. Slice the chicken and place it on top. Add colorful veggies like bell peppers and corn. For a fresh touch, sprinkle chopped cilantro on top. A lime wedge adds zing and brightness. You can also drizzle extra hot honey over the chicken for added flavor. Enjoy your beautiful, tasty bowl! For the full recipe, check out the detailed instructions above. {{image_2}} You can make this dish vegetarian with ease. Replace the chicken with hearty tofu or tempeh. Both soak up flavors well. Press and cube the tofu for a firmer texture. Marinate as you would the chicken. Cook the tofu until golden brown for a nice crunch. You can also use chickpeas for a protein boost. They add a nice texture and flavor to the bowl. If you love heat, add more spice! You can increase the cayenne pepper in the marinade. For an extra kick, mix in some diced habanero or serrano peppers. Sliced jalapeños work great as a topping too. You can even drizzle on extra hot honey for a sweet and spicy finish. Adjust the heat level to match your taste. The base of your bowl is just as important. While brown rice and quinoa are great, you can mix it up. Try using farro or couscous for a different bite. Cauliflower rice is a low-carb option that adds a fresh twist. You can also use a mix of grains for varied textures. Each base brings its own flavor, so don’t be afraid to experiment. After enjoying your hot honey chicken bowls, you may have some leftovers. To keep them fresh, place the chicken and rice mixture in airtight containers. This method helps lock in moisture and flavor. Store them in the fridge for up to three days. Remember to let the food cool to room temperature before sealing. This prevents condensation, which can make your meal soggy. When it's time to reheat, you want to keep your meal tasty. Use a microwave or stovetop for best results. If using a microwave, cover the bowl with a damp paper towel. This helps keep the chicken moist. Heat for one to two minutes, checking halfway. If using the stovetop, warm it on low heat in a skillet. Stir gently to avoid drying out the chicken. Freezing is a great option if you want to save your hot honey chicken bowls for later. First, let the dish cool completely. Then, portion it into freezer-safe containers. You can freeze these for up to three months. When ready to eat, thaw in the fridge overnight. Reheat on the stove or in the microwave. Your meal will taste fresh and delicious, just like the first time. You can find the full recipe here. Hot honey is a sweet and spicy blend. It combines honey with chili peppers. You can buy it at stores or make it at home. To make it, heat honey in a pot. Add crushed red pepper flakes or fresh chili peppers. Let it simmer for a few minutes. This lets the flavors mix well. You can adjust the heat by adding more or less spice. Hot honey adds a unique kick to many dishes. It works great on pizza, wings, and even in drinks. Yes, you can use chicken breasts instead of thighs. Chicken breasts are leaner and cook faster. They may not be as juicy, but they still taste good. Just be careful not to overcook them. Cook them until they reach 165°F. This keeps them tender and safe to eat. You can follow the same steps in the recipe. The flavor from the hot honey will still shine through. Hot honey chicken bowls are tasty on their own. You can serve them with various sides to enhance the meal. Here are some ideas: - Steamed vegetables: Broccoli or green beans add color and nutrients. - Salad: A fresh garden salad can balance the heat. - Cornbread: This sweet bread pairs well with the spicy chicken. - Pickles: They add a nice crunch and tang. Feel free to mix and match your sides! They can add different flavors and textures to your meal. For the full recipe, check out the details above. This blog post covered everything you need for hot honey chicken bowls. We identified fresh ingredients and essential tools to get started. I shared steps for marinating and cooking the chicken to perfection. Flavor tips and serving ideas can enhance your dish even more. Explore variations for vegetarian options and spicy twists. Lastly, I included storage and reheating tips to keep your meals tasty. Now, you have everything to make delicious bowls that impress!](https://easycookingbite.com/wp-content/uploads/2025/05/22f192af-4576-475e-8f11-4f49ace0afe7.webp)
Are you ready to spice up your weeknight meals? These Savory Hot Honey Chicken Bowls deliver a delightful mix of

If you’re craving a sweet escape to a tropical paradise, Pineapple Heaven Cake is your ticket! This delightful dessert balances
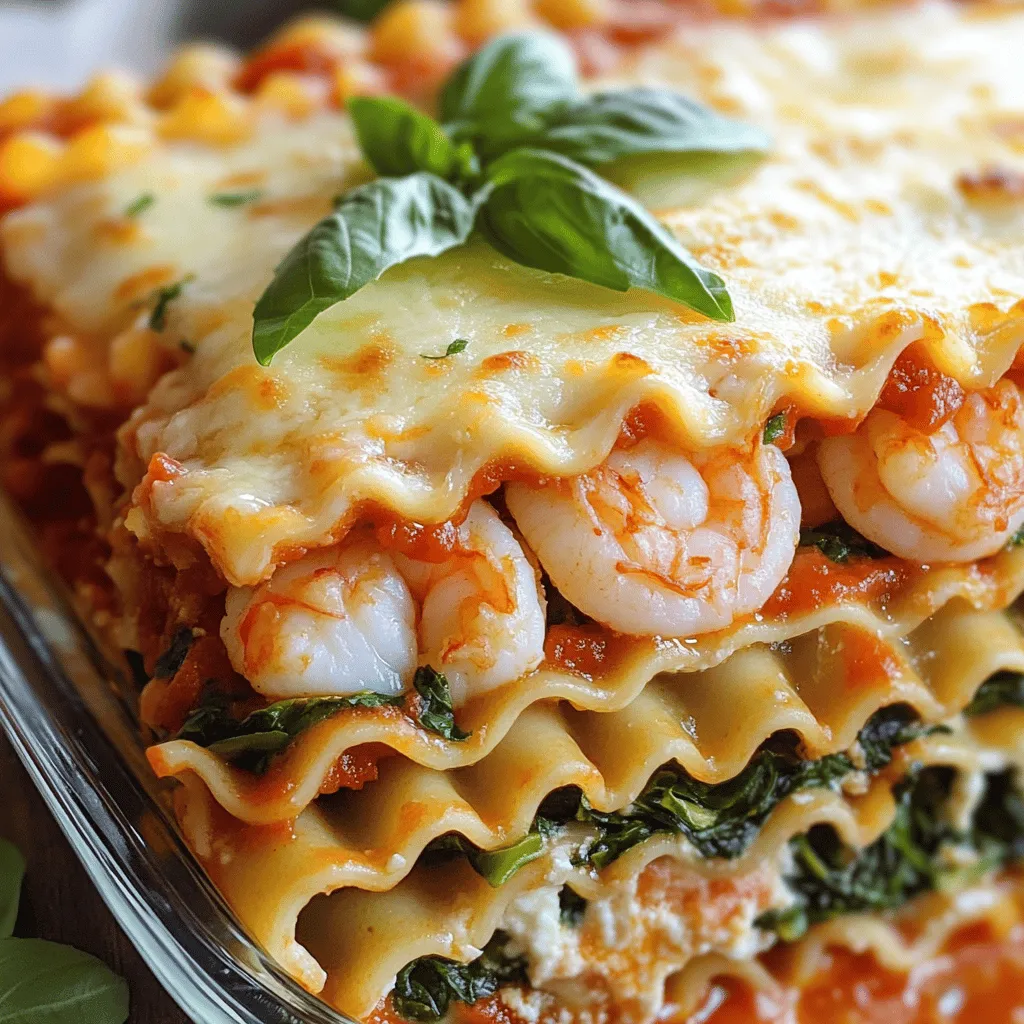
If you love seafood and comfort food, seafood lasagna is a must-try! This creamy and delightful meal blends fresh shrimp
![To make Mongolian Ground Beef Noodles, you need these main ingredients: - 8 oz. egg noodles - 1 lb. ground beef - 1 small onion, finely chopped - 3 cloves garlic, minced - 1-inch piece ginger, grated - 2 green onions, chopped (plus extra for garnish) - 2 tablespoons soy sauce - 1 tablespoon oyster sauce - 1 tablespoon hoisin sauce - 1 tablespoon sesame oil - 1 teaspoon chili garlic sauce (optional, for heat) - Salt and pepper to taste - 1 cup broccoli florets - 1 red bell pepper, sliced - Sesame seeds (for garnish) These ingredients create a tasty, satisfying meal that is easy to prepare. The egg noodles give the dish its hearty base, while the ground beef adds rich flavor and protein. The sauces bring a wonderful umami taste to the mix. You can boost the flavor of your noodles with these extras: - Fresh cilantro for garnish - Sliced carrots for crunch - Snap peas for a fresh bite Adding these ingredients can make your dish even more colorful and exciting. For example, cilantro adds a bright taste, while snap peas give a nice crunch. If you have dietary needs, here are some substitutions to consider: - Swap ground beef with ground turkey or chicken for a leaner option. - Use gluten-free noodles if you need to avoid gluten. - Try tofu or tempeh for a plant-based version. These substitutions keep the dish delicious, while catering to different diets. You can enjoy this recipe no matter your eating style! For the full recipe, check out the [Full Recipe]. Start with a large pot. Fill it with water and add salt. Bring the water to a boil. Add the egg noodles. Cook according to the package, usually about 5-7 minutes. When done, drain the noodles and set them aside. This step is key to a great dish. Grab a large skillet or wok. Heat 1 tablespoon of sesame oil over medium-high heat. Add the ground beef. Cook it while breaking it apart with a spatula. Brown the beef for about 5-7 minutes. If there is extra fat, drain it. Next, add chopped onion, minced garlic, and grated ginger. Sauté for 2-3 minutes. The onion should turn translucent. You want the garlic to smell amazing. Now, it’s time for the veggies. Stir in broccoli florets and sliced red bell pepper. Cook them for 3-4 minutes. They should be tender but still crisp. In a small bowl, mix soy sauce, oyster sauce, hoisin sauce, and chili garlic sauce if you want heat. Pour this sauce over the beef and veggies. Stir well and cook for another 2 minutes. This will help the flavors blend nicely. Add the cooked egg noodles to the skillet. Toss everything together. Make sure the noodles are coated in the sauce. Heat them through for a minute or two. Taste the dish and adjust seasoning with salt and pepper as needed. Finally, stir in the chopped green onions. Serve your Mongolian Ground Beef Noodles hot. Top with sesame seeds and extra green onions for flair. Enjoy this dish, which is not only tasty but also quick to make! For a full guide, check the Full Recipe. To get the best noodle texture, cook your egg noodles just right. Follow the package instructions closely. You want them to be tender but not mushy. Drain them and toss with a bit of sesame oil. This keeps them from sticking together. Homemade sauces make a big difference in flavor. The mix of soy sauce, oyster sauce, and hoisin sauce creates a rich taste. You can also add chili garlic sauce for a spicy kick. Adjust the sauce to match your taste. Try adding a splash of rice vinegar for a tangy touch. One common mistake is overcooking the beef, which can make it tough. Cook it just until browned. Another mistake is adding too much salt. The sauces already have salt, so taste your dish before adding more. Lastly, don’t skip the vegetables. They add texture and color. Remember, fresh ingredients make your meal shine! For the complete recipe, check out the Full Recipe section. {{image_2}} You can make Mongolian Ground Beef Noodles vegetarian or vegan. Start by swapping ground beef for soy crumbles or lentils. These options give a meaty texture. Use vegetable broth instead of meat broth for flavor. Replace the oyster sauce with mushroom sauce to keep the umami taste. You can add extra veggies like carrots, mushrooms, or bell peppers. They add color and crunch. This way, you keep the dish hearty and satisfying. If you need gluten-free Mongolian Ground Beef Noodles, choose gluten-free noodles. Rice noodles or zucchini noodles are great choices. Check the soy sauce for gluten-free options, like tamari. Be mindful of sauces, too; some may contain gluten. You can use cornstarch instead of flour for thickening. This keeps the sauce smooth and tasty. These swaps make the dish just as delicious without gluten. For those who want different proteins, there are many options. You can use ground turkey or chicken as a leaner choice. Tofu is another great option; just press it to remove water, then crumble it. This gives a nice texture and absorbs flavors well. You may also try shrimp or beef strips for a different bite. Each protein brings a unique taste to the dish. Feel free to mix and match your favorites! To keep your Mongolian Ground Beef Noodles fresh, place them in an airtight container. Make sure the noodles cool down to room temperature before sealing. This helps prevent moisture buildup. Store the container in your fridge. Properly stored, these noodles last about three to four days. When you're ready to enjoy your leftovers, use a skillet or a microwave. If using a skillet, add a splash of water or broth to keep them moist. Heat over medium until warmed through. Stir often to avoid sticking. If using a microwave, cover the bowl with a lid to trap steam. Heat in short bursts, stirring in between, until hot. If you want to save your noodles for later, freezing works well. Portion the noodles into freezer-safe bags. Squeeze out excess air before sealing. They can stay frozen for about three months. When you're ready to eat them, thaw in the fridge overnight. Reheat as described above for the best taste. Mongolian Ground Beef Noodles are not from Mongolia. They are a fusion dish. It blends Asian noodles with beef and sauces. This dish draws from Chinese cuisine, especially in flavor. It became popular in many places, especially in the West. Chefs adapted it to fit local tastes. Yes, you can! Feel free to swap the egg noodles. You can use rice noodles or udon noodles too. Each type adds its own texture. Just adjust cooking times as needed. Follow package instructions for the best results. For spice, add more chili garlic sauce. You can also include sliced fresh chilies. If you prefer it milder, reduce the chili sauce. You can skip it entirely if you want. Adjust the flavors to suit your taste. These noodles pair well with many sides. Try steamed broccoli or a simple salad. You can also serve it with spring rolls for crunch. A light soy dipping sauce adds extra flavor too. For a drink, iced tea or lemonade works great! In this article, we explored the key ingredients and steps for Mongolian ground beef noodles. You learned about cooking the noodles, preparing the beef, and combining flavors. Tips on texture and enhancing taste were shared, along with variations to meet dietary needs. Storing and reheating leftovers were also covered. Mongolian ground beef noodles offer a tasty, adaptable dish. Try your own twists to make it your favorite! Enjoy cooking!](https://easycookingbite.com/wp-content/uploads/2025/05/d553b55b-38f1-4c90-ac05-2fcfd091ff50.webp)
Welcome to my kitchen! Today, I’m excited to share my Mongolian Ground Beef Noodles recipe. This dish is not only
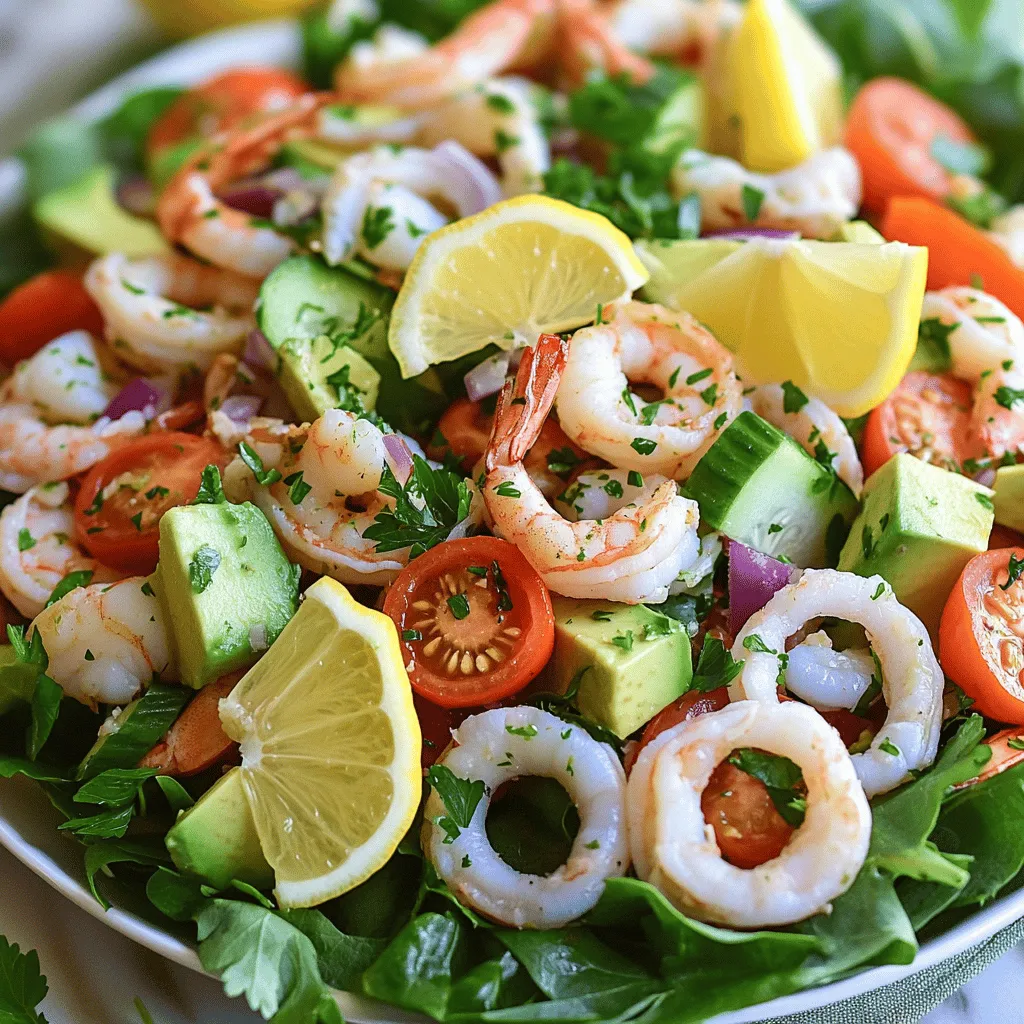
Summer is here, and nothing beats a fresh seafood salad! You’ll enjoy the mix of tasty seafood, crisp veggies, and

Get ready to dive into a warm bowl of Homemade Chicken Stroganoff! This creamy, savory dish combines tender chicken, fresh
![- 2 cups potato gnocchi (store-bought or homemade) - 2 medium russet potatoes, baked and cooled - ½ cup sour cream - 1 cup shredded cheddar cheese - ½ cup cooked bacon, chopped - ¼ cup green onions, sliced - 2 tablespoons butter - 1 teaspoon garlic powder - ¼ cup cream cheese for extra creaminess - Salt and pepper to taste Using the right ingredients is key for great flavor. I love using russet potatoes. They have a fluffy texture that works well. Bake them until soft for the best results. Use store-bought gnocchi for quick meals or make your own for fun. Sour cream adds a nice tang. It makes the dish creamy and rich. Shredded cheddar cheese melts beautifully. It gives that cheesy goodness we all want. Bacon adds a savory crunch. If you're a fan, don't skip it! Green onions add freshness. They brighten up the dish and look pretty. For optional ingredients, butter adds a nice flavor. Garlic powder gives a nice hint of garlic. If you like creamy gnocchi, cream cheese is perfect. Season with salt and pepper to taste. You can find the full recipe linked above to guide you through the cooking steps. - Preheat oven to 400°F (200°C). - Bake potatoes for approximately 45 minutes until tender. First, you need to bake the potatoes. Preheat your oven to 400°F (200°C). Place the potatoes on a baking sheet. Bake them for about 45 minutes. You want them to be soft when done. After baking, let them cool a bit before handling. - Scoop out the insides of the baked potatoes into a mixing bowl. - Mix in sour cream, garlic powder, salt, and pepper, mashing until smooth. - Optional: Add cream cheese for a creamier texture. Now, let’s make the mashed potato mix. Scoop out the insides of the cooled potatoes into a mixing bowl. Add sour cream, garlic powder, salt, and pepper. Mash it all together until smooth. If you like it creamier, toss in some cream cheese too. This mix adds flavor and makes the gnocchi rich. - Melt butter in a large skillet over medium heat. - Add potato gnocchi, cooking for 3-4 minutes until slightly browned. - Lower heat, combine with mashed potato mixture, and stir in cheese and bacon. Next, it’s time to cook the gnocchi. Melt butter in a large skillet over medium heat. Once melted, add the potato gnocchi. Cook them for about 3-4 minutes until they’re slightly browned. This makes them crispy. Then, lower the heat. Stir in the mashed potato mixture. Add shredded cheese and chopped bacon to the skillet. Mix everything well until the cheese melts and blends in. The flavors will come together nicely. For the full recipe, you can check the details provided earlier. To get the best texture for your gnocchi, you want a crispy outside and a soft inside. Start by letting your baked potatoes cool before mashing. Cooling them helps keep the moisture down, which makes your gnocchi light and fluffy. If you skip this step, the gnocchi might turn out dense and heavy. To boost the flavor, think about adding spices or herbs. A pinch of paprika or some fresh thyme can make a big difference. When it comes to cheese, I recommend using sharp cheddar for its rich flavor. You can also mix in some mozzarella for a gooey texture. These choices will really elevate your dish. Serving Loaded Baked Potato Gnocchi can be fun! Use a large bowl or individual plates. Top with extra cheese, crumbled bacon, or fresh green onions. This makes your dish look more inviting. You can even drizzle some sour cream on top for added flair. A little creativity goes a long way in making this dish stand out. For the full recipe, check out the [Full Recipe]. {{image_2}} You can easily make Loaded Baked Potato Gnocchi vegetarian. Start by substituting the bacon with mushrooms. Mushrooms add a great umami taste. You can also use other veggies, like spinach or zucchini. They bring color and nutrients to the dish. For a dairy-free option, use plant-based cheese. This swap makes the dish creamy without any dairy. To spice things up, add paprika or cayenne pepper. These spices give your gnocchi a nice kick. If you like more heat, try adding jalapeños. They add flavor and a bit of crunch. Bell peppers are another great choice. They offer sweetness and a pop of color. Mix and match toppings to find your favorite flavors. You can use sweet potato gnocchi for a twist. Sweet potato adds a hint of sweetness and a lovely orange color. If you feel adventurous, make your own gnocchi! Homemade gnocchi can taste amazing. It allows you to control the ingredients. If you prefer convenience, store-bought gnocchi works just fine. Both options can lead to a delicious meal. Remember, the key is to enjoy the process as you explore these variations. For the full recipe, check out the full recipe section. To store your Loaded Baked Potato Gnocchi, place it in an airtight container. Let it cool first, then transfer to the fridge. This will help keep the flavors fresh. You can enjoy the leftovers for up to three days. After that, the taste and texture may change. When reheating, aim to keep the gnocchi soft yet crispy. For the microwave, place the leftovers in a bowl. Heat in short bursts, stirring often. This helps avoid sogginess. If you prefer the stovetop, use a skillet. Add a splash of water or broth, cover, and heat on low. Stir occasionally until warmed through. For long-term storage, freezing is a great choice. First, let the dish cool completely. Then, scoop portions into freezer-safe bags. Squeeze out excess air and seal tightly. You can freeze it for up to three months. When ready to eat, thaw it in the fridge overnight. Reheat using the stovetop or microwave as mentioned above. This way, your gnocchi stays tasty and ready to enjoy. Yes, you can prepare Loaded Baked Potato Gnocchi in advance. First, cook the gnocchi according to the recipe. After cooking, let it cool completely. Store it in an airtight container in the fridge for up to two days. When ready to serve, reheat in a skillet over low heat. Add a little butter to keep it moist. The best potatoes for Loaded Baked Potato Gnocchi are russet potatoes. They are starchy and fluffy, which gives your gnocchi a nice texture. Avoid waxy potatoes, like red or yellow ones, as they won’t provide the same lightness. Using the right potatoes makes all the difference in flavor. Yes, you can use gluten-free gnocchi. Many brands offer gluten-free options made from rice, potato, or other flours. Just check the package for the right cooking time. The flavor will still be great, but it may have a different texture than regular gnocchi. You can top your Loaded Baked Potato Gnocchi with many delicious options. Here are some great ideas: - Extra shredded cheddar cheese - Crumbled bacon - Sliced green onions - Sour cream or cream cheese - Fresh herbs like parsley or chives Mix and match to create your perfect dish! Loaded Baked Potato Gnocchi is a delightful dish combining comfort food with ease. We covered essential and optional ingredients, step-by-step cooking, and tips for great texture. I shared ways to modify the recipe for a vegetarian option and how to store leftovers. Remember, creativity can enhance this dish—try different toppings or types of gnocchi. Enjoy crafting your own version of this tasty meal and impress friends and family with your skills!](https://easycookingbite.com/wp-content/uploads/2025/05/2fa4ab8e-a396-4d03-a2fb-4102180b39e2.webp)
Craving something warm and comforting? You’ve come to the right place! My Loaded Baked Potato Gnocchi recipe combines the classic
![- 8 oz linguine pasta - 1 lb large shrimp, peeled and deveined - 1 cup panko breadcrumbs - 2 tablespoons cornstarch - 2 large eggs, beaten - 1/2 cup mayonnaise - 3 tablespoons sweet chili sauce - 2 tablespoons sriracha sauce - 2 tablespoons lime juice - 2 garlic cloves, minced - 2 green onions, chopped - Salt and pepper to taste - Olive oil for frying - Gluten-free alternatives: Use gluten-free pasta and gluten-free breadcrumbs for a safe option. - Fresh vs frozen shrimp: Fresh shrimp offer great taste, but frozen shrimp work well too. Just thaw them properly before cooking. - Large pot for boiling pasta - Skillet for frying shrimp - Mixing bowls for prep - Measuring cups and spoons for accuracy These ingredients come together to make a delightful Bang Bang Shrimp Pasta. Each element plays a role in the flavor and texture. By following the Full Recipe, you can create a dish that impresses everyone at the table. To start, bring a large pot of salted water to a boil. This will help the pasta taste great. Add the linguine and cook it according to the package instructions. Usually, this takes about 8 to 10 minutes. You want the pasta to be al dente, which means it should still have a slight bite. To check, taste a piece a minute or two before the time is up. Once done, drain the pasta and rinse it under cold water. This stops the cooking process and keeps it from getting mushy. Next, we need to prepare the shrimp. In one shallow bowl, mix the cornstarch with a bit of salt and pepper. In another bowl, beat the eggs. For the final coating, grab a third bowl and add the panko breadcrumbs. Take each shrimp and dip it in the cornstarch first. Shake off any extra. Then dip it in the eggs and finally coat it with the panko. This will give the shrimp a nice crunch when cooked. For the best results, make sure the shrimp are well coated in each step. Now, it’s time to fry the shrimp. Heat a large skillet over medium heat and add enough olive oil to cover the bottom. You want the oil hot, so it sizzles when you add the shrimp. Add the shrimp in batches. Fry them for about 2 to 3 minutes on each side. They should turn golden brown and crispy. To check if they are done, look for that nice color and make sure they curl up slightly. Once fried, place them on a paper towel-lined plate to drain off any extra oil. While the shrimp cooks, let’s make the Bang Bang sauce. In a separate bowl, mix together mayonnaise, sweet chili sauce, sriracha, lime juice, and minced garlic. Stir until it’s smooth and creamy. You can adjust the sriracha to make it spicier or milder, based on your taste. This sauce adds a creamy and spicy kick to the dish. Finally, it’s time to combine everything. In a large bowl, toss the cooked linguine with the Bang Bang sauce until it’s well coated. Carefully fold in the crispy shrimp, mixing them evenly with the pasta. For a nice touch, serve the pasta in bowls or on a platter. Top with chopped green onions for color and flavor. This makes the dish look great and adds a fresh taste. Enjoy your Bang Bang Shrimp Pasta! For the full recipe, check out the details above. - Overcooking the shrimp: This is a big no-no! Shrimp cooks fast. If you leave it on the heat too long, it becomes rubbery. Fry them for about 2-3 minutes on each side. They should be pink and firm. - Under-seasoning the sauce: Your Bang Bang sauce needs flavor! Taste it before you mix it with the pasta. If it seems bland, add more sriracha or lime juice for zest. You want bold flavors to shine through. - Making the recipe gluten-free: Swap the linguine for gluten-free pasta. Most brands taste great and cook just like regular pasta. Be sure to check the labels on sauces, too. Some may have gluten. - Dairy-free options for the sauce: You can make the sauce without mayo. Use avocado or a dairy-free mayo as a base. This keeps the creaminess while making it safe for those who avoid dairy. - Suggested herbs and spices: Fresh herbs like cilantro or basil add brightness. You can sprinkle some on top before serving. A pinch of smoked paprika can also add depth to your sauce. - Pairing drinks to complement the dish: A light white wine, like Sauvignon Blanc, pairs well. If you prefer non-alcoholic, try sparkling water with a slice of lime. Both enhance the flavors of the dish without overpowering it. For the complete recipe, check out the [Full Recipe]. {{image_2}} You can easily change the pasta type in this recipe. Try spaghetti or fettuccine for a new twist. If you want to go gluten-free, use rice noodles or chickpea pasta. For proteins, shrimp is great, but you can also use chicken or tofu. Both options add unique flavors and textures. Adding veggies boosts nutrition and flavor. Consider tossing in bell peppers or snap peas. Broccoli or spinach also works well. You can sauté the vegetables with the shrimp or steam them separately. This keeps them bright and fresh. To control heat, adjust the sriracha in the sauce. If you like it milder, start with one tablespoon. For a spicy kick, add more sriracha or try chili garlic sauce. Sweet chili sauce balances the heat well. Don't be afraid to experiment with different sauces for unique flavors. For the full recipe, check out the detailed instructions to make your own Bang Bang Shrimp Pasta. Bang Bang Shrimp Pasta lasts about 3 to 4 days in the fridge. Store it in an airtight container. This keeps the pasta fresh and prevents strong odors from mixing. You can freeze Bang Bang Shrimp Pasta, but it affects texture. Place it in a freezer-safe container. Make sure to label it with the date. To reheat, thaw it overnight in the fridge. Heat in a skillet over low heat. Add a splash of water to keep it moist. Leftovers can be fun! Turn them into a shrimp salad. Mix with greens and a light dressing. You can also make a shrimp wrap with tortillas. Add veggies and your favorite sauce for a quick meal. Another option is to bake it into a casserole with cheese. This gives a new twist to the dish! To make Bang Bang Shrimp Pasta, follow these steps: 1. Cook the Pasta: Boil salted water and cook 8 oz of linguine until al dente. Drain it and rinse with cold water. Set aside. 2. Prepare the Shrimp: Mix 1 cup of panko breadcrumbs with a pinch of salt and pepper. Put 2 tablespoons of cornstarch in another bowl. Dip each shrimp into cornstarch, then into 2 beaten eggs, and finally coat with panko. 3. Fry the Shrimp: Heat olive oil in a skillet. Fry the shrimp until golden brown, about 2-3 minutes on each side. Drain on a paper towel. 4. Make the Bang Bang Sauce: Mix 1/2 cup mayonnaise, 3 tablespoons sweet chili sauce, 2 tablespoons sriracha, 2 tablespoons lime juice, and 2 minced garlic cloves. Adjust sriracha for spice. 5. Combine: Toss the cooked linguine with the sauce. Fold in the crispy shrimp. 6. Serve: Plate the pasta and garnish with chopped green onions. Yes, you can prepare some parts ahead of time. Here are my best tips: - Cook the Pasta: Make the pasta early and store it in the fridge. Add a little olive oil to keep it from sticking. - Prepare the Sauce: You can mix the sauce and store it in an airtight container in the fridge. This keeps flavors fresh. - Shrimp: I recommend frying the shrimp right before serving. This keeps them crispy. To find the best Bang Bang Shrimp Pasta, consider these tips: - Check Online Reviews: Use apps like Yelp or Google Maps to read recent reviews. - Ask Locals: Talk to friends or coworkers for their favorite places. - Chain Recommendations: Look for popular chains that often serve Bang Bang Shrimp Pasta, like Bonefish Grill or others. Explore these options and enjoy a delicious meal! For the complete recipe, see the Full Recipe section. In this blog post, we covered how to make Bang Bang Shrimp Pasta using fresh ingredients. We detailed the steps, from cooking pasta and preparing shrimp to making a spicy sauce. I shared tips to avoid common mistakes and suggestions for dietary needs. Remember, you can customize this dish with different proteins and veggies. Enjoy creating and sharing this meal. Use the storage tips to keep leftovers fresh or transform them into new dishes. Happy cooking!](https://easycookingbite.com/wp-content/uploads/2025/05/c548a9a3-7d36-4ec9-8aab-161a4b573df6.webp)
Craving a quick and tasty dinner? Look no further! This Bang Bang Shrimp Pasta recipe combines the perfect blend of
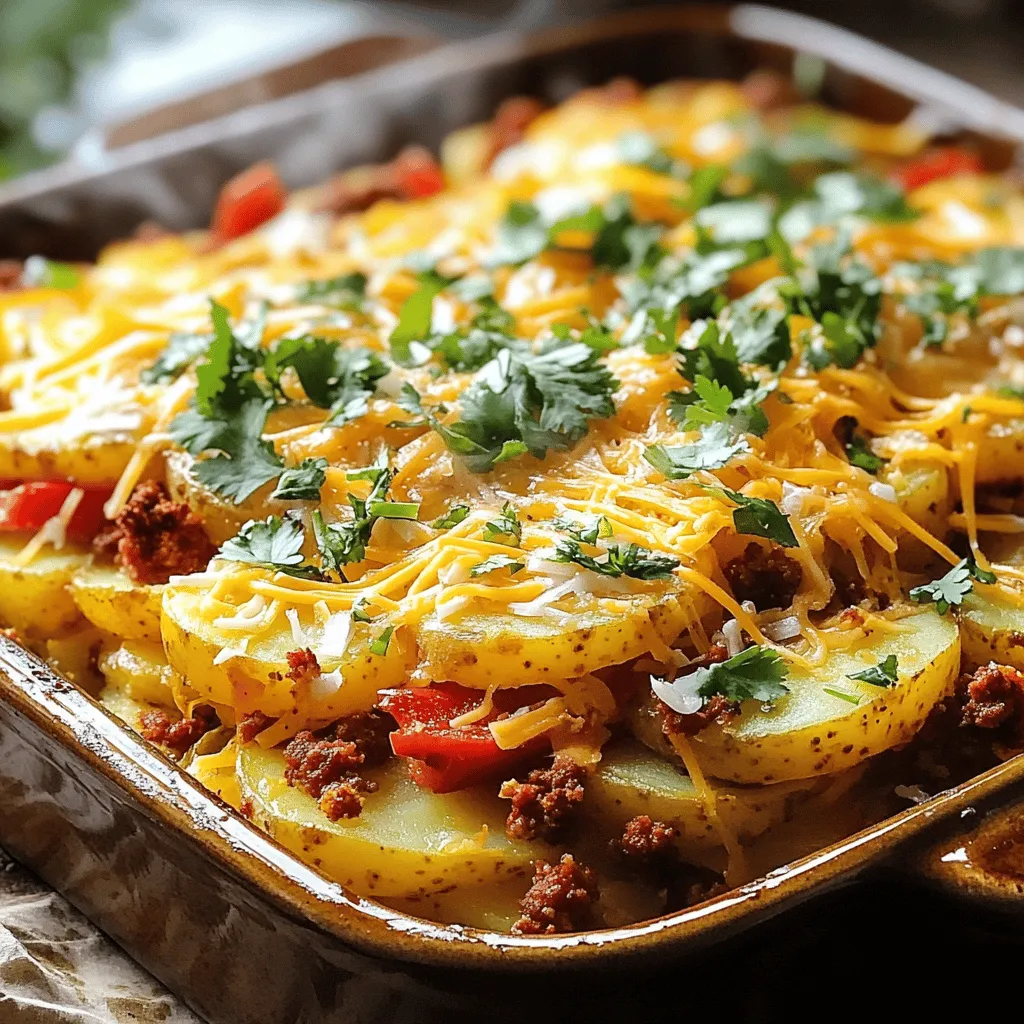
If you’re after a warm, filling dish that delights your taste buds, you’ve found it! The Chorizo & Potato Egg
