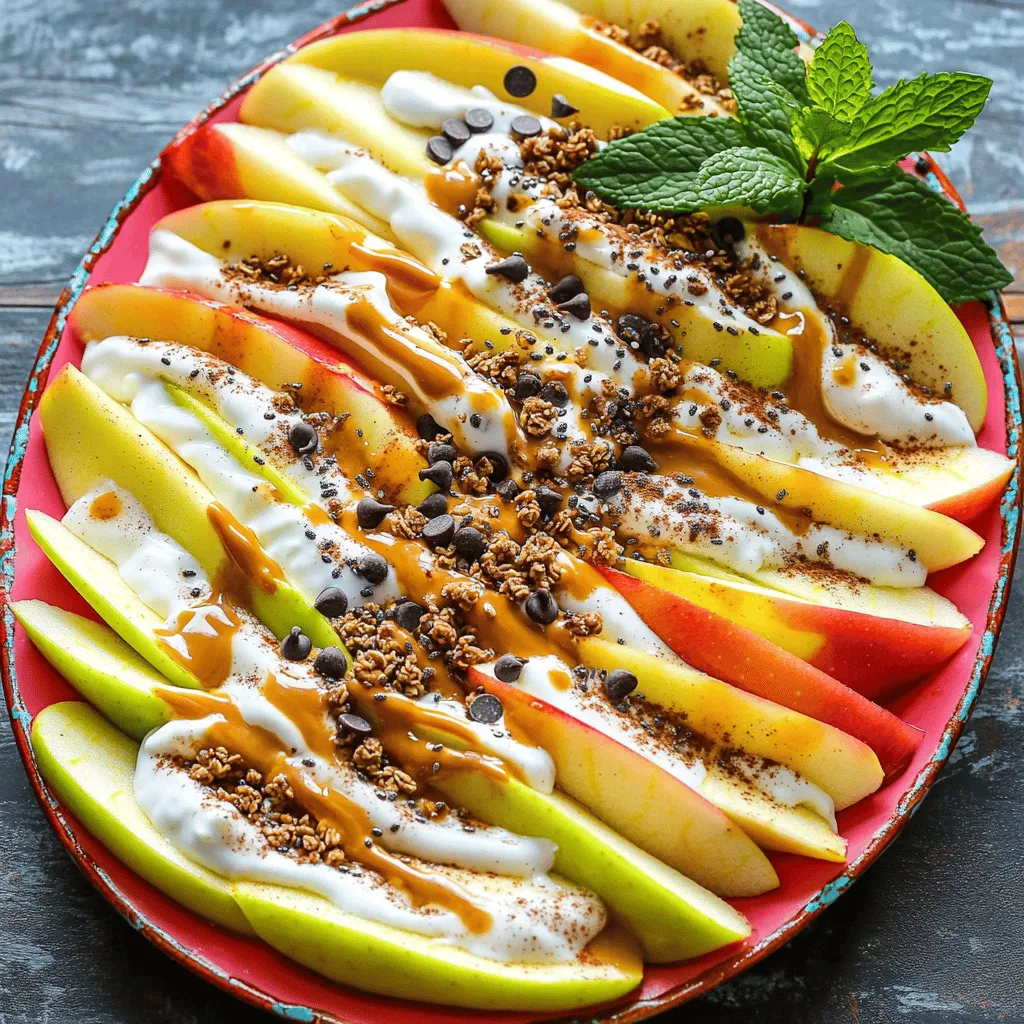
Healthy Apple Nachos Tasty Snack for Everyone
Looking for a fun and healthy snack? Try my Healthy Apple Nachos! Packed with delicious ingredients like apples, nut butter,
Looking for a fun and healthy snack? Try my Healthy Apple Nachos! Packed with delicious ingredients like apples, nut butter,

Get ready to satisfy your sweet tooth with my Milk and Cookies Fudge! This delightful recipe blends the classic flavors

If you’re craving a tasty, healthy dish, Baked Parmesan Zucchini is the answer. This simple recipe packs a crunch and
. To cook chicken evenly, start with smaller pieces. Diced chicken cooks faster and more evenly. Use medium heat to avoid burning. Sauté until golden brown, about 5-7 minutes. This locks in flavor and keeps it juicy. For perfect vegetable tenderness, add your veggies based on their cooking time. Broccoli and bell peppers take longer than shredded carrots. Cook broccoli and peppers first. Add carrots in the last few minutes of cooking. This way, they stay crisp and colorful. Serve your casserole hot, right from the oven. It tastes best when warm and cheesy. For extra fun, offer chopsticks alongside forks. This adds a playful touch to your meal. Pair your casserole with simple sides. Steamed rice or a fresh salad complements it well. You can also serve it with pickled vegetables for a tangy crunch. To prepare in advance, cook the chicken and chop the veggies a day ahead. Store them in the fridge until you're ready to mix. This saves time on busy weeknights. For reheating, use the oven to keep the cheese melted. Cover the dish with foil to prevent drying out. Heat at 350°F (175°C) until warmed through, about 20-25 minutes. Enjoy your flavorful Teriyaki Chicken Casserole any night of the week! For the full recipe, check [Full Recipe]. {{image_2}} For those who need gluten-free options, swap the teriyaki sauce for a gluten-free brand. Use tamari or coconut aminos for great flavor. You can also use rice noodles instead of rice for a fun twist. If you want a vegetarian or vegan version, replace chicken with tofu or tempeh. Make sure to press the tofu first to remove excess water. Use a plant-based teriyaki sauce to keep it vegan-friendly. To add more depth to your teriyaki chicken casserole, consider introducing spices or herbs. Ginger, garlic, or even a dash of chili powder can enhance the flavor. A sprinkle of black sesame seeds can add a nice crunch and taste. Adjusting the sweet and savory balance can also elevate your dish. If you like it sweeter, add a bit of honey or brown sugar. For extra savory notes, add soy sauce or a splash of rice vinegar. You can serve the casserole in two styles: individual portions or family-style. For individual servings, use ramekins or small bowls. This makes for a fun and easy meal, especially for kids. For a family-style casserole, serve directly from the dish. Pair it with Asian-inspired side dishes like a simple cucumber salad or steamed edamame. This adds freshness and balances the rich flavors of the casserole. For the complete cooking process, check out the Full Recipe. After you enjoy your teriyaki chicken casserole, let it cool first. This step helps avoid moisture buildup. Once cool, pack the leftovers in an airtight container. Glass or plastic containers work well. Make sure the lid seals tightly to keep air out. You can freeze your casserole before or after baking. If you freeze it before baking, cover it tightly. Use aluminum foil or plastic wrap. When ready to bake, thaw it overnight in the fridge. If you bake first, cool it completely before freezing. Thaw the baked casserole in the fridge before you reheat it. In the fridge, your casserole lasts about 3 to 4 days. If you freeze it, it can stay good for up to 3 months. Always check for signs of spoilage. If you see mold or an off smell, throw it away. You can add hot sauce or red pepper flakes to your casserole. Start with a little, then taste. If you want more heat, add a bit more. This gives your dish a nice kick. You can also try using spicy teriyaki sauce. It adds flavor along with heat. Yes, you can! Cooking in a slow cooker is a great idea. First, brown the chicken in a pan. Then, add all ingredients to the slow cooker. Cook on low for 4 to 6 hours or high for 2 to 3 hours. Just check that the chicken is fully cooked before serving. Beyond sesame seeds and green onions, try these toppings: - Crushed peanuts for crunch - Chopped cilantro for freshness - Sliced jalapeños for heat - Avocado for creaminess These toppings add flavor and make your dish look great. Feel free to mix and match for a fun twist! For the full recipe, check out the earlier section. This Teriyaki Chicken Casserole is simple and tasty. You learned about the key ingredients and how to prepare them. I shared tips for ingredient swaps and ways to make it healthy. The cooking steps will help you create a flavorful meal. Lastly, I provided storage info and answers to common questions. Enjoy making this dish for busy nights or creating new flavors. Try your own ideas and share your results!](https://easycookingbite.com/wp-content/uploads/2025/05/457ab190-b4c0-4b09-90b4-eb72b6cb8770.webp)
Weeknight dinners don’t have to be bland or boring. My Teriyaki Chicken Casserole combines juicy chicken, vibrant vegetables, and cheesy
. To make your slow cooker broccoli cheese soup even better, adjust the seasoning to your taste. Start with the basic amounts, then add more salt or pepper if needed. You can also add herbs or spices for a unique twist. Try fresh thyme or rosemary for a fresh taste. A pinch of cayenne can bring heat if you like spice. If you want a chunkier soup, save some broccoli before blending. This allows you to add texture back into the soup. You can also experiment with different cheese types. While sharp cheddar gives great flavor, a mix of gouda and mozzarella can make it creamy and rich. Don’t be afraid to try new combinations to find your perfect blend. {{image_2}} You can easily make this soup dairy-free. First, substitute heavy cream with coconut milk. This keeps the soup creamy while adding a light coconut flavor. Next, use nutritional yeast instead of cheese. Nutritional yeast gives a cheesy taste without dairy. This option is great for those with lactose issues. You can add more to your soup for extra flavor. Incorporate protein like cooked chicken or ham. This turns the soup into a hearty meal. You can also mix in other vegetables, such as carrots or cauliflower. This adds color and nutrition to the dish. Be creative and have fun with your choices! For the full recipe, check the detailed instructions above. To store leftovers in the fridge, let the soup cool first. Pour the soup into airtight containers. I recommend using glass or BPA-free plastic containers. Seal them tightly to keep out air. The soup can last for up to three days in the fridge. To freeze the soup, follow these steps: 1. Allow the soup to cool completely. 2. Pour it into freezer-safe bags or containers. 3. Remove as much air as possible to avoid freezer burn. 4. Label the bags or containers with the date. For thawing, move the soup to the fridge overnight. To reheat, warm it on the stove over low heat. Stir it often to ensure it heats evenly. You can also use a microwave, but check to avoid hot spots. Enjoy your creamy goodness anytime! You can keep the soup in the fridge for about 3 to 5 days. Make sure to store it in an airtight container. This helps keep the flavors fresh. When you reheat it, stir well and check if it needs more seasoning. Yes, you can use frozen broccoli! It works great in this recipe. Just add it straight to the slow cooker. There’s no need to thaw it first. The cooking time may be a bit shorter, so check for tenderness. Absolutely! This soup is perfect for meal prep. You can make it a day or two in advance. Let it cool completely before storing it in the fridge. Just reheat on the stove or microwave when you’re ready to enjoy. I love serving this soup with warm, crusty bread. It also pairs well with a fresh salad. For extra crunch, top with croutons. You can also sprinkle some fresh parsley for color. Want to spice it up? A dash of hot sauce adds a nice kick! For the full recipe, check out the details above. You learned how to make Slow Cooker Broccoli Cheese Soup with fresh ingredients. We walked through preparing the base, cooking, and blending for a smooth finish. Remember to experiment with flavors and textures to suit your taste. Whether you stick to the original recipe or try variations, this soup is tasty and filling. Lastly, proper storage ensures you enjoy it later. Enjoy making this warm comfort food at home!](https://easycookingbite.com/wp-content/uploads/2025/05/ead8b181-e87f-4494-a7d8-c9477fa8003d.webp)
Are you craving a warm, cheesy bowl of soup? Look no further! My Savory Slow Cooker Broccoli Cheese Soup Delight

If you’re craving a sweet treat that’s easy to make, you’ve come to the right place! These decadent carrot cake
![- 1.5 pounds baby potatoes, washed and halved - 4 tablespoons unsalted butter - 4 cloves garlic, minced - 1 cup heavy cream - 1 cup grated Parmesan cheese - 1 teaspoon dried oregano - 1 teaspoon salt - ½ teaspoon black pepper - ¼ teaspoon crushed red pepper flakes (optional) - Fresh parsley for garnish - Large pot - Strainer - Mixing bowl - Whisk To make creamy garlic sauce baby potatoes, you need a few simple ingredients. Baby potatoes are small and tender. They soak up flavors well. The garlic adds a bold taste. Butter makes the sauce rich. Heavy cream creates a smooth texture. Parmesan cheese gives depth and saltiness. Dried oregano adds a hint of earthiness. You can add crushed red pepper flakes for some heat. Fresh parsley is perfect for color and freshness. You will also need basic cooking tools. A large pot is essential for boiling the potatoes. A strainer helps you drain them easily. A mixing bowl is great for combining the sauce ingredients. A whisk makes mixing smooth and easy. For the full recipe, check out the details above. You'll enjoy making this dish! To start, we need to boil the baby potatoes. Fill a large pot with water and add a pinch of salt. Bring it to a boil. Once boiling, add the halved baby potatoes. Cook them for about 12 to 15 minutes. Check for tenderness by piercing with a fork. When they are soft, drain the potatoes and set them aside. Now, let’s make the garlic sauce. In the same pot, add four tablespoons of unsalted butter. Melt the butter over medium heat. Once melted, throw in four cloves of minced garlic. Sauté the garlic for about one to two minutes. Be careful not to burn it, as burnt garlic tastes bitter. After that, lower the heat to medium-low. Pour in one cup of heavy cream while stirring. Gradually add one cup of grated Parmesan cheese, whisking until it becomes smooth and creamy. Next, we will combine the potatoes and sauce. Stir in one teaspoon of dried oregano, one teaspoon of salt, and half a teaspoon of black pepper. If you like a little heat, add a quarter teaspoon of crushed red pepper flakes. Let the sauce simmer for another two to three minutes. This helps thicken it. Now, gently add the drained baby potatoes back into the pot. Toss them in the garlic sauce until they are well coated. Cook for an additional two to three minutes for the flavors to meld. The creamy garlic sauce baby potatoes are now ready to enjoy. You can find the full recipe for more details! To make a great creamy garlic sauce, avoid overcooked garlic. Cook it just until fragrant, about 1-2 minutes. If it burns, the sauce will taste bitter. Keep an eye on it while it cooks. Next, to achieve the desired creaminess, use heavy cream and Parmesan cheese. Stir the cheese in slowly. This helps it melt evenly. If you want a thicker sauce, let it simmer for a few extra minutes. Garnishing with fresh parsley adds color and flavor. Chop it finely and sprinkle it on top right before serving. You can also add a bit more Parmesan for a richer look. For serving, use a rustic bowl. It makes the dish feel cozy and inviting. I like to drizzle extra sauce over the potatoes for an elegant touch. If your baby potatoes are larger or smaller, adjust the cooking time. Larger potatoes may need a few extra minutes, while smaller ones cook quicker. Always check for tenderness with a fork. For reheating, do it gently. Use low heat on the stove or microwave in short bursts. This helps keep the sauce creamy and smooth without drying it out. {{image_2}} You can switch the cheese if you want. Try using mozzarella or feta. These cheeses give a different taste. You can also add herbs like basil or thyme for extra flavor. They bring freshness to the dish. To make a vegan version, use plant-based butter and cream. Nutritional yeast can replace the cheese. It adds a cheesy flavor without dairy. For gluten-free options, choose gluten-free pasta or use cornstarch to thicken the sauce. Want a spicy kick? Add more crushed red pepper flakes to the sauce. This makes it fun and zesty. You can also add vegetables, like spinach or mushrooms. These add more nutrients and a lovely texture to your creamy garlic sauce baby potatoes. Check out the Full Recipe for more on how to create this dish. To keep your creamy garlic sauce baby potatoes fresh, cool them quickly. Let them sit at room temperature for no more than two hours. Use a shallow container to help them cool faster. Store the potatoes in an airtight container. This method keeps them tasty and prevents drying out. If you want to freeze these potatoes, follow these steps. First, let the potatoes cool completely. Then, spoon them into freezer-safe bags or containers. Make sure to remove as much air as possible to avoid freezer burn. When you are ready to eat, take them out of the freezer. Thaw them in the fridge overnight. Reheat them gently on the stove or in the microwave until they are warm. For the best taste, eat the creamy garlic sauce baby potatoes within three to five days when stored in the fridge. You can tell if they are spoiled if they smell off or have a slimy texture. Always trust your senses and throw them away if unsure. Enjoy these creamy potatoes while they are fresh for the best flavor! For the full recipe, check out the [Full Recipe]. You can pair these potatoes with many tasty dishes. Here are some ideas: - Complementary side dishes: - A fresh garden salad adds crunch. - Steamed broccoli brings color and nutrition. - Roasted asparagus offers a nice contrast. - Suggested protein pairings: - Grilled chicken adds flavor. - Baked salmon complements the creaminess. - Tofu works well for a plant-based meal. Yes, you can prep ahead. - Prep and cooking timeline: - Cook and cool the potatoes, then store in the fridge. - Make the garlic sauce and keep it separate. - Reheating tips: - Heat the sauce gently on low. - Toss in the baby potatoes and warm until heated through. You can add heat to fit your taste. - Additional spice options: - Use more crushed red pepper flakes for extra kick. - Stir in some cayenne pepper for a bolder flavor. - Adjusting flavor balance: - Taste as you go to balance the heat. - Add more cream if it gets too spicy. For the full recipe, visit [Full Recipe]. In this blog post, I covered how to make creamy garlic sauce baby potatoes. We went through the key ingredients, cooking tools, and step-by-step instructions. I also shared tips for perfecting the sauce and ideas for presentation. You can modify the recipe for dietary needs or to boost flavors. Lastly, I gave insights on proper storage and addressing common questions. Enjoy experimenting with this dish, and let it bring new flavors to your table!](https://easycookingbite.com/wp-content/uploads/2025/05/342bc3fd-8252-43d6-97d5-29aa2dbfd8cf.webp)
Are you ready to elevate your potato game? In this article, I’ll show you how to make Easy Creamy Garlic
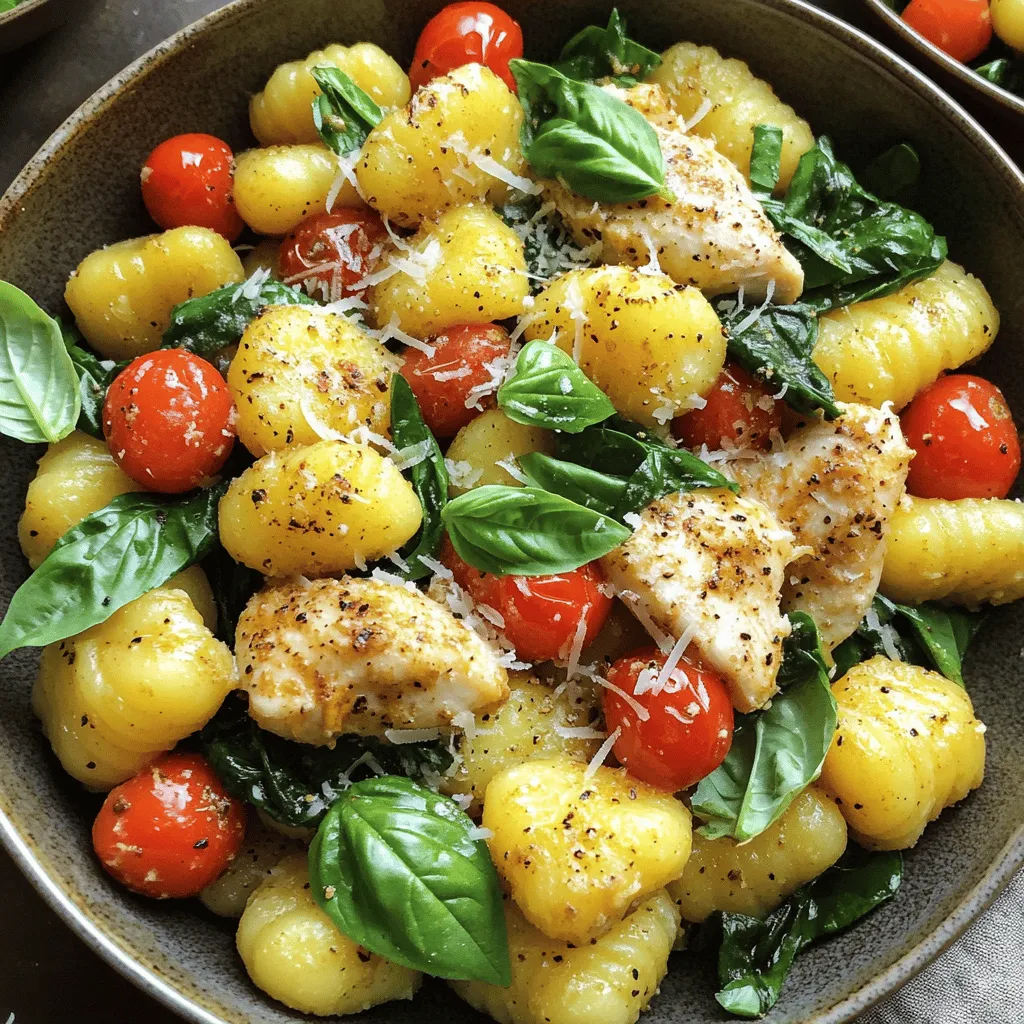
Are you ready for a delicious one-pan meal that’s quick and easy? This Garlic Chicken Gnocchi Skillet packs amazing flavors
![Let’s gather everything we need for this tasty dish. Here’s a simple list of ingredients: - 1 cup brown or green lentils, rinsed - 1 medium onion, chopped - 3 cloves garlic, minced - 1 medium carrot, diced - 1 medium red bell pepper, chopped - 2 teaspoons ground cumin - 1 teaspoon ground coriander - 1 teaspoon ground cinnamon - 1/2 teaspoon smoked paprika - 1/4 teaspoon cayenne pepper (optional, for heat) - 1 can (14 oz) diced tomatoes, with juices - 4 cups vegetable broth - 1 cup fresh spinach, chopped - Salt and pepper to taste - 2 tablespoons olive oil - Fresh cilantro or parsley for garnish You can find the full recipe [Full Recipe]. Each ingredient brings its own charm to the dish. The lentils are hearty and filling, while the spices add warmth and depth. The veggies add freshness and color. You’ll love how easy it is to make this meal in your Instant Pot! - Set the Instant Pot to Sauté mode. - Heat 2 tablespoons of olive oil until hot. - Add 1 chopped onion and cook until translucent, about 3-4 minutes. - Stir in 3 minced garlic cloves, 1 diced carrot, and 1 chopped bell pepper. Cook for another 2-3 minutes. - Mix in 2 teaspoons of ground cumin, 1 teaspoon of ground coriander, 1 teaspoon of ground cinnamon, and 1/2 teaspoon of smoked paprika. - If you like heat, add 1/4 teaspoon of cayenne pepper. - Cook for about 1 minute until fragrant. - Add 1 cup of rinsed lentils, 1 can of diced tomatoes (with juices), and 4 cups of vegetable broth to the pot. - Stir everything together so it combines well. - Close the lid and set the valve to “Sealing.” - Pressure cook on high for 15 minutes. You can follow the [Full Recipe] for more details on this delightful dish. How to rinse lentils properly Rinsing lentils is key. Place them in a fine-mesh sieve. Rinse under cool water for about 30 seconds. This removes dust and small debris. You want your lentils clean before cooking. Best practices for sautéing vegetables in Instant Pot To get great flavor, use the Sauté mode. Heat olive oil in the pot. Add onions first; cook for 3-4 minutes until soft. Then, mix in garlic, carrot, and bell pepper. Stir them for 2-3 minutes. This builds a tasty base for your dish. Suggestions for spice adjustments If you like heat, add more cayenne pepper. For a richer taste, bump up the cumin. You can also try adding a pinch of nutmeg for depth. Adjust spices to match your own taste. Ways to enhance with herbs or additional ingredients Fresh herbs make a big difference! Add chopped cilantro or parsley at the end. You can also stir in a squeeze of lemon juice for brightness. If you want more veggies, try adding zucchini or sweet potatoes. Recommended pairings (rice, bread, etc.) Serve these lentils over fluffy rice or with warm pita bread. They also pair well with couscous for a nice twist. You can create a full meal in minutes. Ideal garnishes for presentation Garnish with fresh herbs like cilantro or parsley. A drizzle of olive oil can add flavor and shine. If you want an extra touch, sprinkle toasted nuts on top. They add crunch and contrast to the soft lentils. {{image_2}} You can boost your Moroccan instant pot lentils with protein. Here are some tasty options: - Chicken: Add diced chicken breast for a hearty meal. - Sausage: Use slices of sausage for a smoky flavor. - Tofu: For a vegetarian option, try firm tofu. If you want vegan protein, here are some substitutes: - Chickpeas: Add canned or cooked chickpeas for extra protein. - Quinoa: This grain packs a protein punch. You can switch up the veggies based on what you have. Here are some ideas: - Zucchini: Chop and add for a fresh taste. - Sweet Potatoes: Diced sweet potatoes bring a sweet note. - Kale: Substitute spinach with kale for more texture. Seasonal swaps can add fun: - Spring: Use asparagus or peas for bright flavors. - Fall: Try pumpkin or butternut squash for warmth. Changing spices can create new tastes. Here’s what to try: - Ras el Hanout: This mix adds depth and warmth. - Garam Masala: For a different twist, use this spice blend. Adjust the heat level to your liking: - Mild: Skip the cayenne for a gentle taste. - Spicy: Add more cayenne or fresh chili peppers for kick. Experiment with these variations to make the dish your own! For more details, check out the Full Recipe. To store leftovers, place them in an airtight container. Make sure the dish cools down first. This helps keep the lentils fresh. You can store them in the fridge for up to five days. After that, they may lose flavor and texture. For freezing Moroccan lentils, use freezer-safe containers. Leave some space at the top, as the lentils may expand. They stay good in the freezer for about three months. To thaw, move the container to the fridge overnight. You can also use a microwave on low power. You can reheat lentils in a microwave or on the stove. If using the stove, heat them on low. Stir often to keep the texture nice. Add a splash of water or broth if they seem dry. This keeps the flavors fresh and vibrant. Cooking lentils in an Instant Pot is quick. Brown or green lentils take about 15 minutes. Red lentils cook even faster, usually around 10 minutes. Always add time for pressure build-up and release. Yes, you can use dried lentils. Rinse them well before adding. They will absorb more liquid, so adjust the broth amount. Dried lentils also need more time to cook. Moroccan lentils pair well with many sides. Here are some great options: - Couscous: Fluffy and light, it soaks up flavors. - Rice: White or brown rice adds texture. - Salads: A fresh salad brightens the meal. - Flatbreads: Serve with pita or naan for dipping. Yes, this recipe is gluten-free. All the ingredients, like lentils and spices, contain no gluten. If you add bread or couscous, opt for gluten-free options. This blog post covered how to make a tasty Moroccan lentil dish in an Instant Pot. You learned about key ingredients like lentils, veggies, and spices. We walked through easy steps from sautéing to pressure cooking. Plus, I shared tips on adding proteins, adjusting flavors, and storing leftovers. In closing, this dish is healthy, simple, and full of flavor. You can easily change it up based on what you like or have on hand. Enjoy making this meal for you and your loved ones!](https://easycookingbite.com/wp-content/uploads/2025/05/eea30fdc-1109-4759-afde-bb60f12b9cd2.webp)
Are you ready to make a delicious and simple meal? This Moroccan Instant Pot Lentils recipe packs a punch with
![For the 10 Minute Honey Garlic Shrimp, gather these key items: - 1 pound large shrimp, peeled and deveined - 3 tablespoons honey - 3 tablespoons soy sauce (low sodium recommended) - 4 cloves garlic, minced - 1 tablespoon fresh ginger, minced - 2 tablespoons sesame oil (or olive oil) - 1 teaspoon red pepper flakes (adjust to taste) - 2 green onions, thinly sliced (for garnish) - Sesame seeds (for garnish) - Cooked rice or quinoa (for serving) These ingredients come together to create a tasty dish. The shrimp is the star, but the honey and garlic add depth. To make this dish, you will need: - A large skillet - A small bowl - A whisk or fork - A cutting board - A sharp knife These tools help you cook quickly and efficiently. The skillet is key for that perfect sauté. Feel free to change some ingredients to suit your taste: - Use chicken or tofu instead of shrimp for different proteins. - Swap honey for maple syrup for a vegan option. - Use tamari instead of soy sauce for a gluten-free version. - Add vegetables like bell peppers or snap peas for more color and flavor. These swaps keep the dish fun and fresh. Experimenting can lead to new favorites! For the full recipe, check the details provided. To start, gather your ingredients. You need shrimp, honey, soy sauce, garlic, ginger, sesame oil, red pepper flakes, green onions, and sesame seeds. First, peel and devein the shrimp if needed. This saves time later. Mince the garlic and ginger finely. This ensures you get their full flavor. In a small bowl, mix the honey, soy sauce, garlic, ginger, and red pepper flakes. Whisk them together until they blend well. Set this sauce aside; you will use it soon. Now, heat the sesame oil in a large skillet over medium-high heat. Wait until the oil shimmers; this means it's hot. Add the shrimp in a single layer. Let them cook for about 2-3 minutes. Watch as they turn pink and opaque. This is your sign they are cooking well. Next, pour the honey garlic sauce over the shrimp. Stir gently to coat each shrimp evenly. Cook for another 2-3 minutes. This lets the sauce thicken and cling to the shrimp. Stir occasionally to keep the shrimp from sticking. Once done, take the skillet off the heat. To serve, use a large bowl. Place a bed of cooked rice or quinoa at the bottom. This helps soak up the sauce. Add the shrimp on top. Drizzle any extra sauce over them for great flavor. For a colorful touch, sprinkle sliced green onions and sesame seeds on top. These give a nice crunch and look good. Enjoy this quick dish right away for the best taste! For the full recipe, refer back to the ingredients and instructions. When making honey garlic shrimp, a few mistakes can ruin your dish. First, do not overcook the shrimp. They should turn pink and opaque in just 2-3 minutes. If you cook them too long, they become tough. Second, make sure your sauce ingredients are mixed well. If the honey settles at the bottom, it won't coat the shrimp evenly. Lastly, be careful with the heat. If your skillet is too hot, the sauce may burn. To get that perfect sauce, start by mixing the honey, soy sauce, garlic, ginger, and red pepper flakes. Whisk them well until they blend smoothly. You want a thick but pourable sauce. If your sauce is too thin, let it cook a bit longer after adding it to the shrimp. Stir it often. This helps it thicken without burning. If it’s too thick, add a splash of water or extra soy sauce to loosen it up. Cooking shrimp is simple if you follow a few best practices. Always use fresh or well-thawed shrimp. Frozen shrimp can be watery if not thawed properly. Heat your skillet before adding oil. This ensures the shrimp sears well. Place the shrimp in a single layer in the skillet. Avoid crowding them. This helps them cook evenly. Finally, add the sauce at the right time. Pour it in when the shrimp are just about done. This way, they soak up the flavors without overcooking. For the complete recipe, check the Full Recipe section. {{image_2}} Want a kick? Add more heat! Mix in extra red pepper flakes. For a bolder flavor, try fresh chopped chili peppers. This twist makes the dish exciting and full of zest. You can also use sriracha or chili paste for more spice. Adjust the heat to your liking. If you prefer a plant-based option, swap shrimp for tofu. Use firm or extra-firm tofu for the best texture. Cut the tofu into cubes and follow the same steps. Sauté the tofu until golden brown. Then, pour the honey garlic sauce over it. This creates a tasty dish that everyone can enjoy. Boost nutrition by adding veggies. Bell peppers, snap peas, or broccoli work great. Cut the vegetables into bite-sized pieces. Sauté them for a few minutes before adding shrimp or tofu. This method not only adds color but also makes the meal more filling. You can even serve it over a bed of greens for added crunch. For the full recipe, check out the [Full Recipe]. After enjoying your honey garlic shrimp, let the leftovers cool down. Place them in an airtight container. Store the container in the fridge. The shrimp will stay fresh for 2-3 days. Just make sure to seal it well to keep moisture out. To reheat your shrimp, you have a few options. You can use a microwave for quick heating. Place the shrimp on a plate and cover it with a damp paper towel. Heat in short bursts of 30 seconds until warm. You can also reheat them on the stove. Just add a bit of oil to a pan and heat over medium. Stir gently until warmed through. If you want to save your honey garlic shrimp for later, freezing is a great option. Place the cooled shrimp in a freezer-safe bag. Remove as much air as possible before sealing. Label the bag with the date. The shrimp can last up to 3 months in the freezer. When you're ready to eat, thaw in the fridge overnight. Then, reheat as mentioned above for a quick meal. For the complete recipe, check out the Full Recipe section! You can serve honey garlic shrimp with cooked rice or quinoa. Both soak up the sauce well. Steamed broccoli or snap peas add a nice crunch. You might also enjoy a fresh salad on the side. Pairing it with garlic bread can be a fun option, too. Yes, you can use frozen shrimp. Just thaw them before cooking. Place them in cold water for about 15 minutes. This helps them cook evenly. Ensure they are peeled and deveined for best results. Frozen shrimp may take a bit longer to cook, so keep an eye on them. To make your honey garlic shrimp less sweet, reduce the honey amount. Try using only two tablespoons instead of three. Adding a splash of lime juice can also balance the sweetness. You can include more soy sauce for a savory touch. Adjusting the red pepper flakes will add a nice kick, too. Check the full recipe for more tips! This blog post covered all you need for cooking honey garlic shrimp. We listed essential ingredients, tools, and smart substitutions. I walked you through each step, from preparation to serving. You learned helpful tips for perfect sauce and shrimp. We explored tasty variations and how to store leftovers. Remember, cooking is fun! Don’t hesitate to experiment with flavors. Your skills will grow with practice. Dive in and enjoy the process. Happy cooking!](https://easycookingbite.com/wp-content/uploads/2025/05/6536ecc5-aadb-43bc-bfe2-b8a639d971d1.webp)
Are you in a rush but craving a tasty meal? Look no further! This 10 Minute Honey Garlic Shrimp recipe
