Skip to content
DisclaimerTerms Of UseGDPR PolicyCookie Policy

easycookingbite

  • Home
  • Drinks
  • Appetizers
  • Dinner
  • Dessert
  • About
  • Contact
  • Privacy Policy
DisclaimerTerms Of UseGDPR PolicyCookie Policy

Lily

For Sweet Pineapple Chicken & Rice, you will need: - 2 cups jasmine rice - 4 cups chicken broth - 1 lb boneless, skinless chicken breasts, cubed - 1 cup fresh pineapple, diced (or canned, drained) - 1 red bell pepper, diced - 1 cup sugar snap peas, trimmed - 3 tablespoons soy sauce (low sodium recommended) - 2 tablespoons honey - 1 tablespoon sesame oil - 2 cloves garlic, minced - 1 inch ginger, minced - 3 green onions, sliced (for garnish) - Sesame seeds (for garnish) - Salt and pepper to taste If you cannot find jasmine rice, you can use basmati or long-grain rice. For low-sodium soy sauce, regular soy sauce works but adds more salt. If you want to avoid sugar snap peas, try green beans or broccoli florets. Fresh pineapple gives the best taste, but canned pineapple is fine if drained well. You can also swap honey with maple syrup for a different flavor. Each serving of Sweet Pineapple Chicken & Rice contains approximately: - Calories: 450 - Protein: 30g - Carbohydrates: 60g - Fat: 10g - Fiber: 3g - Sugars: 8g This dish is a great balance of protein and carbs, making it a filling meal. It's also rich in vitamins from the vegetables and pineapple. You can find the full recipe to see how to make this tasty dish come together. To cook the rice, start by bringing 4 cups of chicken broth to a boil in a medium pot. Once boiling, add 2 cups of jasmine rice. Cover the pot and reduce the heat to low. Let it simmer for about 15 minutes. The rice will absorb all the liquid. After 15 minutes, take it off the heat and let it sit, covered, for 5 more minutes. This step makes the rice fluffy and perfect for our dish. While the rice cooks, heat 1 tablespoon of sesame oil in a large skillet or wok over medium-high heat. Season 1 pound of cubed chicken breasts with salt and pepper. Add the chicken to the hot skillet. Cook it for 5 to 7 minutes. Stir occasionally until the chicken gets a nice brown color and is fully cooked. Then, add 2 cloves of minced garlic and 1 inch of minced ginger. Sauté this mix for about 1 minute until you smell the garlic and ginger. Next, stir in 1 diced red bell pepper and 1 cup of sugar snap peas. Cook these for 3 to 4 minutes. You want them to be slightly tender but still crunchy. This adds great texture and color to your meal. In a small bowl, whisk together 3 tablespoons of low-sodium soy sauce, 2 tablespoons of honey, and 1 cup of diced pineapple. Pour this sauce over the chicken and veggies in the skillet. Stir everything to coat well. Let it simmer for 2 to 3 minutes. This helps all the flavors mix together. Now, fluff the cooked jasmine rice with a fork. Add the rice directly into the skillet, mixing it gently with the chicken and veggies. Make sure everything is combined evenly. To serve, divide the Sweet Pineapple Chicken & Rice into bowls. Garnish with sliced green onions and a sprinkle of sesame seeds. Enjoy this colorful and tasty meal that brings smiles to the table! You can find the full recipe for more details. To boost flavor, use fresh ingredients. Fresh pineapple adds sweetness. It balances the savory chicken. The soy sauce brings depth. I prefer low sodium to keep it lighter. Always taste as you cook. Adjust salt, pepper, or honey to suit your taste. You can switch up proteins in this dish. Shrimp works great if you want seafood. Firm tofu is a fantastic choice for a vegetarian meal. Just cook it until golden brown. You can also use pork or beef. Each protein adds its own unique flavor. One mistake is overcooking the chicken. It should be juicy and tender. Keep an eye on the heat when cooking. Another mistake is not tasting your dish. Always adjust flavors before serving. Lastly, don’t skip the garnishes. Green onions and sesame seeds make the dish pop. For the full recipe, check out the Sweet Pineapple Chicken & Rice section. {{image_2}} You can easily change the veggies in this dish. For a colorful mix, try adding: - Broccoli florets - Carrots, thinly sliced - Zucchini, diced - Baby corn These veggies bring bright colors and great taste. Each one adds a unique crunch. You can even add a mix of your favorites. They all work well with the sweet pineapple. If you love heat, add some spice! Chili flakes or sriracha can give this meal a kick. Here's how: - Stir in 1 teaspoon of chili flakes with the garlic and ginger. - For sriracha, drizzle 1-2 tablespoons into the sauce mix. This twist makes your Sweet Pineapple Chicken & Rice even more exciting. The sweet and spicy balance creates a fun flavor combo. Pairing sides with your Sweet Pineapple Chicken & Rice can elevate the meal. Here are some ideas: - Steamed broccoli for extra greens - A simple green salad for freshness - Crispy spring rolls for a crunchy bite These sides bring great flavors and textures. They enhance the overall meal experience, making it more enjoyable. Remember, serving is all about balance! For full details on making this dish, check the Full Recipe. To keep your Sweet Pineapple Chicken & Rice fresh, store it in an airtight container. Make sure to let the dish cool to room temperature before sealing it. This helps prevent moisture buildup that can lead to spoilage. You can also divide it into smaller portions. This way, you can enjoy it later without reheating the whole batch. When it's time to enjoy your leftovers, reheat the dish in the microwave. Place a portion in a microwave-safe bowl, cover it loosely with a lid or plastic wrap, and heat for 2-3 minutes. Stir halfway through to ensure even heating. If you want to use a skillet, heat it over medium heat with a splash of chicken broth to keep it moist. Stir until it's heated through. In the refrigerator, Sweet Pineapple Chicken & Rice lasts about 3-4 days. Make sure to check for any signs of spoilage before eating. If you want to keep it longer, freeze it. In the freezer, it can last up to 3 months. Just remember to label the container with the date. This helps you keep track of how long it has been stored. For the best taste, try to use it within the first month of freezing. To make Sweet Pineapple Chicken & Rice gluten-free, use gluten-free soy sauce. You can find this in most grocery stores. Substitute regular soy sauce with the gluten-free option. Ensure your chicken broth is also gluten-free. Avoid any sauces or ingredients that may have gluten. This way, you keep the flavor and make it safe for all diets. Yes, you can use brown rice instead of jasmine rice. Brown rice has a nuttier taste and a chewier texture. It does take longer to cook, so adjust the cooking time. Typically, brown rice needs about 40-45 minutes to cook. Make sure to use enough chicken broth for added flavor. This swap will give you a heartier meal. Other fruits can add a nice twist to Sweet Pineapple Chicken & Rice. Mango, for example, brings sweetness and a tropical vibe. You could also try diced peaches or even fresh orange segments. These fruits can enhance the flavor and add freshness. They pair well with the chicken and rice, making the dish even more vibrant. In this blog post, we covered how to make Sweet Pineapple Chicken & Rice. I shared ingredient lists, step-by-step instructions, and tips for perfecting the dish. You learned how to enhance flavor and avoid common mistakes. We also discussed variations like adding spicy elements and alternative vegetables. In closing, this dish is easy to customize and delightful. You can adjust flavors and ingredients to suit your taste. Enjoy cooking and creating your version!

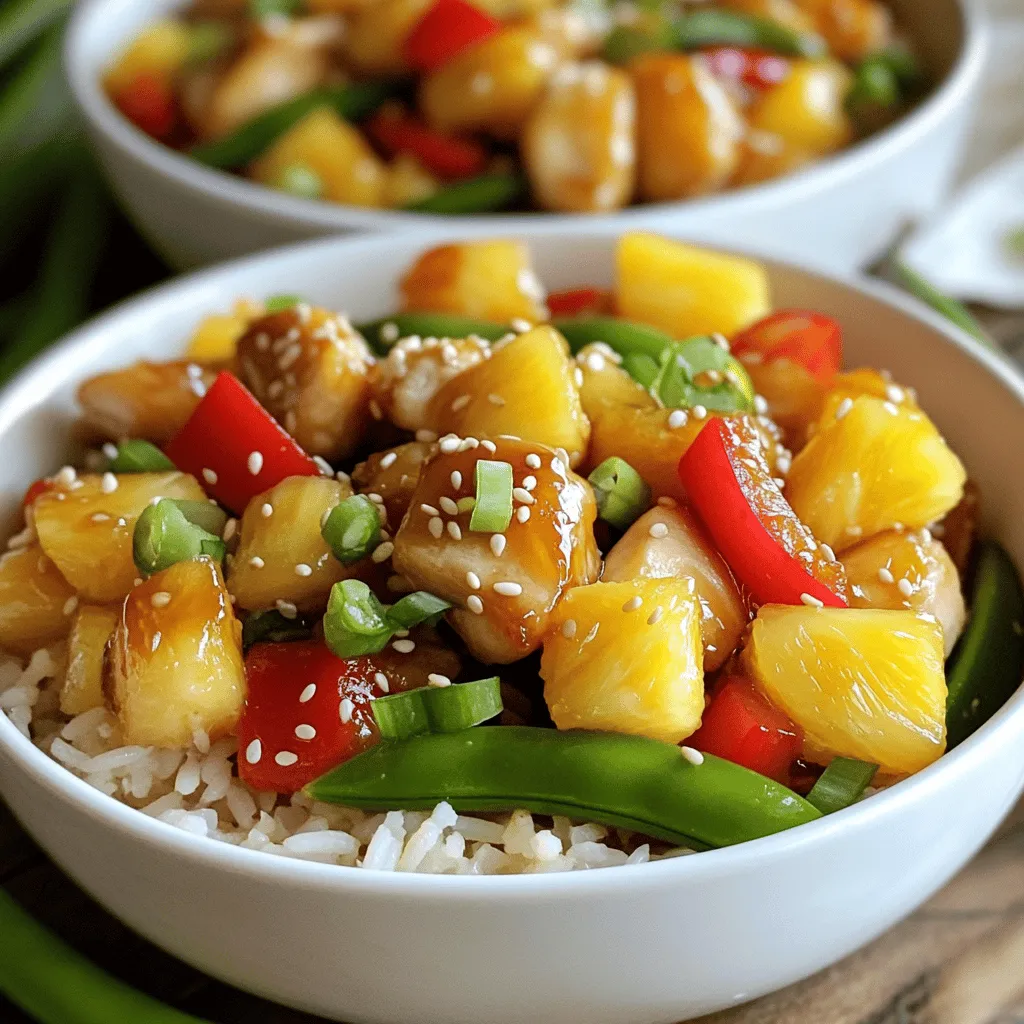
Sweet Pineapple Chicken & Rice Flavorful Family Meal

Looking for a fun and tasty dinner idea? Try my Sweet Pineapple Chicken & Rice! This dish combines juicy chicken,

- 2 cups all-purpose flour - 1 cup granulated sugar - 1 tablespoon baking powder - ½ teaspoon salt - 1 teaspoon ground cinnamon - 1 cup whole milk - ½ cup unsalted butter, melted - 2 large eggs - 1 teaspoon vanilla extract - ½ cup packed brown sugar - 2 tablespoons ground cinnamon - 4 tablespoons unsalted butter, softened - 4 oz cream cheese, softened - 1 cup powdered sugar - 2 tablespoons milk - ½ teaspoon vanilla extract This recipe for cinnamon roll cake uses simple ingredients. You need both dry and wet items to create a soft and flavorful base. The dry ingredients mix together easily. First, whisk the flour, sugar, baking powder, salt, and cinnamon. The wet ingredients blend well too. Mix the milk, melted butter, eggs, and vanilla extract in another bowl. The cinnamon swirl adds a tasty twist. You’ll want brown sugar, cinnamon, and softened butter for that. The cream cheese glaze is a nice finish. It combines cream cheese, powdered sugar, milk, and vanilla extract. This glaze makes the cake even more special. For the full recipe, check the earlier section. Enjoy baking this delicious treat! 1. Preheat the Oven: First, set your oven to 350°F (175°C). Grab a 9x13 inch baking dish and grease it well. This helps the cake release easily after baking. 2. Mixing Dry Ingredients: In a large bowl, add 2 cups of all-purpose flour, 1 cup of granulated sugar, 1 tablespoon of baking powder, ½ teaspoon of salt, and 1 teaspoon of ground cinnamon. Whisk these together until they blend well. 3. Combining Wet Ingredients: In another bowl, combine 1 cup of whole milk, ½ cup of melted unsalted butter, 2 large eggs, and 1 teaspoon of vanilla extract. Mix them until smooth. Gradually add this wet mix to the dry mix. Stir until just combined, but don't overmix. 1. Making the Cinnamon Swirl Paste: In a small bowl, combine ½ cup of packed brown sugar, 2 tablespoons of ground cinnamon, and 4 tablespoons of softened unsalted butter. Mix until it forms a smooth paste. 2. Layering the Batter with Cinnamon Swirl: Pour half of the cake batter into the greased dish. Spread it evenly. Next, spoon dollops of the cinnamon swirl paste over the batter. Make sure to distribute it as evenly as you can. 1. Pouring the Remaining Batter: Carefully pour the rest of the cake batter over the cinnamon swirl. Use a spatula to spread it out evenly. 2. Baking the Cake to Perfection: Place the baking dish in your preheated oven. Bake for 28-35 minutes. To check if it’s done, insert a toothpick into the center. If it comes out clean, the cake is ready. 3. Making the Cream Cheese Glaze: While the cake bakes, prepare your glaze. In a medium bowl, whisk 4 oz of softened cream cheese until smooth. Gradually add 1 cup of powdered sugar, 2 tablespoons of milk, and ½ teaspoon of vanilla extract. Mix until creamy and pourable. 1. Cooling Time After Baking: Once the cake is done, take it out of the oven. Let it cool in the pan for about 10 minutes. This helps it set and makes it easier to cut. 2. Drizzling the Glaze Over the Cake: After cooling, drizzle your cream cheese glaze over the warm cake. Let it soak in for extra flavor. Enjoy making this cinnamon roll cake! For the full recipe, check out the [Full Recipe]. To keep your cake moist, follow these tips: - Use fresh ingredients. Old flour or baking powder can ruin your cake. - Avoid overmixing the batter. Mix just until combined for the best texture. - Consider adding a little more milk if the batter feels too thick. For the best cinnamon swirl, try this: - Make sure your cinnamon swirl paste is smooth. This helps it spread easily. - When layering the batter, use dollops of the swirl. This makes it easier to mix in. - After adding the top layer of batter, swirl gently. A knife or skewer works well. For a beautiful finish, slice the cake into squares. Serve on a nice platter. Here are some garnishing ideas: - Sprinkle additional cinnamon on top for color and flavor. - Add chopped nuts for a crunchy texture. - Drizzle extra cream cheese glaze over the top for a sweet touch. For pairing options, consider serving with: - Fresh fruit, like berries or sliced bananas. - A scoop of vanilla ice cream to complement the warmth of the cake. - A hot cup of coffee or tea to balance the sweetness. You can find the full recipe to make this delightful treat! {{image_2}} You can change this cinnamon roll cake to fit your taste. Adding nuts or fruits boosts flavor and texture. Consider adding walnuts, pecans, or even apples. These additions bring a lovely crunch and sweetness. Swirls of chocolate or caramel also make a fun twist. Just swirl in melted chocolate or caramel sauce into the batter. This adds richness and makes the cake even more delightful. Feel free to mix and match these ideas for a unique treat. If you need gluten-free options, you can use a gluten-free flour blend. Brands like Bob's Red Mill or King Arthur offer great choices. This way, everyone can enjoy this cake. For a vegan adaptation, replace eggs with flax eggs. Mix one tablespoon of flaxseed meal with three tablespoons of water for each egg. Use almond milk or oat milk instead of whole milk. Choose plant-based butter for a rich flavor. These adjustments keep the cake tasty and enjoyable for all diets. For the full recipe, refer to the Cinnamon Swirl Dream Cake section. To keep your cinnamon roll cake fresh, store it in the fridge. Use an airtight container or cover it tightly with plastic wrap. This helps keep moisture in and prevents the cake from drying out. In the fridge, the cake lasts for about 3 to 5 days. It's best to eat it sooner for the best taste. If you want to save your cake for later, freezing is a great option. First, let the cake cool completely. Then, cut it into slices. Wrap each slice in plastic wrap. Place the wrapped slices in a freezer bag or container. This method helps to keep the cake fresh for up to 3 months. When you're ready to enjoy the cake, take it out of the freezer. Place the slices in the fridge to thaw overnight. If you're in a hurry, you can thaw them at room temperature for a few hours. To reheat, pop the slices in the microwave for about 15-20 seconds. This adds warmth and makes the glaze nice and gooey. Can I use a different type of flour? Yes, you can use whole wheat flour or gluten-free flour. Each option gives a unique taste. Whole wheat may add a nutty flavor. Gluten-free flour can work well, too. Just ensure you check the blend for best results. How do I know when the cake is done baking? Check the cake at 28 minutes. Insert a toothpick in the center. If it comes out clean, the cake is ready. If it has wet batter on it, bake for a few more minutes. Can I make this cake in advance? Absolutely! You can bake the cake a day before. Let it cool, then cover it tightly. Store it in the fridge. Just reheat slices in the microwave for a few seconds. What can I use instead of cream cheese for the glaze? You can use Greek yogurt or a dairy-free cream cheese. Greek yogurt gives a nice tang. If using dairy-free, check the texture to ensure it can drizzle well. For the full recipe, refer back to the beginning of this article. You learned how to make a delicious cinnamon roll cake. We covered ingredients, step-by-step instructions, and helpful tips. I shared variations you can try, as well as storage info for your cake. This treat is perfect for any occasion. With practice, you can refine your skills. Have fun in the kitchen, and share your tasty results!

Cinnamon Roll Cake Soft and Flavorful Delight Recipe

Have you ever craved a soft, warm cinnamon roll but wanted a quicker option? I’ve got just the treat for

To make a delicious Mango Coconut Chia Pudding, you need a few simple ingredients. Here’s what you will gather: - 1 cup coconut milk (canned or carton) - 1/2 cup almond milk (or any milk of choice) - 1/4 cup chia seeds - 2 tablespoons maple syrup (or honey) - 1 ripe mango, diced - 1/2 teaspoon vanilla extract - Pinch of salt - Toasted coconut flakes (for garnish) - Fresh mint leaves (for garnish) These ingredients create a creamy and tasty treat. The chia seeds are key. They soak up liquid and turn into a pudding-like texture. The coconut milk adds richness, while almond milk keeps it light. Sweeteners like maple syrup or honey give it a nice touch of sweetness. Use ripe mango for the best flavor. It adds a burst of color and freshness. Don’t forget the garnishes! Toasted coconut flakes add crunch, and fresh mint leaves bring a pop of color. Enjoy collecting these ingredients. They will come together for a healthy delight! {{ingredient_image_1}} 1. In a mixing bowl, combine 1 cup of coconut milk, 1/2 cup of almond milk, and 2 tablespoons of maple syrup. Whisk until mixed well. 2. Add 1/4 cup of chia seeds, 1/2 teaspoon of vanilla extract, and a pinch of salt. Stir to spread the chia seeds evenly. 3. Cover the bowl with plastic wrap. Place it in the fridge for at least 4 hours or overnight. This helps the chia seeds swell and form a pudding. 1. When ready to serve, stir the chia pudding to mix. 2. Layer the pudding in small bowls or glasses. Add diced mango between layers. Repeat until the bowls are full. 3. Top each bowl with toasted coconut flakes. Add fresh mint leaves for a nice touch. 1. If the pudding is too thick, add a bit more milk. Stir until you reach your desired consistency. 2. You can play with the milk amounts for a creamier texture. Experiment to find what you like best! How to prevent clumps in chia pudding To avoid clumps, start by mixing the chia seeds with the liquids. Stir well right after you add the seeds. This helps each seed absorb liquid evenly. If you find clumps later, stir the pudding again before serving. Letting it sit for a longer time also helps the seeds expand properly. Ensuring optimal flavor profiles To boost the flavor, use ripe mangoes that are sweet and juicy. Fresh vanilla extract adds a rich taste, too. Adjust the sweetness by adding more maple syrup or honey if needed. A pinch of salt enhances all the flavors, making each bite delightful. Pairing with other fruits or nuts You can add other fruits like strawberries, blueberries, or bananas. Nuts such as almonds or walnuts add a nice crunch. Layer these fruits and nuts with the pudding for a colorful treat. Perfecting the garnish For garnish, toasted coconut flakes add texture and a tropical vibe. Fresh mint leaves not only look nice but also add a refreshing taste. A few small pieces of diced mango on top can make it look even more inviting. Pro Tips Tip for Perfect Consistency: Ensure that you whisk the chia seeds thoroughly into the liquid; this prevents clumping and helps achieve that smooth pudding texture. Choosing the Right Mango: Use a ripe, sweet mango for the best flavor. A good mango will give slightly when pressed and have a fragrant aroma. Variations for Flavor: Feel free to experiment with other fruits like pineapple or berries; they can add unique flavors and colors to your chia pudding. Make Ahead for Convenience: This pudding can be made in advance and stored in the fridge for up to 5 days, making it a great option for meal prep. {{image_2}} You can mix up your mango coconut chia pudding by using different fruits. Try berries, bananas, or peaches. Each fruit adds its own taste and color. This keeps your pudding exciting and fresh. If you want a sweeter taste, consider alternative sweeteners. You can use agave syrup or stevia. These options can change the flavor profile. They can also make the pudding lower in calories. For a vegan option, stick with coconut and almond milk. Both are plant-based and creamy. You can also use maple syrup instead of honey. This keeps your pudding vegan while still being delicious. If you need dairy-free alternatives, use almond milk or oat milk. These milks work well in this recipe. They provide a rich texture without dairy. Enjoy your pudding knowing it fits your dietary needs! To keep your mango coconut chia pudding fresh, store it in the fridge. Use airtight containers for best results. This helps prevent the pudding from absorbing other odors. Chia pudding stays good for about 3 to 5 days in the fridge. After that, the texture may change. Always check for any off smells or changes in color before eating. Chia pudding is best served cold. If you have leftovers, simply take them out of the fridge. Stir the pudding well, as it may thicken over time. If it's too thick for your taste, add a splash of coconut milk or almond milk. This will bring back its creamy texture. Top with more diced mango or toasted coconut flakes before serving. Enjoy your delightful treat! Chia seeds are small but powerful. They are packed with fiber, protein, and omega-3 fatty acids. These nutrients help with digestion and heart health. One ounce of chia seeds has about 11 grams of fiber. This can help keep you full and support healthy weight. Chia seeds also contain antioxidants, which fight free radicals in your body. This means they can help reduce inflammation and protect your cells. Eating chia seeds can boost your energy levels and improve your overall well-being. Yes, you can make mango coconut chia pudding ahead of time. In fact, it tastes better when chilled overnight. This allows the chia seeds to soak up the liquids fully. You can prepare it in the morning and refrigerate it until you are ready to serve. Just remember to stir it before serving. If it is too thick, add a bit more milk to reach your preferred texture. Making this pudding in advance saves time and makes it easy for busy days. If you don’t have almond milk, don’t worry! You can use any milk you like. Some great options include coconut milk, soy milk, or oat milk. Each type will change the flavor a bit. For instance, coconut milk will make it richer and creamier. You can also use dairy milk if you prefer. Just keep in mind that using different milks may change the final taste and texture slightly. Mango coconut chia pudding can last in the fridge for about 5 days. Store it in an airtight container to keep it fresh. If you notice any separation, just give it a good stir before serving. The flavors may develop more over time, making it taste even better. However, if you see any signs of spoilage, like an off smell or mold, it’s best to toss it. Enjoy your delicious pudding while it’s fresh! Chia pudding is easy to make and delicious. We explored ingredients like coconut milk, chia seeds, and ripe mango. I shared steps for preparation and serving. Tips helped enhance flavor, while variations offered new twists. Remember, you can adjust sweetness and fruit for your taste. Store it well for the best experience. With this knowledge, you can make a healthy, tasty treat anytime. Enjoy your chia pudding adventure!

Mango Coconut Chia Pudding Easy and Healthy Delight

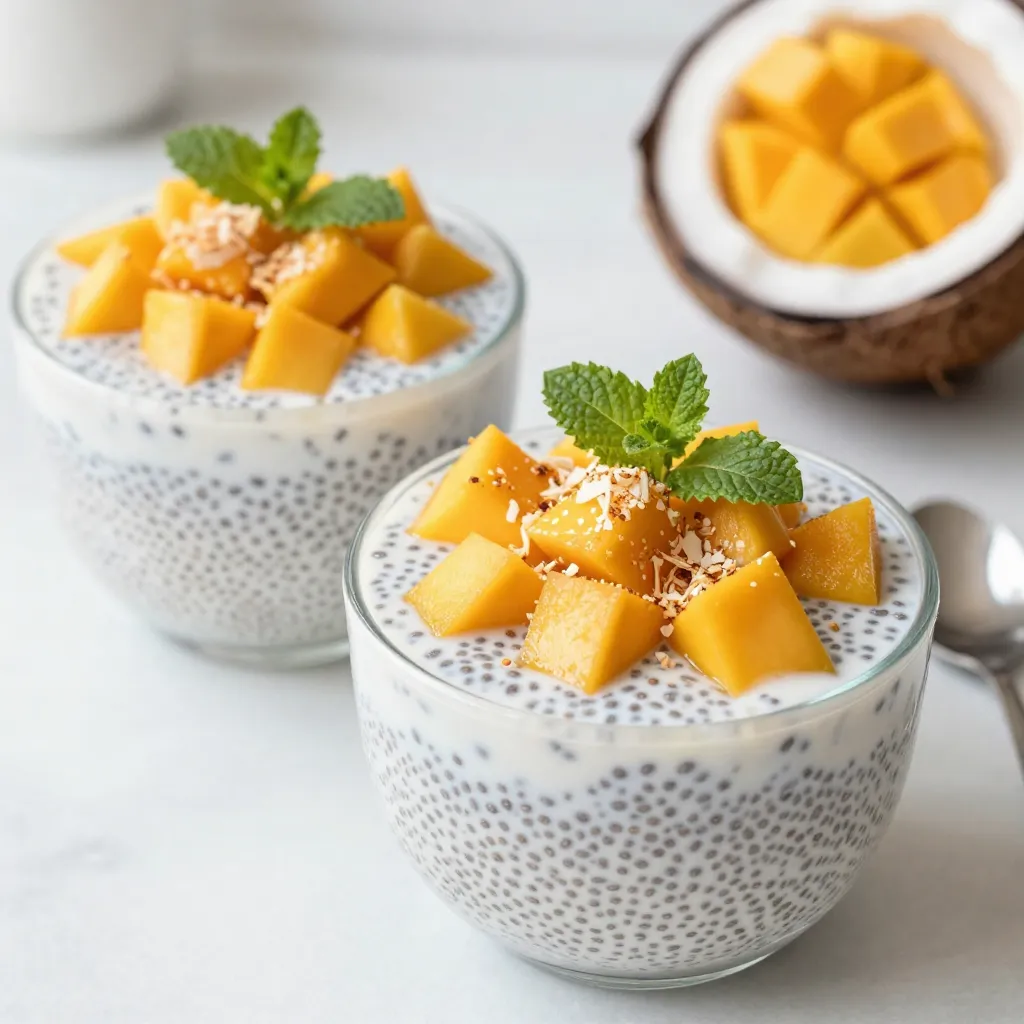
Looking for a quick, healthy dessert? You’ll love this Mango Coconut Chia Pudding! This tasty treat combines creamy coconut milk,

To make these tasty garlic butter chicken bites, you need a few key items: - 1 pound (450g) boneless, skinless chicken breasts, cut into bite-sized pieces - 4 tablespoons unsalted butter - 5 cloves garlic, minced These main ingredients form the base of the dish. The chicken provides protein, while the butter adds rich flavor. The garlic gives a wonderful aroma and taste. Adding the right seasonings makes this dish shine. You will need: - 1 teaspoon dried parsley - 1 teaspoon dried oregano - ½ teaspoon red pepper flakes (optional for heat) - Salt and pepper to taste - 1 tablespoon fresh lemon juice These seasonings blend well with the chicken. The dried herbs add depth. The red pepper flakes give a nice kick if you like heat. The salt and pepper bring out the natural flavors, while lemon juice adds brightness. To make your dish look even better, consider these garnishes: - 2 tablespoons chopped fresh parsley, for garnish - Lemon wedges, for serving Chopped parsley adds a fresh touch. Lemon wedges give an option for extra zing. These garnishes not only look good but also enhance the taste. For the full recipe, check out the [Full Recipe]. Start by cutting your chicken breasts into small, bite-sized pieces. This helps them cook evenly. In a medium bowl, sprinkle salt and pepper over the chicken. Toss it well until each piece is coated. This simple step ensures flavor in every bite. Next, heat a large skillet over medium heat. Add 2 tablespoons of unsalted butter. Wait until the butter starts to bubble but does not brown. Then, add the seasoned chicken in a single layer. Let it cook for about 5 to 6 minutes. Stir it occasionally so it browns nicely on all sides. Once done, the chicken should be golden brown and fully cooked. Now, reduce the heat to low and add the minced garlic to the pan. Stir it for 1 to 2 minutes. You want the garlic to become fragrant but not burnt. After that, mix in the dried parsley, oregano, and red pepper flakes if you like heat. Cook for another minute so the flavors blend well. Finally, remove the skillet from heat and drizzle fresh lemon juice over the chicken. Add the remaining butter and stir until it melts into a creamy sauce. For the full recipe, you can refer to the detailed instructions. Transfer your garlic butter chicken bites to a serving plate. Garnish with fresh parsley and serve with lemon wedges for a bright twist. To get that golden crust, start with dry chicken. Pat each piece with a paper towel. This helps the chicken sear well. Use medium heat and don’t overcrowd the pan. If you add too many pieces, the chicken will steam instead of sear. Cook in batches if needed. Let the chicken rest for a few minutes after cooking. This keeps it juicy inside. You can boost the taste in many ways. For a deeper flavor, use fresh herbs instead of dried ones. Fresh basil or thyme can add a nice twist. If you like heat, increase the red pepper flakes. A splash of soy sauce can also add a savory kick. Adjust the lemon juice for more tang. Taste as you go, and find the right balance for your palate. Make your dish look as good as it tastes. Serve the chicken bites in a shallow bowl. This highlights the buttery sauce. Sprinkle fresh parsley on top for a pop of color. Place lemon wedges around the dish for a fresh touch. Consider pairing this with rice or a green salad. It adds color and texture to your table. For a full experience, check out the Full Recipe for more tips. {{image_2}} You can change up the protein in this recipe easily. Try shrimp or scallops for a seafood twist. Both cook quickly and soak up the garlic butter flavor. If you want something heartier, use chicken thighs. They stay juicy and add a rich taste. You can even swap in firm tofu for a plant-based choice. Just make sure to press the tofu to remove excess water. Want to amp up the heat? Add more red pepper flakes or a dash of hot sauce. For a fresh taste, mix in herbs like basil or thyme. You can also use fresh garlic instead of dried. If you love lemon, add more juice or zest for a bright kick. This keeps the dish lively and vibrant. You can serve these chicken bites in many ways. For a fun twist, place them in soft tortillas for tacos. Serve with rice or pasta for a full meal. You can also make a salad by adding greens and veggies. Place the chicken bites on top for a hearty salad. For a crowd, skewer the bites for easy eating. You can store Garlic Butter Chicken Bites in the fridge for up to three days. Let the chicken cool down before putting it in a container. Use an airtight container to keep it fresh. This will help hold in the flavors and moisture. If you want to keep the chicken bites longer, you can freeze them. Place the cooled chicken in a freezer-safe bag or container. Remove as much air as possible to prevent freezer burn. You can freeze them for up to three months. Label the bag with the date for easy tracking. To reheat, you can use a skillet or the microwave. If you use a skillet, add a little butter over low heat. This helps to keep the chicken juicy. Stir occasionally until warm. If you use a microwave, cover it with a damp paper towel and heat in short bursts. Check often to avoid overcooking. Enjoy your meal again without losing the tasty flavors from the original recipe! Garlic Butter Chicken Bites last about 3 to 4 days in the fridge. Store them in an airtight container. This keeps them fresh and safe to eat. When you want to reheat, just warm them in a skillet. This helps keep the flavor and texture intact. Yes, you can use frozen chicken for this recipe. Make sure to thaw it first. You can do this in the fridge overnight or use the microwave. Pat the chicken dry before cooking. This step helps achieve a nice sear. Garlic Butter Chicken Bites pair well with many sides. Here are some tasty options: - Rice: White or brown rice soaks up the butter sauce well. - Vegetables: Steamed broccoli or green beans add color and nutrition. - Salad: A fresh green salad adds a crisp contrast. - Bread: Crusty bread is great for dipping in the garlic butter. For a full guide on making these bites, check the Full Recipe. In this post, we covered the tasty Garlic Butter Chicken Bites. You learned about the key ingredients and seasonings. I shared step-by-step instructions for making them juicy and flavorful. We also discussed handy tips for perfect cooking and clever variations to try. Lastly, I explained how to store and reheat your bites. With these insights, you can create a delightful dish that impresses. Enjoy cooking, tasting, and sharing this simple recipe with others!

Garlic Butter Chicken Bites Savory and Simple Recipe

Are you ready for a dish that’s simple, savory, and packed with flavor? Garlic Butter Chicken Bites are a quick

- 8 ounces spaghetti - 1 pound large shrimp, peeled and deveined - 2 tablespoons olive oil - 3 cloves garlic, minced - 1 can (14 ounces) crushed tomatoes - 1 cup heavy cream - 1 teaspoon dried basil - 1 teaspoon sugar - Salt and pepper to taste - 1/4 cup freshly grated Parmesan cheese - Fresh parsley, chopped for garnish Gathering your ingredients is a key step for cooking. You want fresh and high-quality items for the best taste. Start with the spaghetti. Use a good brand. This will give your dish the right texture. Next, choose large shrimp. They should be fresh, peeled, and deveined. This makes cooking fast and easy. Olive oil is important. It brings flavor and helps cook the shrimp. Garlic adds a nice aroma and taste. Use fresh cloves if you can. Crushed tomatoes provide a rich base for our sauce. Heavy cream is what makes it creamy and smooth. For seasoning, dried basil gives a nice herbal note. Sugar balances the acidity of the tomatoes. Always season with salt and pepper to your taste. Lastly, Parmesan cheese adds a savory touch. Fresh parsley makes your dish look pretty and adds freshness. Make sure you have all these ingredients ready before you start cooking. Check out the Full Recipe for more details on how to bring everything together! 1. Boil salted water: Start by filling a large pot with water. Add a good amount of salt. Bring this water to a boil. 2. Cook pasta until al dente: Add 8 ounces of spaghetti to the boiling water. Cook it according to the package instructions until it is al dente. This usually takes about 8 to 10 minutes. 3. Reserve pasta water and drain: Before draining, save about half a cup of the pasta water. This water helps adjust the sauce later. After this, drain the spaghetti and set it aside. 4. Heat olive oil in a skillet: In a large skillet, pour in 2 tablespoons of olive oil. Heat it over medium heat until it shimmers. 5. Sauté garlic until fragrant: Add 3 cloves of minced garlic to the hot oil. Sauté for about 30 seconds until the garlic smells great. 6. Cook shrimp until pink and opaque: Now, increase the heat to medium-high. Add 1 pound of shrimp. Cook the shrimp for 2 to 3 minutes on each side. They should turn pink and opaque. Once done, take them out of the skillet and set them aside. 7. Add crushed tomatoes and cream to skillet: In the same skillet, pour in 1 can of crushed tomatoes and 1 cup of heavy cream. This will form the creamy sauce. 8. Stir and simmer for sauce thickness: Stir the mixture well. Let it simmer for about 5 minutes. This helps the sauce thicken. 9. Combine shrimp and spaghetti, adjust sauce consistency: Return the cooked shrimp to the skillet. Add the drained spaghetti next. Toss everything together. If the sauce seems too thick, add some reserved pasta water to reach your desired consistency. This method ensures a delicious dish that blends flavors perfectly. For the full recipe, check out the details above. - Ensure pasta is al dente. This means it should be firm to the bite. Overcooking makes it mushy. - Use fresh shrimp for the best flavor. Fresh shrimp tastes sweet and tender. Frozen shrimp can work too if fresh is not available. - Try adding a pinch of red pepper flakes for some heat. This can brighten the dish. - Drizzling with olive oil before serving adds richness. It also gives a nice shine to the dish. - Serve the pasta in deep bowls for a cozy feel. This can make the dish look inviting. - To garnish, sprinkle fresh parsley on top. A grating of extra Parmesan can also enhance the look. - A drizzle of olive oil on the top adds elegance. It makes your dish look restaurant-ready. For more cooking insights, don't forget to check the Full Recipe! {{image_2}} You can switch shrimp with other proteins. Chicken is a great choice. Just cut it into small pieces and cook it until it's no longer pink. Tofu is also a good option. Use firm tofu and sauté it until golden. Both options offer tasty variations. If you want more seafood, try scallops or crab. They add a unique flavor. Just remember to adjust cooking times for each protein type. This keeps your dish safe and tasty. Want to jazz up the sauce? Try a vodka sauce instead! It has a rich and creamy texture. Simply replace the cream with vodka, then add crushed tomatoes and seasonings. This change brings a whole new taste to your meal. You can also add veggies for a healthy twist. Spinach, bell peppers, or zucchini work well. Just sauté them with garlic before adding the sauce. This adds color and flavor, making your dish even better. If you need gluten-free options, look for gluten-free spaghetti. Many brands offer tasty alternatives made from rice or quinoa. They cook just like regular pasta, so you won’t miss a beat. For those who want a dairy-free option, use coconut cream or cashew cream. These alternatives keep your sauce rich and creamy without dairy. You can enjoy this dish while sticking to your diet. Explore these variations for a fun twist on spaghetti with shrimp in creamy tomato sauce. For the full recipe, check out the earlier section! To keep your spaghetti with shrimp fresh, store leftovers in an airtight container. This helps maintain flavor and texture. Ensure the container seals tightly to keep moisture in. Place the container in the fridge. Use leftovers within three days for the best taste. When reheating, use a skillet for the best results. Heat the skillet over medium-low. Add a splash of water or broth to keep the pasta moist. This prevents the sauce from drying out. Stir gently as it warms. Heat until everything is hot, but avoid overcooking. If you want to freeze your dish, first let it cool completely. Then, place it in a freezer-safe container. Leave some space at the top for expansion. It can last up to three months in the freezer. To thaw, move it to the fridge overnight. Reheat gently on the stove, adding a little cream or water for moisture. This storage info will help you enjoy your spaghetti with shrimp in creamy tomato sauce later! For the full recipe, check the previous section. The best way to cook shrimp is quick and hot. Start by heating olive oil in a skillet over medium heat. Add fresh garlic and let it sizzle for about 30 seconds. Then, add the shrimp in a single layer. Cook them for 2-3 minutes on each side. You know they are done when they turn pink and opaque. Overcooking can make shrimp tough, so keep an eye on them. Perfect shrimp should be juicy and tender. Yes, you can use canned tomatoes! Canned tomatoes are often picked at peak ripeness. They pack a lot of flavor and save time. They also have a smooth texture, perfect for sauces. Canned tomatoes come ready to use, so you skip the chopping. This makes them very convenient for busy cooks. Just choose quality brands for the best taste. You’ll find they work great in this creamy sauce. To spice up your dish, consider adding red pepper flakes. Start with a small pinch and taste as you go. You can also add fresh chopped chili peppers for a bold kick. Another option is a dash of hot sauce, which gives flavor and heat. Just make sure not to overpower the creamy tomato sauce. Balance is key, so add spices gradually. Feel free to adjust the heat to your liking! This blog post covered the main ingredients and step-by-step instructions for a delicious shrimp pasta dish. You learned about cooking tips, flavor enhancements, and variations to suit your tastes. In summary, cooking this meal is simple and fun. You can customize it as you like. Enjoy experimenting with flavors and share your creations! Cooking should be enjoyable, and this dish is sure to impress.

Spaghetti with Shrimp in Creamy Tomato Sauce Delight

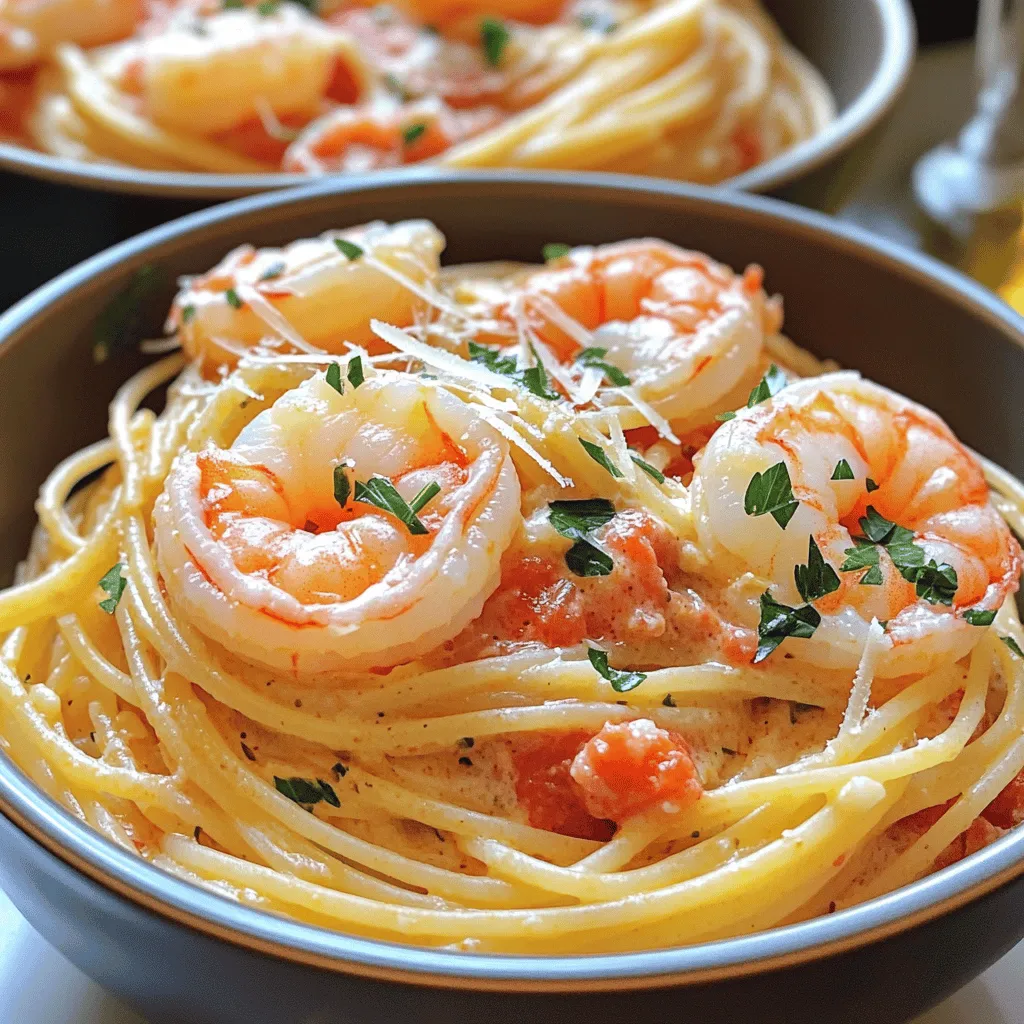
Are you ready to elevate your pasta game? In this article, we dive into a delicious recipe for Spaghetti with

- 2 cups cooked brown rice - 1 lb boneless, skinless chicken breast, diced - 1 tablespoon olive oil - 1 teaspoon chili powder - 1 teaspoon cumin - 1 teaspoon garlic powder - 1/2 teaspoon smoked paprika - Salt and pepper to taste The base of my chicken burrito bowl is brown rice. It adds fiber and makes the dish filling. I use boneless, skinless chicken breast for lean protein. Dicing it helps with even cooking. Olive oil keeps the chicken moist and adds flavor. For seasoning, I love using chili powder, cumin, garlic powder, and smoked paprika. These spices give the chicken a delicious kick. Salt and pepper enhance all the flavors. - 1 can black beans, drained and rinsed - 1 cup corn (fresh or frozen) - 1 cup cherry tomatoes, halved - 1 avocado, diced - 1/2 cup diced red onion - 1/2 cup fresh cilantro, chopped - Juice of 2 limes The toppings make the burrito bowl fun and colorful. Black beans add protein and fiber. Corn brings a sweet crunch. Cherry tomatoes add brightness and freshness. Diced avocado gives creaminess, while red onion adds a sharp bite. Fresh cilantro brings a nice herbal note. Squeezing lime juice on top brightens all the flavors. - Salsa (to taste) - Sour cream or Greek yogurt (optional, for topping) For a zesty kick, I love adding salsa. You can choose your favorite type, from mild to spicy. A dollop of sour cream or Greek yogurt adds creaminess. This is optional but can balance the spices well. For the full recipe, check out the Full Recipe section. To start, gather these ingredients: - 1 lb boneless, skinless chicken breast, diced - 1 tablespoon olive oil - 1 teaspoon chili powder - 1 teaspoon cumin - 1 teaspoon garlic powder - 1/2 teaspoon smoked paprika - Salt and pepper to taste In a bowl, mix the diced chicken with olive oil and all the spices. Make sure the chicken is well coated. This step is key for flavor. Let the chicken marinate for at least 15 minutes. If you have more time, marinating longer will add even more taste. Now, heat a large skillet over medium-high heat. Add the marinated chicken to the skillet. Cook for about 7 to 10 minutes. Stir occasionally. The chicken should no longer be pink when done. This ensures it's safe to eat. Once cooked, remove it from heat and set it aside to rest for a few minutes. This helps keep it juicy. In a serving bowl, begin layering your ingredients. Start with 2 cups of cooked brown rice as the base. Next, add the cooked chicken on top. Then, layer in the black beans and corn. Follow with halved cherry tomatoes and diced avocado. Add 1/2 cup of diced red onion for crunch. Finally, sprinkle chopped cilantro on top for a fresh taste. For a finishing touch, squeeze juice from 2 limes over the bowl. Add salsa to your liking. If you’d like creaminess, top it with sour cream or Greek yogurt. Serve it all in vibrant bowls. Garnish with extra lime wedges and cilantro for a pop of color. Enjoy your beautiful Chicken Burrito Bowl! For the full recipe, check out the details provided earlier. Marinate your chicken for at least 15 minutes. This step adds great flavor. Use olive oil, chili powder, cumin, garlic powder, and smoked paprika. These spices work well together and create a tasty mix. Letting the chicken sit in the marinade makes it juicy and tender. You can also marinate it for longer if you have time. This allows the flavors to really soak in. You can cook your chicken in different ways. Grilling gives your chicken a smoky taste. It makes for a lovely char on the outside. Baking is another option and is easy to do. Simply place the marinated chicken on a baking sheet. Cook it at 400°F for about 20-25 minutes. Both methods work well and keep the chicken moist. Choose the method that fits your style or mood. Make your bowl look lovely with some simple tips. Use deep, vibrant bowls for serving. This will make your colorful ingredients pop. Add lime wedges and extra cilantro for garnish. These small touches add flair to the dish. You can also layer the ingredients for a beautiful display. If you prefer, toss everything together for a more casual look. Either way, your Chicken Burrito Bowl will impress! {{image_2}} You can make your Chicken Burrito Bowl healthier by swapping some ingredients. For instance, try using quinoa instead of brown rice. Quinoa has more protein and fiber. You can also add spinach or kale for extra nutrients. These greens add color and taste. Instead of sour cream, use Greek yogurt. It has less fat and more protein. You can also reduce the amount of cheese or use a low-fat option. If you want a vegetarian or vegan version, replace chicken with beans or grilled veggies. Black beans or chickpeas work great for protein. You can also use tofu or tempeh for a meat-like texture. For added flavor, marinate them just like the chicken. Instead of sour cream, use avocado or a cashew cream. This gives a creamy touch without animal products. To give your bowl a true Mexican twist, add traditional flavors. Consider using chipotle peppers for a smoky kick. Fresh jalapeños can add heat, while pickled red onions offer tanginess. You might also want to sprinkle some queso fresco on top for a salty bite. Another option is to add a handful of fresh corn tortillas, cut into strips and lightly fried for crunch. These variations make your Chicken Burrito Bowl more exciting and cater to different diets. Explore these options to find your favorite mix. You can always check the Full Recipe for more ideas and details. To keep your Chicken Burrito Bowl fresh, store it in an airtight container. This method helps prevent moisture loss and keeps flavors intact. Make sure to refrigerate within two hours of cooking. Leftovers can last for about three days in the fridge. For longer storage, freezing is a great choice. You can freeze the chicken, rice, and veggies separately. This helps maintain texture and flavor. Use freezer-safe containers or bags. Be sure to label them with the date. You can keep them in the freezer for up to three months. When it's time to enjoy your bowl again, reheat it gently. Use a microwave or stovetop to warm everything. If using a microwave, cover the bowl to trap steam. For stovetop, add a splash of water to keep it moist. This helps the ingredients stay flavorful and tasty. You can store a Chicken Burrito Bowl in the fridge for up to three days. Make sure to keep it in an airtight container. This keeps the flavors fresh. If you want to save it longer, you can freeze it. In the freezer, it lasts about two months. Just remember to let it cool before freezing. Yes! You can use other grains in your burrito bowl. Quinoa is a great choice. It adds protein and cooks quickly. Cauliflower rice is another option for a low-carb meal. It’s light and tasty. Try both to find what you like best. You can switch up the protein in your burrito bowl. Beef is a hearty choice. Shrimp cooks fast and adds a nice flavor. Tofu is perfect for a plant-based option. Each protein brings its own taste, so mix and match to keep it exciting. This blog post covered how to make a delicious Chicken Burrito Bowl. We explored the main ingredients, cooking steps, and storage tips. I shared options for healthy, vegetarian, and Mexican-inspired bowls. Remember, you can mix and match flavors and textures to your taste. With simple ingredients and easy steps, you can create a meal everyone loves. Enjoy making your Chicken Burrito Bowl your own!

Chicken Burrito Bowl Flavorful and Simple Recipe

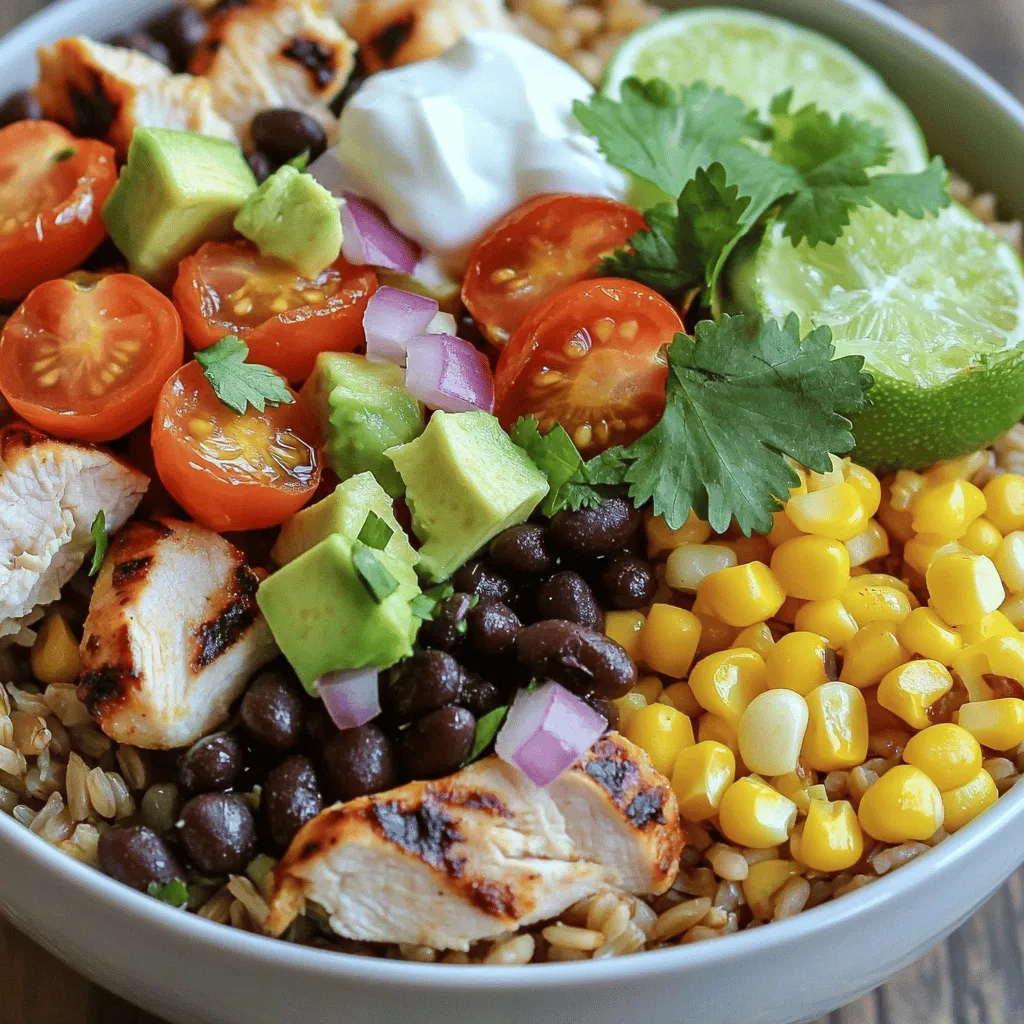
Are you ready to enjoy a delicious Chicken Burrito Bowl that’s packed with flavor and super easy to make? In

To make this chocolate lasagna, you need some key ingredients. Here’s a handy list: - 12 Oreo cookies, crushed - 1/4 cup unsalted butter, melted - 1 package (8 oz) cream cheese, softened - 1 cup powdered sugar - 1 cup whipped topping, thawed - 1 package (3.9 oz) chocolate instant pudding mix - 2 cups cold milk - 1 cup semi-sweet chocolate chips - Additional whipped topping and chocolate shavings for garnish These ingredients create a rich, layered dessert that is easy to prepare. The creamy layers mix well with the crunchy crust, making every bite a delight. You can make your chocolate lasagna even more special with a few garnishes: - Extra whipped topping - Chocolate shavings - Fresh mint leaves These toppings add a nice touch and make your dessert look stunning. You can get creative and even add some fruit like strawberries or raspberries for a pop of color. If you don’t have some ingredients, don’t worry! Here are some easy swaps: - Use any chocolate cookies instead of Oreo cookies for the crust. - Swap cream cheese with mascarpone cheese for a different flavor. - If you want a lighter option, use low-fat whipped topping. - You can use almond milk or oat milk instead of regular milk for a dairy-free version. These substitutions can help you customize your chocolate lasagna to fit your needs and tastes. For the full recipe, check out the detailed instructions in the article. To start, gather your ingredients. You need 12 crushed Oreo cookies and 1/4 cup of melted unsalted butter. In a medium bowl, mix the crushed cookies with the melted butter. Make sure all crumbs get moist. Next, press this mixture into the bottom of a 9x9-inch baking dish. This will be your crust. Press down firmly to make it solid. Now, let’s make the cream cheese layer. In a clean bowl, add 1 package (8 oz) of softened cream cheese and 1 cup of powdered sugar. Beat them together until smooth. It should look creamy and fluffy. Next, gently fold in 1 cup of thawed whipped topping. This adds a light texture. Spread this cream cheese mixture evenly over the Oreo crust using a spatula. It’s time to assemble the chocolate lasagna! In another bowl, whisk 1 package (3.9 oz) of chocolate instant pudding mix with 2 cups of cold milk. Whisk for about 2 minutes until it thickens. Pour this pudding layer over the cream cheese layer. Spread it out evenly. Now, sprinkle 1 cup of semi-sweet chocolate chips on top. This adds an extra chocolate kick. Next, we need to chill the dessert. Take the remaining 1 cup of whipped topping and spread it over the chocolate chips. Smooth it out for a nice finish. Cover the dish with plastic wrap. Place it in the fridge for at least 4 hours, or overnight if possible. This allows all the layers to set properly. Once chilled, slice into squares and enjoy! For garnish, add whipped topping and chocolate shavings on each slice. Follow these steps, and you will have a delightful chocolate lasagna. You can find the full recipe above for more details! To get great layers in your chocolate lasagna, use a firm hand. Press the Oreo crust down well. This keeps it stable. When making the cream cheese layer, mix until smooth. Don’t rush this step. A lumpy layer does not look nice. Spread the cream cheese mixture evenly over the crust. After that, pour the pudding layer. Make sure it is thick before adding. This helps keep the layers defined. When serving chocolate lasagna, always aim for a beautiful presentation. Slice the dessert into squares. Place each square on a decorative plate. Drizzle chocolate sauce over the top for flair. Add a dollop of whipped topping and some chocolate shavings. Fresh mint leaves also add a nice touch. These small details make your dessert stand out. It’s all about the wow factor! One common mistake is not chilling the dessert long enough. This can lead to messy slices. Always chill for at least four hours. Another mistake is adding too much liquid to the pudding. Follow the package directions carefully. Lastly, don’t skip the chocolate chips. They add a great texture and flavor. For the best result, stick to the Full Recipe. {{image_2}} You can change the flavors in your chocolate lasagna. Instead of Oreo cookies, use graham crackers. For a fruity twist, add a layer of fresh strawberries or raspberries. You can also try vanilla pudding instead of chocolate. This gives a light and creamy taste. Mix in some peanut butter for a rich, nutty flavor. You can even add coffee to the pudding for a mocha effect. Each change adds fun and new tastes to your dessert. Texture makes every bite exciting. You can add a layer of crushed nuts for crunch. Walnuts or almonds work great. Another idea is to include a layer of crushed cookies between the cream cheese and pudding layers. This adds more flavor and fun. For a chewy bite, sprinkle mini marshmallows on top of the chocolate chips. These small changes create layers of delight in every piece. For a dairy-free or vegan chocolate lasagna, swap the cream cheese for a vegan cream cheese. Use coconut whipped cream instead of regular whipped topping. For the pudding, choose a plant-based milk, like almond or oat milk. Make sure the chocolate chips are dairy-free. These swaps let everyone enjoy this dessert. You still get the same rich flavor and creamy texture without dairy. To keep your chocolate lasagna fresh, cover it tightly with plastic wrap. You can also use an airtight container. This helps prevent drying and keeps the flavors strong. Store it in the fridge for best results. Avoid placing it near strong-smelling foods, as it can absorb those odors. When stored properly, chocolate lasagna lasts about 3 to 5 days in the fridge. If you want to enjoy it longer, you can freeze it. Just make sure to wrap it well. In the freezer, it can last up to 2 months. When ready to eat, let it thaw in the fridge overnight. Chocolate lasagna is best served cold, so no need to heat it up. If you prefer a softer texture, let it sit out for about 15 minutes before serving. This helps the layers blend nicely. Cut it into squares and garnish as desired, using the Full Recipe as a guide for presentation. Enjoy your delicious dessert! Chocolate lasagna is a no-bake dessert. It layers creamy chocolate and sweet goodness. The base is made of crushed Oreo cookies. You then add layers of cream cheese, chocolate pudding, and whipped topping. Each bite is rich and satisfying. It’s a treat that pleases both kids and adults. Yes, you can make chocolate lasagna ahead of time. It’s perfect for parties or gatherings. Prepare it a day before, then chill it overnight. This allows the layers to set properly and flavors to blend. Just remember to cover it tightly to keep it fresh. You know the chocolate lasagna is set when it feels firm to the touch. After chilling, the layers should hold their shape. If you gently press on the top layer, it should not jiggle. Refrigerating it for at least four hours is key to achieving the right texture. Yes, you can use other cookies for the crust. Choose cookies that complement the chocolate flavor. For example, you could use graham crackers or chocolate wafer cookies. Just crush them finely and mix with melted butter. This will give you a new twist on the classic recipe. Here are the basic nutritional facts for one serving of chocolate lasagna: - Calories: 300 - Total Fat: 18g - Saturated Fat: 9g - Cholesterol: 25mg - Sodium: 200mg - Total Carbohydrates: 35g - Dietary Fiber: 1g - Sugars: 20g - Protein: 3g These values may vary based on the specific ingredients used in the full recipe. Always check the labels for precise information. Chocolate lasagna is a fun and easy dessert to make. We explored its main ingredients, step-by-step instructions, and helpful tips. You learned about variations to keep it fresh and how to store it properly. Remember, your options are endless. You can customize flavors and textures to match your taste. Enjoy the process and savor the delights of this dessert. Happy baking!

Chocolate Lasagna Delightful Dessert for Everyone

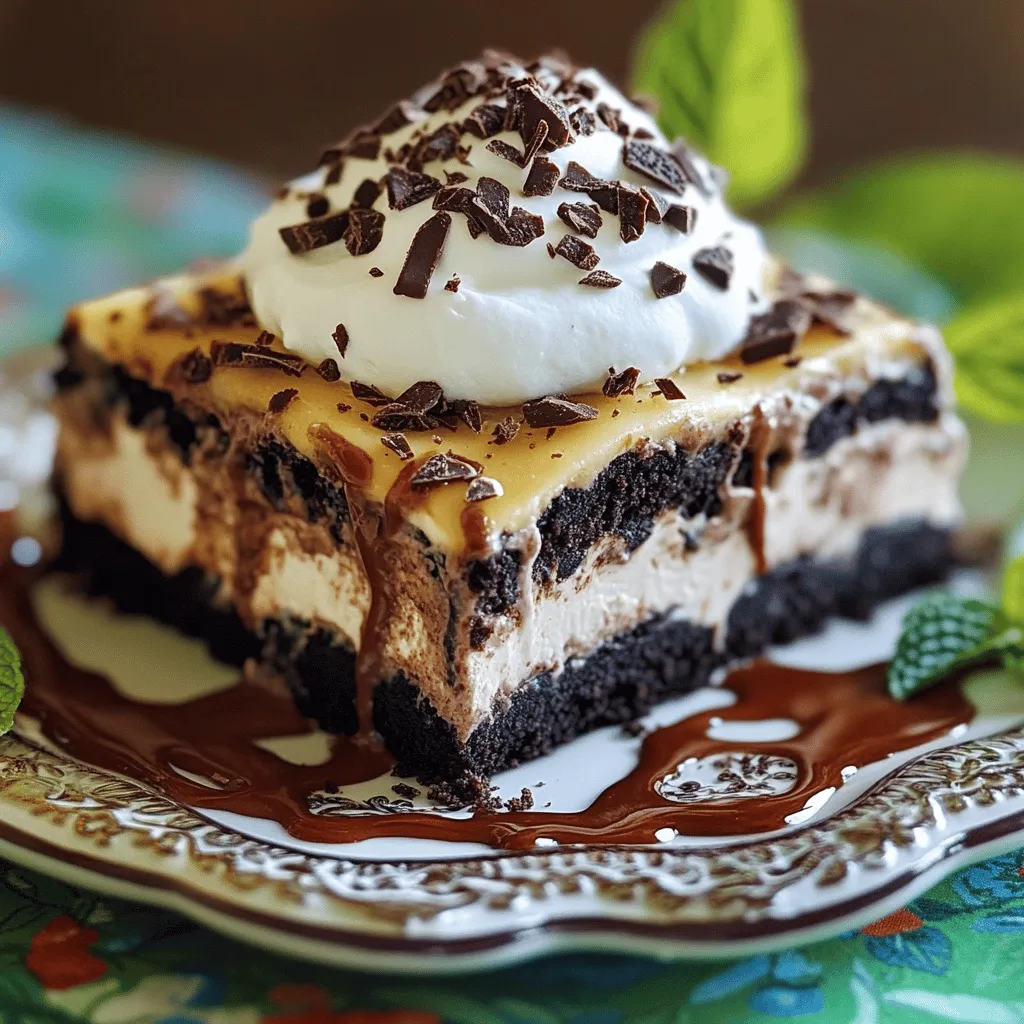
Are you ready to indulge in a sweet treat that dazzles every palate? Chocolate lasagna is a layered dessert that

To make soft and chewy snickerdoodle cookies, you need simple ingredients. This recipe yields about 24 cookies, perfect for sharing or enjoying at home. - 1 cup unsalted butter, softened - 1 ½ cups granulated sugar - 2 large eggs - 1 teaspoon vanilla extract - 3 cups all-purpose flour - 2 teaspoons cream of tartar - 1 teaspoon baking soda - ½ teaspoon salt - 2 tablespoons cinnamon sugar (mix 1 tablespoon cinnamon with 1 tablespoon sugar) If you need to adjust measurements, here are some handy tips: - 1 cup of butter equals 2 sticks or 225 grams. - For sugar, 1 cup equals about 200 grams. - Use 1 tablespoon of baking powder if you don’t have cream of tartar. - You can swap all-purpose flour with a gluten-free blend if needed. Feel free to explore the Full Recipe for more details on how to create these delightful cookies! To bake the best snickerdoodle cookies, you need some key tools. Gather these items before you start: - Mixing bowls - Electric mixer - Measuring cups - Measuring spoons - Parchment paper - Baking sheet - Wire rack These tools help make the process smooth and fun. Follow these steps to create delicious cookies. 1. Preheat your oven to 350°F (175°C). This is important for even baking. 2. Line a baking sheet with parchment paper. This keeps cookies from sticking. 3. In a large mixing bowl, cream the softened butter and granulated sugar. Mix until light and fluffy. This takes about 3-4 minutes. 4. Next, beat in the eggs one at a time. Add the vanilla extract after mixing in the eggs. 5. In another bowl, whisk the flour, cream of tartar, baking soda, and salt together. 6. Gradually mix the dry ingredients into the wet ones. Be careful not to overmix. This keeps the cookies soft. 7. Chill the dough in the fridge for about 30 minutes. This helps the flavors blend and makes it easier to scoop. 8. Once chilled, scoop out dough balls, about 1.5 tablespoons each. Roll them into balls. 9. Roll each ball in the cinnamon sugar mixture until fully coated. 10. Place the dough balls on the prepared baking sheet, leaving about 2 inches between them. 11. Bake in the preheated oven for 10-12 minutes. Watch for lightly golden edges and soft centers. 12. Let the cookies cool on the baking sheet for 5 minutes. Then transfer them to a wire rack to cool completely. Baking time is key to perfect cookies. Keep these tips in mind: - Always preheat your oven. This ensures even baking. - Bake for 10-12 minutes. Check for golden edges but soft centers. - Let cookies cool on the sheet before moving them. This helps them set. By following these steps closely, your snickerdoodle cookies will turn out soft and chewy, just like you want! For the complete list of ingredients and instructions, check the Full Recipe. To get those perfect soft and chewy snickerdoodles, start with room temperature butter. This helps create a creamy mix with sugar. Use a mixer to blend the butter and sugar well. Whip them together for about 3-4 minutes. This step adds air and makes the cookies light. Next, don't skip chilling the dough. It helps the flavors blend and keeps the cookies from spreading too much. Chill the dough for at least 30 minutes. When you bake, take them out while the centers still look soft. They will continue cooking as they cool. This is key for that gooey bite. One big mistake is overmixing the dough. Mix until just combined. Overmixing can make cookies tough. Another common issue is not measuring flour correctly. Too much flour can dry out the cookies. Use the spoon and level method for accurate measuring. Lastly, don’t skip the cinnamon sugar coating. It adds a nice crunch and flavor. Roll each dough ball well in the mix before baking. For a flavor boost, use high-quality vanilla extract. It makes a noticeable difference in taste. You can also try adding a pinch of nutmeg along with the cinnamon. It gives a warm, cozy flavor. If you want a little more depth, consider browning the butter. It adds a rich, nutty flavor that complements the cookies well. For the full recipe, check the [Full Recipe]. {{image_2}} Snickerdoodles are great on their own, but you can add fun ingredients! Try mixing in chopped nuts like pecans or walnuts. They add a nice crunch. You can also fold in chocolate chips for a sweet surprise. Dark chocolate or white chocolate chips work well. These add-ins make each bite even more exciting. Want to mix it up? You can change the flavor of your snickerdoodles. Adding pumpkin puree gives them a fall twist. Just replace some of the butter with pumpkin. For a minty treat, mix in peppermint extract. This gives a fresh taste that’s perfect for the holidays. Experiment with these flavors to find your favorite! Looking for healthier options? You can make gluten-free snickerdoodles! Use a gluten-free flour blend instead of all-purpose flour. If you want vegan cookies, substitute the eggs with flax eggs made from ground flaxseed and water. You can also replace the butter with coconut oil or vegan butter. These swaps help you enjoy snickerdoodles while sticking to your diet. For the full recipe, check out the earlier section. Enjoy creating your perfect batch of cookies! To keep your snickerdoodle cookies soft and chewy, storage is key. Always let cookies cool completely before storing. Use an airtight container for the best results. Line the container with parchment paper to absorb any moisture. Layer the cookies with parchment in between to prevent sticking. Keep the container at room temperature. This helps maintain the perfect texture. Freezing cookies is a great way to save them for later. After baking, let the cookies cool. Place them in a single layer on a baking sheet. Put the sheet in the freezer for about one hour. Once frozen, transfer the cookies to a freezer-safe bag or container. Make sure to remove as much air as possible. They can last for up to three months in the freezer. When you want to enjoy them, just thaw at room temperature. If your cookies lose their softness, don't worry. You can easily revive them. Place the cookies in the microwave for about 10 seconds. This will add some warmth and moisture back. Another option is to place a slice of bread in the container. The cookies will absorb the moisture from the bread. This helps keep them soft and chewy longer. Snickerdoodle cookies get their soft and chewy texture from two main ingredients: cream of tartar and butter. Cream of tartar helps the cookies rise and gives them a unique taste. It also keeps the cookies tender. Using softened butter creates a nice, rich flavor. When you mix them together, you get that perfect chewy bite you love. Yes, you can use brown sugar! Brown sugar adds moisture and a deeper flavor. It can make your cookies a bit softer and chewier. If you decide to switch, use the same amount of brown sugar as granulated sugar. You may notice a slight change in taste, which can be delicious! Homemade snickerdoodle cookies can last up to a week when stored properly. Keep them in an airtight container at room temperature. To extend their freshness, you can freeze them. Just place the cookies in a freezer-safe bag, and they can last for up to three months. When you're ready to eat, thaw them at room temperature. Enjoy the soft and chewy goodness! You now have all the tools to make perfect snickerdoodle cookies. We covered each ingredient and its role in this tasty treat. I shared tips to avoid common mistakes and achieve the best texture. Remember to explore fun variations and dietary substitutions. Proper storage will keep your cookies fresh, and knowing the answers to FAQs will help you troubleshoot. Baking should be fun, so let your creativity shine. Enjoy the sweet results of your hard work!

Soft and Chewy Snickerdoodle Cookies Dessert Delight

Are you ready to bake the most irresistible Soft and Chewy Snickerdoodle Cookies? With their warm cinnamon flavor and perfect

- 1 cup cooked jasmine rice - 1 pound chicken breast, diced - 1 can (15 oz) corn kernels, drained - 1/2 cup crumbled feta cheese - 1/4 cup mayonnaise - 1 tablespoon lime juice - 1 teaspoon chili powder - 1/2 teaspoon garlic powder - Salt and pepper to taste - 1/4 cup fresh cilantro, chopped - 1 avocado, sliced - Lime wedges for garnish The Street Corn Chicken Rice Bowl has a mix of fresh and tasty ingredients. You start with cooked jasmine rice, which adds a nice base. The chicken breast brings in lean protein and a great texture. The corn kernels give a sweet crunch, while the feta cheese adds a salty flavor. For seasoning, the mayonnaise, lime juice, chili powder, and garlic powder create a creamy and zesty sauce. You can adjust salt and pepper to match your taste. The garnishes of cilantro and avocado not only look beautiful but also add fresh flavors. Lime wedges are a fun touch, letting you squeeze fresh juice right before you dig in. You can find the full recipe to guide you through each step. With these ingredients, you’ll make a meal that is not only filling but also bursting with flavor. First, heat a drizzle of oil in a large skillet over medium heat. Add 1 pound of diced chicken breast. Season it with salt, pepper, 1 teaspoon of chili powder, and 1/2 teaspoon of garlic powder. Cook for about 7 to 10 minutes. The chicken should be fully cooked and golden brown. This step gives your bowl a great flavor base. In a bowl, combine 1 can of drained corn, 1/2 cup of crumbled feta, 1/4 cup of mayonnaise, and 1 tablespoon of lime juice. Add a pinch of salt and pepper to taste. Mix everything well to combine the flavors. This creamy mix adds a fresh and zesty twist to your bowl. Once the chicken is done, add the street corn mixture directly to the skillet. Stir gently to combine and heat through for 2 to 3 minutes. In serving bowls, place a generous scoop of 1 cup of cooked jasmine rice at the bottom. Top it with the chicken and street corn mixture. You can garnish with fresh cilantro, sliced avocado, and a lime wedge. For the full recipe, check out the details above. Enjoy creating your flavorful and filling Street Corn Chicken Rice Bowl! - Dice the chicken evenly for uniform cooking. This helps it cook nicely. - Use leftover rice for a quicker meal prep. It saves time and adds flavor. - Adjust cooking times based on chicken thickness. Thinner pieces cook faster than thicker ones. - Experiment with spice levels in the street corn mixture. You can make it mild or spicy based on your taste. - Use colorful bowls for an attractive presentation. Bright colors make the meal more inviting. - Garnish with extra cilantro and a lime wedge for a vibrant touch. This gives a fresh finish to the dish. For the full experience, check out the Full Recipe for detailed steps and ingredients! {{image_2}} You can change the protein in your bowl. Try shrimp or tofu instead of chicken. Both add a nice twist. If you like beef, grilled steak makes a great heartier option. Just cook the steak to your desired doneness. If you want a vegetarian bowl, swap the chicken for black beans or chickpeas. Both are packed with protein and flavor. Use vegan mayonnaise instead of regular. You can also skip the feta cheese to keep it fully plant-based. Want to spice things up? Add jalapeños for a spicy kick. If you enjoy crunch, diced red onions or bell peppers work well. They add color and texture to your meal. Experiment with these options to find your favorite flavor mix. Store any leftovers in an airtight container. This keeps the food fresh and tasty. You can enjoy the meal within 3-4 days for the best flavor. If you want to save some for later, freeze it in individual portions. This way, you can enjoy it any time. It stays good for up to 2 months. Remember to thaw it in the refrigerator before reheating. When you're ready to eat again, you can reheat it in the microwave or on the stovetop. If the rice seems dry, just add a splash of water. This helps bring back its moisture and flavor. A Street Corn Chicken Rice Bowl is a fun dish inspired by street food. It features seasoned chicken, sweet corn, and creamy toppings. Here’s what you’ll find in this bowl: - 1 cup cooked jasmine rice - 1 pound diced chicken breast - 1 can (15 oz) drained corn kernels - 1/2 cup crumbled feta cheese - A mix of mayonnaise, lime juice, chili powder, and garlic powder - Fresh cilantro and avocado for garnish - Lime wedges to squeeze on top This meal mixes flavors and textures. You get juicy chicken, crunchy corn, and creamy feta. It’s filling and perfect for lunch or dinner. Making this dish is quick and easy. Here’s the time breakdown: - Prep time: 15 minutes - Cook time: 15 minutes - Total time: 30 minutes In just half an hour, you can have a tasty meal ready to enjoy. Yes, you can prepare this dish ahead. Here are some tips: - Cook the chicken and street corn mixture in advance. - Store them in separate airtight containers. - Keep the rice in the fridge as well. You can assemble the bowls right before eating. This method is great for meal prep. Adding toppings can make your bowl even better. Here are some popular options: - Sliced jalapeños for heat - Chopped green onions for extra flavor - Extra feta cheese for creaminess - A drizzle of hot sauce for spice Feel free to mix and match toppings based on your taste! Yes, making this dish gluten-free is easy. Just follow these tips: - Ensure your mayonnaise is gluten-free. - Use certified gluten-free chili powder. You can enjoy this flavorful meal without worries if you make these small changes. For the full recipe, check the earlier section. Enjoy! This blog post discussed how to make a delicious Street Corn Chicken Rice Bowl. We covered essential ingredients like chicken, corn, and feta, along with simple steps to prepare and assemble your meal. You can mix and match proteins and toppings to suit your taste. Whether you want a quick dinner or meal prep, this recipe is perfect for you. Enjoy your cooking and savor the rich flavors in every bite!

Street Corn Chicken Rice Bowl Flavorful and Filling Meal

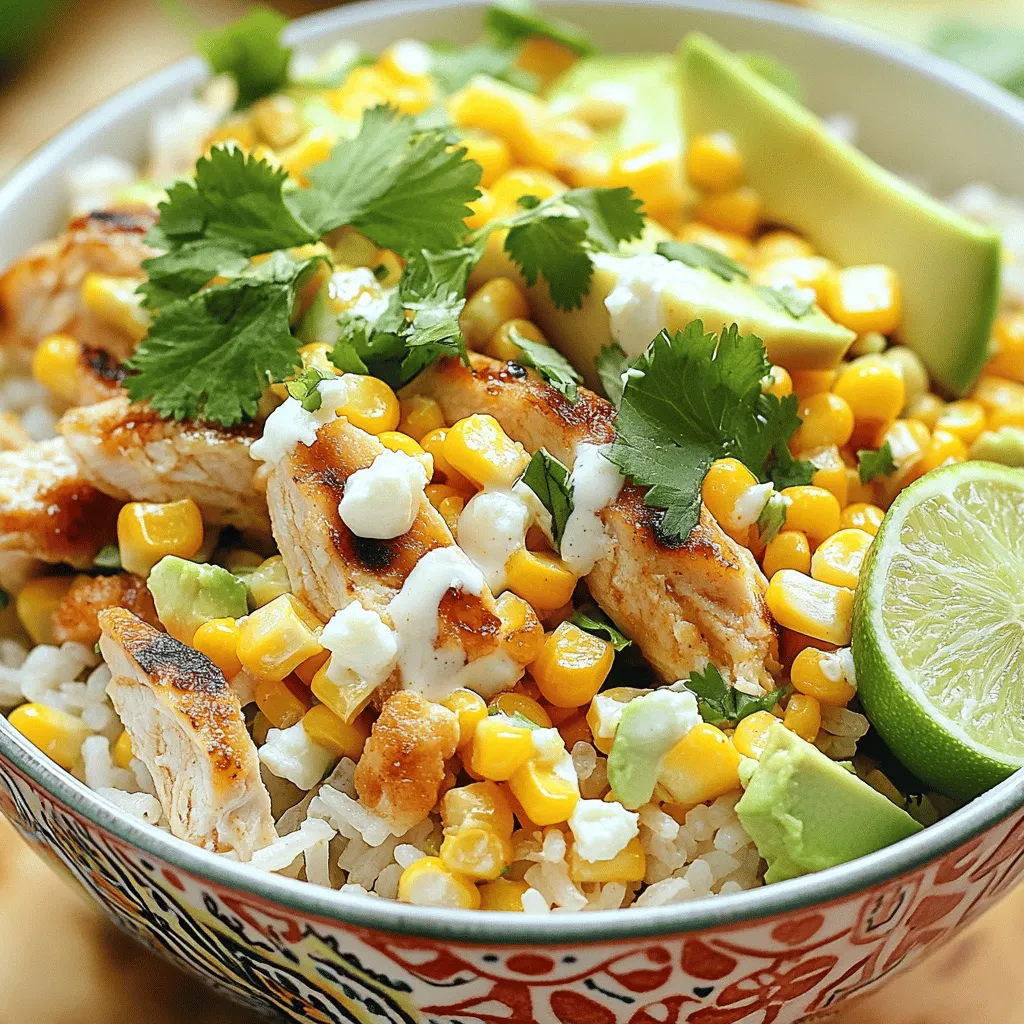
Ready for a tasty meal? This Street Corn Chicken Rice Bowl packs tons of flavor and fills you up! With

- 1 tablespoon vegetable oil - 1 medium onion, diced - 2 cloves garlic, minced - 1 inch piece of ginger, grated - 2 cups shredded cabbage (green and/or red) - 1 cup shredded carrots - 1 cup sliced shiitake mushrooms (or any mushrooms of your choice) These essential ingredients form the heart of your Egg Roll Soup. The vegetable oil gives a nice base when you sauté the aromatics. Onions, garlic, and ginger add depth and warmth. The cabbage, carrots, and mushrooms bring color and crunch, making every bite delightful. - 4 cups chicken or vegetable broth - 2 tablespoons soy sauce (low-sodium preferred) - 1 tablespoon sesame oil - 1 teaspoon rice vinegar The broth is the soul of the soup. Chicken broth gives a rich flavor, while vegetable broth suits those who prefer plant-based meals. Soy sauce adds saltiness and umami, while sesame oil lends a nutty aroma. Rice vinegar adds a subtle tang, balancing all the flavors. - 2 green onions, sliced (for garnish) - Sesame seeds (for garnish) - Salt and pepper to taste Garnishes elevate your soup. Green onions add a fresh, crisp note. Sesame seeds provide a nutty crunch. A sprinkle of salt and pepper ties everything together, enhancing each flavor. For the full recipe, check out the details earlier. Sautéing the aromatics First, grab a large pot and heat the vegetable oil over medium heat. Add the diced onion. Sauté it until it turns translucent, which takes about 3 to 4 minutes. Next, stir in the minced garlic and grated ginger. Cook them for about 1 minute until they smell great. Cooking the vegetables Now, add the shredded cabbage, carrots, and sliced mushrooms to the pot. Cook these for about 5 to 7 minutes. Stir often so they soften but still stay crisp. Adding the broth and simmering Pour in the chicken or vegetable broth. Bring the mixture to a boil. Once it boils, lower the heat and let it simmer for 10 minutes. This step helps all the flavors blend together. Incorporating seasonings Stir in the soy sauce, sesame oil, and rice vinegar. Taste it and add salt and pepper as needed. Adjust these to your liking. Drizzling in the eggs Beat the eggs in a bowl. Slowly drizzle them into the hot soup while stirring gently. This creates lovely egg ribbons. Cook for another 2 to 3 minutes until the eggs are cooked through. Serving suggestions Once ready, remove the pot from the heat. Serve the soup hot in clear bowls. Garnish with sliced green onions and a sprinkle of sesame seeds. For a fun twist, provide chopsticks and a spoon for your guests. Enjoy this easy and warm dish, perfect for any day! For the full recipe, check out the details above. Using homemade broth makes a big difference. It tastes fresh and rich. Store-bought broth is quick and easy. Look for low-sodium options to control salt. You can always add more salt later, but you can’t take it away. To boost flavor, add spices like garlic powder or crushed red pepper. These spices add warmth and depth. Always taste as you go. Adjust seasoning to suit your taste. You may want more soy sauce or a splash of rice vinegar. Trust your palate! Eggs must be added carefully. Pour them slowly while stirring the soup. This helps create lovely egg ribbons. Overcooking them makes them rubbery. Keep the heat gentle after adding eggs. For veggies, aim for a slight crunch. Cook them just until they soften, but not mushy. This keeps your soup bright and colorful. For more details, check out the Full Recipe. {{image_2}} You can easily change the protein in your egg roll soup. Try adding chicken for a hearty twist. Cook it until golden and tender before adding it to the soup. Shrimp is another great option. It cooks quickly and adds a nice flavor. If you're looking for a plant-based choice, tofu works well. Use firm tofu and cube it before adding. This way, you get protein without meat. Want to make this soup vegan or vegetarian? Just swap the chicken broth for vegetable broth. You can also skip the eggs or replace them with a silken tofu blend. This gives you a similar texture without using eggs. For those needing gluten-free options, use tamari instead of soy sauce. This will keep the flavor while making it safe for gluten-free diets. If you like a kick, add sriracha to your soup. Just a spoonful can spice things up. You can also play with mushrooms. Try using different types like oyster or portobello. Each type brings its own flavor. This flexibility lets you customize your egg roll soup to your liking. You can find the full recipe [here](#). To keep your Egg Roll Soup fresh, store it in the fridge. Use an airtight container. It will stay good for about 3 to 4 days. When reheating, use a pot on medium heat. Stir often to warm it evenly. You can also use a microwave. Heat in short bursts and stir in between. If you want to keep Egg Roll Soup longer, freeze it. Let the soup cool down first. Then, pour it into freezer-safe containers. Leave some space at the top for expansion. It can last up to 3 months in the freezer. To thaw, place it in the fridge overnight. Reheat it in a pot or microwave until hot. Egg Roll Soup can last up to 4 days in the fridge. If frozen, it can last about 3 months. Always check for changes in smell or color before eating. Fresh ingredients make the best soup. For the full recipe, check the earlier section. Egg Roll Soup is a warm and comforting dish inspired by the classic egg roll. It blends rich broth with fresh vegetables and eggs. This soup comes from Chinese cuisine, where egg rolls are popular. The main elements include cabbage, carrots, and mushrooms, all sautéed to enhance their flavors. The broth ties everything together, creating a cozy meal. To add heat to your Egg Roll Soup, consider using a few spices. You can add red pepper flakes for a mild kick. Sriracha or chili oil works well for more heat. If you prefer fresh ingredients, jalapeños or Thai bird’s eye chilis can spice things up nicely. Just add them in small amounts, tasting as you go. Yes, you can substitute many vegetables in Egg Roll Soup. If you don’t have cabbage, try bok choy or spinach. For carrots, you can use bell peppers or snap peas. Broccoli and zucchini also add a great crunch. Feel free to mix and match based on what you have or prefer. To thicken your Egg Roll Soup, you have a few options. Cornstarch mixed with water can create a nice thickness. Simply mix one tablespoon of cornstarch with two tablespoons of water. Add this mixture to the soup and simmer until it thickens. You can also use a few pureed vegetables for a natural thickening method without losing flavor. Egg Roll Soup is a tasty dish packed with fresh veggies and rich flavors. We explored essential ingredients like broth, vegetables, and garnishes that make it shine. The step-by-step guide showed how to prepare and combine these elements to create a delicious soup. I shared tips to perfect your stock, enhance flavors, and how to adjust for dietary needs. Don't forget storage tips to keep your soup fresh. Experiment with protein and spices to make it your own! Enjoy this fun and flexible soup as a meal or a starter.

Egg Roll Soup Tasty and Simple Comfort Food Recipe

Welcome to the cozy world of Egg Roll Soup—your new go-to comfort food! With its warm broth and fresh veggies,

Older posts
Newer posts
← Previous Page1 … Page138 Page139 Page140 … Page164 Next →

dsad

© 2026 easycookingbite • Built with GeneratePress

Our Policies

  • Copyright Policy
  • Cookie Policy
  • GDPR Policy
  • Privacy Policy
  • Disclaimer
  • Terms Of Use

More Information

  • Home
  • About
  • Contact
  • Appetizers
  • Dessert
  • Dinner
  • Drinks
©2026, easycookingbite About Back To Top