Slow Cooker BBQ Beef Sandwiches Flavorful and Easy
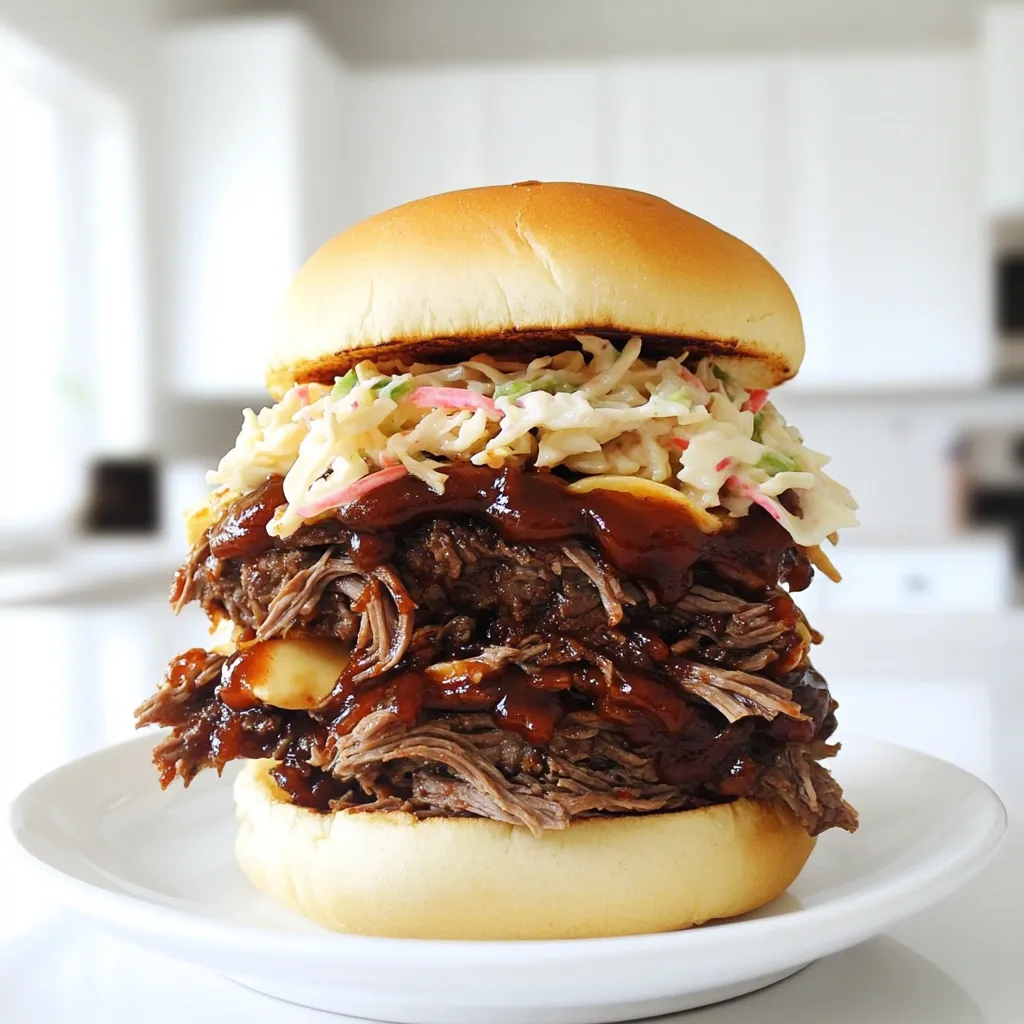
Looking for a meal that’s packed with flavor and easy to make? Slow Cooker BBQ Beef Sandwiches are your answer!
Looking for a meal that’s packed with flavor and easy to make? Slow Cooker BBQ Beef Sandwiches are your answer!

Craving a cozy drink that warms your heart and soul? Let me introduce you to my Warm Maple Cinnamon Hot

Looking for a quick meal that’s packed with flavor? You’re in the right place! My Minute Creamy Lemon Garlic Chicken

Are you ready to transform a simple can of chickpeas into a crunchy, spicy delight? In this guide, I’ll show
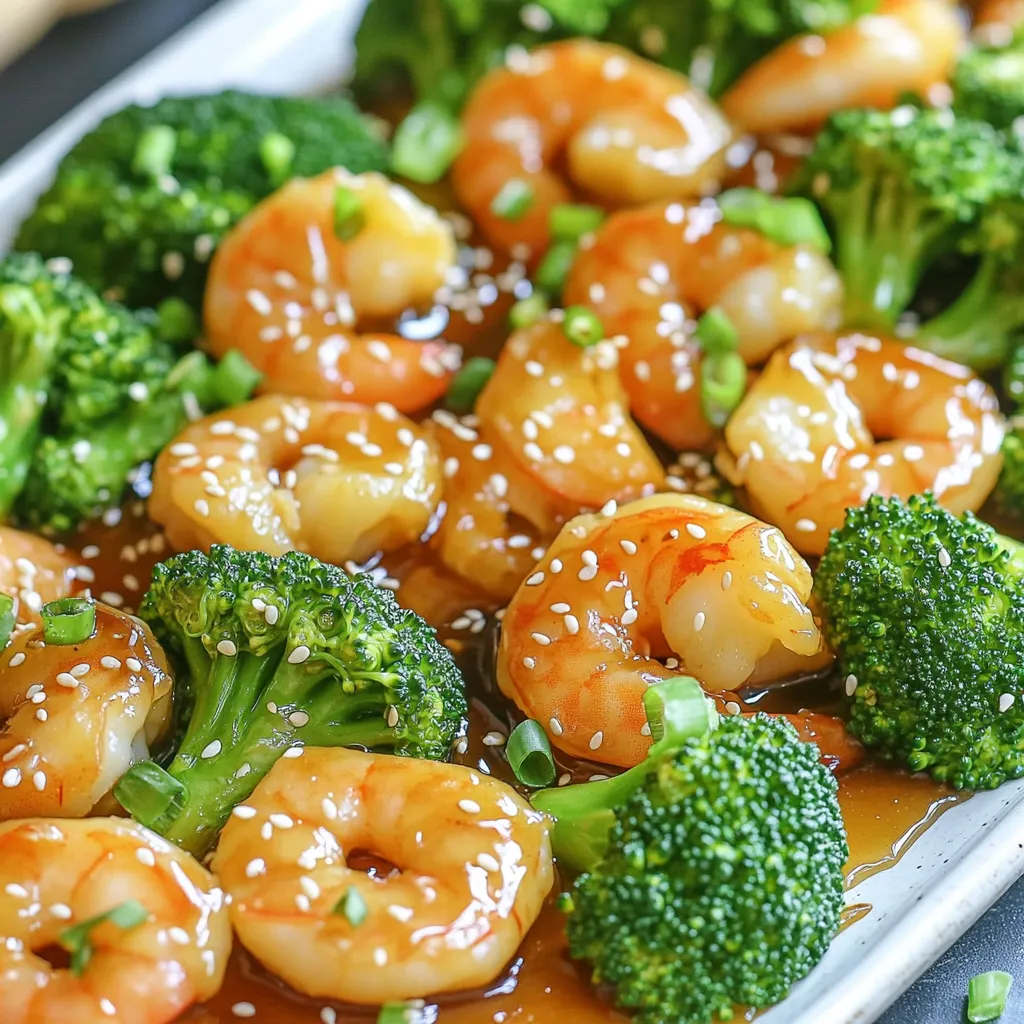
Are you ready for a meal that’s both quick and tasty? This Sheet-Pan Honey Garlic Shrimp and Broccoli Delight is

If you love cookies that melt in your mouth and burst with flavor, you’re in for a treat! My Brown

Craving a quick and tasty dinner? This Crispy Chicken Parmesan Air Fryer recipe is your answer! In just a few

If you’re craving a warm bowl of deliciousness, you’re in the right place! My creamy tortellini soup is the ultimate

Are you tired of takeout that never quite hits the spot? Let’s change that! In this guide, I’ll show you
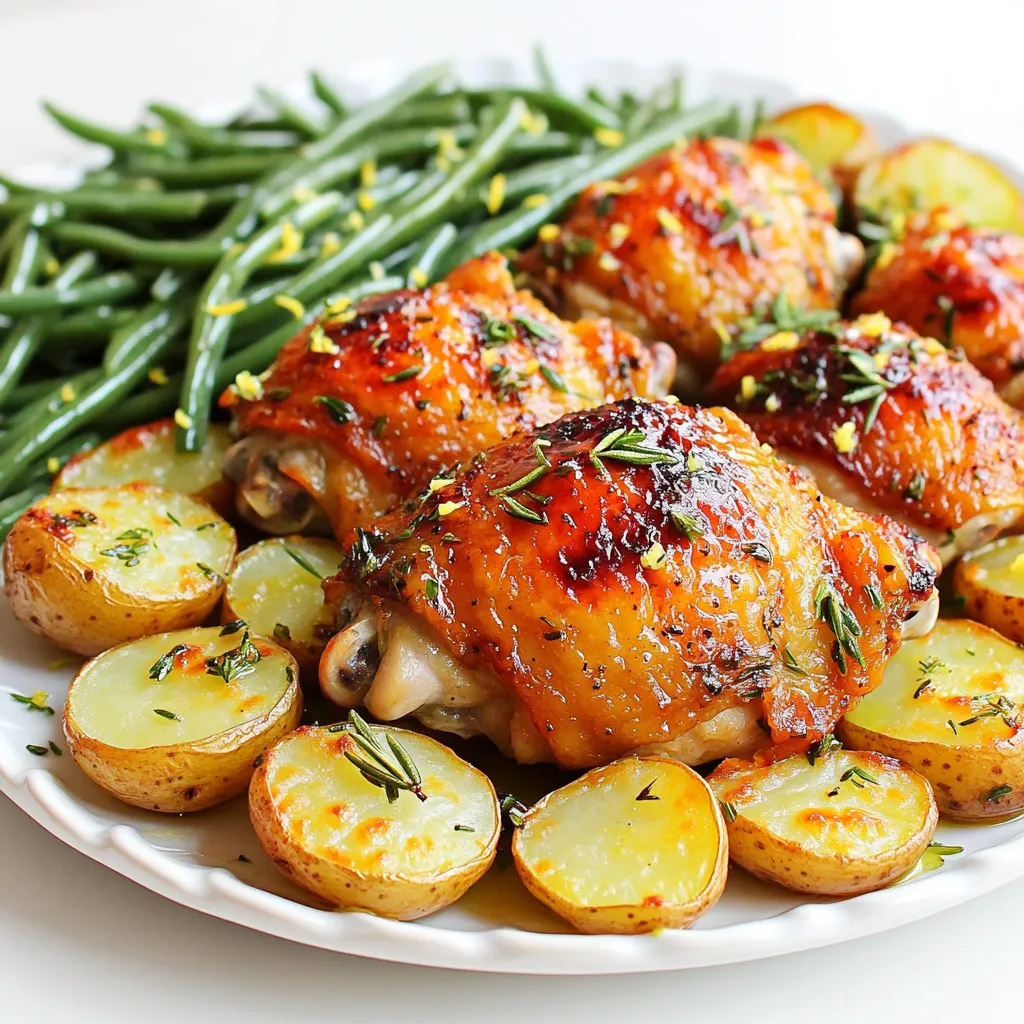
Are you ready to impress dinner guests with minimal effort? My Garlic Butter Chicken Thighs Sheet Pan recipe is your
