Skip to content
DisclaimerTerms Of UseGDPR PolicyCookie Policy

easycookingbite

  • Home
  • Drinks
  • Appetizers
  • Dinner
  • Dessert
  • About
  • Contact
  • Privacy Policy
DisclaimerTerms Of UseGDPR PolicyCookie Policy

Lily

To make a delicious coconut cream pie, you need the following ingredients: - 1 pre-made graham cracker pie crust - 1 cup coconut milk - 1 cup heavy whipping cream - 3/4 cup granulated sugar - 1/4 cup cornstarch - 1/4 teaspoon salt - 1 teaspoon vanilla extract - 1 cup shredded unsweetened coconut - 3 egg yolks - 1 tablespoon butter - Whipped cream and toasted coconut for topping

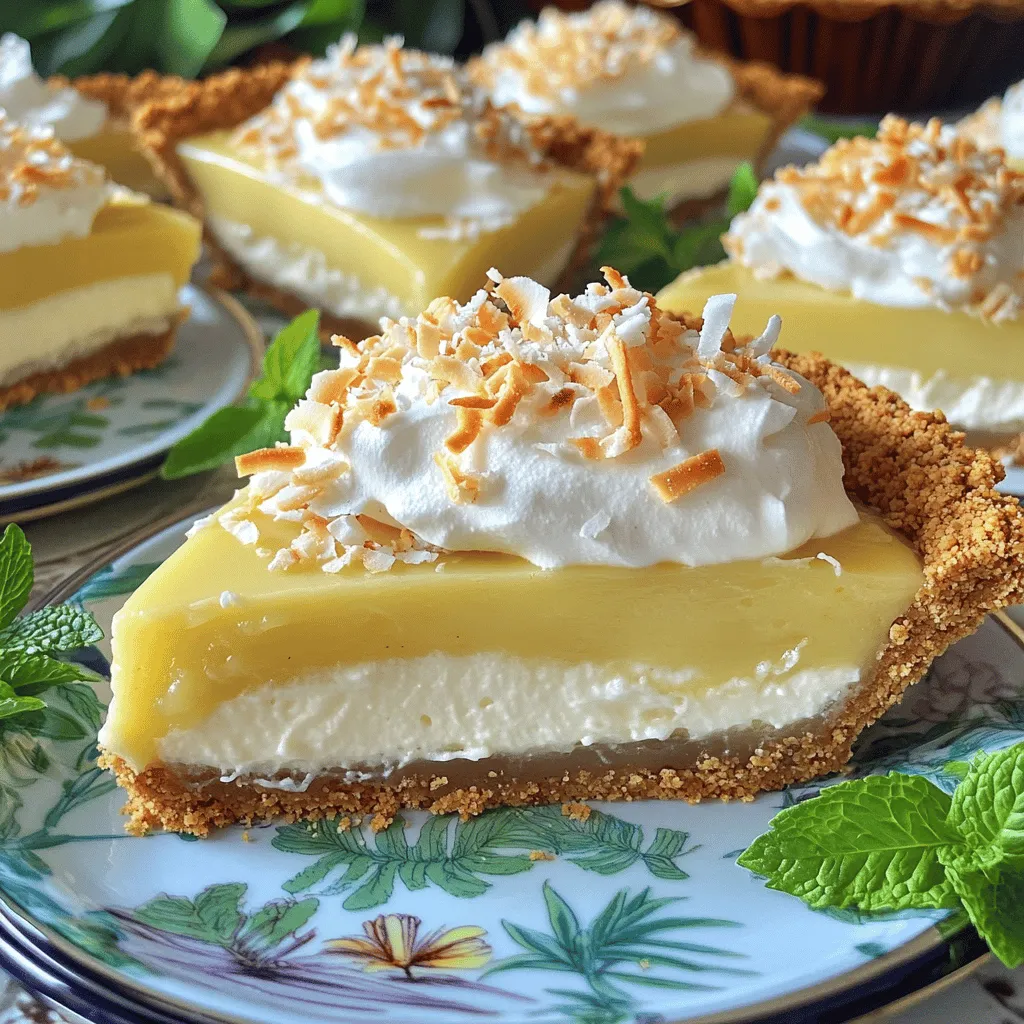
Coconut Cream Pie Scrumptious and Simple Recipe

If you love desserts that are sweet and creamy, you will adore this Coconut Cream Pie recipe. It’s easy to

To make crispy fried chicken, you need a few simple ingredients. Here’s what you’ll need:

Crispy Fried Chicken Delightfully Easy to Prepare

Do you crave crunchy, juicy fried chicken that’s easy to make? You’re in the right place! I’ll guide you through

For Tangy Lemon Garlic Roasted Carrots, you need simple and fresh ingredients. Here’s the complete ingredient list:

Tangy Lemon Garlic Roasted Carrots Flavorful Side Dish

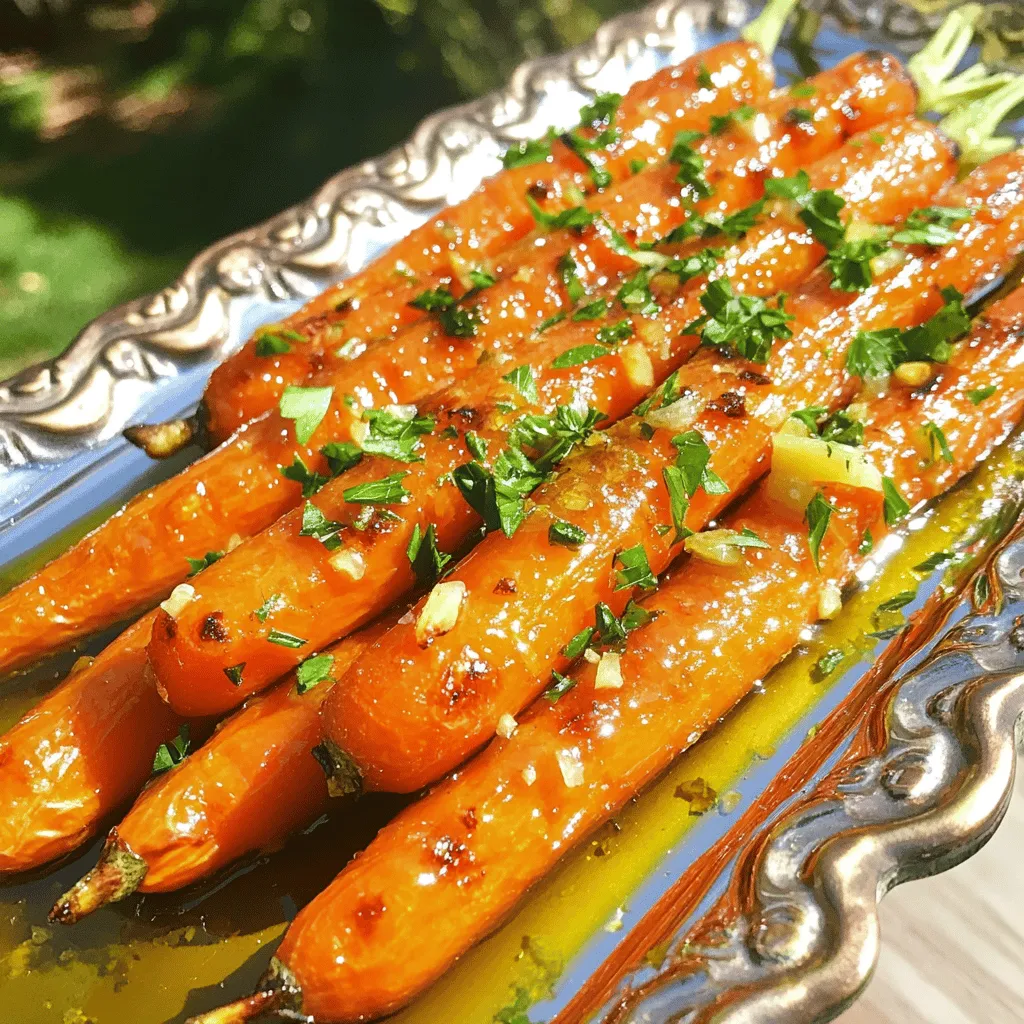
Are you ready to elevate your dinner game with a vibrant, delicious side dish? Tangy Lemon Garlic Roasted Carrots are

- 1 pound large shrimp, peeled and deveined - 8 ounces linguine pasta - 6 tablespoons unsalted butter - 4 cloves garlic, minced - 1 teaspoon red pepper flakes - 1/2 cup chicken broth - 2 tablespoons lemon juice - Salt and pepper to taste - 2 tablespoons fresh parsley, chopped - Zest of 1 lemon To make Garlic Butter Shrimp Scampi, you need fresh, quality ingredients. Start with large shrimp. They should be peeled and deveined for easy cooking. Next, grab some linguine pasta. This will pair perfectly with the shrimp. Butter brings richness to this dish. Use unsalted butter for more control over the salt. Garlic is a must in this recipe. Freshly minced garlic adds bold flavor. Red pepper flakes give a nice kick. Adjust the spice to fit your taste. Chicken broth adds depth to the sauce. For brightness, you’ll need lemon juice and zest. Fresh parsley adds color and freshness. Salt and pepper bring everything together. Gather these ingredients ahead of time. This will make your cooking process smooth and fun. Enjoy the journey of making this tasty dish! {{ingredient_image_1}} To cook the linguine, fill a large pot with salted water. Bring the water to a rolling boil. Add the linguine and cook according to the package instructions. I like to check it a minute early. You want it to be firm but not hard. This is called al dente. Reserve 1/2 cup of pasta water before draining. This water helps thicken the sauce later. In a large skillet, melt 4 tablespoons of butter over medium heat. Add 4 cloves of minced garlic and 1 teaspoon of red pepper flakes. Cook until you smell the garlic, about 1 minute. Then, increase the heat to medium-high. Add 1 pound of peeled shrimp. Season with salt and pepper. Cook for 2-3 minutes. The shrimp should turn pink and opaque. Once cooked, remove the shrimp and set them aside. In the same skillet, pour in 1/2 cup of chicken broth and 2 tablespoons of lemon juice. Bring this mix to a simmer. Use a wooden spoon to scrape up any brown bits from the skillet. This adds great flavor! Let it simmer for about 2-3 minutes. Reduce the heat to low and return the cooked shrimp to the skillet. Add the drained linguine and the remaining 2 tablespoons of butter. Toss everything well. If the sauce seems thick, add a little reserved pasta water until it’s just right. Finally, stir in 2 tablespoons of chopped parsley and the zest of 1 lemon. Taste and adjust the seasoning if needed. Serve it right away, garnished with extra parsley if you like. Enjoy your Garlic Butter Shrimp Scampi! To keep shrimp tender, cook them for only a short time. When they turn pink and opaque, they are done. If you cook them too long, they become rubbery. Choose large shrimp for this dish. They hold up well in the sauce. Fresh shrimp tastes best, but frozen shrimp works too. Just thaw them in the fridge before cooking. To make the sauce thicker, use the reserved pasta water. Start with a little, then add more if needed. This water adds flavor and helps the sauce cling to the pasta. For a richer sauce, add more garlic or some white wine. You can also mix in a pinch of herbs like thyme or basil. These will deepen the flavor and make every bite taste amazing. For beautiful plating, use a large bowl or plate. Start with a nest of linguine. Then, arrange the shrimp on top for a nice look. Garnish with fresh parsley and lemon zest. This adds color and a fresh taste. You can also add lemon wedges on the side. They make the dish pop and look appetizing. Pro Tips Use Fresh Shrimp: For the best flavor and texture, opt for fresh shrimp rather than frozen. If using frozen, ensure they are completely thawed before cooking. Perfect Pasta Cooking: Make sure to cook the linguine just until al dente. This ensures it retains a slight bite and won’t become mushy when tossed with the sauce. Adjust Spice Level: Feel free to adjust the amount of red pepper flakes to suit your taste. You can also omit them entirely for a milder dish. Garnish for Freshness: Always finish your dish with freshly chopped parsley and lemon zest. This adds a vibrant flavor and a beautiful presentation. {{image_2}} If you want to go gluten-free, try using rice noodles or zucchini noodles. These options work well and keep the dish light. You can also swap the shrimp for other seafood, like scallops or crab. Chicken or tofu can be nice substitutes too. These changes keep the flavor while meeting dietary needs. You can spice up the dish by adding herbs like basil or oregano. A pinch of cayenne pepper can give it a nice kick. You might also like to toss in vegetables. Try adding spinach, cherry tomatoes, or bell peppers. They add color and extra nutrients to your meal. For the best side dishes, serve Garlic Butter Shrimp Scampi with a fresh salad or garlic bread. These pair well and complement the main dish. When it comes to drinks, a crisp white wine like Sauvignon Blanc works great. If you prefer non-alcoholic options, try sparkling water with a slice of lemon. This keeps everything fresh and bright. To store leftover Garlic Butter Shrimp Scampi, let it cool first. Place the shrimp scampi in a shallow container. This helps it cool quickly and evenly. Seal the container with a lid or plastic wrap. Store it in the fridge for up to three days. If you want to keep it longer, freeze it. Use a freezer-safe container or a resealable bag. This way, you can enjoy it later without losing flavor. To reheat, I suggest using the stove for best results. Place the leftover scampi in a skillet over medium heat. Add a splash of chicken broth or water to keep it moist. Stir often to heat evenly. It should take about 5 to 7 minutes. You can also use the microwave, but it may not keep the same texture. If using the microwave, heat in short bursts of 30 seconds, stirring in between. This method prevents overcooking. Aim for a warm, not hot, dish to enjoy all the flavors. To make Garlic Butter Shrimp Scampi, start by cooking linguine in salted water. Boil it until it's al dente. Meanwhile, melt butter in a skillet and sauté minced garlic with red pepper flakes. Add shrimp, cooking until they turn pink. Then, pour in chicken broth and lemon juice. Toss in the cooked pasta and mix in more butter. Finish with parsley and lemon zest for flavor. Yes, you can use frozen shrimp! Just make sure to thaw them before cooking. You can do this by placing them in cold water for a few minutes. This helps them cook evenly and keeps them tender. If you don’t have chicken broth, you can use vegetable broth or fish stock. Both options will add flavor to your dish. You can also use water, but it may not give as much taste. Garlic Butter Shrimp Scampi can be healthy, especially if you watch the butter amount. Shrimp is low in calories and high in protein. You can also add veggies for more nutrients. Just be mindful of portion sizes. To make it spicier, add more red pepper flakes. You can also include diced jalapeños or a splash of hot sauce. Start with a little and taste as you go to find your preferred spice level. This blog post covered making Garlic Butter Shrimp Scampi, from ingredients to serving tips. You learned how to cook pasta, sauté shrimp, and make a delicious sauce. I shared ways to adjust flavors, store leftovers, and answered common questions. Cooking this dish is easy and quick. Enjoy it fresh or explore fun variations. Now, it’s time to bring this recipe to your kitchen and impress your family and friends. Get ready to relish every bite!

Garlic Butter Shrimp Scampi Flavorful Easy Recipe

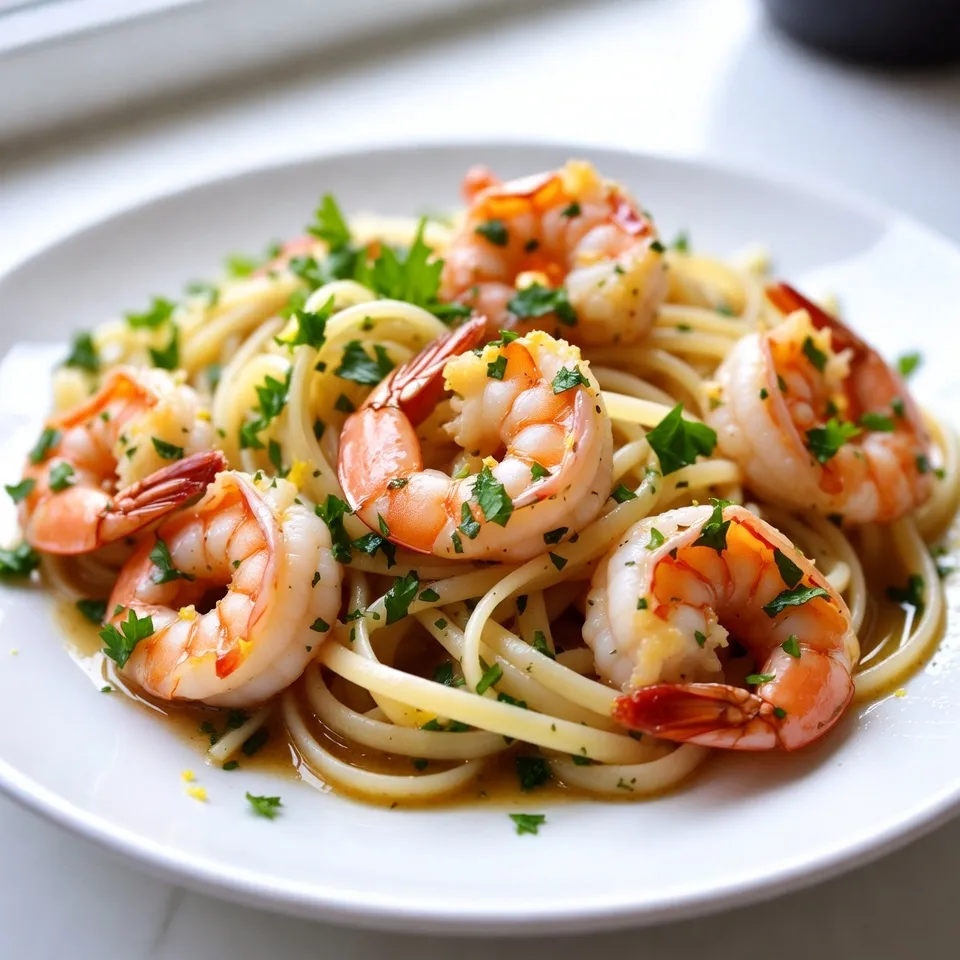
Want an easy dish that’s packed with flavor? Garlic Butter Shrimp Scampi is your go-to recipe! You only need a

- 4 boneless, skinless chicken breasts - 1 can (15 oz) black beans, drained and rinsed - 1 can (15 oz) corn, drained - 1 can (10 oz) diced tomatoes with green chilies

Crockpot Mexican Chicken Flavorful and Easy Recipe

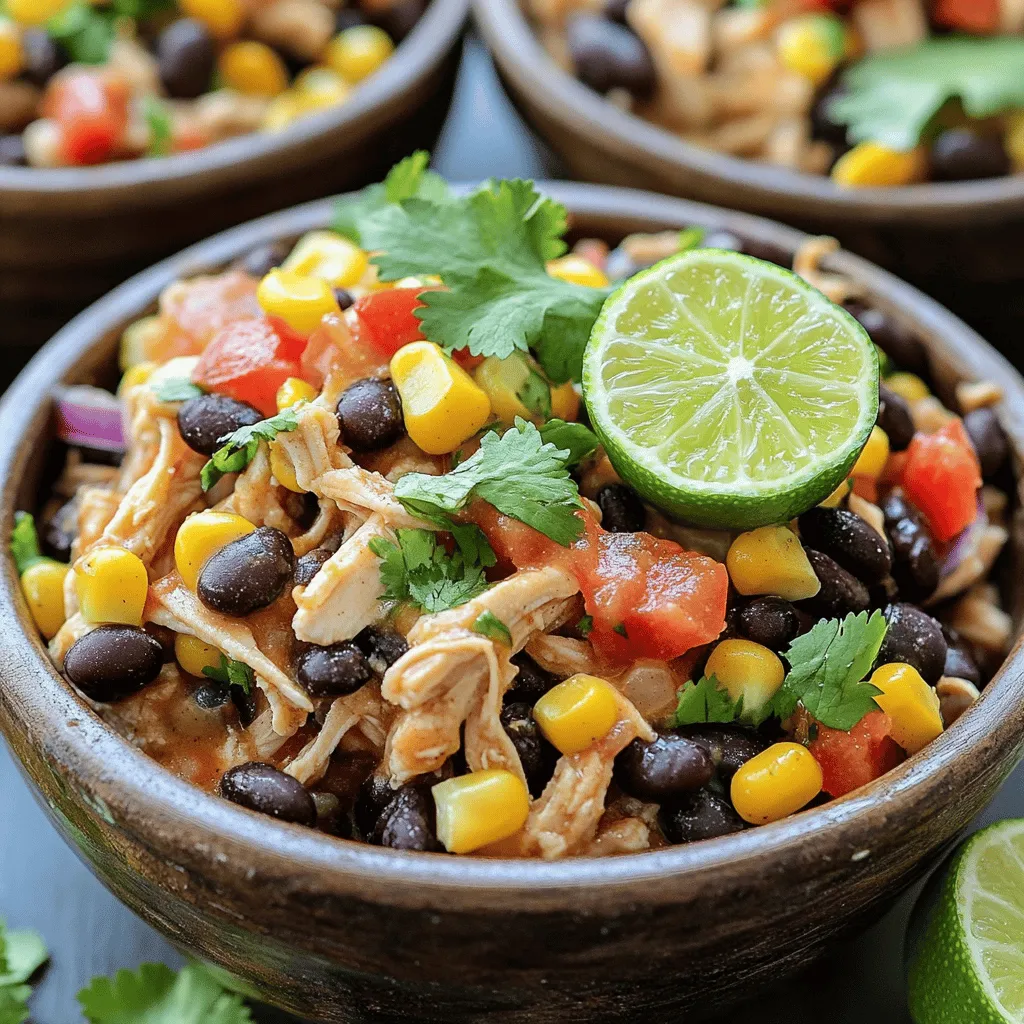
Looking for a simple, tasty dinner idea? This Crockpot Mexican Chicken recipe is your answer. With just a few easy

To make a tasty Spring Hash Brown Crust Quiche, gather these main ingredients: - 6 large eggs - 1 cup milk - 1 cup shredded cheddar cheese - 1/2 cup crumbled feta cheese - 1 cup fresh spinach, chopped - 1/2 cup cherry tomatoes, halved

Spring Hash Brown Crust Quiche Flavorful and Easy Meal

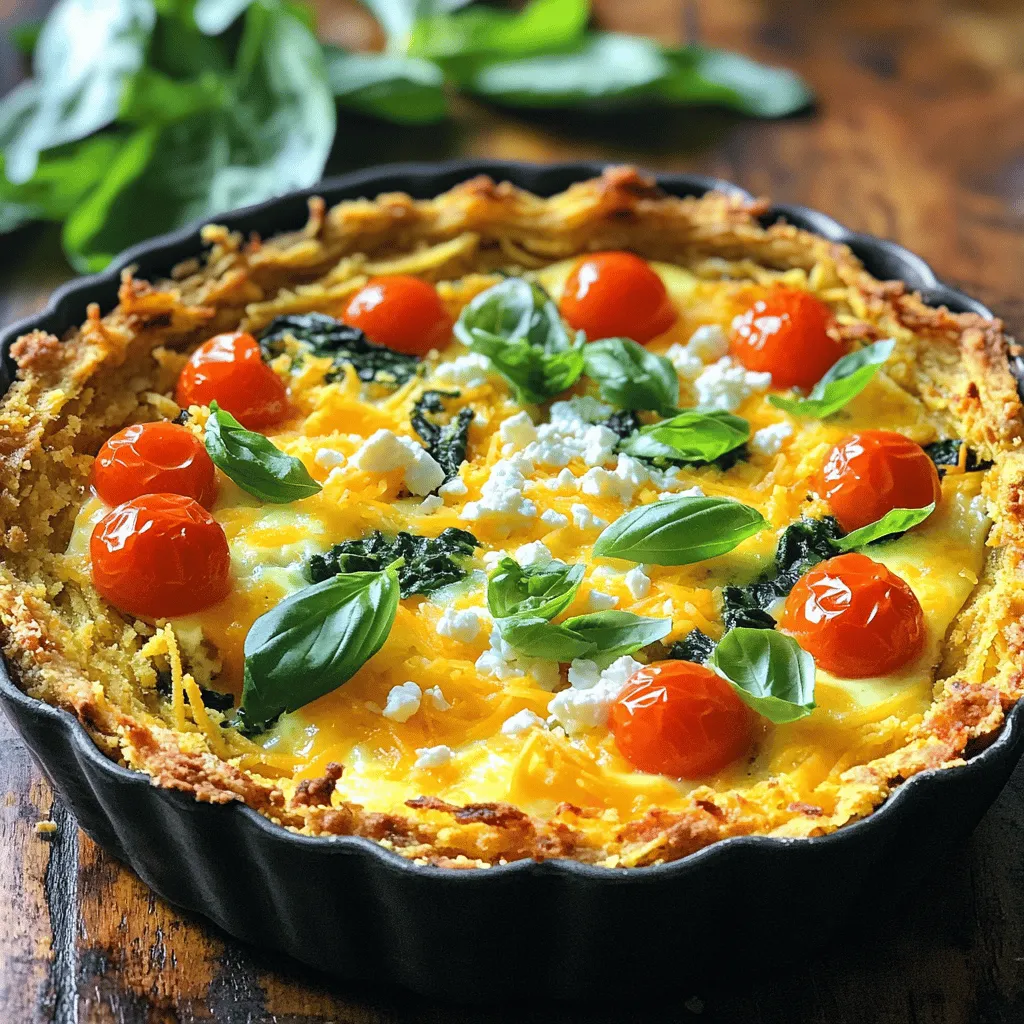
Spring Hash Brown Crust Quiche offers a fresh twist on an easy classic. With crispy hash browns as the crust,

To create delicious cookie dough ice cream sandwiches, gather the following ingredients: - 1 cup unsalted butter, softened - 3/4 cup granulated sugar - 3/4 cup brown sugar, packed - 1 teaspoon vanilla extract - 2 large eggs - 2 1/4 cups all-purpose flour - 1 teaspoon baking soda - 1/2 teaspoon salt - 1 cup semi-sweet chocolate chips - 2 cups vanilla ice cream Each ingredient plays a key role in the final flavor and texture. The unsalted butter makes cookies soft and rich. Granulated sugar and brown sugar give sweetness. Brown sugar adds a deeper flavor and moisture. Vanilla extract offers a warm aroma. Eggs bring structure and help the cookies rise. All-purpose flour is the base for your cookies. Baking soda helps them spread and rise. Salt balances the sweetness. Semi-sweet chocolate chips give a nice melt and contrast. Finally, vanilla ice cream adds a cool, creamy layer. With these ingredients, you can create a treat that is both fun and satisfying. Enjoy the process of measuring and mixing! {{ingredient_image_1}} First, preheat your oven to 350°F (175°C). This is the perfect temperature for baking cookies. Next, line two baking sheets with parchment paper. This helps prevent the cookies from sticking. In a large mixing bowl, cream together one cup of softened unsalted butter, 3/4 cup granulated sugar, and 3/4 cup brown sugar. Mix until it looks light and fluffy. This step is key for a soft cookie. Now, add two large eggs, one at a time, mixing well after each. Finally, stir in one teaspoon of vanilla extract. This will add a lovely flavor to your dough. In a separate bowl, whisk together 2 1/4 cups of all-purpose flour, one teaspoon of baking soda, and 1/2 teaspoon of salt. These dry ingredients create the base for your cookies. Gradually add the dry mix to the wet mixture. Stir until everything combines well. Finally, fold in one cup of semi-sweet chocolate chips for that sweet, gooey goodness. Undercooking cookies is key for the best texture. When you bake, take them out when the edges are golden brown, but the middle looks soft. They will firm up as they cool. This gives you a chewy center and a crisp edge. To make great ice cream sandwiches, use a scoop to add ice cream. Place a scoop on the flat side of one cookie. Then, gently press another cookie on top. This helps spread the ice cream evenly. You want each bite to have the same amount of ice cream and cookie. You can add fun flavors to your cookie dough or ice cream. Try mixing in nuts or different kinds of chocolate chips. For the ice cream, think about adding cookie crumbs or sprinkles. This can make your sandwiches more exciting and tasty. Pro Tips Chill the Dough: For thicker cookies, chill the cookie dough in the refrigerator for at least 30 minutes before baking. This helps to prevent spreading and results in a chewier texture. Use a Cookie Scoop: To ensure uniformity in size and baking, use a cookie scoop to portion out the dough. This will give you evenly sized cookies for your sandwiches. Customize Your Ice Cream: Feel free to swap out the vanilla ice cream for your favorite flavor, such as chocolate or mint chocolate chip, to create a unique ice cream sandwich. Store Properly: To keep your ice cream sandwiches fresh, wrap each one in plastic wrap and store them in an airtight container in the freezer. They can last up to two weeks! {{image_2}} You can make these treats gluten-free. Substitute the all-purpose flour with almond flour or oat flour. Both options work well and keep the dough tasty. Just ensure your flour is certified gluten-free to avoid cross-contamination. Want a vegan version? Use plant-based butter instead of regular butter. For eggs, try flaxseed meal or applesauce. Mix one tablespoon of flaxseed meal with three tablespoons of water to replace one egg. This change keeps your cookie dough rich and delicious. Switch up the ice cream flavor for fun. Chocolate, cookies and cream, or mint chocolate chip are great choices. You can also add mix-ins like crushed Oreos, nuts, or sprinkles. This way, each sandwich can be a new adventure in taste! To keep your cookie dough ice cream sandwiches fresh, wrap each one in plastic wrap. Place them in an airtight container. This helps avoid freezer burn. Make sure to stack them neatly. You can also separate layers with parchment paper. This way, they won’t stick together. Store them in the freezer for up to two weeks. If you want to enjoy leftovers, take them out of the freezer. Let them sit at room temperature for about five minutes. This softens the ice cream and makes each bite easier to enjoy. You can also warm them in the microwave. Heat for about 10 seconds. This gives you a warm, gooey treat without melting the ice cream too much. These tasty treats last for two weeks in the freezer. After two weeks, the flavors may fade. They might not taste as fresh. If you keep them in the fridge, eat them within a day or two. This keeps the cookies soft and the ice cream creamy. Enjoy your cookie dough ice cream sandwiches while they are at their best! Yes, you can use many types of chocolate chips. Try milk chocolate, dark chocolate, or even white chocolate. Each type adds a different taste. Mix and match to find your favorite flavor. You can also use chunks for a different texture. To make these sandwiches ahead, first bake the cookies and let them cool. You can store them in an airtight container. Make sure they are completely cool to avoid sogginess. When you’re ready to serve, scoop ice cream onto the cookies. Assemble them quickly for the best taste. You can also freeze the assembled sandwiches for later enjoyment. To soften butter fast, cut it into small cubes. Place it in a bowl at room temperature. This method takes about 10-15 minutes. You can also microwave it on low power for a few seconds. Just be careful not to melt it. Softened butter is easier to cream with sugar, making your cookies fluffy and light. You learned the key ingredients for delicious ice cream cookie sandwiches. We went over step-by-step instructions to bake perfect cookies. I shared tips to help you master the art of sandwich making. You also found variations for different diets and flavor options. Remember, these treats are all about fun and creativity. Try new flavors or share them with friends. Baking can bring joy and tasty rewards. Get started and make your own unique ice cream cookie sandwiches!

Cookie Dough Ice Cream Sandwiches Delightful Treats

If you love cookie dough and ice cream, you’re in for a treat! I’ll show you how to make delicious

- 1 bunch of fresh kale, stems removed and leaves chopped - 1/2 cup freshly grated Parmesan cheese - 1/4 cup toasted pine nuts - 1/2 cup cherry tomatoes, halved - 1/4 cup red onion, thinly sliced - 1 lemon (zested and juiced) - 3 tablespoons extra virgin olive oil - 1 teaspoon honey - Salt and pepper to taste Kale is a superfood packed with vitamins A, C, and K. It helps your body fight disease and keeps your skin healthy. Parmesan cheese adds a rich, savory taste. It also offers protein and calcium. Pine nuts bring healthy fats and a nice crunch. They help keep your heart healthy. Cherry tomatoes add sweetness and color. They are low in calories and high in vitamins. Red onion adds a mild bite, and it’s good for your heart, too. Lemon juice and zest brighten the salad. They add flavor and vitamin C, which boosts your immune system. Using fresh ingredients makes a big difference. Fresh kale tastes better and has more nutrients than pre-packaged greens. Grating Parmesan cheese fresh gives a creamier texture. It melts into the salad nicely. Toasting pine nuts brings out their nutty flavor. Processed ingredients often lack flavor and nutrients. They can also have added sugars or preservatives. Choosing fresh means you get a tastier, healthier salad. Always opt for ripe cherry tomatoes for the best taste. {{ingredient_image_1}} Start with fresh kale. Remove the stems and chop the leaves into bite-sized pieces. Place the kale in a large bowl. Sprinkle a pinch of salt over the chopped kale. Massage the leaves for 3 to 5 minutes. This step softens the kale and brings out its flavor. The leaves will turn bright green and tender. In a small bowl, combine lemon juice and lemon zest. Add extra virgin olive oil, honey, salt, and pepper. Whisk these ingredients together until they blend well. This dressing adds bright flavor to the salad and enhances the kale. The honey balances the acidity of the lemon. Pour the dressing over the massaged kale. Toss the kale well to coat all the leaves evenly. Let the salad sit for about 10 minutes. This allows the kale to soak up the dressing. Next, gently fold in the halved cherry tomatoes, sliced red onion, and grated Parmesan cheese. Each ingredient adds color and flavor. Heat a dry skillet over medium heat. Add the pine nuts to the skillet. Toast them for 3 to 4 minutes. Shake the pan often to prevent burning. The nuts should turn golden brown and fragrant. This step adds a crunchy texture to the salad. Serve the salad in a large, shallow bowl. Top it with the toasted pine nuts just before serving. For a beautiful finish, add extra Parmesan shavings and a sprinkle of lemon zest. This salad is not only tasty but also visually appealing. Enjoy your fresh and flavorful Lemon Parmesan Kale Salad! Massaging kale is key to a tasty salad. First, grab your chopped kale. Add a pinch of salt to the bowl. Use your hands to squeeze and rub the leaves. This helps break down tough fibers. Do this for about 3-5 minutes. The kale will soften and become darker. This step makes the salad more enjoyable to eat. The lemon dressing adds bright flavor to the salad. For a twist, try different citrus. Lime or orange juice works well too. You can also swap honey for maple syrup for a vegan option. Add a dash of mustard for extra zing. Mix and match to find your favorite flavor combo. Serve this salad in a big, shallow bowl. It looks great when you add extra Parmesan shavings on top. A sprinkle of lemon zest adds a pop of color. For a crunch, top it with toasted pine nuts just before serving. Arrange cherry tomatoes and red onion for a beautiful display. This makes the salad not just tasty but pretty too. Pro Tips Massage the Kale: This technique helps to break down the tough fibers in the kale, making it tender and more enjoyable to eat. Use Fresh Ingredients: For the best flavor, opt for fresh lemon juice and high-quality Parmesan cheese; they make a significant difference in taste. Customize Your Nuts: Feel free to substitute pine nuts with walnuts or almonds if you prefer a different flavor or texture in your salad. Let It Marinate: Allowing the salad to sit for 10 minutes after adding the dressing enhances the flavor as the kale absorbs the dressing. {{image_2}} You can easily make this salad heartier by adding proteins. Grilled chicken adds a nice flavor. It is also a great way to make it a full meal. You can use shredded rotisserie chicken for ease. If you prefer plant-based options, try cubed tofu. Make sure to press the tofu first to remove excess water. This helps it absorb the dressing better. While Parmesan shines in this dish, other cheeses work well too. Feta cheese gives a tangy kick. Goat cheese offers a creamy texture that blends nicely. If you want a stronger flavor, try blue cheese. Each choice adds a unique taste to the salad. You can mix and match to find your favorite. Feel free to swap in seasonal ingredients for variety. In spring, add fresh peas or asparagus for extra crunch. Summer calls for fresh cucumbers or bell peppers for a refreshing touch. In fall, roasted sweet potatoes or butternut squash add warmth. Using seasonal produce not only boosts flavor but also keeps the salad exciting. After enjoying your Lemon Parmesan Kale Salad, you can store leftovers in the fridge. Use an airtight container to keep the salad fresh. Make sure to keep the pine nuts separate if you want them crunchy. They can get soft in the dressing. The salad will last about 2 to 3 days in the fridge. To keep your salad fresh, store it in a cool place. Don't add the dressing until you are ready to eat. This keeps the kale crisp. If you notice the kale wilting, you can massage it again with a little salt. This can help revive its texture. Freezing this salad is not the best choice. The kale can become mushy when thawed. You can freeze the dressing, though! Pour the dressing into an ice cube tray. Once frozen, store the cubes in a bag. This way, you can use them later for other salads or dishes. This salad lasts about 2 to 3 days in the fridge. The kale stays fresh due to the dressing. However, the tomatoes may lose some crunch. To keep it fresh, store it in an airtight container. Yes, you can use other nuts like walnuts or almonds. Each nut adds a unique flavor and crunch. If you want a nut-free option, try sunflower seeds or pumpkin seeds instead. Absolutely! This salad is perfect for meal prep. You can make it ahead and store it in portions. Just add the toasted nuts right before eating to keep them crunchy. You can try different dressings based on your taste. A balsamic vinaigrette works great. A creamy Caesar dressing can also be tasty. Feel free to explore and find your favorite! This blog post shared how to make a healthy salad with fresh ingredients, tasty dressings, and fun variations. I explained the benefits of ingredients and how to prepare them step by step. I also offered tips for getting the best taste and ways to store leftovers. In closing, enjoy experimenting with different foods and flavors in your salad. With the right ingredients and a bit of creativity, you can make every meal unique and delicious.

Lemon Parmesan Kale Salad Fresh and Flavorful Mix

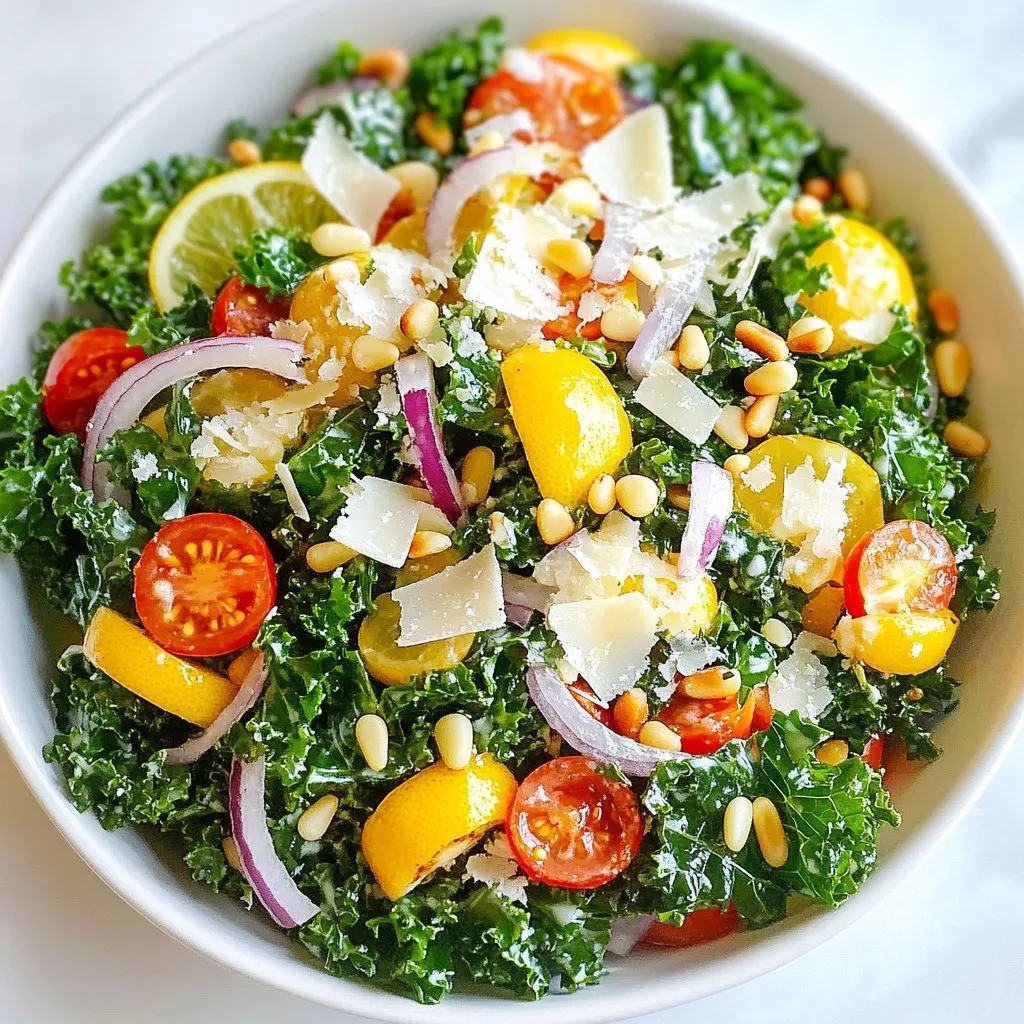
If you’re looking for a salad that’s both fresh and packed with flavor, you’ve found it! This Lemon Parmesan Kale

- 1 cup fresh spinach - 1 ripe banana - 1/2 cup pineapple chunks (fresh or frozen) - 1/2 cup mango chunks (fresh or frozen) - 1/2 avocado - 1 cup coconut water - 1 tablespoon chia seeds - 1 tablespoon honey or agave syrup (optional) - Ice cubes (optional, for a thicker texture) Fresh spinach is full of vitamins A and C. It helps keep your skin clear and healthy. Bananas give you energy and help with digestion. Pineapple has bromelain, which aids in digestion and reduces inflammation. Mango is rich in antioxidants and boosts your immune system. Avocado provides healthy fats that are good for your heart. Coconut water keeps you hydrated and has potassium, which is great for muscle function. Chia seeds are tiny powerhouses full of fiber, protein, and omega-3 fatty acids. If you like it sweeter, honey or agave syrup can add a touch of sweetness without too many calories. When choosing fruits, look for vibrant colors and a fresh smell. For bananas, pick ones that are yellow with some brown spots. This means they are ripe and sweet. Pineapples should feel heavy for their size and have a sweet scent at the base. For mangoes, press gently; they should give slightly when ripe. Avocados should feel soft but not mushy. If they are hard, leave them out for a few days. Fresh fruits make your smoothie taste better and more refreshing. {{ingredient_image_1}} To make the Tropical Green Smoothie, start by gathering all your ingredients. In your blender, add 1 cup of fresh spinach, 1 ripe banana, 1/2 cup of pineapple chunks, 1/2 cup of mango chunks, and 1/2 avocado. These fruits and veggies will give your smoothie a bright taste and a creamy texture. Next, pour in 1 cup of coconut water. This will help everything blend smoothly. Now, add 1 tablespoon of chia seeds for a boost in fiber and omega-3s. If you like it sweeter, you can add 1 tablespoon of honey or agave syrup. Blend on high speed until all the ingredients are creamy and well mixed. If you want a thicker smoothie, toss in a few ice cubes and blend again. Taste your smoothie and adjust the sweetness or thickness as you like. When you’re happy with the taste and texture, pour it into a tall glass. To change the texture of your smoothie, you can add more or less coconut water. If it’s too thick, add a little more. If you like it thicker, add more ice cubes. For sweetness, start with the honey or agave syrup. After blending, taste it. If it needs more sweetness, just add a bit more syrup and blend again. For the best results, use a high-speed blender. It will make your smoothie smooth and creamy. If you don’t have a high-speed blender, don’t worry! A regular blender will work too, but you may need to blend a little longer. Make sure to use a measuring cup for the ingredients to keep everything balanced. Enjoy your smoothie right away for the best taste and freshness! To make the best tropical green smoothie, start with the right order. Always add liquids first. Pour in your coconut water before the fruits and greens. This helps the blades move freely. Next, add soft items like banana and avocado. Then, add the spinach and frozen fruits. This order makes blending smooth and easy. For a creamier texture, use a ripe avocado. It adds a rich and smooth feel. You can also add ice cubes for thickness. Blend until everything is creamy. If it's too thick, add more coconut water. Blend again until you reach your desired texture. One common mistake is overloading the blender. Too many ingredients can lead to uneven blending. Stick to the amounts in the recipe. Another mistake is skipping the sweetener. If your smoothie tastes too green, a little honey or agave can help. Finally, don’t forget to taste your smoothie. Adjust sweetness and texture as you blend. Pro Tips Use Frozen Fruit: Using frozen pineapple or mango can make your smoothie colder and thicker without needing extra ice. Boost Nutrients: Consider adding a scoop of protein powder or a handful of nuts for an added protein boost. Experiment with Greens: If you're not a fan of spinach, try kale or Swiss chard for variety in flavor and nutrients. Adjust Consistency: If your smoothie is too thick, add more coconut water a little at a time until you reach your desired consistency. {{image_2}} You can change the fruits in your Tropical Green Smoothie to keep it fun. Try using strawberries instead of mango. Or, swap out pineapple for kiwi. Each fruit adds a unique taste. You can also mix in some blueberries for extra color and flavor. The key is to choose ripe fruits for the best taste. Want to boost the health benefits? Add superfoods! You can mix in protein powder for extra energy. Spirulina is another great option; it’s packed with nutrients. Adding flaxseeds offers healthy fats. Each superfood brings its own health perks. Just be careful not to add too much; a little goes a long way. To make your smoothie vegan, skip honey and use agave syrup instead. All the other ingredients are already plant-based. If you want a creamier texture, try using almond milk instead of coconut water. This switch gives a nice nutty flavor and keeps it dairy-free. Enjoy your smoothie guilt-free! If you have leftover tropical green smoothie, store it right away. Use an airtight container. This keeps air out and helps maintain freshness. Place it in the fridge. Enjoy it within 24 hours for the best taste. If it separates, just shake or stir before drinking. Freezing ingredients is a great idea. You can freeze ripe bananas, pineapple, and mango chunks. Just chop them first. Lay them flat on a tray and freeze until solid. Then, transfer them to a freezer bag. This way, you can grab them easily for future smoothies. Spinach can also be frozen. Wash it, dry it well, and pack it into bags. Meal prepping smoothies can save time. Prepare the ingredients in bags. You can mix spinach, fruits, and chia seeds in each bag. Label them with the date. When you’re ready, just add coconut water and blend. This keeps your smoothie fresh and tasty. Enjoy making healthy choices with ease! If you need an alternative to coconut water, try using almond milk or regular water. Almond milk adds a nutty taste while keeping it light. Regular water works too, but it may not have the same tropical flavor. You can also use a mix of pineapple juice and water for a sweeter touch. Yes, you can use other greens! Kale is a great choice and adds a nice texture. Swiss chard or romaine lettuce work well too. Each green has its own flavor, so feel free to experiment. Just remember to wash your greens thoroughly to remove any dirt or grit. A green smoothie typically lasts about 24 to 48 hours in the fridge. To keep it fresh, store it in a sealed container. The color may change, but it should still taste good. If you notice separation, simply shake or stir before drinking. In this blog post, we explored great tropical smoothie recipes. We discussed key ingredients and their health benefits. I shared tips for picking the best fruits and provided step-by-step blending instructions. You learned how to customize your smoothie for taste and texture. Remember, making smoothies can be fun and healthy. Try different fruits and superfoods for new flavors. Avoid common mistakes to make every sip smooth and creamy. Happy blending!

Tropical Green Smoothie Refreshing and Nutritious Drink

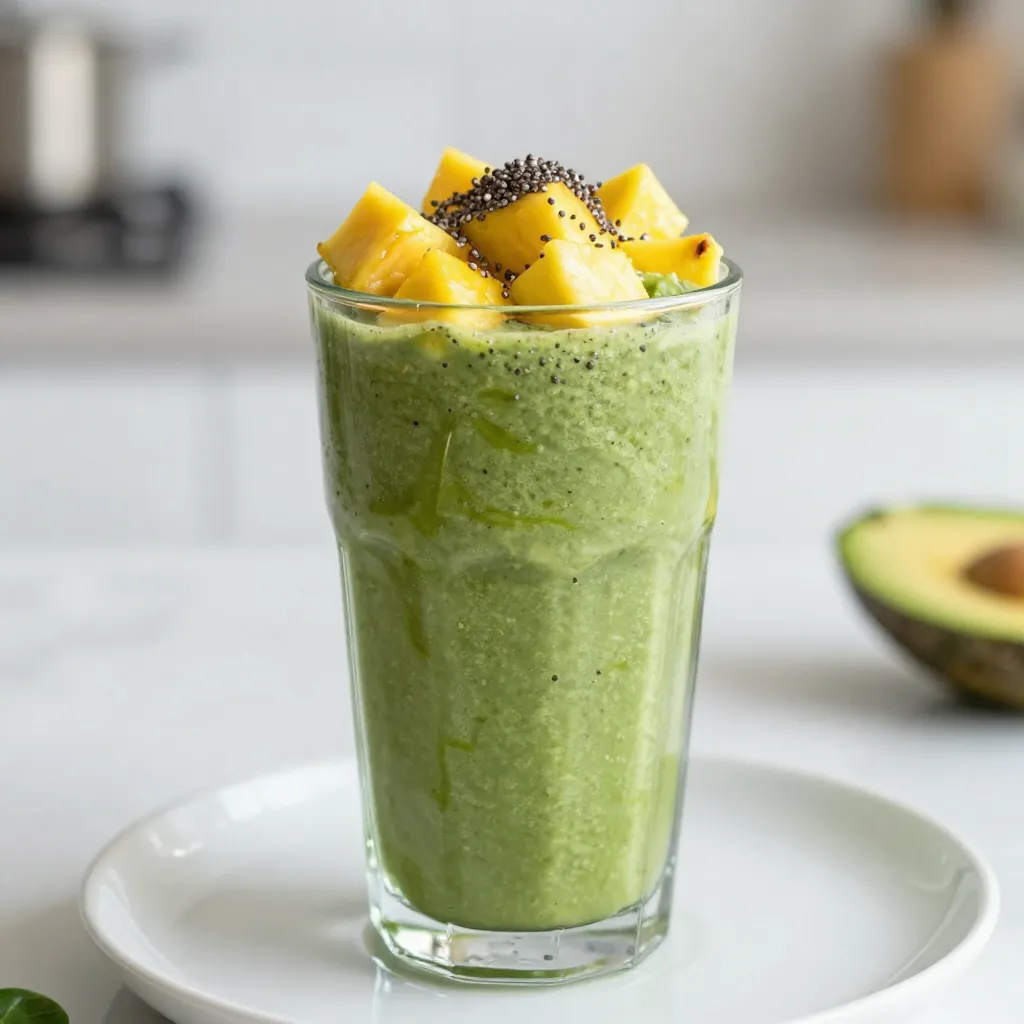
Are you ready to sip on something tasty and good for you? A Tropical Green Smoothie packs delicious fruits and

- Chicken - 2 boneless, skinless chicken breasts, diced - Marinade Components - 2 tablespoons sesame oil - 2 tablespoons low-sodium soy sauce - 1 tablespoon honey or maple syrup - 1 tablespoon rice vinegar - 2 cloves garlic, minced - 1 inch ginger, grated - Vegetables and Grains - 1 cup broccoli florets - 1 red bell pepper, sliced - 1 cup cooked brown rice or quinoa - 2 green onions, sliced - 2 tablespoons sesame seeds - Salt and pepper to taste To make a healthy sesame chicken bowl, start with fresh ingredients. The chicken gives protein and flavor. The marinade adds depth. You want to soak the chicken for at least 15 minutes. This helps it absorb all the tasty flavors. For veggies, broccoli and red bell pepper bring color and crunch. They cook quickly and stay crisp. You can use brown rice or quinoa as a base. Both are great for adding fiber. Don’t forget green onions and sesame seeds for garnish. They add a nice finish. Each ingredient plays a role. Choose quality, fresh items for the best taste. Enjoy creating a balanced meal that looks good and tastes even better! {{ingredient_image_1}} To start, you need to prepare the marinade. In a medium bowl, mix the diced chicken with half of the sesame oil, low-sodium soy sauce, honey or maple syrup, rice vinegar, minced garlic, and grated ginger. This blend adds flavor and keeps the chicken moist. You should marinate the chicken for at least 15 minutes. This time allows the chicken to soak up the flavors. Marinating is essential because it makes the chicken tender and tasty. Now it’s time to cook the chicken. Heat a large skillet or wok over medium-high heat. Add the remaining sesame oil and the marinated chicken. Remember to reserve the marinade for later. Cook the chicken for about 5 to 7 minutes. Keep stirring occasionally to ensure even cooking. You’ll know it’s done when the chicken is browned and fully cooked. Season it with salt and pepper to taste. This step adds a nice crust and enhances the flavor. Next, it’s time to add the veggies. Toss in the broccoli florets and sliced red bell pepper into the skillet. Pour in the reserved marinade to keep everything moist. Stir the vegetables for about 3 to 4 minutes. This cooking time helps keep them tender-crisp, which is important for texture and nutrition. You want them to stay bright and vibrant. They will add color and crunch to your bowl. For a tasty twist, try different marinades. You can use teriyaki sauce or even a spicy chili sauce. Both add a nice kick. Fresh ingredients make a big difference. Use crisp veggies and fragrant herbs. They bring life to your dish and boost flavor. Choosing between a skillet or a wok? A wok heats evenly and cooks food fast. It’s great for stir-frying. A skillet works well too. Just keep an eye on your heat. Start with medium-high, then lower it if needed. This way, your chicken cooks perfectly without burning. Garnishing matters! Sprinkle green onions and sesame seeds on top. This adds color and crunch. Serve it in a nice bowl to impress. Think about layering your dish. Start with grains, then add chicken and veggies on top. A beautiful plate makes meals more enjoyable. Pro Tips Marinate for Flavor: Allow the chicken to marinate for at least 30 minutes or up to overnight for deeper flavor absorption. Vegetable Variations: Feel free to add other vegetables like snap peas, carrots, or mushrooms for added color and nutrition. Perfectly Cooked Rice or Quinoa: Use a rice cooker or instant pot to ensure perfectly cooked brown rice or quinoa every time. Garnish Wisely: Experiment with different garnishes like crushed peanuts or cilantro for an extra layer of flavor and texture. {{image_2}} If you want a vegetarian option, try using tofu or tempeh. Both are great sources of protein. Tofu is soft and absorbs flavors well. Tempeh has a nutty taste and a firm texture. Both can be marinated just like chicken. For those who need gluten-free options, choose tamari instead of soy sauce. Tamari has a similar taste but is made without wheat. You can also look for gluten-free soy sauces at the store. Always check labels to ensure they meet your dietary needs. Brown rice is a classic choice for this bowl. It adds fiber and nutrients. Quinoa is another excellent option. It cooks quickly and is packed with protein. Both grains give a nice texture to your meal. You can also explore other whole grains. Barley or farro can add a different taste. They are hearty and very filling. Experiment with what you have on hand for variety. Swapping vegetables can keep your dish fresh and exciting. In spring, add asparagus or snap peas. In summer, zucchini and corn are tasty choices. Fall brings squash, while winter is great for carrots and kale. Using frozen veggies is a smart option too. They are often picked at peak ripeness. Just toss them in at the end of cooking. This saves time and keeps the meal nutritious. Leftovers from your Healthy Sesame Chicken Bowl can last in the fridge for about three days. To keep them fresh, store them in airtight containers. Glass containers work best as they do not absorb odors. Make sure to cool the food before sealing it up. You can freeze the cooked sesame chicken bowl for up to three months. To freeze, let the dish cool completely. Then, transfer it to freezer-safe bags or containers. Try to remove as much air as possible to prevent freezer burn. For reheating, thaw it overnight in the fridge for best results. To keep the chicken tender, reheat it in a skillet over medium heat. Add a splash of water or broth to maintain moisture. If you use a microwave, cover the bowl with a damp paper towel to avoid dryness. Avoid reheating too long to keep the texture right and prevent sogginess. Yes, you can make the sesame chicken ahead. To prep, marinate the chicken in advance. Store it in the fridge for up to a day. This helps flavors develop. When ready to cook, just heat your skillet and follow the steps. If you want to save even more time, you can cook the chicken and veggies and store them separately. This way, you can mix fresh rice or quinoa right before eating. This healthy sesame chicken bowl pairs well with many sides. Here are some tasty ideas: - Steamed edamame for a protein boost. - A fresh salad with cucumbers and carrots. - Crispy spring rolls for a fun crunch. - A side of pickled vegetables for tanginess. These options will add more color and flavor to your meal. Each side can help balance the dish. Absolutely! This recipe works great for meal prep. To portion for the week, divide the chicken and veggies into containers. Add a serving of brown rice or quinoa in each. Use airtight containers to keep the meals fresh. You can store them in the fridge for up to four days. For longer storage, freeze portions. Just reheat when you're ready to enjoy. This method saves time and keeps meals healthy! This blog post covered key steps to make a delicious sesame chicken dish. We discussed ingredients, marinating tips, cooking methods, and even storage advice. Flavor is key, so consider fresh ingredients and alternative marinades. Don’t forget about variations for dietary needs and seasonal veggies. With these tips, you can make meals easier and tastier. Remember, cooking should be fun and creative. Enjoy experimenting to find your perfect mix!

Healthy Sesame Chicken Bowl with Flavorful Veggies

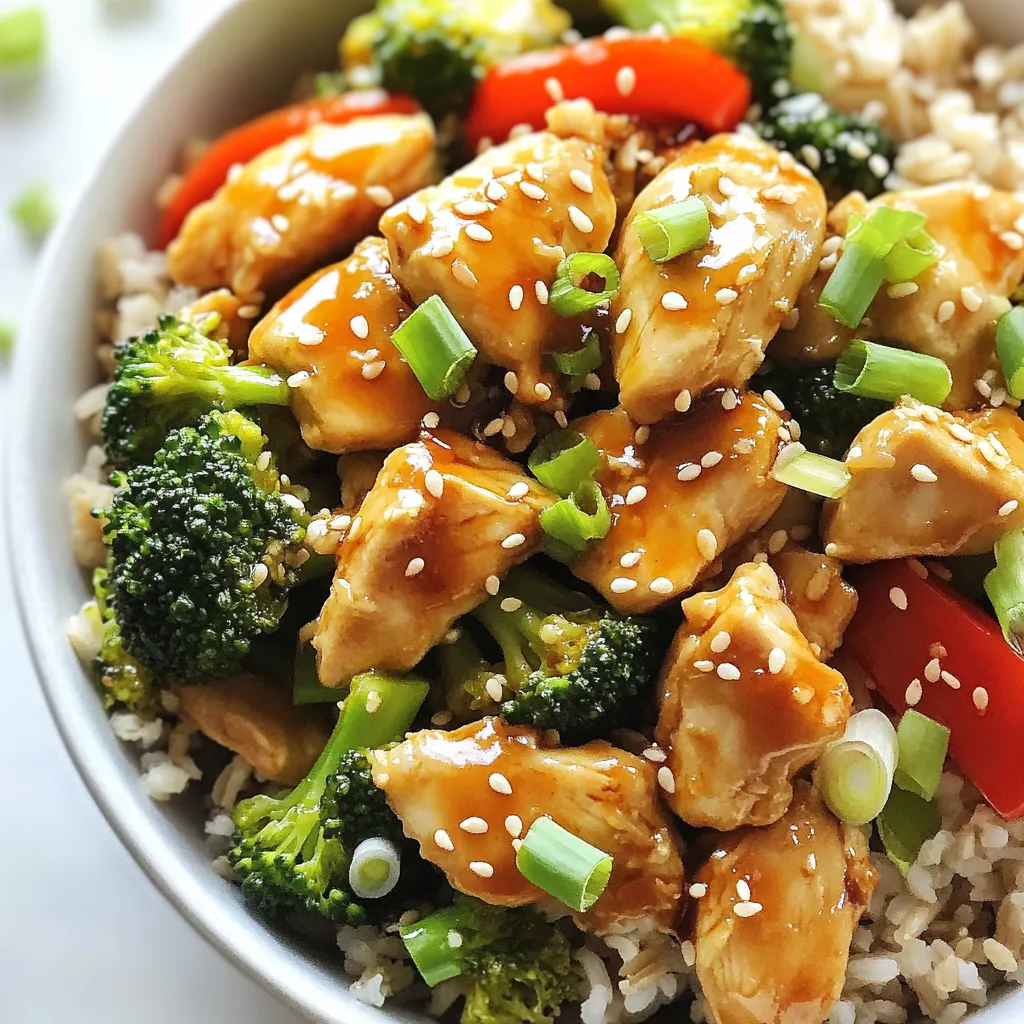
Looking for a quick and healthy meal that bursts with flavor? This Healthy Sesame Chicken Bowl with Flavorful Veggies is

Older posts
Newer posts
← Previous Page1 … Page143 Page144 Page145 … Page164 Next →

dsad

© 2026 easycookingbite • Built with GeneratePress

Our Policies

  • Copyright Policy
  • Cookie Policy
  • GDPR Policy
  • Privacy Policy
  • Disclaimer
  • Terms Of Use

More Information

  • Home
  • About
  • Contact
  • Appetizers
  • Dessert
  • Dinner
  • Drinks
©2026, easycookingbite About Back To Top