Skip to content
DisclaimerTerms Of UseGDPR PolicyCookie Policy

easycookingbite

  • Home
  • Drinks
  • Appetizers
  • Dinner
  • Dessert
  • About
  • Contact
  • Privacy Policy
DisclaimerTerms Of UseGDPR PolicyCookie Policy

Lily

- 1 cup rolled oats - 1/2 cup almond flour - 1/2 cup nut butter (peanut, almond, or cashew) These three main ingredients make the base of your cookies. Rolled oats give the cookies a chewy texture. Almond flour adds a nice nutty flavor and keeps the cookies moist. Nut butter, whether peanut, almond, or cashew, binds everything together while adding healthy fats. - 1/4 cup honey or maple syrup You can choose honey or maple syrup as your sweetener. Honey adds a rich taste and works well in baking. Maple syrup is a great vegan choice and adds a unique flavor. Both options bring natural sweetness, so pick what you enjoy most! - 1/2 cup mixed nuts (chopped walnuts, almonds, pecans) - 1/2 cup dried fruit (cranberries, raisins, or apricots) - 1/4 cup dark chocolate chips (optional) Add mixed nuts for crunch and protein. You can use walnuts, almonds, or pecans. Dried fruits like cranberries, raisins, or apricots add sweetness and chewiness. If you like chocolate, toss in some dark chocolate chips. They melt during baking and give a fun surprise in every bite! {{ingredient_image_1}} First, preheat your oven to 350°F (175°C). While it heats, line a baking sheet with parchment paper. This helps the cookies not stick. Next, gather a large mixing bowl. In this bowl, combine the rolled oats, almond flour, baking powder, salt, and cinnamon. Use a spoon to mix well. You want the dry ingredients evenly spread. Now, take another bowl for the wet mixture. Add the nut butter, honey (or maple syrup), and vanilla extract. Stir until smooth and creamy. This will make your cookies sweet and tasty. Pour the wet mixture into the dry bowl. Mix until you see no dry spots. The dough will be thick, but that’s good! Now, fold in the chopped mixed nuts and dried fruit. If you like, add dark chocolate chips for extra fun. To shape the cookies, use a cookie scoop or a spoon. Drop rounded tablespoons of dough onto your lined baking sheet. Make sure to leave space between each one. Gently flatten each cookie with your fingertips. This will help them bake evenly. Now, pop them in the oven and bake for 12-15 minutes. Keep an eye on them! They are ready when the edges turn golden brown. Once baked, remove the cookies from the oven. Let them cool on the baking sheet for about 5 minutes. Then, transfer them to a wire rack to cool completely. Enjoy your tasty trail mix breakfast cookies! To avoid crumbly cookies, use enough nut butter. Nut butter helps bind the ingredients. If your dough seems dry, add a little more honey or syrup. Mixing well is key. Make sure to stir until there are no dry spots left. Spice up your cookies with different flavors. Try adding a pinch of nutmeg or ginger for warmth. You can also mix in coconut flakes or chia seeds for fun textures. These small changes can make a big difference in taste. Keep an eye on your baking time. Set a timer for 12 minutes. Check your cookies at that point. The edges should be golden brown. If they need more time, bake for a minute more. This way, you won't overbake them. Pro Tips Storage Tip: Store cookies in an airtight container to keep them fresh for up to a week. Substitution Tip: Feel free to substitute any nut butter or dried fruit based on your preferences or allergies. Texture Tip: For a chewier texture, slightly underbake the cookies and allow them to cool on the baking sheet. Serving Suggestion: Pair these cookies with a glass of milk or a smoothie for a wholesome breakfast. {{image_2}} If you want to make nut-free cookies, don't worry! You can swap nut butter with seed butter. Sunflower seed butter works great. It adds a nice taste and keeps the cookies soft. You can also try pumpkin seed butter. Just make sure to check for allergies in your group. For those following a vegan diet, this recipe is easy to adapt. Replace honey with maple syrup. Use a plant-based nut butter or seed butter as well. This way, you keep the cookies vegan and tasty. You can enjoy these cookies without any animal products! You can customize your cookies with different flavors! Try using dried fruits like mango or figs for a sweet twist. You can change the nuts too. Pecans give a buttery flavor, while walnuts add a nice crunch. If you like chocolate, add dark chocolate chips for extra richness. Get creative and mix your favorite ingredients! To keep your cookies fresh, store them in an airtight container. Place parchment paper between layers to avoid sticking. They stay tasty for about a week at room temperature. If it's warm, put them in the fridge. This helps maintain their texture and flavor. To freeze your cookies, first let them cool completely. Then, place them in a single layer on a baking sheet. Freeze for 1-2 hours until firm. Afterward, transfer them to a freezer bag or container. Remove as much air as possible to prevent freezer burn. They can last up to three months in the freezer. To enjoy your cookies warm, preheat your oven to 300°F (150°C). Place the cookies on a baking sheet and heat for about 5-10 minutes. You can also microwave them for about 15-20 seconds. This warms them up nicely without drying them out. Enjoy your cookies fresh and soft! Yes, you can use quick oats. They will work well in this recipe. Quick oats may make the cookies softer. If you like a chewier cookie, stick with rolled oats. They hold their shape better. These cookies last about a week when stored properly. Keep them in an airtight container at room temperature. For longer storage, you can freeze them. They stay fresh for up to three months in the freezer. Absolutely! These cookies are packed with good nutrients. They have whole grains, healthy fats, and protein. The nuts and dried fruits add vitamins and minerals. Enjoy them as a quick breakfast or snack. You can substitute almond flour with other flours. Oat flour or whole wheat flour are good options. If you use all-purpose flour, the cookies may be less moist. Adjust the liquid if needed for a good texture. This blog covers everything you need to make delicious cookies. We discussed main ingredients like oats and nut butter, plus sweeteners like honey and maple syrup. You learned step-by-step instructions, tips for better texture, and tasty variations for all diets. Don’t forget storage tips to keep your cookies fresh. These cookies are not just a treat; they can fit various diets and preferences. Enjoy baking and sharing your creations!

Trail Mix Breakfast Cookies Nutritious and Easy Recipe

Looking for a delicious and nutritious breakfast? These Trail Mix Breakfast Cookies are perfect for you! They combine wholesome ingredients

To make a tasty creamy mushroom stroganoff, gather these main ingredients: - 12 oz (340g) wide egg noodles - 2 tablespoons olive oil - 1 medium onion, finely chopped - 3 cloves garlic, minced - 16 oz (450g) mixed mushrooms (cremini, shiitake, and button), sliced - 1 tablespoon soy sauce - 1 teaspoon dried thyme - 1 teaspoon smoked paprika - 1 cup vegetable broth - 1 cup sour cream or Greek yogurt - 2 tablespoons all-purpose flour - Salt and pepper to taste These ingredients bring rich flavor and a creamy texture to your dish. To make your stroganoff even better, consider adding these garnishes: - Fresh parsley, chopped - Cracked black pepper - A sprinkle of paprika These garnishes add color and a fresh finish to your meal. You can customize the recipe with these easy substitutions: - Use any pasta shape instead of wide egg noodles. - Swap olive oil for butter for a richer taste. - Replace sour cream with Greek yogurt for a tangy twist. - Use any mix of mushrooms you like. These swaps help you adapt the recipe to what you have at home. {{ingredient_image_1}} Start by boiling water in a large pot. Once it bubbles, add 12 oz of wide egg noodles. Cook them until they are al dente. This usually takes about 8-10 minutes. Stir them occasionally to avoid sticking. Once done, drain the noodles and set them aside. In a large skillet, pour 2 tablespoons of olive oil over medium heat. Let it warm up for a minute. Next, add 1 medium onion, finely chopped. Sauté the onion for about 4-5 minutes. You want it to become soft and translucent. After that, stir in 3 cloves of minced garlic. Cook for another minute until you smell the garlic's rich aroma. Now it's time for the mushrooms! Add 16 oz of sliced mixed mushrooms to the skillet. These can be cremini, shiitake, and button mushrooms. Cook them for about 8-10 minutes. Stir occasionally until they turn brown and tender. Then add 1 tablespoon of soy sauce, 1 teaspoon of dried thyme, and 1 teaspoon of smoked paprika. Stir well to coat the mushrooms. Cook for one more minute. Next, sprinkle 2 tablespoons of all-purpose flour over the mixture. Stir it in to blend well. This will help thicken the sauce. Gradually pour in 1 cup of vegetable broth while stirring. Keep stirring to avoid lumps. Let the sauce simmer for 3-4 minutes until it thickens slightly. Lower the heat and mix in 1 cup of sour cream or Greek yogurt. Stir well for a creamy finish. Let it simmer for another 2-3 minutes. Now, taste the sauce and add salt and pepper as needed. Toss the cooked egg noodles into the creamy mushroom sauce. Mix gently to coat the noodles evenly. Serve hot and garnish with freshly chopped parsley for a pop of color. Enjoy your creamy mushroom stroganoff! To get that perfect creamy texture, use sour cream or Greek yogurt. Both add richness. If you want a lighter option, go for Greek yogurt. Blend it in at low heat. This keeps the cream smooth and prevents curdling. Always add it after the sauce thickens. Stir gently to blend, and avoid boiling. You can boost flavor with a few extras. Try adding a splash of white wine for depth. Fresh herbs like thyme or dill also work well. A pinch of nutmeg can add warmth, too. For a bit of heat, sprinkle in red pepper flakes. Taste as you go to find your sweet spot. Don’t rush the mushroom cooking. Take time to brown them well; it brings out flavors. Adding sour cream too early can cause curdling. Always mix it in last. Avoid overcooking the noodles; they should be al dente. Finally, remember to taste and adjust seasoning before serving. Pro Tips Use Fresh Mushrooms: For the best flavor and texture, opt for fresh mushrooms rather than canned. They will enhance the overall dish. Thicken the Sauce: If you prefer a thicker sauce, add an additional tablespoon of flour and cook it for a minute before adding the broth. Alternative Creaminess: For a lighter version, substitute sour cream with low-fat Greek yogurt or a dairy-free alternative. Garnish Generously: Don't skip the fresh parsley garnish! It adds a pop of color and a fresh flavor that complements the dish beautifully. {{image_2}} You can easily make this dish vegetarian or vegan. For a vegetarian version, just use sour cream or Greek yogurt as usual. If you want it vegan, replace these with cashew cream or coconut yogurt. Both options keep the creamy texture and taste great. Use vegetable broth and check your soy sauce for animal products. This change still gives you that rich flavor you love. To make this dish gluten-free, swap out the egg noodles for gluten-free pasta. There are many good options available in stores. You can also use gluten-free flour when thickening the sauce. Make sure your soy sauce is gluten-free too. With these swaps, you can enjoy the same hearty meal without the gluten. Mushroom stroganoff has many variations around the world. In Russia, they often use beef instead of mushrooms. In Germany, you might find a touch of mustard for added flavor. You can also try different mushrooms like portobello or oyster for diverse tastes. If you're feeling adventurous, add some spinach or kale for a pop of color and nutrition. These swaps will keep your stroganoff fresh and exciting every time you make it. To store leftovers, let the dish cool down first. Place the creamy mushroom stroganoff in an airtight container. It will keep well in the fridge for up to three days. If you want to keep it longer, consider freezing it. When reheating, do it slowly. Use the stove or microwave. If using the stove, add a splash of broth to keep it creamy. Heat on low and stir often. If using the microwave, cover it and heat in short bursts, stirring in between. You can freeze creamy mushroom stroganoff for up to three months. To freeze it, let it cool completely. Place it in a freezer-safe container or bag. Remove as much air as possible to prevent freezer burn. When you’re ready to eat, thaw it overnight in the fridge before reheating. Yes, you can use many types of mushrooms. I like cremini, shiitake, and button mushrooms. You can mix and match flavors. Try portobello for a meatier taste. Just chop them up and add them to the pan. Each type gives a unique flavor to the dish. To make creamy mushroom stroganoff gluten-free, swap regular flour for gluten-free flour. You can also use gluten-free pasta instead of egg noodles. Always check labels for hidden gluten in sauces. With these changes, you will enjoy a tasty, gluten-free dish. Creamy mushroom stroganoff pairs well with many sides. I recommend a fresh green salad. Garlic bread is also a great choice for soaking up the sauce. You could serve it with steamed vegetables or roasted potatoes for a hearty meal. Enjoy your meal! In this post, we explored making creamy mushroom stroganoff. We discussed key ingredients, optional garnishes, and substitutions. You learned step-by-step how to prepare the dish, from noodles to sauce. Tips ensured a rich texture and great flavor. Variations catered to different diets. Finally, we covered storage and common questions. Now, you can create a tasty meal that suits your needs and preferences. Enjoy experimenting with this easy recipe!

Creamy Mushroom Stroganoff Simple and Hearty Dish

If you’re looking for a warm and filling meal, you’ve come to the right place! Creamy Mushroom Stroganoff is simple

To make delicious Classic Tiramisu Cups, you need the following ingredients: - 1 cup strong brewed coffee, cooled - 1 cup heavy cream - 8 oz mascarpone cheese - 1/2 cup granulated sugar - 1 teaspoon vanilla extract - 12 ladyfinger cookies - Unsweetened cocoa powder for dusting - Dark chocolate shavings for garnish (optional) Each ingredient plays a key role in creating the perfect dessert. The strong coffee adds rich flavor. Heavy cream gives a light, fluffy texture. Mascarpone cheese brings a smooth and creamy element. Sugar balances the flavors. Vanilla extract adds a warm note. Ladyfinger cookies soak up the coffee and add structure. The cocoa powder on top provides a hint of bitterness, while chocolate shavings can add a touch of elegance. Using quality ingredients makes a big difference. Choose good coffee and fresh mascarpone for the best taste. Enjoy gathering these items as you prepare to create a delightful dessert. {{ingredient_image_1}} 1. Start with a large bowl. Pour in 1 cup of heavy cream. 2. Use an electric mixer to whip the cream. Stop when soft peaks form. 3. In another bowl, mix 8 oz of mascarpone cheese, 1/2 cup of sugar, and 1 teaspoon of vanilla extract. Blend until smooth. 4. Gently fold the whipped cream into the mascarpone mixture. This gives a light and airy texture. 1. Take 12 ladyfinger cookies and dip each one into the cooled coffee. Soak for about 2 seconds. 2. In your serving cups, place the soaked ladyfingers on the bottom. 3. Add about 2-3 tablespoons of the mascarpone mixture on top. 4. Repeat this layering. Alternate between ladyfingers and mascarpone, finishing with mascarpone on top. 1. Cover the cups with plastic wrap. Refrigerate for at least 4 hours, or overnight if possible. 2. Before serving, dust the tops of each cup with cocoa powder. 3. Optionally, you can add dark chocolate shavings for a special touch. These steps make it easy to create your own Classic Tiramisu Cups. Enjoy the process and the delicious results! - Achieving perfect peaks To get perfect peaks, use cold heavy cream. Start mixing at low speed. Gradually increase the speed until soft peaks form. This means the cream holds shape but still looks fluffy. - Avoiding over-whipping Watch the cream closely. If you whip too long, it can turn into butter. Stop mixing when you see soft peaks. - Best practices for layering Use a clear cup to show off the layers. Dip each ladyfinger in coffee for just 2 seconds. This keeps them soft but not soggy. - Ensuring even distribution When layering, use a spoon to spread the mascarpone mixture evenly. This helps each cup taste great. Aim for about 2-3 tablespoons per layer. - Serving suggestions and plating Serve your tiramisu cups on a pretty platter. This adds charm to your dessert table. - Optional garnishes for visual appeal Dust cocoa powder on top for a classic look. Dark chocolate shavings add a touch of elegance. A sprig of mint can brighten the dish and make it pop! Pro Tips Use Fresh Coffee: For the best flavor, use freshly brewed coffee and allow it to cool before dipping the ladyfingers. Don't Overwhip the Cream: Stop whipping the heavy cream as soon as soft peaks form to maintain a light and airy texture in your tiramisu. Layering Technique: When layering, ensure each layer of ladyfingers is fully soaked for optimal flavor, but avoid soaking them for too long to prevent sogginess. Chill Time: For the best results, let the tiramisu chill overnight; this allows the flavors to meld beautifully. {{image_2}} You can easily boost the flavor of your tiramisu cups. Adding liqueurs like Kahlúa or Amaretto gives a rich taste. Just a tablespoon adds depth without being too strong. You can also try different extracts. Almond or hazelnut extract adds a unique touch. If you want to make your dessert healthier, swap in alternative sweeteners. Stevia or maple syrup works well. For those who avoid dairy, use coconut cream instead of heavy cream. It still gives a creamy texture and taste. Make your tiramisu cups pop with fresh fruits. Berries like raspberries or strawberries pair well with coffee flavors. You can also adapt the recipe for holidays. Add spices like nutmeg or cinnamon for a festive flair. To keep your tiramisu cups fresh, cover them tightly with plastic wrap. This keeps moisture out and flavors in. Store the cups in the fridge. They will last for up to 3 days. However, for the best taste, enjoy them within 24 hours. Can you freeze tiramisu cups? Yes, you can freeze them! Wrap each cup in plastic wrap and then place them in an airtight container. They will stay good for about a month. When it's time to serve after freezing, remove the cups from the freezer. Let them thaw in the fridge for several hours. Avoid using a microwave, as it can change the texture. Once thawed, dust with cocoa powder and enjoy! You can easily make tiramisu cups without alcohol. Use strong brewed coffee, as it gives great flavor. You can also add a splash of vanilla extract for extra taste. The main ingredients, like mascarpone and cream, stay the same. They create a rich and creamy dessert. This way, everyone can enjoy it, even kids! Yes, you can make tiramisu cups ahead of time. In fact, it’s better to let them sit in the fridge. This helps the flavors mix well. Make them the day before you want to serve. Just cover them with plastic wrap and chill. The longer they sit, the more delicious they become. If you don’t have ladyfingers, don’t worry! You can use other cookies like sponge cake or even graham crackers. Just cut them into pieces that fit your cups. These options will still soak up the coffee and taste great. They will give you a similar texture, making your dessert just as delightful. This blog post covered how to make delicious Tiramisu cups step-by-step. You learned about the key ingredients and how to prepare them. We discussed tips for the best cream and layering methods. You discovered fun variations and how to store your dessert. In summary, Tiramisu cups are easy to make and taste amazing. Try different flavors and enjoy this classic treat! Your homemade dessert will impress everyone.

Classic Tiramisu Cups Delightful and Easy Dessert Recipe

Are you ready to impress your friends and family with a classic dessert? My Classic Tiramisu Cups are both delightful

- 1 ½ cups all-purpose flour - 1 teaspoon baking powder - ½ teaspoon baking soda - ¼ teaspoon salt - ½ cup unsalted butter, softened - 1 cup granulated sugar - 2 large eggs - 1 teaspoon vanilla extract - 1 teaspoon lemon zest - ½ cup fresh lemon juice - ½ cup buttermilk - 1 cup fresh strawberries, pureed - ½ cup powdered sugar (for frosting) - 1 teaspoon lemon juice (for frosting) These ingredients create a tasty mix of flavors. The all-purpose flour gives the cupcakes their structure. Baking powder and baking soda help them rise. A pinch of salt adds balance to the sweet taste. Butter makes the cupcakes rich and soft. Granulated sugar sweetens the batter well. Eggs help bind everything together and add moisture. Vanilla extract brings warmth, while lemon zest adds a bright touch. Fresh lemon juice gives a tangy kick, and buttermilk keeps the texture moist and tender. Pureed strawberries add a burst of fruity flavor. For the frosting, powdered sugar and lemon juice blend to create a smooth, sweet topping. This combination makes every bite a delight. {{ingredient_image_1}} 1. Preheat your oven to 350°F (175°C). Line a muffin tin with cupcake liners to prepare for baking. 2. In a medium bowl, mix together the all-purpose flour, baking powder, baking soda, and salt. Set this dry mix aside for later. 3. In a large bowl, beat the softened butter and granulated sugar. Keep mixing until the mixture is light and fluffy, which should take about 3-4 minutes. 4. Add the eggs one at a time. Mix well after adding each egg. Then, stir in the vanilla extract and lemon zest for flavor. 5. Slowly add the fresh lemon juice and buttermilk to the mix. Do this alternately with the dry ingredients. Start and end with the flour mix. 6. Gently fold in the pureed strawberries. Be careful not to overmix; we want these flavors to combine nicely. 1. Spoon the batter into each cupcake liner. Fill them about 2/3 full to allow for rising. 2. Place the muffin tin in the oven and bake for 18-20 minutes. To check if they are done, insert a toothpick into the center. If it comes out clean, they are ready. 3. Once baked, let the cupcakes cool in the pan for 5 minutes. Then, move them to a wire rack to cool completely. 1. To make the lemon frosting, beat together the powdered sugar and lemon juice. Mix until the frosting is smooth and fluffy. 2. If the frosting is too thick, add a little water to adjust the consistency. You want it spreadable but not runny. 3. When the cupcakes are completely cool, frost them generously with the lemon frosting. For a fun touch, you can top each cupcake with a slice of fresh strawberry. To ensure moist cupcakes, use fresh ingredients. Always check the expiration dates on your baking powder and baking soda. Properly cream the butter and sugar until light and fluffy; this adds air and moisture. Use room temperature eggs and buttermilk for better mixing. This helps create a smooth batter. Measuring ingredients accurately is key. Use dry measuring cups for flour and baking powder. Spoon the flour into the cup, then level it off with a knife. Avoid packing flour tightly; this can lead to dry cupcakes. For liquids, use a clear measuring cup. Check the measurement at eye level for precision. To achieve the right consistency for your frosting, start with softened butter. Beat the powdered sugar and lemon juice until smooth. If the frosting is too thick, add a tiny bit of water. If it's too thin, add more powdered sugar until you get a fluffy texture. For decorating ideas, use a piping bag to create fun designs on your cupcakes. You can also sprinkle lemon zest or place a fresh strawberry slice on top for a beautiful finish. This adds color and makes your cupcakes pop! One common mistake is overmixing the batter. Mix until just combined to keep the cupcakes light and airy. Overmixing can lead to dense results. Another mistake is not cooling the cupcakes before frosting. Allow them to cool completely on a wire rack. If you frost them too soon, the frosting may melt and slide off. This small step will keep your cupcakes looking great and tasting fresh! Pro Tips Use Fresh Strawberries: For the best flavor, use ripe, fresh strawberries for pureeing. This will enhance the cupcake's taste and aroma. Check for Doneness: To ensure your cupcakes are perfectly baked, insert a toothpick into the center. If it comes out clean, they are ready! Room Temperature Ingredients: Make sure your butter, eggs, and buttermilk are at room temperature. This helps create a smooth batter and fluffy cupcakes. Decorate with Care: After frosting, you can add a slice of fresh strawberry or a sprinkle of lemon zest on top for an extra pop of color and flavor. {{image_2}} You can easily make vegan strawberry lemonade cupcakes. Replace the eggs with flaxseed meal. Mix 1 tablespoon of flaxseed meal with 2.5 tablespoons of water. Let it sit for a few minutes to thicken. Use coconut oil instead of butter for a rich taste. For gluten-free options, swap all-purpose flour with gluten-free flour. Brands like almond or coconut flour can also work. Make sure your baking powder is gluten-free. This way, everyone can enjoy these tasty treats. You can play with flavors by using different fruits. Try raspberries or blueberries for a unique twist. They both pair well with lemon and add a pop of color. You can also mix in lemon zest from other citrus fruits like oranges or limes. For frosting, try cream cheese icing or a berry buttercream. This adds a creamy texture and extra flavor. You could even use whipped cream for a light finish. Each frosting option gives a new taste to your cupcakes. Pair your cupcakes with refreshing drinks. Lemonade, iced tea, or sparkling water work well. Their bright flavors balance the sweetness of the cupcakes. These cupcakes are perfect for special occasions. Serve them at birthday parties or summer picnics. They also make a great treat for potlucks or family gatherings. Their fun taste and look will impress all your guests! To keep your strawberry lemonade cupcakes fresh, follow these simple steps. First, let the cupcakes cool completely. This avoids sogginess. Once cool, place them in an airtight container. Use a container with a lid to prevent air exposure. You can also use plastic wrap, but ensure it’s tightly sealed. Store them at room temperature for up to three days. If you want to keep them longer, the fridge is an option, but be aware they may dry out a bit. Freezing cupcakes is a great way to enjoy them later. To freeze, place the cooled cupcakes in a single layer in a freezer-safe container. You can also wrap each cupcake in plastic wrap first, then place them in a container. This helps keep them tasty. They can stay frozen for about three months. When you’re ready to enjoy a cupcake, take it out and let it thaw at room temperature. This usually takes about an hour. If you want a warm treat, pop it in the microwave for about 10-15 seconds. Frost them after thawing, so the frosting stays fresh and fluffy. To keep your cupcakes moist, use these tips: - Use buttermilk: It adds fat and flavor. - Don’t overbake: Check for doneness at 18 minutes. - Add pureed strawberries: They add moisture and flavor. - Cool properly: Let them cool in the pan for 5 minutes, then on a rack. These steps help keep the cupcakes soft and delicious. Yes, you can substitute many ingredients: - Butter: Use coconut oil for a dairy-free option. - Buttermilk: Mix milk with lemon juice or vinegar. - Sugar: You can use brown sugar instead of granulated sugar. - Fresh strawberries: Frozen strawberries work too; just thaw and puree them. These swaps work well in the recipe. To frost your cupcakes evenly, follow these steps: - Use a piping bag: This helps control the frosting. - Start in the center: Swirl the frosting outwards in circles. - Add a layer: Frost a little, then add more for height. - Top with fruit: A slice of strawberry looks nice. These methods ensure your cupcakes look and taste great. Strawberry lemonade cupcakes last about 3 days at room temperature. To keep them fresh: - Store in an airtight container: This prevents them from drying out. - Keep in the fridge: They last up to a week if chilled. - For longer storage: Freeze them for up to 3 months. These tips help maintain their flavor and texture. You learned how to make delicious strawberry lemonade cupcakes from scratch. We covered ingredients, baking steps, and frosting tips. You now have tricks to avoid common mistakes and ideas for variations. Remember to store your cupcakes properly for fresh snacks later. Experiment with flavors and substitutions to make this recipe your own. Happy baking! Enjoy your tasty treats at any occasion. Your friends and family will love them.

Strawberry Lemonade Cupcakes Tangy and Sweet Delight

Are you ready to create a treat that’s as bright and cheerful as summer itself? Strawberry Lemonade Cupcakes combine tangy

To make a great chicken and rice casserole, you need these key items: - 2 cups cooked rice (white or brown) - 2 cups cooked chicken, shredded - 1 cup broccoli florets (fresh or frozen) - 1 cup cheddar cheese, shredded - 1/2 cup cream of mushroom soup - 1/2 cup milk - 1/2 teaspoon garlic powder - 1/2 teaspoon onion powder - 1 teaspoon dried thyme - Salt and pepper to taste - 1/4 cup breadcrumbs (for topping) - 2 tablespoons olive oil These ingredients blend together to create a warm, cheesy dish that everyone loves. You can change a few ingredients to suit your taste. Here are some ideas: - Use cooked turkey instead of chicken for a different flavor. - Swap broccoli for other veggies like peas or spinach. - Try different cheeses, like mozzarella or pepper jack, for a unique taste. - Use brown rice for a healthier option. Feel free to get creative! Each change can make the dish new and exciting. If you do not have some ingredients, don’t worry! Here are some easy swaps: - For cream of mushroom soup, use cream of chicken or a homemade white sauce. - If you lack milk, try chicken broth or a plant-based milk. - Replace dried thyme with Italian seasoning for a different herb flavor. - For breadcrumbs, crushed crackers or panko work well, too. These substitutions maintain flavor while allowing you to work with what you have. {{ingredient_image_1}} Start by preheating your oven to 350°F (175°C). This step is key for even cooking. While the oven heats, grease a 9x13 inch casserole dish. Use cooking spray or a little oil. This will help the casserole come out easily after baking. In a large mixing bowl, combine the cooked rice, shredded chicken, and broccoli florets. Add half of the cheddar cheese, cream of mushroom soup, and milk. Then, sprinkle in the garlic powder, onion powder, and dried thyme. Mix it all well until everything is coated. Don’t forget to season with salt and pepper to taste. Make sure you mix well. This helps all the flavors blend together. Now, transfer the mixture to your greased casserole dish. Spread it out evenly. In a small bowl, mix the breadcrumbs with olive oil and a pinch of salt. Stir until the breadcrumbs are coated. Sprinkle this mixture over the casserole. Then, add the rest of the cheddar cheese on top. Bake in the oven for 25-30 minutes. You want the cheese to be bubbly and the breadcrumbs to turn golden brown. When done, take it out and let it cool for 5-10 minutes before serving. To make sure your casserole is creamy, use a mix of cream of mushroom soup and milk. This blend adds rich flavor and moisture. I also recommend using shredded cheese, as it melts well and keeps things smooth. If you want extra creaminess, mix in a bit of sour cream. Stir gently to keep it fluffy and light. Serve your casserole straight from the dish. This keeps it warm and inviting. For a pop of color, top it with fresh parsley or chives. Pair it with a fresh side salad for crunch and balance. You can also serve it with crusty bread to soak up every bit of creamy goodness. When reheating, use the oven for the best results. Preheat it to 350°F (175°C). Cover the casserole with foil to keep it moist. Heat for about 15-20 minutes or until warm. If you prefer the microwave, use a microwave-safe bowl. Heat in short bursts, stirring in between, to keep it from drying out. Pro Tips Use Leftover Chicken: This recipe is perfect for utilizing leftover rotisserie chicken, saving you time and enhancing the flavor. Cheese Variations: Feel free to mix different types of cheese such as mozzarella or pepper jack for a unique twist on flavor. Make it Creamy: For an extra creamy casserole, consider adding an additional 1/4 cup of cream or sour cream to the mixture. Frozen Broccoli: If using frozen broccoli, thaw and drain excess water beforehand to prevent the casserole from becoming watery. {{image_2}} You can make this casserole healthier. Use brown rice instead of white rice. Brown rice has more fiber and keeps you full longer. Swap the cream of mushroom soup for a homemade version. You can mix low-fat yogurt with herbs for creaminess without the extra fat. Add more veggies like spinach or carrots. This boosts nutrition and flavor. Use lean chicken or turkey to cut down on fat. Lastly, try low-fat cheese or reduce the amount of cheese used. You can easily make a vegetarian version of this casserole. Replace chicken with chickpeas or lentils for protein. Use vegetable broth instead of chicken broth. This adds depth to the flavors. Swap broccoli for any veggies you love, like zucchini or bell peppers. You can also use tofu for a protein source. For the creamy part, consider using a mix of cashew cream or coconut milk. This keeps it rich and tasty without meat. You can make this dish in a slow cooker. Start by mixing all the ingredients in the slow cooker. Add cooked rice, shredded chicken, and veggies into it. Pour in the cream of mushroom soup and milk. Stir until everything is coated well. Season with garlic powder, onion powder, and thyme. Set the slow cooker to low for 4-6 hours or high for 2-3 hours. When it’s done, check the texture. It should be creamy and flavorful. Top with cheese and breadcrumbs before serving. Enjoy the convenience of a slow cooker meal! Store your leftover chicken and rice casserole in an airtight container. Let it cool to room temperature before sealing. This helps keep it fresh longer. You can store it in the fridge for up to three days. Use clear labels to mark the date. It helps avoid any confusion later. To freeze the casserole, use a freezer-safe container. Make sure to cool it first. Cover it tightly with plastic wrap or foil. You can freeze it for up to three months. When you need it, just thaw it in the fridge overnight before reheating. This keeps the flavors intact. Reheat your casserole in the oven for the best results. Preheat your oven to 350°F (175°C). Place the casserole in a baking dish. Add a splash of milk if it seems dry. Cover it with foil to keep it moist. Heat for about 20-25 minutes. You can also use the microwave if you’re short on time. Heat it in short bursts, stirring in between. This helps it heat evenly. Enjoy your warm, tasty meal! Yes, you can use brown rice! It adds a nutty taste and extra fiber. Brown rice takes longer to cook, so make sure it's fully cooked before mixing it in the casserole. This will help keep your dish creamy and prevent it from being too dry. Uncooked chicken and rice casserole can last up to two days in the fridge. Store it in an airtight container. If you want to keep it longer, consider freezing it instead. Just remember to thaw it in the fridge before baking. You can serve this casserole with a fresh side salad. A simple green salad pairs well. You can also add steamed vegetables for extra color and nutrition. For a comforting touch, serve it with warm bread or garlic bread. In this blog post, we explored how to make a tasty chicken and rice casserole. We covered key ingredients, suggested variations, and even substitutions. You learned step-by-step instructions for prepping and baking. I shared tips to keep your casserole creamy and tasty. We looked at healthy options and storage best practices, too. As you try this dish, remember you can adjust it to your taste. Enjoy creating your perfect casserole!

Savory Chicken and Rice Casserole Simple and Tasty

Are you craving a warm, satisfying meal that’s both simple and delicious? Look no further! This Savory Chicken and Rice

Making Almond Joy Energy Balls is simple. Gather these ingredients for a sweet and healthy treat: - 1 cup pitted dates - 1 cup almond butter - 1 cup unsweetened shredded coconut - 1/2 cup almonds, roughly chopped - 1/4 cup cocoa powder - 1 tsp vanilla extract - A pinch of sea salt - 2 tablespoons honey or maple syrup (optional for added sweetness) Each ingredient plays a key role in flavor and texture. Pitted dates provide natural sweetness and stickiness. Almond butter adds creaminess and healthy fat. Shredded coconut gives a chewy texture and tropical taste. Chopped almonds add crunch. Cocoa powder brings rich chocolate flavor. Vanilla extract enhances the sweetness, while sea salt balances the taste. Honey or maple syrup is optional; use it if you want a sweeter snack. These ingredients come together to create a delicious energy ball. They are perfect for a quick snack or a post-workout boost. The mix of flavors will remind you of the classic Almond Joy candy, but in a healthier way. Plus, these energy balls are easy to make and store! {{ingredient_image_1}} First, gather your pitted dates and almond butter. In a food processor, combine these two ingredients. Pulse until the mixture is smooth and creamy. You might need to stop and scrape the sides. This ensures every bit mixes well. Next, add the fun stuff! Toss in the shredded coconut, chopped almonds, cocoa powder, vanilla extract, and a pinch of sea salt. If you like more sweetness, now is the time to add honey or maple syrup. This can really boost the flavor! After mixing, process the mixture until it forms a sticky dough. If the dough feels too dry or crumbly, add a tablespoon of water or more nut butter. This helps it stick together. Now, scoop out about a tablespoon of the mixture. Roll it into a ball with your hands. Repeat this step until you’ve used up all the dough. Finally, place your rolled energy balls on a baking sheet lined with parchment paper. Refrigerate them for about 30 minutes. This step helps them firm up and makes them easier to eat. Enjoy! To get the perfect texture, you might need to adjust the mix. If the dough feels too crumbly, add a tablespoon of water or more almond butter. This helps bind everything together. Make sure not to over-process the mixture. You want to keep some texture in your energy balls for that delightful bite. Presentation makes a big difference. I love to garnish my energy balls with shredded coconut or crushed almonds. It adds a nice touch and makes them look tasty. Serving them in decorative bowls also boosts their visual appeal. A simple bowl can turn a snack into a treat. You can customize the sweetness to your liking. Honey and maple syrup are great options to add flavor. If you prefer a milder taste, skip the sweetener. Each sweetener changes the flavor slightly, so feel free to experiment. Pro Tips Use Fresh Dates: Make sure to use fresh, soft pitted dates for the best texture and sweetness in your energy balls. Customize Your Nuts: Feel free to mix and match your nuts. Cashews or walnuts can be great alternatives to almonds for a different flavor profile. Experiment with Flavors: Add spices like cinnamon or nutmeg to give your energy balls an extra flavor kick. Storage Tips: Store your energy balls in the fridge for up to two weeks or freeze them for longer storage. Just make sure to use an airtight container! {{image_2}} You can change the taste of your Almond Joy Energy Balls easily. Try using different nut butters. Sunflower seed butter or cashew butter can offer new flavors. You can also add protein powders for a boost. If you want a twist, replace cocoa powder with carob. Carob has a sweet, earthy flavor that many enjoy. It can make your energy balls unique and tasty. If you need vegan or nut-free options, you can make simple swaps. For a vegan version, use maple syrup instead of honey. To make these nut-free, replace almond butter with sunflower seed butter. You can also ensure all ingredients are free from gluten. This way, everyone can enjoy these energy balls without worry. To make your energy balls even more fun, add mix-ins. Dried fruits like raisins or cranberries add sweetness. Chia seeds can provide a good crunch and nutrition. If you love chocolate, throw in some dark chocolate chips. These additions can make each bite exciting and different! To keep your Almond Joy Energy Balls fresh, store them in an airtight container. This helps prevent them from drying out. You can place them in the fridge for longer shelf life. They will stay good for about a week in the fridge. If you want to save them for later, refrigeration works great! You can freeze these energy balls for long-term storage. Simply place them in a single layer on a baking sheet. Once frozen, transfer them to a freezer-safe bag or container. This method helps keep them from sticking together. They can last up to three months in the freezer. When you want to enjoy one, simply take it out and let it thaw. You can leave it at room temperature for about 30 minutes. If you’re in a hurry, you can also pop it in the microwave for a few seconds. Enjoy your tasty snack anytime! Almond Joy Energy Balls last about one week in the fridge. Store them in an airtight container. For longer storage, you can freeze them. They keep well for up to three months in the freezer. Just thaw them before eating. Yes, you can use different nuts! Try walnuts, pecans, or cashews. Each nut adds its own flavor and crunch. Just chop them roughly before mixing. This will keep your energy balls exciting and tasty. These energy balls are full of nutrients. They provide healthy fats, fiber, and protein. Dates offer natural sweetness and energy. Almond butter adds healthy fats and protein. Coconut gives you fiber and adds a tropical taste. Together, they make a balanced snack. If you want to skip dates, use ripe bananas or applesauce. Both options will add natural sweetness. You might need to adjust the amount of nut butter. Just make sure the mixture stays sticky enough to form balls. Absolutely! You can make these energy balls ahead of time. Just prepare them and store them in the fridge. They are perfect for a quick snack or a post-workout boost. Having them ready makes healthy eating easy! You learned how to make Almond Joy Energy Balls using simple, tasty ingredients. We covered each step, from mixing the base to forming the balls and chilling them. Remember, you can adjust sweetness and flavor to suit your taste. Storage is easy, ensuring they stay fresh or last longer in the freezer. Enjoy making these snacks for a healthy treat anytime. They are fun, nutritious, and full of flavor. With these tips, you can tailor your energy balls to your liking, making them a perfect addition to your meal prep.

Almond Joy Energy Balls Easy and Healthy Snack

Looking for a quick and healthy snack? Almond Joy Energy Balls are your answer! Made with simple, wholesome ingredients, these

For the best Blueberry Crumble Bars, use fresh ingredients. You need: - 2 cups fresh blueberries - 1 tablespoon lemon juice - 1/4 cup granulated sugar (adjust based on blueberry sweetness) - 1 teaspoon cornstarch Fresh blueberries give the bars a juicy and sweet flavor. The lemon juice brightens the taste, while sugar sweetens it. Cornstarch helps thicken the filling. You will also need some common baking staples. Gather these: - 1 1/2 cups all-purpose flour - 1/2 cup rolled oats - 1/2 cup brown sugar, packed - 1/2 teaspoon baking powder - 1/4 teaspoon salt - 1/2 cup unsalted butter, melted - 1 teaspoon vanilla extract Flour and oats create a great crumble. Brown sugar adds depth, while baking powder helps the bars rise. Salt balances the sweetness, and butter brings everything together. You can tweak the recipe to suit your taste. If your blueberries are very sweet, use less granulated sugar. You can also try swapping the brown sugar for coconut sugar for a different flavor. If you want a lighter option, use less butter or a butter substitute. These small changes can help make the bars just right for you. {{ingredient_image_1}} First, preheat your oven to 350°F (175°C). Grease an 8x8-inch baking dish with butter or cooking spray. This step helps the bars come out easily after baking. In a mixing bowl, gently combine the fresh blueberries with 1 tablespoon of lemon juice, 1/4 cup of granulated sugar, and 1 teaspoon of cornstarch. Mix these ingredients carefully to avoid squishing the berries. Let this sit for a few minutes. This time allows the flavors to blend and the cornstarch to thicken. In another bowl, whisk together 1 1/2 cups of all-purpose flour, 1/2 cup of rolled oats, 1/2 cup of brown sugar, 1/2 teaspoon of baking powder, and 1/4 teaspoon of salt. These ingredients form the tasty crumb base and topping. Next, pour in 1/2 cup of melted unsalted butter and 1 teaspoon of vanilla extract. Mix until the dry ingredients get coated and the mixture becomes crumbly. Take about two-thirds of this mixture and press it firmly into the bottom of your greased baking dish. Make sure it's even and covers the entire base. Now, take the blueberry mixture and spoon it evenly over the pressed crumble base. Spread the blueberries gently so they cover the whole area. Finally, sprinkle the remaining crumble mixture over the blueberries. Ensure it's distributed evenly for the best texture. Bake the dish in the preheated oven for 30-35 minutes. You want the top to turn golden brown and the blueberries to bubble. Let the bars cool in the pan for at least 15 minutes before slicing into squares. To get the best crumble, use cold butter. Cut it into small cubes and mix it in. This keeps the mixture crumbly. You want to see small clumps of butter. Don’t over-mix; stop when the mix looks sandy but holds together. The oats add a nice chewiness too. I love serving these bars warm. They taste great with a scoop of vanilla ice cream. Dusting them with powdered sugar adds a sweet touch. You can also enjoy them plain or with fresh berries on top. They are perfect for breakfast or dessert! A common mistake is using soft butter. It makes the crumble too smooth. Always measure your flour correctly; too much can make it dry. Don’t skip the cornstarch in the filling. It helps thicken the blueberries and keeps the bars from being too runny. Lastly, let them cool before slicing; it makes cutting easier! Pro Tips Use Fresh Blueberries: Fresh blueberries will provide the best flavor and texture for your crumble bars. If using frozen, make sure to thaw and drain excess moisture. Adjust Sweetness: Depending on the ripeness of your blueberries, you may need to adjust the sugar content. Taste the mixture before baking to find the perfect balance. Perfect Crumble Texture: For a crumbly topping, ensure your butter is melted but not too hot. Mix until just combined to keep the texture nice and crumbly. Let Cool Before Slicing: Allow the bars to cool for at least 15 minutes before slicing. This helps them set and makes for cleaner cuts. {{image_2}} You can make these blueberry crumble bars gluten-free. Use gluten-free all-purpose flour instead of regular flour. Check the flour blend to ensure it works well in baking. This small change makes the bars safe for gluten-sensitive friends without losing flavor or texture. To make this recipe vegan, swap butter for coconut oil or a vegan butter. You can also use maple syrup or agave syrup instead of granulated sugar. For the egg, use unsweetened applesauce (1/4 cup per egg) if you decide to add it for moisture. These swaps keep the bars tasty while meeting vegan needs. You can add fun flavors to your bars. Mix in chopped nuts like walnuts or pecans for crunch. Add spices like cinnamon or nutmeg to give warmth and depth. A little zest from an orange or lemon brightens the blueberries. These extras can make your bars unique and exciting. To keep your blueberry crumble bars fresh, store them in an airtight container. Use parchment paper to separate layers if you stack them. This helps prevent sticking. Place the container in the fridge for best results. If you want to keep them longer, you can freeze them. In the fridge, these bars last about 3 to 5 days. The blueberries stay juicy, and the crumble remains tasty. If frozen, they can last up to 3 months. Just make sure to wrap them well to avoid freezer burn. To reheat, take a bar and place it on a microwave-safe plate. Heat it for 15 to 20 seconds. This warms the bar and makes the blueberries soft again. You can also bake them in the oven. Set the oven to 350°F (175°C) and warm the bars for about 10 minutes. This makes the crumble nice and crisp again. Enjoy warm for the best flavor! Yes, you can use frozen blueberries. They work well in this recipe. Just add them straight from the freezer. You may want to increase the baking time slightly. The filling might be a bit juicier, but it will still taste great! Adjust the sugar based on the sweetness of your blueberries. If they are tart, add more sugar. If they are sweet, use less. Start with the 1/4 cup sugar and taste the mixture. This way, you make sure the filling is just right. Absolutely! You can double the recipe. Use a larger baking dish, like 9x13 inches. Just keep an eye on the baking time. Larger bars may need a few extra minutes to bake fully. If you need a butter substitute, try coconut oil or vegan butter. Both options work well in this recipe. They will keep the crumble nice and rich. Just melt them the same way you would butter. Yes, these bars freeze well! Once cooled, wrap them in plastic wrap or foil. Store them in an airtight container. They can last up to three months in the freezer. Just thaw them in the fridge before serving. This article covered how to make delicious blueberry crumble bars. You learned about fresh ingredients needed, baking staples, and simple adjustments. I shared step-by-step instructions for baking and tips for the perfect texture. Plus, I offered storage info and answered common FAQs. Blueberry crumble bars are easy and fun to make. Enjoy experimenting with variations to suit your taste. With these tips, your baking will shine. Happy baking!

Blueberry Crumble Bars Irresistibly Delicious Treat

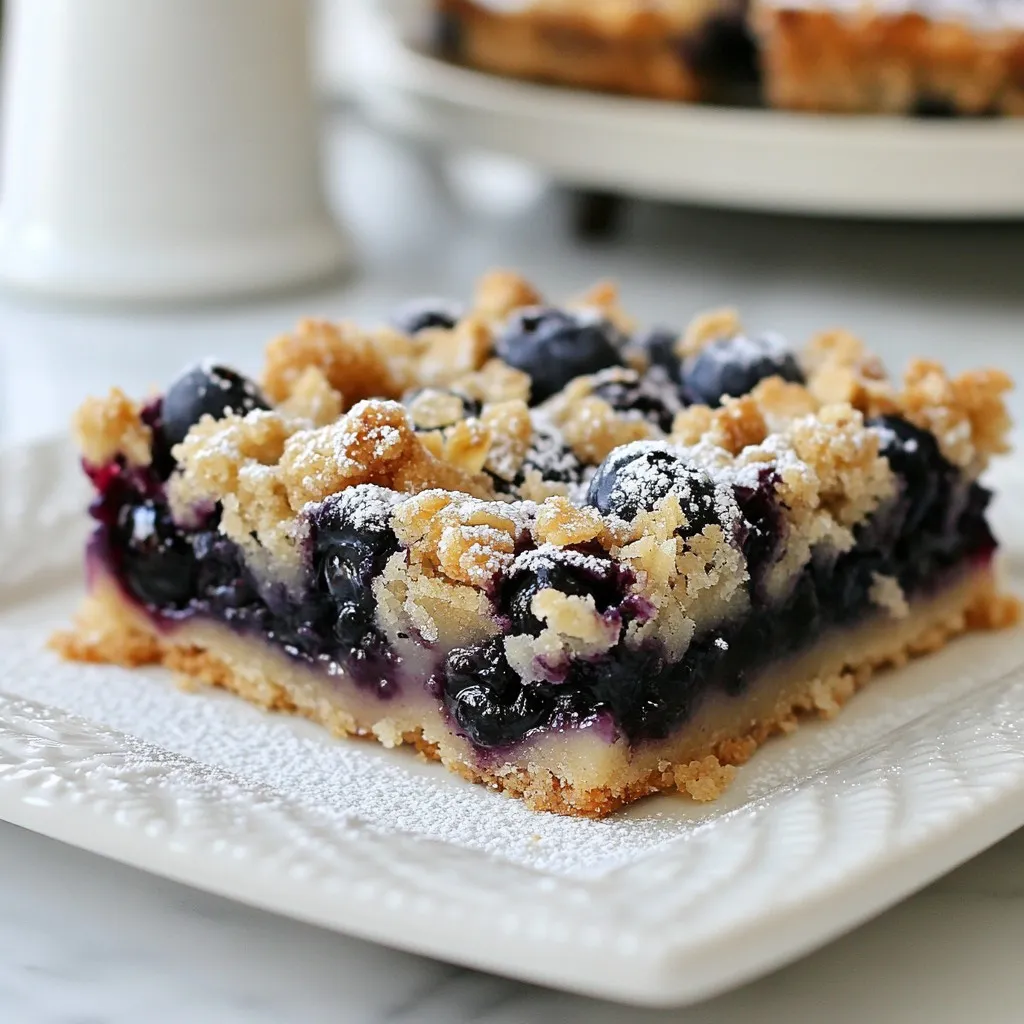
If you love sweet treats that burst with flavor, you’ll adore these Blueberry Crumble Bars. They blend juicy blueberries with

- 1 pound beef sirloin, thinly sliced - 1 bell pepper (red or yellow), sliced - 1 cup broccoli florets - 1 medium carrot, julienned - 3 green onions, chopped - 3 cloves garlic, minced - 1 tablespoon ginger, grated The star of this dish is the beef sirloin. It cooks quickly and has great flavor. Choose fresh, bright vegetables. The bell pepper adds sweetness, while broccoli packs nutrients. Carrots bring color and crunch. Garlic and ginger add warmth and spice. - 1/4 cup soy sauce (low sodium) - 2 tablespoons honey or maple syrup - 1 tablespoon sesame oil - 1 tablespoon cornstarch mixed with 2 tablespoons water (slurry) The teriyaki sauce is simple yet rich. Low-sodium soy sauce keeps it savory without being too salty. Honey or maple syrup gives it that sweet touch. Sesame oil adds a nutty flavor that ties everything together. The cornstarch slurry thickens the sauce, making it stick to the beef and veggies. - Sesame seeds for garnish Sesame seeds add a nice crunch and look great on top. They also give a hint of nuttiness that complements the dish. {{ingredient_image_1}} To start, gather your sauce ingredients. You need soy sauce, honey or maple syrup, and sesame oil. In a bowl, whisk these items together. Add a pinch of pepper for extra flavor. Set the sauce aside for later. Next, heat a large skillet over medium-high heat. Add one tablespoon of vegetable oil. Once the oil is hot, add the sliced beef in a single layer. Sear the beef for about 2-3 minutes until it turns brown. Make sure not to crowd the pan. After browning, remove the beef and set it aside. Now, use the same skillet for your veggies. Add the remaining tablespoon of vegetable oil. Toss in minced garlic and grated ginger. Stir for about 30 seconds until it smells great. Then, add the sliced bell pepper, broccoli florets, and julienned carrot. Stir-fry these vegetables for 3-4 minutes. You want them soft yet crunchy. Return the beef to the skillet. Pour the teriyaki sauce over the beef and veggies. Stir everything well to mix the flavors. Slowly add the cornstarch slurry while stirring. This helps the sauce thicken. Cook for an additional 1-2 minutes. Finally, toss in the chopped green onions before serving. To get great beef texture, avoid overcooking. Cook the beef slices for just 2-3 minutes until they turn brown. This keeps them juicy and tender. If you cook too long, the beef will become tough. Always remove it from the pan once cooked. Let it rest while you cook the veggies. This way, it stays perfect. You can easily adjust the flavors. If you want it spicy, add a dash of red pepper flakes or some sliced chili. If you prefer sweet, increase the honey or maple syrup. Mix it in the teriyaki sauce before you cook. Tasting the sauce helps you find the right balance. Remember, you can always add more but can’t take it out. Using the best tools makes a big difference. A large skillet or wok is perfect for stir-frying. It allows heat to spread evenly. A good spatula helps mix everything well without sticking. Make sure your pan is hot before adding the beef. This helps create that nice sear. Always have everything ready before you start cooking for smooth flow. Pro Tips Slice Against the Grain: For tender beef, always slice against the grain of the meat. This helps to break down the muscle fibers, resulting in a more tender bite. Prep Your Ingredients First: Stir frying is a quick cooking method. Make sure all your ingredients are prepped and within reach before you start cooking to ensure a smooth process. Adjust Sweetness to Taste: Depending on your preference, you can adjust the sweetness of the teriyaki sauce by adding more honey or maple syrup, or balancing it with a splash of vinegar for acidity. Use Fresh Vegetables: Fresh produce adds vibrant color and texture to your stir fry. Consider using seasonal vegetables for the best flavor and nutrition. {{image_2}} You can swap beef for other proteins. Chicken works great in this dish. Just slice it thinly like the beef. Tofu is a good choice for a vegetarian option. Use firm tofu and press it to remove extra water. Shrimp is another tasty protein; it cooks quickly and adds a nice flavor. Feel free to play with your veggies! You can use seasonal vegetables like snap peas or bell peppers. Frozen vegetables work well, too. They save time and are often just as nutritious. Just remember to thaw them before cooking, so they heat evenly. If you need a gluten-free option, use tamari instead of soy sauce. Tamari tastes similar but has no wheat. You can also look for other gluten-free sauces. Be sure to check the labels for any hidden gluten. This way, you can enjoy teriyaki beef stir fry without worry! Store your leftover teriyaki beef stir fry in a sealed container. Make sure it cools to room temperature before sealing. It stays fresh in the fridge for up to 3 days. Label your container with the date. This helps you keep track of how long it's been stored. To freeze stir fry, let it cool completely. Place it in a freezer-safe bag, removing as much air as you can. It can last in the freezer for up to 3 months. When you're ready to eat, thaw it in the fridge overnight. Reheat in a skillet over medium heat, adding a splash of water to prevent drying out. Understanding the shelf life helps you enjoy your stir fry safely. In the fridge, it is best consumed within 3 days. If you freeze it, use it within 3 months for the best taste. Always check for any signs of spoilage, like off smells or colors, before eating. This way, you can enjoy your meal without worries. Yes, you can make Teriyaki Beef Stir Fry ahead of time. Here are some best practices for meal prep: - Cook your beef and veggies: Prepare the beef and vegetables as per the recipe. - Store separately: Keep the cooked beef and veggies in separate containers. This helps maintain texture. - Refrigerate: Place them in the fridge within two hours of cooking. They will stay fresh for up to three days. - Reheat properly: When ready to eat, reheat on the stove. This keeps the stir fry crispy. You can pair Teriyaki Beef Stir Fry with many tasty sides: - Steamed rice: White or brown rice soaks up the sauce. - Noodles: Lo mein or rice noodles add a fun twist. - Salad: A simple green salad offers a fresh crunch. - Spring rolls: These add a crispy side that complements the meal. You can easily make Teriyaki Beef Stir Fry healthier with these tips: - Use leaner cuts: Choose flank steak or sirloin for less fat. - Add more veggies: Load up on broccoli, bell peppers, or snap peas for extra nutrients. - Swap sauces: Use low-sodium soy sauce to cut down on salt. - Try baking: Instead of frying, bake the beef for a lower-fat option. These simple changes can help you enjoy this dish while sticking to a healthier diet. Teriyaki beef stir fry is simple and fun to make. You learned about key ingredients like beef sirloin, fresh veggies, and teriyaki sauce. I shared steps to cook the beef and keep veggies crunchy. You can also add spice or swap proteins. Remember to store leftovers safely, too. With practice, you’ll master this dish and impress your family. Enjoy every bite and feel proud of your cooking!

Teriyaki Beef Stir Fry Simple and Tasty Recipe

Ready to spice up your dinner routine? In this post, I’ll share a simple and tasty Teriyaki Beef Stir Fry

- 4 ears of fresh corn, husked - 1 lime, zested and juiced To make chili lime grilled corn, fresh corn is key. Choose ears that feel firm to your touch. Look for bright green husks. The lime adds a zesty kick, making the corn pop with flavor. - 2 tablespoons chili powder - 1 tablespoon smoked paprika - 1 teaspoon garlic powder - 3 tablespoons olive oil - Salt to taste For the seasoning mix, chili powder gives heat, while smoked paprika adds depth. Garlic powder boosts flavor without being overpowering. Olive oil helps blend everything and keeps the corn moist. Don’t forget to add salt to taste; it enhances all the flavors. - Crumbled feta cheese - Fresh cilantro, chopped - Lime wedges for serving Toppings can elevate your dish. Crumbled feta cheese adds creaminess. Fresh cilantro gives a burst of freshness. Serve with lime wedges for extra zing. All these toppings make the corn even more delicious and fun to eat! {{ingredient_image_1}} First, you need to preheat the grill. Set it to medium-high heat. This helps the corn cook evenly and get those nice grill marks. Next, grab a small bowl. Combine these ingredients: - 2 tablespoons chili powder - 1 tablespoon smoked paprika - 1 teaspoon garlic powder - Zest from 1 lime - 3 tablespoons olive oil - Salt to taste Mix well until it forms a thick paste. This adds great flavor to your corn. Now, take your ears of corn and husk them. Remove all the silk strands. Brush the chili-lime mixture all over each ear of corn. Make sure to coat them well. Place the corn directly on the grill grates. Grill for about 10-12 minutes. Turn the corn every few minutes. You want the kernels to be tender and slightly charred. Once done, take them off the grill and squeeze fresh lime juice over each ear. Enjoy! To get that perfect char, start with a clean grill. A clean grill helps the corn cook evenly. Preheat the grill to medium-high heat. Place the corn directly on the grill grates. Turn the corn every few minutes. This helps to avoid burning while getting those nice grill marks. Look for a golden-brown color on the kernels. This means your corn is ready and has great flavor. The chili-lime paste is tasty, but you can add more! Try using cumin or cayenne for extra heat. Fresh herbs like thyme or oregano can change the taste too. If you like smokiness, try adding more smoked paprika. Don't forget about lime zest; it gives a fresh kick. Feel free to mix and match spices based on your taste. Serving your chili-lime grilled corn can be fun! Place the corn on a large platter for a family-style meal. Squeeze fresh lime juice over each ear for a zesty finish. Sprinkle crumbled feta cheese on top for a salty bite. Add chopped cilantro for a pop of color. Serve with lime wedges on the side for extra zing. This simple presentation makes your dish look great and taste even better! Pro Tips Choose Fresh Corn: For the best flavor, select ears of corn that are bright green, with tightly wrapped husks and moist silk. Fresh corn is sweet and tender, making it perfect for grilling. Customize the Spice Level: If you prefer a milder version, reduce the amount of chili powder or opt for a mild variant. For extra heat, add cayenne pepper or red pepper flakes to the chili-lime mix. Grill Technique: To prevent the corn from charring too quickly, you can soak the husked ears in water for about 15 minutes before grilling. This will add moisture and help achieve a perfect char. Serving Suggestions: For a fun twist, try serving the corn with a variety of toppings such as avocado, lime crema, or a sprinkle of chili flakes for an extra kick. {{image_2}} You can change the spice mix for fun new flavors. Try using cumin for a warm taste. Paprika adds a smoky flavor. If you want heat, add cayenne pepper. For a fresh twist, use fresh herbs like basil or mint. Mix and match to find your favorite blend! To make this dish dairy-free, skip the feta cheese. You can still enjoy a rich flavor. Instead, use avocado or a sprinkle of nutritional yeast. Both add creaminess without dairy. This way, everyone can enjoy this corn dish, even those with dairy allergies. Don’t have a grill? No problem! You can roast the corn in the oven. Preheat to 400°F. Wrap the corn in foil and bake for 20 minutes. You can also use a stovetop grill pan. Just heat it over medium heat and cook the corn for 10-12 minutes, turning often. You’ll get that nice char even indoors! To store leftover grilled corn, let it cool first. Wrap each ear tightly in plastic wrap. Place the wrapped corn in an airtight container. This keeps the corn fresh for up to three days in the fridge. You can also use aluminum foil if you prefer. Just make sure it is sealed well. To reheat the corn without losing its great taste, try using the grill or stovetop. Heat your grill to medium. Place the corn on the grill for about 5 minutes. Turn it until warm. If using the stovetop, add a little olive oil to a pan. Heat the corn over medium heat, turning often. This keeps the corn juicy and tasty. Yes, you can freeze grilled corn! First, let it cool down. Then, remove the husks and wrap each ear in plastic wrap. Place the wrapped corn in a freezer bag. Be sure to squeeze out as much air as possible. This will keep the corn fresh for up to six months in the freezer. When ready to eat, thaw it in the fridge overnight before reheating. Yes, you can use frozen corn. However, fresh corn gives better flavor and texture. Frozen corn might be softer after grilling. If using frozen corn, thaw it first. Pat it dry to reduce moisture. This step helps achieve a good char. Cook it for shorter time, about 5-7 minutes. Watch closely to avoid mushiness. You can tell corn is done when it is tender and slightly charred. Look for deep golden brown spots on the kernels. They should be juicy and soft but not mushy. Use tongs to turn the corn every few minutes. This ensures even cooking. If you hear popping sounds, it’s a good sign! Yes, you can prepare the chili lime mixture ahead of time. Mix the chili powder, smoked paprika, garlic powder, lime zest, olive oil, and salt. Store it in an airtight container in the fridge. It will keep well for about a week. Stir well before using, as it may separate. This saves time on grilling day! Grilling corn is simple and rewarding. We covered the best ingredients, seasonings, and optional toppings. I shared step-by-step instructions and helpful tips for perfect grill marks and flavor. You can try variations for different tastes and learned how to store leftovers. Enjoy your grilled corn! It's a tasty treat for any meal or gathering.

Chili Lime Grilled Corn Savory and Simple Treat

If you’re looking for a quick and tasty side dish, you’ll love my Chili Lime Grilled Corn! This simple recipe

- 1 cup rolled oats - 2 cups almond milk (or any milk of choice) - 1 medium apple, peeled and diced - 1 tablespoon chia seeds - 1 tablespoon maple syrup (optional, for sweetness) - 1 teaspoon ground cinnamon - 1/2 teaspoon vanilla extract - 1/4 cup walnuts, chopped (optional for crunch) - Pinch of salt To make apple cinnamon overnight oats, you need simple ingredients. Each one adds flavor and texture. Rolled oats are the base. They soak up the milk and get soft. They give you a great start to the day. Almond milk is my choice for creaminess, but you can use any milk. Cow’s milk or oat milk also works well. Apples bring sweetness and crunch. I like to use a medium apple. Just peel and dice it into small pieces. Chia seeds add a fun texture. They help the oats thicken and give you fiber. If you want some sweetness, maple syrup is a great option. It gives a nice flavor but is not a must. Ground cinnamon is key for that warm spice taste. It pairs perfectly with apples. A touch of vanilla extract enhances the flavor. It makes the oats taste extra special. For extra crunch, add walnuts. They are optional, but I love their nutty taste. Lastly, don’t forget a pinch of salt. It balances the flavors and makes everything pop. This combination makes a tasty breakfast you can prepare in minutes. {{ingredient_image_1}} 1. Start by mixing the dry ingredients. In a large bowl, add 1 cup of rolled oats, 1 tablespoon of chia seeds, and a pinch of salt. Stir well to combine. 2. Now, combine the wet ingredients. In another bowl or measuring jug, pour in 2 cups of almond milk. Add 1 tablespoon of maple syrup, 1 teaspoon of ground cinnamon, and 1/2 teaspoon of vanilla extract. Whisk until fully blended. 3. It’s time to merge the mixtures. Pour the milk mixture over the oat mixture. Stir until everything is evenly combined. 1. Divide the mixture into two jars or containers. If you like, sprinkle 1/4 cup of chopped walnuts on top for extra crunch. 2. Cover each jar with a lid or plastic wrap. Place them in the refrigerator overnight. This allows the oats and chia seeds to soak up the liquid. 1. In the morning, grab your jars from the fridge. Give the oats a good stir to mix everything. If you want a creamier texture, add a splash of milk. 2. Top your oats with additional apple slices, a sprinkle of cinnamon, and a drizzle of maple syrup for added flavor. Enjoy your tasty breakfast! - Adjusting sweetness levels: You can change the sweetness by using more or less maple syrup. If you like it sweet, add a little more. If you prefer it less sweet, skip it or use a touch of honey. - Substituting ingredients: You can swap almond milk for any milk you like. Coconut milk gives a nice flavor. If you don’t have chia seeds, try flaxseeds for a similar texture. - Ensuring proper consistency: If your oats are too thick in the morning, just add a splash of milk. Stir well to mix it up. The oats should be creamy but not runny. - Preparing in bulk: You can make several jars at once. Just double or triple the recipe. Store them in the fridge for busy mornings. - Quick morning assembly: In the morning, all you need to do is stir and add toppings. This keeps your routine fast and easy. You can grab a jar and enjoy your meal on the go. Pro Tips Use a variety of apples: Different apple varieties can add unique flavors and textures to your overnight oats. Try using honeycrisp for sweetness or tart green apples for a refreshing bite. Meal prep for the week: Make several jars of overnight oats at once and store them in the fridge for quick breakfasts throughout the week. Just customize toppings each day! Experiment with spices: While cinnamon is a classic choice, feel free to experiment with nutmeg, ginger, or even pumpkin spice for a seasonal twist. Adjust the consistency: If you prefer your oats creamier, add more milk in the morning until you reach your desired texture. You can also blend the mixture for a smoother consistency. {{image_2}} You can change this recipe by using different fruits. Here are some fun ideas: - Bananas: Slice them in and mix for a creamy texture. - Berries: Strawberries, blueberries, or raspberries add a burst of flavor. - Peaches: Fresh or canned, they bring a sweet twist. You can also switch up the spices. Instead of cinnamon, try: - Nutmeg: It gives a warm and cozy taste. - Cardamom: This spice adds a unique flavor. - Ginger: A little kick of spice can brighten your oats. For some crunch, add nuts or seeds like: - Almonds: They are crunchy and healthy. - Pumpkin seeds: They are full of nutrients. - Sunflower seeds: These add a nice texture. If you want to make this dish vegan or dairy-free, use plant-based milk. Almond milk works great, but you can also try: - Oat milk: It has a creamy taste. - Coconut milk: This adds a tropical flair. - Soy milk: A good option for a protein boost. For gluten-free oats, make sure to use certified gluten-free rolled oats. This way, you can enjoy your meal without worry. You can keep apple cinnamon overnight oats in the fridge for up to five days. Make sure to store them in airtight jars or containers. This keeps them fresh and tasty. If you want to freeze them, do so in freezer-safe containers. They can last for up to three months in the freezer. Just remember to leave some space in the container for expansion. To reheat your overnight oats, take them out of the fridge or freezer. If they are frozen, let them thaw in the fridge overnight before reheating. Add a splash of almond milk to make them creamy again. Heat them in the microwave for about one minute, stirring halfway through. You can also add fresh ingredients after storage. Try topping with more diced apples, a sprinkle of cinnamon, or a drizzle of maple syrup for extra flavor. Can I use quick oats instead of rolled oats? Yes, you can use quick oats. They cook faster and absorb liquid more quickly. However, the texture will be creamier and less chewy than rolled oats. Is it necessary to use chia seeds? Chia seeds add fiber and help thicken the mixture. If you don’t have them, you can skip them. Your oats will still taste great without them. Can I make this recipe nut-free? Definitely! Just replace almond milk with any other milk like oat or soy milk. You can also skip walnuts or use seeds instead. Caloric content per serving Each serving has about 300 calories. This may vary based on your milk choice and any add-ins. Health benefits of ingredients - Rolled oats: Great for heart health and full of fiber. - Chia seeds: Packed with omega-3 fatty acids and protein. - Apples: Good source of vitamins and fiber. - Cinnamon: May help regulate blood sugar levels. - Walnuts: Loaded with healthy fats and antioxidants. This blog post guides you through making a great oatmeal dish. We covered essential ingredients, from rolled oats to your favorite fruit. You learned the steps to mix, layer, and store your oatmeal. I shared helpful tips for perfecting the recipe and saving time on busy mornings. You can explore fun variations based on your tastes or dietary needs. Remember, oatmeal can be simple and delicious. Try these ideas, and enjoy a tasty breakfast every day.

Apple Cinnamon Overnight Oats Easy and Tasty Recipe

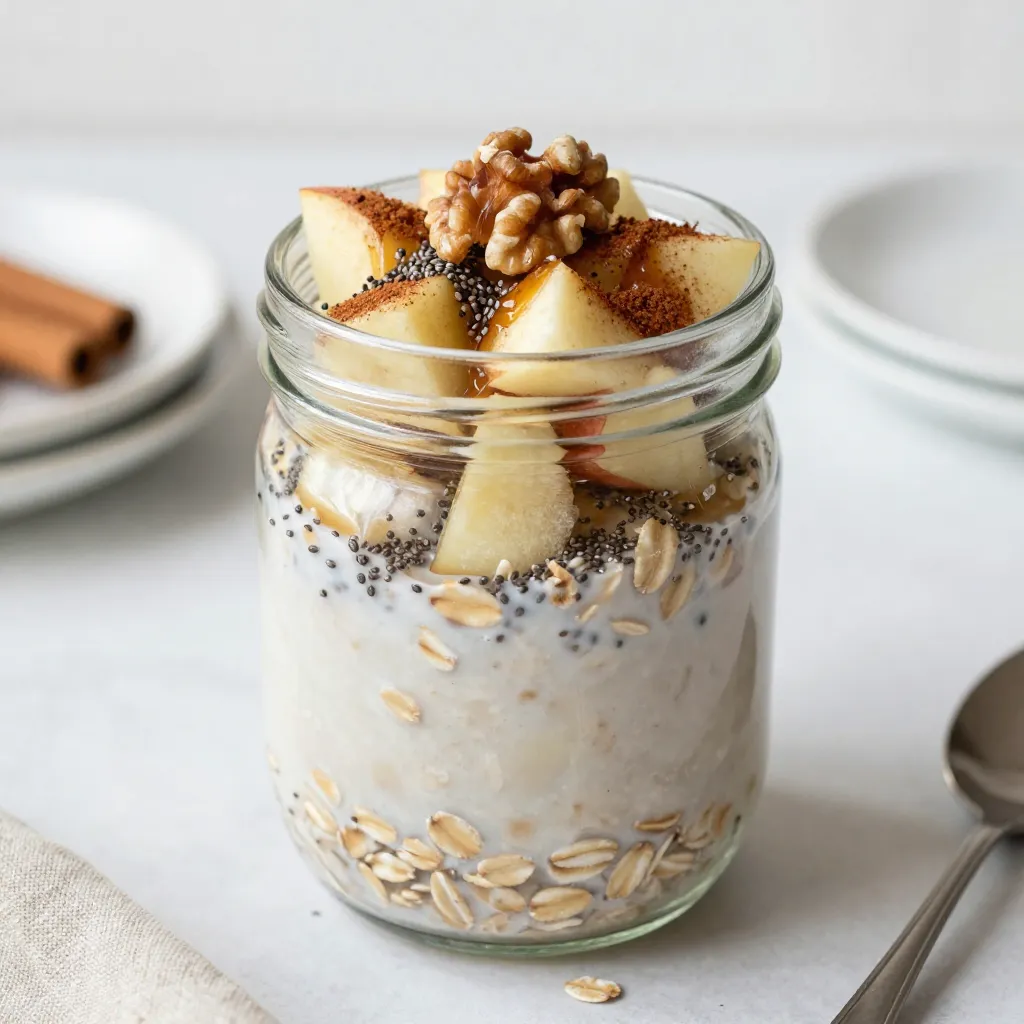
Start your mornings on a high note with my easy and tasty Apple Cinnamon Overnight Oats! This simple recipe combines

Older posts
Newer posts
← Previous Page1 … Page147 Page148 Page149 … Page164 Next →

dsad

© 2026 easycookingbite • Built with GeneratePress

Our Policies

  • Copyright Policy
  • Cookie Policy
  • GDPR Policy
  • Privacy Policy
  • Disclaimer
  • Terms Of Use

More Information

  • Home
  • About
  • Contact
  • Appetizers
  • Dessert
  • Dinner
  • Drinks
©2026, easycookingbite About Back To Top