Skip to content
DisclaimerTerms Of UseGDPR PolicyCookie Policy

easycookingbite

  • Home
  • Drinks
  • Appetizers
  • Dinner
  • Dessert
  • About
  • Contact
  • Privacy Policy
DisclaimerTerms Of UseGDPR PolicyCookie Policy

Lily

To make a delicious peppermint white chocolate cheesecake, gather these ingredients: - 1 ½ cups graham cracker crumbs - ½ cup unsalted butter, melted - 2 tablespoons granulated sugar - 16 oz cream cheese, softened - 1 cup white chocolate chips, melted - ½ cup powdered sugar - 2 large eggs - 1 teaspoon peppermint extract - 1 cup heavy whipping cream - Crushed peppermint candies for garnish If you need to swap out ingredients, here are some options: - Graham cracker crumbs: You can use cookie crumbs or crushed oats. - Unsalted butter: Coconut oil or vegan butter work well. - Cream cheese: Use vegan cream cheese or a soft tofu blend. - White chocolate chips: Try dairy-free chocolate chips for a vegan option. - Powdered sugar: You can blend regular sugar to make your own powdered sugar. - Eggs: Substitute with flaxseed meal mixed with water for a vegan option. - Heavy whipping cream: Use coconut cream for a dairy-free version. Using high-quality ingredients can really enhance your cheesecake. Here’s how: - Choose fresh cream cheese: Look for a brand with simple ingredients. - Select premium white chocolate: Higher cocoa butter content leads to better flavor. - Use pure peppermint extract: This adds a stronger, more natural taste. - Opt for organic eggs: They often have richer flavor and better texture. - Select fresh peppermint candies: These should be vibrant and flavorful for the best garnish. By focusing on quality, you will elevate your peppermint white chocolate cheesecake to a new level. {{ingredient_image_1}} To start, preheat your oven to 325°F (160°C). Grab a bowl and mix together 1 ½ cups of graham cracker crumbs, ½ cup of melted unsalted butter, and 2 tablespoons of granulated sugar. Stir until it looks like wet sand. Press this mixture firmly into the bottom of a 9-inch springform pan. Get it nice and even. Bake the crust for 10 minutes, then take it out and let it cool. In a large mixing bowl, beat 16 oz of softened cream cheese until it's smooth. Next, slowly add 1 cup of melted white chocolate and mix it in well. Gradually add in ½ cup of powdered sugar, beating as you go. Now, add 2 large eggs, one at a time, mixing thoroughly after each. Finally, mix in 1 teaspoon of peppermint extract until the filling is silky and creamy. This mixture should smell amazing! Pour the creamy filling over your cooled crust in the springform pan. Smooth the top with a spatula for a nice finish. Bake in the preheated oven for 50-60 minutes. You want the edges to set, but the center should still jiggle just a little. Once done, turn off the oven and crack the door open. Let the cheesecake cool in the oven for 1 hour. After that, refrigerate it for at least 4 hours, or even overnight, to let it set completely. To get a smooth and creamy cheesecake, start with room-temperature cream cheese. Cold cream cheese can create lumps in your filling. Beat it well until it's completely smooth. When you add eggs, mix them in one at a time. This helps keep the mixture light and fluffy. Remember to not overbeat once you add the eggs. Overmixing can make your cheesecake dense. Finally, bake it until the edges are set, but the center should still jiggle slightly. This ensures a creamy texture. For a beautiful look, top your cheesecake with whipped cream. I like to whip the cream until soft peaks form. Spread it evenly over the cheesecake. Then, sprinkle crushed peppermint candies for a festive touch. You can also drizzle melted white chocolate on top. This adds a sweet shine. Serve slices on decorative plates for a special touch. For extra fun, add a few more crushed candies around the plate. One big mistake is not cooling your cheesecake properly. After baking, let it cool in the oven for an hour. This helps prevent cracks. Another mistake is not chilling it long enough. Aim for at least four hours, but overnight is best. If you rush this step, the texture won't be right. Lastly, don’t skip the peppermint extract. It gives that holiday flavor. If you do, your cheesecake will taste flat. Pro Tips Cool Gradually: After baking, let the cheesecake cool in the oven with the door cracked. This helps prevent cracks on the surface by allowing it to cool gradually. Use Room Temperature Ingredients: Ensure your cream cheese and eggs are at room temperature for a smoother filling. This helps achieve a silky texture without lumps. Chill Overnight: For the best flavor and texture, chill the cheesecake overnight. This allows the flavors to meld and the cheesecake to firm up perfectly. Whipped Cream Variations: Experiment with flavored whipped cream, such as vanilla or chocolate, for an unexpected twist on the traditional topping. {{image_2}} You can mix flavors to change this cheesecake. Try using almond extract instead of peppermint. This gives a nice nutty taste. You can also add orange zest for a citrus twist. If you love chocolate, add cocoa powder to the filling. This makes a rich chocolate version. Each change brings a new fun taste to your cheesecake! To make a vegan version, swap cream cheese for a plant-based option. Use dairy-free white chocolate for a similar taste. Instead of eggs, try silken tofu. Blend it until smooth for the perfect texture. Use coconut cream instead of heavy cream for whipping. This keeps it rich and creamy without dairy. If you want a gluten-free crust, use almond flour or gluten-free graham crackers. Combine the flour with melted coconut oil and sugar. Press this mixture into your springform pan. This crust will be just as tasty and hold up well. A nice nutty flavor will make your cheesecake even better! To keep your peppermint white chocolate cheesecake fresh, store it in the fridge. Use an airtight container or cover it tightly with plastic wrap. This helps prevent it from absorbing any strong smells from other foods. Make sure to place it on a flat surface to avoid any damage to the top or edges. You can freeze the cheesecake if you want to save some for later. First, let it chill in the fridge for at least four hours. Once it is set, wrap it tightly in plastic wrap, then in aluminum foil. This double layer protects it from freezer burn. When you’re ready to eat, let it thaw in the fridge for several hours or overnight. The cheesecake lasts about five to seven days in the fridge. After that, it may lose its taste and texture. If you see any signs of mold or it smells off, it’s best to throw it away. Keeping track of how long it’s been in the fridge helps ensure you enjoy it at its best. To slice cheesecake, use a sharp knife. Dip it in hot water for a clean cut. Wipe the knife after each slice. This keeps the edges neat and pretty. Aim for 10-12 slices for sharing. Yes, you can make this cheesecake a day or two ahead. It sets best after chilling overnight. This also helps flavors blend. Just cover it well in the fridge. Check the edges of the cheesecake. They should be firm, while the center has a slight jiggle. This means it will firm up as it cools. A toothpick inserted should come out clean, but not too dry. This blog post covered everything you need to make the best cheesecake. We explored ingredients, substitutions, and quality tips. I shared step-by-step instructions and essential tips for perfect texture. We also looked at fun variations, storage methods, and frequently asked questions to help you succeed. With these insights, you can make a delicious cheesecake that impresses. Enjoy each step and let your creativity shine in the kitchen!

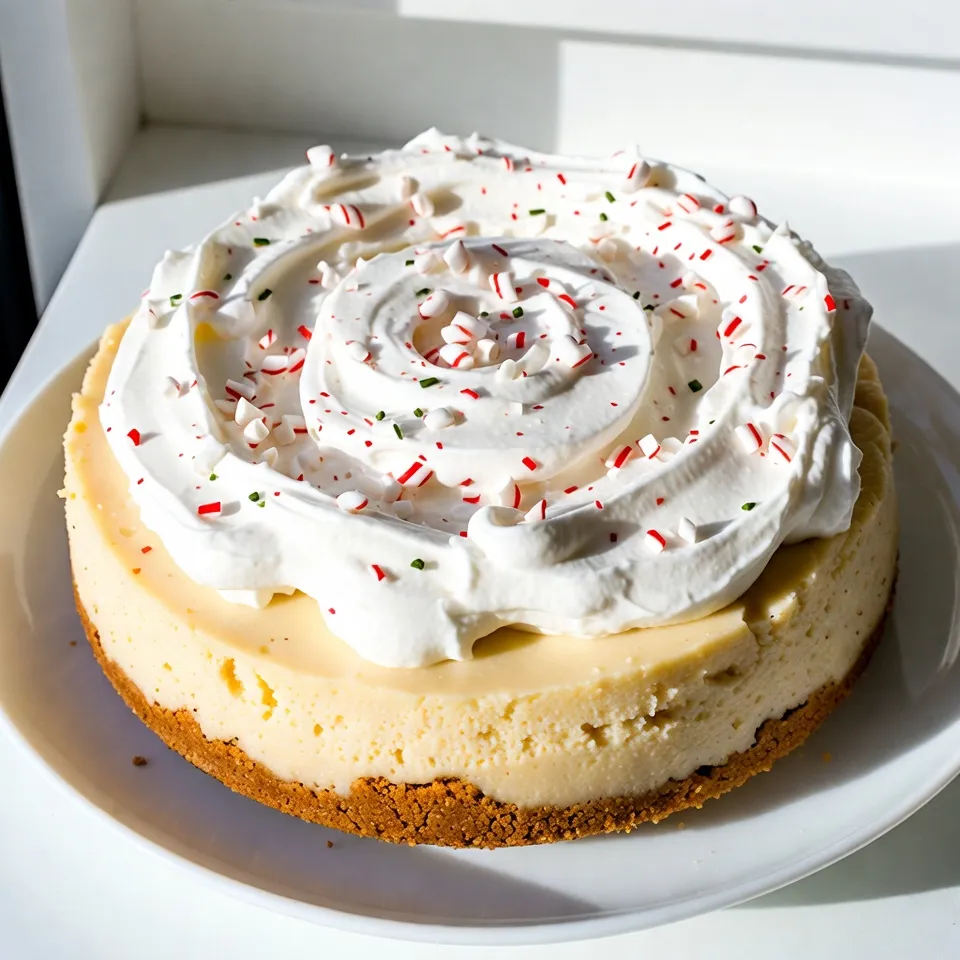
Peppermint White Chocolate Cheesecake Delightful Treat

Get ready to treat yourself to a Peppermint White Chocolate Cheesecake! This festive dessert is creamy, rich, and bursting with

- Kale: Freshness and Nutritional Benefits Kale is the star of this salad. It has lots of vitamins, like A, C, and K. This leafy green helps boost your immune system. Plus, it has fiber, which is great for digestion. Choose fresh, dark green leaves for the best taste. - Roasted Sweet Potatoes: Flavor and Texture Roasted sweet potatoes add warmth and sweetness. They bring a creamy texture that contrasts with the kale. When you roast them, the natural sugars caramelize, making them even tastier. Cut them into cubes and roast until golden for the best flavor. - Pomegranate Seeds: Color and Antioxidants Pomegranate seeds are a treat for the eyes and body. Their bright red color adds cheer to the dish. They also pack antioxidants that help fight free radicals. Sprinkle these gems on top for a burst of flavor and crunch. - Sliced Almonds and Feta Cheese: Crunch and Creaminess Sliced almonds give a nice crunch to the salad. They provide healthy fats and protein. Feta cheese brings creaminess and a salty zing. Together, they balance the salad's flavors perfectly. Use crumbled feta for easy mixing. - Olive Oil: Base of the Dressing Olive oil is the heart of our dressing. It adds richness and helps blend flavors. Use high-quality extra virgin olive oil for the best taste. It also has healthy fats that are good for your heart. - Apple Cider Vinegar: Tanginess Apple cider vinegar adds a tangy kick. It brightens up the salad and enhances the flavors. This vinegar also has benefits for digestion. Just a tablespoon will do the trick! - Dijon Mustard: Flavor Enhancer Dijon mustard adds depth to the dressing. Its sharp taste complements the sweet potatoes and kale. It helps to emulsify the dressing, making it smooth and creamy. - Seasonings: Salt and Pepper Salt and pepper are essential for flavor. They bring out the taste of each ingredient. Adjust these to your liking, but start with a pinch of salt and a dash of pepper. {{ingredient_image_1}} Preheat Oven and Cube Sweet Potatoes First, set your oven to 400°F (200°C). Next, peel and cube the sweet potatoes into bite-sized pieces. Seasoning and Roasting Steps Toss the cubes in a bowl with a drizzle of olive oil, and sprinkle with salt and pepper. Spread them out on a baking sheet. Roast for 25-30 minutes, stirring halfway through, until they turn golden and soft. Importance of Massaging Kale Massaging kale helps break down tough fibers. This makes the leaves softer and easier to eat. It also enhances the flavor. Techniques for Proper Massaging In a large bowl, add the chopped kale. Drizzle a teaspoon of olive oil and a pinch of salt over it. Use your hands to massage the kale for about 3-5 minutes. You’ll notice it shrinks and becomes tender. Whisking Instructions for a Creamy Dressing In a small bowl or jar, combine the remaining olive oil, apple cider vinegar, Dijon mustard, salt, and pepper. Whisk or shake until everything is mixed well. Adjusting Flavor: Tips for Balancing If the dressing tastes too sharp, add a bit more honey or maple syrup. Balance it by tasting as you go. Mixing Technique for a Well-Coated Salad Add the roasted sweet potatoes, pomegranate seeds, sliced almonds, feta cheese, and dried cranberries to the massaged kale. Drizzle the dressing on top. Gently toss everything together until well coated. Plating Tips for Presentation Transfer the salad to a serving bowl or individual plates. For a nice touch, garnish with extra pomegranate seeds and sliced almonds. Enjoy your colorful and tasty winter kale salad! - Best Varieties of Kale for Salads I love using dinosaur kale, also known as lacinato kale. Its dark leaves have a rich flavor and great texture. Curly kale can work too, but it often has a stronger taste. - Signs of Freshness Look for bright green leaves with no yellow spots. Fresh kale should feel crisp and firm. If the leaves are wilting or brown, skip it. - Alternative Cooking Methods: Air Fryer, Boiling If you want a quicker method, use an air fryer. Cut the sweet potatoes smaller. Cook them at 375°F for about 15 minutes. For boiling, cube the potatoes and cook until tender, around 10-15 minutes. - Preventing Sweet Potatoes from Sticking Toss the sweet potatoes in olive oil before roasting. This helps them brown nicely and prevents sticking. You can also use parchment paper on your baking sheet for easy cleanup. - Storing Leftover Salad: Best Practices Keep leftovers in an airtight container. This helps keep the salad fresh for up to 2 days. If you add dressing, it may get soggy, so store it separately. - How to Keep Ingredients Crisp To keep ingredients like kale and sweet potatoes crisp, avoid mixing them until you’re ready to serve. Store them in separate containers. This way, your salad stays crunchy and fresh! Pro Tips Choose Fresh Kale: Opt for vibrant, dark green kale leaves. Avoid any that appear yellow or wilted for the best flavor and nutrition. Perfectly Roasted Sweet Potatoes: Cut sweet potatoes into uniform cubes to ensure even cooking. Stir halfway through roasting for a consistent golden color. Massage the Kale: Spend a few extra minutes massaging the kale. This helps to break down its fibrous structure, making it more tender and palatable. Customize Your Toppings: Feel free to mix and match toppings! Add nuts, seeds, or even grilled chicken for added protein and texture. {{image_2}} Winter kale salad allows for many exciting twists. You can add other winter veggies like beets and Brussels sprouts. Both of these veggies bring deep flavors and bright colors to your dish. Beets add natural sweetness, while Brussels sprouts provide crunch. If you're looking to boost protein, consider adding chicken, chickpeas, or quinoa. Chicken adds heartiness, while chickpeas and quinoa offer plant-based protein. These additions make your salad more filling and nutritious. The dressing can change the whole salad. A creamy Greek yogurt dressing brings a rich taste. It provides a nice contrast to the greens. You can also try a citrus vinaigrette for a bright, fresh flavor. This vinaigrette can lift the other ingredients with its tanginess. If you have dietary needs, you can easily adapt this salad. For gluten-free options, simply ensure all ingredients are certified gluten-free. You can also go vegan by skipping the feta cheese and using plant-based protein. If you need nut-free alternatives, consider using seeds. Sunflower seeds or pumpkin seeds work well and add good crunch. These substitutes ensure everyone can enjoy this winter kale salad without worry. To keep your leftover salad fresh, use airtight containers. Glass containers work well. They help avoid odors and moisture. Store the salad in the fridge right away. It lasts about 3 days. The kale may wilt slightly over time, but the flavors remain great. Can you freeze kale salad? I do not recommend it. Freezing changes the texture of the kale. When thawed, it becomes soft and mushy. If you must freeze, only freeze the roasted sweet potatoes. Keep the dressing separate until you are ready to serve. To reheat sweet potatoes, use the oven or a stovetop. Preheat the oven to 350°F (175°C). Spread the potatoes on a baking sheet. Heat for about 10 minutes until warm. If using the stovetop, place them in a pan over low heat. Stir occasionally to prevent burning. This keeps the flavor intact and the texture nice. Yes, you can prepare this salad in advance. Here are some tips: - Kale: Massage and store it in a sealed container. - Sweet Potatoes: Roast them and keep them in the fridge. - Dressing: Mix it and store it separately. - Assembly: Combine everything just before serving for the best taste. You can add many tasty ingredients to enhance this salad. Here are some ideas: - Roasted carrots: Add sweetness and color. - Quinoa: For extra protein and texture. - Avocado: Adds creaminess and healthy fats. - Citrus segments: Brighten the flavors with fresh zest. Yes, this salad works great for meal prep. Follow these tips: - Separate containers: Store each ingredient in its own container. - Layering: Place dressing at the bottom to keep kale crisp. - Use within a week: For the best taste, eat within five days. Making this salad vegan is simple. Here are some swaps: - Feta cheese: Use vegan cheese or omit it. - Honey: Replace it with maple syrup in the dressing. - Almonds: Ensure they are not roasted in butter. - Choose plant-based ingredients: Make sure all add-ins fit a vegan diet. This winter kale salad combines fresh kale, roasted sweet potatoes, and vibrant pomegranate seeds. Each ingredient adds flavor and nutrition. I shared easy steps to prepare the salad and tips for storage and variations. You can customize it to fit your taste. Remember, each bowl can be a nutrient-packed meal. With these tips, you can create dishes that are both tasty and healthy. Enjoy the warmth and color this salad brings to your table.

Winter Kale Salad Packed with Flavor and Nutrition

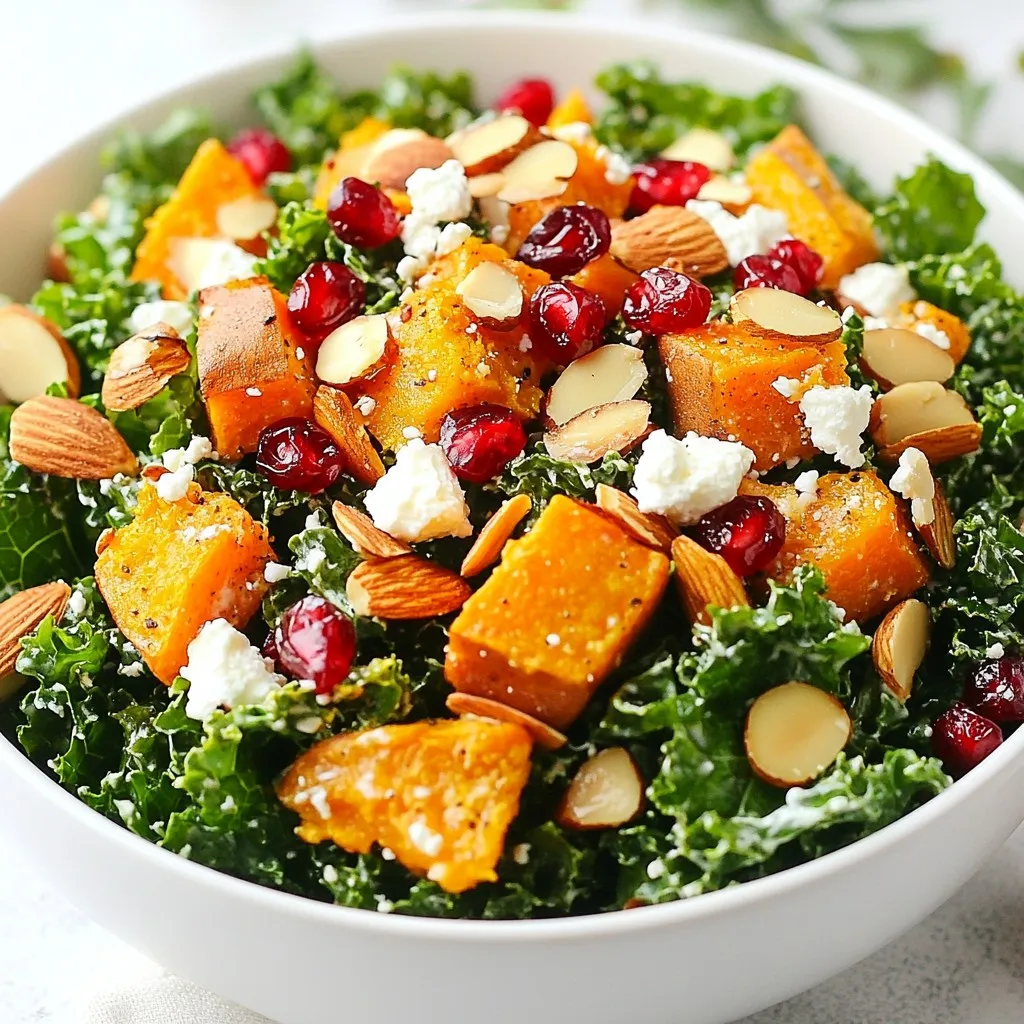
Looking for a fresh and healthy dish to brighten your winter meals? This Winter Kale Salad Packed with Flavor and

- 1 and ½ cups warm water (110°F to 115°F) - 1 packet (2 and ¼ teaspoons) active dry yeast - ¼ cup granulated sugar - 4 cups all-purpose flour - ¾ teaspoon salt - ½ cup baking soda - 1 large egg (beaten) - ½ cup unsalted butter, melted - ½ cup granulated sugar (for coating) - 2 teaspoons ground cinnamon Each ingredient serves a key role in making these pretzel bites. - Warm water activates the yeast. The right temperature helps it bloom perfectly. - Active dry yeast is the magic that makes your dough rise. It gives the bites their fluffy texture. - Granulated sugar feeds the yeast, helping it grow and adds a touch of sweetness. - All-purpose flour forms the base of the dough. It gives structure and chewiness. - Salt enhances flavors. It balances the sweetness from the sugar. - Baking soda is crucial for that classic pretzel flavor. It helps achieve a nice golden color. - Beaten egg gives a shiny finish. It helps the sugar stick to the pretzels. - Unsalted butter adds richness, making each bite flavorful. - Granulated sugar and ground cinnamon create the delicious topping that makes these bites irresistible. If you are missing an ingredient, here are some swaps you can use: - Warm water: You can use milk for a richer flavor. - Active dry yeast: Instant yeast can work too. Just add it directly to the flour. - Granulated sugar: Brown sugar gives a deeper flavor if you prefer. - All-purpose flour: Whole wheat flour can be used for a healthier twist. - Salt: If you're watching sodium, use a low-sodium option. - Baking soda: You can replace this with baking powder, but the flavor will change. - Egg: A flax egg (1 tablespoon ground flaxseed + 2.5 tablespoons water) works for a vegan option. - Unsalted butter: Coconut oil or vegetable oil can be good alternatives for a dairy-free version. {{ingredient_image_1}} Start by gathering your ingredients. In a large mixing bowl, combine 1 and ½ cups of warm water, 1 packet of active dry yeast, and ¼ cup of granulated sugar. Mix gently and let it sit for 5 minutes. This step is key. You'll see bubbles forming, which means the yeast is active and ready to go. Once the yeast mixture is frothy, add 4 cups of all-purpose flour and ¾ teaspoon of salt. Stir until a dough forms. Now, place the dough on a lightly floured surface. Knead it for about 5-7 minutes, until it feels smooth and elastic. This process develops gluten, making the pretzel bites chewy and delicious. After kneading, let the dough rise. Place it in a greased bowl and cover it with a kitchen towel. Set it in a warm spot for about 1 hour. It should double in size. When ready, preheat your oven to 425°F. Boil 10 cups of water in a large pot, adding ½ cup of baking soda carefully. Punch down the dough and cut it into small pieces. Roll each piece into a ball about 1 inch wide. Dip each ball into the boiling water for 30 seconds, then place them on lined baking sheets. Now, brush the pretzel bites with a beaten egg and sprinkle a bit of salt on top. Bake them for 10-12 minutes until golden brown. While they bake, mix ½ cup of sugar with 2 teaspoons of ground cinnamon in a bowl. As soon as the bites come out of the oven, coat them in melted butter and roll them in the cinnamon sugar mix. Let them cool slightly before diving in! Enjoy the warm, sweet treats. To get the best pretzel bites, you need the right dough. The dough must be smooth and elastic. Knead it for 5 to 7 minutes. If it's too sticky, add a bit more flour. Let it rise in a warm spot until it doubles in size. This step is key to a soft center. The boiling water bath also helps create a chewy outer layer. One common mistake is not measuring the water temperature correctly. If the water is too hot, the yeast will die. If it’s too cold, the yeast won't activate. Also, avoid boiling the pretzel bites too long. Thirty seconds is perfect. Overdoing it can make them tough. Lastly, do not skip the cinnamon sugar coating; it adds that sweet touch. Cinnamon sugar pretzel bites are great on their own, but you can make them even better. Serve them warm with a side of cream cheese or chocolate dip. They pair well with fresh fruit, like strawberries or apples. For a fun twist, try them with a caramel sauce. These bites also make a fantastic snack for parties or movie nights. Pro Tips Use Warm Water: Ensure the water is between 110°F to 115°F to activate the yeast properly, which is crucial for a good rise. Knead Thoroughly: Kneading the dough for 5-7 minutes develops the gluten, leading to a chewy texture that is characteristic of pretzels. Boiling is Key: Boiling the pretzel bites in baking soda water gives them their signature flavor and shiny crust, so don’t skip this step! Fresh Cinnamon Sugar: For the best flavor, mix the cinnamon sugar while the pretzel bites are baking so it’s fresh and ready to use right after they come out of the oven. {{image_2}} Sweet pretzel bites can excite your taste buds. You can add chocolate chips to the dough for a rich treat. Just fold in 1 cup of mini chocolate chips after kneading. For a vanilla twist, mix 1 teaspoon of vanilla extract into the warm water when activating the yeast. This small change will give your bites a lovely flavor. If you prefer savory pretzel bites, cheese is a great choice. Add 1 cup of shredded cheese, like cheddar, to the dough. This makes each bite a cheesy delight. For garlic lovers, melt 2 tablespoons of butter, mix in 2 teaspoons of garlic powder, and brush this mix onto the pretzel bites before baking. It adds a great garlic flavor that pairs well with the dough. You can easily make these pretzel bites gluten-free. Just swap all-purpose flour with a gluten-free blend that works for baking. Keep the rest of the recipe the same for tasty bites. To make it vegan, replace the egg wash with a splash of almond milk, and use coconut oil instead of butter. This way, everyone can enjoy your cinnamon sugar pretzel bites! To keep your pretzel bites fresh, store them in an airtight container. This will help prevent them from drying out. If you have extras, let them cool completely first. Once cool, place them in the container. You can store them at room temperature for up to two days. If you want them to last longer, consider refrigerating them. Just remember to wrap them in plastic wrap or foil before placing them in the fridge. When you're ready to enjoy your pretzel bites again, reheating is simple. Preheat your oven to 350°F (175°C). Place the bites on a baking sheet. Heat them for about 5-10 minutes. This will make them warm and slightly crispy again. You can also microwave them for about 15-20 seconds if you’re in a hurry. However, this may make them a bit softer. If you want to save some for a future snack, freezing is a great option. Place the cooled pretzel bites in a freezer-safe bag. Remove as much air as possible before sealing. They can last in the freezer for up to three months. When you're ready to eat them, thaw them in the fridge overnight. Then, reheat in the oven as mentioned above for the best texture. Yes, you can use instant yeast. Just skip the proofing step. Mix it directly with the flour. This saves time and works well in this recipe. Instant yeast will help your dough rise just fine. Your dough has risen enough when it doubles in size. You can gently poke it with your finger. If it springs back slowly, it is ready. If it stays flat, let it rise longer. The warm place helps this process so keep it cozy. If your pretzel bites are not browning, check your oven temperature. Make sure it is set to 425°F. Also, brushing with the egg wash gives them a nice color. If they are still pale, bake them a few minutes longer. Cinnamon sugar pretzel bites go great with many dips! You can try warm cream cheese frosting or chocolate sauce. For a fun twist, serve them with vanilla yogurt. These dips add a tasty layer to your sweet snack. Making pretzel bites involves choosing the right ingredients, prepping the yeast, and kneading the dough. I shared helpful tips to get the texture just right and avoid mistakes. You can explore tasty variations, from sweet to savory, and easily adapt for dietary needs. Storing and reheating are simple too, ensuring you enjoy them fresh. With these steps and insights, you can create perfect pretzel bites every time. Enjoy your baking journey and the delicious results!

Cinnamon Sugar Pretzel Bites Tasty Easy Snack Recipe

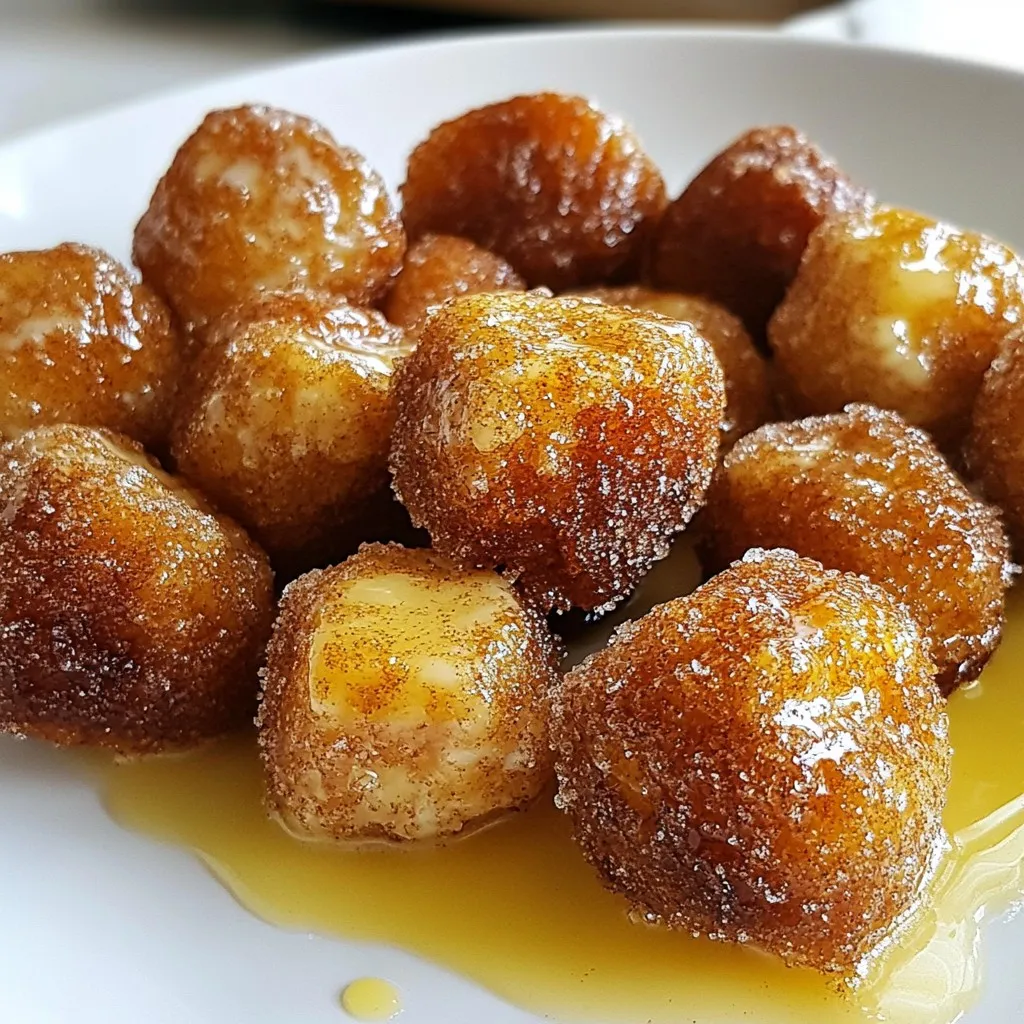
Looking for a fun and quick snack? You’ll love making Cinnamon Sugar Pretzel Bites! They’re soft, chewy, and covered in

To make Greek Lemon Potatoes, you will need several fresh and simple ingredients. Here’s what you need: - 2 lbs baby Yukon gold potatoes, halved - ⅓ cup olive oil - 4 cloves garlic, minced - 1 cup vegetable broth - 1 large lemon, juiced and zested - 2 teaspoons dried oregano - Salt and pepper to taste - Fresh parsley, chopped (for garnish) Each ingredient plays a key role in creating the bright, zesty flavor of this dish. The baby Yukon gold potatoes are creamy and hold their shape well. Olive oil gives richness, while garlic adds depth. The lemon juice and zest bring a refreshing tang. Dried oregano is a classic herb in Greek cooking, adding earthy notes. Salt and pepper enhance all these flavors, making them pop. Finally, fresh parsley adds a lovely touch of color and freshness when you serve. {{ingredient_image_1}} - Preheat your oven to 425°F (220°C). - In a large bowl, combine: - 2 lbs baby Yukon gold potatoes, halved - ⅓ cup olive oil - 4 cloves garlic, minced - 1 large lemon, juiced and zested - 2 teaspoons dried oregano - Salt and pepper to taste - Toss the potatoes to coat them evenly. - Arrange the potatoes in a single layer in a baking dish, cut side up. - Pour 1 cup of vegetable broth around the potatoes. - Cover the baking dish tightly with foil and bake for 30 minutes. - After 30 minutes, remove the foil. - Return the potatoes to the oven and bake for another 25-30 minutes. - Cook until the potatoes are golden brown and crispy on the edges. - Once done, let them cool for a few minutes. - Toss gently with more lemon juice if you like. - Adjust the seasoning before serving. - Garnish with chopped fresh parsley for a pop of color. To get the best texture, use both steaming and baking methods. Start by covering the baking dish with foil. This traps steam and helps cook the potatoes fast. After 30 minutes, take off the foil. This step lets the potatoes get crispy. Adjust the cooking time based on your oven. If your potatoes are not golden after 25-30 minutes, bake them a little longer. Every oven is different, so check them often. The goal is a soft inside and crispy outside. For more flavor, add extra herbs and spices. Try fresh thyme or rosemary for a twist. These herbs pair well with lemon and potatoes. You can also add a pinch of red pepper flakes for a kick. Adjust the lemon juice to suit your taste. If you love lemon, add more juice. This will make the dish bright and zesty. Taste the potatoes before serving and add more seasoning if needed. A little extra salt can really enhance the flavors too. Pro Tips Perfect Potato Size: Ensure your baby Yukon gold potatoes are halved evenly for consistent cooking. This helps them brown nicely and cook through at the same time. Maximize Flavor: For an extra burst of flavor, marinate the potatoes in the olive oil, garlic, lemon juice, and zest for at least 30 minutes before baking. Adjusting Crispiness: If you prefer extra crispy edges, increase the oven temperature to 450°F (232°C) for the last 10 minutes of baking, keeping an eye on them to prevent burning. Garnishing Tips: Adding a sprinkle of feta cheese or olives on top right before serving can elevate the dish and add an authentic Greek touch. {{image_2}} You can switch up the potatoes if you like. Instead of baby Yukon gold, try red or fingerling potatoes. Each type gives a unique taste and texture. You can also use sweet potatoes for a fun twist. For oils, olive oil is best, but you can use avocado oil too. It has a high smoke point and a nice flavor. If you want to change the broth, use chicken broth or mushroom broth. Each broth adds a different depth of flavor. To make this dish even more Greek, add olives or feta cheese. Black olives or Kalamata olives work well. Just sprinkle them on top before serving. Feta adds creaminess and tang, making each bite better. You can also add other Mediterranean flavors. Try some sun-dried tomatoes or artichokes for an extra kick. Fresh herbs like thyme or mint can brighten the dish. Each twist gives you a new way to enjoy Greek lemon potatoes! After enjoying your Greek lemon potatoes, store any leftovers properly. Place the cooled potatoes in an airtight container. They will last in the fridge for up to three days. If you want to keep them longer, freeze them. For freezing, spread the potatoes on a baking sheet first. Freeze them for about an hour until firm. Then, transfer them into a freezer bag. They can stay in the freezer for up to three months. To reheat your Greek lemon potatoes, you can use the oven or microwave. For the oven, preheat it to 350°F (175°C). Spread the potatoes on a baking sheet. Heat them for about 15-20 minutes until they are warm and crispy again. In the microwave, place the potatoes in a safe dish. Heat for one to two minutes, stirring halfway. To refresh the flavors, add a splash of lemon juice or a drizzle of olive oil before serving. This keeps the dish bright and zesty! Can I use other types of potatoes? Yes, you can use other types of potatoes. Try red potatoes or fingerling potatoes. These varieties will give you a different texture and taste. However, Yukon gold potatoes work best for their creamy inside and crispy outside. How can I make this dish vegan? To make Greek lemon potatoes vegan, simply use vegetable broth. The rest of the ingredients are already plant-based. This way, everyone can enjoy the dish! What dishes pair well with Greek Lemon Potatoes? Greek lemon potatoes pair well with grilled meats, like chicken or lamb. They also go nicely with fresh salads or roasted vegetables. These potatoes make a great side for any Mediterranean meal. You can make delicious Greek Lemon Potatoes with simple ingredients. We covered recipes, tips, and variations. You learned how to get the perfect texture and great flavors. Remember, you can adjust the ingredients to fit your taste. Storage and reheating also help keep your dish fresh. Try this dish with different sides to find your favorite combo. Cooking should be fun and creative! Enjoy experimenting with these tasty potatoes.

Greek Lemon Potatoes Easy and Flavorful Recipe

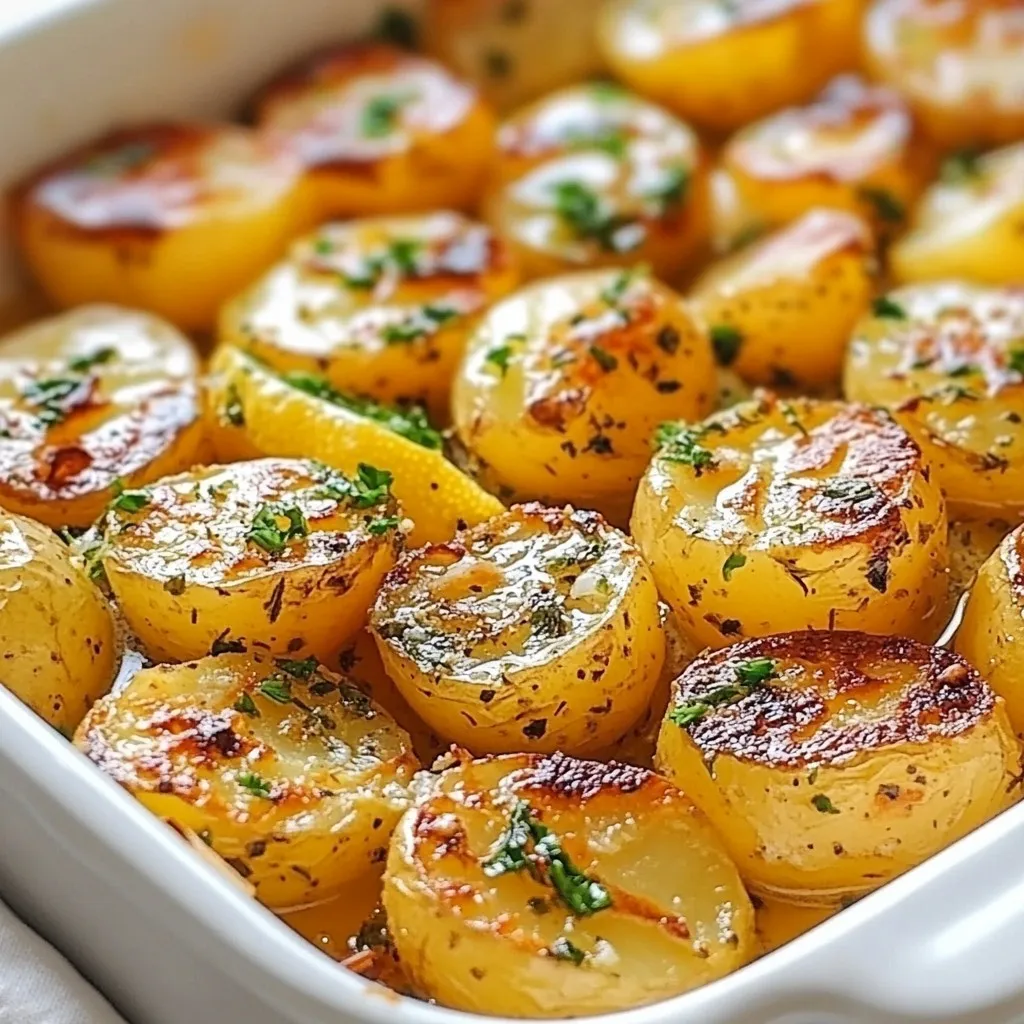
Looking to spice up your weeknight meals? These Greek Lemon Potatoes are a must-try! With their bright, zesty flavor and

To create Texas Style Cheeseburger Meatballs, gather these ingredients: - 1 pound ground beef - 1 cup breadcrumbs - 1/2 cup shredded cheddar cheese - 1/4 cup diced onion - 3 cloves garlic, minced - 1 tablespoon Worcestershire sauce - 1 tablespoon mustard - 1 teaspoon smoked paprika - 1/2 teaspoon salt - 1/4 teaspoon black pepper - 1/4 cup ketchup (plus extra for serving) - 1/4 cup pickles, finely chopped (for added crunch) - 1 tablespoon fresh parsley, chopped (for garnish) You can make tasty swaps for some ingredients. If you want a leaner option, use ground turkey instead of beef. For a gluten-free meal, try gluten-free breadcrumbs. If you are vegan, use plant-based ground meat and omit cheese. You can also use any type of cheese you love, such as pepper jack for a spicy kick. Choosing the right ingredients makes a big difference. For ground beef, look for 80/20 fat content. This gives your meatballs great flavor and moisture. Fresh herbs add more taste, so if you can, pick parsley from a local farmer. When selecting cheese, choose a block of cheddar. Shredded cheese can have additives that change its melt. Lastly, use fresh garlic and onions for the best flavor. Always pick ingredients that look fresh and vibrant. {{ingredient_image_1}} First, set your oven to 400°F (200°C). This temperature helps the meatballs cook well and get a nice brown color. While the oven heats, get a baking sheet. Line it with parchment paper. This makes cleanup easy and keeps the meatballs from sticking. In a large bowl, combine all the meatball ingredients. You need: - 1 pound ground beef - 1 cup breadcrumbs - 1/2 cup shredded cheddar cheese - 1/4 cup diced onion - 3 cloves garlic, minced - 1 tablespoon Worcestershire sauce - 1 tablespoon mustard - 1 teaspoon smoked paprika - 1/2 teaspoon salt - 1/4 teaspoon black pepper - 1/4 cup ketchup Mix these well with your hands. Make sure the beef and cheese blend evenly with the spices. You want every bite to taste great. Now it’s time to shape the meatballs. Take a small amount of the mixture and roll it into a ball about 1.5 inches wide. Place each meatball on the lined baking sheet. Leave some space between each one. This helps them cook evenly. Bake the meatballs for 20 to 25 minutes. Check that they are cooked through and have a nice brown color. Five minutes before they are done, take them out and add a little extra ketchup and pickles on top. This gives them a tasty finish. After baking, let the meatballs cool for a minute before serving. Garnish with fresh parsley for a nice touch. To get the best meatball texture, start with cold ingredients. Use cold ground beef and cheese. This helps the meatballs hold their shape. Mix gently but thoroughly. Overmixing can make them tough. Aim for a soft, moist mix. Add breadcrumbs to bind the meatballs. They keep the meatballs light and fluffy. Cooking time may change based on your oven and meatball size. For smaller meatballs, check them at 15 minutes. Larger meatballs may need up to 30 minutes. Always make sure they are cooked to 160°F (70°C) for safety. Use a meat thermometer to check. If they are browning too fast, cover them with foil. You can boost flavor with simple add-ins. Try adding diced jalapeños for spice. A dash of hot sauce in the mix adds a nice kick. Fresh herbs like cilantro or chives can brighten the taste. For a smokier flavor, increase smoked paprika. Lastly, serve with your favorite dipping sauces to enhance flavor. Pro Tips Use 80/20 Ground Beef: For the juiciest meatballs, opt for ground beef that has a higher fat content, such as 80/20. This will keep your meatballs tender and flavorful. Chill the Mixture: If you have time, refrigerate the meatball mixture for about 30 minutes before forming them. This helps them hold their shape better while baking. Add Your Favorite Seasonings: Feel free to customize the flavor by adding your favorite spices or herbs, such as onion powder, garlic powder, or even a touch of cayenne for heat. Perfect Dipping Sauces: Serve these meatballs with a variety of dipping sauces like BBQ sauce, ranch dressing, or even a spicy mustard for an extra kick. {{image_2}} To add heat to your meatballs, use spicy ingredients. You can mix in diced jalapeños or a few dashes of hot sauce. If you want more flavor, add a teaspoon of cayenne pepper. This will give a real kick to the dish! You can make these meatballs without meat. Use lentils or black beans as a base. Combine them with breadcrumbs, onion, and spices. For vegan options, replace the cheese with a dairy-free kind. This makes a tasty dish for everyone! Cheese can change the taste of your meatballs. Try using pepper jack for a spicy twist. Mozzarella adds a nice stretch and creaminess. Even blue cheese can bring a bold flavor. Mix and match to find your favorite! To keep your leftover Texas Style Cheeseburger Meatballs fresh, first let them cool. Once cool, place the meatballs in an airtight container. This helps to keep them moist. You can store them in the fridge for up to four days. If you want them to last longer, freezing is a great option. Freezing meatballs is easy and smart for meal prep. First, let the meatballs cool completely. Then, place them in a single layer on a baking sheet. Freeze them for about one hour. After they are firm, transfer them to a freezer bag or container. Be sure to label the bag with the date. You can freeze them for up to three months. This way, you always have a tasty meal ready to go! When you’re ready to eat your meatballs, reheating them is simple. For best taste, use the oven. Preheat your oven to 350°F (175°C). Place the meatballs on a baking sheet and cover them with foil. Heat for about 15-20 minutes or until warm. You can also use a microwave, but the oven keeps them juicy. Just heat them in 30-second intervals, checking to make sure they don’t dry out. Enjoy your savory meatballs just like the first time! Yes, you can make these meatballs ahead of time. Form the meatballs and place them on a baking sheet. Cover them with plastic wrap and store them in the fridge for up to 24 hours. When you are ready, bake them as directed. This saves time on busy days. These meatballs pair well with many sides. You can serve them with: - Fries - Coleslaw - Salad - Baked beans You can also place them in a sandwich or serve them as a fun appetizer with toothpicks. You can easily adjust the recipe for different diets. For gluten-free eaters, use gluten-free breadcrumbs. For a lower-calorie option, try lean ground turkey instead of beef. If you want a vegetarian dish, use a plant-based ground meat. These swaps keep the flavor while meeting dietary needs. In this blog post, we explored the key ingredients for Texas Style Cheeseburger Meatballs, including swaps and quality tips. We walked through the step-by-step process of making these tasty meatballs, from preparation to baking. I shared useful tricks for perfect texture and flavor, as well as variations to suit your taste. Finally, we discussed how to store, freeze, and reheat leftovers. Now, you have all the tools to create mouthwatering meatballs. Enjoy making this dish that everyone will love!

Texas Style Cheeseburger Meatballs Savory and Tasty Dish

Looking for a savory twist on classic comfort food? Texas Style Cheeseburger Meatballs blend juicy beef, melted cheese, and bold

To make Coconut Almond Granola Clusters, you will need: - 2 cups rolled oats - 1 cup unsweetened shredded coconut - 1 cup almonds, roughly chopped - 1/2 cup almond butter - 1/3 cup honey or maple syrup - 1/4 cup coconut oil, melted - 1/2 teaspoon vanilla extract - 1/2 teaspoon sea salt - 1/2 teaspoon cinnamon - 1/3 cup dried cranberries or your favorite dried fruit (optional) You can make this recipe your own by changing some ingredients. - Instead of almond butter, try peanut butter or sunflower seed butter. - Use agave nectar or brown rice syrup if you want a different sweetener. - Swap almonds for walnuts, pecans, or your favorite nuts. - If you need a nut-free option, leave out the nuts. You can add seeds like pumpkin or sunflower seeds instead. Using high-quality ingredients is key. Fresh oats and nuts give the best taste and texture. - Choose organic shredded coconut to avoid added sugars. - Select pure almond butter with no extra oils or sugars for the best flavor. - Great quality honey or maple syrup adds natural sweetness and depth. These choices make your granola not just tasty but also healthy. So, always pick the best! {{ingredient_image_1}} Start by preheating your oven to 325°F (165°C). This step is key for even baking. While the oven heats, grab a baking sheet and line it with parchment paper. This helps the granola clusters not stick. In a large mixing bowl, combine the rolled oats, shredded coconut, chopped almonds, sea salt, and cinnamon. Make sure to stir well until everything mixes evenly. This will give your granola a great flavor base. Next, take a separate bowl. In this bowl, whisk the almond butter, honey or maple syrup, melted coconut oil, and vanilla extract together. Keep mixing until it's smooth and well combined. This wet mixture will help bind the dry ingredients. Pour the wet mixture over the dry ingredients in the large bowl. Stir well until every bit of dry mix is coated. If you want to add dried cranberries or another dried fruit, fold them in now. Use your hands to squeeze small handfuls of the mix together to form clusters. Place these on the prepared baking sheet, leaving space between each one. Bake your clusters in the oven for 20 to 25 minutes. Stir halfway through to ensure they bake evenly. After baking, take the sheet out and let the granola clusters cool completely. They will harden as they cool. Once cool, break up any large clusters if you like. Store your granola in an airtight container at room temperature. It will stay fresh for about two weeks. To get those perfect clusters, you need to squeeze. When you mix the wet and dry ingredients, make sure to use your hands. This helps to form small clusters. Avoid overmixing, as this can break them apart. Bake until golden brown, then let them cool completely. Clusters will firm up as they cool. Store your granola clusters in an airtight container. This keeps them crunchy and fresh. You can leave them at room temperature for up to two weeks. If you want them to last longer, consider freezing them. Just make sure they are in a freezer-safe container. When you're ready to eat, thaw them at room temperature. One common mistake is not measuring ingredients accurately. Use measuring cups for dry and wet ingredients. Another mistake is baking at too high a temperature. Stick to 325°F (165°C) for even baking. Lastly, do not skip the cooling step. If you try to break them apart too soon, they may crumble instead of staying in clusters. Pro Tips Use Fresh Ingredients: Using fresh almonds and coconut will enhance the flavor and texture of your granola clusters. Experiment with Sweeteners: Feel free to substitute honey with agave syrup or brown rice syrup for different sweetness levels and flavors. Customize with Spices: Add a pinch of nutmeg or cardamom to give your granola a unique twist that complements the coconut and almond. Store Wisely: Keep your granola clusters in the fridge during hot weather to maintain their crispness longer. {{image_2}} You can easily switch up the nuts in this recipe. Try walnuts, pecans, or hazelnuts. Each nut adds its own taste and crunch. You can also add seeds like pumpkin or sunflower seeds. They bring a nice texture and extra nutrients. Mix and match to find your favorite blend. Just remember to keep the nut and seed amount the same. Want to boost the health factor? Add superfoods! Chia seeds and flaxseeds are great choices. They add fiber and omega-3s. Just a few tablespoons will do. You can mix them in with the dry ingredients. This way, they blend well with the oats and nuts. Superfoods make your granola even better for you. Adding spices and extracts can take your granola to the next level. Try a dash of nutmeg or ginger for warmth. You can also experiment with flavored extracts. Almond or coconut extract can add a nice twist. Be careful not to add too much, as a little goes a long way. These small changes can create a unique flavor that excites your taste buds. To keep your coconut almond granola clusters fresh, use an airtight container. Glass jars or plastic bins work well. Store the clusters at room temperature, away from sunlight. This helps them stay crunchy and tasty. Avoid warm areas like near the stove or oven. If you live in a humid place, consider using silica gel packs to absorb moisture. Granola clusters last up to two weeks when stored properly. If you want to keep them longer, freeze them. Place the clusters in a freezer-safe bag or container. They can last for up to three months in the freezer. When you want to eat them, just take out a portion and let it thaw at room temperature. They will still taste great! If your granola clusters lose their crunch, don’t worry! You can easily revive them. Preheat your oven to 300°F (150°C). Spread the stale granola on a baking sheet in a thin layer. Bake for about 5-10 minutes, stirring halfway through. This will help them regain their crispiness. Let them cool before you enjoy them again. Yes, you can use rolled oats. They add a nice texture. Quick oats cook faster but rolled oats hold their shape better. I prefer rolled oats for crunch. To make crunchy clusters, bake them longer. Keep an eye on the color. Stir halfway through baking to get even heat. Let them cool completely to harden. This step is key for perfect clusters. Yes, coconut almond granola clusters can be gluten-free. Just make sure your oats are certified gluten-free. This choice keeps the recipe safe for those with gluten issues. Absolutely! You can use sun butter or soy nut butter. This change works well if you need a nut-free option. Just make sure the texture is similar for best results. In this article, we explored how to make coconut almond granola clusters. We covered essential ingredients, tips on measurements, and the importance of quality. The step-by-step instructions guide you through mixing and baking. You learned how to achieve perfect clusters and store them for freshness. We also discussed variations and common questions. Granola clusters are tasty and easy to make. By following these steps, you can enjoy a healthy snack anytime. Now, get ready to create your own delicious clusters!

Coconut Almond Granola Clusters Crunchy and Flavorful

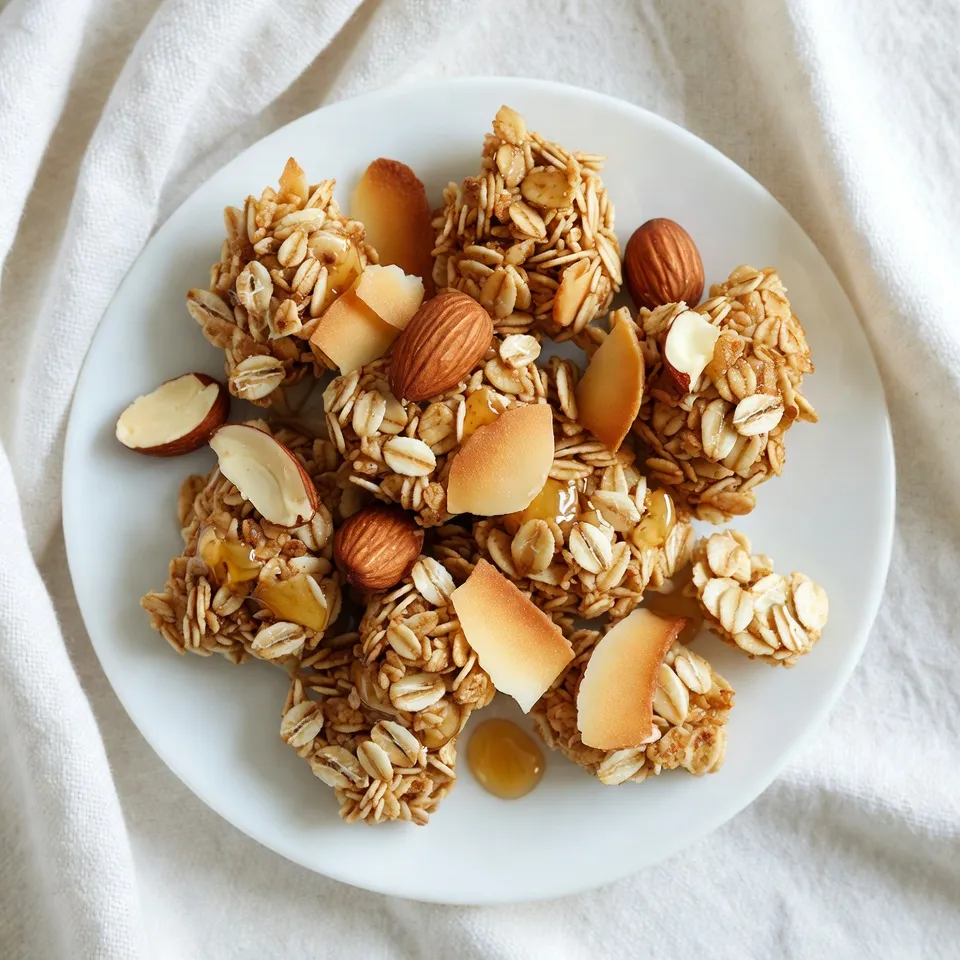
Are you ready to elevate your snack game with homemade Coconut Almond Granola Clusters? These tasty bites pack a crunchy

- 1 cup unsalted butter (2 sticks) - 2 cups granulated sugar - 4 large eggs - 1 teaspoon vanilla extract - 1 cup all-purpose flour - 1 cup unsweetened cocoa powder - 1/2 teaspoon baking powder - 1/2 teaspoon salt - 1 cup semi-sweet chocolate chips - 1 cup mini marshmallows - 1 cup graham cracker crumbs - Unsalted butter: This adds richness and moisture. It helps the brownies stay soft and chewy. - Granulated sugar: This sweetens the brownies and helps them rise. It gives a nice texture. - Eggs: They bind the ingredients and create structure. Eggs also add moisture. - Vanilla extract: This adds a warm flavor that makes the brownies taste richer. - Cocoa powder: This gives the brownies their deep chocolate flavor. It is key for that brownie look. - Baking powder: This helps the brownies rise, making them light and fluffy. - Salt: Just a pinch balances the sweetness and enhances the chocolate flavor. - Semi-sweet chocolate chips: These add extra chocolate chunks that melt in your mouth. - Mini marshmallows: These give the bars a gooey, sweet topping, like classic s'mores. - Graham cracker crumbs: These add crunch and the classic s'mores flavor. - Nuts: Chopped walnuts or pecans can add a nice crunch and flavor. - Peanut butter: Swirling in some peanut butter gives a creamy twist. - Different chocolate: You can use dark chocolate or white chocolate chips for a change. - Fruit: Add chopped strawberries or bananas for a fruity note. {{ingredient_image_1}} First, you need to preheat your oven to 350°F (175°C). This step is key for even baking. Next, take a medium saucepan and melt 1 cup of unsalted butter over low heat. Once it melts, remove it from the heat. Stir in 2 cups of granulated sugar until mixed well. This will add sweetness and help with texture. After that, add 4 large eggs one at a time. Make sure to mix well after each egg. Then, stir in 1 teaspoon of vanilla extract for a nice flavor boost. In another bowl, whisk together 1 cup of all-purpose flour, 1 cup of unsweetened cocoa powder, ½ teaspoon of baking powder, and ½ teaspoon of salt. Gradually mix these dry ingredients into the wet mixture. Stop mixing once it is just combined. You want a thick batter. Now, fold in 1 cup of semi-sweet chocolate chips. This adds rich chocolate flavor to your bars. Pour half of the brownie batter into your lined 9x13 inch baking pan. Spread it evenly across the bottom. Bake this first layer for 20 minutes. This step helps create a solid base for your s'mores brownie bars. After 20 minutes, take the pan out of the oven. Sprinkle 1 cup of graham cracker crumbs evenly over the baked brownie layer. Then, add 1 cup of mini marshmallows on top of the crumbs. This gives that classic s'mores flavor. Next, spoon the remaining brownie batter over the marshmallows. Try to cover as much as you can. This will trap the marshmallows inside as it bakes. Return the pan to the oven and bake for an additional 25-30 minutes. To test doneness, insert a toothpick into the center. It should come out with moist crumbs, not wet batter. Let the brownies cool completely in the pan. Once cool, use the parchment overhang to lift them out. Cut into squares and enjoy your delicious s'mores brownie bars! To get that perfect brownie texture, follow these steps. First, melt the butter gently. This helps keep the brownies moist. Mix the sugar and butter well. This creates a smooth base. When you add the eggs, mix one at a time. This ensures a nice blend. Avoid overmixing the batter. Stir just until the flour disappears. Overmixing can lead to tough brownies. Once you bake the first layer, let it cool a bit. This helps the layers stick better. One common mistake is not measuring ingredients correctly. Use a scale for precise amounts. Another mistake is skipping the parchment paper. It makes it easy to lift out the brownies. Don’t bake for too long. If you do, the brownies will dry out. Always check for moist crumbs with a toothpick. Finally, don’t forget to let them cool completely. Cutting them too soon can make a mess. For the best presentation, serve the brownie bars warm. Drizzle some chocolate sauce on top. It adds a rich touch. Also, sprinkle crushed graham crackers for extra crunch. You can even add a scoop of ice cream for a fun twist. Arrange the bars on a nice plate. This makes them look inviting. You can also add some mini marshmallows on the side for fun. These little details make a big impact on how they look! Pro Tips Use Room Temperature Ingredients: Ensure your eggs and butter are at room temperature for a smoother batter and better incorporation. Don't Overmix the Batter: Mix until just combined to keep your brownies fudgy and moist. Add Extra Marshmallows: For an even gooier texture, sprinkle additional mini marshmallows on top before baking the second layer. Cool Before Cutting: Let the brownies cool completely in the pan to achieve clean cuts and prevent them from falling apart. {{image_2}} You can make S'mores Brownie Bars even better by adding nuts. Chopped walnuts or pecans work well. They add crunch and flavor. Simply stir in half a cup of nuts when mixing in the chocolate chips. You can also try using flavored chocolate chips, like mint or caramel, for a fun twist. If you want to switch it up, consider using peanut butter cups or chocolate-covered pretzels. Just chop them up and sprinkle them over the marshmallows. This adds a salty-sweet touch that pairs nicely with the s'mores flavor. You can even use different kinds of marshmallows, like chocolate or strawberry, for a fun color change. You can easily make these bars gluten-free. Just swap the all-purpose flour for a gluten-free blend. Make sure it has a good binding agent, like xanthan gum. For a dairy-free version, use vegan butter and dairy-free chocolate chips. These changes keep the flavor rich and delicious without gluten or dairy. To keep your S'mores brownie bars fresh, store them in an airtight container. You can layer parchment paper between the bars to avoid sticking. This helps maintain their soft, gooey texture. If you want to keep them longer, wrap them in plastic wrap first. They will stay fresh in the fridge or at room temperature. If you have leftovers, you can easily reheat them. Place a bar in the microwave for about 10-15 seconds. This warms it up without drying it out. If you prefer, you can also use an oven. Set it to 350°F (175°C) and heat for about 5-10 minutes. This keeps the brownie bars soft and melty, just like when they were fresh. S'mores brownie bars last about 3-5 days at room temperature. If you store them in the fridge, they can last up to a week. For longer storage, consider freezing them. Wrap them tightly and place them in a freezer-safe bag. They can last for about 2-3 months in the freezer. Just thaw them overnight in the fridge before enjoying! Yes, you can make S'mores Brownie Bars ahead of time. Bake them and let them cool completely. Once cooled, cut them into squares. Store them in an airtight container at room temperature. They stay fresh for up to three days. You can also freeze them for later. Just wrap each square in plastic wrap and place them in a freezer bag. When you are ready to enjoy, thaw them at room temperature. If you don't have chocolate chips, you have options. You can use chopped chocolate bars instead. Dark, milk, or even white chocolate works well. You could also use butterscotch chips or peanut butter chips for a twist. If you want a healthier choice, try dried fruit or nuts. Keep in mind that these will change the flavor a bit. To check if the brownies are done, insert a toothpick into the center. If it comes out with moist crumbs, they are ready. If it comes out wet with batter, they need more time. Bake them for an extra 5 minutes, then check again. Brownies can look a bit soft in the center. That's okay, as they will firm up as they cool. In this blog post, we explored how to make S'mores Brownie Bars. We covered the key ingredients, including options for fun variations. I shared easy, step-by-step instructions to prepare and bake your brownies. You learned tips for the best texture and how to avoid common mistakes. Plus, we discussed storage tips and answered frequent questions. Now, you have the tools to create these tasty treats. I hope you enjoy baking and sharing them with friends!

S’mores Brownie Bars Irresistible and Easy Recipe

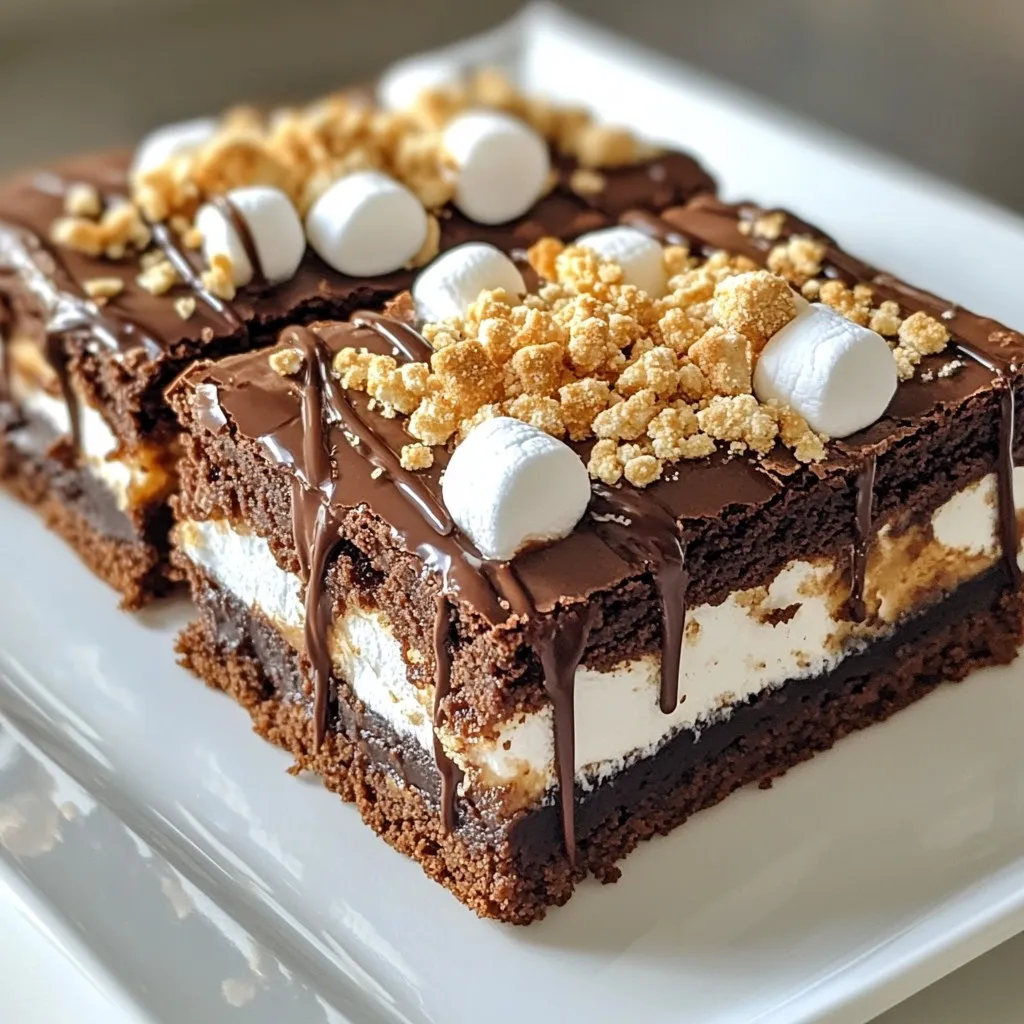
Craving a tasty treat that combines gooey s’mores and rich brownies? Look no further! My S’mores Brownie Bars recipe is

- 1 lb sirloin steak, cut into 1-inch cubes - 4 tablespoons unsalted butter - 4 cloves garlic, minced The main ingredients create a tasty base for garlic butter steak bites. Sirloin steak works best because it is tender and flavorful. The unsalted butter adds richness, while minced garlic gives a wonderful aroma. - 1 tablespoon fresh rosemary, chopped - 1 teaspoon smoked paprika - Salt and black pepper to taste Seasonings enhance the flavor of the steak. Fresh rosemary brings a bright taste that pairs well with the meat. Smoked paprika adds a hint of smokiness, while salt and black pepper balance the dish. - Fresh parsley, chopped (for garnish) Garnishing with fresh parsley adds color and freshness. It not only looks nice but also adds a slight herbal note. Use it to finish your dish before serving. Each ingredient plays a key role. Together, they create a dish that is both juicy and flavorful. Enjoy creating this dish that impresses everyone at your table! {{ingredient_image_1}} Start by seasoning the steak cubes. Use salt, black pepper, and smoked paprika. This adds amazing flavor. Make sure to coat each piece evenly. An even coating helps the steak cook well. It also ensures every bite is tasty. Next, melt butter in a skillet. Use medium-high heat for this. Add 2 tablespoons of unsalted butter and let it bubble. Once it bubbles, add the seasoned steak cubes. Be careful not to overcrowd the pan. If needed, cook in batches. Sear the steak bites for 2-3 minutes on each side. You want a nice brown crust. The cooking time varies based on how you like your steak. For rare, aim for about 2 minutes per side. For medium, cook a bit longer. Once cooked, remove the steak bites and put them on a plate. In the same skillet, add the rest of the butter. Then, add minced garlic and chopped rosemary. Sauté these for 1-2 minutes. The garlic should smell great but not turn brown. After that, return the steak bites to the skillet. Toss them in the garlic butter mixture. Make sure they are well-coated. Cook for an extra minute to heat through. Now, you’re ready to enjoy your garlic butter steak bites! Seasoning is key for great steak bites. I recommend using salt, black pepper, and smoked paprika. These spices enhance the beef's natural taste. Always coat the steak cubes evenly. This ensures every bite bursts with flavor. For the best cut, I suggest sirloin. It’s tender and holds flavor well. You can also try ribeye or tenderloin for a richer taste. Choosing a good cut makes a big difference. Use a heavy skillet, preferably cast iron or stainless steel. These materials heat evenly and help create a good crust. Avoid non-stick pans for this recipe. They don’t give that nice sear we want. Never overcrowd the pan. If you add too many steak bites at once, they will steam instead of sear. This is why cooking in batches is important. You want that delicious brown crust on each piece. Cooking times vary by preference. For rare steak, aim for 2 minutes per side. For medium, cook for 3 minutes per side. Medium-well takes about 4 minutes per side. To check for doneness, use a meat thermometer. For rare, aim for 125°F; medium is 135°F, and medium-well hits 145°F. This method takes the guesswork out of cooking steak. Pro Tips Rest Your Meat: Allow the steak bites to rest for a few minutes before serving. This helps the juices redistribute, making each bite more flavorful and tender. Choose the Right Cut: Sirloin is great for steak bites, but you can also use ribeye for a richer flavor or tenderloin for a more delicate texture. Don’t Overcrowd the Pan: Cooking the steak in batches if necessary ensures a proper sear. Overcrowding can cause the meat to steam instead of brown. Add a Splash of Acid: A squeeze of fresh lemon juice or a dash of balsamic vinegar before serving can brighten the flavors of the garlic butter steak bites. {{image_2}} You can switch up the cut of meat for garlic butter steak bites. Ribeye offers a rich, juicy flavor. It has more fat, giving it a tender bite. Tenderloin is another great choice. It is lean and very soft. Both options will still soak up that delicious garlic butter. Want to add even more taste? You can mix in some mustard or Worcestershire sauce. These sauces boost the savory notes of your steak bites. You can also try different herbs. Fresh thyme or oregano can bring a new twist. Just chop them finely and add them to the mix. You have options for cooking methods too! Grilling gives a nice char and smoky flavor. Just be sure to watch the heat. Pan-searing is easy and gives a great crust. For a hands-off approach, try oven-baking. Just spread the steak bites on a tray and roast until golden. This method keeps the kitchen cooler! To keep your garlic butter steak bites fresh, store them in an airtight container. This helps seal in the flavors. Place the container in the fridge right after your meal. Garlic butter steak bites can last for about 3-4 days in the fridge. If you want to enjoy them later, freezing is a great option. When reheating, use gentle heat to keep the steak bites tender. The best methods are using a skillet or microwave. If using a skillet, add a little butter and heat on low. Stir often to avoid sticking and overcooking. If using the microwave, heat in short bursts. Check every 30 seconds to keep them juicy. To freeze steak bites, first ensure they cool completely. Place them in a freezer-safe bag or container. Remove as much air as possible to prevent freezer burn. They can last up to 3 months in the freezer. When you’re ready to eat, thaw them overnight in the fridge. For quick thawing, you can also use the microwave. The best cut for steak bites is sirloin. It has great flavor and tenderness. Ribeye is also a good choice. It is juicy and rich. Tenderloin is another option if you want a lean cut. Choose a cut that fits your taste and budget. Yes, you can prepare garlic butter steak bites ahead of time. Cook them fully and let them cool. Store them in an airtight container in the fridge for up to three days. To reheat, place them in a skillet over low heat. Add a little butter to keep them moist. Garlic butter steak bites taste great with many sides. I love serving them with mashed potatoes. They also go well with roasted vegetables. A fresh salad can balance the richness too. Try some crispy fries for a fun twist! This blog post covered the key ingredients and steps for making garlic butter steak bites. I shared tips on flavors, the best techniques, and how to store leftovers. You can enjoy this dish with many sides and modify it as you like. In the end, remember that cooking is fun. With the right ingredients and methods, you can create a tasty meal everyone will love. Enjoy your cooking adventure!

Garlic Butter Steak Bites Juicy and Flavorful Treat

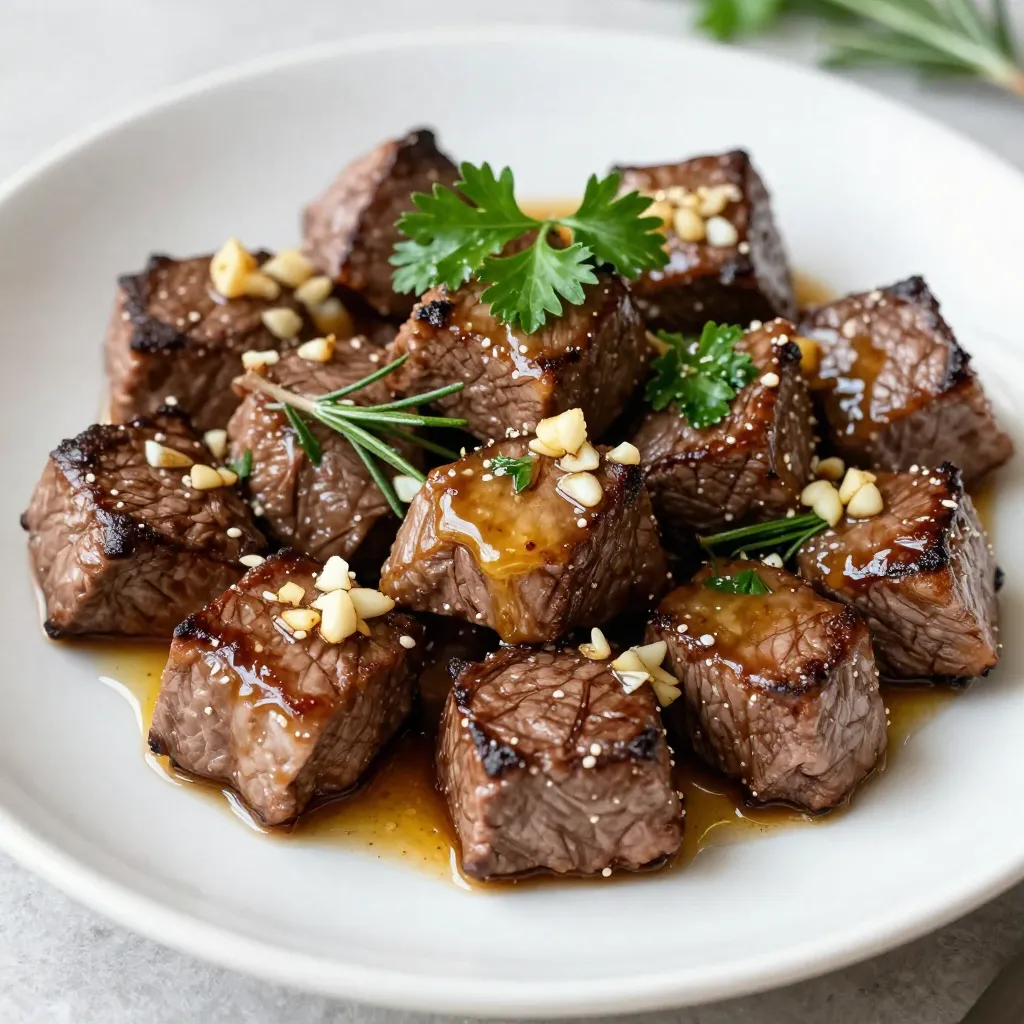
If you love steak bursting with flavor, you’re in for a treat! Garlic Butter Steak Bites bring together juicy sirloin,

To make a yummy Strawberry Cheesecake Icebox Cake, you need these fresh ingredients: - 2 cups fresh strawberries, hulled and sliced - 1 package (8 oz) cream cheese, softened - 1 cup powdered sugar - 1 teaspoon vanilla extract - 2 cups heavy whipping cream - 1 package (14 oz) graham crackers - 1 tablespoon lemon juice You will need a few simple tools to make this cake: - A medium mixing bowl - An electric mixer - A separate mixing bowl for the whipped cream - A rectangular or square dish for layering - Plastic wrap to cover the dish To make your cake even more special, you can add these optional garnishes: - Fresh mint leaves - Extra sliced strawberries {{ingredient_image_1}} To start, take a medium bowl. Add the softened cream cheese, powdered sugar, and vanilla extract. Mix these ingredients with an electric mixer. Keep mixing until the mixture is smooth and creamy. This step is key for a rich flavor. In a separate bowl, whip the heavy cream. You want to whip it until stiff peaks form. Then, gently fold this whipped cream into the cream cheese mixture. This makes it light and fluffy. Now, add the lemon juice to the cream cheese mix. Fold it in gently to blend the taste. Next, grab a rectangular or square dish for layering. Begin by placing a layer of graham crackers at the bottom. This will be the base of your cake. Spread a layer of the cream cheese mixture over the graham crackers. Then, add a layer of sliced strawberries on top. Repeat this process. Layer graham crackers, cream cheese mix, and strawberries until you reach the top. Finish with a layer of the cream cheese mixture. This creates a beautiful finish. Once you finish layering, cover the dish with plastic wrap. Place it in the fridge for at least 4 hours, or overnight. This step helps the flavors meld together. It also allows the cake to set. When you take it out, it will be firm and ready to slice. Before serving, add some extra strawberries and mint leaves on top for a pop of color. Enjoy your delicious strawberry cheesecake icebox cake! To get the best texture, use full-fat cream cheese. Softened cream cheese blends well. Mix it with powdered sugar and vanilla until smooth. Whip the heavy cream until stiff peaks form. Folding the whipped cream gently into the cream cheese mixture keeps it light. The lemon juice adds a nice tang and enhances the creaminess. This balance makes each bite creamy and fluffy. If you have leftovers, cover the cake tightly with plastic wrap. Store it in the fridge for up to three days. The icebox cake tastes even better after a day or two. The flavors have time to blend. If you notice the graham crackers getting too soft, it’s still safe to eat. Just enjoy it as a spoonable dessert! You can make this cake a day before serving. It needs at least four hours in the fridge to set. Making it ahead allows the flavors to meld perfectly. Just remember to cover it well. When you are ready to serve, add fresh strawberries and mint for a lovely finish. This makes it not only delicious but also beautiful! Pro Tips Use Fresh Strawberries: Always opt for fresh, ripe strawberries for the best flavor. They should be bright red and firm to the touch. Chill Your Ingredients: For a smoother cream cheese mixture, ensure your cream cheese is at room temperature before mixing. Chill the final cake in the refrigerator to enhance the flavors. Layering Technique: When layering, make sure to spread the cream cheese mixture evenly and press down gently on each layer to prevent air pockets. Garnish Wisely: Add garnishes just before serving to keep them fresh and visually appealing. Fresh mint and extra strawberries add a lovely touch! {{image_2}} You can change the flavor of your icebox cake easily. Swap strawberries for blueberries or raspberries. You can also use peaches or mangoes for a tropical twist. For a chocolate version, add cocoa powder to the cream cheese mix. You will enjoy a rich, chocolatey delight. Want a gluten-free version? Use gluten-free graham crackers. This simple swap keeps the taste and texture intact. To make it vegan, replace cream cheese with a vegan cream cheese. Use coconut cream instead of heavy cream. Sweeten with maple syrup instead of powdered sugar. These changes make the cake delicious without animal products. Feel free to get creative with fruits! Bananas add a creamy sweetness. Cherries bring a tart flavor that contrasts well with the cream. You can even mix different fruits for a fun twist. Just make sure to slice them thin. This way, they layer well and blend nicely with the cream cheese mixture. To keep your Strawberry Cheesecake Icebox Cake fresh, store it in the fridge. Use a tight lid or plastic wrap to cover the dish. This helps keep the cake moist and tasty. The cool air will also help the flavors blend well. It’s best to keep it on a middle shelf, where the temperature is most stable. You can freeze this cake if you want to save some for later. First, cut it into slices. Wrap each slice in plastic wrap, then place them in a freezer-safe bag. Make sure to remove all the air from the bag. This helps prevent freezer burn. When you’re ready to eat, let it thaw in the fridge overnight. In the fridge, this cake lasts about 3 to 5 days. If you freeze it, it can last up to 2 months. Just remember, the fresher it is, the better it tastes! Always check for any changes in smell or texture before eating. Enjoy your delicious dessert with ease! An icebox cake is a layered dessert. It requires no baking. You stack layers of cookies or graham crackers with creamy filling. The cake chills in the fridge, allowing the layers to soften. This creates a smooth and rich texture. Icebox cakes are easy to make and fun to eat! Yes, you can use frozen strawberries. Just thaw them first and drain any excess liquid. This way, your cake won’t get soggy. Fresh strawberries taste great, but frozen works too. They still add that sweet strawberry flavor! Your cake is ready when it has chilled for at least four hours. If you can, let it chill overnight. This helps the flavors blend well. When you cut into it, the layers should hold together nicely. It should look delicious and ready for a scoop! You learned about icebox cake, its fresh ingredients, and essential equipment. I shared step-by-step instructions for making it, including tips for texture and storing leftovers. You can customize the cake with different flavors and dietary options, too. Proper storage is key for enjoyment later. In the end, this dessert is easy and fun to make. You can impress friends and family with your skills. Enjoy your sweet creations!

Strawberry Cheesecake Icebox Cake Delicious and Easy

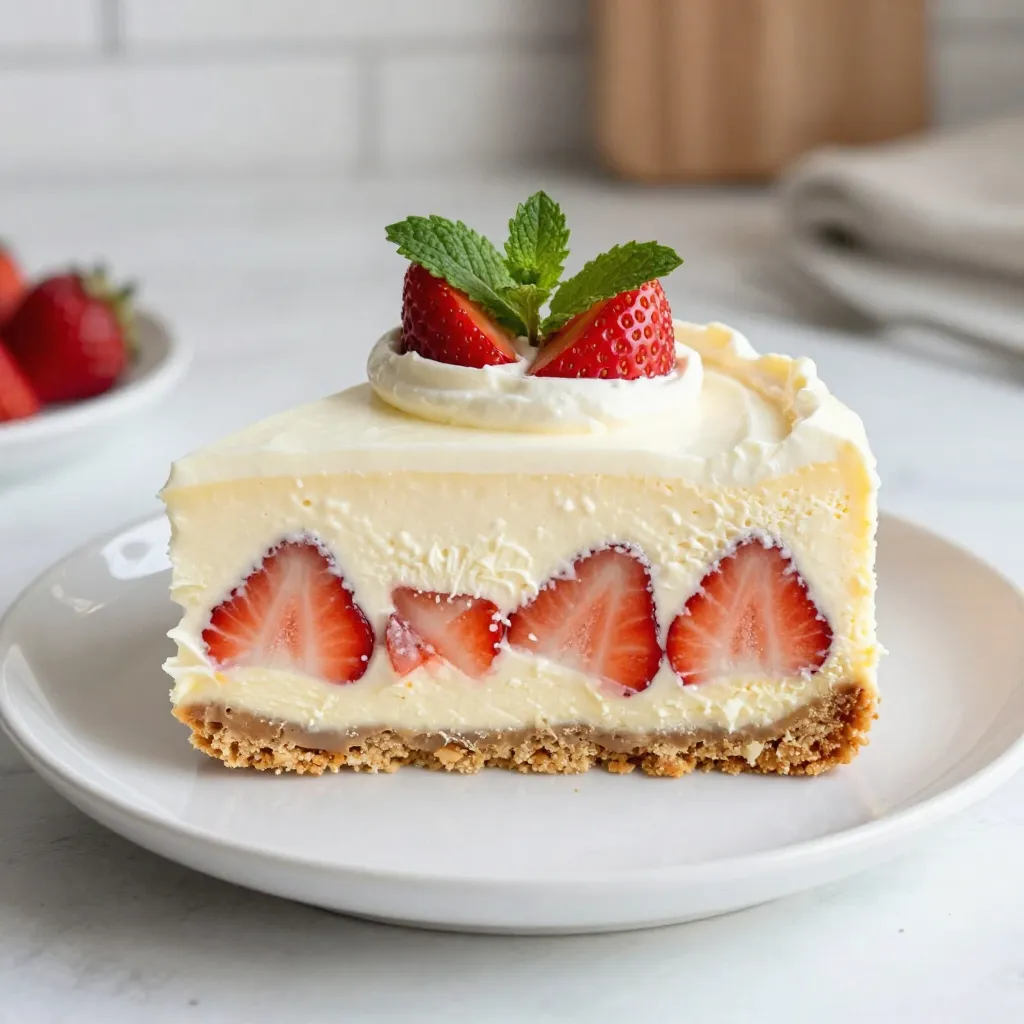
Are you ready for a cool treat that’s super easy to make? This Strawberry Cheesecake Icebox Cake combines creamy cheese

To make Keto Supreme Pizza Casserole, gather these items: - 1 lb ground beef or turkey - 1 lb Italian sausage, casing removed - 1 green bell pepper, diced - 1 red onion, diced - 1 cup mushrooms, sliced - 2 cups cauliflower florets - 1 can (14 oz) crushed tomatoes - 1 tablespoon Italian seasoning - 2 cups shredded mozzarella cheese - 1 cup pepperoni slices - Salt and pepper to taste - 2 tablespoons olive oil These main ingredients create a savory and hearty casserole. Using ground beef or turkey gives you a great protein base. The Italian sausage adds rich flavor that you will love. The colorful veggies, like bell peppers and mushrooms, boost nutrition and taste. If you want to mix things up, consider these options: - Low-carb pizza sauce alternative - Cauliflower crust variations - Cheese alternatives for dairy-free options These substitutions allow you to customize the dish. For example, a low-carb sauce can enhance flavor while keeping carbs low. You can also use a cauliflower crust if you want a different texture or base. Each serving of Keto Supreme Pizza Casserole is packed with nutrition. It provides about: - Calories: 450 - Fats: 30g - Proteins: 30g - Carbs: 8g This breakdown shows how filling and nutritious the meal is. With its low carbs, this casserole is perfect for your keto diet. Enjoy a delicious meal while sticking to your health goals! {{ingredient_image_1}} 1. Preheating the oven Preheat your oven to 375°F (190°C). This gets it ready for baking. 2. Cooking meats and vegetables In a large skillet, add 2 tablespoons of olive oil. Heat over medium. Add 1 lb of ground beef or turkey. Cook until browned, about 5-7 minutes. Then, add 1 lb of Italian sausage. Break it apart as it cooks for another 5-7 minutes. Stir in 1 diced green bell pepper, 1 diced red onion, and 1 cup of sliced mushrooms. Cook for 5 more minutes until they soften. Add 1 can of crushed tomatoes and 1 tablespoon of Italian seasoning. Mix in salt and pepper. Let it simmer for 5 minutes. 3. Steaming and preparing cauliflower Take 2 cups of cauliflower florets and steam them. It will take about 5 minutes until tender. Once cooked, chop them into small pieces. 1. Layering the casserole in a baking dish In a large baking dish, spread the chopped cauliflower evenly at the bottom. Pour the meat and vegetable mix over the cauliflower. 2. Adding toppings Layer 1 cup of pepperoni slices on top of the meat mixture. Then sprinkle 2 cups of shredded mozzarella cheese generously over everything. 1. Covering with foil and baking times Cover the baking dish with aluminum foil. Bake in the preheated oven for 25 minutes. 2. Final baking to achieve golden cheese After 25 minutes, remove the foil. Bake for another 10 minutes. Check for bubbly and slightly golden cheese before taking it out. To ensure even cooking of meats, start with a hot skillet. Brown the ground beef or turkey first. This helps lock in juices. After that, add Italian sausage and break it apart well. Cook until both meats are browned. Stir often for even cooking. Choosing quality ingredients is key for the best flavor. Look for fresh vegetables, like bell peppers and onions. Choose naturally raised meats for better taste. High-quality cheese, like mozzarella, melts nicely and adds richness. For the best sides, consider a fresh salad. A simple green salad pairs well with the casserole. It adds crunch and brightness. You can also serve it with steamed veggies or a side of roasted zucchini. For presentation tips, serve the casserole hot. Garnish with fresh basil or parsley. This adds color and a fresh flavor. Use a nice baking dish to show off your work. To store leftovers, let the casserole cool down first. Cover it tightly with plastic wrap or foil. Store it in the fridge for up to four days. For reheating, you can use the oven or the microwave. If using the oven, cover it with foil to keep it moist. Bake at 350°F until warmed through. In the microwave, heat in short bursts to avoid overcooking. Pro Tips Use Fresh Ingredients: Fresh vegetables and high-quality meats enhance the flavor of your casserole. Opt for organic produce and fresh ground meats whenever possible. Customize Your Toppings: Feel free to add your favorite pizza toppings like olives, jalapeños, or different types of cheese to make it your own! Let It Rest: Allow the casserole to cool for a few minutes after baking. This helps the layers set and makes it easier to serve. Store Leftovers Properly: Store any leftovers in an airtight container in the refrigerator for up to three days. Reheat in the oven for best results. {{image_2}} You can easily switch meats in this casserole. Try using chicken, ground pork, or sausage. Each option brings its own flavor. You can also mix up the vegetables. Consider adding spinach, zucchini, or bell peppers. These swaps keep the dish fresh and exciting. Want to kick up the flavor? Add more seasonings or spices. Garlic powder or crushed red pepper can boost taste. If you enjoy heat, go for spicy pepperoni. For a milder version, stick with classic toppings. Adjusting the spices makes every bite your own. If you follow a vegetarian or vegan diet, replace the meat with plant-based protein. Use tofu or tempeh to maintain texture. For gluten-free options, ensure your sausage and pepperoni are gluten-free. You can make this dish fit many diets while keeping it delicious. Can I freeze Keto Supreme Pizza Casserole? Yes, you can freeze this casserole. Just let it cool first. Cut it into portions. Wrap them tightly in plastic wrap. Then place them in a freezer bag. This way, you can enjoy it later. How long does it last in the fridge? Keto Supreme Pizza Casserole lasts about 3 to 4 days in the fridge. Store it in an airtight container. Reheat it before serving for the best taste. Can I make this recipe ahead of time? You can prepare the casserole in advance. Assemble it and cover it. Store it in the fridge for up to a day before baking. Just extend the baking time a bit if it’s cold. What if I don’t have cauliflower? If you don’t have cauliflower, try broccoli instead. Broccoli gives a similar texture. You can also use zucchini or even spaghetti squash. Just chop them small and follow the same steps. How do I make it spicier? To spice up your casserole, add red pepper flakes. You can also mix in jalapeños or hot sausage. Taste as you go to get the heat just right. What are good cheese alternatives for keto? If you want a cheese swap, try goat cheese or feta. Both give a nice tang. You can also use dairy-free cheese made from nuts. Just check that they are low in carbs. Can I use different types of sauce? Yes, feel free to use different sauces. A low-carb pizza sauce works great. You can also try pesto or alfredo sauce for a twist. Just keep an eye on the carb count. The keto diet focuses on low carbs and high fats. This helps your body burn fat for energy. The Keto Supreme Pizza Casserole fits perfectly into this plan. It is packed with protein and healthy fats. You can enjoy it without worrying about carbs. The mix of meats and veggies gives great flavor. Plus, the cheese adds a creamy touch. This meal keeps you full and satisfied. If you love casseroles, try these other keto ideas: - Cheesy Broccoli and Chicken Casserole - Zucchini Lasagna Bake - Spinach and Feta Casserole These dishes are easy to make and low in carbs. You can prep them in advance for quick meals. They fit well into a keto lifestyle and taste great too. Many users love the Keto Supreme Pizza Casserole. Here are some comments: - "This is now my favorite recipe!" - "I added extra veggies, and it was amazing!" - "Even my kids loved it!" People enjoy making their own variations. Some swap meats or add spices. Others use different types of cheese. This recipe is flexible, and the options are endless! This blog post covered the essential ingredients, step-by-step instructions, and helpful tips for making a Keto Supreme Pizza Casserole. You learned about the key ingredients like ground meat, vegetables, and cheese. We also discussed optional swaps and nutritional facts. In the end, this dish is flexible and easy. You can make it your own while enjoying a healthy meal. Try it out, and enjoy the great taste without the carbs!

Keto Supreme Pizza Casserole Delicious and Simple Meal

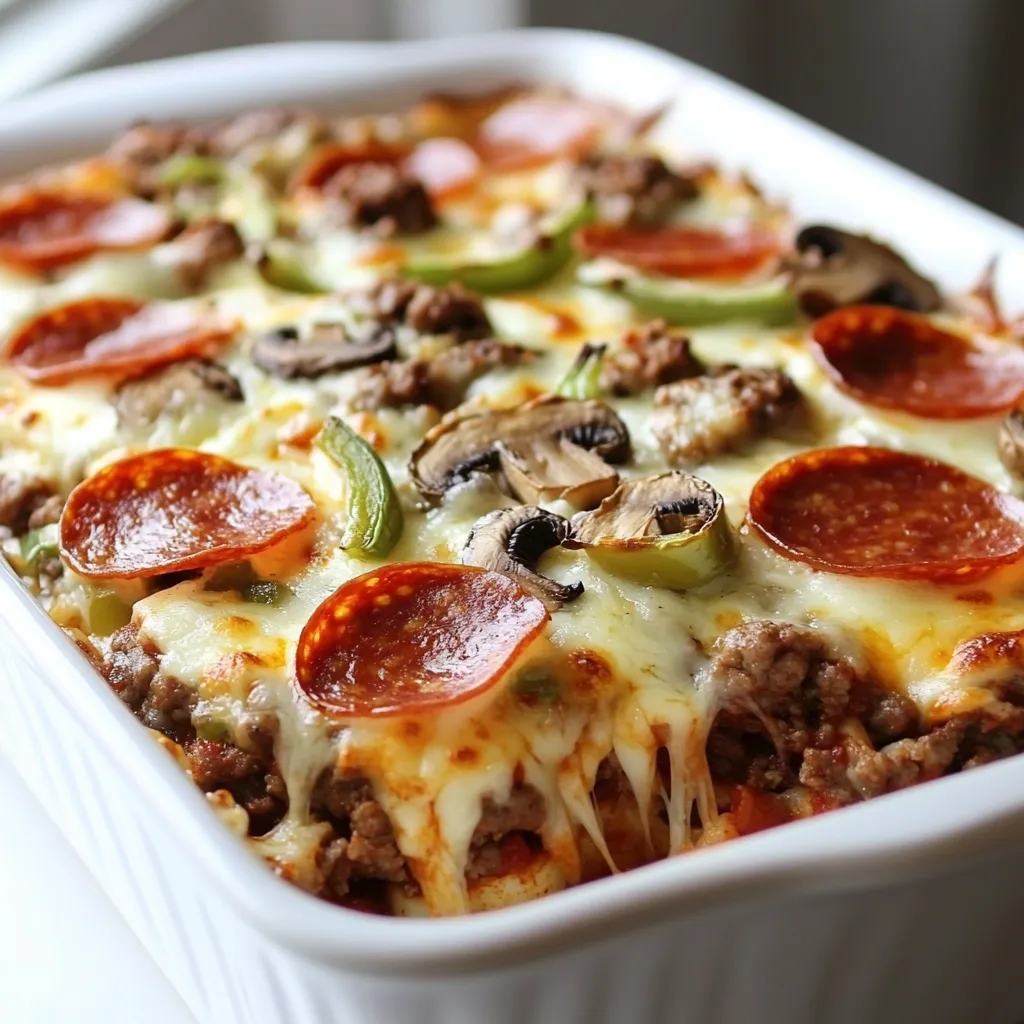
Are you ready to transform your dinner game with a quick and tasty dish? The Keto Supreme Pizza Casserole is

Older posts
Newer posts
← Previous Page1 … Page149 Page150 Page151 … Page164 Next →

dsad

© 2026 easycookingbite • Built with GeneratePress

Our Policies

  • Copyright Policy
  • Cookie Policy
  • GDPR Policy
  • Privacy Policy
  • Disclaimer
  • Terms Of Use

More Information

  • Home
  • About
  • Contact
  • Appetizers
  • Dessert
  • Dinner
  • Drinks
©2026, easycookingbite About Back To Top