Skip to content
DisclaimerTerms Of UseGDPR PolicyCookie Policy

easycookingbite

  • Home
  • Drinks
  • Appetizers
  • Dinner
  • Dessert
  • About
  • Contact
  • Privacy Policy
DisclaimerTerms Of UseGDPR PolicyCookie Policy

Lily

- 1 lb ground turkey - 1 cup fresh spinach, finely chopped - 1/2 cup feta cheese, crumbled - 1/4 cup breadcrumbs (whole wheat or gluten-free) - 1 large egg - 1 teaspoon dried oregano - 1/2 teaspoon salt - 1/4 teaspoon black pepper - 1 garlic clove, minced - 1 small onion, finely chopped - 1 tablespoon olive oil (for cooking) - Optional: marinara sauce for serving Gather these ingredients to create flavorful spinach feta turkey meatballs. The ground turkey offers lean protein. Fresh spinach adds nutrients and color. Feta cheese gives a nice tang. Breadcrumbs help bind the meatballs together. The egg holds everything in place. For seasoning, dried oregano brings warmth. Salt and black pepper enhance taste. The minced garlic and onion add depth. You can use whole wheat or gluten-free breadcrumbs, depending on your needs. Finally, drizzle olive oil for cooking. It helps the meatballs brown nicely. The marinara sauce serves as a tasty option for dipping. This simple list helps you make delicious meatballs that everyone will love. {{ingredient_image_1}} - Preheat the oven to 400°F (200°C). - Prepare a baking sheet with parchment paper. This keeps the meatballs from sticking. - In a large bowl, combine these ingredients: - 1 lb ground turkey - 1 cup fresh spinach, finely chopped - 1/2 cup feta cheese, crumbled - 1/4 cup breadcrumbs - 1 garlic clove, minced - 1 small onion, finely chopped - 1 large egg - 1 teaspoon dried oregano - 1/2 teaspoon salt - 1/4 teaspoon black pepper Mix well. You can use your hands or a spatula. Just be gentle to avoid overmixing. - With wet hands, shape the mixture into meatballs. Aim for about 1.5 inches in diameter. Place them on the prepared baking sheet. - Drizzle olive oil over the meatballs. This helps them brown nicely in the oven. - Bake the meatballs for 20-25 minutes. They should be cooked through and golden brown. For extra flavor, serve the meatballs with marinara sauce on the side. Enjoy the delicious taste! To keep your meatballs moist, use fresh ingredients. Fresh spinach adds moisture. Feta cheese also helps keep the meatballs tender. Always avoid overmixing the ingredients. Mix just until combined. Overmixing makes the meatballs tough and dry. Serve your meatballs on a nice platter. Drizzle with olive oil for shine. Sprinkle fresh parsley or basil on top for color. This makes the dish look appealing. You can place the meatballs on sautéed zucchini noodles or a fresh spinach salad for a complete meal. You can swap the ground turkey for other meats. Ground chicken or beef works well too. If you're gluten-free, use gluten-free breadcrumbs. They give the same texture without the gluten. You can also try oats for a different twist. Pro Tips Keep it Moist: To prevent the meatballs from drying out, avoid overmixing the ingredients. Just blend them until combined. Experiment with Herbs: Feel free to add other herbs like basil or parsley for an extra layer of flavor. Fresh herbs can make a big difference! Use a Cookie Scoop: For evenly sized meatballs, use a cookie scoop. This ensures they cook uniformly and look professional. Serve with Style: Drizzle with a little olive oil and sprinkle fresh herbs before serving. This adds visual appeal and enhances flavor. {{image_2}} To keep your spinach feta turkey meatballs fresh, follow these steps: - Refrigerate Leftovers: Place the meatballs in an airtight container. They stay good for about 3-4 days. Make sure they cool before sealing to avoid excess moisture. - Freezing Options: If you want to store them longer, freeze the meatballs. Arrange them in a single layer on a baking sheet. Once frozen, transfer them to a freezer bag. They can last for up to three months. Reheating meatballs can be easy and quick. Here’s how: - Recommended Methods: You can reheat them in the oven at 350°F (175°C) for about 15 minutes. This helps keep them moist. Microwave them for 1-2 minutes, but be careful not to overheat. - Maintaining Flavor and Texture: To keep the meatballs flavorful, add a splash of broth or marinara sauce when reheating. This adds moisture and enhances the taste. Marinara sauce works great with these meatballs. You can use store-bought or homemade. A rich, chunky marinara adds a nice touch. You might also like dipping sauces. Try tzatziki for a cool taste. Barbecue sauce can add a sweet twist. Mix and match to find your favorite! For sides, zucchini noodles are a fun choice. They add color and are low in carbs. A fresh spinach salad complements the meatballs well. Toss in some cherry tomatoes and cucumbers. You could also serve roasted vegetables for extra flavor. These sides keep the meal light and healthy. These meatballs work well for meal prep. You can make a big batch at once. Store them in the fridge for quick meals. Use them in wraps or on top of rice. They also taste great in pasta dishes. You can even freeze them for later. Just reheat and enjoy! The best way to cook turkey meatballs is to bake them. Preheat your oven to 400°F (200°C). Bake the meatballs on a lined baking sheet for 20-25 minutes. This method helps them cook evenly and stay moist. You can also pan-fry them in olive oil for extra flavor. Just make sure they get a nice brown crust. Yes, you can make these meatballs ahead of time. Prepare the meatballs, then place them on a baking sheet in the fridge. You can cook them later or freeze them for later use. If frozen, thaw them in the fridge before cooking. This makes meal prep easy and quick. These meatballs can be gluten-free! Just use gluten-free breadcrumbs instead of regular ones. Check the labels on your products to ensure they meet your needs. This way, everyone can enjoy these flavorful meatballs. You can tell the meatballs are fully cooked by checking their internal temperature. Use a meat thermometer; it should read 165°F (75°C). If you don't have one, cut one meatball in half. The meat should be no longer pink, and the juices should run clear. You’ve learned how to make tasty spinach feta turkey meatballs today. We covered the key ingredients and step-by-step instructions, ensuring a simple cooking process. I shared tips for flavor, presentation, and storage, so you can enjoy these meatballs all week. Now, imagine the joy of serving this dish with loved ones. Try adding your twist to the recipe and make it your own. Happy cooking!

Savory Spinach Feta Turkey Meatballs Simple Recipe

Looking for a tasty dinner that’s easy to make? Try my Savory Spinach Feta Turkey Meatballs! Packed with flavor from

- 1 cup crushed graham crackers - 4 tablespoons unsalted butter, melted - 8 oz cream cheese, softened - 1/2 cup powdered sugar - 1 teaspoon vanilla extract - 1 cup heavy whipping cream - 1 cup fresh strawberries, diced (plus extra for topping) - 2 tablespoons sugar (for strawberries) - 1 tablespoon lemon juice These ingredients create a sweet, creamy dessert. The graham crackers form a crunchy base. The butter helps hold the crust together. Cream cheese makes the filling rich and smooth. Powdered sugar adds sweetness, while vanilla gives great flavor. Heavy cream adds lightness and fluffiness. Fresh strawberries give a bright taste and color. Sugar and lemon juice help soften the strawberries for a juicy topping. Each part plays a role in making this dessert a treat you will crave! {{ingredient_image_1}} To start, mix 1 cup of crushed graham crackers with 4 tablespoons of melted unsalted butter. Make sure the crumbs are fully coated. This mix gives a nice crunch. Next, divide this mixture evenly into 6 small jars. Press down firmly to form a solid crust. This step is key for a stable base. In a new bowl, beat 8 ounces of softened cream cheese until it becomes smooth. Then, add 1/2 cup of powdered sugar and 1 teaspoon of vanilla extract. Continue to mix until it is creamy and well combined. In another bowl, whip 1 cup of heavy cream until stiff peaks form. Gently fold this whipped cream into the cream cheese mix. This will give the cheesecake its light and fluffy texture. Now, let's add some flavor! In a small bowl, combine 1 cup of diced fresh strawberries with 2 tablespoons of sugar and 1 tablespoon of lemon juice. Let this sit for about 10 minutes. This will bring out the natural sweetness of the strawberries. Begin layering: add the cheesecake mixture on top of the crust. Fill each jar about halfway. Then, add a layer of the marinated strawberries on top of the cheesecake. Finish off with more cheesecake mixture until the jars are full. Smooth the top of each jar’s cheesecake layer to make it look nice. For the final touch, add a few fresh strawberry slices on top for garnish. This not only looks pretty but adds extra flavor. Finally, refrigerate the jars for at least 2 hours. This helps the cheesecake set perfectly. Enjoy your sweet mini strawberry cheesecake jars! To get a smooth and creamy cheesecake, start with softened cream cheese. Cold cream cheese will not mix well. Let it sit at room temperature for about 30 minutes before you beat it. This step makes a big difference. When you whip the cream, use a cold bowl and beaters. This helps the cream whip faster. Whip it until you see stiff peaks. This means it holds its shape well. Then, fold the whipped cream gently into the cream cheese mix. This keeps your cheesecake light and fluffy. Make your mini cheesecakes look great in jars. Use clear jars to show off the layers. You can add a layer of strawberry sauce on top for a pop of color. A sprinkle of mint leaves adds a fresh touch. Try different sizes and shapes of jars too. This can make your dessert more fun. You can even use small glasses or cups if you don’t have jars. Serve these mini cheesecakes with fresh fruit on the side. Berries or a fruit salad work well. They balance the rich flavors of the cheesecake. These desserts taste best when they are cold. Chill them for at least two hours before serving. This helps the flavors meld together nicely. Enjoy them straight from the fridge for a cool treat! Pro Tips Chill Your Ingredients: For a smoother cheesecake filling, ensure your cream cheese and heavy cream are well chilled before whipping and mixing. Use Fresh Strawberries: Fresh strawberries will provide the best flavor and texture. Avoid using frozen strawberries as they can become mushy when thawed. Layering Technique: For a visually appealing presentation, carefully layer the cheesecake and strawberry mixtures to create distinct layers in the jars. Make Ahead: These jars can be made a day in advance and stored in the refrigerator, allowing the flavors to meld beautifully before serving. {{image_2}} You can switch up the flavors in your mini cheesecake jars. Instead of strawberries, try these options: - Blueberries: Their tartness adds a nice contrast. - Raspberries: They bring a sweet and sour taste. - Peaches: Fresh peaches give a lovely summer flavor. Chocolate lovers can enjoy a chocolate version. Swap out some cream cheese for cocoa powder or melted chocolate. You can also use chocolate cookies for the crust. For a caramel twist, drizzle caramel sauce on top. If you need gluten-free options, use gluten-free graham crackers. They work just as well for the crust. For low-sugar versions, replace powdered sugar with a sugar substitute. You can also use less sugar in the strawberries. If you want a vegan cheesecake, swap cream cheese with a vegan cream cheese. Use coconut cream instead of heavy cream. It still tastes rich and creamy. To keep your mini cheesecake jars fresh, store them in the fridge. Cover each jar with a lid or plastic wrap. This helps keep the flavors strong and prevents them from absorbing other smells. Mini cheesecakes stay fresh for up to five days in the refrigerator. After that, they may lose flavor and texture. You can freeze mini cheesecakes if you want to save them for later. To freeze, seal each jar tightly. Use freezer-safe lids or wrap them in plastic wrap. The mini cheesecakes can last up to three months in the freezer. When you’re ready to eat them, move the jars to the fridge for about four hours. This slow thaw helps maintain the creamy texture. Enjoy your sweet treat! Yes, you can prepare these mini cheesecakes in advance. They taste great after sitting in the fridge for a while. I suggest making them the day before you plan to serve them. Just keep them covered in the fridge. This way, they will be ready to enjoy when you are. If you want a different flavor or need a dairy-free option, try using Greek yogurt. It gives a nice tang. Another option is mascarpone cheese, which is creamier and sweeter. Just remember, these swaps will change the taste slightly. To change the sweetness, you can add or reduce powdered sugar in the mix. Taste the filling as you go. If it is too sweet, you can add a bit of lemon juice to balance it out. This adds a nice zing, too. Yes! You can use blueberries or raspberries for a fruity twist. Crushed cookies or chocolate shavings also make great toppings. If you want something creamy, a dollop of whipped cream on top is pure bliss. You now have a clear guide to making mini cheesecakes. We covered ingredients, steps, and tips for perfecting your treats. Remember, fresh strawberries add great flavor. Don't shy away from trying different toppings or flavors. You can even adapt the recipe for dietary needs. Store them well to keep them tasty. Enjoy showing off your delicious mini cheesecakes. They are sure to impress friends and family! Making these desserts is fun and rewarding. Happy baking!

Mini Strawberry Cheesecake Jars Irresistible Dessert Treat

You’ll love these Mini Strawberry Cheesecake Jars! They’re the perfect treat for any dessert lover. With just a few simple

- 1 cup strawberries, quartered - 1 cup blueberries - 1 cup pineapple, diced - 1 cup kiwi, peeled and sliced - 1 cup mango, diced - 3 tablespoons honey - 2 tablespoons lime juice - 1 tablespoon fresh mint, chopped (optional) You need fresh fruits to make this salad shine. Start with strawberries. Their sweet and juicy flavor adds a great contrast. Next, include blueberries for their pop of color and antioxidants. Pineapple brings a tropical touch that brightens every bite. Then, add kiwi for a lovely tartness and vibrant green. Lastly, mango adds sweetness and a smooth texture. For the dressing, you will need honey and lime juice. Honey adds natural sweetness, while lime juice gives a zesty kick. If you want, add fresh mint to elevate the flavor. This mix of sweet and tangy makes the fruit salad irresistible. Gather these ingredients and prepare for a fresh and tasty experience! {{ingredient_image_1}} - First, rinse the strawberries and blueberries under cold water. This helps remove any dirt. - Cut the strawberries into quarters. Set them aside for later. - Trim the pineapple. Cut it into small, bite-sized pieces. - Peel the kiwi. Slice it into rounds. - Peel and dice the mango into small chunks. - In a large bowl, combine the chopped strawberries, blueberries, pineapple, kiwi, and mango. - In a small bowl, whisk together the honey and lime juice until smooth and well mixed. - Drizzle the honey-lime mixture over the fruit salad. - Gently toss the fruits and dressing together. Ensure all pieces are coated without mashing them. - If you like, sprinkle chopped fresh mint over the salad. Toss gently again to mix in the mint. - Chill the salad in the refrigerator for about 15-30 minutes. This allows the flavors to blend well. - Use fresh lime juice for a zesty kick. Fresh lime juice brightens the salad. It adds a lively flavor. Avoid bottled juice for the best taste. - Opt for ripe fruits for better taste. Choose fruits that are in season and perfectly ripe. This choice makes the salad sweeter and more flavorful. - Serve in a clear glass bowl. A clear bowl shows off the colorful fruits. Guests will love the vibrant look! - Garnish with extra mint leaves. Adding mint leaves on top gives a fresh touch. It also adds a nice pop of green color. - Best served chilled. Chilling the salad makes it refreshing. It’s perfect for hot days or gatherings. - Can be paired with yogurt or granola. This salad goes well with creamy yogurt or crunchy granola. It adds texture and richness, making it even more delicious. Pro Tips Use Fresh Fruits: Always opt for the freshest fruits available to enhance the flavor and texture of your salad. Chill Before Serving: Let the fruit salad chill in the refrigerator for at least 15-30 minutes to allow the flavors to meld beautifully. Mixing Technique: Gently toss the fruits to avoid bruising them, ensuring they maintain their shape and integrity. Customize Your Fruits: Feel free to swap in your favorite seasonal fruits or berries for a personalized touch to your salad. {{image_2}} You can add more texture to your Honey Lime Fruit Salad by including chopped nuts. I suggest using almonds or walnuts. These nuts add crunch and a nutty flavor that pairs well with the sweet fruits. Just sprinkle a handful over the top before serving. It’s an easy way to boost nutrition and flavor. Feel free to mix in other seasonal fruits. Grapes and oranges can be great substitutes or additions. Grapes add a juicy pop, while oranges bring a bright, citrus flavor. You can use what you have on hand or what is in season. This keeps your salad fresh and exciting. For a tropical twist, consider adding coconut flakes or passionfruit. Coconut adds a delightful chewiness and a hint of sweetness. Passionfruit brings a tangy punch that elevates the dish. Just sprinkle some on top or mix it in for a fun flavor experience. These small changes can make your fruit salad feel like a mini vacation! Store your Honey Lime Fruit Salad in an airtight container in the fridge. This keeps the fruits fresh and prevents them from browning. Make sure the lid is secure to avoid any odors from other foods. For the best taste and texture, consume the salad within 2-3 days. After this time, the fruits may lose their crunch and flavor. Eating it fresh ensures you enjoy the full burst of flavors from the honey and lime. You can make the fruit salad a day in advance. This is perfect for parties or busy days. However, hold off on adding the dressing until just before you serve it. This keeps the fruits crisp and juicy. Enjoy the bright flavors, and watch your guests smile! You can prep the fruits a day ahead. Cut and store them in a bowl. Keep the bowl covered in the fridge. Wait to add the honey-lime dressing until just before serving. This keeps the fruit fresh and vibrant. Yes, you can use other sweeteners. Agave syrup works well and is mild. Maple syrup adds a hint of flavor. Both options are good for those avoiding honey. Many fruits fit well in this salad. Seasonal fruits like peaches and cherries add sweetness. Grapes or oranges can also give a nice twist. Choose whatever you love! This blog post covers a simple and tasty honey lime fruit salad. You learned how to prepare fresh fruits, mix them, and add a sweet dressing. Remember to use ripe fruits for the best flavor. Feel free to add nuts or try different fruits for a twist. Store the salad in the fridge for up to three days. Enjoy it chilled with yogurt or granola for a great treat. Now you have all you need to make this refreshing dish!

Honey Lime Fruit Salad Fresh and Flavorful Delight

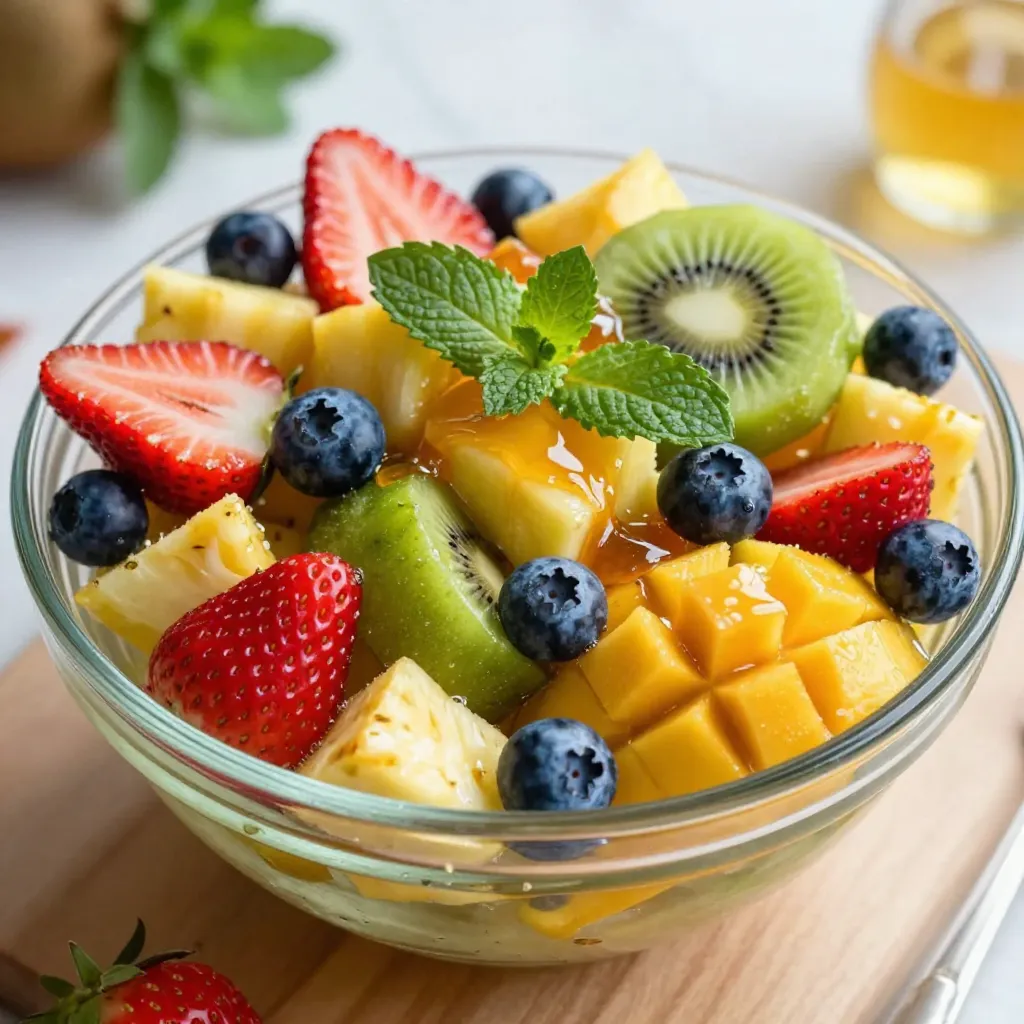
Are you ready for a refreshing treat that’s easy to make? The Honey Lime Fruit Salad is a vibrant mix

- 1 lb boneless, skinless chicken thighs - 2 tablespoons soy sauce - 1 tablespoon sesame oil - 1 tablespoon honey - 2 teaspoons garlic powder - 1 teaspoon ginger powder - ½ teaspoon black pepper - ¼ teaspoon red pepper flakes - 2 tablespoons green onions, chopped - 1 teaspoon sesame seeds Gather these ingredients to make a tasty Air Fryer Hibachi Chicken. The chicken thighs are the star. They stay juicy and flavorful. Soy sauce adds a nice saltiness. Sesame oil gives it a lovely nutty taste. Honey adds a bit of sweetness that balances the flavors. The spices are simple but pack a punch. Garlic powder and ginger powder add warmth. Black pepper gives it a mild kick. Red pepper flakes are optional but can add heat for those who enjoy spice. For garnishes, chopped green onions bring a fresh crunch. Sesame seeds add a nice touch and a bit of crunch, too. Together, these ingredients create a dish that is both delicious and quick to prepare. {{ingredient_image_1}} - Combine 2 tablespoons of soy sauce, 1 tablespoon of sesame oil, and 1 tablespoon of honey. - Add 2 teaspoons of garlic powder, 1 teaspoon of ginger powder, ½ teaspoon of black pepper, and ¼ teaspoon of red pepper flakes. - Mix well until smooth. - Add 1 pound of boneless, skinless chicken thighs cut into bite-sized pieces. - Ensure all chicken pieces are coated. - Marinate in the refrigerator for at least 30 minutes. This helps the chicken absorb the flavors. - Set your air fryer to 390°F (200°C). - Preheat for about 5 minutes. This step ensures even cooking. - Lightly spray the air fryer basket with non-stick cooking spray. - Place the marinated chicken in a single layer in the basket. - Cook for 15 minutes. Shake the basket halfway through. This helps the chicken cook evenly. - Look for a golden-brown color. Make sure the chicken reaches an internal temperature of 165°F for safety. To make your chicken taste great, marinate it well. Use soy sauce, sesame oil, honey, garlic powder, ginger powder, black pepper, and red pepper flakes. This mix helps the chicken soak up the flavors. For best results, let the chicken sit in the fridge for at least 30 minutes. This time allows the flavors to blend well. Even cooking is key. Place the marinated chicken in a single layer in the air fryer. This step helps all pieces cook evenly. Set your air fryer to 390°F (200°C) for 15 minutes. Halfway through, shake the basket to stir the chicken. Always check the internal temperature. It should reach 165°F to be safe to eat. Presentation matters. Serve your hibachi chicken over a bed of steamed rice or with grilled veggies. This adds color and balance to your meal. For a fun touch, sprinkle chopped green onions and sesame seeds on top. These garnishes make your dish look tasty and inviting. Pro Tips Marination Time: The longer you marinate the chicken, the more flavorful it will be. Aim for at least 1 hour or even overnight for optimal taste. Batch Cooking: If cooking for a crowd, consider doubling the recipe, but make sure to cook in batches to maintain even cooking. Checking Doneness: Always use a meat thermometer to check that the internal temperature of the chicken reaches 165°F for safety. Garnish Options: Feel free to add other garnishes like sliced cucumbers or pickled ginger for additional flavor and presentation. {{image_2}} You can make your Air Fryer Hibachi Chicken even better by adding vegetables. Bell peppers, zucchini, and mushrooms work great. Cut the vegetables into bite-sized pieces. - Bell Peppers: Add them during the last 5 minutes of cooking for a crisp bite. - Zucchini: Cook for about 7 minutes. This keeps them tender and bright. - Mushrooms: Slice and add them in the last 5 minutes too. They soak up flavors well. If you want to switch things up, try using chicken breasts instead of thighs. Breasts are leaner and cook faster. - Chicken Breasts: Cut them into smaller pieces for even cooking. - Other Meats: Shrimp or pork also work well. They add different flavors. - Tofu: For a plant-based option, use firm tofu. Make sure to press it to remove excess water. You can customize your sauce to fit your taste. Homemade teriyaki sauce is a great option. It adds a sweet and savory touch. - Teriyaki Sauce: Mix soy sauce, honey, and a bit of ginger for a quick version. - Spice Adjustments: If you like heat, you can add more red pepper flakes. For a milder taste, skip them or use less. These variations let you enjoy this dish in many ways, making it fun and tasty! To store leftover hibachi chicken, let it cool first. Place it in an airtight container. This keeps it fresh longer. You can refrigerate it for up to four days. If you want to enjoy it later, make sure it is sealed well. This helps prevent any strong odors from the fridge from seeping in. For meal prep, you can freeze hibachi chicken. Use freezer-safe containers or bags. Remove as much air as possible to avoid freezer burn. This chicken can last up to three months in the freezer. When you’re ready to eat it, let it thaw in the fridge overnight. This keeps the chicken juicy. To reheat, the best method is using the air fryer. Set it to 350°F (175°C) and cook for about 5-7 minutes. This keeps the chicken crispy. If you use the microwave, do so in short bursts. Check the chicken often to avoid overcooking. You want to heat it through, not dry it out. Yes, you can use chicken breasts. Chicken breasts have a milder flavor. They are leaner than thighs. This means they may dry out faster. Thighs are juicier and more flavorful. They hold up well in the air fryer. If you use breasts, keep an eye on the cooking time. I recommend marinating the chicken for at least 30 minutes. This allows the flavors to soak in. You can marinate it longer for more flavor. For best results, try marinating for 1 to 2 hours. Just keep it in the fridge. You can serve hibachi chicken with many sides. Here are some ideas: - Steamed rice - Grilled vegetables - Fried rice - Noodles - Salad These sides pair well with the flavors of the chicken. They make a complete meal. This blog post covered making delicious Air Fryer Hibachi Chicken. You learned about the key ingredients, spices, and how to marinate and cook the chicken perfectly. We also explored tips for flavor, cooking, presentation, and various protein alternatives for your dish. Remember to store leftovers correctly to enjoy them later. I hope these easy steps inspire you to create tasty meals. Delve into each method, and you’ll impress anyone at the table!

Air Fryer Hibachi Chicken Tasty and Quick Recipe

Want to whip up a delicious meal in no time? This Air Fryer Hibachi Chicken recipe is quick and easy,

- 2 cups fresh strawberries, hulled and sliced - 1 cup freshly squeezed lemon juice (about 4-6 lemons) - 1 cup granulated sugar (adjust to taste) - 2 cups ice cubes - 1 cup cold water - Fresh mint leaves for garnish (optional) To make frozen strawberry lemonade, gather your ingredients first. Fresh strawberries are the star here. Look for ripe, sweet ones. You will need about two cups. Next, squeeze lemons for the juice. Aim for one cup of fresh lemon juice. This will brighten up your drink. The sugar adds sweetness. You can tweak this to fit your taste. Start with one cup. Ice cubes are a must for that slushy texture. Use two cups to keep it cold and refreshing. Cold water helps blend everything smoothly. You will need one cup of this as well. If you like, add fresh mint leaves as a garnish. They add a nice touch and flavor. Remember, fresh ingredients yield the best taste. Enjoy making this simple, tasty drink! {{ingredient_image_1}} To start, you need to blend the fresh strawberries. This step is key for a smooth texture. Place the hulled and sliced strawberries in your blender. Blend until you get a nice, smooth puree. If it feels too thick, add a little cold water to help the blend. If you use frozen strawberries, let them thaw for a few minutes first. This will make blending easier. Next, fresh lemon juice is a must for great flavor. Squeeze about 4 to 6 lemons to get one cup of juice. Pour this juice into a bowl. Add the granulated sugar right away. Stir well until the sugar fully dissolves. If the sugar does not dissolve, it can cause a gritty texture in your drink. Now, mix the strawberry puree with the lemon juice mixture. Make sure to blend these well for an even flavor. The ratio is important here: one cup of lemon juice to two cups of strawberries. If you want it sweeter, you can add more sugar to your taste. Pour everything into the blender. Add two cups of ice cubes and the remaining cold water. Blend on high until it becomes smooth and slushy. You want a refreshing drink, not a soup! If the mixture is too thick, add a bit more water and blend again. Aim for a soft, slushy texture. If you follow these steps, you will create a perfect frozen strawberry lemonade every time. To make your frozen strawberry lemonade even better, try adding other fruits. Raspberries mix well with strawberries. They add a nice tartness. You can also try adding fresh basil. It gives a surprising twist that brightens the drink. Mix and match your favorite fruits for fun flavor combos. Pineapple and lime work well too. Experimenting keeps the drink fresh and exciting. The right glass can make your drink shine. Use tall, clear glasses to show off the vibrant color. A classic mason jar also adds a rustic touch. For garnishes, fresh mint leaves are perfect. They add color and a nice aroma. You can also add lemon slices or even whole strawberries on the rim. For a complete experience, serve with a straw or a fun cocktail umbrella. You can prepare this drink in advance. Store it in an airtight container in the freezer. It lasts well for about a week. If it gets too hard, let it sit at room temp for a few minutes. To refresh the drink, simply blend it again. This brings back the slushy texture. Adjust sweetness again if needed, and enjoy! Pro Tips Choose Ripe Strawberries: Use fresh, ripe strawberries for the best flavor. Look for berries that are bright red and fragrant. Adjusting Sweetness: Taste the mixture before serving. Depending on the sweetness of your strawberries, you may want to adjust the sugar level. Add a Splash of Sparkling Water: For a fizzy twist, top off your frozen lemonade with a splash of sparkling water just before serving. Garnish for Presentation: Fresh mint leaves not only add flavor but also enhance the visual appeal of your drink. Don't skip this step! {{image_2}} You can make this frozen strawberry lemonade lighter and healthier. Here are some tips: - Low-sugar options: Use less sugar to cut calories. Try 1/2 cup instead of 1 cup. - Alternative sweeteners: Agave syrup or honey can replace granulated sugar. They add sweetness and flavor without the extra calories. Want to make it a fun drink for adults? Adding a splash of alcohol can turn this into a refreshing cocktail. Here’s how to do it: - Recipes for adding spirits: Mix in a shot of vodka or rum for an adult twist. Start with 1 ounce and adjust to taste. - Tips for balance of flavors: Ensure the sweetness stays right. You might need a little more lemon juice to balance the alcohol's taste. If you prefer a creamier texture, you can try dairy-free options. Here are some suggestions: - Coconut milk: Substitute part of the water with coconut milk for a richer flavor. - Other non-dairy alternatives: Almond milk or oat milk can also work. They give a nice flavor while keeping it light and refreshing. Frozen strawberry lemonade lasts in the fridge for about 2-3 days. To store leftovers, pour it into an airtight container. This keeps the drink fresh and tasty. Always remember to chill the container before filling it. If you do not have an airtight container, cover it tightly with plastic wrap. To freeze leftover frozen strawberry lemonade, pour it into ice cube trays. Fill each compartment and freeze. This way, you can use small amounts later. For thawing, simply take out the cubes and let them sit a few minutes. If you want to enjoy it slushy again, re-blend the thawed lemonade. Add a splash of cold water if it seems too thick. Yes, you can use frozen strawberries! Frozen berries work well for this drink. They are often picked at peak ripeness, which keeps their flavor great. Just remember to let them thaw a bit before blending. This helps to get a smooth texture. If you don’t have a blender, you can still make this drink. Start by mashing the fresh strawberries in a bowl. Use a fork or a potato masher to break them down. Mix the mashed strawberries with lemon juice and sugar. Stir in ice cubes and cold water. Then, shake everything in a large jar. The best way to sweeten your drink is with granulated sugar. You can adjust the amount based on your taste. Another option is to use honey or agave syrup for a different flavor. Always taste as you go to find your perfect balance. Yes, you can make this drink in advance! Just prepare the mixture and store it in the fridge. Before serving, give it a quick stir to mix any settled ingredients. If it’s too thick, add a splash of cold water and stir again. Frozen strawberry lemonade is refreshing and light. For each serving, it typically has about 150 calories. It contains sugar and carbs from the strawberries and lemon juice. It also gives you vitamins C and A from the fresh fruits. Adjusting the sugar can change these facts, too. This guide covered all you need for frozen strawberry lemonade. We looked at the ingredients, blending tips, and ways to enhance flavor. You learned how to combine everything for a great drink. In the end, making frozen strawberry lemonade is simple and fun. You can customize it to match your taste. Enjoy this refreshing drink whether it's hot or cold.

Frozen Strawberry Lemonade Refreshing and Simple Recipe

Are you ready to sip on something cool and refreshing? This Frozen Strawberry Lemonade recipe is as simple as it

To make these tasty muffins, you need the following ingredients: - 1 cup rolled oats - 1 cup whole wheat flour - 1/2 cup brown sugar, packed - 1 tbsp baking powder - 1/2 tsp baking soda - 1/2 tsp salt - 1 cup buttermilk (or plant-based milk with 1 tbsp vinegar) - 1/4 cup vegetable oil (or melted coconut oil) - 2 large eggs - Zest of 1 lemon - 1/4 cup fresh lemon juice - 1 cup fresh blueberries (or frozen, if not in season) - 1 tsp vanilla extract These ingredients work together to create a muffin that is soft and moist. The oats give a hearty texture. The blueberries add sweetness and bursts of flavor. The lemon zest and juice bring a fresh, zesty kick. If you have dietary needs, you can easily swap some ingredients. For a gluten-free version, use gluten-free rolled oats and flour. Instead of buttermilk, mix plant-based milk with vinegar. You can use flax eggs instead of regular eggs. Just mix 1 tbsp of ground flaxseed with 2.5 tbsp of water for each egg. This will keep your muffins tasty and safe for your diet. Want to get creative? Here are some fun add-ins: - Chopped nuts like walnuts or pecans for crunch - Shredded coconut for a tropical twist - A dash of cinnamon or nutmeg for warmth - A handful of dark chocolate chips for sweetness These add-ins can boost the flavor and texture of your muffins. Experiment and find your favorite mix! {{ingredient_image_1}} Start by preheating your oven to 350°F (175°C). This step helps the muffins rise well. Line a muffin tin with paper liners or grease it lightly. In a large bowl, mix together 1 cup of rolled oats, 1 cup of whole wheat flour, and 1/2 cup of packed brown sugar. Add 1 tablespoon of baking powder, 1/2 teaspoon of baking soda, and 1/2 teaspoon of salt. Whisk these dry ingredients until they blend well. Now, in a separate bowl, whisk together 1 cup of buttermilk, 1/4 cup of vegetable oil, and 2 large eggs until smooth. Add the zest of 1 lemon, 1/4 cup of fresh lemon juice, and 1 teaspoon of vanilla extract. Mix these wet ingredients until they are fully combined. Pour the wet mixture into the dry ingredients and stir until just combined. Small lumps are just fine—do not overmix! Gently fold in 1 cup of fresh blueberries. This adds a burst of flavor to each muffin. Divide the batter evenly among the muffin cups, filling each one about 3/4 full. Place the muffin tin in the preheated oven. Bake for 18-20 minutes. To check if they’re done, insert a toothpick into the center. If it comes out clean, the muffins are ready! Once baked, let the muffins cool in the tin for about 5 minutes. This helps them set. Then, move them to a wire rack to cool completely. For a lovely touch, serve them warm or at room temperature. You can dust them with powdered sugar or pair them with lemon curd or Greek yogurt. Enjoy your yummy lemon blueberry oatmeal muffins! To get the best texture in your muffins, use fresh ingredients. Always measure your flour correctly. Scoop the flour into a cup, then level it off with a knife. This helps avoid dense muffins. Let your wet and dry ingredients mix just until combined. Overmixing can make muffins tough. You want a light and fluffy muffin, so mix gently. One common mistake is not preheating the oven. Always preheat for even baking. Another issue is not using enough baking powder. It helps muffins rise well. Check the expiration date on your baking powder to ensure it’s active. Also, avoid opening the oven door too soon. This can let heat escape and affect how the muffins bake. Using fresh lemon juice and zest brightens up the flavor. It adds a nice zing that pairs well with blueberries. You can also try adding zest from another citrus, like orange, for extra depth. This small change can elevate your muffins. For berries, fresh blueberries are best, but frozen ones work too. Just make sure they are not clumped together. Pro Tips Use Fresh Ingredients: Always opt for fresh blueberries and freshly squeezed lemon juice for the best flavor and texture in your muffins. Don't Overmix: When combining wet and dry ingredients, mix just until combined. Overmixing can lead to dense muffins. Cool Properly: Let the muffins cool in the tin for a few minutes before transferring them to a wire rack to ensure they don't become soggy. Storage Tips: Store leftover muffins in an airtight container at room temperature for up to 3 days, or freeze them for longer storage. {{image_2}} To make gluten-free lemon blueberry muffins, swap the whole wheat flour with a gluten-free blend. Look for a blend that works well for baking. You can also add a bit of xanthan gum to help with texture. Use certified gluten-free oats to ensure there’s no cross-contamination. This change will keep the muffins soft and tasty. Feel free to mix in nuts like walnuts or pecans for a nice crunch. Chopped nuts add flavor and texture. You can also use other fruits. Try raspberries or strawberries if you want a twist. Just remember to keep the total amount of fruit around one cup to maintain the muffin structure. For a vegan version, replace the eggs with flax eggs. To make one flax egg, mix one tablespoon of ground flaxseed with three tablespoons of water and let it sit for five minutes. Use plant-based milk mixed with vinegar as a buttermilk substitute. This way, you can enjoy these muffins without any animal products, keeping them moist and delightful. To keep your lemon blueberry oatmeal muffins fresh, store them in an airtight container. This helps lock in moisture and flavor. Place a piece of parchment paper between layers to reduce sticking. If you plan to eat them within a few days, store them at room temperature. For longer storage, the fridge is a good choice. Just remember to let them cool completely before sealing. Freezing muffins is a smart way to keep them fresh. First, let the muffins cool down fully. Then, wrap each muffin in plastic wrap or foil. Place them in a freezer bag for extra protection. You can freeze them for up to three months. When you want to enjoy one, take it out and let it thaw at room temperature. For best results, warm it in the oven for a few minutes. To enjoy that fresh-baked taste, reheat your muffins before serving. Preheat your oven to 350°F (175°C). Place the muffins on a baking sheet and heat for about 5-10 minutes. You can also use a microwave for quick reheating. Just microwave for 10-15 seconds. This warms them up without drying them out. A warm muffin pairs perfectly with a cup of tea or coffee! Yes, you can use frozen blueberries in these muffins. Just add them straight from the freezer. Do not thaw them first. This keeps them from getting mushy. Frozen blueberries can also add a nice burst of flavor. You can easily make buttermilk at home. Mix 1 cup of any plant-based milk with 1 tablespoon of vinegar. Let it sit for about 5 to 10 minutes. This creates a great substitute for buttermilk in your muffins. If you want to skip the eggs, you have options. You can use 1/4 cup of unsweetened applesauce. Another good choice is 1/4 cup of mashed banana. Both will help bind your muffins and keep them moist. These muffins can last for about 3 to 4 days at room temperature. Keep them in an airtight container to keep them fresh. If you want to store them longer, put them in the fridge for up to a week. You now know how to make lemon blueberry oatmeal muffins. We covered essential ingredients, tasty substitutions, and optional add-ins. I shared step-by-step instructions to ensure perfect results every time. Tips and tricks helped enhance flavor and avoid common mistakes. We explored gluten-free and vegan options, along with storage tips to keep your muffins fresh. Use this knowledge to bake delicious muffins that everyone will love! Enjoy your baking journey!

Lemon Blueberry Oatmeal Muffins Simple and Tasty Treat

Get ready to enjoy a burst of flavor with my Lemon Blueberry Oatmeal Muffins! These simple treats mix zesty lemon

- 9-12 lasagna noodles - 2 cups ricotta cheese - 2 cups shredded mozzarella cheese (divided) - 1 cup grated Parmesan cheese - 1 large egg - 2 cups spinach (fresh or frozen, thawed and drained) - 2 cups marinara sauce - 1 teaspoon garlic powder - 1 teaspoon Italian seasoning - Salt and pepper to taste - Fresh basil leaves for garnish (optional) When choosing ingredients, quality matters. Look for fresh ricotta cheese. It adds a creamy texture. Opt for whole milk mozzarella for the best melt. If you prefer a stronger flavor, use aged Parmesan. Fresh spinach is great, but frozen works too. Just make sure to drain it well. You can swap ricotta for cottage cheese if you want a lighter option. For a dairy-free version, try cashew cheese. Instead of marinara, use pesto for a twist. If you don’t have lasagna noodles, try using zucchini slices or eggplant for a low-carb option. {{ingredient_image_1}} To start, cook the lasagna noodles. Boil them until they are just right, or al dente. This means they should be firm but not hard. Drain the noodles and lay them flat on a clean kitchen towel. This helps them cool and avoids sticking. Make sure they are not overlapping. Now, let’s make the filling. In a mixing bowl, combine the ricotta cheese, one cup of mozzarella cheese, and Parmesan cheese. Add the egg, spinach, garlic powder, Italian seasoning, salt, and pepper. Mix everything well until it looks smooth and creamy. This filling is the heart of our roll ups. Next, it’s time to roll up the noodles. Spread a thin layer of marinara sauce on the bottom of a baking dish. Take one noodle and spread a good amount of the cheese and spinach filling along it. Roll the noodle tightly from one end to the other. Place the roll seam side down in the dish. Repeat this for all noodles. Arrange them side by side in the dish. Pour the rest of the marinara sauce on top, covering the roll ups. Finally, sprinkle the remaining mozzarella cheese over everything. For baking, cover the dish with aluminum foil. Make sure the foil does not touch the cheese. Bake at 375°F (190°C) for 25 minutes. Then, remove the foil and bake for another 15 minutes. This makes the cheese bubbly and golden. Let the roll ups cool for about 5-10 minutes before serving. If you want, add fresh basil leaves for a nice touch. Enjoy your savory lasagna roll ups! When making lasagna roll ups, some mistakes can spoil your dish. First, avoid overcooking the noodles. They should be al dente, so they hold their shape. If you cook them too soft, they may tear when you roll them. Another mistake is not cooling the noodles properly. If they are too hot, the filling will melt and ooze out. Lastly, be careful not to skimp on the sauce. It keeps the roll ups moist and flavorful. For creamy and delicious cheese filling, use fresh ingredients. Ricotta cheese should be smooth, not grainy. Mixing in an egg helps bind everything together. Use a good quality mozzarella cheese for that melty goodness. Remember to save some mozzarella for the top! This will create a golden layer that is both tasty and inviting. To boost flavor, add fresh herbs like basil or parsley to your cheese mix. This gives a fresh taste that brightens the dish. For added nutrition, mix in vegetables like bell peppers or zucchini. These veggies complement the spinach and add color. You can also swap regular noodles for whole wheat or gluten-free options. This makes your roll ups healthier while still being delicious. Pro Tips Perfectly Cooked Noodles: Make sure to cook the lasagna noodles until they are al dente to prevent them from becoming mushy during baking. Spinach Options: If using frozen spinach, ensure it is thoroughly thawed and drained to avoid excess moisture in the filling. Cheese Variations: Feel free to mix in other cheeses like ricotta or provolone for added flavor and creaminess. Make Ahead: You can prepare the roll ups a day in advance, cover them, and store them in the refrigerator until you're ready to bake. {{image_2}} You can make lasagna roll ups without meat. Use more veggies for flavor. Great choices include zucchini, mushrooms, or bell peppers. Add these to your cheese and spinach mix. You can also swap ricotta for a vegan cheese. This way, you keep it tasty and plant-based. For those who love meat, add ground beef or sausage. Cook it first, drain the fat, and mix it into the cheese filling. You can also layer in pepperoni or prosciutto. This gives your roll ups a hearty flavor. Don't forget to mix in some herbs for extra taste. If you need gluten-free roll ups, choose gluten-free lasagna noodles. Many brands offer tasty options. You can also use zucchini slices instead of noodles. This cuts carbs and adds freshness. Just slice the zucchini thin and grill or roast it first. You’ll get a great flavor with fewer carbs. After your meal, let the lasagna roll ups cool down. Place the leftovers in an airtight container. Store them in the fridge for up to 3 days. This keeps the flavors fresh. To reheat, preheat your oven to 350°F (175°C). Place the roll ups in an oven-safe dish. Add a bit of marinara sauce on top to keep them moist. Cover the dish with foil. Heat for about 20 minutes or until warm. This way, the cheese stays gooey and delicious. You can freeze lasagna roll ups for later. Wrap each roll up tightly in plastic wrap. Then, place them in a freezer bag or a container. They can last up to 3 months in the freezer. When you're ready to eat them, thaw in the fridge overnight. Then, follow the reheating tips to enjoy them again. Yes, you can make Lasagna Roll Ups in advance. Prepare the roll ups and place them in a baking dish. Cover them with plastic wrap. You can store them in the fridge for up to two days. This saves time on busy nights. Just remember to add a bit more baking time if they are cold from the fridge. The best way to reheat your Lasagna Roll Ups is in the oven. Preheat the oven to 350°F (175°C). Place the roll ups in a baking dish. Add a splash of marinara sauce to keep them moist. Cover with foil to prevent drying. Heat for about 20-25 minutes. Check that they are hot all the way through before serving. Yes, you can use no-boil lasagna noodles. They work well in this recipe. Just layer them with the cheese filling and sauce. They will cook as they bake in the oven. This saves time and effort, making your lasagna roll ups even easier to prepare. This blog post covered everything you need for perfect lasagna roll ups. We discussed ingredients, instructions, tips, variations, and storage methods. You can avoid common mistakes and enhance flavor easily. Remember, whether you choose veggie or meat versions, the key lies in the right ingredients and techniques. With these tips, you can make delicious meals with confidence. Enjoy your cooking!

Easy Lasagna Roll Ups Savory and Simple Recipe

Are you ready to impress your family with a delicious dinner that’s both easy and fun to make? My Easy

- 1 cup quinoa, rinsed - 2 cups chicken broth (or vegetable broth for a vegetarian option) - 2 boneless, skinless chicken breasts - 1 tablespoon olive oil - 1 teaspoon chili powder - 1 teaspoon cumin - 1 teaspoon garlic powder - Salt and pepper to taste - 1 can (15 oz) black beans, rinsed and drained - 1 cup corn (frozen or canned) - 1 cup cherry tomatoes, halved - 1 avocado, diced - 1/4 cup fresh cilantro, chopped - Juice of 1 lime - 1/2 cup shredded cheese (cheddar or Mexican blend) - Optional: hot sauce for serving You can switch out ingredients based on what you have. For quinoa, try brown rice or farro. If you want a meatless bowl, use tofu or tempeh instead of chicken. You can also use vegetable broth instead of chicken broth for a vegetarian option. If you don’t have black beans, pinto beans work well too. Instead of cherry tomatoes, you can use diced bell peppers for a crunch. - Quinoa: This grain is packed with protein and fiber. It helps keep you full longer. - Chicken: A lean meat, chicken provides protein for muscle growth and repair. - Black Beans: They are rich in fiber and can help with digestion. - Avocado: This fruit is full of healthy fats. It supports heart health and keeps skin glowing. - Cilantro: Fresh cilantro adds flavor and may help lower blood sugar levels. - Lime Juice: This adds vitamin C, which helps boost your immune system. These ingredients make Tex-Mex Chicken Quinoa Bowls not only tasty but also good for you. Enjoy the mix of flavors and health benefits in every bite! {{ingredient_image_1}} To start, rinse 1 cup of quinoa under cold water. This step helps remove any bitter taste. In a medium saucepan, mix the rinsed quinoa with 2 cups of chicken broth. You can swap the broth for vegetable broth if you prefer a vegetarian meal. Bring the mixture to a boil, then lower the heat. Cover the pot and let it simmer for about 15 minutes. The quinoa is done when it is soft and the liquid is absorbed. Use a fork to fluff it up and set it aside. While the quinoa cooks, let’s prepare the chicken. Take 2 boneless, skinless chicken breasts and season them. Use 1 tablespoon of olive oil in a skillet over medium-high heat. Sprinkle 1 teaspoon of chili powder, 1 teaspoon of cumin, and 1 teaspoon of garlic powder on both sides of the chicken. Add salt and pepper to taste. Place the seasoned chicken in the hot skillet. Cook each side for about 6-7 minutes. The chicken should be cooked through and no longer pink in the middle. Once done, let it rest for a few minutes before slicing it into strips. Now, it’s time to assemble the bowls! In a large bowl, combine the cooked quinoa, 1 can of black beans (rinsed and drained), 1 cup of corn, and 1 cup of halved cherry tomatoes. Next, add 1 diced avocado and 1/4 cup of chopped fresh cilantro. Squeeze the juice of 1 lime over the mixture. Gently toss everything together. To serve, scoop the quinoa mixture into bowls, top with sliced chicken, and sprinkle with 1/2 cup of shredded cheese. If you like a little heat, add hot sauce on top. Enjoy your colorful and healthy Tex-Mex Chicken Quinoa Bowls! To cook quinoa well, rinse it first. This removes the bitter saponins. Use a two-to-one ratio of liquid to quinoa. For this dish, combine one cup of rinsed quinoa with two cups of chicken broth. Bring it to a boil, then lower the heat. Cover the pot and let it simmer for about 15 minutes. Once done, fluff it with a fork. This makes your quinoa light and fluffy, perfect for your Tex-Mex bowl. For the chicken, I like to pan-sear it. Start with a hot skillet and add olive oil. Season your boneless, skinless chicken breasts with chili powder, cumin, garlic powder, salt, and pepper. Cook each breast for about 6 to 7 minutes per side. This method keeps the chicken juicy and flavorful. Always check for doneness; the chicken should not be pink in the center. Let it rest before slicing to keep it tender. To boost flavor, add lime juice right before serving. It brightens the entire dish. Fresh cilantro adds a nice herbal note. If you like heat, drizzle some hot sauce on top. You can also mix in different spices like smoked paprika or cayenne for extra depth. Don't forget the cheese! A sprinkle of shredded cheddar or Mexican blend ties everything together. These small tweaks can elevate your Tex-Mex Chicken Quinoa Bowls to a new level. Pro Tips Cook Quinoa Perfectly: Make sure to rinse quinoa thoroughly before cooking to remove its natural coating, called saponin, which can give a bitter taste. Rest the Chicken: Allow the cooked chicken to rest for a few minutes before slicing. This helps retain its juices for a more tender bite. Customize the Spice Level: Adjust the amount of chili powder and hot sauce according to your taste preference to control the heat of the dish. Fresh Ingredients Matter: Using fresh ingredients like cilantro and lime juice will elevate the flavors of the bowl, making it more vibrant and delicious. {{image_2}} You can easily make a vegetarian or vegan version of these Tex-Mex chicken quinoa bowls. Simply swap out the chicken for grilled vegetables or marinated tofu. Use vegetable broth instead of chicken broth. Add more black beans or chickpeas to boost protein. This keeps the dish tasty and filling without meat. Feel free to switch up ingredients to suit your taste. Instead of black beans, try pinto beans or lentils. For a different grain, use brown rice or farro. You can also change the cheese to feta or omit it for a dairy-free bowl. Cherry tomatoes can be replaced with diced bell peppers for a crunchier texture. To control spice levels, adjust the chili powder. For a milder dish, use less chili powder or skip it. If you love heat, add more chili powder or some diced jalapeños. You can mix in a splash of hot sauce before serving for an extra kick. This way, you can customize each bowl to your liking. To keep your Tex-Mex chicken quinoa bowls fresh, use airtight containers. Place the cooled bowls in the fridge. They will last for about three to four days. Make sure to store the chicken separately if you want it to stay juicy. Keeping the toppings, like avocado and cheese, in separate containers helps too. This way, your meal stays fresh and tasty. When you're ready to enjoy your leftovers, heat them up in the microwave. Place the quinoa bowl in a microwave-safe dish. Cover it with a damp paper towel to keep the moisture in. Heat for about one to two minutes, or until warm. Stir halfway through to make sure it heats evenly. If you prefer, you can reheat it on the stove. Just add a splash of water to a pan and heat on low until warm, stirring often. If you want to save some bowls for later, freezing is a great option. Portion out the bowls into airtight containers or freezer bags. Leave some space at the top, as the food will expand when frozen. Label the bags with the date. You can freeze them for up to three months. To thaw, place them in the fridge overnight. Then reheat as mentioned above for a quick meal later. Yes, you can make Tex-Mex Chicken Quinoa Bowls in advance. This dish keeps well in the fridge. Prepare the quinoa, chicken, and toppings ahead of time. Store each component separately. When you're ready to eat, just combine them in a bowl. This makes for a quick and easy meal. You can use vegetable broth instead of chicken broth. This option is great for vegetarians. Water is also an option, but it won't add much flavor. You can even use low-sodium broth if you prefer less salt. This keeps the dish healthy and tasty. To add more protein, consider beans or lentils. Chickpeas are a great choice too. You can also top the bowls with a fried egg. If you want more meat, try adding shrimp or beef. Each option boosts the protein and keeps the dish filling. You learned about the key ingredients for Tex-Mex Chicken Quinoa Bowls and their health benefits. I shared tips for cooking quinoa and chicken perfectly. We explored fun variations, from vegetarian options to spice adjustments. You also got storage tips to keep meals fresh and tasty. Overall, this dish is flexible and healthy. You can easily change it to suit your taste. Enjoy making these bowls for yourself or for friends and family. They'll love it!

Tex-Mex Chicken Quinoa Bowls Flavorful and Healthy Dish

Looking for a dish that’s both healthy and tasty? You’ve found it! Tex-Mex Chicken Quinoa Bowls bring bold flavors and

- 200g feta cheese, crumbled - 4 large eggs - 1 cup cherry tomatoes, halved - 1/2 red onion, thinly sliced - 1/2 cup Kalamata olives, pitted and halved These main ingredients create the base of this dish. The creamy feta adds a rich taste. The eggs provide protein and heartiness. Cherry tomatoes bring sweetness, while the red onion adds a nice crunch. Kalamata olives give a salty flavor, balancing the dish perfectly. - 2 tablespoons olive oil - 1 teaspoon dried oregano - Salt and pepper to taste The olive oil adds moisture and depth. Dried oregano gives that classic Mediterranean taste. Salt and pepper are key to enhancing all the flavors in this dish. You can adjust them based on your taste. - Pita bread - Crusty bread - Fresh parsley Pita or crusty bread is perfect for dipping into the baked dish. It adds a nice texture. Fresh parsley not only adds color but also freshness. You can sprinkle it on top for a burst of flavor. {{ingredient_image_1}} 1. Preheating the oven Start by preheating your oven to 375°F (190°C). This ensures even cooking for your dish. 2. Preparing the baking dish Grab a medium baking dish. Spread the halved cherry tomatoes and sliced red onion evenly across the bottom. This creates a colorful base for your dish. 1. Spreading cherry tomatoes and red onion The cherry tomatoes add sweetness, while the red onion brings a nice bite. Drizzle 1 tablespoon of olive oil over the veggies. Season with salt, pepper, and dried oregano. Toss them to coat well. 2. Crumbling feta and creating wells for eggs Now, crumble 200g of feta cheese evenly over the vegetables. Use the back of a spoon to make four small wells in the feta mixture. This is where you will crack the eggs. 1. Drizzling oils and seasoning Carefully crack one egg into each well. Drizzle the remaining tablespoon of olive oil over the eggs. Lightly season them with salt and pepper for extra flavor. 2. Baking time and doneness indicators Bake your dish in the preheated oven for 20-25 minutes. The egg whites should be set, while the yolks remain slightly runny. Adjust the time to fit your taste. Enjoy the wonderful aroma that fills your kitchen! To get the right egg consistency, watch the baking time closely. Bake for 20-25 minutes. The egg whites should be firm, but the yolks should stay runny. You can test this by gently shaking the dish. If the yolks jiggle slightly, they are just right. If you bake too long, the yolks will set hard, losing that creamy texture. To avoid overcooking, check your dish a few minutes early. Ovens can vary in temperature. If you see the whites are set but the yolks still jiggle, it’s time to take them out. Let them cool for a minute before serving. If you cannot find feta cheese, goat cheese works great too. It has a similar creamy texture and tangy flavor. You can also try ricotta for a milder taste. For other vegetable additions, consider spinach or bell peppers. Sauté them first for even more flavor. Zucchini or mushrooms can also add nice texture and taste. Serve the baked feta eggs hot from the oven. Pair them with warm pita bread or crusty bread. This makes dipping easy and fun. For garnishing, chop fresh parsley and sprinkle it on top. This adds color and a fresh taste. You can also add a drizzle of olive oil for extra richness. Pro Tips Choose Quality Feta: Opt for a good quality feta cheese, preferably made from sheep's milk for a creamier texture and richer flavor. Adjust Egg Cook Time: Keep an eye on the eggs while baking; if you prefer firmer yolks, extend the baking time by a few minutes. Experiment with Vegetables: Feel free to add other vegetables like bell peppers or spinach to customize the dish to your liking. Serve Immediately: This dish is best enjoyed right out of the oven while the eggs are still warm and the feta is melty. {{image_2}} You can easily boost the taste of Mediterranean Baked Feta Eggs. Adding fresh herbs like basil or thyme gives a bright twist. Try using spices like paprika or cayenne for a bit of heat. Each herb or spice adds a unique layer of flavor. You can also switch up the cheese! Feta is great, but you can try goat cheese or ricotta. Each cheese brings its own creaminess and taste to the dish. To make this dish vegetarian-friendly, just ensure all your ingredients are plant-based. The feta cheese is usually made from sheep's milk, so choose a dairy-free feta if needed. It’s easy to make this dish gluten-free too. Just serve it without bread or choose gluten-free options. You can enjoy the eggs and feta with fresh veggies or a salad instead. If you’re cooking for a crowd, simply scale up the recipe. Use a larger baking dish and add more eggs and cheese. You can also make individual ramekin servings. This way, everyone gets their own portion. Just adjust the baking time based on the size of the ramekins. Each person will love having their own personal dish of baked feta eggs. To keep your Mediterranean baked feta eggs fresh, store them in an airtight container. Refrigerate them within two hours of cooking. This helps prevent any bacteria growth. Your leftovers will stay good for about 3 days in the fridge. When it's time to enjoy your leftovers, the best way to reheat them is in the oven. Preheat your oven to 350°F (175°C). Place the dish in the oven for about 10-15 minutes. This method helps keep the eggs tender and the feta creamy. You can also use the microwave, but it may change the texture. If you do, heat in short bursts, checking often to avoid overcooking. You can freeze Mediterranean baked feta eggs, but it’s best to do so before baking. Prepare the dish, cover it tightly, and place it in the freezer. It will last about 2 months. When ready to bake, thaw it overnight in the fridge. Then, bake it as normal. This method keeps the eggs fluffy and the flavors fresh. Mediterranean Baked Feta Eggs is a flavorful dish that combines feta cheese, eggs, and fresh veggies. This dish has roots in Mediterranean cooking, where simple, fresh ingredients shine. The creamy feta pairs well with the soft-cooked eggs and juicy tomatoes. It offers a delightful mix of flavors and textures that brighten any breakfast. Yes, you can prepare this dish ahead of time. You can chop the veggies and crumble the feta the night before. Just store them in the fridge. When you are ready to bake, simply assemble the dish and add the eggs. You can also bake it and store leftovers in the fridge. It lasts for about three days. The best bread to serve with Mediterranean Baked Feta Eggs is warm pita bread or a crusty loaf. Both options soak up the egg and feta flavors well. Pita is soft and perfect for dipping, while crusty bread adds a nice crunch. You can also use sourdough or baguette for variety. Absolutely! You can add cooked sausage, bacon, or even diced ham. Just make sure to cook the meat first. Stir it in with the veggies before adding the feta and eggs. This will give your dish a heartier feel and add rich flavor. Adjust the seasoning to balance the added meat. Mediterranean Baked Feta Eggs is a tasty dish filled with fresh ingredients. We covered key ingredients like feta, eggs, and olives. I shared steps to prepare, bake, and serve this meal. You can add variations and tips to make it your own. This dish is perfect for any meal and easy to store. Enjoy making it your own!

Mediterranean Baked Feta Eggs Flavorful Breakfast Dish

Start your day with a burst of Mediterranean flavor! Mediterranean Baked Feta Eggs is a delightful breakfast dish that combines

- 2 pounds beef chuck roast - 1 tablespoon olive oil - 1 large onion, sliced - 4 cloves garlic, minced - 4 cups beef broth - 2 tablespoons Worcestershire sauce - 1 teaspoon dried thyme - 1 teaspoon dried rosemary - Salt and pepper to taste - 4 large hoagie rolls - 8 slices provolone cheese - Fresh parsley, chopped (for garnish) - Slow cooker - Large skillet - Mixing bowl - Forks for shredding The beef chuck roast is the star of this dish. It has rich flavor and tenderness when cooked. The olive oil adds a nice crust when you sear the meat. I use a large onion and garlic to build a solid base flavor. Beef broth provides moisture and depth. The Worcestershire sauce gives a tangy kick. Thyme and rosemary add earthy notes, making each bite delicious. For serving, I choose hoagie rolls and provolone cheese. The rolls hold the beef well. The cheese melts beautifully, adding creaminess. Finally, I sprinkle chopped parsley on top for color and freshness. Each ingredient plays a role in making this sandwich juicy and flavorful. {{ingredient_image_1}} - Sear the beef chuck roast in a large skillet. - Transfer the roast to the slow cooker. - Add onions and garlic. Start by heating one tablespoon of olive oil in a large skillet over medium-high heat. Once the oil is hot, carefully place the beef chuck roast in the skillet. Sear the meat until it turns a deep brown on all sides. This step locks in the flavor. After searing, move the roast into your slow cooker. Top it with sliced onion and minced garlic. This adds aroma and taste. - Mix beef broth, Worcestershire sauce, thyme, and seasoning. - Pour over beef and onions. In a mixing bowl, combine four cups of beef broth, two tablespoons of Worcestershire sauce, one teaspoon of dried thyme, and salt and pepper to taste. Stir well to blend the flavors. Once mixed, pour this mixture over the beef and onions in the slow cooker. - Cover and cook on low for 8 hours or high for 4 hours. - Shred beef once cooked and mix with sauce. Cover the slow cooker with its lid. Cook on low for eight hours or on high for four hours. The beef will become tender and juicy. When the cooking time is up, take the roast out. Use two forks to shred it into pieces. Return the shredded beef to the slow cooker and mix it well with the broth and onions. - Preheat oven to 350°F (175°C). - Toast hoagie rolls with provolone cheese. While the beef cooks, preheat your oven to 350°F (175°C). Split the hoagie rolls open. Layer in slices of provolone cheese. Place the rolls in the oven for about five to seven minutes. This melts the cheese and crisps up the bread. - Fill rolls with shredded beef. - Serve with broth for dipping. Now, it’s time to build your sandwiches. Take each toasted hoagie roll and fill it with a generous amount of shredded beef. Don’t forget to serve the rich, flavorful broth from the slow cooker on the side for dipping! Searing the beef is key. It locks in juices and adds a nice crust. I use olive oil in my skillet. It helps create that rich, savory taste. For seasonings, I love using Worcestershire sauce, thyme, and rosemary. These add layers of flavor that make the dish pop. Don’t skimp on salt and pepper; they bring balance. Cooking time depends on your meat size. For a 2-pound roast, 8 hours on low works great. If you’re short on time, cooking on high for 4 hours also does the trick. Instant Pots can speed things up too. They can cook a similar roast in about an hour. Just adjust the liquid and timing accordingly. French dip sandwiches pair well with crispy fries or a fresh salad. I also love serving them with a side of pickles. For presentation, use a wooden cutting board. Place small bowls of broth for dipping next to each sandwich. A sprinkle of fresh parsley on top adds a nice touch too. This makes the dish look inviting and delicious! Pro Tips Use Quality Meat: Opt for a good-quality beef chuck roast for the best flavor and tenderness. Grass-fed or organic options can enhance the taste. Enhance the Broth: Add a splash of red wine to the broth mixture for added depth and richness in flavor. Toast the Rolls: Make sure to toast the hoagie rolls just right for a crispy exterior that holds up well against the juicy filling. Serving Suggestions: Serve with a side of pickles or a simple salad for a complete meal experience. {{image_2}} You can switch the beef chuck roast for other meats. Pork shoulder works well. It gives a different taste but still stays juicy. Chicken is another option. It cooks faster and is lighter. For a fun twist, try using mushrooms. They make a great vegetarian choice. Just sauté them first to boost their flavor. While provolone is a classic choice, you can mix it up. Swiss cheese melts nicely and adds a nutty taste. Cheddar gives a sharp flavor that many enjoy. If you want a dairy-free option, look for plant-based cheeses. They can melt just like regular cheese and taste great too. Toppings can take your sandwiches to the next level. Sautéed peppers add sweetness and color. Onions, grilled or raw, give a nice crunch. Don't forget about fresh herbs like basil or cilantro for a pop of flavor. For sauces, think about horseradish or spicy mustard. These can add a nice kick to your dip. To properly store the beef and rolls, let them cool first. Place the shredded beef in an airtight container. Use another container for the rolls. This keeps the beef juicy and the rolls fresh. I recommend glass or BPA-free plastic containers. They help keep flavors locked in. When reheating, aim to keep it moist. You can warm the beef in a pot with a splash of broth. Stir gently over low heat. For the hoagie rolls, wrap them in foil and place them in a warm oven. This method prevents them from becoming tough. Yes, you can freeze this meal! To freeze, let the beef cool completely. Place it in a freezer-safe container. Wrap the rolls separately in plastic wrap. When you want to eat, thaw the beef in the fridge overnight. Reheat gently as mentioned above, and enjoy your meal later! Cooking slow cooker French dip sandwiches takes about 8 hours on low or 4 hours on high. The longer cook time helps the beef become very tender. I always prefer low heat for better flavor. Yes, you can make this recipe ahead of time. Cook the beef and store it in the fridge for up to three days. To save time, shred the beef and keep it in its broth. You can also freeze it for up to three months. Just remember to thaw it before reheating. Serve French dip sandwiches with crispy fries or a fresh salad. You could also add a side of coleslaw for crunch. For drinks, iced tea or soda pairs well. A light beer complements the meal nicely, too. In this blog post, I covered how to make tasty Slow Cooker French Dip Sandwiches. We discussed key ingredients, cooking steps, and helpful tips. I shared how to enhance flavor and suggested variations to try. Remember, using the right meat and seasonings is key for a great taste. Whether you choose to store leftovers or serve them fresh, this recipe is sure to impress. Enjoy creating these sandwiches, and don’t forget to experiment with your own twist!

Slow Cooker French Dip Sandwiches Juicy and Flavorful

Are you ready to create a meal that will wow your family and friends? Slow Cooker French Dip Sandwiches are

Older posts
Newer posts
← Previous Page1 … Page151 Page152 Page153 … Page164 Next →

dsad

© 2026 easycookingbite • Built with GeneratePress

Our Policies

  • Copyright Policy
  • Cookie Policy
  • GDPR Policy
  • Privacy Policy
  • Disclaimer
  • Terms Of Use

More Information

  • Home
  • About
  • Contact
  • Appetizers
  • Dessert
  • Dinner
  • Drinks
©2026, easycookingbite About Back To Top