Skip to content
DisclaimerTerms Of UseGDPR PolicyCookie Policy

easycookingbite

  • Home
  • Drinks
  • Appetizers
  • Dinner
  • Dessert
  • About
  • Contact
  • Privacy Policy
DisclaimerTerms Of UseGDPR PolicyCookie Policy

Lily

- 2 cups cooked chicken, shredded - 4 medium potatoes, peeled and thinly sliced - 1 cup ranch dressing - 1 cup shredded cheddar cheese - 1 cup cream of chicken soup The main ingredients give the casserole its rich and creamy flavor. I love using shredded chicken for a tender bite. Thinly sliced potatoes soak up all the great tastes. Ranch dressing adds a zesty kick. Cream of chicken soup ties everything together, making it creamy and comforting. - 1 tsp garlic powder - 1 tsp onion powder - 1/2 tsp paprika - Salt and pepper to taste - 1/2 cup green onions, chopped (for garnish) Seasonings are key to depth of flavor. Garlic powder brings warmth, while onion powder adds a savory note. Paprika gives a hint of smokiness. Salt and pepper balance all the tastes. Don’t forget the green onions! They add a fresh crunch and bright color when you serve the dish. - 1 cup chicken broth - Mixing bowls - Baking dish You need the right tools to make this dish shine. Chicken broth adds moisture and flavor. Mixing bowls help combine the ranch dressing mix smoothly. A baking dish holds all the layers and ensures even baking. With these essentials, you’ll create a warm and hearty meal that your family will love. {{ingredient_image_1}} First, you need to preheat the oven to 375°F (190°C). This step warms the oven for even cooking. Next, grab a large mixing bowl. Here, mix the ranch dressing, cream of chicken soup, chicken broth, garlic powder, onion powder, paprika, salt, and pepper. Stir well until it is smooth and creamy. Now, get a greased 9x13 inch baking dish. Start layering the dish with half of the thinly sliced potatoes. Spread them evenly at the bottom. After that, add half of the shredded chicken over the potatoes. Make sure it covers them well. Pour half of the ranch mixture over the chicken and potatoes. Spread it out evenly to coat everything. Repeat this process. Layer the rest of the potatoes, chicken, and ranch mixture. Finally, sprinkle the shredded cheddar cheese generously on top. This will melt beautifully in the oven. Cover the baking dish with aluminum foil. This helps keep the moisture in during the first bake. Place it in the preheated oven and bake for 45 minutes. After 45 minutes, remove the foil. Bake for an additional 15-20 minutes. This step allows the cheese to bubble and turn golden brown. Once baking is complete, take the casserole out of the oven. Let it rest for about 10 minutes. This resting period helps the layers settle. For a great presentation, serve the casserole in individual bowls. Add a sprinkle of chopped green onions on top for a pop of color. Pair it with a simple side salad for a full meal experience. To avoid soggy potatoes, slice them thin. Thin slices cook faster and keep their shape. You can soak them in cold water for 30 minutes before baking. This helps remove excess starch. Ensure even cooking by layering the potatoes, chicken, and ranch mix evenly. Press down gently on each layer to remove air pockets. This helps heat circulate better. You can add temporary ingredients to boost flavor. Try adding cooked bacon or mushrooms for a savory twist. Fresh herbs like thyme or parsley can also add a nice touch. For cheese, sharp cheddar gives a rich taste. You can also mix in mozzarella for extra creaminess. Experiment with different cheese blends to find your favorite. When cooking for a crowd, you might need to adjust serving sizes. Double the recipe for larger gatherings. Use a bigger baking dish or two smaller ones. Meal prep works great here. You can assemble the casserole a day ahead and store it in the fridge. Just cover it well. Bake it fresh when you are ready to serve. Pro Tips Tip 1 - Use Leftover Chicken: This recipe is a fantastic way to use up any leftover cooked chicken, making it a quick and economical meal option. Tip 2 - Customize Your Cheese: Feel free to substitute or mix different types of cheese, such as Monterey Jack or pepper jack, for a unique flavor twist. Tip 3 - Make It Creamier: For an extra creamy texture, add an additional half cup of cream of chicken soup or a splash of heavy cream to the ranch mixture. Tip 4 - Add Veggies: Incorporate vegetables such as broccoli or spinach between the layers for added nutrition and color. {{image_2}} You can change the meat in this dish. Use turkey or ham instead of chicken. These options add new flavors and keep things fun. You can also add vegetables like broccoli or spinach. They boost nutrition and color. Just slice them thinly, so they cook well. If you need gluten-free options, use gluten-free ranch dressing and soup. They work just as well! For low-calorie alternatives, consider using low-fat cheese or yogurt instead of sour cream. You can also use fewer potatoes or swap them for cauliflower. These choices keep the dish tasty and lighter. Want to spice things up? Try adding hot sauce to your ranch dressing mix. It gives a nice kick! You can also mix different cheeses, like mozzarella or pepper jack, for fun flavors. Each cheese brings its own unique taste, making your casserole special and exciting. To keep your Ranch Chicken Potato Casserole fresh, use airtight containers. Glass or plastic containers work well. Store the casserole in the fridge for up to three days. Make sure to let it cool before sealing. This helps avoid moisture buildup. You can freeze this casserole for later enjoyment. If you freeze it before baking, wrap it tightly in foil or plastic wrap. Label it with the date. For best taste, use it within three months. If you freeze it after baking, cool it down first. Then, wrap it well to prevent freezer burn. When you’re ready to eat, thaw it in the fridge overnight. Reheat it in the oven at 350°F (175°C) until warm. This should take about 30 minutes. You can also microwave it, but the oven gives a better texture. Let's look at the shelf life of the key ingredients: - Cooked Chicken: Up to four days in the fridge. In the freezer, it lasts about four months. - Potatoes: Store raw potatoes in a cool, dark place. They last about two weeks. - Ranch Dressing: Sealed bottles last about a year. Once opened, use within a month or two. - Cheddar Cheese: Unopened, it lasts about six months. Once opened, use within a week. - Cream of Chicken Soup: Unopened cans last for years. Once opened, use within three days. Knowing these times helps you enjoy your casserole to the fullest! Yes, you can use fresh chicken. If you choose this route, chop the chicken into small pieces. Cook the chicken in a skillet over medium heat until it is no longer pink, around 10-12 minutes. Then, shred the chicken and mix it with the ranch sauce. This method ensures your casserole stays juicy and flavorful. To add heat, you can mix in diced jalapeños or crushed red pepper flakes. Start with a small amount and taste as you go. Another option is to use a spicy ranch dressing. You can also sprinkle pepper jack cheese on top for a creamy and spicy kick. These tips will give your casserole a nice zing. This casserole pairs well with a fresh green salad. A simple side salad with lettuce, tomatoes, and cucumbers adds crunch. You can also serve it with steamed broccoli or green beans for a healthy touch. For a heartier side, consider garlic bread or rolls to soak up the tasty sauce. This Ranch Chicken Potato Casserole is simple and tasty. We covered key ingredients, cooking steps, and helpful tips. You can swap ingredients for personal flavor and adjust for guests. Storing leftovers is easy, too. With this guide, you can whip up a crowd-pleaser. Enjoy cooking and experimenting with this dish. It’s perfect for family dinners or gatherings. Each bite will bring smiles. Get ready to share your delicious creation!

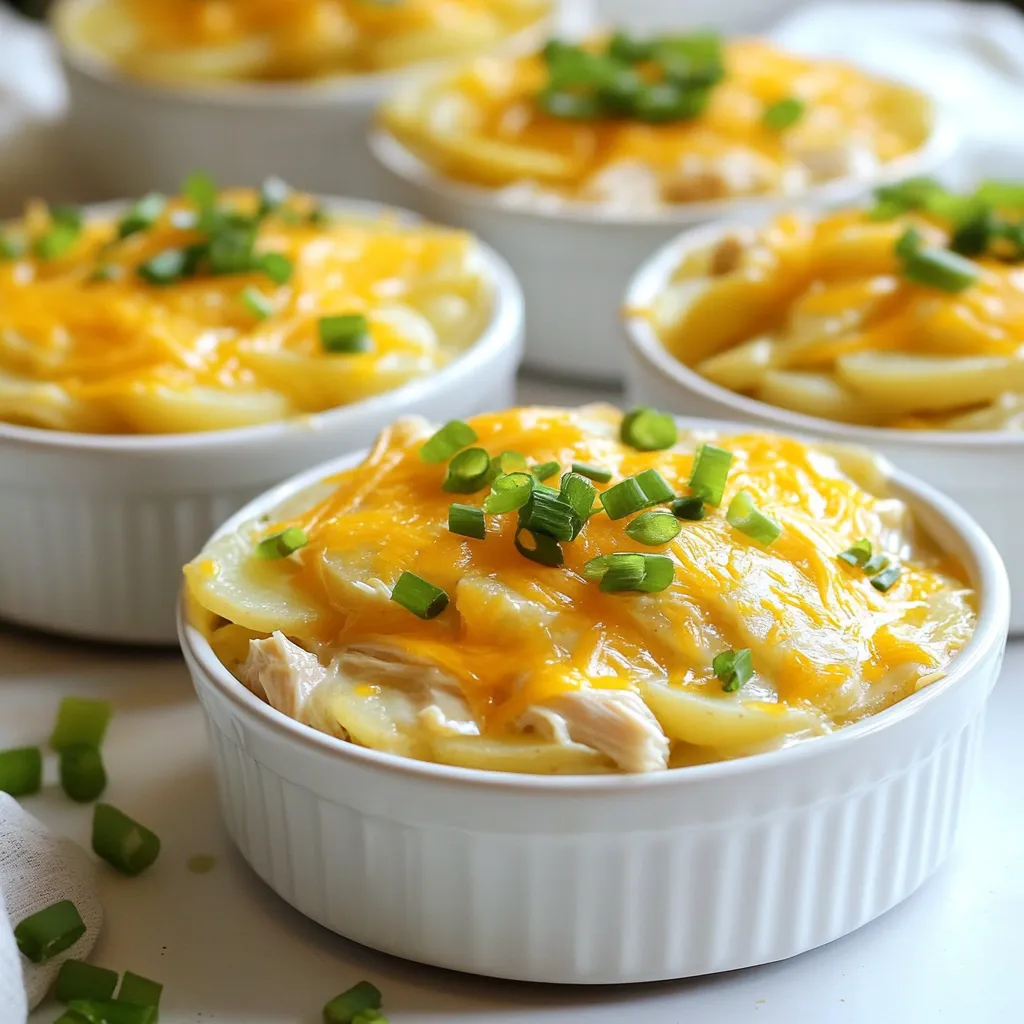
Ranch Chicken Potato Casserole Flavorful Family Meal

Are you looking for a simple, tasty meal that your family will love? Look no further than my Ranch Chicken

For this dish, you need: - 4 boneless, skinless chicken breasts - 1 cup fresh mozzarella cheese, sliced Chicken breasts are juicy and tender, making them perfect for baking. Fresh mozzarella adds a creamy texture. It melts beautifully on top. You will also need: - 1 cup cherry tomatoes, halved - 1/2 cup fresh basil leaves, chopped (plus extra for garnish) - 2 cloves garlic, minced Cherry tomatoes bring sweetness and color to the dish. Fresh basil adds a burst of flavor. Garlic enhances the overall taste and aroma. Gather these simple items: - 2 tablespoons olive oil - 1 teaspoon balsamic vinegar - Salt and pepper to taste - 1 teaspoon dried oregano - 1/4 teaspoon red pepper flakes (optional for a bit of heat) Olive oil keeps the chicken moist. Balsamic vinegar adds a tangy kick. Salt and pepper are essential for flavor. Oregano gives it an Italian touch. If you like heat, try adding red pepper flakes! {{ingredient_image_1}} Start by preheating your oven to 375°F (190°C). This gets the oven ready for the chicken. While it heats, take a small bowl. Mix two cloves of minced garlic, two tablespoons of olive oil, one teaspoon of balsamic vinegar, one teaspoon of dried oregano, salt, and pepper. If you want some heat, add red pepper flakes. This mix adds great flavor to the chicken. Next, grab four boneless, skinless chicken breasts. Place them in a baking dish. Season them well with salt and pepper. Pour half of your garlic-oil mixture over the chicken. Make sure each piece is coated evenly. Once your chicken is ready, bake it for about 20 minutes. This cooks the chicken halfway. The inside should reach 165°F (75°C). After 20 minutes, take the dish out of the oven. Now, it’s time to layer! Add sliced mozzarella cheese on top of each chicken breast. Use one cup of fresh mozzarella for this. Next, sprinkle halved cherry tomatoes over the cheese. These add a juicy burst of flavor. Finally, drizzle the rest of your garlic-oil mixture on top. Don’t forget to add the chopped basil for extra freshness. Return the chicken to the oven for another 10-15 minutes. You want the cheese to melt and get bubbly. The tomatoes should look slightly roasted. When it’s done, take the chicken out and let it rest for about 5 minutes. This helps keep it juicy. Before you serve, garnish with extra fresh basil. This not only looks nice but adds a lovely aroma. Enjoy your Mozzarella Basil Chicken! Select fresh, boneless, skinless chicken breasts. They cook evenly and stay juicy. Look for chicken that feels firm and has no strange odor. If you can, buy organic or free-range chicken. This choice often tastes better and is healthier. To get that gooey, melty mozzarella, slice it thick. Use fresh mozzarella for a rich flavor. When adding it to the chicken, place it on top just before finishing cooking. This timing helps it melt perfectly without getting rubbery. Taste as you go. Start with the basic salt and pepper. If you want more flavor, add more garlic or oregano. For a kick, sprinkle in extra red pepper flakes. Always remember, it’s easier to add than to take away. Pro Tips Marinate for More Flavor: For an extra flavor boost, marinate the chicken breasts in the garlic-oil mixture for at least 30 minutes before baking. Use Fresh Ingredients: Fresh mozzarella and basil will enhance the dish’s flavor significantly compared to dried or processed alternatives. Customize Your Veggies: Feel free to add other vegetables like bell peppers or zucchini for added color and nutrition. Rest Before Serving: Allow the chicken to rest for a few minutes after baking. This helps retain the juices, ensuring tender and moist chicken. {{image_2}} You can boost the taste by adding vegetables. Think about using bell peppers, zucchini, or spinach. Slice bell peppers and add them to the dish. They give color and crunch. Zucchini works great when sliced thin. It adds a nice texture. Spinach wilts down and blends into the dish well. The more veggies, the more flavor! You can even mix them all for a colorful meal. Mozzarella shines, but other cheeses can be fun too. Try provolone or fontina for a twist. These cheeses melt well and have rich flavors. If you want a sharp taste, go for parmesan on top. It creates a crusty layer, adding a nice touch. Mixing cheeses can make each bite unique and delicious! Want some heat? Adjust the spice level to fit your taste. Add more red pepper flakes for a kick. If you’re feeling bold, try a dash of cayenne pepper. For a milder dish, skip the heat altogether. You can also use fresh jalapeños for a fresh, spicy flavor. Tailor the spice to make it just right for you! After enjoying your Mozzarella Basil Chicken, store leftovers in an airtight container. Make sure to cool the dish to room temperature before sealing. This helps keep the chicken fresh. Leftovers can stay good in the fridge for up to three days. To reheat, preheat your oven to 350°F (175°C). Place the chicken on a baking dish and cover it with foil to keep it moist. Heat for about 15-20 minutes until warm. You can also reheat in the microwave. Just place the chicken on a microwave-safe plate and heat for 1-2 minutes. If you want to save some for later, you can freeze the chicken. Wrap each piece tightly in plastic wrap or foil. Then, place them in a freezer-safe bag. This helps prevent freezer burn. Label the bag with the date. The chicken can stay in the freezer for up to three months. When ready to eat, let it thaw in the fridge overnight before reheating. Yes, you can use chicken thighs. They have more fat and flavor. This can make the dish juicier. If you use thighs, cook them a bit longer. Aim for an internal temperature of 165°F. Mozzarella Basil Chicken pairs well with many sides. Here are a few ideas: - Garlic bread: It soaks up the juices. - Pasta: Toss it with olive oil and herbs. - Salad: A fresh green salad adds a nice crunch. - Rice or quinoa: These grains add a filling touch. These sides balance the dish and enhance the meal. To check if the chicken is done, use a meat thermometer. The safe temperature is 165°F. If you don’t have a thermometer, cut into the chicken. The meat should be white and juices should run clear. If it’s pink, cook it longer. Always ensure chicken is fully cooked for safety. This blog post covered how to make Mozzarella Basil Chicken. We talked about the best ingredients, like chicken, veggies, and seasonings. I showed you step-by-step instructions, tips for choosing chicken, and how to melt cheese just right. You also learned different variations and how to store leftovers. Now, you can create a tasty meal that your family will enjoy. Happy cooking!

Mozzarella Basil Chicken Savory and Simple Meal

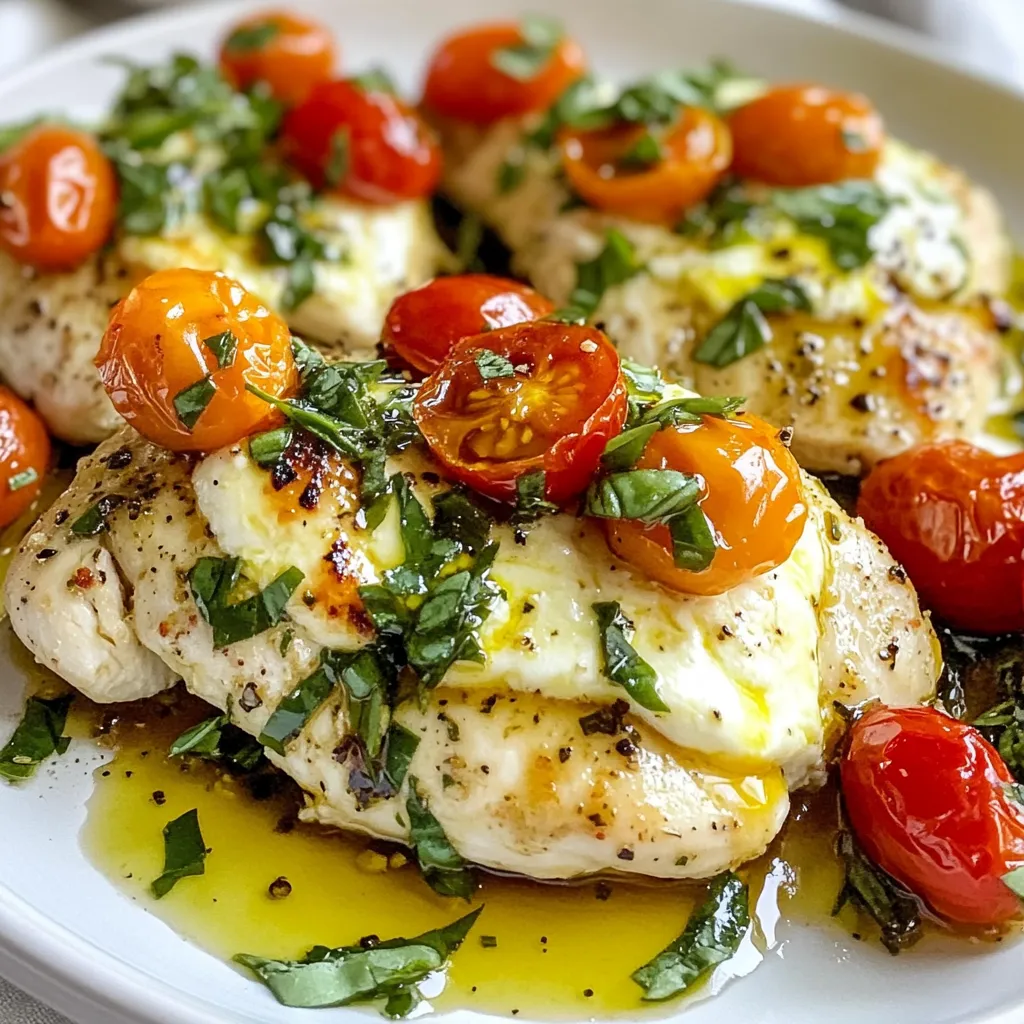
Looking for a quick and tasty dinner idea? Mozzarella Basil Chicken is the answer! This dish is easy to make

- 1 lb ground turkey - 2 cups broccoli florets - 1 red bell pepper, sliced - 1 medium onion, diced - 2 cloves garlic, minced - 1 tablespoon grated ginger - 2 tablespoons soy sauce or tamari - 1 tablespoon honey or maple syrup - 1 tablespoon sriracha - 1 tablespoon sesame oil - Salt and pepper to taste - Cooked rice or quinoa - Chopped green onions - Sesame seeds {{ingredient_image_1}} - In a small bowl, whisk together: - 2 tablespoons soy sauce (or tamari) - 1 tablespoon honey (or maple syrup) - 1 tablespoon sriracha - Mix until well combined. Set the sauce aside for later use. - Heat 1 tablespoon of olive oil in a large skillet over medium heat. - Add 1 pound of ground turkey. Break it apart with a spatula. - Cook until browned, about 5 to 7 minutes. Season with salt and pepper. - Add 1 diced onion, 2 minced garlic cloves, and 1 tablespoon grated ginger to the skillet. - Sauté until the onion is clear, about 3 minutes. - Stir in 2 cups of broccoli florets and 1 sliced red bell pepper. - Cook for another 5 minutes, stirring often. Keep the veggies bright and tender. - Pour the prepared sauce over the turkey and veggies. Stir well to coat everything. - Let it simmer for 2 to 3 minutes. This helps meld the flavors together. - Serve the mixture over bowls of cooked rice or quinoa. - Top with chopped green onions and a sprinkle of sesame seeds for added crunch. Using a skillet for this recipe works great. A large skillet gives you space to stir. A wok can also work if you have one. It heats up faster and cooks evenly. Cook the ground turkey until it's brown, about 5-7 minutes. The turkey should reach 165°F for safety. When adding veggies, stir for about 5 minutes. You want them tender but still bright. If you want, you can swap ground turkey for chicken or tofu. Both options offer great taste. Chicken is lean, and tofu is plant-based. Feel free to mix in other vegetables too. Try bell peppers, snap peas, or carrots. They will add color and flavor to your bowl. To change the heat, modify the sriracha. Add less for a milder dish or more for a kick. You can also add chili flakes for extra heat. For heat lovers, consider fresh jalapeños or chili paste. They will amp up the spice level and enhance flavor. Enjoy finding your perfect heat! Pro Tips Adjust the Spice Level: Feel free to modify the amount of sriracha according to your heat preference. Start with less if you're unsure, and add more to taste. Use Fresh Ingredients: For the best flavor, use fresh garlic, ginger, and vegetables. They will enhance the overall taste of the dish. Meal Prep Option: This dish is excellent for meal prep! Make a larger batch and store it in airtight containers in the fridge for up to 4 days. Experiment with Veggies: Don’t hesitate to swap in other vegetables like snap peas, carrots, or bell peppers to suit your taste or what you have on hand. {{image_2}} You can switch things up for variety. Try serving your Sweet and Spicy Ground Turkey Broccoli Bowls with cauliflower rice. This makes a great low-carb option. Cauliflower rice has a nice texture and soaks up flavors well. You can also add other colorful veggies. Carrots, snap peas, or bell peppers work great. This adds more crunch and color to your bowl. You can change the flavor easily. Try adding different sauces like teriyaki for a sweet twist. This adds a rich flavor to your dish. Another great idea is to add nuts for crunch. Chopped peanuts or cashews give a nice texture and flavor boost. Just sprinkle them on top before serving. Making this dish ahead of time can save you stress during busy weeks. You can cook a large batch and keep it in the fridge. This way, you have quick meals ready to go. Just reheat and enjoy. You can also freeze the mixture for later dinners. Make sure to store it in airtight containers. When you're ready to eat, just thaw and reheat. - How Long it Lasts in the Fridge Store the Sweet and Spicy Ground Turkey Broccoli Bowls in the fridge. They keep well for about 3 to 4 days. Make sure to cool them to room temp before storing. - Best Containers for Storage Use airtight containers for the best results. Glass containers work great since they are easy to clean and do not stain. - Steps for Proper Freezing First, let the dish cool completely. Then, portion it into freezer-safe bags or containers. Remove as much air as possible before sealing. Label the bags with the date. - Reheating Tips for Freshness When you want to eat, thaw the bowls in the fridge overnight. For best taste, reheat in a skillet over medium heat. Add a splash of water to keep it moist. - Stove vs. Microwave I recommend using the stove for reheating. It warms the food evenly and keeps the texture nice. The microwave is quicker, but it can make the veggies a bit soggy. - Ensuring Even Heating When using the microwave, stir the bowl halfway through. This helps distribute the heat and ensures your meal warms up evenly. Yes, you can use frozen broccoli in this recipe. Frozen broccoli is quick and easy. It cooks faster than fresh, saving you time. However, frozen broccoli can be softer. It may lose some crunch compared to fresh. If you use frozen, adjust cooking time. These bowls are great on their own, but you can add sides. Here are some ideas: - Steamed edamame - Crispy spring rolls - A fresh green salad - Roasted sweet potatoes - A side of kimchi These sides can add more flavor and texture to your meal. Yes, this recipe can be gluten-free. Just use tamari instead of soy sauce. Tamari is a gluten-free soy sauce alternative. Double-check your other ingredients too. Some brands of sriracha contain gluten. Always read labels to ensure safety. Enjoy your bowls worry-free! This recipe highlights the mix of ground turkey, fresh veggies, and flavorful sauces. You learned how to cook and store a healthy meal, making it perfect for any weeknight. Remember, you can swap ingredients easily to fit your taste. Experiment with different sauces and veggies for fun variations. Meal prep helps you enjoy this dish anytime. With these tips, you can create a delicious bowl that satisfies and nourishes. Enjoy your cooking journey!

Sweet and Spicy Ground Turkey Broccoli Bowls Recipe

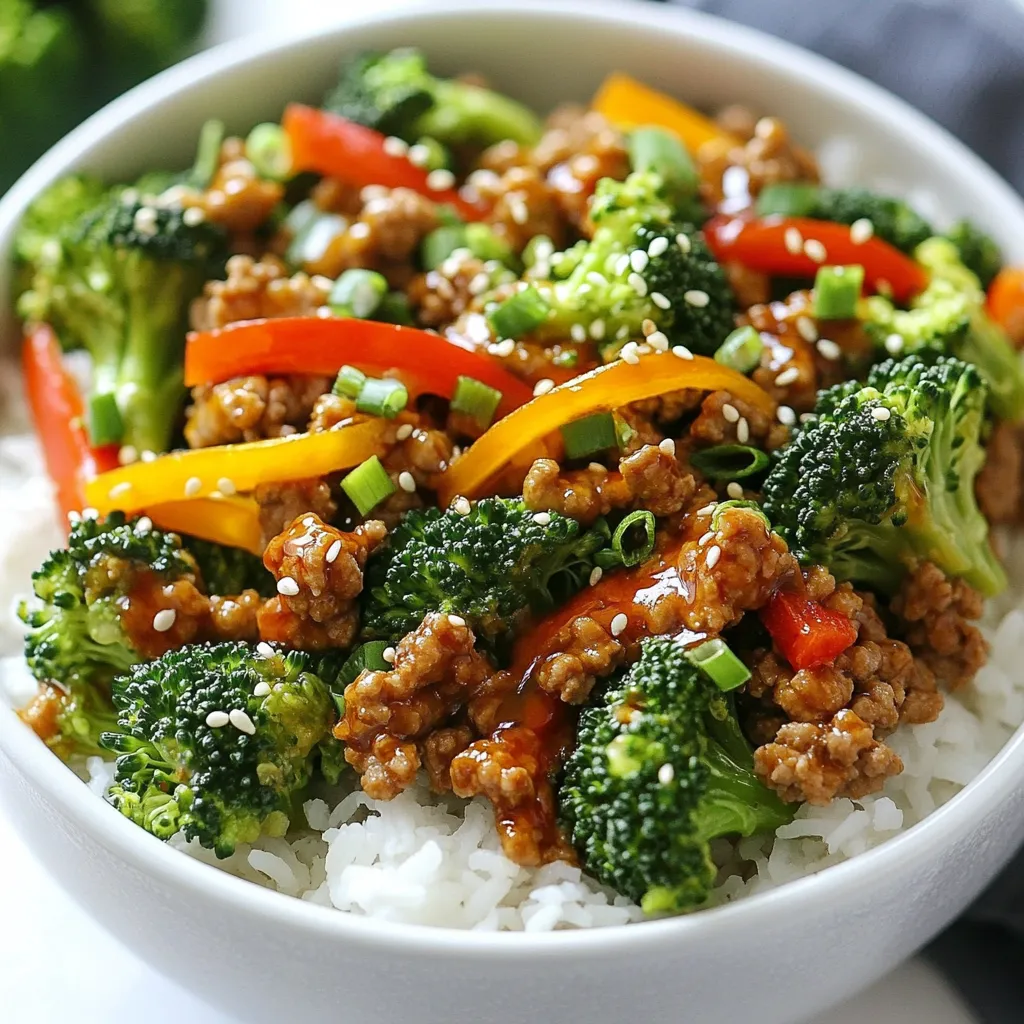
Ready to spice up your dinner routine? These Sweet and Spicy Ground Turkey Broccoli Bowls are quick, tasty, and perfect

For this Keto Chicken Parmesan Zucchini Boats recipe, you need the following ingredients: - 4 medium zucchinis - 2 cups cooked chicken, shredded - 1 cup marinara sauce (sugar-free) - 1 ½ cups shredded mozzarella cheese - ½ cup grated Parmesan cheese - 1 teaspoon Italian seasoning - 2 cloves garlic, minced - 2 tablespoons olive oil - Salt and pepper to taste - Fresh basil leaves for garnish (optional) These ingredients create a tasty and healthy dish. Zucchini serves as the perfect low-carb base. The shredded chicken adds protein, while the cheeses bring flavor and texture. Finding sugar-free marinara sauce is easy. Many grocery stores offer it. Look for sauces labeled "no added sugar" or "sugar-free." Read the labels carefully. Some brands sneak in sugar under different names. If you prefer, you can also make your own. Blend tomatoes, garlic, and herbs for a fresh, homemade sauce. If you want to switch things up, there are plenty of cheese options. You can use provolone or gouda for a different flavor. If you need a dairy-free option, try vegan cheese made from nuts or soy. Just ensure it melts well. This way, you can still enjoy those cheesy goodness without straying from your keto plan. {{ingredient_image_1}} First, heat your oven to 375°F (190°C). Take four medium zucchinis and slice them in half lengthwise. Use a spoon to scoop out some flesh from each half. Make sure not to cut all the way through. This creates a little boat for your filling. Set the prepared zucchinis aside while you make the chicken mixture. In a skillet, pour in two tablespoons of olive oil and heat over medium. Add two minced garlic cloves and sauté for about one minute. You want it to smell amazing! Next, stir in two cups of shredded cooked chicken, one cup of sugar-free marinara sauce, one teaspoon of Italian seasoning, and salt and pepper to taste. Heat this mixture for about three to five minutes until warm. Now it’s time to fill the zucchini boats. Spoon the chicken mixture into each hollowed zucchini half, packing it tightly. Top each one with a generous amount of shredded mozzarella cheese and grated Parmesan cheese. Place the zucchini boats on a baking sheet and bake for 20 to 25 minutes. You want the zucchinis to be tender and the cheese to be melted and bubbly. For a golden topping, broil for an extra two to three minutes. Once done, let them cool slightly before serving. Enjoy your tasty meal! To make great zucchini boats, choose medium zucchinis. They hold the filling well and cook evenly. Slice them in half lengthwise and scoop out some flesh. Leave enough to keep them sturdy. This helps avoid sogginess. Always preheat your oven to get the best melt on the cheese. Use fresh garlic for the best taste. Sauté it in olive oil until fragrant. This step adds a rich flavor to the chicken mixture. Add Italian seasoning for a touch of herbiness. You can also sprinkle some red pepper flakes for heat. For extra depth, mix in some chopped sun-dried tomatoes or olives. Each zucchini boat can be a perfect serving. Pack them tightly with the chicken mixture to fill them up. This helps you feel full without extra carbs. Pair the dish with a side salad to balance your meal. This way, you enjoy a delicious and satisfying meal while sticking to your keto goals. Pro Tips Choose Firm Zucchini: Look for firm zucchinis without soft spots to ensure they hold their shape during baking. Customize Your Filling: Feel free to add vegetables like spinach or mushrooms to the chicken mixture for added flavor and nutrition. Use Fresh Herbs: Fresh basil or oregano can elevate the flavor profile of the dish; add them just before serving for freshness. Adjust Cheese Levels: If you're a cheese lover, don’t hesitate to sprinkle more mozzarella or Parmesan on top before baking for extra gooeyness! {{image_2}} You can change up the filling to suit your taste. Instead of chicken, try ground turkey or beef. Both options work great and add different flavors. You can also use shredded rotisserie chicken for a quick meal. If you want a bold taste, use spicy sausage. Just cook it well before adding it to the zucchinis. If you like some heat, add red pepper flakes to the chicken mix. Start with a pinch and taste as you go. You can also mix in some hot sauce with the marinara. For an extra kick, try jalapeños. Just chop them finely and mix them in with the chicken. For a veggie version, swap the chicken for mushrooms or lentils. You can sauté mushrooms until soft and add them to the mix. Cooked lentils are also a tasty choice. They add protein and are very filling. Top the zucchini with cheese for a nice finish. This way, everyone can enjoy this meal! To store leftovers, let the zucchini boats cool down. Place them in an airtight container. You can keep them in the fridge for up to three days. This helps preserve their taste and texture. When you reheat the zucchini boats, use the oven for the best results. Preheat your oven to 350°F (175°C). Place the boats on a baking sheet. Cover them with foil to keep them moist. Bake for about 15 minutes. This method makes sure the cheese stays melty and the zucchini soft. If you want to freeze the zucchini boats, wrap them well in plastic wrap. Then, place them in a freezer bag. They can last for up to three months. To cook from frozen, bake them at 375°F (190°C) for about 30-35 minutes. This method keeps the flavor intact and makes for a quick meal later. Yes, you can! Other veggies work well too. Try bell peppers, eggplant, or even spaghetti squash. Each option brings a unique flavor. Just make sure they can hold the filling. Cut them the same way, and scoop out some flesh. This keeps the filling intact. Absolutely! Keto Chicken Parmesan Zucchini Boats are great for meal prep. Make a batch ahead of time. Store them in airtight containers in the fridge. They last for about three to four days. You can reheat them in the oven or microwave when ready to eat. This dish is low in carbs and high in protein. Each serving has about 350 calories. It contains around 20 grams of protein and 5 grams of net carbs. The fats come mainly from cheese and olive oil, making it a filling meal. Check the exact values based on your ingredients for accuracy. This post shared a simple way to make Keto Chicken Parmesan Zucchini Boats. We covered the best ingredients, how to prepare them, and essential tips. You learned how to store leftovers and found answers to common questions. Embrace these methods to enjoy a tasty, low-carb meal. Explore different proteins and flavors for variety. With a little practice, you’ll master this dish and impress others in your kitchen!

Keto Chicken Parmesan Zucchini Boats Easy and Tasty Meal

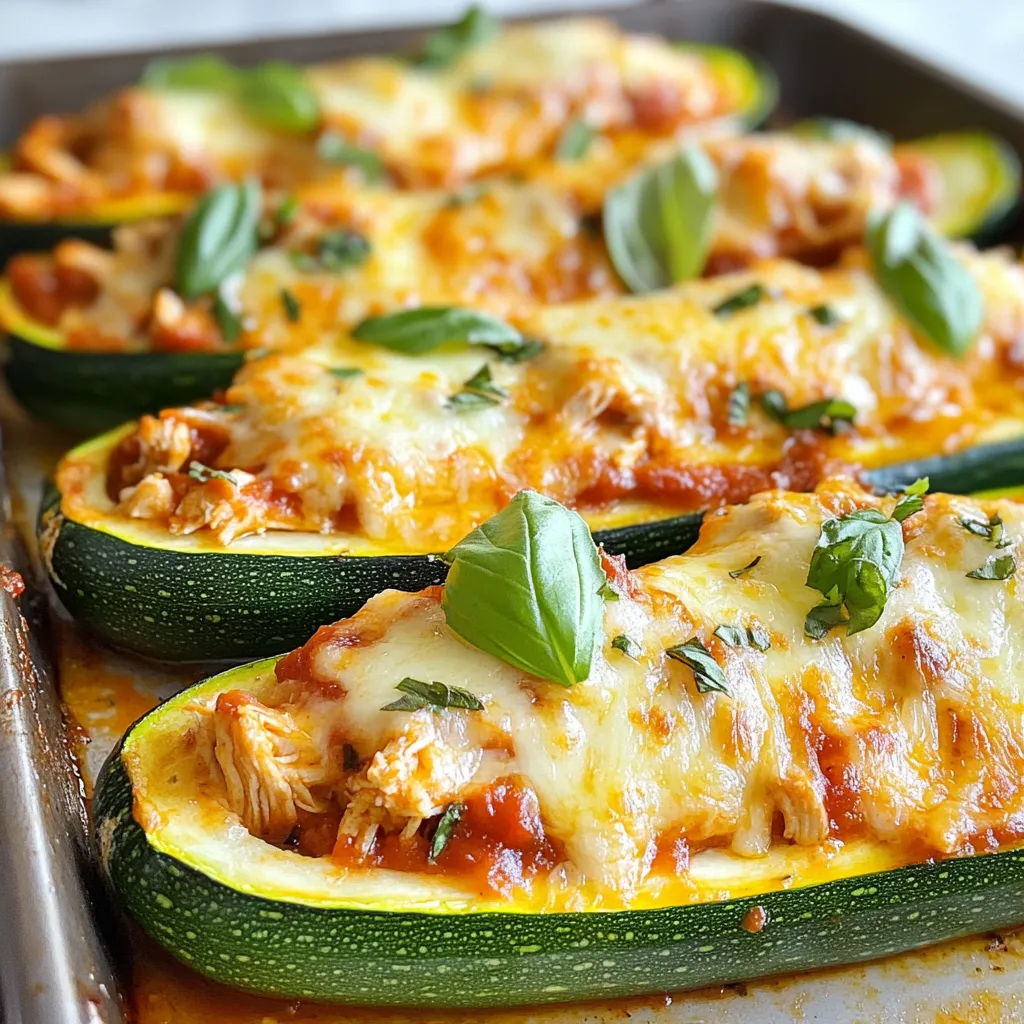
Are you ready to make a meal that’s both easy and delicious? Keto Chicken Parmesan Zucchini Boats offer a fun

- 1 lb Italian sausage (mild or spicy) - 1 medium onion, diced - 2 carrots, diced - 2 celery stalks, diced - 1 can (14 oz) diced tomatoes (with juice) - 4 cups chicken broth - 1 cup kale or spinach, chopped These main ingredients form the heart of the Parmesan Italian sausage soup. The Italian sausage, either mild or spicy, adds depth and flavor. The mix of onion, carrots, and celery provides a classic base, known as mirepoix. Diced tomatoes add a touch of acidity, while chicken broth brings it all together. Finally, kale or spinach adds a nutritious pop of color. - 1 teaspoon dried oregano - 1 teaspoon dried basil - 1/2 teaspoon red pepper flakes (optional) - Salt and pepper to taste - 1 cup heavy cream - 1 cup grated Parmesan cheese - Fresh parsley, chopped (for garnish) Seasonings elevate the flavors of the soup. Oregano and basil offer warmth and earthiness. Red pepper flakes can add a bit of heat if you like spice. Salt and pepper balance the flavors. The heavy cream makes it rich and creamy, while grated Parmesan cheese brings a nutty sharpness. Fresh parsley not only adds a burst of color but also a fresh taste that brightens each bowl. {{ingredient_image_1}} Start by removing the sausage from its casing. Crumble the sausage into a large pot over medium heat. Cook it until it turns brown, which should take about 6 to 8 minutes. If needed, drain any excess fat to keep the soup light and tasty. Next, add the diced onion, carrots, and celery to the pot. Sauté these vegetables for about 5 minutes, until they soften. This step builds a great base for your soup. Then, incorporate the minced garlic and let it cook for one more minute. You want to smell that wonderful garlic aroma! Now it’s time to create the soup base. Stir in the canned diced tomatoes, including their juice. Pour in the chicken broth along with the dried oregano and dried basil. If you like a little heat, add red pepper flakes. Bring this mixture to a boil. Reduce the heat and let it simmer for about 15 minutes. This allows all the flavors to blend beautifully. For the final touches, add the chopped kale or spinach. Let it simmer for another 5 minutes until the greens wilt. Lower the heat and pour in the heavy cream, mixing it gently. Finally, stir in the grated Parmesan cheese, letting it melt into the soup. Adjust with salt and pepper to taste. Enjoy the rich, creamy goodness! - Fresh herbs boost taste. Add parsley or basil at the end for freshness. - Adjust spice levels by controlling the red pepper flakes. Start small; add more if needed. - Brown sausage well for flavor. Crumble it and cook until dark brown, about 6-8 minutes. - Simmer the soup gently. Let it bubble for about 15 minutes to blend flavors well. - Garnish with fresh parsley for color. It adds a pop and looks great. - Serve with crusty bread or a side salad. It makes the meal more filling and fun. Pro Tips Use Fresh Herbs: Fresh basil and oregano will enhance the flavor of your soup compared to dried herbs. Add them at the end of cooking for maximum flavor. Adjust the Creaminess: If you prefer a lighter soup, you can substitute half of the heavy cream with low-fat milk or a plant-based alternative. Make it Ahead: This soup tastes even better the next day! Make it in advance and store it in the refrigerator to allow the flavors to meld. Add Some Heat: For an extra kick, consider adding diced jalapeños or a splash of hot sauce along with the red pepper flakes. {{image_2}} You can switch the Italian sausage for ground turkey or chicken. This makes a lighter soup. Turkey or chicken still gives great flavor. You can season them like sausage to boost taste. For a vegetarian option, use beans instead of meat. Cannellini or black beans work well. They add protein and texture to the soup. Feel free to mix in seasonal vegetables. Zucchini, bell peppers, or green beans are all great choices. They add color and nutrition. If you are short on time, use frozen or pre-chopped veggies. They save prep time and still taste good in the soup. While Parmesan cheese shines in this recipe, other cheeses can work too. Try using mozzarella for a melty twist. Feta cheese can add a salty kick. If you want to skip dairy, use a dairy-free cream. Almond or coconut cream can be a good substitute. They keep the soup creamy without the dairy. To keep your leftover soup fresh, store it in an airtight container. This helps prevent odors and keeps the soup tasty. Make sure it cools down before sealing. I recommend using it within 3 to 4 days for the best flavor. Check for any signs of spoilage, like off smells or changes in color. If you want to keep your soup longer, freezing is a great option. Pour the cooled soup into freezer-safe containers, leaving some space at the top for expansion. You can also use freezer bags for easy storage. To thaw, place the soup in the fridge overnight. When ready to eat, reheat it on the stove or in the microwave. Make sure it heats evenly. Stir well to mix the flavors back together. This soup stays good in the fridge for about three to four days. Make sure to store it in an airtight container. Check for signs of spoilage. If it smells off or looks strange, throw it out. Yes, you can make this soup ahead of time. Just follow the recipe and let it cool down. Once cooled, place it in the fridge. When ready to eat, reheat it on the stove. Stir gently to keep the texture nice. You can easily make this soup gluten-free. Use gluten-free chicken broth and check your sausage. Many brands offer gluten-free Italian sausage. This way, you can enjoy the soup without worry. This blog covers how to make a tasty Parmesan Italian Sausage Soup. You learned about key ingredients, cooking steps, and tips for great flavor. Always choose fresh herbs and good-quality sausage for the best taste. Experiment with different veggies or proteins to make it your own. Whether you enjoy it right away or save it for later, this soup is a winner. Remember, cooking is about finding joy in every step! Enjoy your delicious creation.

Parmesan Italian Sausage Soup Comforting and Easy Meal

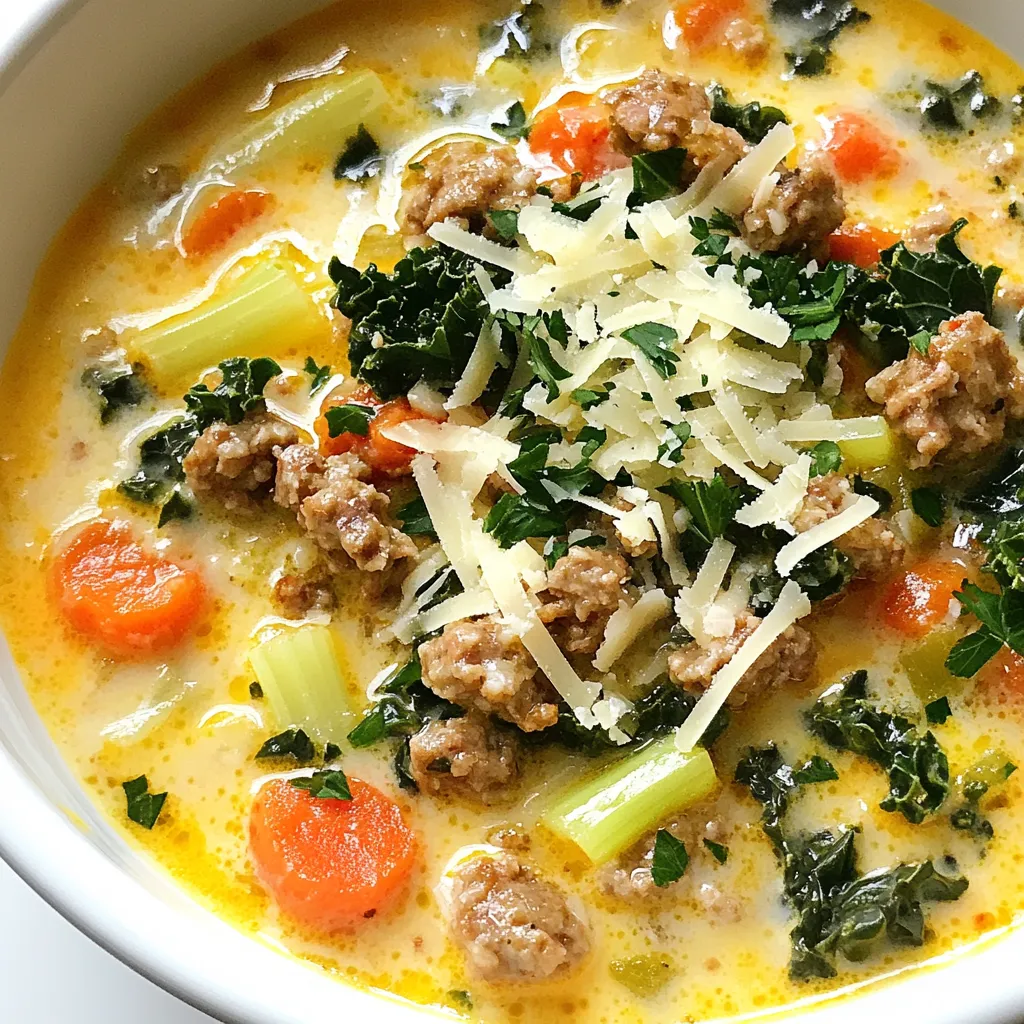
Looking for a meal that warms the soul and is easy to make? Allow me to introduce you to Parmesan

- 4 boneless, skinless chicken breasts - 1/4 cup olive oil - Juice of 2 large lemons - Zest of 1 lemon - 4 cloves garlic, minced - 2 teaspoons dried oregano - 1 teaspoon salt - 1/2 teaspoon black pepper - 1/4 teaspoon red pepper flakes (optional) - Fresh parsley, chopped (for garnish) Choosing the best chicken When buying chicken, look for fresh, plump breasts. They should feel firm and have a nice pink color. Avoid any chicken that looks dull or has a grayish tint. Importance of fresh ingredients Fresh ingredients bring out the best flavors. Use high-quality olive oil and fresh garlic. Your meal will shine with these simple choices. How to select ripe lemons Look for lemons that are bright yellow and feel heavy for their size. A ripe lemon has a firm skin, but it should yield slightly when you press it. This means it’s juicy and ready to add flavor to your dish. {{ingredient_image_1}} To make the marinade, grab a large bowl. In this bowl, add 1/4 cup olive oil, the juice of 2 large lemons, the zest of 1 lemon, 4 minced garlic cloves, 2 teaspoons dried oregano, 1 teaspoon salt, 1/2 teaspoon black pepper, and 1/4 teaspoon red pepper flakes if you like a bit of heat. Now, whisk these ingredients together until they blend well. This step is key. You want all the flavors to mix. After whisking, add 4 boneless, skinless chicken breasts to the bowl. Make sure each piece is well coated with the marinade. Cover the bowl with plastic wrap and place it in the fridge. The chicken should marinate for at least 30 minutes. For the best taste, aim for up to 2 hours. When you’re ready to cook, preheat your grill or grill pan to medium-high heat. This ensures a nice sear on your chicken. Take the marinated chicken out of the fridge. Let any excess marinade drip off. Discard the leftover marinade. Place the chicken on the grill. Cook for 6-8 minutes on each side. You want the chicken to reach an internal temperature of 165°F (75°C). This means it's safe to eat and it will be juicy. Look for a golden brown color on the outside. Once the chicken is fully cooked, transfer it to a plate. Let it sit for about 5 minutes. This resting time helps keep it juicy. For presentation, slice the chicken and arrange it on a platter. Drizzle a little olive oil and lemon juice over the top. This adds shine and flavor. As a final touch, sprinkle some fresh chopped parsley on top for color and freshness. You can also serve it with a Greek salad for a lovely meal. To make your Greek Lemon Chicken shine, focus on marinating. I suggest marinating for at least 30 minutes. For deeper flavor, let it sit for up to 2 hours. This allows the chicken to soak up all the lemon, garlic, and herbs. Adjusting spice levels is also key. If you like it spicy, add more red pepper flakes. If you prefer mild, skip them. Taste your marinade first to find the right balance. You can also bake the chicken if grilling isn’t an option. Preheat your oven to 375°F (190°C). Place the marinated chicken in a baking dish and cook for about 25-30 minutes. Check for doneness at 165°F (75°C). To avoid overcooking, use a meat thermometer. This tool ensures your chicken stays juicy. Remember to let it rest for 5 minutes after cooking. This helps the juices redistribute, making each bite tender. Pair your Greek Lemon Chicken with sides like rice, roasted veggies, or a fresh Greek salad. These options balance the bright flavors of the chicken. For meal prep, slice any leftovers and store them in an airtight container. Use them in wraps or salads throughout the week. The flavors will only get better as they sit! Pro Tips Marinate for Flavor: Allow the chicken to marinate for at least 30 minutes, but ideally for 2 hours to absorb all the zesty flavors. Use a Meat Thermometer: Ensure the chicken is perfectly cooked by checking the internal temperature, which should reach 165°F (75°C). Rest Before Slicing: Let the grilled chicken rest for 5 minutes after cooking. This helps retain the juices and keeps the meat tender. Garnish for Presentation: Enhance visual appeal by garnishing with fresh parsley and a drizzle of olive oil and lemon juice before serving. {{image_2}} You can change the flavors in Greek Lemon Chicken easily. Here are some ideas: - Herbs: Instead of oregano, try thyme or rosemary. Fresh herbs work well, too! - Add-ins: For a twist, add olives or feta cheese. They bring great taste and texture. You can cook your chicken in different ways. Here’s what you can use: - Grilling vs. Baking: Grilling gives a smokier flavor. Baking is easier and keeps it juicy. - Slow Cooker Version: Use a slow cooker for super tender chicken. Just add the marinade and cook for 4-6 hours on low. How you serve your Greek Lemon Chicken can change the vibe: - Family-Style Serving: Place the chicken on a big platter. Let everyone serve themselves. - Individual Servings Ideas: Slice the chicken and plate it with sides. Add a lemon wedge for a pop of color. After enjoying your Greek Lemon Chicken, store any leftovers in the fridge. Place the chicken in an airtight container. This helps keep the flavors fresh and prevents odors from mixing. I recommend glass containers. They are durable and do not hold onto smells. If you want to save your Greek Lemon Chicken for later, freezing is a great option. Wrap each piece in plastic wrap, then place them in a freezer bag. Squeeze out as much air as possible. This keeps the chicken from getting freezer burn. When you’re ready to eat, thaw the chicken in the fridge for a few hours. To reheat, place it in the oven at 350°F (175°C) until warmed through. This keeps the chicken juicy and tender. In the fridge, Greek Lemon Chicken lasts about 3 to 4 days. Always check for signs of spoilage before eating. If the chicken smells off or has a slimy texture, it’s best to toss it. Keeping track of how long it’s been in the fridge helps you enjoy it safely. You can serve Greek Lemon Chicken with many sides. Here are some great options: - Fresh Greek salad with cucumbers, tomatoes, and feta cheese - Roasted potatoes with herbs and olive oil - Light, fluffy rice or quinoa - Grilled vegetables like zucchini and bell peppers - Tzatziki sauce for dipping or drizzling These sides balance the zesty flavor of the chicken and create a complete meal. Yes, you can use other meats. Here are a few ideas: - Bone-in chicken thighs for a juicier option - Pork tenderloin for a different taste - Firm fish like salmon or swordfish for grilling - Tofu for a vegetarian version Adjust the cooking time based on the meat you choose. To check if chicken is done, use a meat thermometer. Look for an internal temperature of 165°F (75°C). Here are other signs: - The juices run clear, not pink - The meat feels firm to the touch - The outside is golden brown Always be careful to avoid undercooking or overcooking. If you lack fresh lemons, you can use bottled lemon juice. Here’s how: - Use about 1.5 tablespoons of bottled juice for each lemon. - Lemon zest can be replaced with lemon extract. Use a drop or two. - Lime juice can be a good alternative, giving a different taste. These substitutes will still provide a nice lemon flavor. Yes, you can prepare Greek Lemon Chicken ahead of time. Here are some tips: - Marinate the chicken up to 2 hours before cooking. - Cook it and store it in the fridge for up to 3 days. - Reheat gently in the oven or on the grill to avoid drying out. This makes it easy to enjoy a delicious meal later! This blog post covered all you need for Greek Lemon Chicken. We listed key ingredients and tips, from choosing fresh chicken to selecting ripe lemons. I walked you through marinating, cooking, and plating for great flavors and presentation. Remember to experiment with variations and use proper storage methods. Enjoy cooking this dish for your family and friends. It’s simple to make and offers delicious results. Dive into this recipe and let your taste buds shine!

Greek Lemon Chicken Flavorful Recipe You’ll Love

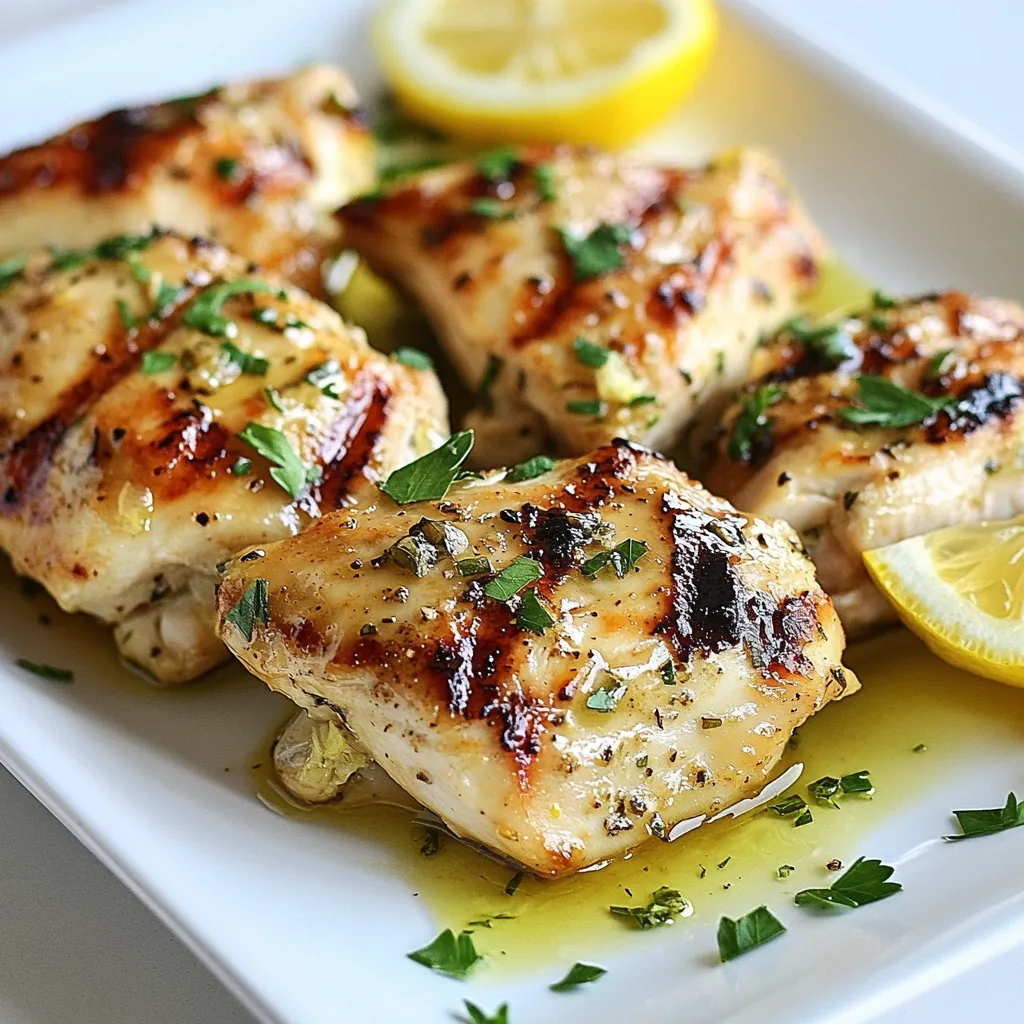
If you’re craving a burst of flavor, this Greek Lemon Chicken recipe is for you! With just a few simple

- 2 cups shredded rotisserie chicken - 4 cups chicken broth - 1 cup cream cheese, softened - 1 cup heavy cream - 1 cup shredded cheddar cheese - 1 cup sautéed green onions - 1 teaspoon garlic powder - 1 teaspoon onion powder - Salt and pepper to taste - 1 teaspoon smoked paprika - Optional: ½ cup crumbled bacon bits (for garnish) - Fresh parsley for garnish This soup is rich and filling. Each serving has about 400 calories. It has around 30 grams of fat and 5 grams of carbs. This makes it great for low-carb diets. You get protein from the chicken and cheese, too. This soup offers a good mix of nutrients without adding too many carbs. You need a large pot to cook this soup. A wooden spoon helps stir the ingredients. A measuring cup is handy for the broth and cream. A sharp knife will help you chop the green onions. If you want to garnish, have a spoon for the bacon bits and parsley. With these tools, you will make this creamy soup with ease. {{ingredient_image_1}} Start by placing a large pot over medium heat. Pour in the chicken broth and add the softened cream cheese. Stir this mix until the cream cheese melts into the broth. This step is key to a smooth soup. Next, add the heavy cream, garlic powder, onion powder, smoked paprika, and salt and pepper. Stir well to blend everything together. Bring the mixture to a gentle simmer. Let it cook for about 5 minutes, stirring now and then to keep it from sticking. Once the base is ready, add the shredded rotisserie chicken. Heat it through for another 5 to 7 minutes. This allows the chicken to soak in all those tasty flavors. Then, stir in the shredded cheddar cheese and sautéed green onions. Mix until the cheese melts completely, making the soup rich and creamy. Taste the soup and adjust the seasoning if needed. When everything is heated and mixed well, take the pot off the heat. To get that perfect creamy texture, make sure the cream cheese is softened. If it’s cold, it won't mix well. You can also whisk the cream cheese into the broth for a smoother mix. Stirring constantly helps prevent lumps. Keep the heat to medium to avoid boiling, which can make the soup grainy. If your soup feels too thick, add a splash of chicken broth until you reach the desired consistency. Cooking times can vary based on your stove and pot size. If you’re using a larger pot, the soup might cook faster. Always check the chicken is heated through before serving. If you're in a hurry, you can increase the heat slightly, but watch closely to avoid burning. If the soup is not hot enough after the suggested time, let it simmer a few minutes longer. This ensures every bowl is warm and ready to enjoy! When making Low Carb Crack Chicken Soup, avoid these common errors: - Skipping the cream cheese: This adds creaminess. No cream cheese means a less rich soup. - Not stirring enough: Stir often to blend flavors and melt cheese well. - Overcooking the chicken: Add it just long enough to heat. Too long makes it dry. To make your soup taste even better, try these tips: - Add fresh herbs: Basil or thyme can brighten the flavor. - Use quality chicken broth: Homemade or low-sodium broth adds depth. - Mix in spices: A pinch of cayenne or chili powder can give it a kick. Serve your soup hot for the best taste. Here are some ideas: - Garnish with bacon bits: They add crunch and flavor. - Top with fresh parsley: It gives a nice pop of color. - Pair with a salad: A fresh side balances the creamy soup. Pro Tips Use High-Quality Broth: A good chicken broth enhances the flavor of your soup. Opt for homemade or a high-quality store-bought variety for the best taste. Customize Your Cheese: While cheddar is delicious, feel free to experiment with other cheeses like Monterey Jack or Gouda for a unique twist on the flavor. Add Veggies: For extra nutrition, consider adding some chopped vegetables like spinach, bell peppers, or zucchini during the simmering stage of the soup. Garnish for Presentation: A sprinkle of fresh herbs or a dollop of sour cream can elevate the presentation and add an extra layer of flavor to your soup. {{image_2}} You can change this recipe to fit your diet. If you want it dairy-free, swap cream cheese and heavy cream for coconut cream. Use a dairy-free cheese for the cheddar. If you need a low-sodium option, pick low-sodium chicken broth. You can also use fresh chicken instead of rotisserie. Just cook and shred it first. This way, you control the salt levels. Adding veggies makes the soup even better. Toss in some spinach or kale for a healthy boost. You can also add diced bell peppers or zucchini. These vegetables bring flavor and color. They also add nutrients without many carbs. Cook them with the chicken for about five minutes. This way, they stay crisp but warm. Using an Instant Pot saves time. Just combine all the ingredients in it. Set the pot to cook for 15 minutes on high pressure. Let the steam release naturally for 10 minutes. For a slow cooker, mix the soup ingredients and cook on low for six hours. Both methods give you a creamy soup with minimal effort. To keep your low carb crack chicken soup fresh, store it in an airtight container. Make sure to cool it down to room temperature first. Place the container in the fridge. This soup stays good for about 3 to 4 days. When you're ready to eat, just take it out and reheat. If you want to freeze the soup, use freezer-safe containers. Pour the cooled soup into the containers, leaving some space at the top. This space allows for expansion as it freezes. Label the containers with the date. You can freeze the soup for up to 3 months. When you want to enjoy it, thaw it in the fridge overnight before reheating. Reheat your soup on the stove for the best results. Pour it into a pot and heat over medium heat. Stir it often to ensure even warming. If you're in a hurry, you can use the microwave. Place the soup in a microwave-safe bowl and cover it loosely. Heat for 1 to 2 minutes, stirring halfway. Always check that it's heated through before serving. Enjoy your creamy and flavorful meal! Yes, Low Carb Crack Chicken Soup is keto-friendly. It has low carbs and high fat. This soup uses heavy cream and cream cheese, which are great for a keto diet. Shredded chicken adds protein without many carbs. Enjoy this soup without guilt if you follow a keto plan. Yes, you can use canned chicken. Canned chicken is easy and quick. It saves time and still tastes good. Just drain and add it to the soup when the broth is hot. This keeps the soup smooth and creamy. To make the soup spicier, add more spices. You can use cayenne pepper or crushed red pepper flakes. Start with a small amount, then taste. You can also add diced jalapeños for a fresh heat. Mix in these spices while you stir the soup. This will give it a nice kick! You learned about key ingredients, cooking steps, and tips for a creamy soup. Understanding common mistakes and flavor enhancements can elevate your dish. You also discovered how to tailor the recipe for dietary needs and store leftovers properly. Embrace these tips and enjoy your cooking journey. With the right ingredients and techniques, you can create a delicious meal that fits your lifestyle. Happy cooking!

Low Carb Crack Chicken Soup Creamy and Flavorful Meal

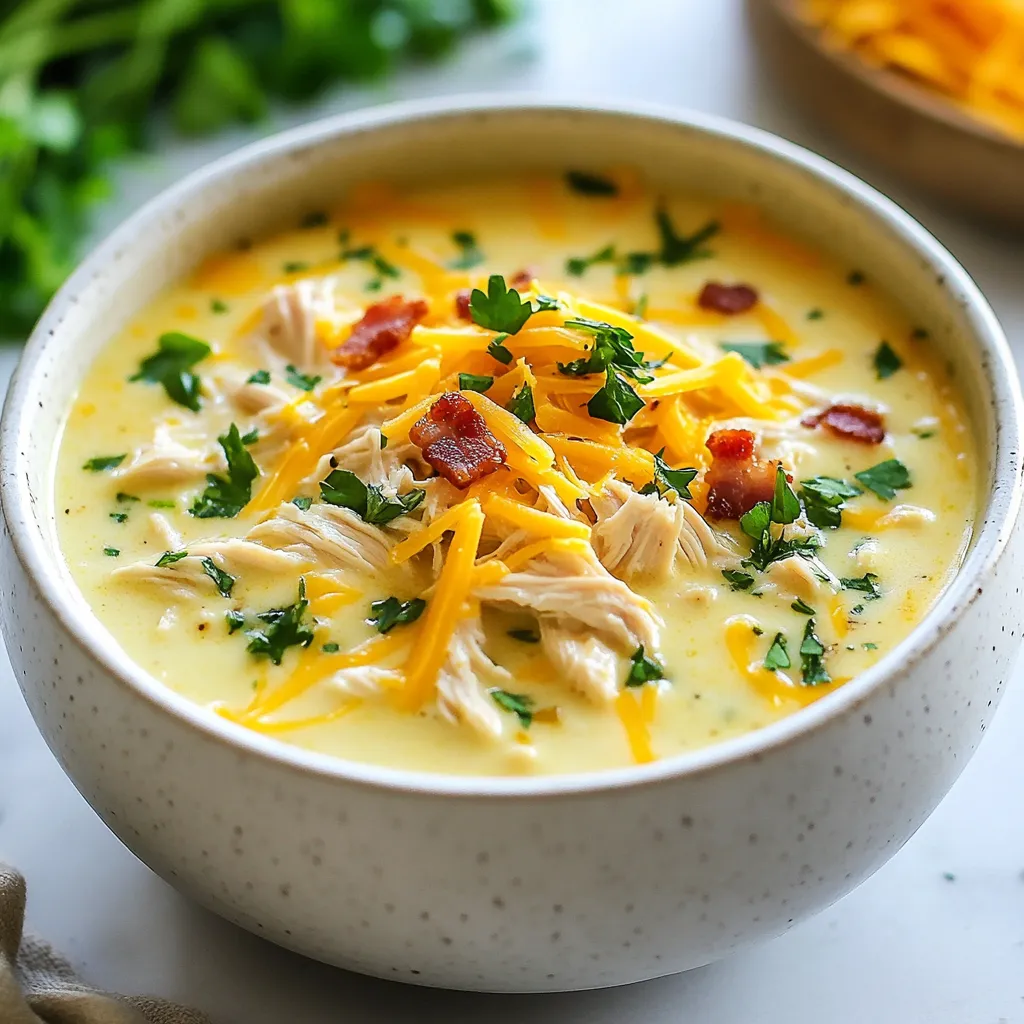
Craving a creamy, flavorful meal? This Low Carb Crack Chicken Soup ticks all the boxes! Packed with savory chicken and

- 2 cups cooked brown rice or quinoa - 2 boneless, skinless chicken breasts - 1 can sweet corn - 1 red bell pepper - Fresh cilantro - Cotija cheese - 1 avocado - Lime juice - 1 teaspoon chili powder - 1 teaspoon paprika - 1/2 teaspoon garlic powder - Salt and pepper - Olive oil for drizzling For this recipe, I love to use cooked brown rice or quinoa as the base. Both grains add great texture and flavor. The chicken breasts are the star! They need a good seasoning. I use chili powder, paprika, garlic powder, salt, and pepper. This mix gives them a smoky and savory taste. Next, we add some sweetness with a can of sweet corn. It pairs well with the crunchy diced red bell pepper. Fresh cilantro adds a bright touch that ties everything together. Don’t forget the creamy cotija cheese! It gives the dish a nice salty kick. For a fresh bite, I add diced avocado and a squeeze of lime juice. This really lifts the flavors. A drizzle of olive oil can enhance the taste even more. You can skip it if you'd like, but I think it’s a nice touch. These ingredients create a vibrant and tasty bowl. You can mix and match them to fit your taste! {{ingredient_image_1}} To make the chicken tasty, start by seasoning the breasts. Use chili powder, paprika, garlic powder, salt, and pepper. Rub the spices all over the chicken. This adds flavor to every bite. Next, grill the chicken. Heat your grill to medium-high. Cook the chicken for about 6 to 7 minutes on each side. You want it to reach 165°F inside. This ensures it cooks through. Let the chicken rest for a few minutes. Then, slice it into nice pieces. Now, let’s make the corn mixture. In a large bowl, combine the sweet corn, diced red bell pepper, and chopped cilantro. This mix adds color and crunch. Next, squeeze in the lime juice. This brightens the flavor. Gently toss the mixture to combine everything well. Add salt and pepper to taste. You want it to be just right! It’s time to put everything together. Start with a serving bowl and add the cooked brown rice or quinoa. This will be your base. Next, layer the sliced chicken on top. Then, add the corn mixture. Make sure to spread it evenly. This helps everyone get a bit of everything in each bite. Finally, add the toppings. Place diced avocado on top and sprinkle cotija cheese over everything. A drizzle of olive oil adds a nice touch, too. Enjoy this vibrant meal while it’s warm! To ensure your chicken is juicy and flavorful, start by seasoning it well. Use chili powder, paprika, garlic powder, salt, and pepper. This blend adds depth to the chicken. Grill it over medium-high heat for 6-7 minutes on each side. Check the internal temperature. It should reach 165°F. After grilling, let the chicken rest. This keeps it moist. For best grilling practices, preheat your grill. This helps achieve nice grill marks. Oil the grill grates lightly to prevent sticking. Always flip the chicken once during cooking. This ensures even cooking on both sides. Pair your bowls with fresh sides or salads. A simple green salad with lime vinaigrette works great. You can also serve tortilla chips for added crunch. For presentation, layer the ingredients neatly in bowls. Start with rice or quinoa at the bottom. Then add sliced chicken and corn mix on top. Finish with avocado and cotija cheese for a pop of color. If you want alternatives for chicken, try grilled shrimp or tofu. Both options add great flavor. For rice, quinoa is a lighter choice. You can also use cauliflower rice for a low-carb option. For vegan alternatives, replace chicken with chickpeas or black beans. Use a dairy-free cheese instead of cotija. This keeps the dish plant-based while still delicious. Pro Tips Rest the Chicken: Allow the grilled chicken to rest for at least 5 minutes before slicing. This helps retain its juices, making it more tender and flavorful. Customize Your Grains: Feel free to switch up the base from brown rice to quinoa or even cauliflower rice for a lighter, low-carb option that still packs a protein punch. Add a Kick: For those who enjoy some heat, consider adding diced jalapeños or a dash of hot sauce to the corn mixture for an extra layer of flavor. Fresh Ingredients Matter: Use fresh lime juice and high-quality cilantro to enhance the overall flavor profile of the dish. Fresh ingredients make a noticeable difference! {{image_2}} You can spice up your Mexican street corn chicken bowls easily. Try adding jalapeños for heat. Slice fresh jalapeños and mix them into the corn mix. This will give your dish a spicy kick. If you prefer sweet flavors, add more corn. Use grilled corn for a smoky taste. You can also toss in some honey for a sweet touch. Both options add great fun to your meal! Want a lighter base? Switch out brown rice for quinoa. Quinoa is nutty and full of protein. You can also use cauliflower rice for a low-carb option. It adds a nice texture and absorbs flavors well. Both quinoa and cauliflower rice work well with the chicken and corn. Toppings can take your bowl to the next level. Consider adding more cheese. Feta or mozzarella can elevate the flavor profile. You might also enjoy some salsa. Fresh tomato salsa or corn salsa can add extra zest. For a fresh touch, use herbs like cilantro or green onion. These herbs enhance the taste and add color to your dish. Experimenting with toppings makes every bowl unique! To keep your Mexican street corn chicken bowls fresh, store them in airtight containers. Place each layer separately if possible. This helps keep the rice, chicken, and toppings fresh. Refrigerate them within two hours of serving to avoid spoilage. Leftovers will stay good in the fridge for about three to four days. When it's time to eat, you can reheat your bowls in a few ways. The microwave is quick and easy. Just heat in short bursts, stirring in between. If you prefer, you can use the oven. Preheat it to 350°F and place the bowls inside for about 10-15 minutes. To keep flavors fresh, add a splash of lime juice or a drizzle of olive oil before reheating. Meal prep makes life easier. You can prepare the rice or quinoa ahead of time. Cook enough for multiple servings, and store it in the fridge. Grilling chicken in bulk also works well. Slice it up and store it for later use. For quick assembly, keep the corn mixture ready in a separate container. When you're ready to eat, just combine everything in a bowl for a fast and tasty meal. Yes, you can make this recipe ahead. Cook the chicken and prepare the corn mix. Store each part in separate containers. This way, you keep the flavors fresh. When you are ready to serve, just assemble the bowls. It saves time and still tastes great. If you can’t find cotija cheese, try feta or queso fresco. Both have a similar crumbly texture. They will add a nice salty flavor to your bowl. You could also use shredded cheddar for a different twist. To spice things up, add diced jalapeños to the corn mix. You can also increase the amount of chili powder in the chicken seasoning. Hot sauce is another great option. Just drizzle some on top when serving. Yes, you can easily make this bowl vegetarian. Replace the chicken with grilled zucchini or mushrooms. You can also add more beans for protein. The corn mix is already packed with flavor, so it will shine. Absolutely! Frozen corn works well in this recipe. Just thaw it before using. You can quickly sauté it in a pan to warm it up. This adds a bit of sweetness and texture. This recipe is naturally gluten-free if you use brown rice or quinoa. Just ensure that the spices and cheese you use are gluten-free. Always check labels for any added ingredients that may contain gluten. This blog post provided a simple recipe for delicious chicken and rice bowls. We covered key ingredients, seasoning, and helpful tips for grilling. You learned how to prepare a tasty corn mixture and assemble your bowl for a nice presentation. Remember, you can customize this dish with different grains or toppings. Explore flavors and find what you enjoy the most. Cooking should be fun, so get creative and make these bowls your own!

Mexican Street Corn Chicken Bowls Flavorful Feast

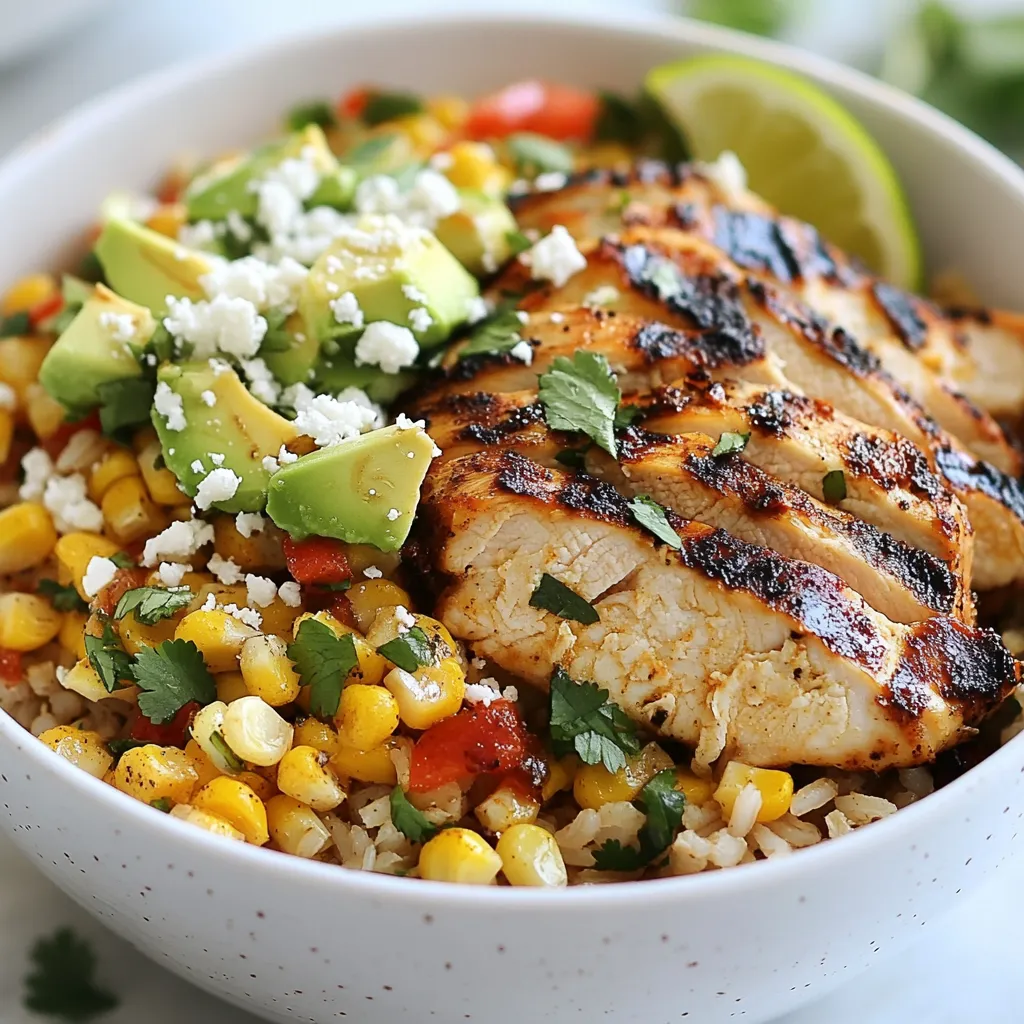
Are you ready to dive into a bowl of flavor? My Mexican Street Corn Chicken Bowls are the perfect blend

- 1 lb boneless, skinless chicken breasts - 1 can (14.5 oz) diced tomatoes with green chilies - 4 cups chicken broth (low sodium) - 1 cup corn kernels (fresh or frozen) - 1 can (15 oz) black beans, rinsed and drained - 1 medium onion, diced - 2 cloves garlic, minced - 1-2 jalapeños, finely chopped (adjust to taste) - 1 teaspoon ground cumin - 1 teaspoon smoked paprika - Salt and pepper to taste - 1 tablespoon olive oil - Juice of 1 lime - Corn tortillas, cut into strips - Avocado - Cilantro - Cheese - Sour cream - Lime wedges Each ingredient plays a key role in the flavor of the soup. The chicken gives it heartiness, while the tomatoes add a nice tang. I love using chicken broth for deep flavor. Corn and black beans bring sweetness and texture. The spices, especially cumin and smoked paprika, add warmth. Adjust the jalapeños to control the heat. For toppings, I recommend crispy tortilla strips for crunch. Fresh avocado and cilantro brighten the dish. A squeeze of lime adds a zesty finish. You can mix and match toppings based on what you enjoy. {{ingredient_image_1}} Using the Sauté Function First, select the Sauté function on your Instant Pot. Add 1 tablespoon of olive oil. Once the oil is hot, add 1 medium diced onion. Sauté for 3-4 minutes until the onion turns soft and clear. Next, add 2 cloves of minced garlic and 1-2 finely chopped jalapeños. Cook for 1 more minute to release their flavors. Adding Ingredients in Order Now, season 1 pound of boneless, skinless chicken breasts with salt, pepper, 1 teaspoon of ground cumin, and 1 teaspoon of smoked paprika. Place the chicken into the pot. Pour in 1 can of diced tomatoes with green chilies and 4 cups of low-sodium chicken broth. Add 1 cup of corn and 1 can of rinsed black beans. Stir everything well to mix. Sealing and Cooking Close the Instant Pot lid tightly. Make sure the valve is set to sealing. Cook on Manual or Pressure Cook for 10 minutes. After cooking, wait for 10 minutes for a natural release. Then, release any remaining pressure quickly. Be careful when opening the lid. Shredding the Chicken Remove the cooked chicken from the pot. Use two forks to shred it into bite-sized pieces. Return the shredded chicken back into the pot to mix with the soup. Adjusting Flavor and Serving Now, stir the juice of 1 lime into the soup. Taste it and adjust the seasoning with more salt and pepper if needed. Serve the hot soup in bowls. Preparing Tortilla Strips For the tortilla strips, cut corn tortillas into strips. You can fry them in a bit of olive oil until crispy. Alternatively, bake them in the oven at 400°F for about 10 minutes. This makes them golden and crunchy. Top the soup with your crispy strips and any optional toppings you like, such as avocado, cheese, or fresh cilantro. Adjusting Spice Levels You can change the heat of your soup. Start with one jalapeño. If you like it hotter, add more. Taste the soup before serving. This way, you can find the right spice for you. Enhancing with Fresh Ingredients Fresh herbs make a big difference. Add fresh cilantro just before serving. You can also add diced avocado for creaminess. A squeeze of lime juice adds brightness. Fresh toppings enhance the whole dish. Making it Creamier To make your soup creamier, stir in a bit of sour cream or Greek yogurt. This adds rich flavor and texture. You can also blend a portion of the soup for a smooth finish. Thickening the Soup If your soup is too thin, you can thicken it. Add crushed tortilla chips and stir. They soak up liquid and add flavor. Another option is to blend part of the soup, then mix it back in. Checking Chicken Doneness Always check the chicken’s doneness. Use a meat thermometer; it should read 165°F. If not, cook for a few more minutes. Shredding the chicken helps mix it well with the broth. Adjusting Broth Amount You can change how much broth you use. For a thicker soup, use less broth. For a lighter soup, add more. Just remember to taste as you adjust. This ensures your soup stays flavorful. Pro Tips Adjust the Heat: If you prefer a milder soup, remove the seeds from the jalapeños or use only one. For extra heat, consider adding a pinch of cayenne pepper. Make It Ahead: This soup tastes even better the next day! Make a big batch and store leftovers in the fridge for up to 3 days or freeze for later. Flavor Boost: Enhance the flavor by adding a teaspoon of chipotle in adobo sauce or a tablespoon of fresh chopped cilantro before serving. Crunch Factor: For added texture, try topping the soup with crushed tortilla chips instead of strips, or add some roasted corn for a delightful crunch. {{image_2}} For a low-carb twist, use cauliflower rice instead of corn. This change cuts carbs and adds fiber. You can also skip the tortilla strips or use cheese crisps for crunch. These tweaks keep the soup tasty and healthy. To make this soup vegan, replace chicken with chickpeas or lentils. Use vegetable broth instead of chicken broth. You can also add beans for protein. This version keeps the rich flavors while being plant-based. If you want to swap the chicken, try turkey or tofu. Both options work well with the spices and broth. Just remember to adjust cooking times for different proteins. You want everything tender and full of flavor. Spices can change the taste of your soup. Try adding chili powder for more heat. Oregano or coriander can also add depth. Remember to start small, then adjust to your taste. You can make your soup heartier by adding more veggies. Bell peppers, zucchini, or carrots work great. Chop them small so they cook quickly. This adds color and nutrition to your meal. For a creamier soup, stir in some cream cheese or sour cream at the end. It gives a rich texture and balances the spice. Cheese can also add a delicious layer of flavor. Just sprinkle some on top before serving. After you enjoy your Instant Pot chicken tortilla soup, you may have leftovers. To store them properly, let the soup cool down first. Then, transfer it to an airtight container. This keeps the flavors fresh and prevents spills in your fridge. For the best taste, eat the soup within 3 to 4 days. If you plan to keep it longer, consider freezing it. Freezing soup is a great way to save it for later. To freeze your chicken tortilla soup, let it cool completely. Next, pour the soup into freezer-safe bags or containers. Leave some space at the top for expansion. When you’re ready to eat, thaw the soup in the fridge overnight. To reheat, you can use the stove or the microwave. Heat it until it is hot throughout. Stir well to combine the ingredients again. Enjoy your tasty soup anytime! Can I use frozen chicken? Yes, you can use frozen chicken. Just add a few extra minutes to the cooking time. Frozen chicken may take longer to cook through, so ensure it reaches 165°F. How spicy is this soup? The soup has a mild to medium heat. You can adjust the spice by using one or two jalapeños. If you prefer less heat, remove the seeds from the jalapeños. Can I make this recipe in advance? Yes, this soup is great for meal prep. You can make it a day ahead and store it in the fridge. The flavors deepen overnight, making it even tastier. What can I use instead of black beans? You can use pinto beans, kidney beans, or chickpeas. Each option adds a different flavor but keeps the soup hearty. Can I substitute fresh corn for canned? Yes, fresh corn works well. If you use fresh corn, add it at the same time as the other ingredients. What if I don't have an Instant Pot? You can cook this soup on the stovetop. Just simmer on low heat for about 25-30 minutes until the chicken is cooked through. Shred the chicken and return it to the pot. This blog post covered everything you need for the perfect Instant Pot soup. We explored the key ingredients, from chicken to vegetables and toppings. You learned how to prepare, cook, and adjust flavors step by step. We also discussed tips for flavor and texture, along with various healthy options. Finally, storing your leftovers and answers to common questions were provided. With this guide, you can make a tasty, comforting soup that fits your needs. Enjoy your cooking adventure!

Instant Pot Chicken Tortilla Soup Flavor Boost

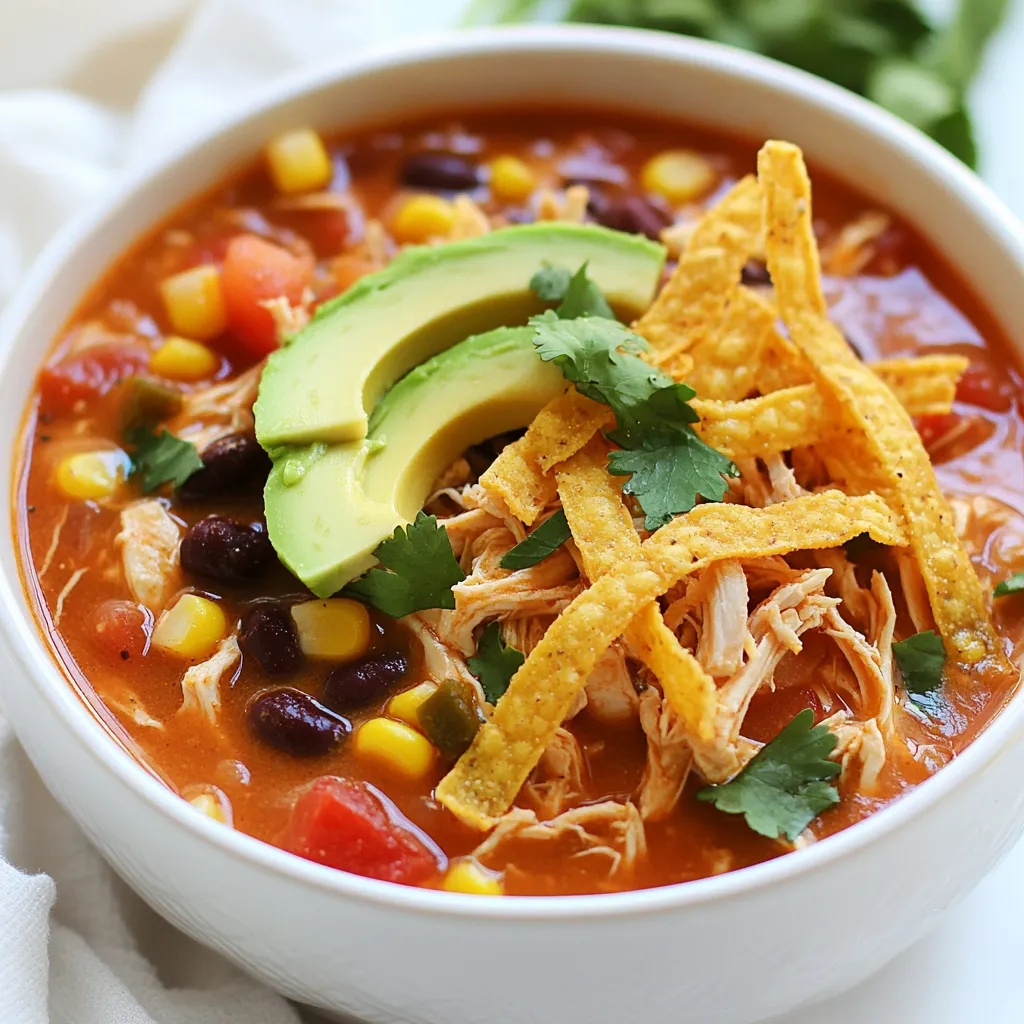
Ready for a warm, hearty meal that’s quick and easy? This Instant Pot Chicken Tortilla Soup packs a punch of

- 1 cup all-purpose flour (heat-treated) - 1 cup brown sugar, packed - 1/2 cup unsalted butter, softened - 1/4 cup granulated sugar - 1 teaspoon vanilla extract - 1/2 cup cream cheese, softened - 1/4 teaspoon salt - 3/4 cup mini chocolate chips - 1/4 cup chopped pecans or walnuts (optional) Each ingredient plays a key role in making this dip amazing. - All-purpose flour gives the dip a cookie-like texture. Heat-treating the flour makes it safe to eat raw. - Brown sugar adds sweetness and moisture. It makes the dip rich and chewy. - Unsalted butter adds creaminess and flavor. It helps mix the sugars well. - Granulated sugar balances the brown sugar and adds sweetness. - Vanilla extract gives the dip a warm, sweet flavor. - Cream cheese makes the dip smooth and creamy. It adds a nice tang. - Salt enhances all the flavors and balances the sweetness. - Mini chocolate chips provide bursts of chocolate in every bite. - Chopped nuts (if used) add crunch and extra flavor. You can change some ingredients if needed. - If you want a gluten-free version, use gluten-free flour. - For a dairy-free option, replace butter and cream cheese with vegan alternatives. - You can swap brown sugar for coconut sugar for a different taste. - If you don’t have mini chocolate chips, regular ones work too. - If you don’t like nuts, simply leave them out. {{ingredient_image_1}} - Mixing the Base Start by taking a large mixing bowl. Add the softened butter, brown sugar, and granulated sugar. Beat these ingredients until they look creamy and smooth. Next, add the cream cheese and vanilla extract. Mix until everything is well blended together. - Heat-Treating the Flour To make the flour safe to eat, heat-treat it first. Spread the flour on a baking sheet and bake it at 350°F (175°C) for 5-7 minutes. Let it cool before you add it to the mix. This step is key to keeping your dip safe and tasty. Once the flour is cool, gradually mix it with the creamy sugar mixture. Add in the salt at this stage. Make sure everything is fully incorporated. Then gently fold in the mini chocolate chips and nuts if you choose to use them. This gives your dip a lovely texture. Transfer the mixture into your chosen serving bowl. Smooth the top for a nice finish. For a fun touch, sprinkle a few extra chocolate chips and nuts on top. This makes it look even more inviting! Serve your dip with a variety of dippers. Graham crackers and pretzels work great. Apple slices add a nice crunch. You can even use mini cookies for a double treat. This dip is perfect for parties or cozy nights at home. Enjoy every bite! Making Chocolate Chip Cookie Dough Dip is fun, but some mistakes can happen. One big mistake is not heat-treating the flour. Raw flour can have bacteria. Always bake it first for safety. Another error is using cold butter. Softened butter mixes better and creates a smooth dip. Lastly, do not rush mixing. Blend until all the ingredients are smooth. Each step matters for the best taste. You can boost the dip's flavor in many ways. Try adding a pinch of cinnamon for warmth. A splash of almond extract can also add a nice twist. If you love chocolate, use dark chocolate chips instead of mini ones. For a nutty flavor, add a bit more chopped pecans or walnuts. These little changes make a big difference! A creamy texture is key for a great dip. Start with softened butter and cream cheese. Mix them well to avoid lumps. If the dip feels too thick, add a splash of milk. This will make it smoother. For serving, use a nice bowl. A pretty presentation can make it more tempting. Enjoy your creamy treat! Pro Tips Heat-Treat Flour: Always heat-treat your flour before using it in no-bake recipes to eliminate any potential bacteria. Butter Temperature: Ensure your butter is softened but not melted for the best creamy texture in your dip. Customize Your Mix-ins: Feel free to substitute chocolate chips with other mix-ins like dried fruit or toffee bits for a fun twist. Chill Before Serving: For a firmer dip, chill it in the refrigerator for about 30 minutes before serving. {{image_2}} I love adding nuts to my cookie dough dip. Chopped pecans or walnuts give it a crunchy twist. Nuts add texture and flavor, making every bite even better. You can mix in about 1/4 cup of your favorite nuts. Just fold them in gently after you add the chocolate chips. This small step makes a big difference! If you're looking for a healthier option, you can adjust the sugars. Try using a sugar substitute like stevia or monk fruit. You can also swap the cream cheese for a dairy-free version. This way, you keep the taste while offering a lighter choice. Use almond milk or coconut milk for extra creaminess. This dip can still taste amazing without all the sugar and dairy. Let’s get creative! Adding peanut butter gives a rich and nutty flavor. Just mix in about 1/2 cup of creamy peanut butter. For a refreshing twist, try mint extract. Just a drop or two will change the whole dip. You can even add a sprinkle of cocoa powder for a chocolate boost. Experimenting with flavors keeps this treat exciting! After you enjoy your dip, store any leftovers in an airtight container. This keeps the dip fresh. Make sure to seal the container well. If you leave it open, it can dry out or absorb other odors in the fridge. Refrigerate the dip right after serving. It can stay fresh in the fridge for up to five days. If you want to save it longer, you can freeze the dip. Just put it in a freezer-safe container. It can last up to three months in the freezer. When you’re ready to eat it, thaw it in the fridge overnight. For the best taste, eat the dip within a week. The flavors stay fresh and yummy. If you notice any changes in smell or texture, it’s best to toss it. Always trust your senses when checking old food. Yes, you can eat cookie dough dip raw. The dip is safe because we heat-treat the flour. This step kills harmful bacteria. To heat-treat flour, just bake it for a short time. Spread the flour on a baking sheet and bake at 350°F (175°C) for 5-7 minutes. Let it cool before mixing it into your dip. This way, you can enjoy that classic cookie dough taste without worry. Chocolate Chip Cookie Dough Dip lasts about 3-5 days in the fridge. Store it in an airtight container. This keeps it fresh and tasty. Make sure to check for any changes in color or smell before eating. If you want to keep it longer, you can freeze it for up to 3 months. Just remember to thaw it in the fridge before serving again. There are many fun things to serve with the dip. Here are some great options: - Graham crackers - Pretzels - Apple slices - Mini cookies - Fresh fruit These dippers add great flavor and texture. Choose your favorites and enjoy! In this post, we explored the ingredients, steps, and tips for making Chocolate Chip Cookie Dough Dip. Each ingredient plays a key role in flavor and texture. I shared ways to swap ingredients and enhance taste. We also looked at fun variations and proper storage tips. Remember, making this dip is easy and fun. Enjoy the process, and don't hesitate to experiment with flavors. You'll impress everyone with this delicious treat!

Chocolate Chip Cookie Dough Dip Irresistible Treat

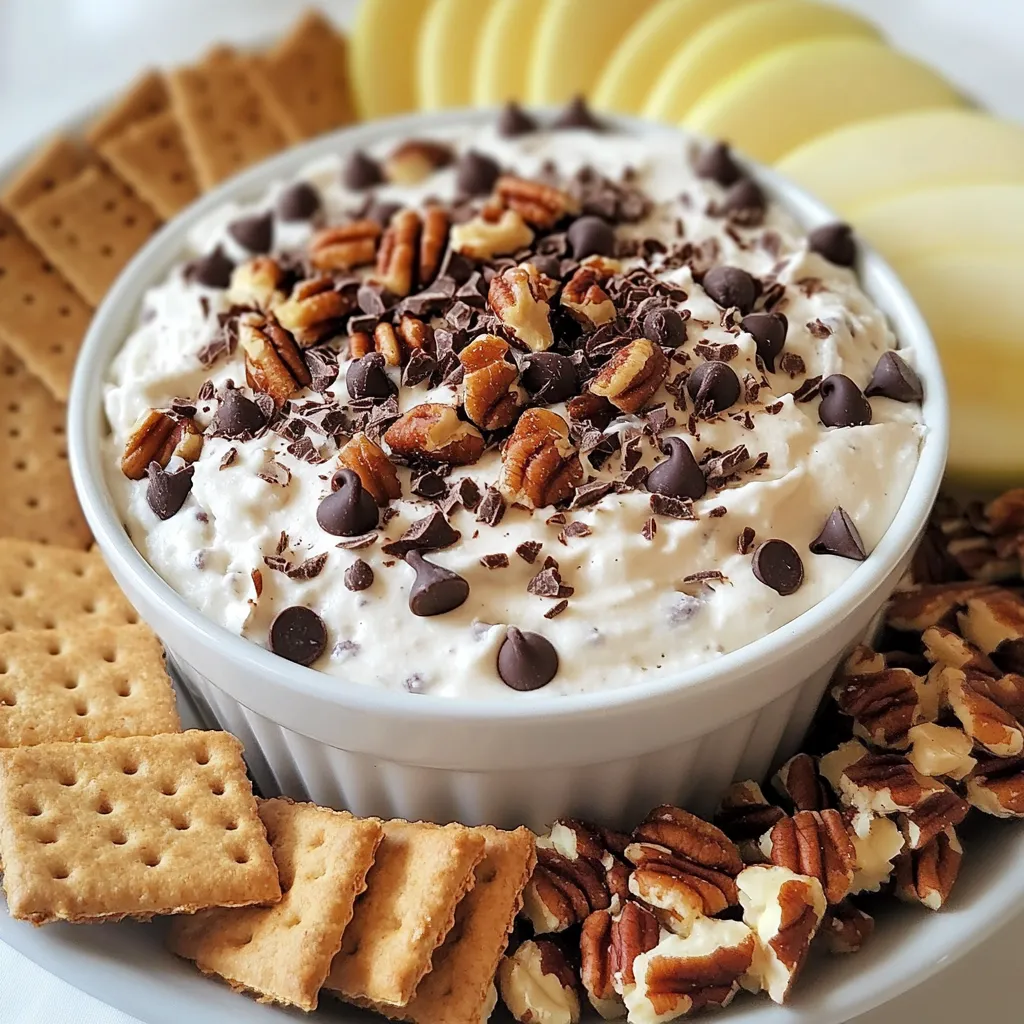
Are you ready for a sweet treat that’s sure to impress? This Chocolate Chip Cookie Dough Dip is an easy,

Older posts
Newer posts
← Previous Page1 … Page162 Page163 Page164 Next →

dsad

© 2026 easycookingbite • Built with GeneratePress

Our Policies

  • Copyright Policy
  • Cookie Policy
  • GDPR Policy
  • Privacy Policy
  • Disclaimer
  • Terms Of Use

More Information

  • Home
  • About
  • Contact
  • Appetizers
  • Dessert
  • Dinner
  • Drinks
©2026, easycookingbite About Back To Top