Skip to content
DisclaimerTerms Of UseGDPR PolicyCookie Policy

easycookingbite

  • Home
  • Drinks
  • Appetizers
  • Dinner
  • Dessert
  • About
  • Contact
  • Privacy Policy
DisclaimerTerms Of UseGDPR PolicyCookie Policy

Lily

- 8 oz fettuccine or spaghetti - 2 tablespoons olive oil - 1 small zucchini, sliced - 1 bell pepper (any color), sliced - 1 cup cherry tomatoes, halved - 1 cup broccoli florets - 1 carrot, julienned - 2 cloves garlic, minced - 1 teaspoon dried oregano - 1 teaspoon red pepper flakes (optional) - 1/4 cup fresh basil, chopped - Salt and pepper, to taste - Freshly grated Parmesan cheese (optional, for serving) These ingredients create a colorful and tasty dish. The pasta serves as a base. The veggies add crunch and flavor. Olive oil provides a rich, smooth taste. Garlic gives it a nice aroma and kick. - Extra vegetables like asparagus or spinach - Protein options such as grilled chicken or shrimp - Crushed nuts for added texture - Fresh herbs like parsley or thyme - Balsamic vinegar for tangy flavor Feel free to mix and match these additions. This way, you can make the dish your own. Adding your favorite veggies can change the taste and look. - Large pot for boiling pasta - Skillet for sautéing vegetables - Cutting board for chopping - Sharp knife for slicing - Colander for draining pasta Using the right tools makes cooking easier. A large pot holds enough water for the pasta. A good skillet helps cook the veggies quickly. A sharp knife speeds up your prep time. {{ingredient_image_1}} To start, grab a large pot. Fill it with water and add salt. Bring the water to a boil. Once boiling, add your fettuccine or spaghetti. Cook it until it's al dente, which takes about 8 to 10 minutes. After cooking, drain the pasta. Save about 1/2 cup of that pasta water for later. Set the pasta aside while you prepare the veggies. Now, take a large skillet and heat 2 tablespoons of olive oil over medium heat. Add the sliced zucchini, bell pepper, broccoli florets, and julienned carrot. Toss in 2 minced garlic cloves too. Sauté the mix for about 5-7 minutes. You want the veggies tender but still bright and colorful. This step brings out their flavors. Next, add 1 cup of halved cherry tomatoes. Sprinkle in 1 teaspoon of dried oregano and, if you like it spicy, add 1 teaspoon of red pepper flakes. Cook this mixture for another 2-3 minutes. You want the tomatoes to soften just a bit. Add the cooked pasta to your skillet with the veggies. If the mix looks dry, pour in some reserved pasta water to help. Toss everything together over low heat for about 2 minutes. This lets the flavors blend nicely. Finally, take it off the heat and stir in 1/4 cup of fresh basil. Season with salt and pepper to taste. Serve the pasta primavera in bowls. If you want, top it with freshly grated Parmesan cheese and a few basil leaves for a beautiful touch. Enjoy! To cook pasta perfectly, use a large pot. Fill it with water and add salt. Bring the water to a rolling boil before adding your pasta. For fettuccine or spaghetti, cook for about 8-10 minutes. Check the package for exact times. Test for al dente by tasting a piece. You want it firm but not hard. Save half a cup of the pasta water. This water helps mix with your sauce later. Always start with hot oil in your pan. Use medium heat to keep the oil from smoking. Add your tougher veggies first, like carrots and broccoli. Cook them for about 3-4 minutes. Then, add softer veggies, such as zucchini and bell peppers. Stir often to keep them from burning. Add garlic near the end, so it doesn't burn. You want the vegetables colorful and tender, not mushy. Enhance your Pasta Primavera with herbs and spices. Dried oregano adds a nice touch. If you like heat, sprinkle in red pepper flakes. Fresh basil gives a burst of flavor. Don’t forget to season with salt and pepper. For a rich finish, top with grated Parmesan cheese. It melts beautifully over the warm pasta. Always taste as you go to find the right balance. Pro Tips Use Fresh Vegetables: For the best flavor and texture, choose fresh, in-season vegetables. They not only taste better but also add vibrant colors to your dish. Reserve Pasta Water: Always save a cup of pasta water before draining. This starchy water is perfect for adjusting the sauce consistency and helps the sauce adhere to the pasta. Customize Your Veggies: Feel free to swap in your favorite vegetables or whatever you have on hand. Asparagus, peas, or spinach are great alternatives for this primavera. Add Protein: If you want to make the dish more filling, consider adding grilled chicken, shrimp, or chickpeas for a protein boost. {{image_2}} Pasta Primavera is a great dish for everyone. To make it vegetarian, just skip the cheese. For a vegan version, use nutritional yeast instead of Parmesan. You can also add more veggies. Think about mushrooms, spinach, or asparagus. They add great flavor and color. Want to add some protein? Chicken works well. Just cook it in the skillet first. Then, add the veggies. Shrimp is another tasty choice. Sauté them until they turn pink. Tofu is great for a vegan option. Use firm tofu and sauté it until golden. Each option boosts the dish's heartiness. If you need gluten-free pasta, there are many choices. Look for brown rice or chickpea pasta. These options taste great and hold up well. Cook them as you would regular pasta. This way, everyone can enjoy Pasta Primavera, no matter their diet. To store leftover pasta primavera, let it cool first. Place it in an airtight container. Make sure to seal it well. Store it in the fridge for up to three days. If you have extra sauce, store it separately. This keeps the pasta from getting mushy. When you are ready to eat your leftovers, take them out of the fridge. You can reheat pasta primavera in a microwave or on the stove. If using a microwave, place it in a bowl and cover it with a lid. Heat it for about 1-2 minutes. Stir halfway through for even heating. On the stove, add a splash of olive oil in a pan. Heat on low and stir for about 5 minutes. This keeps it fresh and tasty. If you want to freeze pasta primavera, use a freezer-safe container. It can stay frozen for up to two months. Make sure to leave some space in the container for expansion. When you are ready to eat, thaw it overnight in the fridge. Reheat as mentioned above. Freezing works best if you leave out the fresh basil and cheese. Add them back in when you serve it. Pasta Primavera is a bright and fresh dish. It features pasta and seasonal vegetables. The name means "spring pasta" in Italian. This dish celebrates vibrant flavors and colors. You can use any pasta type like fettuccine or spaghetti. The main veggies include zucchini, bell peppers, cherry tomatoes, and broccoli. Each bite is a taste of spring. Yes, you can prepare Pasta Primavera ahead of time. Cook the pasta and veggies separately. Let them cool and store in the fridge. When ready to eat, just reheat them together in a pan. Add a splash of reserved pasta water to keep it moist. This way, you save time on busy nights. You can use many vegetables for Pasta Primavera. Good choices include: - Zucchini - Bell peppers - Cherry tomatoes - Broccoli - Carrots - Asparagus - Peas Feel free to mix and match. Pick what you like or what’s in season. Fresh veggies add great color and flavor. To make your Pasta Primavera creamy, you can add a few simple ingredients. After cooking the pasta, save some pasta water. Gradually mix it in while tossing everything together. You can also add cheese like Parmesan for richness. Another option is to use cream or a splash of milk. This will give you a smooth and tasty sauce. This blog covers all you need for Pasta Primavera. We discussed main and optional ingredients, plus tools to use. You learned the steps for cooking and mixing the dish. Tips on cooking pasta and sautéing veggies will help you succeed. We explored tasty variations to fit your diet. Lastly, we provided storage tips for leftovers and answers to common questions. Now, you can enjoy making your Pasta Primavera just how you like it. Happy cooking!

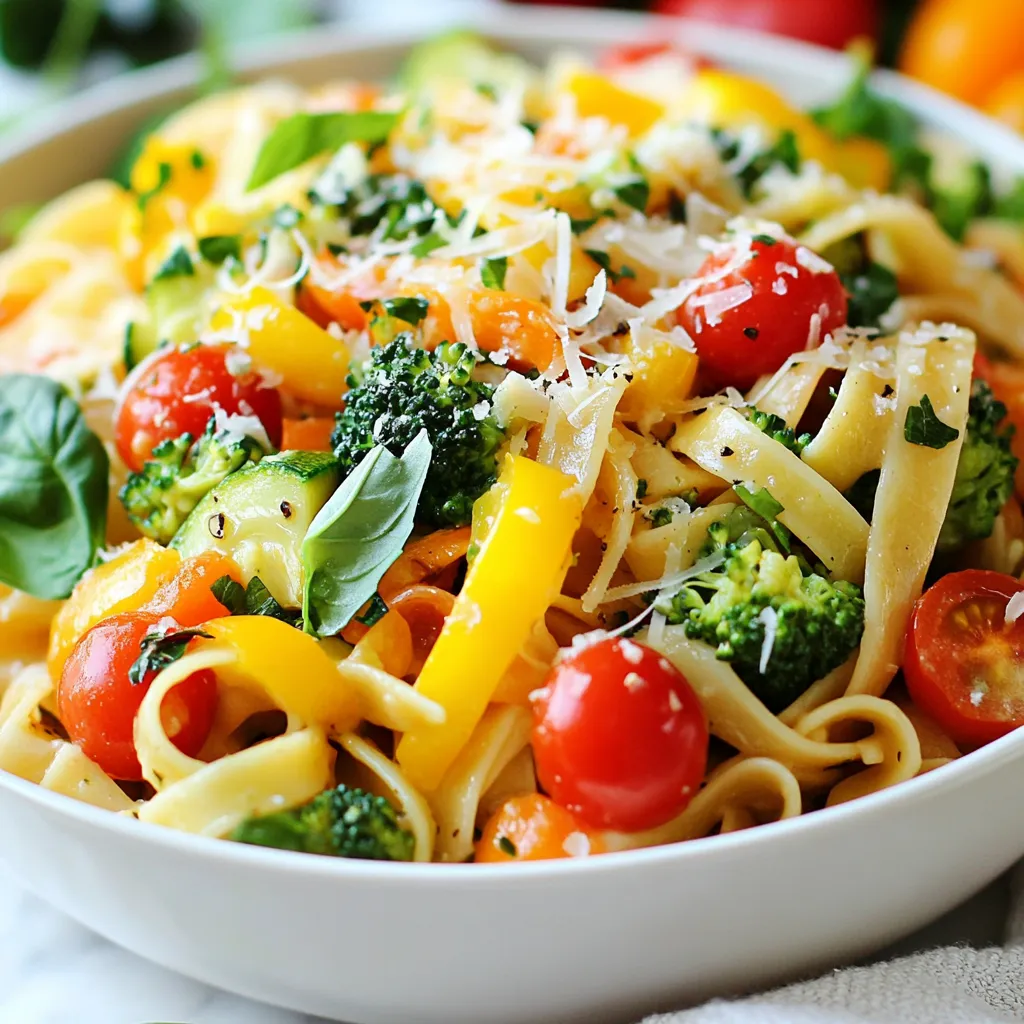
Pasta Primavera Flavorful and Easy Dinner Recipe

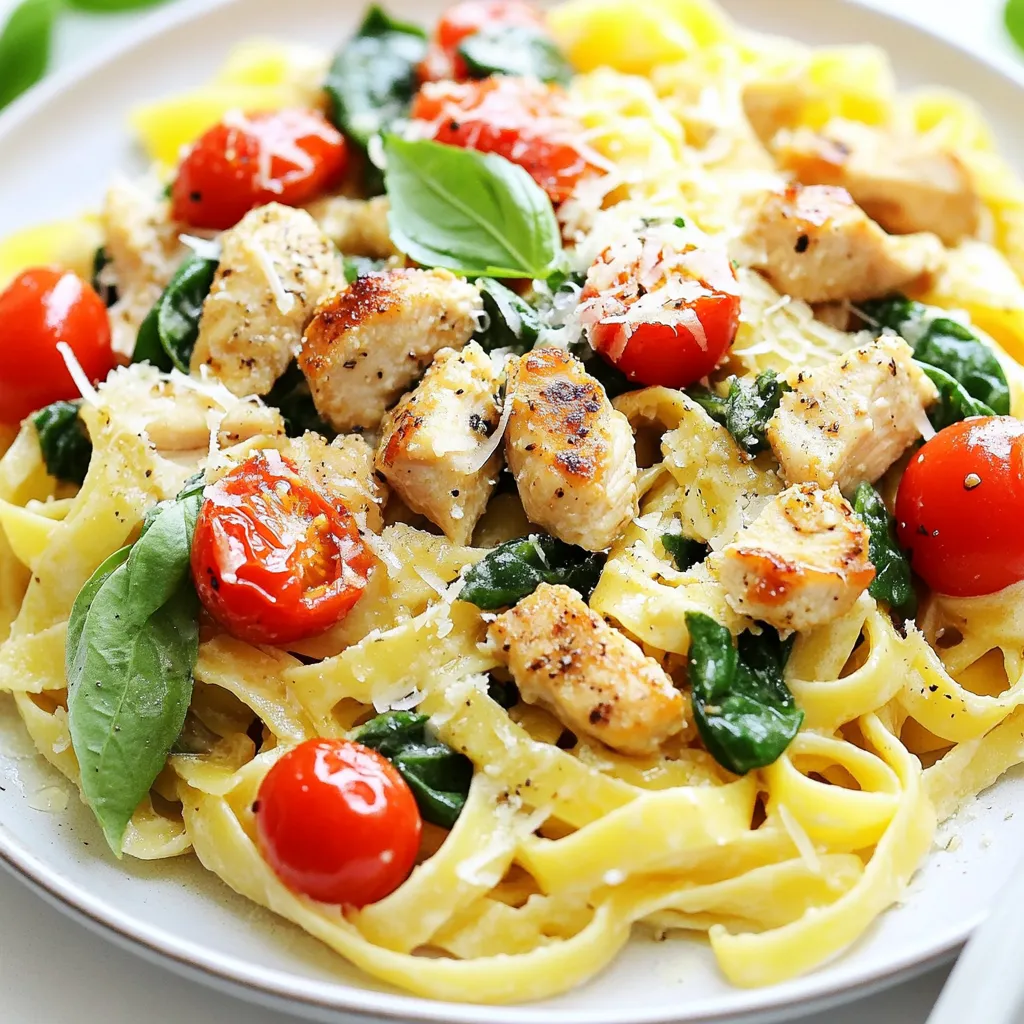
Looking for a quick, tasty dinner? Pasta Primavera is here to save your night! This dish combines fresh veggies with

- 8 ounces pasta (fettuccine or penne) - 1 pound beef sirloin, thinly sliced - 1 tablespoon olive oil - 1 onion, sliced - 1 green bell pepper, sliced - 1 red bell pepper, sliced - 2 cloves garlic, minced - 1 cup beef broth - 1 cup heavy cream - 2 cups provolone cheese, shredded - 1 teaspoon Worcestershire sauce - Salt and pepper to taste - Fresh parsley for garnish When making Philly cheesesteak pasta, these ingredients shine. The pasta forms the base. Choose fettuccine or penne. Both hold sauce well. The beef sirloin adds rich flavor. Slice it thin for quick cooking. Olive oil helps sauté the beef and veggies. The veggies bring crunch and sweetness. I love the mix of onions and bell peppers. Garlic adds depth. The sauce is creamy and savory. Beef broth provides richness. Heavy cream makes it smooth. Provolone cheese melts beautifully, tying all flavors together. Finally, Worcestershire sauce boosts umami. Don’t forget salt and pepper to enhance taste. Fresh parsley adds color and freshness. Gather these ingredients, and you're on your way to a delicious meal! {{ingredient_image_1}} Start by boiling water in a large pot. Add a pinch of salt to the water. When the water boils, add 8 ounces of pasta. I like fettuccine or penne for this dish. Cook the pasta according to the package directions. You want it to be al dente. This means it should be firm but not hard. Once cooked, drain the pasta in a colander and set it aside. In a large skillet, heat 1 tablespoon of olive oil over medium heat. Add 1 sliced onion and both sliced bell peppers. I use one green and one red bell pepper for color. Sauté these for about 5 minutes. You want them soft and a little brown. Stir in 2 cloves of minced garlic and cook for one more minute. The garlic should smell nice. Once done, remove the veggies from the skillet and set them aside. Now, in the same skillet, turn the heat to high. Add 1 pound of thinly sliced beef sirloin. Season with salt and pepper to taste. Cook the beef for about 3 to 4 minutes. Stir often. The beef should turn brown and lose its pink color. Once browned, it’s ready to go. Pour in 1 cup of beef broth and 1 teaspoon of Worcestershire sauce. Use a spatula to scrape the bottom of the skillet. This lifts the tasty bits stuck there. Bring this mixture to a simmer. Then lower the heat to medium-low and stir in 1 cup of heavy cream. This makes the sauce rich and creamy. Slowly add 2 cups of shredded provolone cheese into the skillet. Stir continuously until the cheese melts. The sauce should be smooth and creamy now. Next, add the cooked pasta and the sautéed vegetables back into the skillet. Stir everything together well. Cook for another 2 to 3 minutes to heat it all through. Before serving, taste the dish. Adjust the seasoning with more salt and pepper if needed. Serve the Philly Cheesesteak Pasta on a large platter. I like to garnish it with fresh parsley and an extra sprinkle of provolone cheese. You can also serve garlic bread on the side for a complete meal. Enjoy! To make the sauce creamy, use heavy cream. Add it slowly to the skillet. Stir well as it combines with the beef broth. This helps blend in flavors and makes it smooth. If it feels too thick, add a splash of beef broth. This keeps it rich and tasty without being heavy. When sautéing, heat your oil before adding the veggies. This helps them brown nicely. Keep the heat at medium to avoid burning. Stir often to cook evenly. Once the meat is in, raise the heat to high. This gives the beef a nice sear. It locks in the juices and adds flavor. Garnish your dish with fresh parsley. It adds color and a fresh taste. You can also sprinkle more provolone cheese on top for extra flavor. Serve the pasta with garlic bread. This makes a hearty meal and is perfect for sharing. You can pair it with a simple salad, too. A light side balances the rich pasta. Pro Tips Use Fresh Ingredients: For the best flavor, opt for fresh bell peppers and onions. They will enhance the overall taste of your dish. Slice Meat Thinly: Ensure your beef is sliced very thinly against the grain for tenderness and quicker cooking. Experiment with Cheese: While provolone is traditional, feel free to mix in other cheeses like mozzarella or cheddar for a unique twist. Save Some Pasta Water: If your sauce is too thick, adding a splash of reserved pasta water can help loosen it up and add extra flavor. {{image_2}} You can make a tasty vegetarian version of Philly Cheesesteak Pasta. Instead of beef, use mushrooms or seitan. Both add great texture and flavor. For mushrooms, try portobello or cremini. They soak up flavors well. If you use seitan, it mimics the taste and texture of meat. Sauté them just like you would the beef. Provolone cheese is classic, but don’t stop there! Try mozzarella for a milder taste. It melts beautifully, making your dish creamy. Cheddar can add a sharp flavor, while gouda gives a smoky touch. Mix and match these cheeses for a fun twist! You can add your favorite toppings for more flavor. Try jalapeños for heat or sautéed mushrooms for depth. Fresh herbs like basil or oregano can brighten up your dish. For a crunch, add crispy fried onions or a sprinkle of crushed red pepper. Get creative with spices too! A pinch of paprika or garlic powder can elevate the taste. To keep your Philly Cheesesteak Pasta fresh, store it in an airtight container. Place it in the fridge within two hours of cooking. It will last up to three days. Make sure it is cooled to room temperature before sealing. This helps keep the flavors intact. To reheat, use a skillet over medium heat. Add a splash of beef broth or cream to keep it moist. Stir it often for even heating. You can also use the microwave. Heat in short bursts of 30 seconds. Stir after each burst until hot. This keeps the pasta from drying out. If you want to freeze your pasta, let it cool first. Place it in a freezer-safe container. It can last for up to three months in the freezer. To reheat, thaw it in the fridge overnight. Then, use the skillet method to warm it up. This helps keep the sauce creamy and delicious. Yes, you can! While fettuccine and penne are great choices, many other pasta types work well. You might try: - Rigatoni - Shells - Spaghetti Each pasta shape will hold the sauce in its own way. Pick your favorite for a fun twist! If you love heat, there are many ways to spice up this dish. Here are some tips: - Add crushed red pepper flakes while cooking. - Mix in sliced jalapeños or serrano peppers. - Use pepper jack cheese instead of provolone. These additions will amp up the flavor and give your dish a nice kick! This pasta dish is rich and filling. Here are some great sides to enjoy with it: - Garlic bread - A fresh green salad - Roasted vegetables These sides balance the meal and add extra flavor. Enjoy your cooking adventure! This post covered a tasty Philly Cheesesteak Pasta recipe, starting with key ingredients like pasta, beef, and fresh veggies. You learned how to cook pasta, sauté vegetables, and make a creamy sauce. We also explored cooking tips and fun variations, including vegetarian options. Try this dish for a satisfying meal any night. Enjoy cooking and making it your own!

Philly Cheesesteak Pasta Flavorful and Simple Recipe

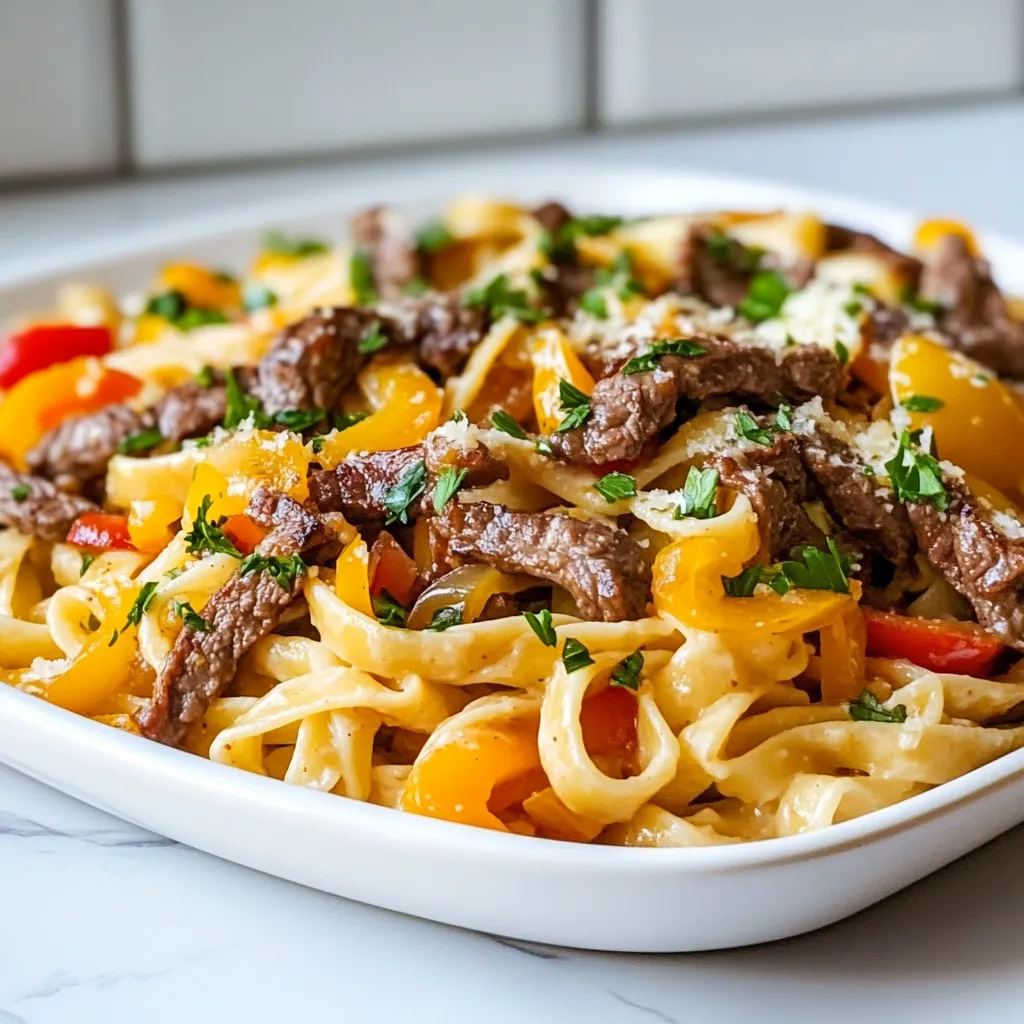
Craving a hearty meal that’s quick to prepare? Look no further than Philly Cheesesteak Pasta! This flavorful dish combines tender

To make tasty Chicken Alfredo Sloppy Joes, you need these main ingredients: - 1 lb ground chicken - 1 cup heavy cream - 1 cup freshly grated Parmesan cheese - 2 tablespoons olive oil - 1 teaspoon garlic powder - 1 teaspoon onion powder - 1/2 teaspoon Italian seasoning - Salt and pepper to taste - 4 whole wheat burger buns These ingredients come together to create a rich and creamy filling. The ground chicken gives you a nice texture, while the heavy cream and Parmesan create that classic Alfredo taste. To make your Sloppy Joes pop, consider these optional garnishes: - Fresh parsley, chopped Chopping fresh parsley adds color and freshness. You can sprinkle it right on top before serving. Pair your Chicken Alfredo Sloppy Joes with these suggested sides: - Fresh salad - Steamed broccoli - Sweet potato fries These sides balance the meal and add more nutrients. They also round out the flavors nicely, making your dinner complete. {{ingredient_image_1}} Start by heating the olive oil in a large skillet over medium heat. Once hot, add the ground chicken. Cook it for about 6 to 8 minutes. Stir often to break up the chicken into small bits. You want it browned and fully cooked. This step is key for a tasty base. Next, lower the heat and pour in the heavy cream. Stir well to mix it with the chicken. Let it simmer for 2 to 3 minutes. This helps the flavors blend. Then, add the garlic powder, onion powder, Italian seasoning, salt, and pepper. Mix everything until well combined. Now, it’s time to add the Parmesan cheese. Gradually stir it in until it melts and the sauce thickens. If it’s too thick, add a splash of chicken broth or water. While this simmers, toast the whole wheat burger buns until golden brown. Spoon the creamy chicken Alfredo mixture onto the bottom half of each bun. Top with the other half and enjoy! To make your Chicken Alfredo Sloppy Joes burst with flavor, use fresh ingredients. Fresh grated Parmesan cheese gives a better taste than packaged cheese. Don’t skip the garlic and onion powder; these add depth. Feel free to adjust salt and pepper based on your taste. Use Italian seasoning for that extra kick. If you like, add a splash of lemon juice for brightness. Cook the ground chicken evenly by breaking it into small pieces. This helps it brown nicely. Use medium heat, so it cooks through without burning. Stir it often while cooking. This keeps the chicken moist and tender. Always check that the chicken is fully cooked; it should be white and no longer pink. Toasting the buns adds a nice crunch. Use a skillet for even toasting. Heat it on medium, then add the buns cut-side down. Toast them until golden brown, about 2-3 minutes. If you prefer, use a toaster, but keep an eye on them. You want them warm and crispy, not burnt. A little butter on the buns before toasting can add more flavor. Pro Tips Use Fresh Ingredients: Freshly grated Parmesan cheese will melt better and provide a richer flavor than pre-grated cheese. Opt for high-quality heavy cream for a creamier sauce. Adjust Thickness: If the Alfredo sauce becomes too thick, add a splash of chicken broth or water to reach your desired consistency. Flavor Boost: Enhance the flavor by adding a splash of white wine to the sauce while it simmers for a gourmet touch. Custom Buns: Experiment with different types of buns, such as brioche or garlic bread, to complement the creamy chicken Alfredo filling. {{image_2}} Want to give your Chicken Alfredo Sloppy Joes a kick? You can add red pepper flakes or hot sauce. Start with a pinch of red pepper flakes while cooking the chicken. This gives a nice heat without overpowering the dish. If you like it spicier, add more! Hot sauce can also work well. Just drizzle it into the Alfredo sauce for a great flavor boost. Adjust the amount based on your taste. If you're looking for a vegetarian option, replace the ground chicken with mushrooms or lentils. Finely chop mushrooms to mimic the texture of ground chicken. Sauté them in the olive oil until soft. For lentils, use cooked green or brown lentils. They add protein and a nice bite. You can keep the rest of the recipe the same. The creamy Alfredo sauce will still shine through. Parmesan is classic for Alfredo, but you can mix it up. Try using Pecorino Romano for a sharper taste. If you want a creamier texture, add a bit of cream cheese to the sauce. It melts well and adds richness. For a fun twist, mix in a little cheddar cheese. This gives a different flavor that pairs nicely with the chicken. Experiment to find your favorite cheese blend! To keep your Chicken Alfredo Sloppy Joes tasty, store leftovers in an airtight container. Let them cool down first. Place them in the fridge if you plan to eat them within three days. For longer storage, freezing is a better option. When you’re ready to enjoy your leftovers, reheat them slowly. You can use a skillet over medium heat. Add a splash of cream or broth to keep the sauce creamy. Stir often until heated through. You can also microwave them in a covered bowl for about two minutes, stirring halfway. To freeze, scoop the chicken mixture into freezer-safe bags. Remove as much air as possible. Label them with the date and freeze for up to three months. When you're ready to eat, let them thaw in the fridge overnight. Reheat as mentioned before for the best taste. Yes, you can use rotisserie chicken. Shred the chicken into small pieces. This option saves time. Just heat it in the skillet with the cream and seasonings. This will give your sloppy joes a great flavor. You can try different sauces. A creamy ranch or a garlic butter sauce works well. You might also use a white cheese sauce for a similar taste. Each sauce brings its own twist to the dish. Experiment to find your favorite! To make this dish gluten-free, use gluten-free burger buns. You can find these in most stores. Check the labels to ensure they are safe. This small change keeps the meal enjoyable for everyone. Enjoy your tasty sloppy joes without worry! This blog post covered all the key points for making Chicken Alfredo Sloppy Joes. You learned about the main ingredients, cooking steps, and tips for great flavor. I also shared variations and storage tips to keep your dish fresh. In my view, this fun twist on classic sloppy joes offers something new for your meal. You can easily adapt it to your taste. Enjoy creating this dish and impressing family and friends!

Chicken Alfredo Sloppy Joes Tasty and Easy Recipe

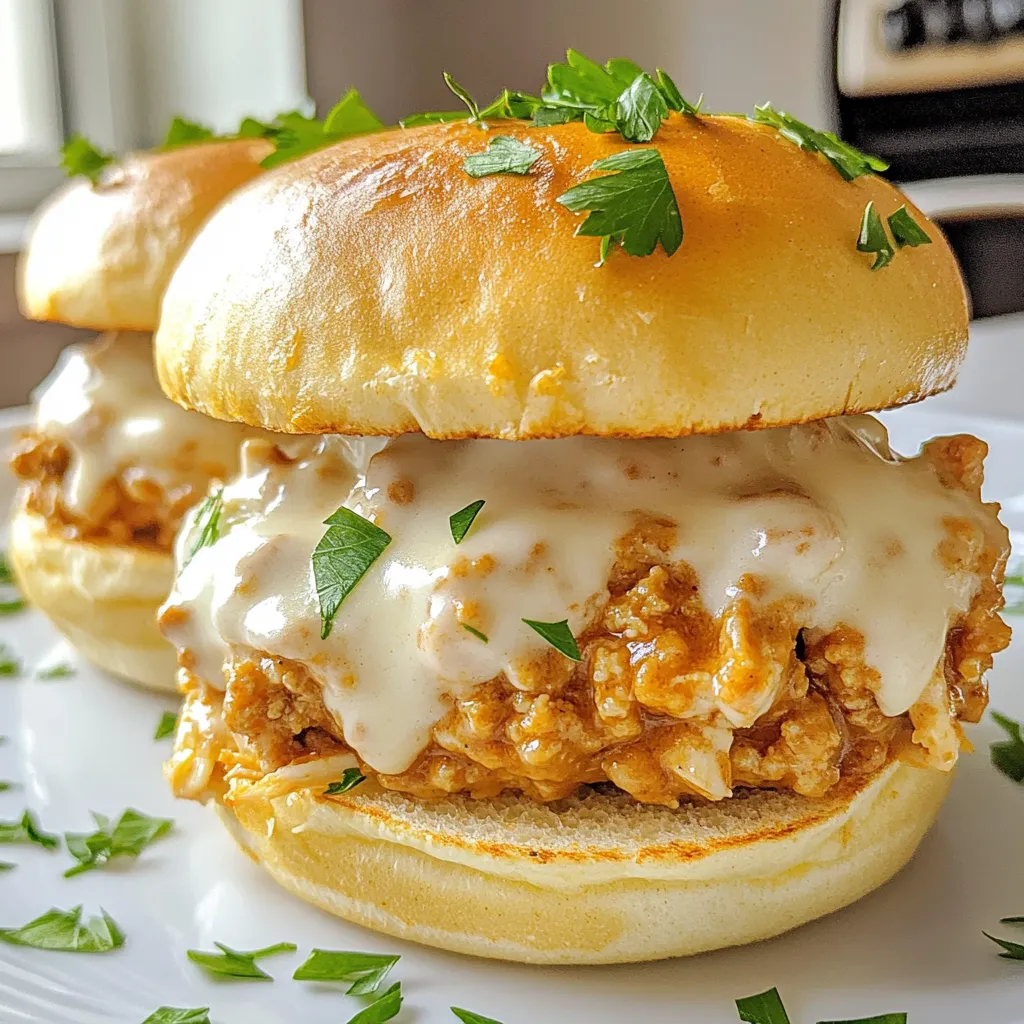
Looking for a fun twist on a classic favorite? Chicken Alfredo Sloppy Joes are here to save dinner! This recipe

To make a delicious Crispy Egg Salad, you need these ingredients: - 6 large eggs - 1/2 cup Greek yogurt - 2 tablespoons mayonnaise - 1 tablespoon Dijon mustard - 1 teaspoon fresh dill, chopped - 1/4 cup celery, finely diced - 1/4 cup red onion, finely diced - Salt and pepper to taste - 1/3 cup crispy fried onions (store-bought or homemade) - Fresh lettuce leaves for serving You can swap some ingredients to fit your taste or needs. Here are my suggestions: - Use sour cream instead of Greek yogurt for a tangy flavor. - Replace mayonnaise with extra yogurt for a lighter dish. - Try yellow mustard in place of Dijon if you want a milder taste. - If you don’t like dill, fresh parsley works well too. - Add chopped pickles for a zesty crunch instead of celery. Fresh ingredients make a big difference. They enhance the taste and texture of your salad. Here’s why: - Fresh eggs provide the best flavor and creamy texture. - Crisp celery and red onion add crunch and sweetness. - Using fresh herbs boosts the salad's aroma and taste. - Quality Greek yogurt and mayonnaise ensure creaminess without heaviness. When you use fresh ingredients, your Crispy Egg Salad will shine on any table! {{ingredient_image_1}} First, gather six large eggs and a pot. Place the eggs in the pot and cover them with water. Turn on the heat and bring the water to a boil. Let it boil for 9 to 12 minutes. After that, remove the pot from heat. Cover the pot and let the eggs sit for another 5 minutes. This step helps to ensure the yolks are cooked just right. Now, it's time to cool the eggs. Carefully transfer them to an ice bath. This helps stop the cooking process. Let them sit in the ice bath for about 5 minutes. Once they are cool, gently tap the eggs on a hard surface. Start peeling them, and chop each egg into quarter-sized pieces. In a mixing bowl, add 1/2 cup Greek yogurt, 2 tablespoons mayonnaise, and 1 tablespoon Dijon mustard. Then, add 1 teaspoon of fresh dill, chopped. Sprinkle in salt and pepper to taste. Mix everything together until it is creamy and smooth. This dressing will bring great flavor to your egg salad. Now, gently fold in the chopped eggs, 1/4 cup finely diced celery, and 1/4 cup finely diced red onion. Make sure all the pieces are well coated with the dressing. Be careful not to mash the eggs, or it will lose its nice texture. Next, fold in 1/3 cup of crispy fried onions. Save some for topping later. This is where the crunch comes in! To serve, take some fresh lettuce leaves and arrange them on a plate. Scoop the egg salad mixture onto the leaves. For a final touch, sprinkle the reserved crispy fried onions on top. This adds extra crunch and makes the dish look even more delicious. Enjoy your Crispy Egg Salad packed with flavor! To get that great crispy texture, you need to add fried onions. They give a nice crunch that makes a big difference. You can buy them or make them at home. If you want to make them, slice onions thin, coat in flour, and fry until golden. Add them last to keep them crispy. To avoid mashing the eggs, chop them gently. Use a sharp knife for clean cuts. Mix the eggs with the dressing carefully. Folding, not stirring, helps keep the eggs intact. This way, you have nice chunks of egg in your salad. You can change this egg salad to fit your taste. Add chopped pickles for tang. You can mix in diced bell peppers for color and crunch. Want some heat? Try adding diced jalapeños or a dash of hot sauce. The options are endless, so have fun! Pro Tips Perfectly Boiled Eggs: To achieve the ideal hard-boiled egg, start with room temperature eggs and an ice bath to stop the cooking process immediately after boiling. Flavor Boosting: Add a splash of lemon juice or a pinch of smoked paprika to the dressing for an extra layer of flavor in your egg salad. Texture Matters: For a delightful variation, consider adding chopped pickles or capers to enhance the crunch and tanginess of your egg salad. Serving Suggestions: Serve the egg salad on toasted bread or in a wrap for a satisfying meal, or keep it light by using lettuce leaves as a low-carb alternative. {{image_2}} Bacon adds a lovely crunch to egg salad. Use 4 slices of cooked bacon. Chop it into bits. Fold the bacon into the egg salad mix. The salty flavor pairs well with the creamy dressing. This adds a savory touch. You can serve it on toast or in a wrap. It's a great option for breakfast or lunch. Avocado brings creaminess and healthy fats. Substitute half of the Greek yogurt with ripe avocado. Mash the avocado before mixing it in. This adds a rich flavor and smooth texture. You can also add lime juice for a zesty kick. Serve it on whole grain bread or lettuce wraps. This version is perfect for a light meal. Spice lovers will enjoy this variation. Add 1-2 finely chopped jalapeños to the salad. Adjust the amount based on your spice level. The heat from the jalapeños balances the creaminess of the dressing. You can also sprinkle in some hot sauce. This adds a flavor punch that wakes up your taste buds. Serve it with tortilla chips for a fun twist. To keep your crispy egg salad fresh, store it in an airtight container. This prevents air from getting in and keeps the salad moist. Make sure to press out any extra air before sealing. If you need to store it for longer, consider dividing it into smaller portions. This way, you can grab just what you need later. Crispy egg salad lasts up to three days in the fridge. The key is to keep it cold. If you see any changes in color or smell, it's better to toss it. Always check for freshness before eating. When reheating, avoid microwaving the entire salad. This can make it mushy. Instead, heat only what you will eat. You can warm it gently on the stove or in the microwave for a few seconds. Add fresh crispy onions after reheating for that delightful crunch. The best way to boil eggs starts with a pot and water. Place the eggs in the pot and cover them with water. Bring it to a boil. Once boiling, reduce the heat and let the eggs cook for 9 to 12 minutes. After that, remove the pot from heat. Cover it and let the eggs sit for 5 more minutes. This method gives you firm eggs without the gray ring. Yes, you can make Crispy Egg Salad in advance. It tastes even better after the flavors mix. Prepare the salad and store it in an airtight container. Keep it in the fridge for up to three days. Just remember to add the crispy fried onions right before serving. It keeps the salad crunchy and fresh. You can use a variety of crunchy toppings for your egg salad. Here are some ideas: - Crispy fried onions - Chopped nuts like walnuts or almonds - Toasted breadcrumbs - Crunchy veggies like radishes or cucumber These toppings add great texture and flavor. Mix and match to find your favorite combo! Yes, Greek yogurt is a great substitute for mayonnaise. It adds creaminess and tang. Plus, it’s lower in fat and higher in protein. You can use it in equal amounts when making your egg salad. This swap makes the dish healthier without losing flavor. In this blog post, we explored the key ingredients for a tasty crispy egg salad. We looked at how to prepare and combine these fresh elements for the best flavor. I shared tips for getting the right texture, along with fun variations you can try. Always remember that quality ingredients make your dish shine. Overall, this easy recipe gives you a tasty meal that you can customize. Enjoy experimenting in your kitchen and making your own version of crispy egg salad!

Crispy Egg Salad Packed with Flavorful Crunch

Ready for a flavor-packed treat? My Crispy Egg Salad combines creamy goodness with a delightful crunch. This simple recipe uses

To make this dish, you need some key ingredients: - 8 oz (225 g) fettuccine or your preferred pasta - 1 lb (450 g) ground beef - 3 cloves garlic, minced - 1 cup cherry tomatoes, halved - 1 cup baby spinach - 1 cup heavy cream - 1/2 cup grated Parmesan cheese - 1/3 cup sun-dried tomatoes, chopped - 1 teaspoon Italian seasoning - 1 tablespoon olive oil - Salt and pepper to taste - Fresh basil leaves for garnish These ingredients bring rich flavors and textures to the dish. The ground beef provides protein, while the heavy cream adds a smooth texture. Garlic and Italian seasoning give it a nice aroma and taste. You can add some optional ingredients to take your dish up a notch: - Red pepper flakes for some heat - Mushrooms for an earthy flavor - Peas for a pop of color and sweetness These additions can change the flavor profile. They let you customize the dish based on your taste. If you cannot find some ingredients, don’t worry! Here are some good substitutions: - Use penne or rigatoni pasta instead of fettuccine. - Swap ground beef for ground turkey or chicken for a lighter dish. - Use half-and-half instead of heavy cream for a lower-fat option. These substitutions can keep your meal exciting while ensuring you still get a tasty result! {{ingredient_image_1}} Start by filling a large pot with water. Make sure to add salt, which adds flavor. Bring the water to a rolling boil. Once boiling, add 8 oz of fettuccine or your favorite pasta. Cook it according to the package directions until it is al dente. This usually takes about 8-10 minutes. When the pasta is ready, save 1/2 cup of the pasta water. Drain the rest and set the pasta aside. Next, grab a large skillet and heat 1 tablespoon of olive oil over medium heat. Once the oil is hot, add 1 lb of ground beef. Sprinkle it with salt and pepper. Cook the beef, breaking it apart with a spatula. This should take about 5-7 minutes until the beef is browned. Browning the beef gives it a deep, rich flavor that makes this dish special. Now, it's time to make the sauce. Stir in 3 cloves of minced garlic. Cook for 1-2 minutes until you smell the garlic. Then, add 1 cup of cherry tomatoes and 1/3 cup of chopped sun-dried tomatoes. Let these cook for about 3-4 minutes until they soften. Pour in 1 cup of heavy cream and stir to mix everything well. Let the sauce simmer for about 5 minutes. Add in 1 teaspoon of Italian seasoning and 1/2 cup of grated Parmesan cheese. Stir until the cheese melts, making it creamy and smooth. To get the sauce just right, start with heavy cream. This gives a rich base. If the sauce seems too thick, add some reserved pasta water. Gradually stir it in until you reach your desired consistency. You want a creamy, smooth sauce that clings to the pasta. Season your beef well with salt and pepper as it cooks. This builds a great flavor base. After adding the cream, taste the sauce. You may want more salt or pepper. Don’t forget to mix in Italian seasoning for that extra kick. Fresh basil at the end adds a nice touch. To save time, prep your ingredients first. Chop garlic and tomatoes before you start cooking. Use a large pot for the pasta. This allows the pasta to move freely. Cook the beef while the pasta boils. This way, you finish the meal in about 30 minutes. Happy cooking! Pro Tips Choose Your Pasta Wisely: Fettuccine is an excellent choice for this dish, but feel free to use any pasta shape you love. Just ensure it can hold onto the creamy sauce well! Don't Skimp on Seasoning: Season each layer of the dish—beef, sauce, and pasta—separately to build flavor. A well-seasoned dish will elevate your meal significantly. Use Fresh Ingredients: Whenever possible, opt for fresh garlic, spinach, and basil. Fresh ingredients can drastically enhance the overall flavor and presentation of your dish. Perfect Your Sauce Consistency: If your sauce seems too thick, gradually add the reserved pasta water. This helps achieve a silky texture without compromising flavor. {{image_2}} You can make a tasty meatless version of this dish. Swap the ground beef for plant-based ground meat. You could also use cooked lentils or chickpeas for protein. The flavors will still shine through. Add extra veggies like mushrooms, zucchini, or bell peppers to keep it hearty. While fettuccine is a classic choice, feel free to get creative. Use penne, rotini, or even gluten-free pasta. Each type brings its own texture and shape. This can affect how the sauce clings to the pasta. Just make sure to cook it according to the package instructions. Enhance the flavor with extra spices. Try adding red pepper flakes for heat. A pinch of smoked paprika can add depth. Fresh herbs like thyme or oregano bring brightness. Experiment with different spices to find your favorite combo. Each addition makes this dish uniquely yours. After enjoying your creamy Tuscan beef pasta, you may have leftovers. To store them, let the pasta cool down first. Then, place it in an airtight container. This helps keep it fresh and tasty. Store it in the fridge for up to three days. If you notice any signs of spoilage, like an off smell or strange color, toss it out. When you’re ready to enjoy your leftovers, reheating is key. You want to keep the creaminess intact. The best way to reheat creamy Tuscan beef pasta is on the stove. Use low heat and add a splash of water or extra cream. Stir frequently until it’s warm. This method helps prevent sticking and keeps the dish creamy. Avoid using the microwave if possible, as it may dry out the pasta. If you have more than a few servings left, consider freezing it. First, let the pasta cool completely. Then, pack it in freezer-safe bags or containers. Remove as much air as possible to prevent freezer burn. You can freeze it for up to three months. When you’re ready to eat it, thaw it in the fridge overnight. Reheat it on the stove with a bit of water or cream to restore its creamy texture. You can serve Creamy Tuscan Beef Pasta with a simple side salad. A green salad with mixed greens pairs well. Garlic bread is a great choice too. It helps to soak up the creamy sauce. You might also enjoy some roasted vegetables. They add color and nutrition to your meal. For a refreshing drink, try a light white wine or sparkling water. To make this dish gluten-free, swap regular pasta for gluten-free pasta. Many brands offer gluten-free fettuccine. Check the package to cook it properly, as cooking times may vary. You can also ensure that all other ingredients are gluten-free. Check the labels on heavy cream and Parmesan cheese. This way, you can enjoy the same creamy taste without the gluten. Yes, you can use other meats if you prefer. Ground turkey or chicken work well in this dish. They will give a lighter flavor. You can also try diced pork for a different taste. If you want a meatless option, use mushrooms or lentils instead. Both add great texture and flavor. Just adjust the cooking time to ensure everything is cooked well. You learned about making creamy Tuscan beef pasta from scratch. We covered the key ingredients and how to cook the pasta just right. I shared tips to enhance flavor and ways to store your meal. Always remember, cooking should be fun and tasty. Don’t be afraid to try new flavors or ingredients. Enjoy the process and share your dish with others!

Creamy Tuscan Beef Pasta Delightful Weeknight Meal

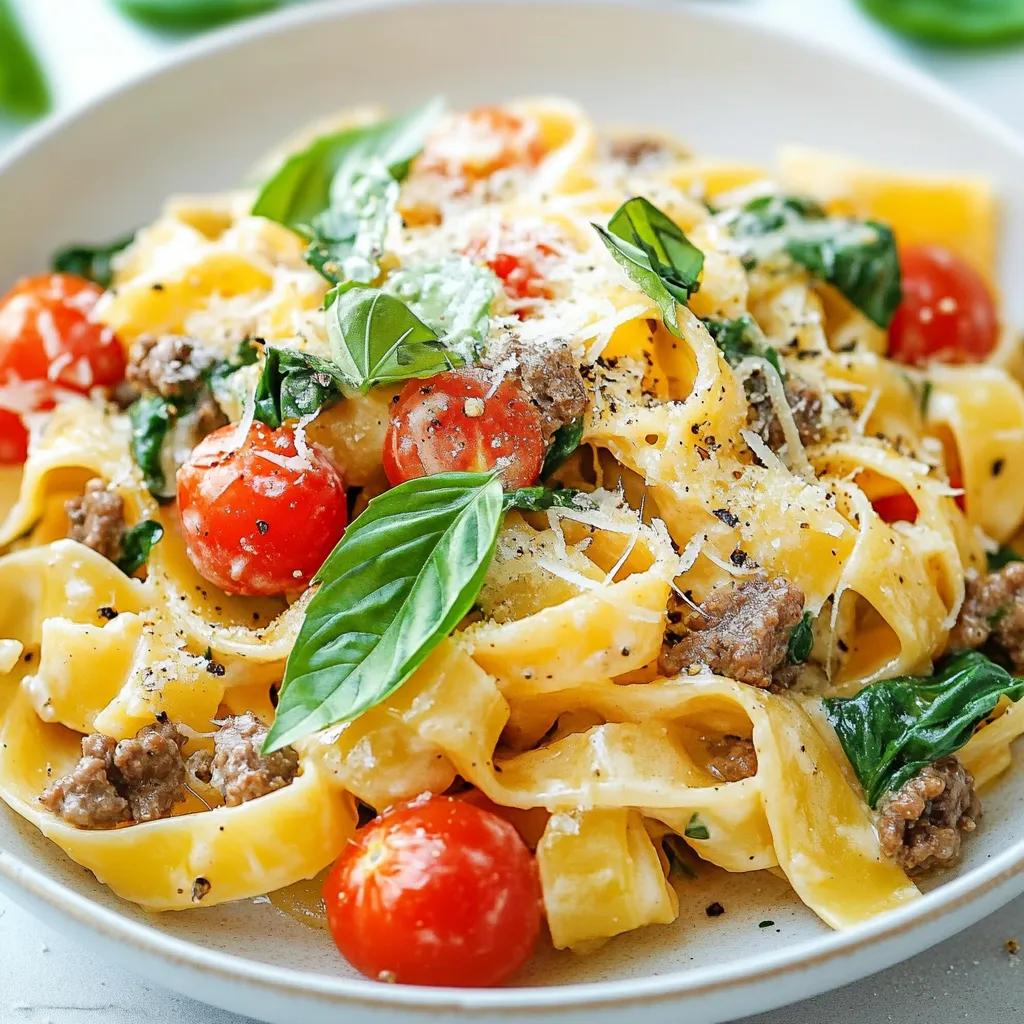
Are you tired of the same old weeknight dinners? Let me introduce you to Creamy Tuscan Beef Pasta! This delightful

- 1 lb ground beef - 1 cup uncooked long-grain rice - 2 cups beef broth - 1 cup shredded cheddar cheese - 1 cup frozen mixed vegetables (carrots, peas, corn) - 1 medium onion, chopped - 2 cloves garlic, minced - 1 tablespoon Worcestershire sauce - 1 teaspoon paprika - Salt and pepper to taste - 2 tablespoons olive oil - Optional: Fresh parsley for garnish To make Cheesy Hamburger Rice Casserole, gather your ingredients first. You need ground beef for flavor and protein. The uncooked long-grain rice will absorb the juices while cooking. Beef broth adds depth to the dish. Cheddar cheese makes it gooey and rich, while the mixed vegetables add color and nutrients. Chopped onion and minced garlic bring great aroma and taste. Worcestershire sauce enhances the flavor profile. Paprika gives a nice hint of smokiness. Finally, have salt and pepper ready to season your dish. Olive oil is key for sautéing. If you like, add fresh parsley on top for a pop of color. - Large skillet - Mixing bowl - 9x13 inch baking dish - Aluminum foil Having the right tools makes cooking easier. A large skillet is perfect for browning the beef and softening the onion. Use a mixing bowl to combine your rice, broth, and other ingredients. The 9x13 inch baking dish holds everything for baking. Aluminum foil is important for covering the dish, keeping moisture in. With these tools, you're ready to create a comforting meal that everyone will enjoy. {{ingredient_image_1}} 1. Preheat your oven to 350°F (175°C). 2. Gather your ingredients. You will need ground beef, rice, beef broth, cheese, veggies, onion, garlic, Worcestershire sauce, paprika, salt, and pepper. 3. In a large skillet, heat 2 tablespoons of olive oil over medium heat. 4. Add the chopped onion and minced garlic. Sauté for 3-4 minutes until they soften. 1. Increase the heat to medium-high. 2. Add 1 pound of ground beef to the skillet. Cook until browned, breaking it apart. This takes about 5-7 minutes. 3. Drain any excess grease from the beef. Stir in 1 tablespoon of Worcestershire sauce, 1 teaspoon of paprika, and season with salt and pepper. Mix well and remove from heat. 4. In a large mixing bowl, combine 1 cup of uncooked rice and 2 cups of beef broth. 5. Stir in 1 cup of frozen mixed vegetables and the cooked beef mixture. Mix until everything is fully combined. 1. Pour the mixture into a greased 9x13 inch baking dish. 2. Cover the dish tightly with aluminum foil. 3. Bake in the preheated oven for 30 minutes. 4. After 30 minutes, remove the foil and sprinkle 1 cup of shredded cheddar cheese evenly on top. 5. Return to the oven, uncovered, and bake for an additional 10-15 minutes. You want the cheese to be bubbly and slightly golden. 6. Once done, take it out of the oven and let it sit for a few minutes before serving. This dish is warm and filling, perfect for family dinners or cozy nights in. To get perfect rice in your casserole, use long-grain rice. It cooks well and stays fluffy. Make sure to measure the rice and broth correctly. The right ratio helps the rice absorb all the flavors. To adjust the seasoning for your taste, start with the basic salt and pepper. You can add more Worcestershire sauce for depth. If you enjoy heat, a pinch of cayenne or chili powder works great. Always taste before serving! Pair your casserole with a fresh side salad. A simple green salad adds crunch and freshness. You can also serve it with garlic bread for a heartier meal. Garnishing with fresh parsley gives your dish a nice pop of color. It also adds a hint of freshness that brightens the flavors. Just chop it finely and sprinkle it on top before serving. If your rice is undercooked, don’t worry! You can add a splash of broth or water and cover it. Return it to the oven for another 10 minutes. This helps the rice finish cooking properly. For excess grease, drain the beef after browning it. This step removes most of the fat. If you find it greasy after baking, use a spoon to skim off the extra fat before serving. Pro Tips Use Lean Ground Beef: Opt for lean ground beef to reduce excess grease and keep the casserole lighter without sacrificing flavor. Flavor Boost: Consider adding your favorite spices or herbs, such as Italian seasoning or crushed red pepper, to elevate the flavor profile of the dish. Cheese Variations: Experiment with different types of cheese such as Monterey Jack or Pepper Jack for a unique twist on the classic cheddar topping. Rest Before Serving: Allow the casserole to sit for a few minutes after baking. This helps the flavors meld together and makes serving easier. {{image_2}} You can swap out ground beef for other meats. Try ground turkey, chicken, or pork. Each option brings a new taste. If you want a meatless meal, use lentils or mushrooms for texture. Cheese is key in this dish. While cheddar is a classic, you can use mozzarella or pepper jack for a kick. Experiment with different cheeses to find your favorite mix. To make the dish gluten-free, use a gluten-free rice or broth. Many brands offer these options. Check labels to ensure they meet your needs. For a vegetarian version, skip the meat. Use extra vegetables like bell peppers or zucchini. Add plant-based cheese for creaminess. This way, everyone can enjoy the meal. Spices and herbs can change the flavor. Try adding cumin or chili powder for warmth. Fresh herbs like basil or parsley can brighten the taste. You can also add more veggies. Consider spinach, broccoli, or bell peppers. They add color and nutrition. Just chop them small so they blend well in the casserole. Store your Cheesy Hamburger Rice Casserole in an airtight container. This keeps it fresh and tasty. Make sure to cool it down before putting it in the fridge. If you want to freeze it, use a freezer-safe container. This helps prevent freezer burn. You can also wrap it tightly in plastic wrap or foil. For best results, eat refrigerated leftovers within three to four days. To reheat, you have two great options. For the oven, preheat to 350°F (175°C). Place the casserole in a baking dish and cover it with foil. Bake for about 20 minutes or until hot throughout. For the microwave, put a single serving on a microwave-safe plate. Heat on high for 2-3 minutes. Stir halfway for even heating. Make sure it's hot before serving. In the fridge, the casserole lasts about three to four days. If you freeze it, it can last up to three months. Just make sure to label your container with the date. This helps you keep track of how long it's been stored. Can I make Cheesy Hamburger Rice Casserole ahead of time? Yes, you can prepare it in advance. Just cook everything, then cover and chill it. When ready to serve, bake it directly from the fridge. You may need to increase the baking time a bit. How do I prevent the rice from getting mushy? To keep the rice firm, use long-grain rice. Make sure to measure the beef broth correctly. Avoid overcooking the casserole in the oven. Cover it only for part of the baking to allow steam to escape. Calories and macronutrient breakdown per serving This casserole has about 400 calories per serving. It includes around 20 grams of protein and 30 grams of carbs. The cheese adds healthy fats too, making it a balanced meal. Healthier ingredient options You can use lean ground turkey instead of beef for fewer calories. Swap white rice for brown rice for added fiber. Choose low-fat cheese to cut back on fat without losing flavor. Scaling the recipe up or down To serve more people, just double the ingredients. If you need less, cut everything in half. The cooking time will stay about the same, but check for doneness. Cooking times for larger batches For larger casseroles, increase the baking time by 10-15 minutes. Always check the rice for doneness. If it’s not done, cover it and bake a little longer. This blog post covered a delicious and easy Cheesy Hamburger Rice Casserole. We shared the ingredients, tools, and step-by-step instructions to make it. Helpful tips ensured your dish comes out just right. Also, we discussed variations to suit different diets and preferences. Finally, storing and reheating tips help you enjoy leftovers later. Cooking should be fun and rewarding. With this recipe, you can share a meal everyone will love. Enjoy your cooking!

Cheesy Hamburger Rice Casserole Tasty Comfort Meal

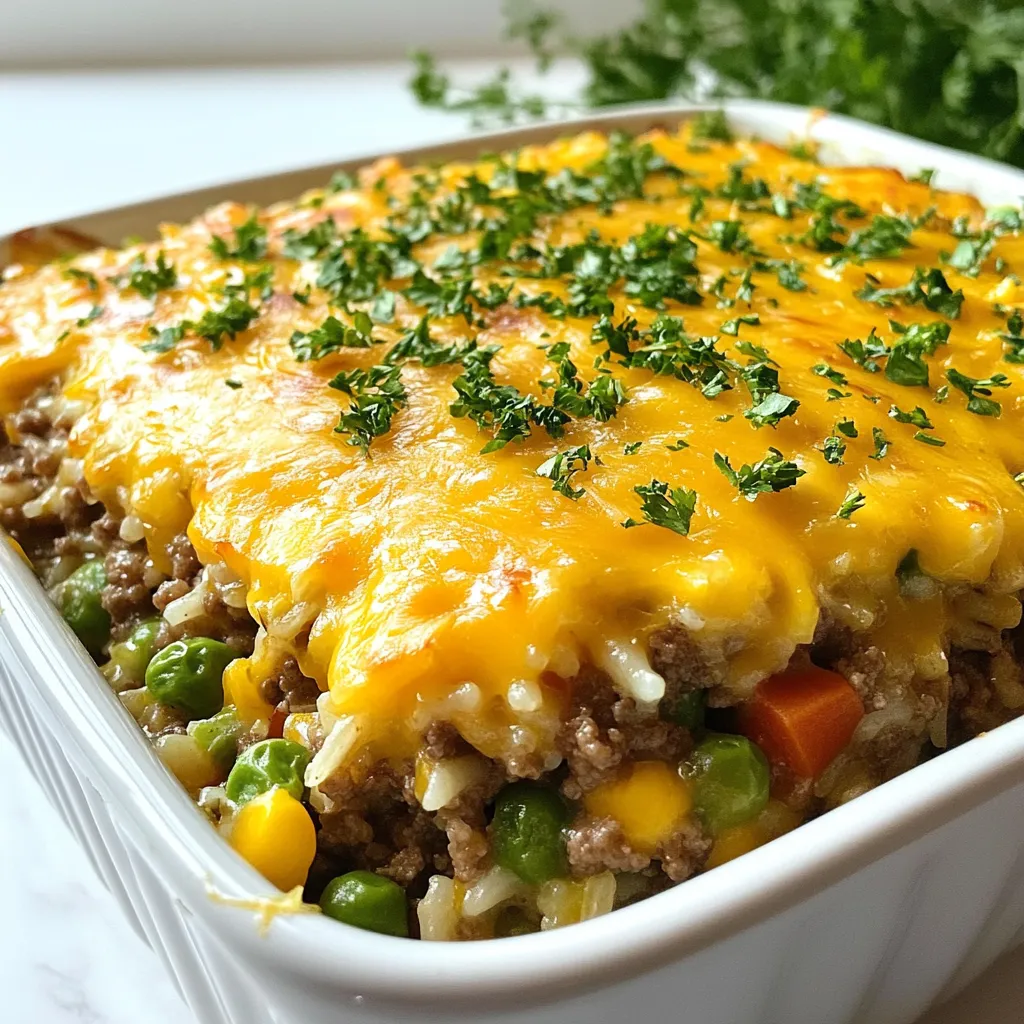
Are you in search of the perfect comfort meal? Look no further! My Cheesy Hamburger Rice Casserole is a one-pan

To make Garlic Butter Chicken Pasta, you need these key ingredients: - 8 oz fettuccine or spaghetti - 2 cups chicken breast, diced - 4 tablespoons unsalted butter - 6 cloves garlic, minced - 1 cup cherry tomatoes, halved - 1 cup spinach leaves, packed - Salt and pepper to taste - 1/4 cup grated Parmesan cheese - Fresh basil leaves for garnish These ingredients come together to create a rich and tasty dish. The butter and garlic give a deep flavor. The chicken adds protein, while the tomatoes and spinach bring freshness. You can add some fun twists to this recipe with optional ingredients: - 1/2 teaspoon red pepper flakes (adds heat) - Lemon zest or juice (for brightness) - Extra vegetables like bell peppers or zucchini - Fresh herbs like parsley or thyme Feel free to mix and match. These additions can make the dish your own. To cook this meal, you'll need these tools: - A large pot for boiling pasta - A skillet for cooking the chicken and sauce - A colander for draining pasta - A knife and cutting board for chopping - Measuring cups for precise amounts Having the right tools makes cooking easier and more fun. With these items, you can whip up this dish in no time! {{ingredient_image_1}} Start by boiling a large pot of salted water. This adds flavor to the pasta. Add 8 oz of fettuccine or spaghetti. Cook it according to the package until it is al dente. This usually takes about 8 to 10 minutes. Save 1/2 cup of the pasta water before draining. This water helps to bind the sauce later. Drain the pasta and set it aside. In a large skillet, heat 2 tablespoons of unsalted butter over medium heat. Once the butter melts, add 2 cups of diced chicken breast. Season the chicken with salt and pepper. Cook it for 6 to 8 minutes. You want the chicken to turn golden brown and be fully cooked. After this, remove the chicken from the skillet and set it aside. In the same skillet, add the remaining 2 tablespoons of butter. When it melts, add 6 cloves of minced garlic. Sauté the garlic for about 1 minute until it smells great. Next, toss in 1 cup of halved cherry tomatoes. Cook them for 2 to 3 minutes until they start to burst. Add 1 cup of packed spinach leaves and, if you like heat, 1/2 teaspoon of red pepper flakes. Cook until the spinach wilts. Then, return the chicken to the skillet. Toss everything together. Add the drained pasta and a splash of the reserved pasta water. Mix gently. Stir in 1/4 cup of grated Parmesan cheese. Adjust the taste with more salt or pepper if needed. If it seems dry, add more pasta water. Serve hot, garnished with fresh basil leaves and extra cheese if you want. To cook pasta, start with a large pot. Fill it with water and add salt. Bring the water to a boil before adding the pasta. Stir the pasta to prevent sticking. Cook it until it is al dente, which means firm to the bite. This usually takes about 8 to 10 minutes for fettuccine or spaghetti. Reserve some pasta water before draining. This starchy water helps bind the sauce later. For juicy chicken, start with diced chicken breast. Season it with salt and pepper. Heat a skillet over medium heat and add butter. Cook the chicken for about 6 to 8 minutes. It should be golden brown and fully cooked. Avoid overcrowding the pan, as this can lead to steaming instead of browning. Use a meat thermometer if you want to be sure; chicken should reach 165°F. Garlic and butter bring great taste to this dish. Use fresh garlic for the best flavor. Mince 6 cloves and add them to the melted butter in the skillet. Sauté the garlic for about a minute until it’s fragrant. Then, add cherry tomatoes to bring sweetness and acidity. Finally, toss in fresh spinach for color and nutrients. This mix creates a rich, savory base for the pasta. Pro Tips Use Fresh Garlic: Freshly minced garlic adds a vibrant flavor that jarred garlic cannot match. Always opt for fresh for the best taste. Perfectly Cook the Pasta: Make sure to cook your pasta al dente. It will continue to cook slightly when combined with the sauce, ensuring the perfect texture. Add Pasta Water Gradually: When mixing the pasta with the sauce, add reserved pasta water a little at a time until you reach your desired creaminess. Customize Your Greens: Feel free to substitute spinach with other greens like kale or arugula for a different flavor profile and added nutrition. {{image_2}} You can switch up the chicken for shrimp or sausage. This change adds new taste. Use different herbs like thyme or oregano for a fresh twist. You can also try sun-dried tomatoes instead of fresh ones. They bring a rich, tangy flavor to the dish. For a creamy touch, add a splash of cream or a dollop of cream cheese. This makes the sauce richer and smoother. While fettuccine or spaghetti works great, you can try penne or farfalle. These shapes hold sauce well, making every bite tasty. Zucchini noodles are a fun choice too. They are low in carbs and add a nice crunch. If you want gluten-free options, use brown rice pasta or quinoa pasta. These alternatives offer new textures and flavors. To make this dish vegetarian, replace chicken with mushrooms or tofu. Both options soak up flavor well. Skip the cheese or use a vegan cheese substitute for a dairy-free meal. You can also add more veggies like bell peppers or asparagus. This adds color and nutrition to your pasta. Use vegetable broth in place of butter for a vegan-friendly sauce. This keeps the dish light and healthy. To keep your garlic butter chicken pasta fresh, place it in an airtight container. Make sure to cool it to room temperature before sealing. This helps prevent condensation, which can make the pasta soggy. Store it in the fridge for up to three days. If you want to enjoy it later, consider freezing it. When you're ready to eat your leftovers, there are a couple of easy ways to reheat them. You can use the microwave or the stovetop. If using the microwave, place the pasta in a bowl and cover it with a damp paper towel. Heat it in short bursts, stirring in between, until it's hot. For stovetop, add a splash of water in a pan and heat over medium. Stir until warmed through. If you plan to keep garlic butter chicken pasta for a long time, freezing is best. Portion it into freezer-safe bags or containers. Remove as much air as possible before sealing. Label each container with the date. This way, you can enjoy it for up to three months. When ready to eat, thaw in the fridge overnight before reheating. Yes, you can use any pasta shape. Fettuccine and spaghetti work best. You can try penne, rigatoni, or even gluten-free pasta. Just follow the cooking time on the package. Make sure to cook it until al dente. This ensures the pasta holds its shape and texture. You can use shrimp, turkey, or tofu. For a vegetarian option, try chickpeas or mushrooms. These options provide great flavor. Cook them the same way as the chicken. Just adjust the cooking time as needed. Shrimp cooks fast, while tofu needs a bit more time. Add red pepper flakes for heat. You can start with 1/2 teaspoon. If you like it hotter, add more. You can also use diced jalapeños or hot sauce. Mix them in with the garlic. Taste as you go to find your perfect spice level. Yes, you can prep some parts ahead. Cook the pasta and chicken earlier. Store them in separate containers in the fridge. When you’re ready, mix everything in a skillet. Heat it gently and add fresh ingredients like spinach. This keeps the dish tasty and fresh. This article covered how to make garlic butter chicken pasta, from ingredients to storage. We discussed the must-have items, optional additions, and tools you'll need. I shared step-by-step cooking instructions and tips to boost your flavors. You learned variations to fit your taste and how to store leftovers. Cooking is fun and easy with the right recipe. Try this dish, and you’ll enjoy delicious meals while impressing your family.

Garlic Butter Chicken Pasta Flavorful and Easy Meal

Are you looking for a quick meal that’s packed with flavor? Look no further! Garlic Butter Chicken Pasta is not

Newer posts
← Previous Page1 … Page163 Page164

dsad

© 2026 easycookingbite • Built with GeneratePress

Our Policies

  • Copyright Policy
  • Cookie Policy
  • GDPR Policy
  • Privacy Policy
  • Disclaimer
  • Terms Of Use

More Information

  • Home
  • About
  • Contact
  • Appetizers
  • Dessert
  • Dinner
  • Drinks
©2026, easycookingbite About Back To Top