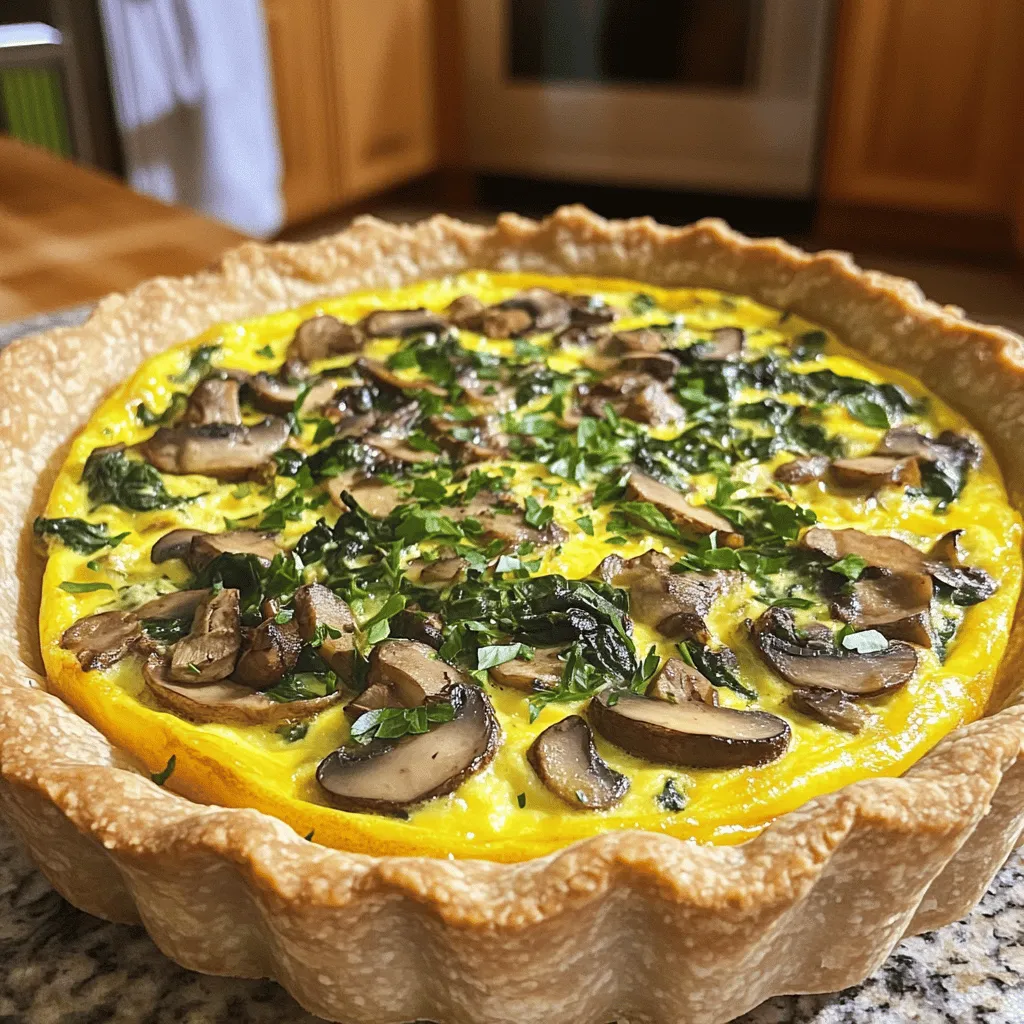
Mushroom Spinach Quiche Savory and Simple Recipe
Are you ready to impress your taste buds with a delicious Mushroom Spinach Quiche? This savory and simple recipe is
Are you ready to impress your taste buds with a delicious Mushroom Spinach Quiche? This savory and simple recipe is
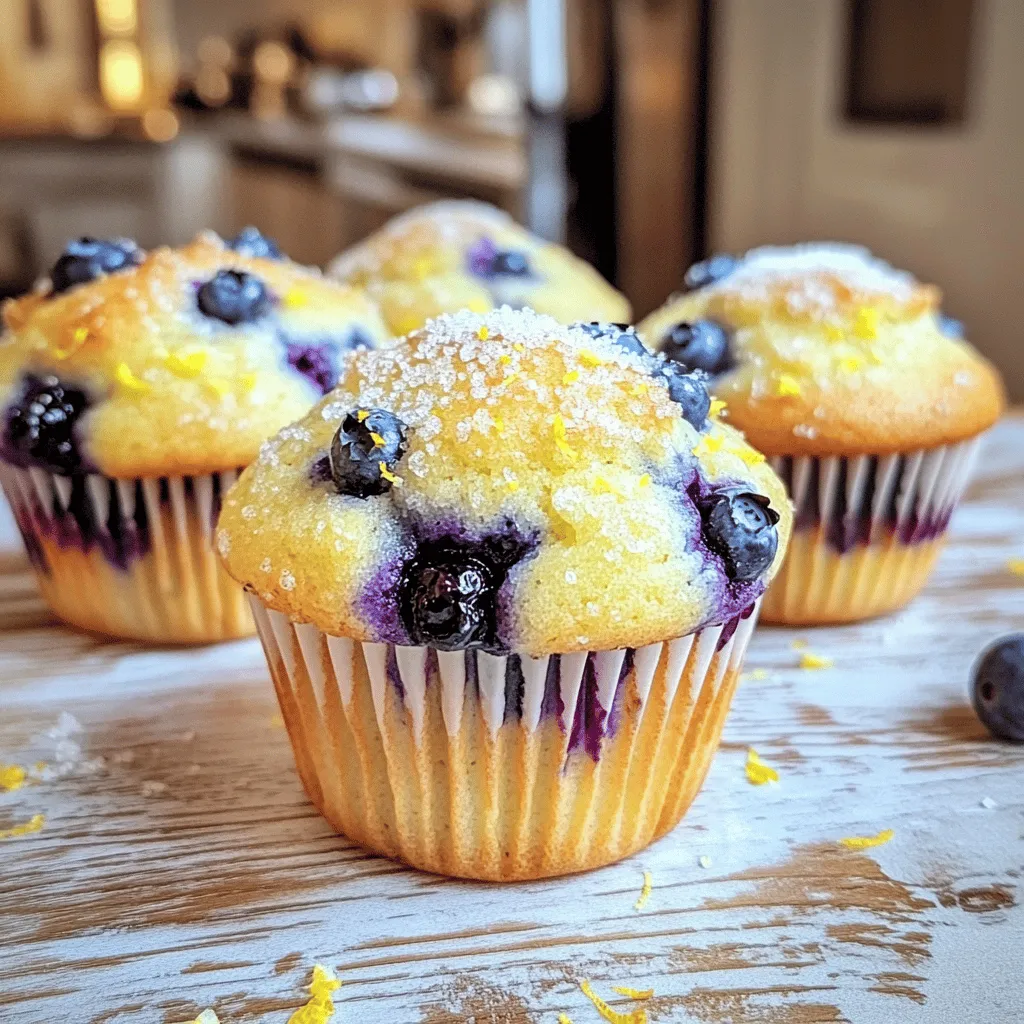
Do you crave a warm, sweet treat that reminds you of your favorite bakery? These Bakery Style Blueberry Lemon Muffins
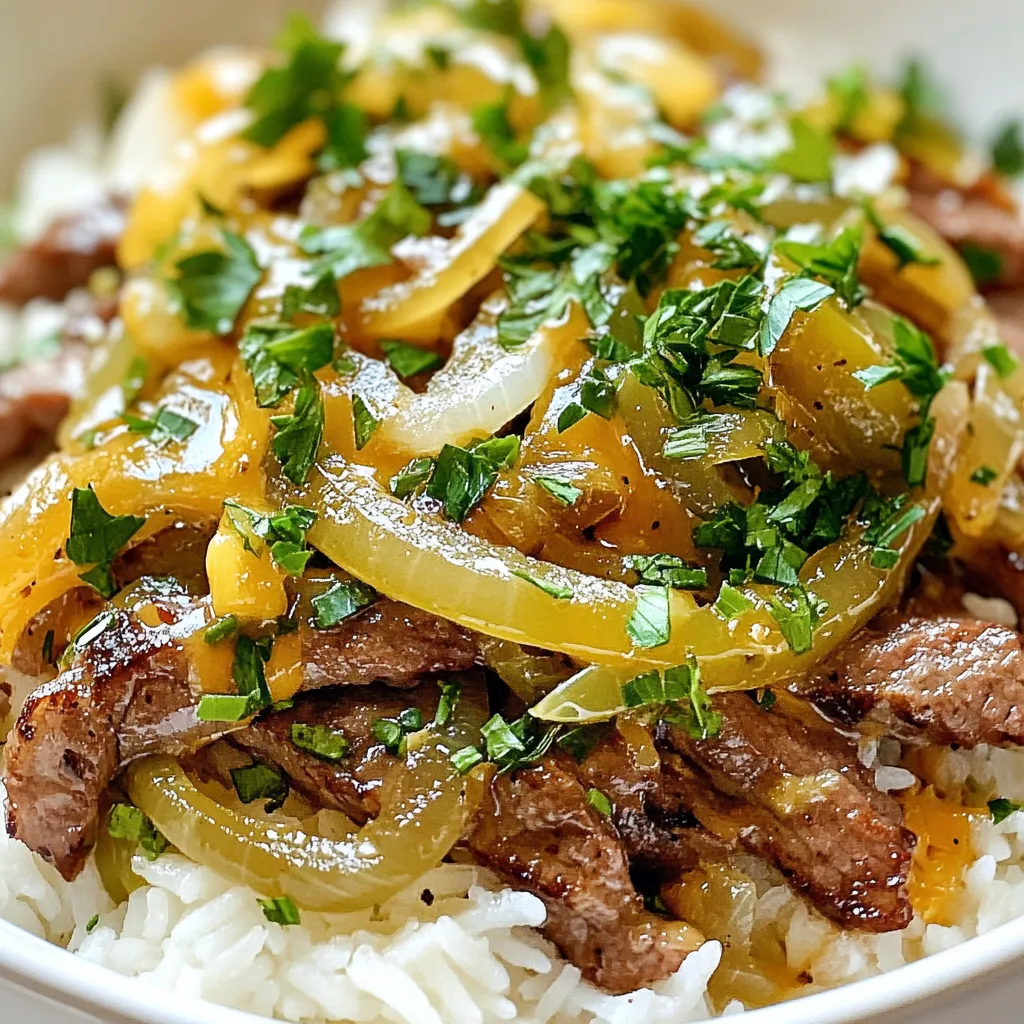
Craving a hearty meal that packs a punch? Look no further! These Philly Cheesesteak Rice Bowls combine tender ribeye steak

If you’re craving a dish that’s both bold and easy to make, look no further! Buffalo Chicken Stuffed Peppers bring
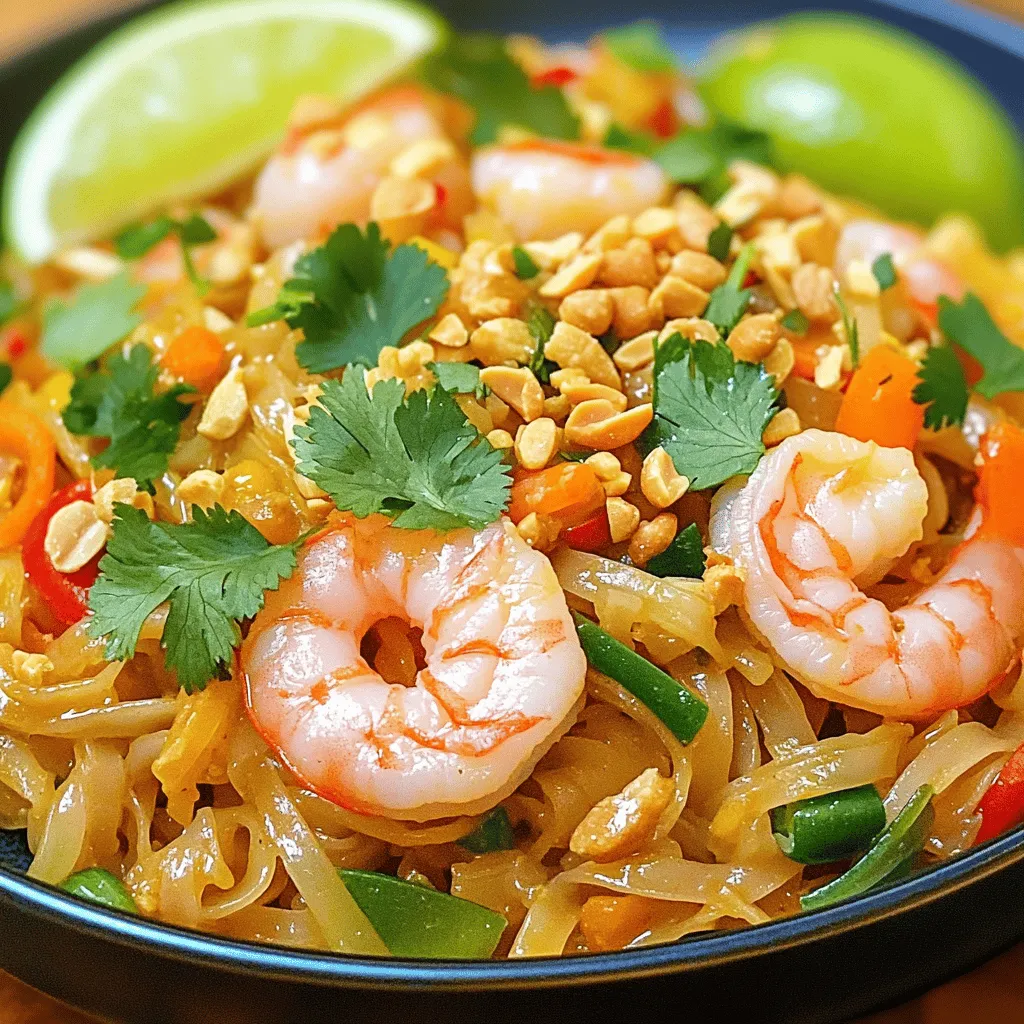
Craving a quick and tasty meal? My Min Shrimp Pad Thai brings bold flavors to your table in no time!
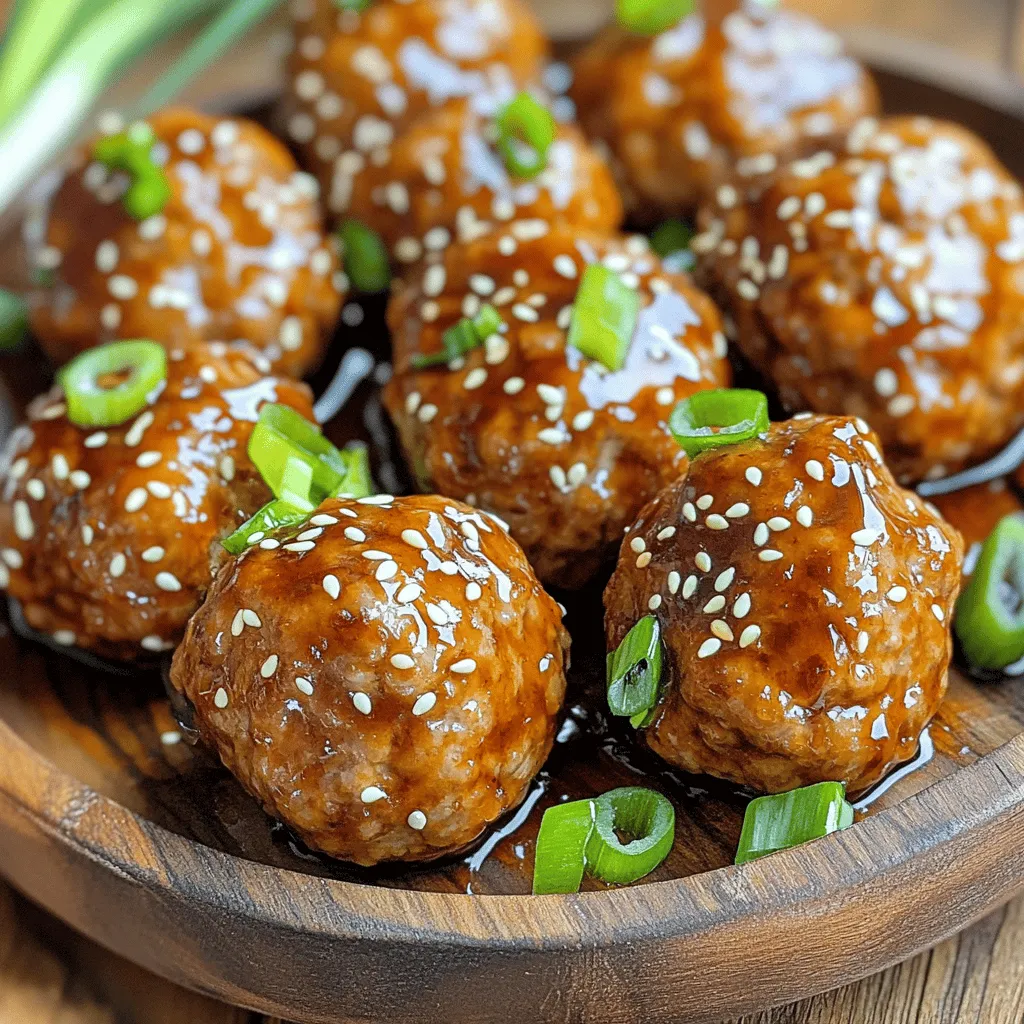
Craving a tasty dinner that’s easy enough to whip up on a busy night? You’ll love these Air Fryer Teriyaki
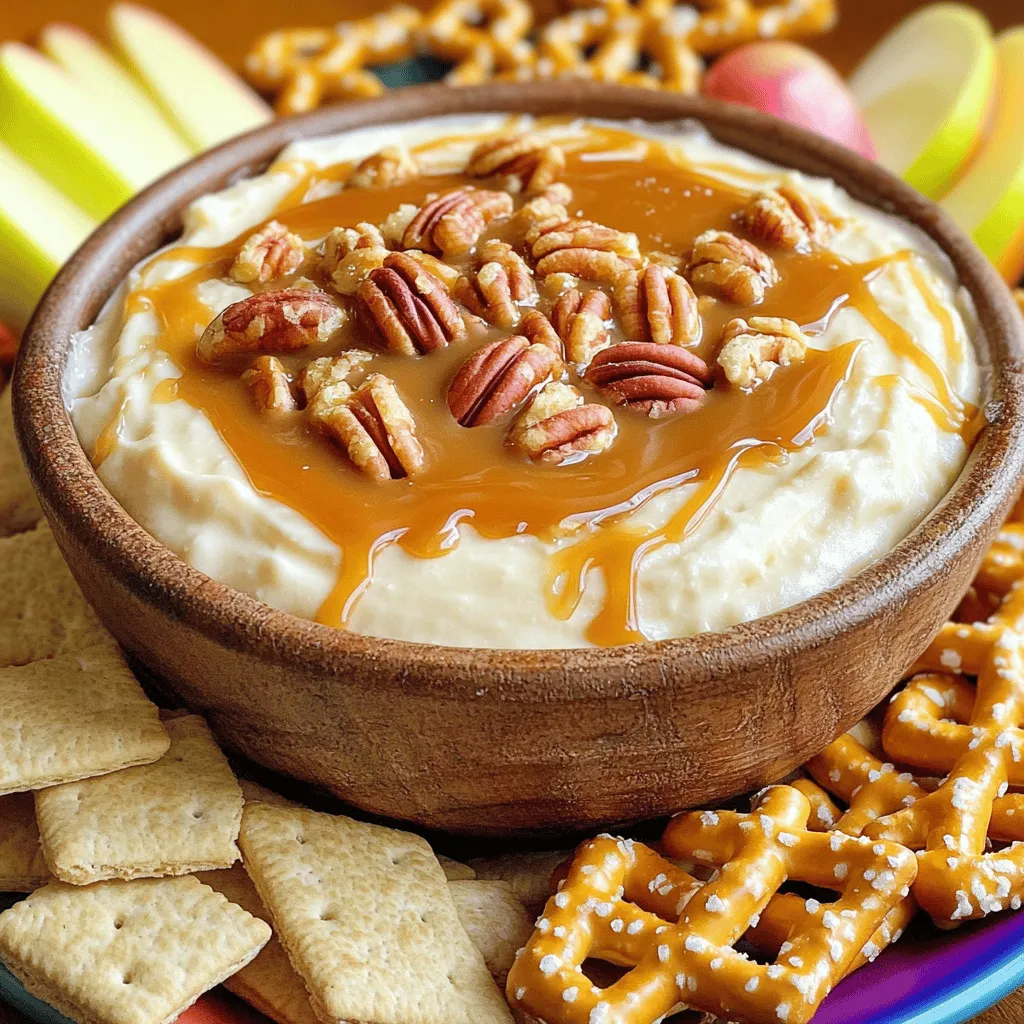
Looking for a sweet treat that’s easy to make? You’ve come to the right place! This Caramel Pecan Cheesecake Dip
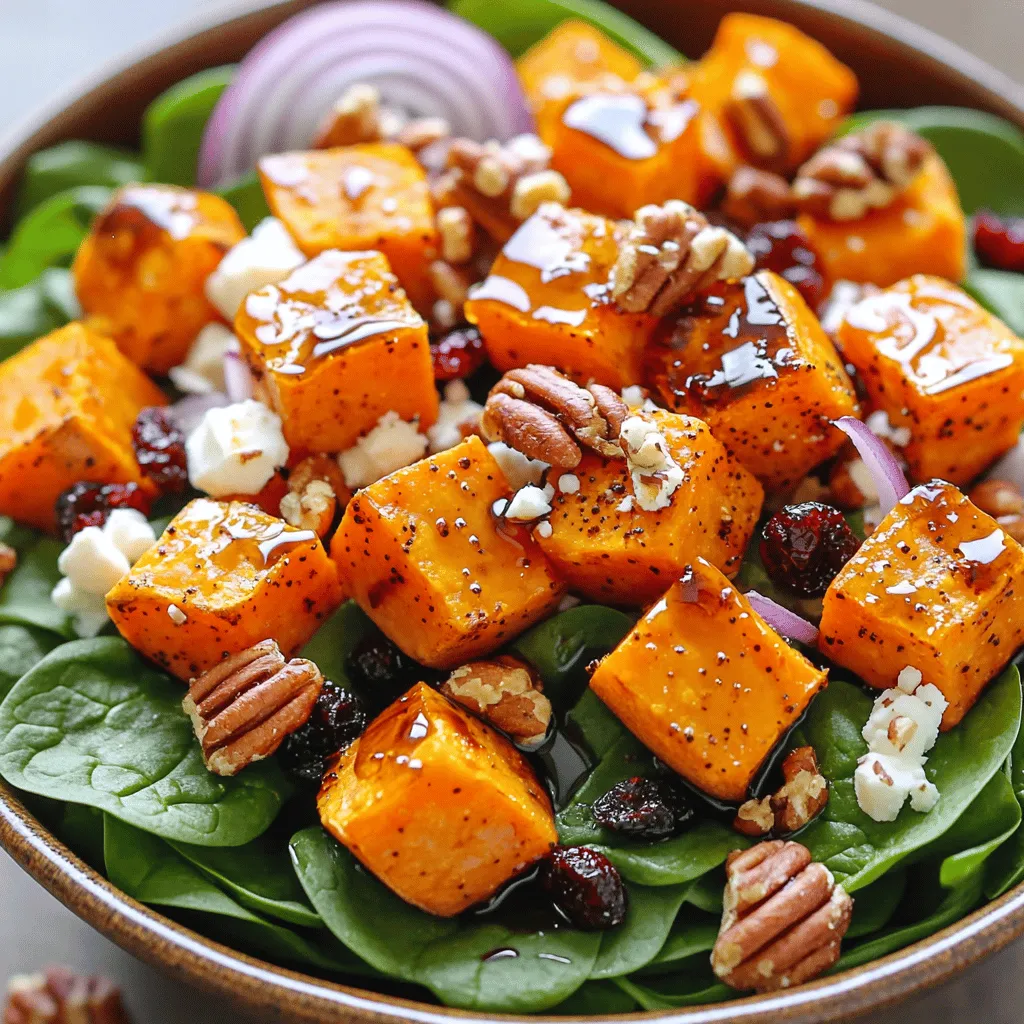
Looking for a refreshing and flavorful dish that’s perfect for any occasion? Dive into this Maple Roasted Sweet Potato Salad!

Looking for a quick and tasty breakfast? You’ll love these Avocado Egg Breakfast Quesadillas! They are simple to make, packed

Looking for a tasty addition to your meals? Try my Jalapeño Cheddar Cornbread Muffins! These muffins pack a punch with
