Spicy Peanut Noodles with Veggies Quick and Easy Meal
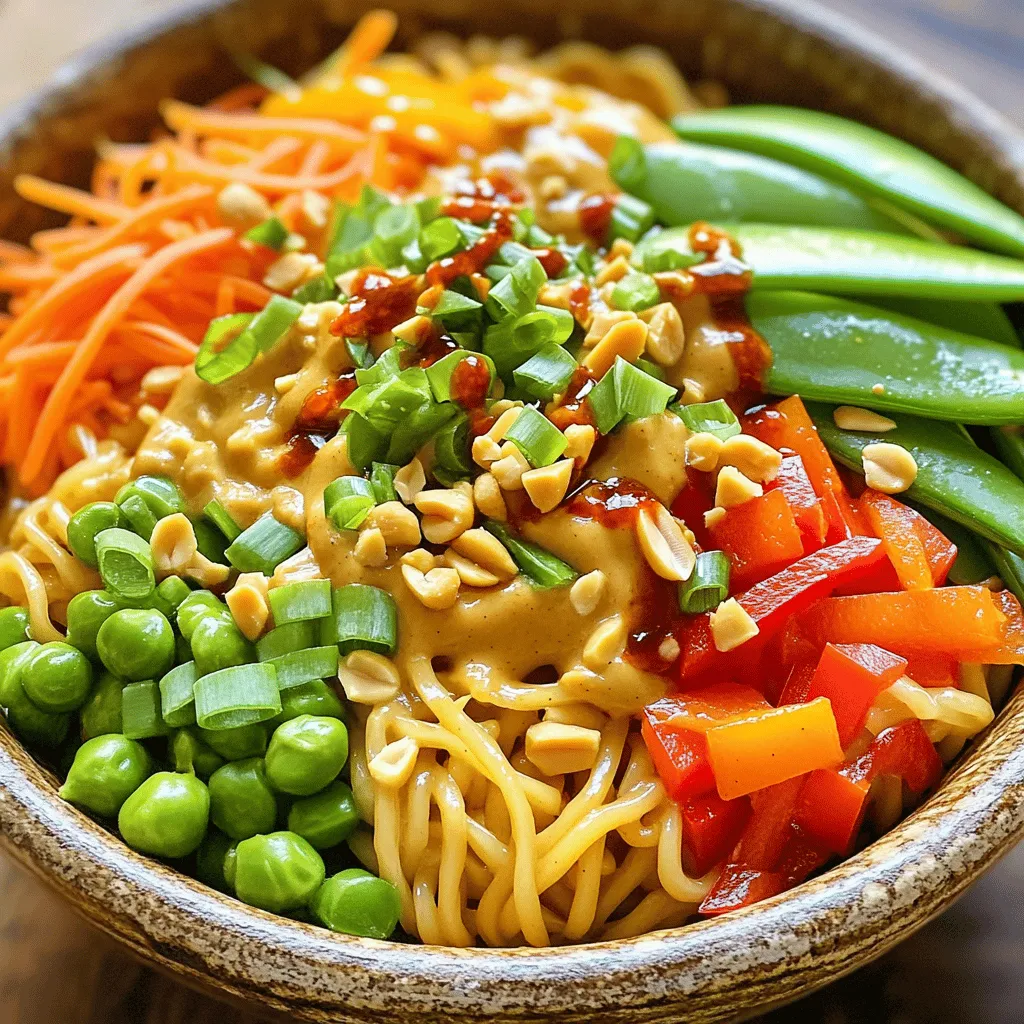
Looking for a quick, tasty meal? Try my Spicy Peanut Noodles with Veggies! This dish combines soft rice noodles, fresh
Looking for a quick, tasty meal? Try my Spicy Peanut Noodles with Veggies! This dish combines soft rice noodles, fresh
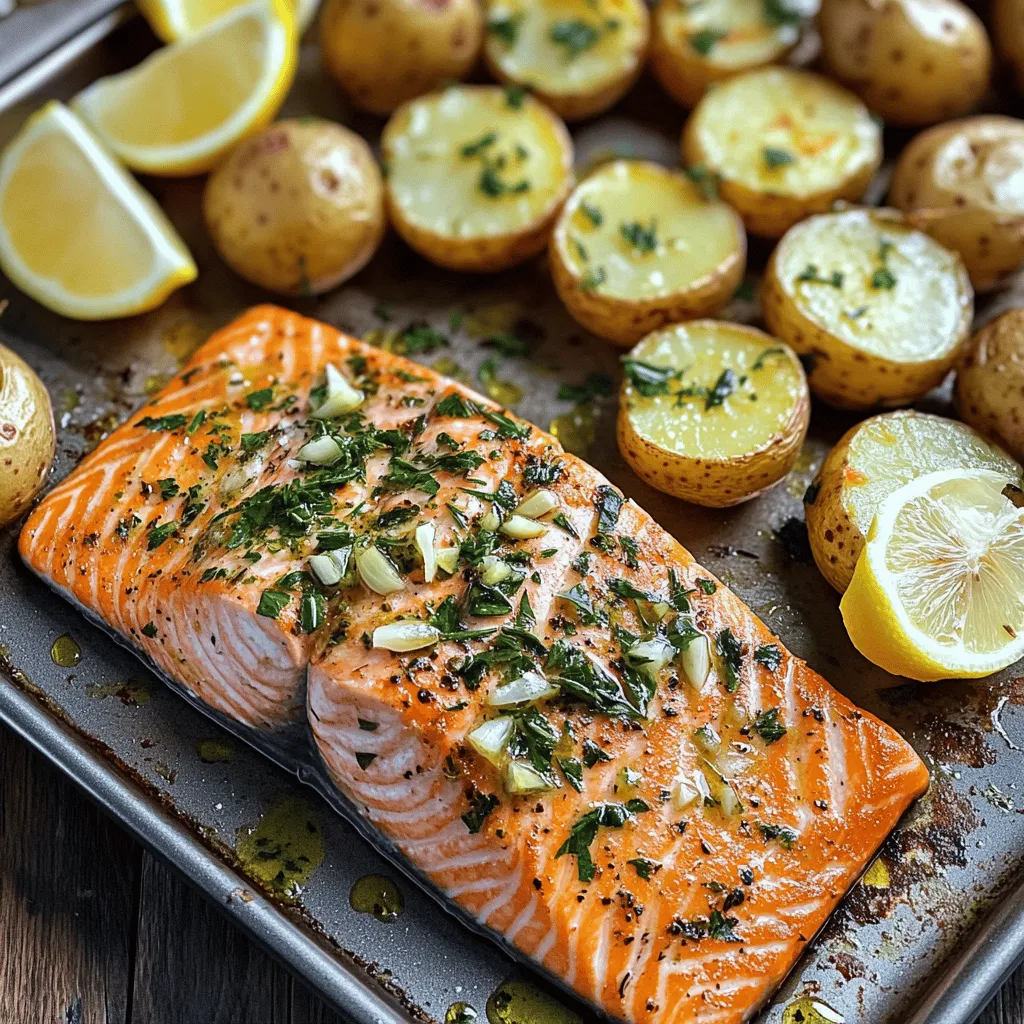
Looking for a tasty, easy meal? My Savory Sheet Pan Garlic Herb Salmon & Potatoes dish is perfect! With just
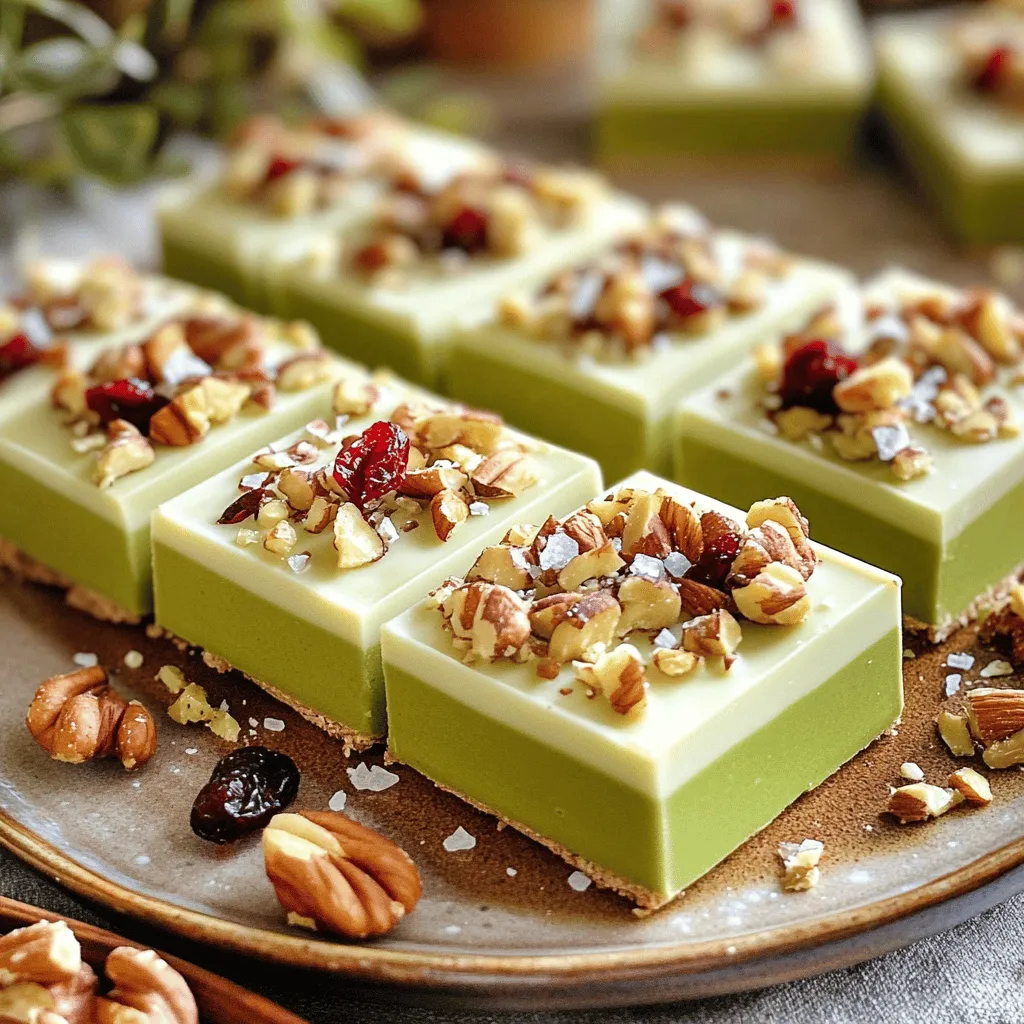
Looking for a sweet treat that’s quick and easy? Dive into my No Bake Matcha White Chocolate Bars! These bars
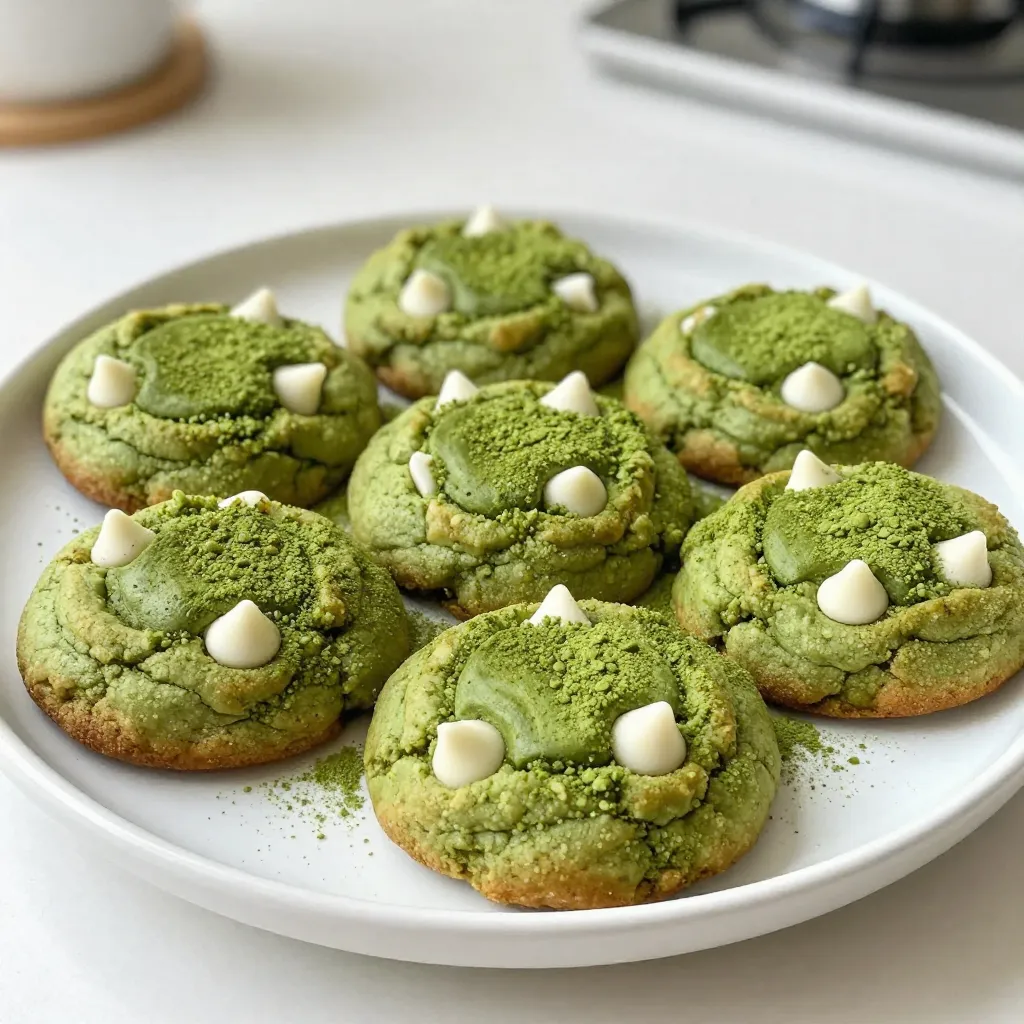
Are you ready to indulge in a treat that is both delicious and unique? Matcha white chocolate cookies blend rich,

Are you ready to spice up your meal routine? My Minute Spicy Garlic Chicken Wraps deliver bold flavor in a
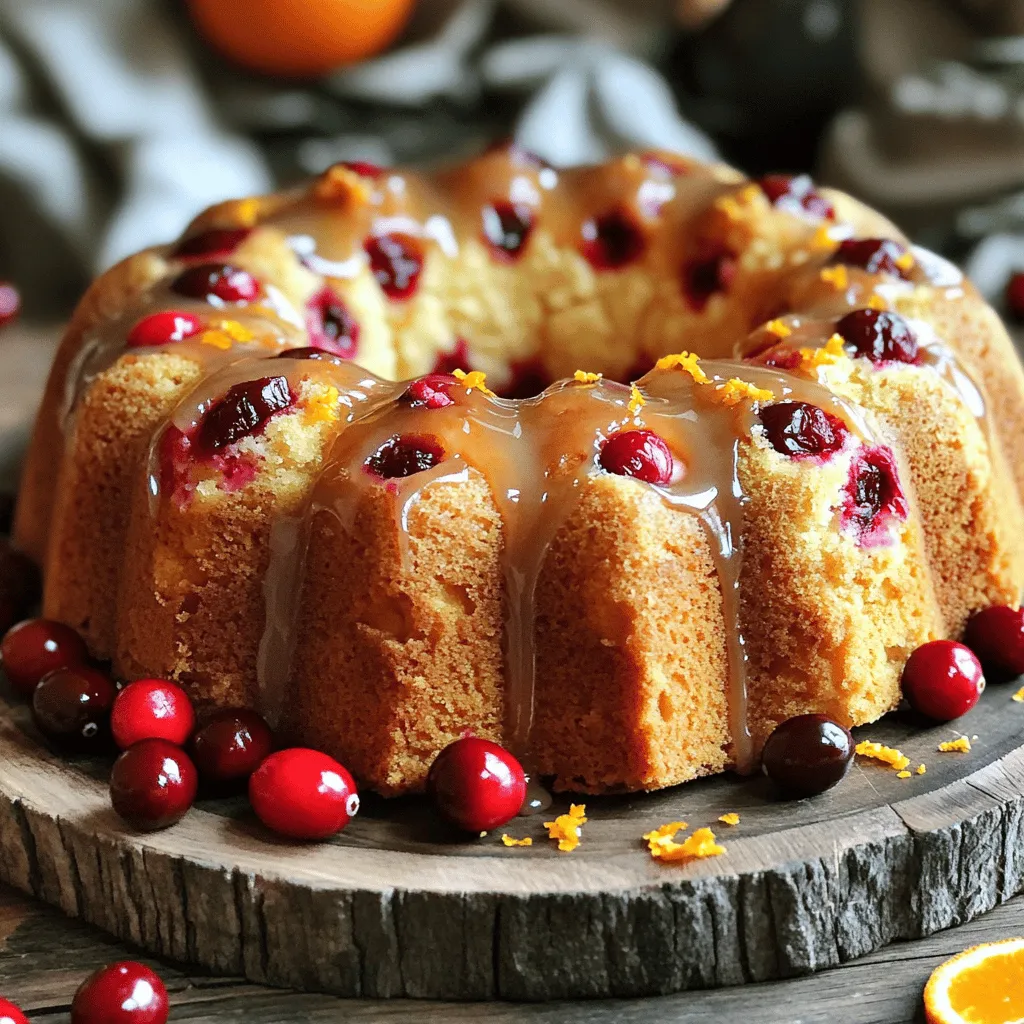
If you’re craving a sweet treat, you’ll love this Cranberry Orange Pound Cake. This delightful cake is bursting with flavor,
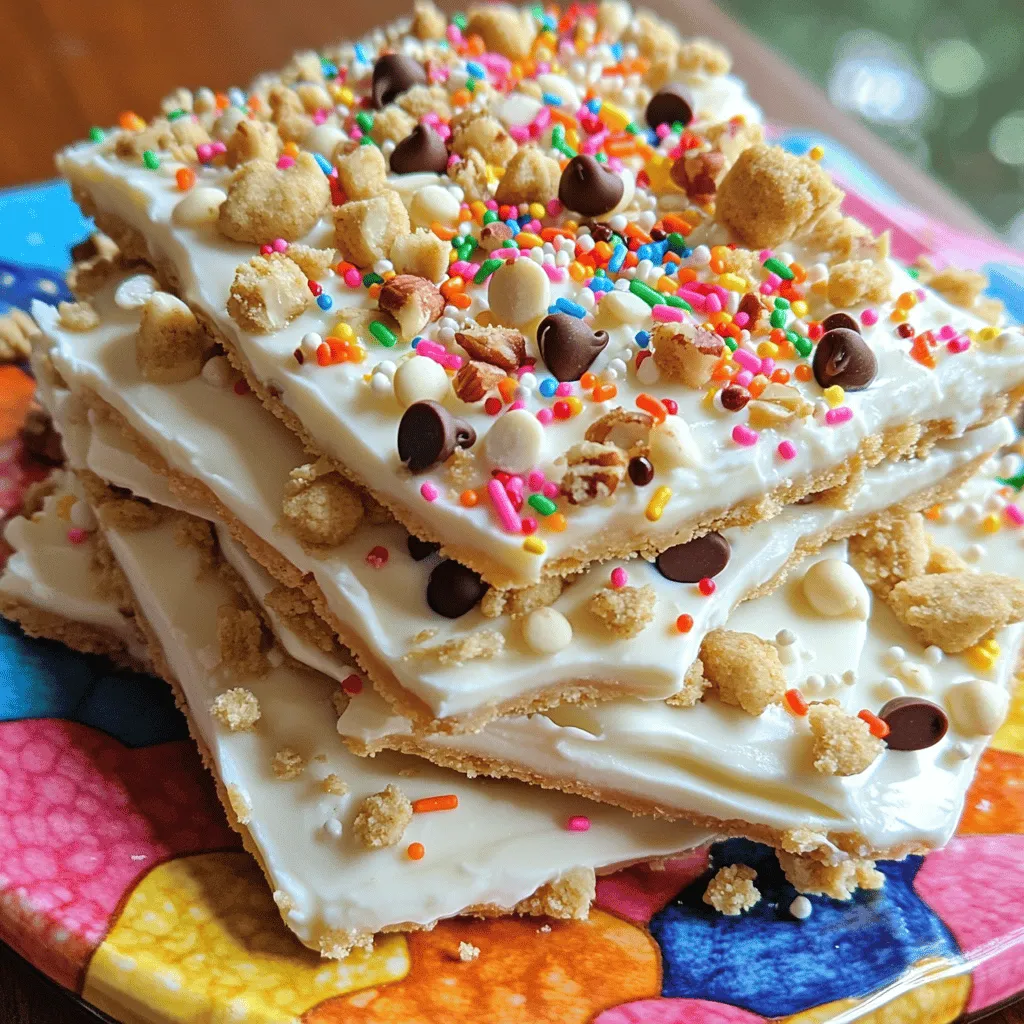
Looking for a sweet treat that’s both fun to make and healthy? You’ll love Cookie Dough Yogurt Bark! This simple
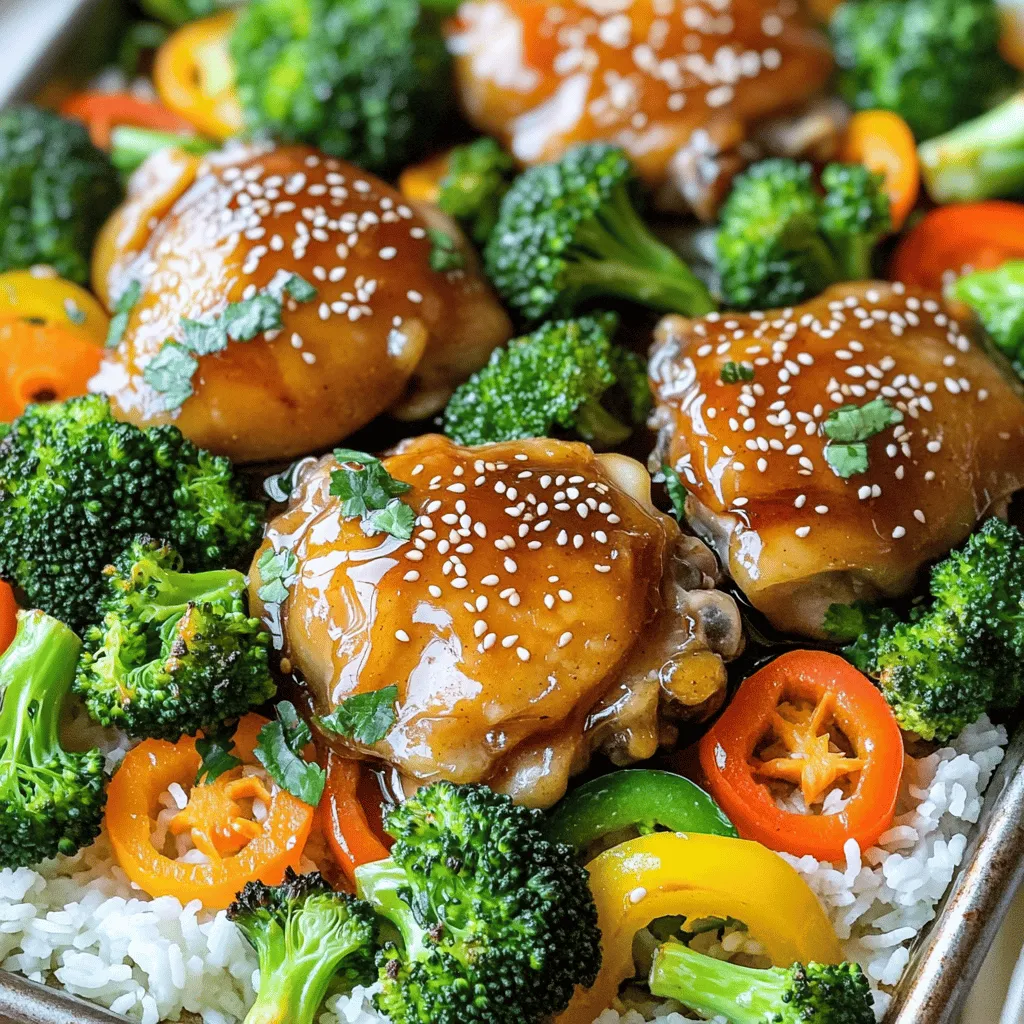
Get ready to savor the flavors of my Sheet-Pan Honey Soy Chicken & Broccoli Delight! This one-pan meal is both
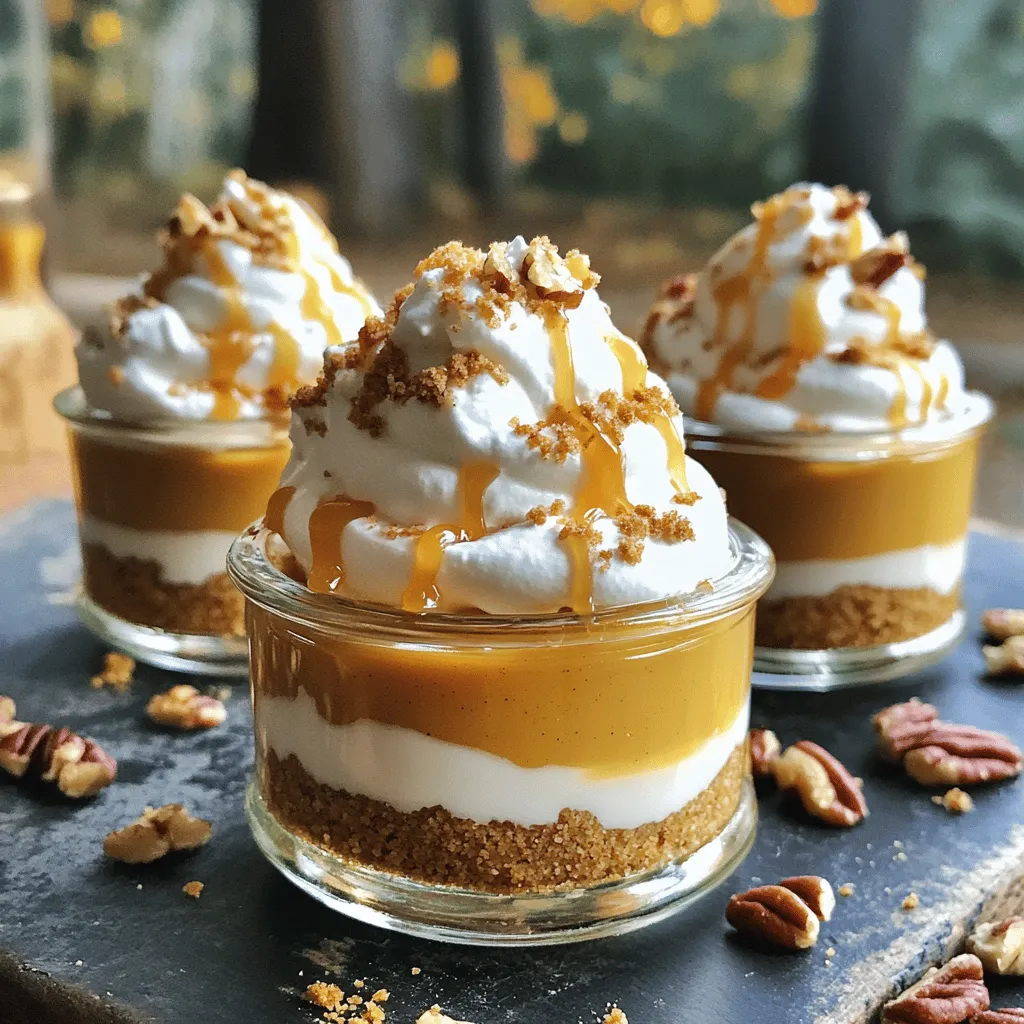
Get ready for a sweet treat! My No-Bake Caramel Pumpkin Pie Cups are easy to make and packed with flavor.
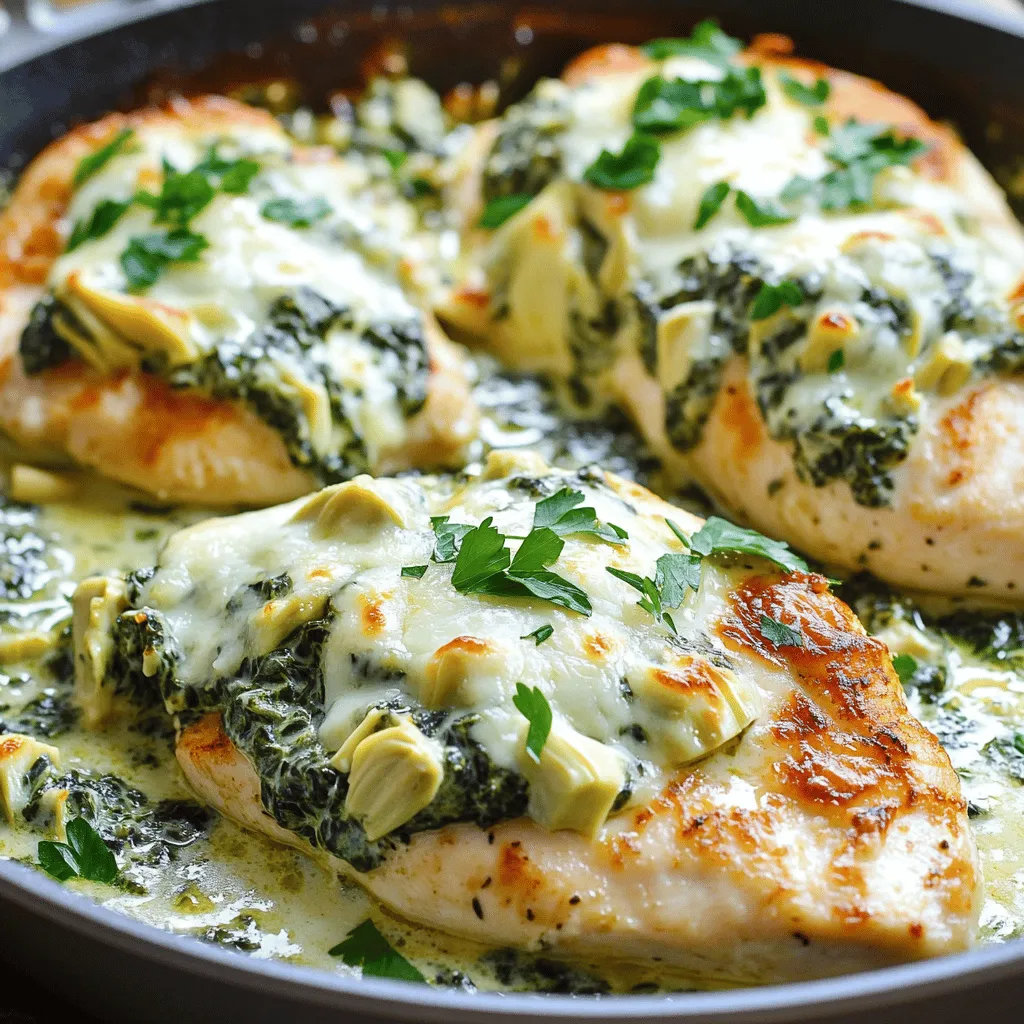
Looking for a quick and tasty meal? Look no further! This One-Pan Spinach Artichoke Chicken is perfect for busy nights.
