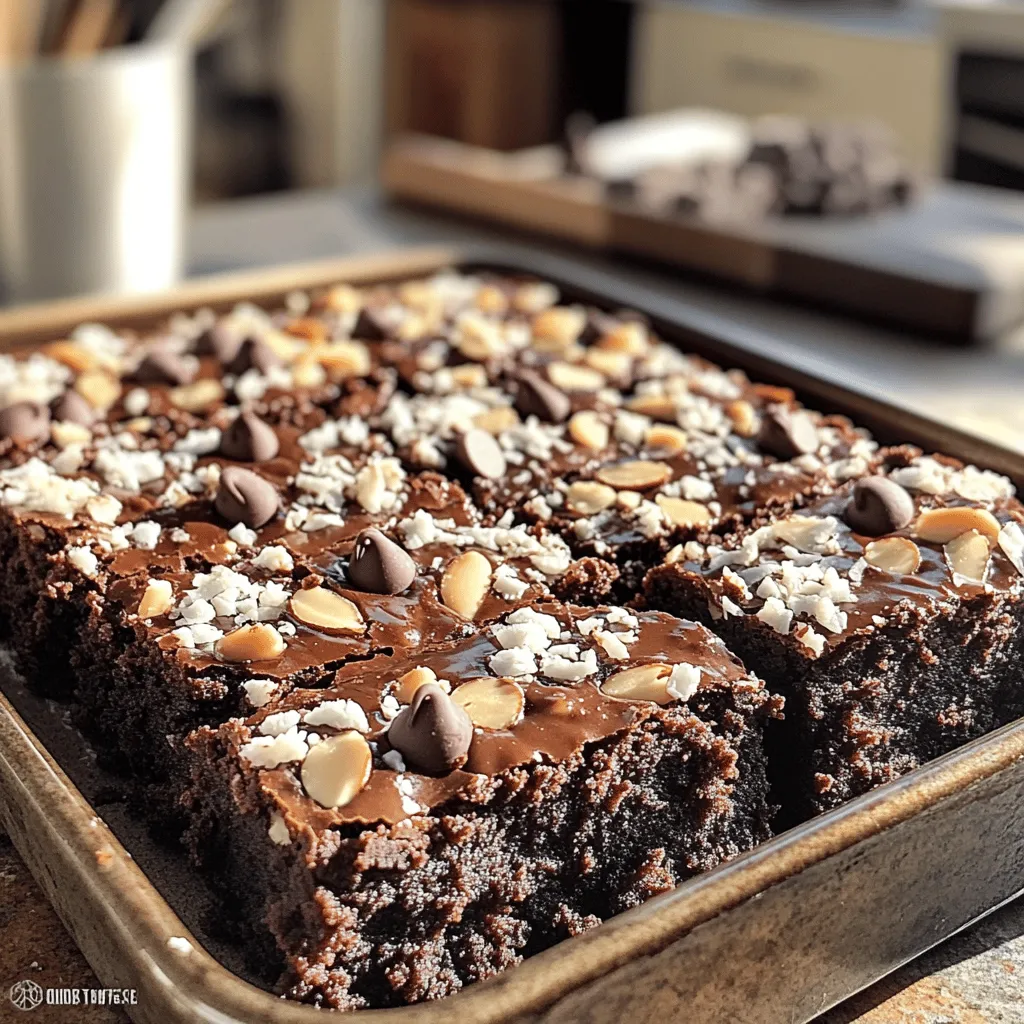
Almond Joy Coconut Brownies Simple and Tasty Treat
Are you ready to indulge in a rich, chewy chocolate treat? My Almond Joy Coconut Brownies combine the best of
Are you ready to indulge in a rich, chewy chocolate treat? My Almond Joy Coconut Brownies combine the best of

If you’re looking for a satisfying dinner that’s both easy and tasty, I have the perfect recipe for you: Pesto
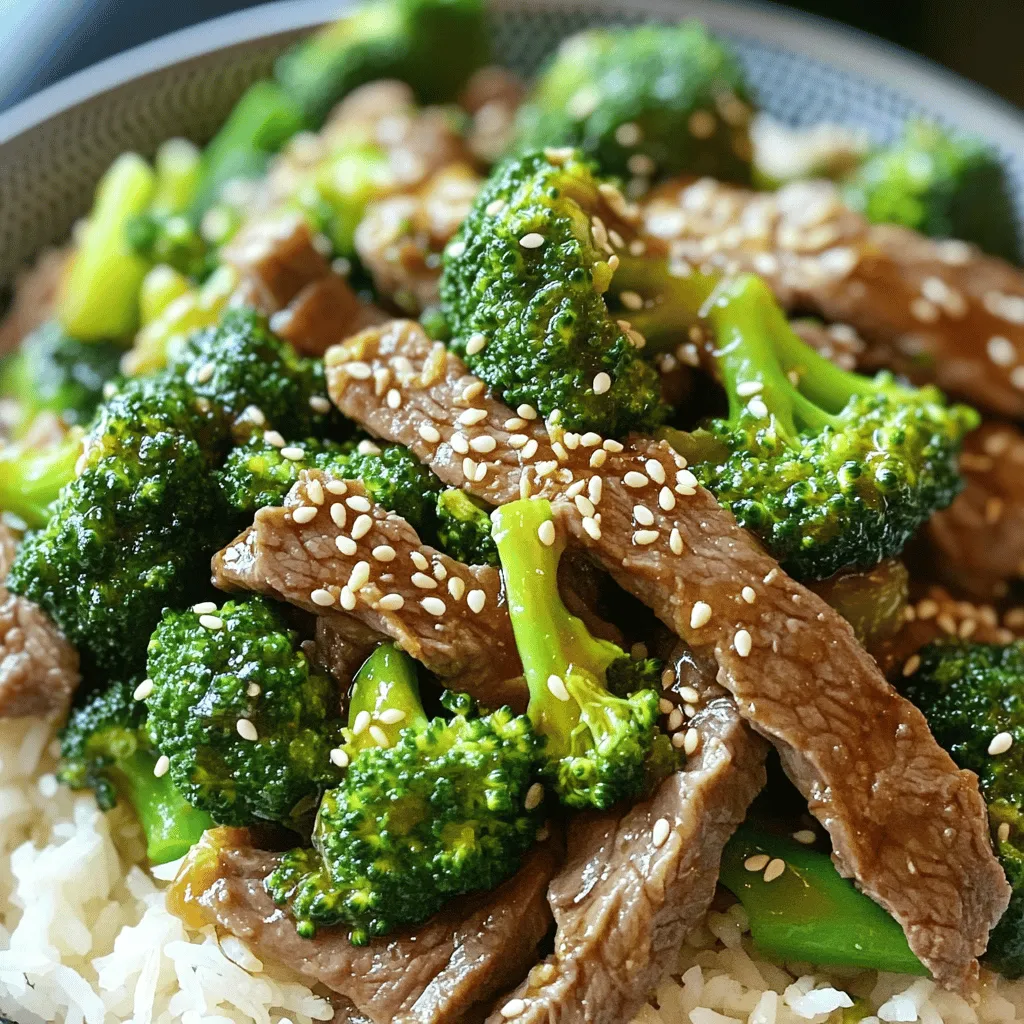
Craving a tasty dinner that’s quick and easy? I’ve got you covered with my Crispy Beef and Broccoli Fakeout! This
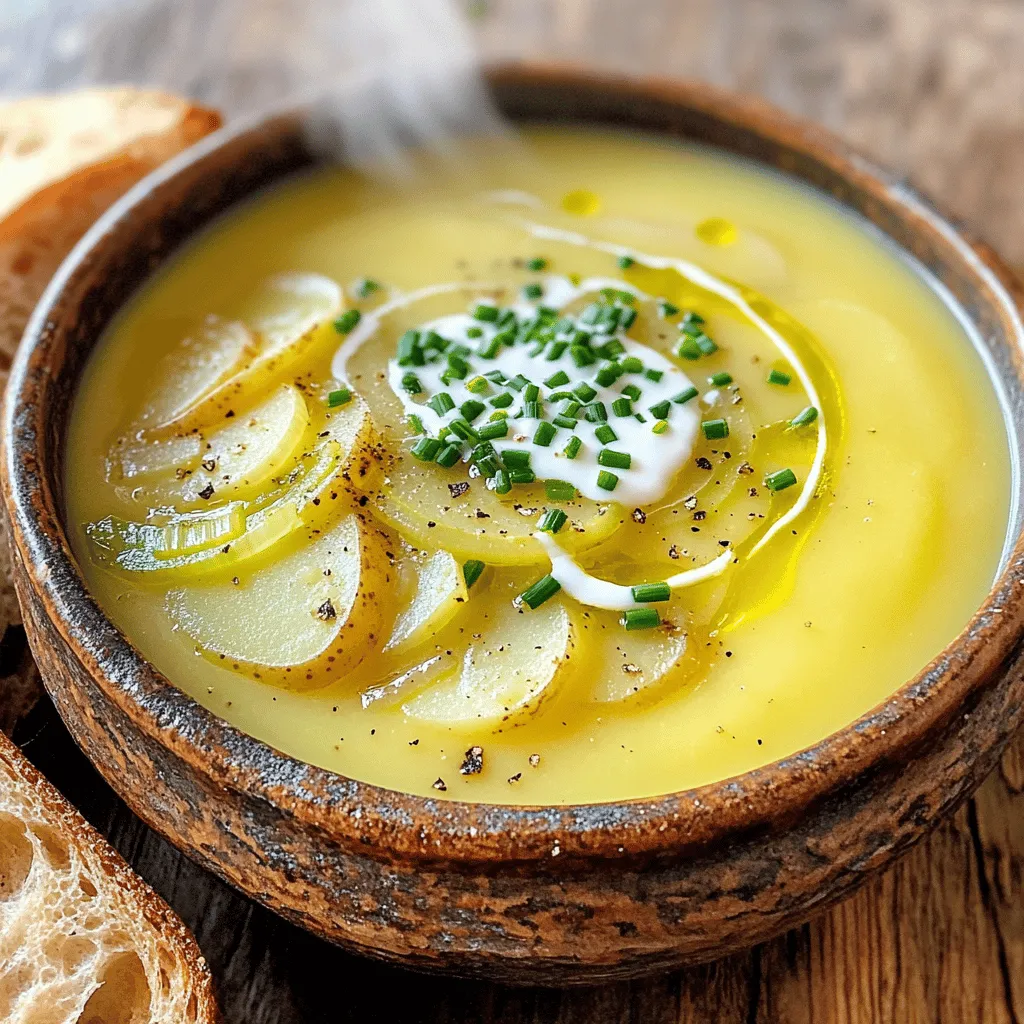
Are you ready to warm up with a bowl of creamy potato leek soup? This slow cooker dish is the
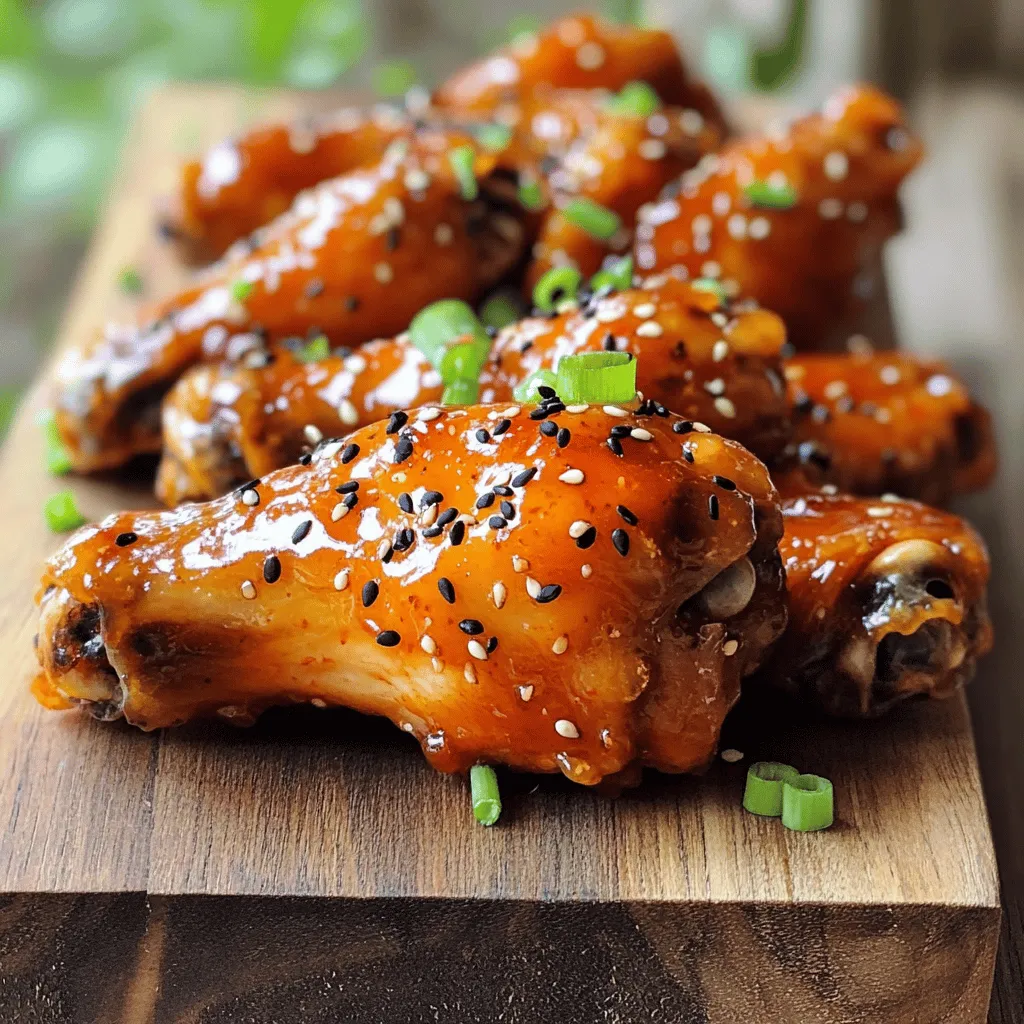
Craving a dish that packs a punch in flavor? You’re in the right place! My Sweet and Spicy Chicken Wings
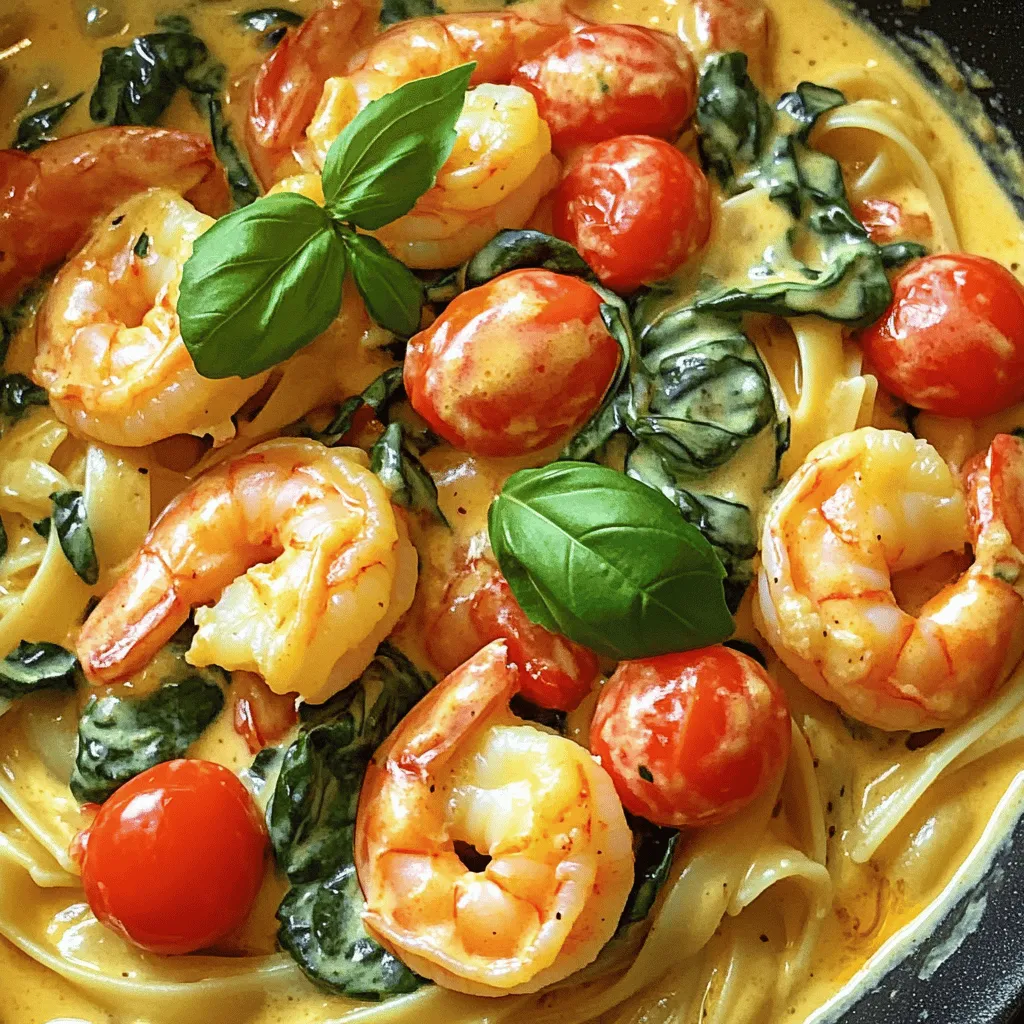
Looking to spice up your dinner routine? The Creamy Tuscan Shrimp Skillet is quick, tasty, and full of flavor. With

Looking for a delightful treat to spice up your mornings? This Pumpkin Cream Cheese Coffee Cake blends warm fall flavors

Looking for a snack that is both rich and healthy? You’ll love these Chocolate Peanut Butter Oat Cups! They combine
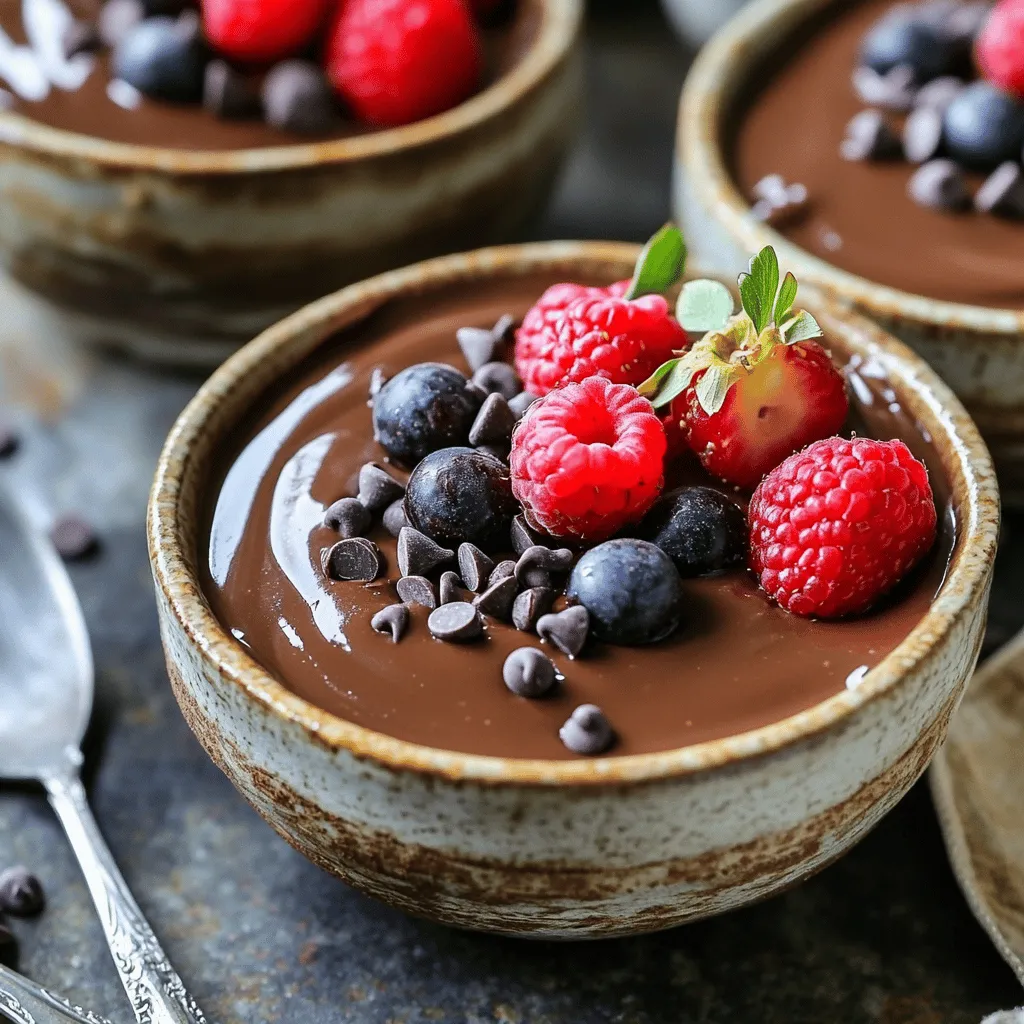
Are you ready for a dessert that’s as rich as it is healthy? Chocolate Cottage Cheese Pudding is your answer!
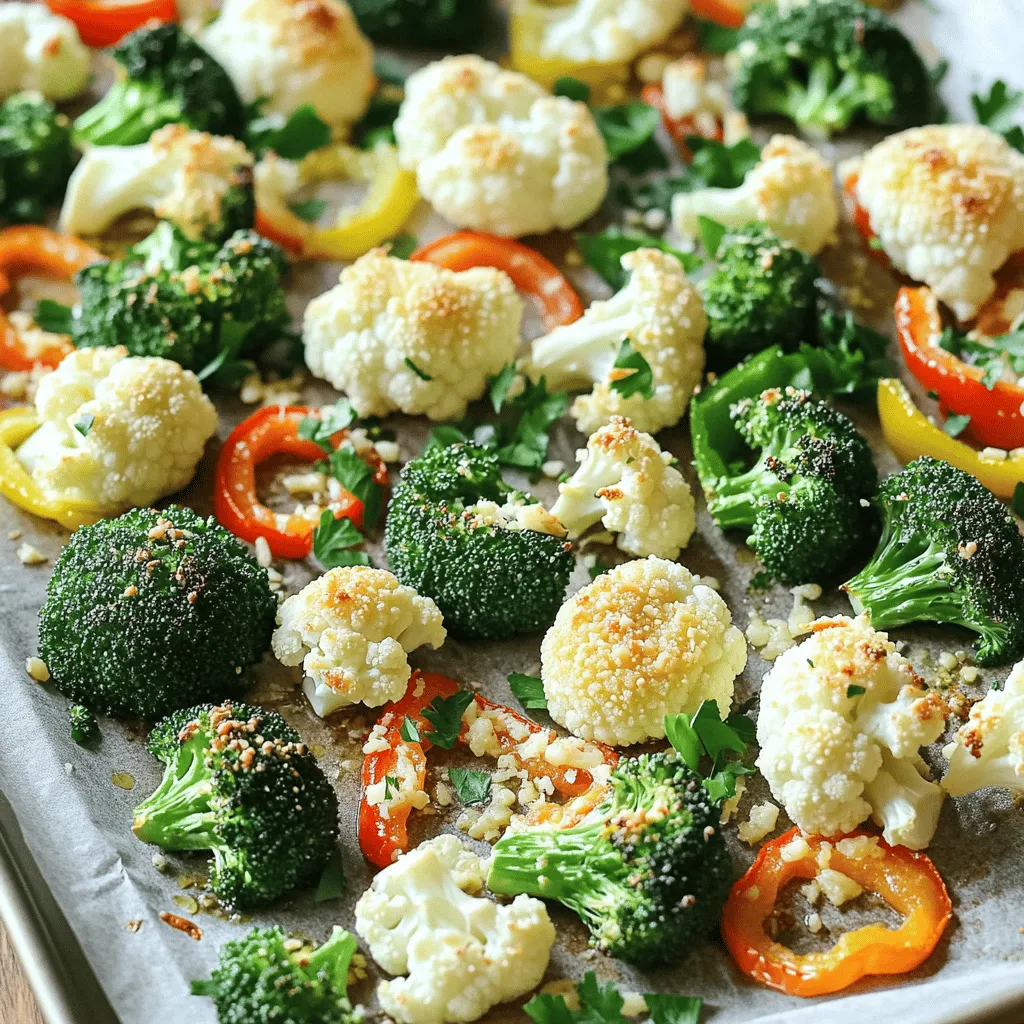
Looking for a simple and tasty dish? Roasted Garlic Parmesan Veggies are perfect! This easy recipe turns fresh vegetables into
