Skip to content
DisclaimerTerms Of UseGDPR PolicyCookie Policy

easycookingbite

  • Home
  • Drinks
  • Appetizers
  • Dinner
  • Dessert
  • About
  • Contact
  • Privacy Policy
DisclaimerTerms Of UseGDPR PolicyCookie Policy

Lily

- 1 cup almond flour - 1 ¾ cups powdered sugar - 3 large egg whites - 1/4 cup granulated sugar - 1/4 teaspoon cream of tartar - 1 teaspoon peppermint extract - A few drops of green food coloring (optional) - 4 oz. white chocolate, chopped - 1/2 cup heavy cream - Crushed peppermint candies for garnish The almond flour gives these macarons their unique texture. It helps create a light and crisp shell. The powdered sugar adds sweetness and aids in forming that perfect smooth surface. Egg whites are key in achieving those lovely fluffy peaks. They provide structure and stability to the shells. Granulated sugar helps strengthen the egg whites, ensuring they whip up nice and firm. Cream of tartar stabilizes the egg whites too, giving them that glossy finish. Peppermint extract brings a fresh burst of flavor. It’s what makes these treats festive and fun. Green food coloring is optional but adds a nice touch for the holidays. The white chocolate is the star of the filling. It melts beautifully with heavy cream to create a rich ganache. Finally, crushed peppermint candies add a lovely crunch and a pop of color on top. If you have nut allergies, you can use sunflower seed flour instead of almond flour. Just keep in mind that the color may be different. For those who avoid sugar, a sugar substitute like erythritol can work in the powdered sugar. You can also skip the peppermint extract and use vanilla extract if you prefer a milder flavor. If you're dairy-free, try using coconut cream in place of heavy cream for the ganache. {{ingredient_image_1}} To make the macaron shells, start by mixing the almond flour and powdered sugar. Use a food processor to pulse them together until they are very fine. This helps create a smooth texture. Next, sift the mixture through a fine mesh sieve. This step removes any lumps and ensures a light shell. Now, it’s time to whip the egg whites. In a clean bowl, beat the egg whites on medium speed until they start to get frothy. Add the cream of tartar, which helps stabilize the egg whites. Gradually add the granulated sugar, one tablespoon at a time, beating until stiff peaks form. This means the egg whites should stand tall when you lift the beaters. Mix in the peppermint extract and, if you like, a few drops of green food coloring for a festive touch. Carefully fold the almond flour mixture into the whipped egg whites. Use a spatula and be gentle. You want to combine them until the mix is smooth but not overmixed. It should flow like lava when you lift the spatula. Next, transfer this batter into a piping bag fitted with a round tip. On a baking sheet lined with parchment paper, pipe 1.5-inch circles. Leave enough space between them, as they will spread a bit while baking. Let the piped macarons rest at room temperature for about 30-45 minutes. This helps them form a dry skin on top. You’ll know they are ready when they are no longer sticky to the touch. Whipping egg whites can be tricky, but with a few tips, you can nail it. First, make sure your bowl and beaters are clean and dry. Any oil or fat can prevent the egg whites from whipping properly. Use room temperature eggs; they whip better than cold ones. Start whipping on medium speed. This allows the air to incorporate slowly. Once they look frothy, add the cream of tartar. This will help your whites hold their shape. Gradually add the sugar. Doing this slowly gives the sugar time to dissolve and helps create a stable meringue. When you reach stiff peaks, stop mixing. Overbeating can lead to dry egg whites, which won’t help your macarons. Aim for a shiny, smooth texture. For the white chocolate ganache, begin by heating the heavy cream in a small saucepan. Heat it over medium heat until it is just about to boil. Remove it from the heat and pour it over the chopped white chocolate in a bowl. Let this sit for about 2 minutes. This allows the chocolate to soften. After 2 minutes, whisk the mixture until it is smooth and creamy. This is your ganache filling. Now, chill it in the fridge for about 30 minutes. You want it to thicken but still be pipeable. To assemble your macarons, pair the shells by size. Pipe a dollop of the white chocolate ganache onto the flat side of one shell. Place its partner on top and gently press down. For a festive touch, sprinkle some crushed peppermint candies on top of the ganache while it is still soft. This adds a nice crunch and festive flair. Making macarons can be tricky. Here are some common mistakes to watch out for: - Not sifting the dry ingredients: This step is key. It helps remove lumps and keeps your macarons smooth. - Overmixing the batter: Mix until the batter flows like lava. Overmixing makes the shells flat. - Skipping the resting time: Letting the piped macarons sit is essential. This helps them form a skin that keeps their shape. Piping macarons takes practice. Here are some tips for neat, uniform shells: - Use a template: Place a template under your parchment paper. This helps you pipe evenly sized circles. - Hold the piping bag straight: Use a steady hand and pipe directly down. This keeps your circles even. - Release pressure before lifting: This prevents peaks. Lift straight up to keep the shell smooth. Getting the oven right is crucial for perfect macarons. Here are my best tips: - Preheat your oven to 300°F (150°C): This is the ideal temperature. It helps your macarons rise and bake evenly. - Rotate the trays halfway through: This ensures even baking. It helps avoid hot spots in the oven. - Bake for 15-20 minutes: Check for crisp shells. They should be firm outside and soft inside. Following these tips will help you make beautiful White Chocolate Peppermint Macarons. Enjoy the process and watch your skills grow! Pro Tips Use aged egg whites: For the best results, use egg whites that have been aged for at least 24 hours in the refrigerator. This helps achieve a better meringue consistency. Don’t skip the resting time: Allowing the piped macarons to rest until they form a skin is crucial. This step helps develop the characteristic "foot" of the macaron during baking. Rotate your baking sheets: To ensure even baking, rotate your baking sheets halfway through the baking time. This helps the macarons bake uniformly for a perfect texture. Experiment with flavors: Feel free to customize the ganache by adding different extracts or spices, like vanilla or cinnamon, to create unique flavor combinations! {{image_2}} You can change the taste of your macarons easily. Here are some fun ideas: - Chocolate Ganache: Mix dark chocolate with heavy cream for a rich filling. - Berry Jam: Use raspberry or strawberry jam for a fruity twist. - Caramel: Whip up a simple caramel sauce for sweetness. - Nutella: Spread creamy Nutella for a hazelnut flavor. Experiment with these ideas to find your favorite! Color makes your macarons stand out! Here are some ways to add color: - Red and White: Use red food coloring for a classic holiday look. - Blue and Silver: Try blue food coloring for a cool winter theme. - Gold Dust: Lightly sprinkle edible gold dust for a touch of glam. Mix and match colors to suit your holiday style! You can create seasonal flavors to match the time of year. Here are some ideas: - Pumpkin Spice: Use pumpkin puree and spices in the ganache for fall. - Lemon Lavender: Mix lemon zest and lavender for a fresh spring treat. - Cinnamon Roll: Add cinnamon and vanilla for a cozy winter flavor. These variations keep your baking fun and festive! To keep your White Chocolate Peppermint Macarons fresh, store them in an airtight container. Layer them with parchment paper to avoid sticking. Place the container in a cool, dry place, away from sunlight. This helps maintain their crisp shells and soft centers. If you plan to eat them later, refrigeration is not the best choice. Cold air can ruin their texture. Freezing macarons is a great way to save them for later. Start by placing them in a single layer on a baking sheet. Freeze them for about an hour. Once frozen, transfer them to a freezer-safe bag or container. Remove as much air as possible before sealing. When ready to enjoy, let them thaw in the fridge overnight. This slow method helps keep their texture perfect. When stored properly, White Chocolate Peppermint Macarons can last up to a week at room temperature. If you freeze them, they can last for up to three months. However, for the best taste and texture, enjoy them within a month. The flavors remain vibrant, and the crunch stays intact. To keep your macarons from cracking, follow a few simple steps. First, be sure to rest the piped shells. Let them sit for 30-45 minutes until they form a dry skin. This step helps them bake evenly. Also, avoid overmixing the batter. Mix until it flows like lava but is not runny. Lastly, make sure your oven temperature is correct. An oven that is too hot can cause cracks. Yes, you can make macarons without almond flour. You can use other nut flours like hazelnut or cashew. You can also try sunflower seed flour for a nut-free option. Keep in mind that these alternatives may change the taste and texture a bit. Experimenting with different flours can yield fun results. Just remember to adjust your ratios as needed. Macarons stay fresh for about 3-5 days when stored correctly. Keep them in an airtight container at room temperature. For longer storage, you can freeze them. Place them in a single layer in a freezer-safe bag. They can last up to a month in the freezer. Just let them thaw in the fridge before enjoying. This way, you can savor your white chocolate peppermint macarons longer! Making White Chocolate Peppermint Macarons is fun and rewarding. We covered key ingredients, tips for success, and how to adapt recipes. Remember, practice makes perfect, and every batch gets better. Using these methods, you can create delicious treats for any occasion. Always keep your macaron shells fresh and enjoy experimenting with flavors. With these tips, you’ll not only impress yourself but also anyone lucky enough to taste your creations. Embrace the joy of baking, and get ready to share your sweet success!

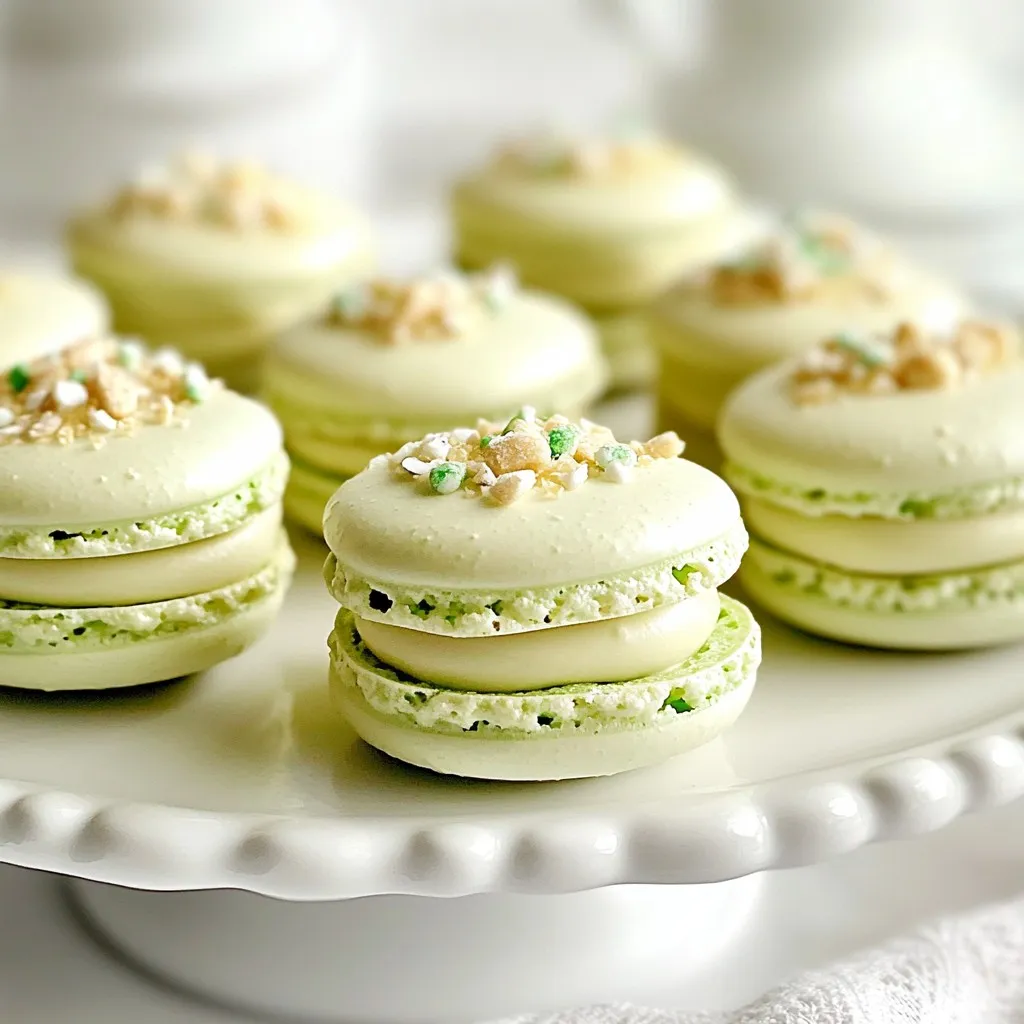
White Chocolate Peppermint Macarons Festive Delight

Get ready to spread some holiday cheer with my White Chocolate Peppermint Macarons! These sweet treats blend the rich taste

- 2 cans (15 oz each) butter beans, drained and rinsed - 2 tablespoons olive oil - 1 small onion, finely chopped - 4 cloves garlic, minced - 1 teaspoon dried Italian herbs (basil, oregano, thyme) - 1 cup cherry tomatoes, halved - 1 cup spinach, fresh - 1 cup heavy cream (or coconut cream for a dairy-free option) - Salt and pepper to taste - Fresh basil leaves for garnish You can swap heavy cream for coconut cream to make this dish dairy-free. Both options add creaminess. For herbs, fresh basil, oregano, or thyme may add more flavor than dried herbs. You can also use fresh tomatoes if you prefer. Just chop them and add them to the skillet after cooking the onion and garlic. {{ingredient_image_1}} Start by heating olive oil in a large skillet over medium heat. Once it’s hot, add the finely chopped onion. Sauté the onion for about 4-5 minutes until it turns translucent. This step builds a nice base flavor. Next, add minced garlic and dried Italian herbs. Cook this mix for one more minute until it smells great. Now, toss in the halved cherry tomatoes. Let them cook for 3-4 minutes until they soften a bit. Now it's time for the star of the dish: butter beans! Add the drained and rinsed butter beans into the skillet. Mix them gently until they are well coated with the onion and tomato mixture. After that, pour in the heavy cream. This makes the dish rich and creamy. Let it simmer for about 5 minutes. This helps the flavors blend and the cream thicken slightly. Next, fold in the fresh spinach. Cook it just until it wilts, which should take around 2-3 minutes. This adds a nice color and freshness. Finally, season with salt and pepper to your taste. Remove the skillet from heat. To make it look pretty, garnish the dish with fresh basil leaves before serving. Enjoy this creamy and flavorful delight! To get the right thickness with cream, use heavy cream. It adds richness. If you want a lighter option, try coconut cream. Both create a nice, smooth texture. Simmer gently after adding cream. This helps it thicken without curdling. You can boost the flavor with herbs and spices. Fresh basil is a great addition. Try adding a pinch of red pepper flakes for some heat. A squeeze of lemon juice brightens the dish, too. Experiment with what you like best! Use a large skillet to cook all the ingredients. This keeps everything mixed well. A wooden spoon is great for stirring. Make sure to keep the heat moderate. This helps the beans warm evenly and prevents burning. Enjoy the process! Pro Tips Use Fresh Herbs: Fresh basil can elevate the flavor of the dish. Add it just before serving to maintain its vibrant taste. Adjust Creaminess: Feel free to use more or less cream based on your preference for creaminess. Coconut cream is a great alternative for a dairy-free version. Perfectly Cooked Spinach: Add the spinach at the end to preserve its bright color and nutrients. Overcooking can make it soggy and dull. Customize the Beans: If you want a different texture, try mixing butter beans with chickpeas or white beans for added variety in your dish. {{image_2}} For a tasty plant-based dish, swap the heavy cream for coconut cream. This keeps the dish rich without dairy. You can also add in more vegetables, like zucchini or bell peppers, to boost nutrition. This way, you still enjoy creamy Tuscan butter beans without losing the flavor. Try using different beans if you can’t find butter beans. Cannellini or navy beans work great. If you want a lighter option, you can use low-fat cream or even almond milk. Fresh herbs give a vibrant taste, but dried ones work too. Just remember, the flavors will be a bit stronger with dried herbs. To make this dish even tastier, consider adding sun-dried tomatoes or olives. They bring a lovely depth to the sauce. You can also sprinkle in some red pepper flakes for a kick. Fresh parsley or rosemary can add a nice touch, making it feel even more Tuscan. These little tweaks can turn a simple meal into a flavorful feast. To keep your creamy Tuscan butter beans fresh, store leftovers in an airtight container. Make sure to let the dish cool down first. Place it in the fridge, where it will stay good for about three days. If you want to enjoy it later, keep it in smaller portions. This way, you can easily grab what you need. When it’s time to enjoy leftovers, reheat them gently. Use a skillet on low heat for the best results. Stir often to prevent sticking. You can also use a microwave; just cover the dish to keep moisture in. Heat it in short bursts, stirring in between. This helps maintain the creamy texture. If you want to freeze the creamy butter beans, place them in a freezer-safe container. Make sure to leave some space at the top, as the dish will expand when frozen. It’s best to eat it within three months. To thaw, put it in the fridge overnight. Reheat as mentioned before for best taste. Yes, you can use fresh butter beans. Fresh beans need to be cooked first. Boil them until tender, which takes about 30 minutes. This adds a nice texture and flavor to your dish. Creamy Tuscan Butter Beans pair well with many dishes. You can serve them with crusty bread or over rice. They also go nicely with grilled chicken or fish. A side salad adds a fresh touch as well. This dish lasts about 3 to 4 days in the fridge. Store it in an airtight container. Make sure it cools down before you put it away. This keeps the flavors fresh and tasty. Yes, you can make this dish ahead of time. It tastes even better after the flavors meld. Just reheat it gently on the stove. Stir well to ensure even heating. In this post, I shared how to make a creamy Tuscan butter bean dish. You learned about the key ingredients, cooking steps, and tips for flavor. I also covered variations, proper storage, and answered common questions. Remember, you can adjust ingredients to fit your taste. The dish is both easy and delicious. Enjoy creating your own version!

Creamy Tuscan Butter Beans Rich and Flavorful Delight

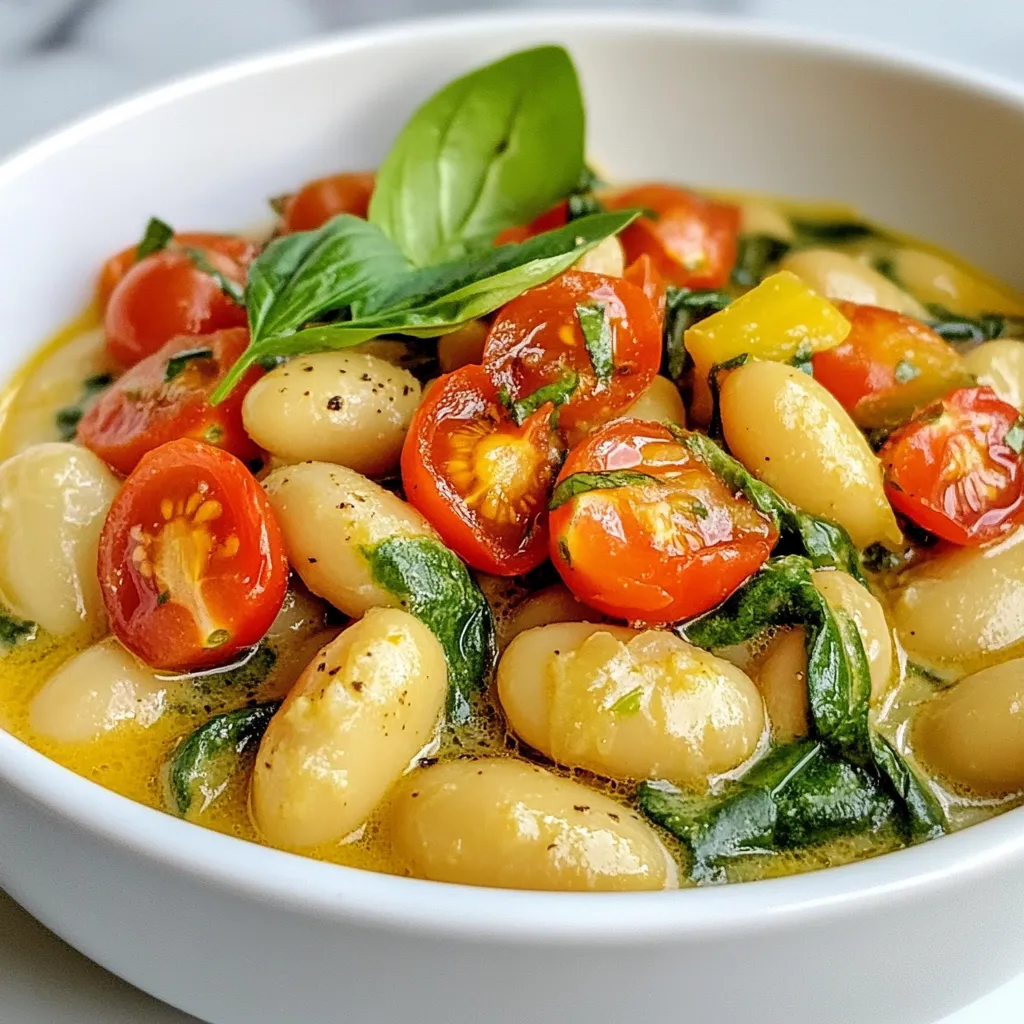
If you’re craving a dish that bursts with flavor and creaminess, you’ve found it. Creamy Tuscan Butter Beans are not

- 12 oz spaghetti or fettuccine - 1 head of garlic - 3 tablespoons olive oil For this dish, I love using spaghetti or fettuccine. Both types work great. The garlic is the star here, giving a rich flavor. Olive oil adds a nice touch and helps with cooking. - 4 cups vegetable broth - 1 teaspoon red pepper flakes (optional) - 1 teaspoon dried Italian herbs Vegetable broth is perfect for a flavorful base. I often add red pepper flakes for a kick. Dried Italian herbs mix in well, enhancing the dish's taste. - 1 cup cherry tomatoes, halved - 1 cup baby spinach - Fresh basil leaves Cherry tomatoes add sweetness and color. Baby spinach wilts nicely, adding nutrition. Fresh basil leaves give a lovely aroma and finish to the dish. - ¼ cup grated Parmesan cheese - Salt and black pepper I suggest adding Parmesan cheese for creaminess. Don’t forget to season with salt and black pepper to taste. These final touches make the dish feel special. To roast the garlic, first, preheat your oven to 400°F (200°C). Take a head of garlic and slice off the top. Drizzle 1 tablespoon of olive oil on it. Wrap the garlic in aluminum foil. Place it in the oven for about 30 to 35 minutes. You want it to become soft and caramelized. This step adds a sweet, rich flavor to your dish. While the garlic roasts, grab a large pot. Combine the uncooked spaghetti or fettuccine with 4 cups of vegetable broth. Add 2 tablespoons of olive oil, 1 teaspoon of red pepper flakes (if you like some heat), and 1 teaspoon of dried Italian herbs. Bring the pot to a boil over medium-high heat. Make sure the pasta is fully submerged in the broth. Once the water is boiling, lower the heat to medium-low. Cover the pot and let it simmer for about 10 to 12 minutes. Stir it occasionally to keep it from sticking. The pasta should be al dente, and most of the broth will be absorbed. Now it’s time to add the roasted garlic. Unwrap it and squeeze the cloves into the pasta. Next, toss in 1 cup of halved cherry tomatoes and 1 cup of baby spinach. Stir everything together until the spinach wilts and the tomatoes soften. Taste your pasta and season with salt and black pepper as needed. For an extra creamy touch, mix in some grated Parmesan cheese. To get the best pasta, cook it al dente. This means it should be firm but not hard. How can I ensure al dente pasta? Start by checking the pasta a minute or two before the time on the package. If it’s just a bit firm, it's ready. The pasta will keep cooking after you take it off the heat. Adjust flavors to suit your taste. How can I adjust flavors and seasonings? You can add more salt or black pepper to enhance the dish. If you like heat, toss in more red pepper flakes. Taste the pasta as you cook. This helps you find the perfect balance. Serve the pasta in a way that looks nice. What are some serving methods for visual appeal? You can serve it straight from the pot for a cozy look. Or, put it in bowls for a more elegant touch. Drizzle a bit of olive oil on top for shine. Add garnishes to make it pretty. What are some garnishing suggestions? Fresh basil leaves add color and flavor. A sprinkle of Parmesan cheese also looks great and adds taste. You can even toss in a few cherry tomato halves on top for a pop of color. Using the right tools makes cooking easier. What are the ideal pots and utensils for the recipe? A large pot is best for cooking pasta and broth together. Choose a pot with a lid to help it simmer well. A wooden spoon works great for stirring. Roasting garlic needs some special tools. What are helpful tools for roasting garlic? You need aluminum foil to wrap the garlic. A small baking dish or tray helps keep it steady in the oven. A sharp knife cuts the top off the garlic easily. {{image_2}} If you need gluten-free pasta options, use rice or quinoa pasta. These types work well in this dish. They cook a bit faster, so check them often while cooking. For a vegan alternative, skip the cheese. Instead, try nutritional yeast. It gives a cheesy flavor without dairy. You can also add more veggies for texture and taste. To add protein, mix in cooked chicken or shrimp. Both options raise the dish's heartiness. If you prefer plant-based protein, try chickpeas or lentils. They blend smoothly with pasta. You can also change up the veggies. Zucchini, bell peppers, or mushrooms add color and flavor. Just sauté them lightly before adding them to the pasta. For a spicy kick, increase the red pepper flakes. Add them to your taste. If you want a milder version, leave them out or use just a pinch. Experiment with different herbs. Fresh parsley or thyme can change the flavor profile. Basil is great for a classic taste, while oregano adds warmth. Adjust herbs based on your mood or season! Store your leftover One-Pot Roasted Garlic Pasta in an airtight container. This keeps it fresh. You can refrigerate it for up to 3 days. Make sure it cools down to room temperature before you seal it. To reheat, use a skillet over medium heat. Add a splash of olive oil or vegetable broth. This helps keep the pasta moist and tasty. Stir gently until heated through. Avoid high heat, as it can dry out the pasta. You can freeze this pasta dish if you have extra. Place it in a freezer-safe container. It stays good for up to 2 months. To thaw, move it to the fridge overnight. Reheat on the stove with a splash of vegetable broth for best results. This method keeps the flavors and texture intact. To boost the flavor of your pasta, use a rich broth. Start with vegetable broth. You can add more spices too. Red pepper flakes give a nice kick. Dried Italian herbs like basil, oregano, and thyme enhance the taste. You can also add salt and black pepper to fit your taste. Fresh ingredients, like cherry tomatoes and spinach, bring extra flavor. Lastly, finish with grated Parmesan cheese for creaminess. Yes, but the taste will change. Whole garlic is sharp and pungent. Roasting garlic makes it sweet and soft. The roasted garlic adds a rich depth to the dish. If you use whole garlic, you might want less. Roasted garlic blends well with the pasta. It creates a creamy texture that whole garlic cannot. If you don’t have vegetable broth, you can use chicken broth. Water with added herbs also works. Try using a mix of both for a lighter flavor. If you want a richer taste, add a splash of white wine. This adds depth without overpowering the dish. Just remember, the broth you choose affects the overall flavor. To keep pasta from sticking, stir it while it cooks. Use a large pot with enough broth. This helps the pasta move freely. Start stirring once it begins to boil. Cover the pot to keep the heat in but stir every few minutes. If you notice it sticking, add a bit more broth. This keeps the pasta from clumping. This blog post covered every step to make a flavorful pasta dish. From key ingredients to cooking tips, you now have a complete guide. Remember to roast garlic for a rich taste. Adjust seasonings to match your flavor needs. Experiment with variations for dietary preferences. Proper storage and reheating keep your leftovers delicious. Enjoy the process, and don’t hesitate to try new ideas. Your cooking skills will grow with each dish you make. Dive in and create something amazing!

One-Pot Roasted Garlic Pasta Simple and Flavorful Dish

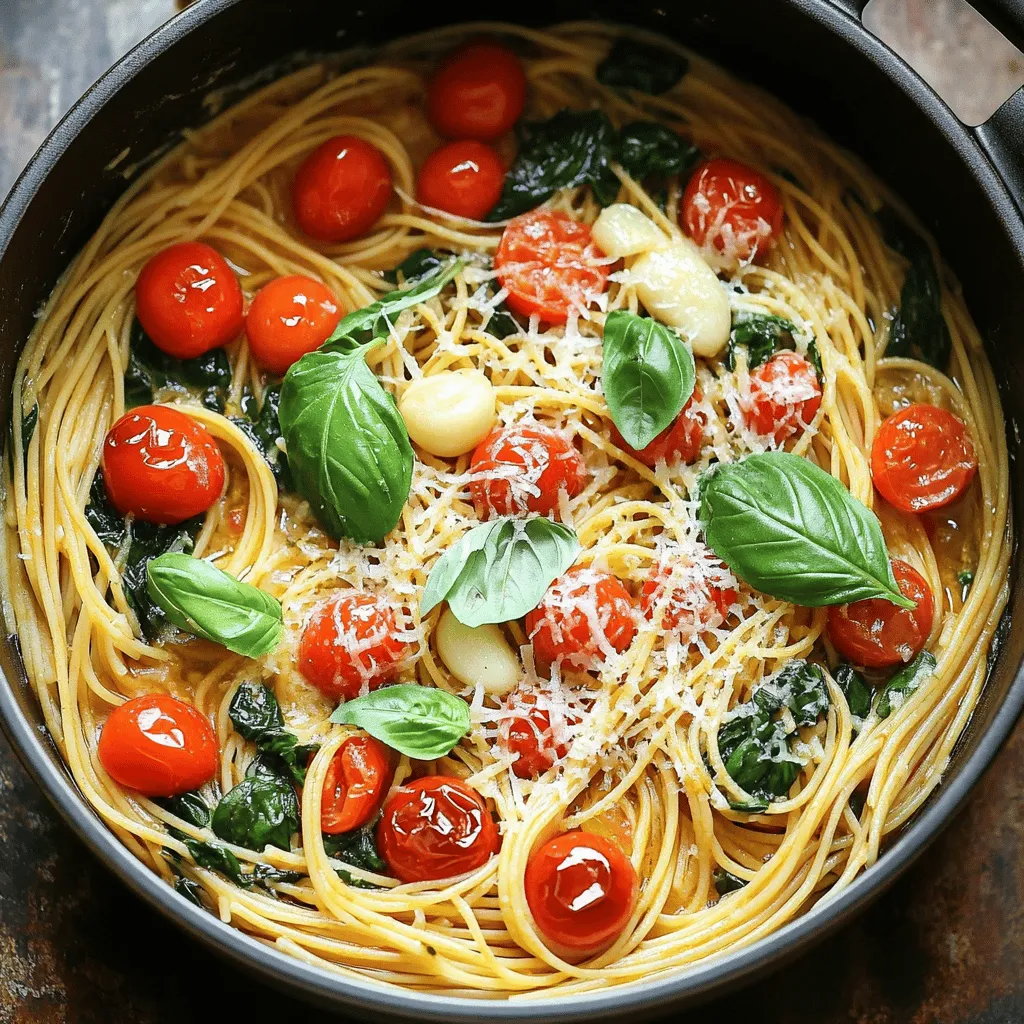
Are you tired of complicated recipes that take forever? Let’s simplify your dinner! This One-Pot Roasted Garlic Pasta is a

- Salmon fillets specifications: You need four salmon fillets. Each should weigh about six ounces. Look for fresh fillets with bright color and no strong fishy smell. The skin can add flavor and help keep the fish moist while cooking. - Alternatives for salmon: If you want a change, you can use chicken breasts or tofu. Chicken works well with the same honey garlic sauce. Tofu absorbs flavors nicely and is a great plant-based option. - Honey and soy sauce ratio: This recipe uses a 1:1 ratio of honey to soy sauce, with each being 1/4 cup. This balance gives the sauce a sweet and salty taste. You can adjust the sweetness or saltiness based on your preference. - Fresh garlic and ginger benefits: Using three cloves of minced garlic and one tablespoon of grated ginger adds great flavor. Garlic has health benefits and boosts the dish’s aroma. Ginger adds warmth and depth, making the sauce even better. - Green beans and cherry tomatoes overview: Two cups of green beans and one cup of halved cherry tomatoes work well. The green beans add crunch, while the tomatoes bring juiciness and sweetness to the dish. - Suggestions for seasonal vegetables: Feel free to swap in seasonal veggies. Try asparagus in spring or zucchini in summer. Broccoli and bell peppers are tasty options in fall and winter. Adjust the cooking time for different vegetables to ensure they cook properly. First, set your oven to 400°F (200°C). This high heat helps cook the salmon quickly and evenly. While the oven warms up, take a large baking sheet. You can line it with parchment paper or aluminum foil. This will help with cleanup. It also keeps the salmon and veggies from sticking. In a small bowl, mix together honey, soy sauce, minced garlic, and grated ginger. Use a whisk to blend it well. You want it smooth and even. This sauce is the star of the dish! To boost flavor, let it sit for a few minutes. This helps all the flavors blend together. Now it’s time to put it all together. Place the salmon fillets on one side of the baking sheet. Drizzle half of the honey garlic sauce over the salmon. Make sure each piece is well-coated. In a large bowl, add green beans and cherry tomatoes. Toss them with olive oil, salt, and pepper. Spread the veggies out on the other side of the baking sheet. Drizzle the rest of the honey garlic sauce over them. This ensures they get the same tasty flavor. Bake everything in the preheated oven for about 15-20 minutes. Check the salmon; it should flake easily with a fork. The veggies should be tender, too. If you like, sprinkle sesame seeds on top before serving. Garnish with fresh parsley for a nice touch. To check if your salmon is done, look for clear signs. The fish should flake easily with a fork. The flesh should turn from bright pink to a light, opaque color. This change means your salmon is ready to eat. To avoid overcooking, set a timer. Cooking time for salmon is usually 15-20 minutes at 400°F. Keep an eye on it as it bakes. If you have a meat thermometer, aim for 145°F in the thickest part of the fillet. You can add extra spices or herbs to boost flavor. Consider using paprika, dill, or thyme. These will add depth to the dish. If you want a little heat, try red pepper flakes. To adjust sweetness, add more honey if you like it sweeter. For saltiness, increase the soy sauce, but do this slowly. Taste as you go to find your perfect balance. For a restaurant-style look, serve the salmon and veggies on a large platter. Drizzle any leftover sauce from the baking sheet over the top. This adds flavor and makes it look appealing. To garnish, sprinkle fresh parsley on top. You can also add sesame seeds for a nice crunch. A lemon wedge on the side can add a pop of color and zest. {{image_2}} If you want to switch things up, try chicken or tofu. Both options work well with the honey garlic sauce. For chicken, use boneless breasts or thighs. Cook them for about 20-25 minutes at the same temperature. Tofu is a great choice for a plant-based option. Press the tofu to remove extra moisture, then cut it into cubes. It will soak up the sauce nicely. You can change the vegetables based on what’s in season. Instead of green beans and cherry tomatoes, try asparagus or bell peppers. Both roast well and add great flavor. You can also mix in zucchini or broccoli for extra color. Make sure to cut the veggies into even pieces. This helps them cook at the same rate as the salmon. For a twist, consider using teriyaki sauce. It adds a sweet and savory touch. Citrus-based sauces also work great, like a lemon or orange glaze. These brighten the dish and give a fresh flavor. Feel free to experiment with different sauces, just keep the main idea of honey and garlic. Always taste as you go to find your favorite combo! To keep your leftovers fresh, use airtight containers. Glass containers work well for reheating. Let the salmon cool first. Place it in the fridge within two hours. It will last for up to three days. The best way to reheat salmon is in the oven. Preheat your oven to 350°F (175°C). Place the salmon on a baking sheet. Reheat for about 10-15 minutes. This will keep the salmon juicy and tasty. To freeze leftovers, wrap each salmon fillet tightly in plastic wrap. Then place it in a freezer-safe bag. Remove as much air as you can. Your salmon will stay good for up to three months. When ready to eat, thaw it in the fridge overnight. Reheat it in the oven as mentioned above for best results. Yes, you can use frozen salmon. Just make sure to thaw it first. The best way to do this is to leave it in the fridge overnight. If you need it faster, you can run cold water over the sealed packet. This keeps the fish safe. Once thawed, treat it the same as fresh salmon in the recipe. This makes it easy to enjoy this dish anytime. This dish is quick and easy. You will need about 10 minutes to prep the ingredients. The cooking time is around 15 to 20 minutes in the oven. In total, you can have this meal ready in just 25 to 30 minutes. This makes it perfect for a busy weeknight dinner. You can pair this salmon with several tasty sides. Here are some ideas: - Rice or quinoa for a hearty base - A fresh green salad for a crisp contrast - Roasted potatoes for extra comfort - Steamed broccoli for added nutrition These options will highlight the flavors of the honey garlic salmon. They make your meal colorful and balanced. This blog post covered how to make a tasty sheet pan honey garlic salmon dish. We discussed salmon types, sauce ingredients, and vegetable options. I shared step-by-step instructions for preparing and cooking. You learned tips for perfecting your salmon and how to present it nicely. Variations let you adapt the recipe, and storage tips ensure your leftovers stay fresh. Enjoy making this easy and delicious meal. The flavors and textures will impress anyone you serve!

Sheet Pan Honey Garlic Salmon Easy and Flavorful Recipe

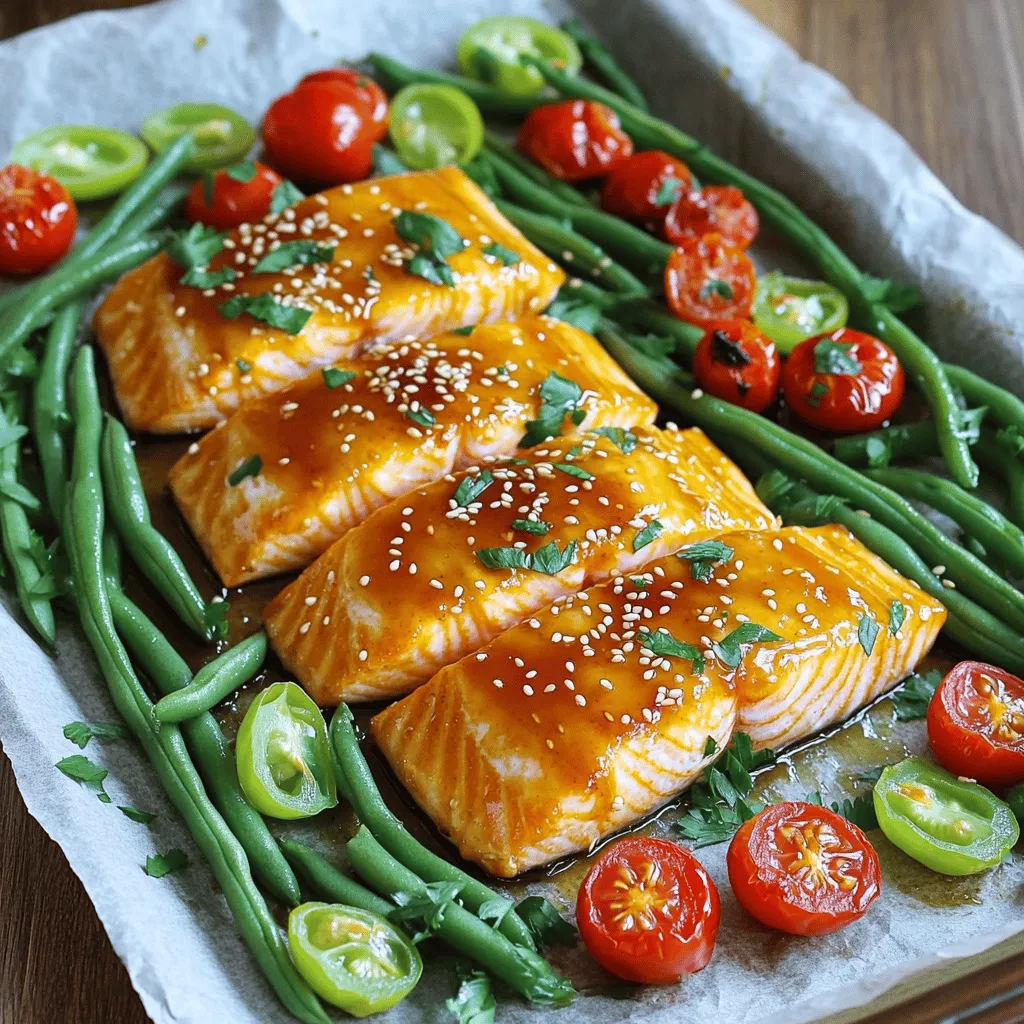
Looking for a quick, tasty dinner? Try my Sheet Pan Honey Garlic Salmon! This dish offers juicy salmon with a

- 1 lb fresh asparagus, trimmed - Optional: Fresh parsley for garnish - 1/2 cup grated Parmesan cheese - 1/2 cup breadcrumbs (Panko recommended) - 1 teaspoon garlic powder - 1 teaspoon onion powder - Salt and pepper to taste - 2 tablespoons olive oil - 1 tablespoon fresh lemon juice Gathering fresh ingredients is key. I love using vibrant asparagus for this dish. Choose bright green stalks. Make sure they are firm and fresh. Trim the woody ends to keep them tender. Next, let’s talk about the coating. Parmesan cheese adds a rich flavor. Panko breadcrumbs give a crunch that I adore. Garlic powder and onion powder add depth to the taste. Don’t forget salt and pepper! They help balance the flavors. For the liquid ingredients, olive oil adds healthy fat. It helps the coating stick. Lemon juice brightens everything up. This makes the dish taste fresh and light. You can also use fresh parsley to garnish your fries. It adds a pop of color and freshness. Enjoy shopping for these ingredients! They make the best asparagus fries. - Rinse the asparagus under cold water. - Trim off the woody ends with a sharp knife. - Pat the asparagus dry with a towel to make it crisp. - In a medium bowl, combine: - 1/2 cup grated Parmesan cheese - 1/2 cup breadcrumbs (Panko for crunch) - 1 teaspoon garlic powder - 1 teaspoon onion powder - Salt and pepper to taste - Mix well to ensure the spices are even. - In another bowl, drizzle: - 2 tablespoons olive oil - 1 tablespoon fresh lemon juice - Toss the asparagus until it is well coated. - Take each piece and roll it in the Parmesan mixture. - Shake off any extra coating. - Preheat the air fryer to 400°F (200°C). - Place the coated asparagus fries in the air fryer basket. - Make sure they don’t overlap for even cooking. - Air fry for about 10-12 minutes. - Flip halfway through to achieve golden brown crispiness. To make your asparagus fries crispy, start by drying them well. After rinsing, use a towel to pat them dry. If the asparagus is wet, it won’t get crispy. Next, coat the asparagus evenly with the spice mix. This ensures every bite bursts with flavor. For the best results, set your air fryer to 400°F (200°C). Cook the fries for about 10 to 12 minutes. Flip them halfway through cooking. This helps them brown evenly. Keep an eye on them to avoid burning. Serve your asparagus fries with tasty dipping sauces. Garlic aioli or lemon pepper dip works great. For presentation, place the fries on a fun platter. You can also add fresh parsley on top for color. It makes the dish look even more appealing! {{image_2}} You can change the cheese for more flavor. Try using asiago or cheddar cheese. These cheeses melt well and add a unique taste. Asiago gives a nutty flavor, while cheddar adds sharpness. You can mix them with Parmesan for a rich blend. Herbs and spices can make your fries more exciting. Consider adding paprika for a smoky kick. Italian seasoning brings a fresh, herby taste. Just sprinkle them into the cheese and breadcrumb mixture. This small change can elevate your dish to new heights. If you want a vegan version, it’s easy to swap ingredients. Use vegan cheese and breadcrumbs. Look for cheese made from nuts or soy. Use whole wheat or gluten-free breadcrumbs if needed. This way, everyone can enjoy these tasty fries without worry. To store leftover asparagus fries, wait until they cool. Place them in an airtight container. Make sure to keep them in the fridge. They last for up to three days. Storing them properly keeps them fresh. To reheat your asparagus fries, use the air fryer for best results. Preheat the air fryer to 350°F (175°C). Place the fries in a single layer for even heating. Cook for about 5 minutes. This method keeps them crispy and tasty. For long-term storage, you can freeze asparagus fries. First, let them cool completely. Then, place them in a freezer-safe bag or container. Be sure to remove as much air as possible. They can last for up to three months in the freezer. When you're ready to eat, no need to thaw. Just air fry them from frozen! To make asparagus fries, follow these steps: 1. Prepare the Asparagus: Rinse the asparagus and trim the woody ends. Dry them well with a towel. 2. Mix the Coating: In a bowl, combine grated Parmesan cheese, breadcrumbs, garlic powder, onion powder, salt, and pepper. Mix well. 3. Coat the Asparagus: In another bowl, drizzle olive oil and lemon juice over the asparagus. Toss to coat evenly. 4. Dredge: Roll each asparagus piece in the Parmesan mixture. Shake off any extra coating. 5. Air Fry: Preheat your air fryer to 400°F (200°C). Place the asparagus in a single layer in the basket. 6. Cook: Air fry for 10-12 minutes, flipping halfway. They should be golden and crispy. 7. Serve: Transfer to a plate and add fresh parsley if you like. You can use frozen asparagus, but there are some things to know. Frozen asparagus may be softer than fresh. This means your fries might not be as crispy. To use frozen asparagus: - Thaw it first: Let it sit in the fridge overnight or run it under cold water. - Dry it well: Pat the spears dry after thawing to remove excess moisture. - Adjust cooking time: Frozen asparagus may need a few extra minutes in the air fryer. Asparagus fries pair well with many dishes. Here are some great options: - Dipping Sauces: Try garlic aioli or a tangy lemon pepper dip. - Main Dishes: Serve alongside grilled chicken or fish for a tasty meal. - Salads: A fresh salad complements the crispy fries well. Feel free to get creative with your pairings! In this blog post, I shared a tasty way to make air-fried asparagus fries. We covered fresh ingredients, simple steps for preparation, and even tips for perfect crispiness. You can easily customize this dish with various toppings and sauces. Enjoy these fries as a snack or a side dish. Remember, fresh asparagus shines best in this recipe. Follow these steps to impress your family and friends. Happy cooking!

Air Fryer Parmesan Asparagus Fries Crispy Delight

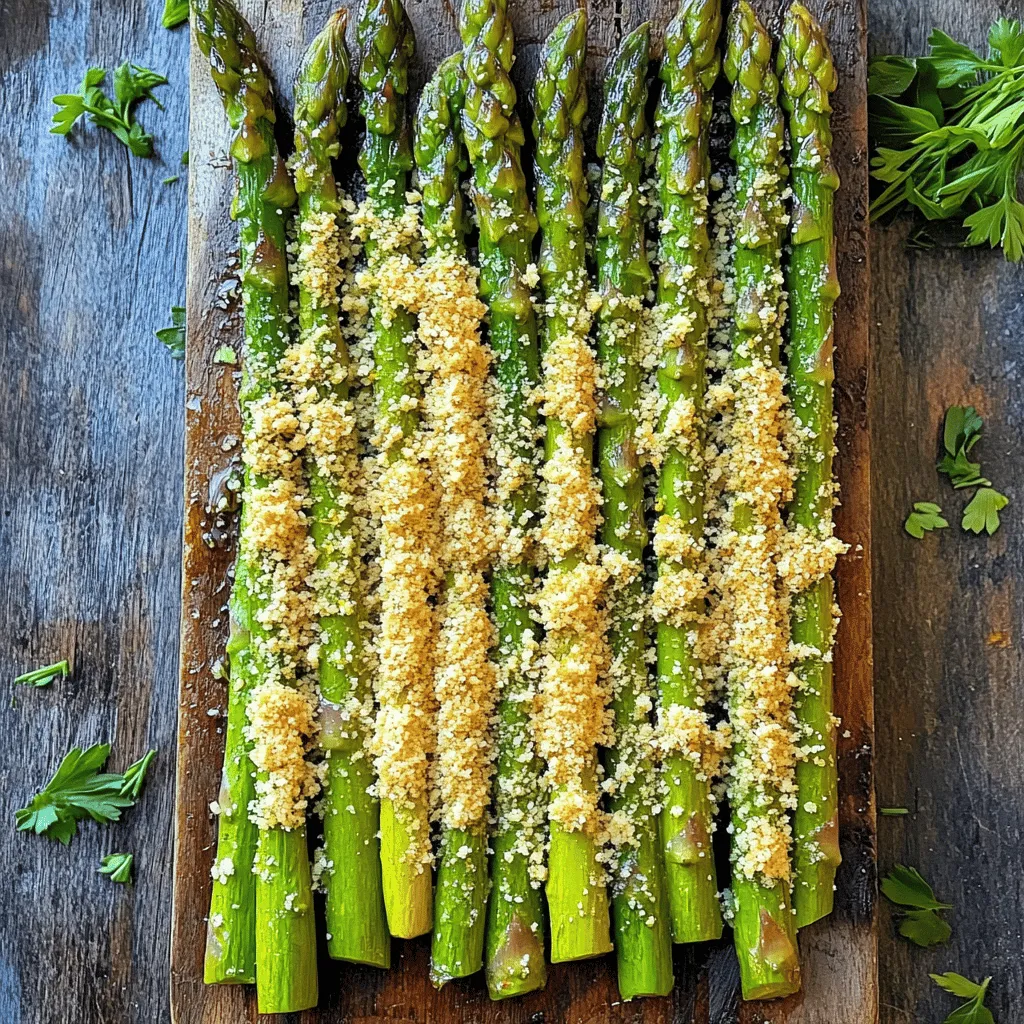
Looking for a tasty snack or side dish? You’ve come to the right place! These Air Fryer Parmesan Asparagus Fries

To make delicious blueberry streusel muffins, you need the following main ingredients: - 2 cups all-purpose flour - 1 cup granulated sugar - 1 tablespoon baking powder - ½ teaspoon baking soda - ½ teaspoon salt - ¾ cup unsalted butter, melted - 2 large eggs - 1 teaspoon vanilla extract - 1 cup buttermilk (or milk with 1 tablespoon vinegar) - 2 cups fresh blueberries (or frozen, thawed and drained) These ingredients create a moist muffin with a sweet blueberry burst. The buttermilk adds a nice tang, while the eggs assist in binding. You can make your muffins from scratch or buy them from a store. Homemade muffins taste fresh and allow you to control the ingredients. Store-bought options are convenient but may lack flavor. If you choose store-bought, look for brands that use real blueberries. You can customize your muffins with optional ingredients: - ½ cup brown sugar, packed (for the topping) - ¼ cup rolled oats (for texture) - ¼ cup cold unsalted butter, cubed (for the topping) - 1 teaspoon cinnamon (for spice) Feel free to add nuts, chocolate chips, or different fruits. Experimenting with flavors makes baking fun. 1. Preheat the Oven: Start by setting your oven to 375°F (190°C). This step ensures even baking. Prepare a muffin tin by lining it with paper liners or greasing it lightly. 2. Mix Dry Ingredients: In a large bowl, whisk together 2 cups of all-purpose flour, 1 cup of sugar, 1 tablespoon of baking powder, ½ teaspoon of baking soda, and ½ teaspoon of salt. These are the base flavors of your muffins. 3. Combine Wet Ingredients: In another bowl, mix ¾ cup of melted unsalted butter, 2 large eggs, 1 teaspoon of vanilla extract, and 1 cup of buttermilk until smooth. This mixture adds moisture and richness. 4. Combine Mixtures: Pour the wet mixture into the dry ingredients. Stir gently just until mixed. Be careful not to overmix. This helps keep your muffins light. Fold in 2 cups of fresh blueberries, handling them gently to avoid breaking. 5. Prepare the Streusel Topping: In a small bowl, combine ½ cup of flour, ½ cup of brown sugar, ¼ cup of rolled oats, and 1 teaspoon of cinnamon. Add ¼ cup of cubed cold butter. Use your fingers or a pastry cutter to mix until it looks like coarse crumbs. 6. Fill Muffin Tin: Divide the batter among the muffin cups, filling each about two-thirds full. Sprinkle the streusel topping generously over each muffin for a sweet crunch. 7. Bake: Place the muffin tin in the oven and bake for 18-22 minutes. The muffins should be golden brown. Insert a toothpick into the center to check for doneness; it should come out clean. 8. Cool: Once baked, take the muffins out of the oven. Let them cool in the pan for about 5 minutes. Then, transfer them to a wire rack to cool completely before serving. Ensure your oven is fully preheated. This step is key for perfect muffins. While the oven heats, gather all your ingredients. Prepare your muffin tin to avoid last-minute scrambles. This will keep the baking process smooth. Always use fresh blueberries when possible for the best flavor. - Don’t Overmix: Mixing too much can lead to tough muffins. Stir until just combined. - Measure Accurately: Use the spoon and level method for flour to avoid dense muffins. Too much flour can weigh them down. - Cool Before Serving: Let the muffins cool for a better texture. Serving them warm is great, but cooling helps set the crumb. - Check Doneness Early: Ovens vary, so check your muffins a few minutes before the suggested time. This helps prevent overbaking. These steps ensure that your Blueberry Streusel Muffins turn out delicious and perfect every time. Happy baking! To get soft and fluffy muffins, mix your wet and dry ingredients separately. This helps keep the batter light. When you combine them, stir gently. Overmixing can lead to tough muffins. Also, fill your muffin cups about two-thirds full. This gives them room to rise without spilling over. Store your muffins in an airtight container at room temperature. They stay fresh for about three days. If you want them to last longer, freeze them. Wrap each muffin in plastic wrap and place them in a freezer bag. To reheat, take out a muffin and microwave it for about 20 seconds. Want to jazz up your muffins? You can add lemon zest for a bright kick. Chopped nuts, like pecans or walnuts, add a nice crunch. For a sweet twist, try adding chocolate chips. Mix and match these extras to create your favorite flavor. {{image_2}} You can switch out blueberries for other fruits. Strawberries, raspberries, or blackberries work well. Try adding nuts or chocolate chips for extra crunch and flavor. You can also top your muffins with a drizzle of icing or a sprinkle of powdered sugar. For gluten-free muffins, swap all-purpose flour for a gluten-free blend. Check that the blend has xanthan gum for the right texture. To make these muffins vegan, use flax eggs instead of regular eggs and plant-based milk. Replace butter with coconut oil or vegan butter. Embrace the seasons with your muffins. In fall, add pumpkin spice or chopped apples. In winter, try cranberries and orange zest. For spring, consider fresh lemon zest and poppy seeds. Summer brings a chance to use peaches or cherries, making your muffins bright and fresh. To keep your blueberry streusel muffins fresh, store them in an airtight container. This will prevent them from becoming dry. Place parchment paper between layers if stacking. This helps avoid sticking. Store at room temperature for up to two days. If you want them to last longer, consider freezing them. Freezing muffins is easy and smart. First, cool them completely. Wrap each muffin in plastic wrap. Then, place them in a freezer-safe bag. Remove as much air as possible before sealing. Label the bag with the date. You can freeze them for up to three months. When ready to eat, thaw them in the fridge overnight or warm them in the microwave. Homemade muffins taste best fresh, but they can last. If kept at room temperature, they stay good for about two days. After that, their taste may decline. In the fridge, they last about a week. Always check for signs of mold or spoilage before eating. For ideal flavor and texture, enjoy them warm after reheating. To stop muffins from sinking, do not overmix the batter. Overmixing can make the muffins tough. Also, use fresh baking powder. Check the date on the package. Make sure your oven is preheated, and bake them right away. This keeps the air bubbles intact, giving your muffins lift. Yes, you can use frozen blueberries. Just thaw and drain them first. Frozen berries may release more juice, so reduce the mixing time. This helps keep the muffins from turning blue. The taste will still be great! To make muffins fluffy, use room temperature ingredients. Mix melted butter with eggs and buttermilk well. This adds air to the batter. Also, avoid overmixing. Fold in the blueberries gently. This keeps the batter light. You can add nutmeg or ginger for extra flavor. A pinch of cardamom also works well. These spices add warmth and depth to the streusel. Just remember to keep the balance right so the blueberry flavor shines. Yes, you can substitute buttermilk. Use regular milk and add 1 tablespoon of vinegar. Let it sit for a few minutes. This makes a quick buttermilk. It gives the muffins the same tangy taste. Muffins are done when they are golden brown on top. Insert a toothpick in the center. If it comes out clean, they are ready. The tops should spring back when gently pressed. This means they are perfectly baked. You learned how to make blueberry streusel muffins from scratch. We covered baking steps, tips, and storage. You can customize your muffins with various flavors and ingredients. Remember, the best muffins come from fresh ingredients. Avoid common mistakes to get that perfect texture. Enjoy your baking and share your tasty treats with others!

Blueberry Streusel Muffins Bakery Tasty Muffin Recipe

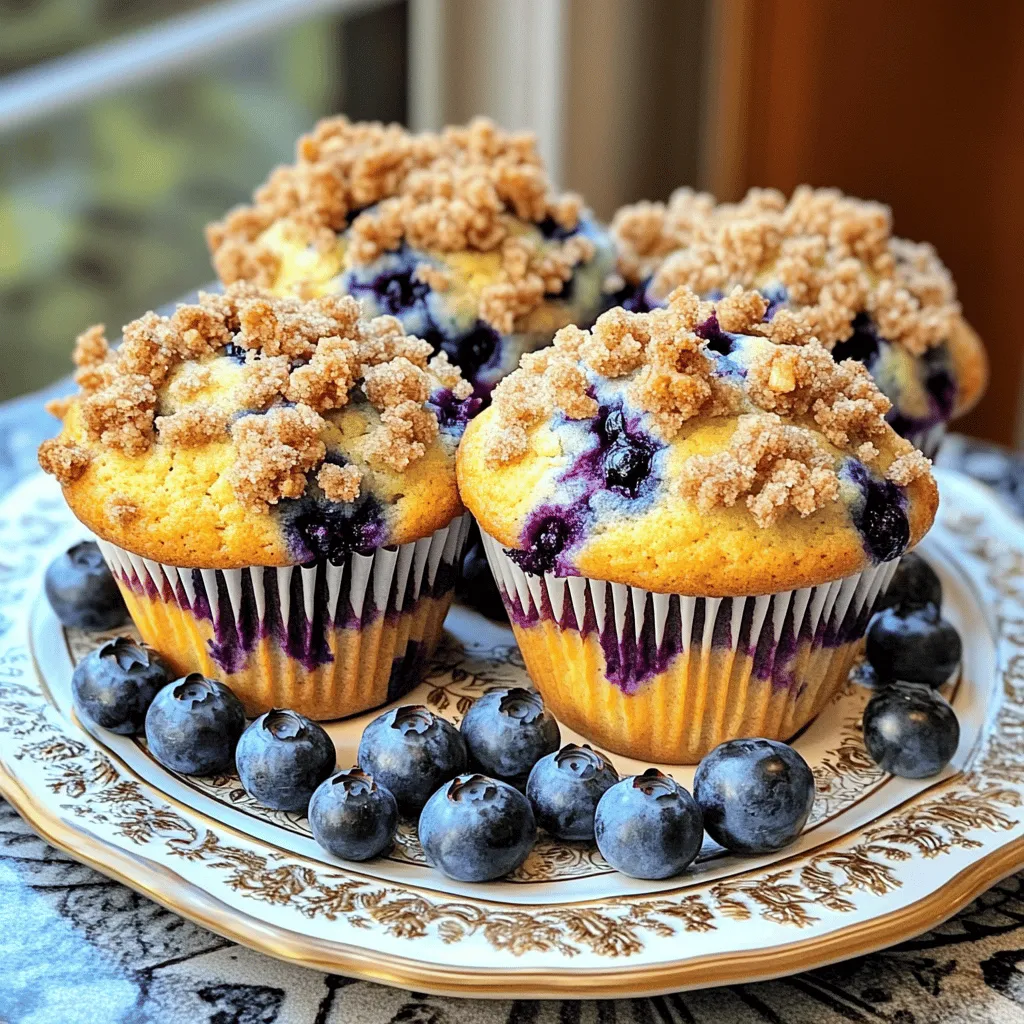
Welcome to your new favorite baking adventure! These Blueberry Streusel Muffins are soft, sweet, and topped with a crunchy layer

- 2 cups rolled oats - 4 cups almond milk (or milk of your choice) - 2 medium apples (peeled, cored, diced) - 1/2 cup brown sugar or maple syrup - 1 teaspoon cinnamon - 1/4 teaspoon nutmeg - 1/4 teaspoon salt - 1 teaspoon vanilla extract - Optional toppings: chopped nuts, dried fruit, or additional apple slices To make the Slow Cooker Cinnamon Apple Oats, you need a few simple items. Rolled oats are the base of this dish. They soak up the liquid and get creamy. Almond milk gives a nice taste, but any milk works well too. Apples add sweetness and texture. I like to use two medium apples, peeled and diced. For sweetness, you can choose brown sugar or maple syrup. Both options bring a rich flavor. You will also need some spices. Cinnamon is a must for that warm taste. Nutmeg adds a hint of warmth too. A little salt helps balance the flavors. Lastly, vanilla extract gives it a lovely aroma. Feel free to add toppings! Chopped nuts or dried fruit add crunch. Extra apple slices make it even fruitier. You can mix and match to find your perfect bowl. To start, gather your ingredients. In a slow cooker, combine: - 2 cups rolled oats - 4 cups almond milk (or any milk of your choice) - 2 medium apples, peeled, cored, and diced - 1/2 cup brown sugar or maple syrup - 1 teaspoon cinnamon - 1/4 teaspoon nutmeg - 1/4 teaspoon salt Mix them well. Ensure the oats are evenly coated with the liquid. Stir in the diced apples gently. This adds sweetness and texture to your oats. Next, set up your slow cooker. Cover it with a lid and set it to low heat. Cook the oats for 6 to 8 hours. The long cooking time allows the flavors to meld and the oats to soften. Check the oats occasionally. You want them to absorb most of the liquid and become creamy. Once the cooking time is up, stir in 1 teaspoon of vanilla extract for added flavor. If the oats seem too thick, just add a splash more milk. This helps reach your desired consistency. Serve the oats warm in bowls. Top them with your choice of: - Chopped nuts - Dried fruit - Additional apple slices Feel free to mix and match toppings to enhance your breakfast! To keep your oats from clumping, stir them well before cooking. Mixing the oats with the almond milk and spices helps them combine smoothly. This simple step ensures even cooking and a creamy finish. For the best texture, try using rolled oats. They cook evenly and give a nice chew. If your oats are too thick after cooking, just add more milk. This will help you get a creamy bowl every time. You can change the sweetness by using honey or agave syrup instead of brown sugar. Each sweetener adds a unique taste. For flavor boosts, try adding a pinch of ginger or a splash of maple extract. You can also toss in more fruits. Try adding pears, bananas, or berries for added nutrition and flavor. Just be sure to adjust the cooking time if you add more ingredients. Cleaning your slow cooker is easy if you follow a few steps. Let it cool completely before washing. Use warm soapy water and a soft sponge to avoid scratches. For tough stains, soak the pot in warm water for a bit. To ensure even cooking, place the slow cooker on a flat surface. Avoid blocking the vent to keep heat circulating. Regular care will keep your slow cooker in great shape for all your tasty meals. {{image_2}} You can make your slow cooker cinnamon apple oats even better! Try adding nuts and seeds. Chopped walnuts or chia seeds give a nice crunch. They also add healthy fats and protein. You can change the flavors with different seasons. In fall, add some pumpkin spice for a cozy taste. In summer, try mixing in berries like blueberries or strawberries. Each season brings a new twist! If you want to make this dish vegan, use almond milk or any plant-based milk. This recipe works great with oat milk or coconut milk too. They all taste delicious! To make it gluten-free, ensure you use certified gluten-free oats. Always check labels! You can enjoy this meal even if you have gluten issues. Do you want to make more or less? You can easily scale the recipe. For larger servings, just double the ingredients. If you need less, cut the amounts in half. This recipe is perfect for meal prep. You can make a big batch on Sunday. Then, store it in the fridge for quick breakfasts during the week. Just heat it up when you're ready to eat! After making your cinnamon apple oats, let them cool down. Store leftovers in an airtight container. This keeps them fresh and tasty. You can store them in the fridge for up to five days. You can freeze your oats for future meals. First, let them cool completely. Then, transfer the oats into freezer-safe containers. They can last for up to three months in the freezer. To reheat, thaw them overnight in the fridge. Then, warm them in the microwave or on the stove. Add a splash of milk for a creamy texture. When serving, use bowls that hold about one cup. This helps with portion control. If you want to prep meals, use small containers with lids. They are great for storing your oats and make for easy grab-and-go breakfasts. Slow cooker cinnamon apple oats take about 6 to 8 hours to cook. I recommend setting your slow cooker on low heat overnight. This way, you wake up to a warm breakfast. The oats get soft and soak up most of the almond milk. You can use steel-cut oats, but cooking time will change. Steel-cut oats take longer to cook, usually about 8 to 10 hours. They also have a chewier texture. Rolled oats are softer and break down more during cooking, which is nice for a creamy bowl. Toppings can make your oats even better! Here are some ideas: - Chopped nuts for crunch - A sprinkle of dried fruit for sweetness - Fresh apple slices for a burst of flavor - A drizzle of honey or maple syrup for extra sweetness Feel free to mix and match your toppings for fun textures and flavors! This blog post covers everything you need to make delicious slow cooker cinnamon apple oats. From the right ingredients to cooking methods, I’ve shared step-by-step tips for perfect oats. Remember to have fun customizing with your favorite fruits and sweeteners. Don’t forget how to store leftovers for another day. With these insights, you can enjoy a warm, hearty breakfast anytime. Cooking should be simple and tasty, and this recipe makes that possible! Enjoy your oats, and share your results. It's all about making breakfast easy and flavorful.

Slow Cooker Cinnamon Apple Oats Tasty Breakfast Delight

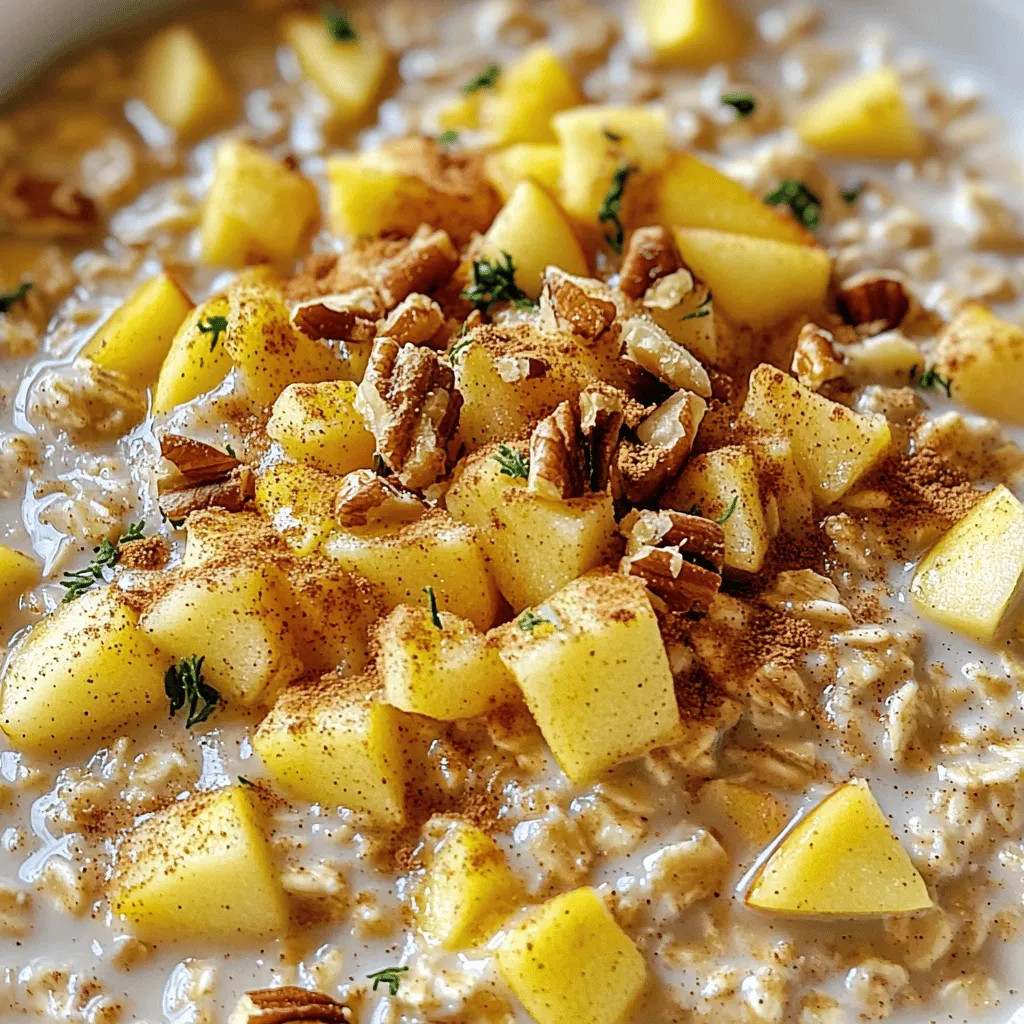
Start your day right with a warm bowl of Slow Cooker Cinnamon Apple Oats. This simple recipe combines rolled oats,

- 2 cups fresh strawberries, hulled and quartered - 3/4 cup granulated sugar (divided) - 1 tablespoon lemon juice - 1 cup cream cheese, softened - 1 cup heavy whipping cream - 1/2 cup whole milk - 1 teaspoon vanilla extract - 1/2 cup graham cracker crumbs - Pinch of salt You can switch the strawberries for other fruits. Blueberries or raspberries work well. If you want lower fat, use light cream cheese. You can also replace heavy cream with coconut cream for a dairy-free treat. Measuring sticky things like sugar or cream cheese can be tricky. Use a spatula to scrape it out completely. For precision, a kitchen scale is your best friend. It helps you get just the right amounts. {{ingredient_image_1}} To start, we need to prepare the strawberries. First, take 2 cups of fresh strawberries and hull them. Then, quarter the strawberries. Place these in a bowl. Add 1/4 cup of granulated sugar and 1 tablespoon of lemon juice. Toss the mixture gently. This helps to coat the strawberries. Let them sit for about 15 minutes. This process is called macerating. It helps release the juices. After 15 minutes, take a fork and mash the strawberries gently. We want a chunky puree. This adds texture to our ice cream. Set the puree aside for later. Next, we will make the cream cheese mixture. In a separate bowl, add 1 cup of softened cream cheese. Then, whisk in the remaining 1/2 cup of sugar. You want it to be smooth and creamy. Using a hand mixer can help here. Now, we add 1 cup of heavy whipping cream, 1/2 cup of whole milk, and 1 teaspoon of vanilla extract. Mixing all these together forms a rich base. Make sure to blend until smooth. Room temperature ingredients are key. They mix better and create a creamier texture. Now it’s time to churn our mix. Take the cream cheese mixture and gently fold in the chunky strawberry puree. Include any juices released. Also, add 1/2 cup of graham cracker crumbs for that cheesecake flavor. Be careful not to overmix. Pour this mixture into your ice cream maker. Follow the manufacturer's instructions for churning. Usually, this takes about 20-25 minutes. You will know the ice cream is ready when it reaches a soft-serve consistency. Once it’s done, transfer the ice cream into an airtight container. Smooth the top with a spatula. Freeze for at least 4 hours, or until it is firm. Before serving, let it sit at room temperature for 5-10 minutes. This softens it for easier scooping. Enjoy your homemade strawberry cheesecake ice cream! To get that creamy texture, you need to incorporate air while churning. Air makes ice cream light and fluffy. If you skip this, your ice cream may turn out dense. Also, chill your mixture before churning. A cold mixture churns better. It helps the ice cream firm up faster, leading to a smoother finish. Serve your strawberry cheesecake ice cream at the right temperature. A good temperature is around 10°F. This makes scooping easy and keeps it creamy. For a fun twist, present the ice cream in chilled bowls. You can also add fresh strawberry slices and a sprinkle of graham cracker crumbs on top. This adds color and texture to your dish. To boost flavor, consider adding extracts or essences. A touch of almond extract can bring a nice twist. You can also pair it with sauces or toppings. A drizzle of chocolate sauce or a spoonful of berry compote can elevate the taste. These additions make your ice cream even more enjoyable! Pro Tips Use Fresh Strawberries: Fresh strawberries will enhance the flavor of your ice cream, making it taste more vibrant and delicious. Chill Your Ingredients: For a creamier texture, chill your cream cheese, heavy cream, and milk before mixing them together. Don’t Overmix: When folding in the strawberries and graham cracker crumbs, be gentle to avoid breaking down the strawberries and keeping the mixture light. Customize Your Mix-ins: Feel free to add other mix-ins like chocolate chips or nuts for added texture and flavor. {{image_2}} You can change your ice cream with fun add-ins. Try adding chocolate chips or swirls for a rich taste. These bits of chocolate will mix well with the strawberry flavor. You can also add nuts for a crunchy texture. Caramel swirls give a sweet touch to each scoop. These add-ins make your ice cream even more exciting. You can create a vegan or dairy-free version of this ice cream. Use coconut milk or almond milk to keep it creamy. For a lighter choice, try yogurt-based options. Greek yogurt adds a tangy flavor and creamy texture. Both versions taste great and fit different diets. When berries are in season, use them for fresh flavors. Blueberries or raspberries can replace strawberries; they add new tastes. You can also mix different fruits for unique twists. Think about using peaches or mangoes for a summer treat. Each fruit brings its own joy to your ice cream. To store your homemade strawberry cheesecake ice cream, use an airtight container. This keeps air out and preserves flavor. Before sealing, smooth the top of the ice cream with a spatula. This minimizes air pockets and helps avoid freezer burn. You can also cover the surface with plastic wrap before sealing the lid for extra protection. To prevent freezer burn, freeze the ice cream quickly. Set your freezer to the coldest setting before you add the ice cream. Store the container in the back of the freezer, where it’s coldest. Avoid frequent opening of the freezer, as this can raise the temperature. Homemade strawberry cheesecake ice cream can last about two weeks in the freezer. After that, the quality may drop. Check for signs of spoilage before serving. If you see ice crystals forming on the surface, the ice cream may be freezer burned. Taste also changes over time. If it tastes off or has an unusual texture, it's best to throw it out. For freezing ice cream, glass or plastic containers work best. They keep the ice cream fresh and are easy to clean. Choose containers with tight-fitting lids. This helps keep ice cream safe from strong freezer smells. You can also use recycled containers, like yogurt or takeout containers, as eco-friendly options. Just ensure they are clean and dry before using. Making this ice cream takes about 4 hours and 25 minutes total. Here’s the breakdown: - Prep time: 15 minutes - Churning time: 20-25 minutes in the ice cream maker - Freezing time: At least 4 hours You can enjoy this creamy treat after a short wait! Yes, you can still make this ice cream! Here’s how: - Mix the ingredients: Follow the recipe for the mixture. - Use a container: Pour it into a shallow dish or bowl. - Stir often: Freeze for about 4 hours. Stir every 30 minutes to break up ice crystals. This method gives you a nice texture, but it requires more attention. Toppings can elevate your ice cream. Here are some tasty ideas: - Fresh strawberry slices: They add color and flavor. - Graham cracker crumbs: Sprinkle them for crunchy texture. - Whipped cream: A dollop makes it extra special. - Chocolate sauce: A drizzle for a sweet twist. Feel free to mix and match your favorites! This blog post covered everything you need to make delicious strawberry cheesecake ice cream. We discussed key ingredients, including fresh strawberries and cream cheese. I shared tips for measuring, as well as step-by-step instructions for preparation and churning. Your ice cream will be creamy and full of flavor. Remember to experiment with variations and toppings. Proper storage is crucial to keep it fresh. With these tips, you can create a delightful treat that impresses everyone. Enjoy your homemade ice cream journey!

Strawberry Cheesecake Ice Cream Creamy Delight Recipe

Summer is here, and there’s nothing quite like a scoop of Strawberry Cheesecake Ice Cream! This creamy delight blends fresh

To make these tasty burrito bowls, gather these key ingredients: - 2 cups cooked brown rice - 1 can (15 oz) black beans, drained and rinsed - 1 cup corn kernels (canned or frozen) - 1 bell pepper, diced (any color) - 1 small red onion, finely chopped - 1 avocado, diced - 1 cup cherry tomatoes, halved - 1 cup shredded cheese (cheddar or a Mexican blend) - 1 teaspoon cumin - 1 teaspoon chili powder - 2 tablespoons olive oil - 2 tablespoons fresh lime juice - Fresh cilantro leaves for garnish - Salt and pepper to taste These ingredients create a colorful and filling meal. The brown rice serves as a hearty base. Black beans and corn add protein and sweet flavor. Fresh veggies bring crunch and zest. You can enhance your burrito bowls with these optional toppings: - Sour cream or Greek yogurt - Salsa or pico de gallo - Jalapeños for heat - Lime wedges for extra zing Each topping adds a unique touch. Sour cream adds creaminess while salsa offers a fresh bite. You can easily swap ingredients to fit your taste: - Use quinoa instead of brown rice for a different grain. - Swap black beans for pinto beans or chickpeas. - Choose any bell pepper color or use zucchini for a fresh twist. - For a dairy-free option, skip the cheese or use a plant-based cheese. These substitutions keep the recipe flexible. They allow you to customize based on what you have or prefer. {{ingredient_image_1}} To start, gather your cooked brown rice. In a large bowl, add the rice along with olive oil, cumin, chili powder, salt, and pepper. Mix it well. Ensure the rice gets coated with the oil and spices. This adds great flavor to your bowl. The warm rice helps the spices blend better. You can also use leftover rice, which saves time and adds nice texture. Grab a serving dish or bowl. Begin with the seasoned rice as your base. Next, evenly spread the drained black beans over the rice. Follow this with the corn kernels. This adds a sweet crunch. Now, scatter the diced bell pepper, red onion, and halved cherry tomatoes on top. This colorful layer makes the bowl look inviting and bright. Now it’s time for the fun part! Gently place diced avocado on top of the veggies. Then, sprinkle a generous amount of shredded cheese over everything. The cheese melts slightly and adds creaminess. Drizzle fresh lime juice all over the bowl for a zesty kick. Finally, garnish with fresh cilantro leaves for a pop of flavor. Serve with extra lime wedges on the side for those who want more zing! To speed up your burrito bowls, use pre-cooked brown rice. You can find it in most stores. Just heat it up, and you're ready to go. Canned beans and frozen corn are great time-savers too. They add flavor and make prep super quick. If you're in a real rush, chop the veggies ahead of time. This way, you can build your bowls in under ten minutes. Seasonings can transform your burrito bowls. The cumin and chili powder in this recipe add warmth and depth. Don't be shy; taste as you go! If you want more heat, add a pinch of cayenne pepper. You can also mix in some taco seasoning for extra flavor. A dash of smoked paprika gives a nice twist. Always finish with fresh lime juice for brightness. It makes everything taste fresh and lively. To make your meal fun, serve the burrito bowls family-style. Place all the layers in separate bowls. Let everyone build their own bowl. This way, each person can choose what they love. You can also add a side of tortilla chips for crunch. Salsa and guacamole are perfect for dipping. This makes dinner special and allows for personal touches. Pro Tips Use Fresh Ingredients: Whenever possible, opt for fresh vegetables and herbs to enhance the flavor and nutrition of your burrito bowls. Customize Your Proteins: Feel free to add grilled chicken, beef, or tofu for extra protein to make the meal more filling. Make It Spicy: For those who enjoy heat, add jalapeños or a splash of hot sauce to elevate the spice level. Meal Prep Friendly: Prepare the components in advance and store them separately for quick assembly on busy days. {{image_2}} You can easily make this dish vegetarian or vegan. Start with the base of brown rice, which is already plant-based. Replace cheese with a vegan option or skip it entirely. For added protein, try using lentils or chickpeas instead of black beans. You can also mix in some diced tofu for a satisfying bite. Top with fresh avocado and a squeeze of lime juice to keep it fresh and tasty. If you love meat, there are great options to add to your burrito bowls. Grilled chicken or steak works well. Simply cook your choice of meat with some cumin and chili powder for extra flavor. You can also use shredded pork or shrimp. Just layer the cooked meat right on top of the beans and corn for a hearty meal. This recipe is already gluten-free since it uses brown rice and beans. However, always check your labels. Some seasonings may contain gluten. If you want to add a crunchy topping, consider using corn tortilla chips instead of croutons. This keeps your meal tasty and safe for those with gluten sensitivities. To keep your burrito bowls fresh, place any leftovers in an airtight container. Make sure to cool the bowls to room temperature before sealing them. This helps lock in flavor and keep bacteria away. Store them in the fridge for up to three days. When ready to eat, take your burrito bowl out of the fridge. If you want to keep the texture, reheat in the microwave. Heat in short bursts of 30 seconds. Stir after each burst until it’s warm. You can also use a skillet on low heat. Just stir often to avoid burning. If you want to freeze your burrito bowls, do it before adding toppings like avocado or cheese. Place the base and layers in a freezer-safe container. You can freeze them for up to three months. When ready to eat, thaw overnight in the fridge. Then, reheat and add fresh toppings. Enjoy a quick meal anytime! You can use white rice for a quick swap. Quinoa is another great choice. It adds more protein. Cauliflower rice gives a low-carb option. Each option brings a unique taste. To serve more, just double the recipe. Use 4 cups of rice and 2 cans of beans. This way, you keep the flavors high and the prep easy. You can also add more toppings for extra fun. Yes! Leftover rice, beans, or veggies work well. Toss them in without worry. This dish is all about using what you have. It keeps meals fresh and fun. To make it mild, skip the chili powder. Add more cumin for flavor without heat. For spice lovers, try jalapeños or hot sauce. Adjust to fit your taste and enjoy! This article covered how to make tasty burrito bowls for your family. We explored the key ingredients, step-by-step instructions, and helpful tips to save time. There are delicious variations for everyone, plus ways to store leftovers for later. Burrito bowls are fun, easy, and great for busy nights. With the right mix of flavors and toppings, you can create a dish everyone will love. Embrace the process and enjoy your creation!

Minute Family Burrito Bowls Quick and Tasty Meal

Are you busy but still want a family meal that’s quick, tasty, and satisfying? Look no further than my Minute

- 2 cups plain Greek yogurt - 1/2 cup natural peanut butter - 1/4 cup honey or maple syrup - 1/4 cup unsweetened cocoa powder - 1/4 cup mini dark chocolate chips - 1/4 cup chopped mixed nuts (almonds, walnuts, or pecans) - Sea salt, for sprinkling These ingredients form the base for my high-protein dessert. The Greek yogurt gives a creamy texture and packs a protein punch. Peanut butter adds richness and flavor. Honey or maple syrup brings sweetness, while cocoa powder adds that deep chocolate taste. Mini dark chocolate chips and chopped nuts give a delightful crunch. A sprinkle of sea salt enhances all the flavors. - Additional nuts or seeds - Different flavored Greek yogurt You can customize this recipe easily. Add your favorite nuts or seeds for extra texture. You can also swap in flavored Greek yogurt for a fun twist. Think vanilla or even chocolate! - Protein content per serving: Approximately 6 grams - Caloric breakdown: About 150 calories per piece Each piece is not only delicious but also healthy. The protein helps keep you full. This is great for a snack or dessert. Enjoy it knowing you are treating yourself well! To start, grab a big mixing bowl. Add in 2 cups of plain Greek yogurt. Next, scoop in 1/2 cup of natural peanut butter. Pour in 1/4 cup of honey or maple syrup for sweetness. Finally, add 1/4 cup of unsweetened cocoa powder for that rich chocolate flavor. Now, mix everything together. Use a whisk or a spatula to stir. Keep mixing until the mixture is smooth and well blended. This step is key to a creamy bark. Take a baking sheet or pan, about 9x9 inches works great. Line it with parchment paper. Make sure to leave some overhang on the edges. This helps you lift out the bark later. It’s an easy trick for quick removal. Now, pour the yogurt mixture onto the lined baking sheet. Use a spatula to spread it out evenly. Aim for about 1/2 inch thick. This thickness gives a nice bite. Next, it’s time to add toppings. Sprinkle 1/4 cup of mini dark chocolate chips and 1/4 cup of chopped mixed nuts over the surface. Gently press them down into the mixture. This helps them stick better. To finish, sprinkle a pinch of sea salt over the whole bark. This simple step enhances the flavor and brings out the sweetness. Once done, place the baking sheet in the freezer. Let it freeze for at least 3-4 hours. When it’s fully set, you can take it out and enjoy your high-protein treat! To get a smooth and creamy texture, start with room temperature ingredients. Cold ingredients can clump together. Mix the Greek yogurt, peanut butter, honey, and cocoa powder well. Use a sturdy spatula for the best results. When spreading the mixture, make sure to keep it even. Aim for about half an inch thick. This helps it freeze evenly. You can change the flavor of your bark easily. Try using flavored Greek yogurt like vanilla or strawberry. This adds a fun twist. For toppings, consider using dried fruit or seeds. You can even use coconut flakes for a tropical vibe. Get creative and mix what you love. What if your bark doesn’t set? If it’s too soft, let it freeze longer. Check every hour until it’s firm. If the texture seems grainy, ensure you mixed well. Mixing too fast can introduce air. You want a smooth blend. If you face any issues, remember, practice makes perfect! {{image_2}} You can make this bark more fun with different flavors. Here are two tasty ideas: - Chocolate Mint Greek Yogurt Bark: Add a few drops of peppermint extract. This gives a great minty twist. Mix it into the yogurt base before spreading it in the pan. Top with crushed mint candies for extra crunch. - Peanut Butter Banana Bark: Mash one ripe banana and mix it into the yogurt base. This adds natural sweetness and a banana flavor. You can also slice fresh bananas on top for more taste. Sometimes, you may want to change the ingredients. Here are some swaps you can try: - Using almond butter instead of peanut butter: Almond butter has a different flavor but works well. It adds a nutty taste and is a good choice if you have peanut allergies. - Incorporating different sweeteners: If you want to reduce sugar, try stevia or agave syrup. These sweeteners can keep your bark sweet without the extra calories. Making this bark fit your diet is easy. Here are some options to consider: - Making it vegan-friendly: Use plant-based yogurt like almond or coconut yogurt. Replace honey with maple syrup for a sweet touch without animal products. - Nut-free alternatives: If you need a nut-free option, skip the peanut butter and use sunflower seed butter. This gives the bark creaminess without nuts. You can also leave out the mixed nuts in the toppings. Store your High-Protein Chocolate Peanut Butter Greek Yogurt Bark in an airtight container. This keeps it fresh for longer. Make sure to seal it tightly. If you want to avoid freezer burn, wrap the bark in plastic wrap before placing it in the container. This extra layer helps protect it from air and moisture. You can keep the bark in the freezer for up to a month. After that, it might lose flavor and texture. Signs of spoilage include ice crystals on the surface or a change in color. If you see these, it’s best to toss it out. To thaw the bark, simply take it out of the freezer and let it sit at room temperature. This usually takes about 10-15 minutes. You can also place it in the fridge for a slower thaw. If the texture feels too icy, cut it into pieces and let it sit for a few extra minutes. This helps refresh the texture and makes it easier to enjoy. The bark takes about 3 to 4 hours to freeze completely. I suggest checking it after three hours. You want it firm enough to cut easily. If you leave it for too long, it may become hard to break. Yes, you can use flavored Greek yogurt. It will change the taste and add extra sweetness. I like to use vanilla or chocolate for a fun twist. Keep in mind that it might alter the texture slightly, but it will still be delicious. This recipe is great for meal prep. You can make a batch and store it in the freezer. Just cut it into pieces before freezing. For serving, I enjoy pairing it with fresh fruit or a sprinkle of granola. It makes for a quick and healthy snack! This blog post covers a simple and tasty recipe for Greek yogurt bark. We explored the key ingredients, easy steps, and tips for success. You can customize the bark with different flavors and toppings. It’s perfect for meal prep or a sweet snack. Remember to store it well, so it stays fresh. Enjoy making this healthy treat that fits your tastes and dietary needs. You'll love the blend of flavors in every bite!

High-Protein Chocolate Peanut Butter Greek Yogurt Bark

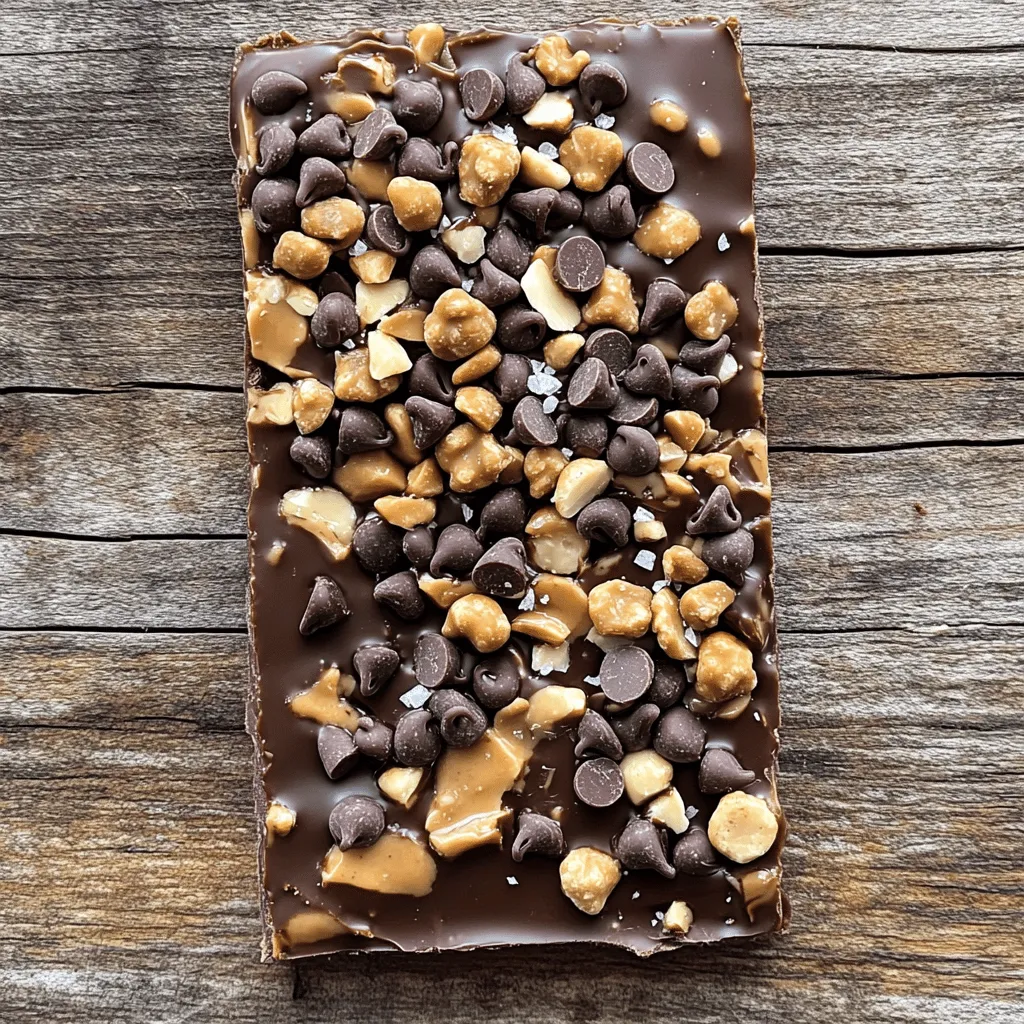
Craving a sweet treat that’s both delicious and packed with protein? You’re in the right place! My High-Protein Chocolate Peanut

Older posts
Newer posts
← Previous Page1 … Page34 Page35 Page36 … Page164 Next →

dsad

© 2026 easycookingbite • Built with GeneratePress

Our Policies

  • Copyright Policy
  • Cookie Policy
  • GDPR Policy
  • Privacy Policy
  • Disclaimer
  • Terms Of Use

More Information

  • Home
  • About
  • Contact
  • Appetizers
  • Dessert
  • Dinner
  • Drinks
©2026, easycookingbite About Back To Top