
Slow Cooker Chicken and Dumplings Simple and Tasty Dish
If you crave a warm, hearty meal, look no further than slow cooker chicken and dumplings! This simple and tasty
If you crave a warm, hearty meal, look no further than slow cooker chicken and dumplings! This simple and tasty
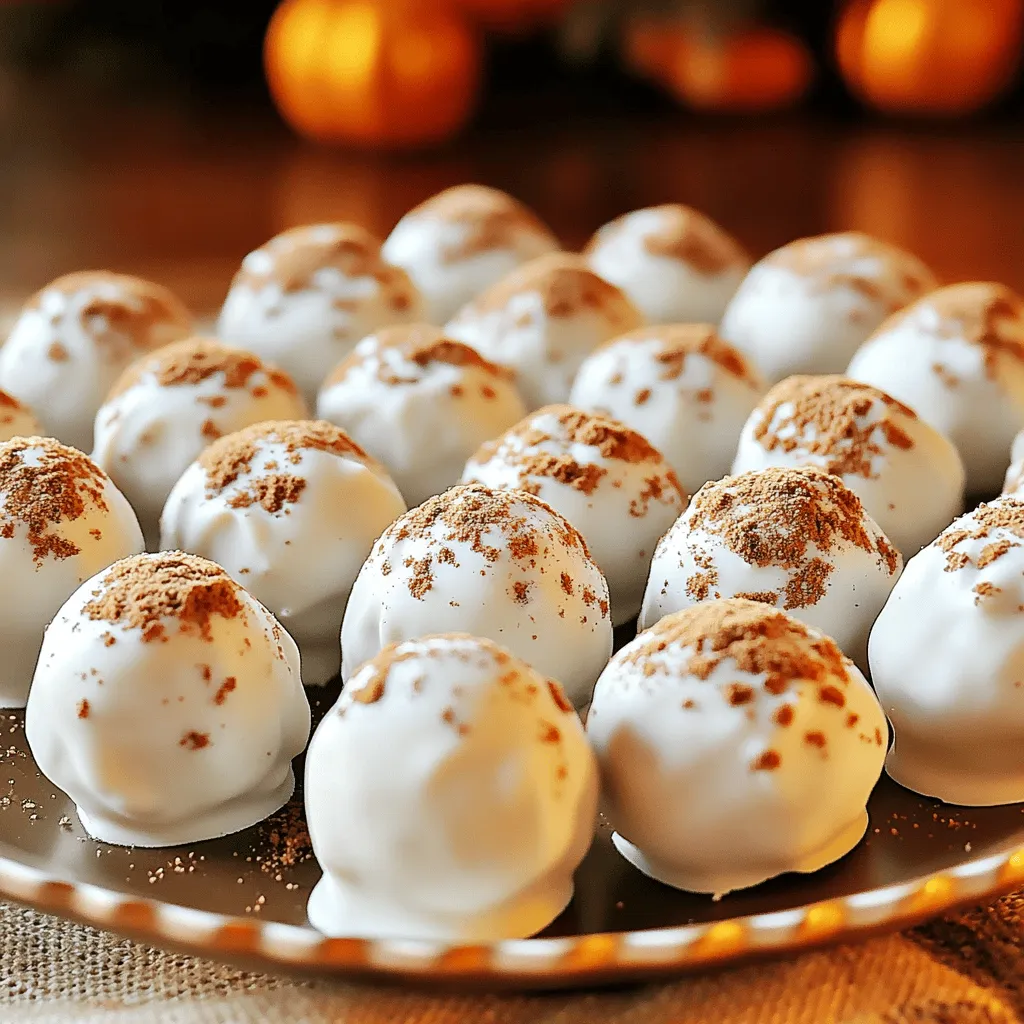
Are you ready to indulge in a sweet treat that requires no oven at all? Today, I’m sharing my easy
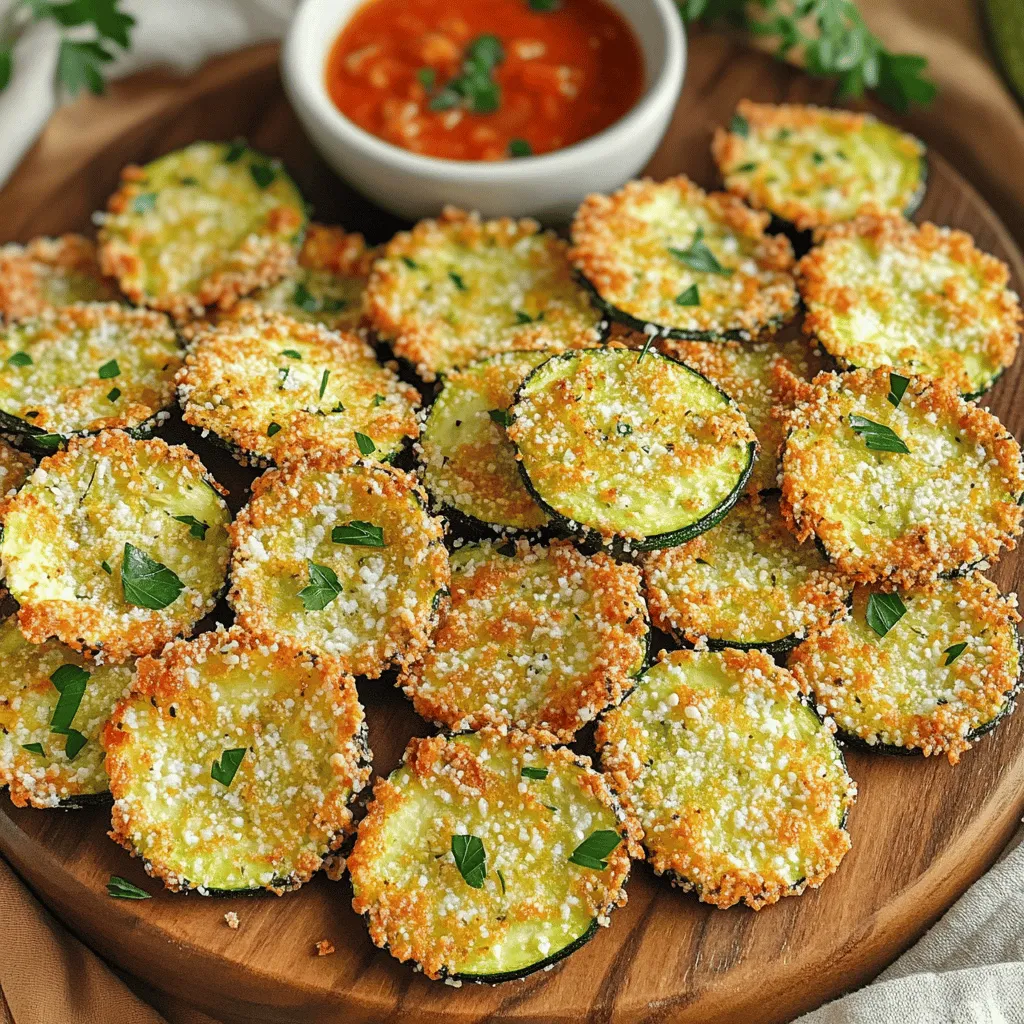
Are you ready to enjoy a tasty and healthy snack? My Air Fryer Parmesan Crusted Zucchini Chips recipe is a
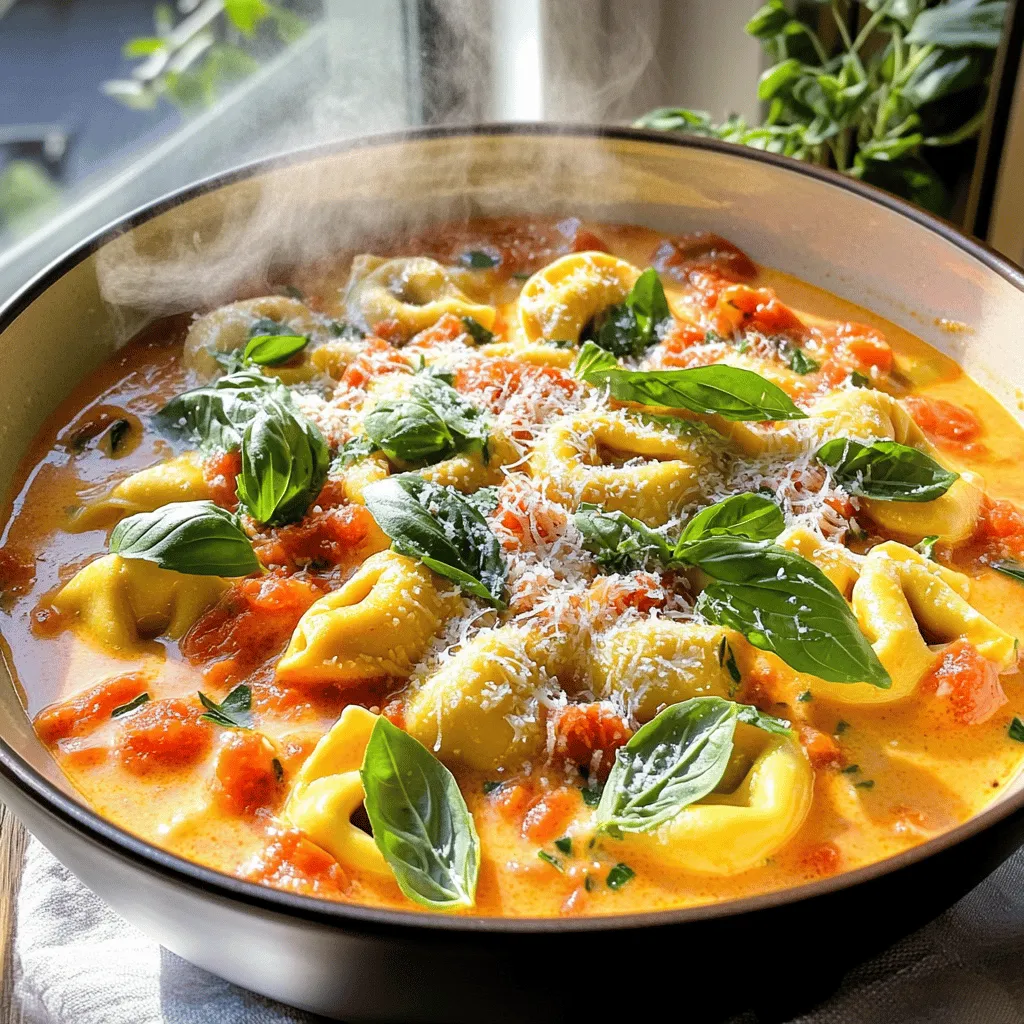
If you’re craving a comforting meal that’s quick and easy, look no further. My One-Pot Creamy Tomato Basil Tortellini Delight
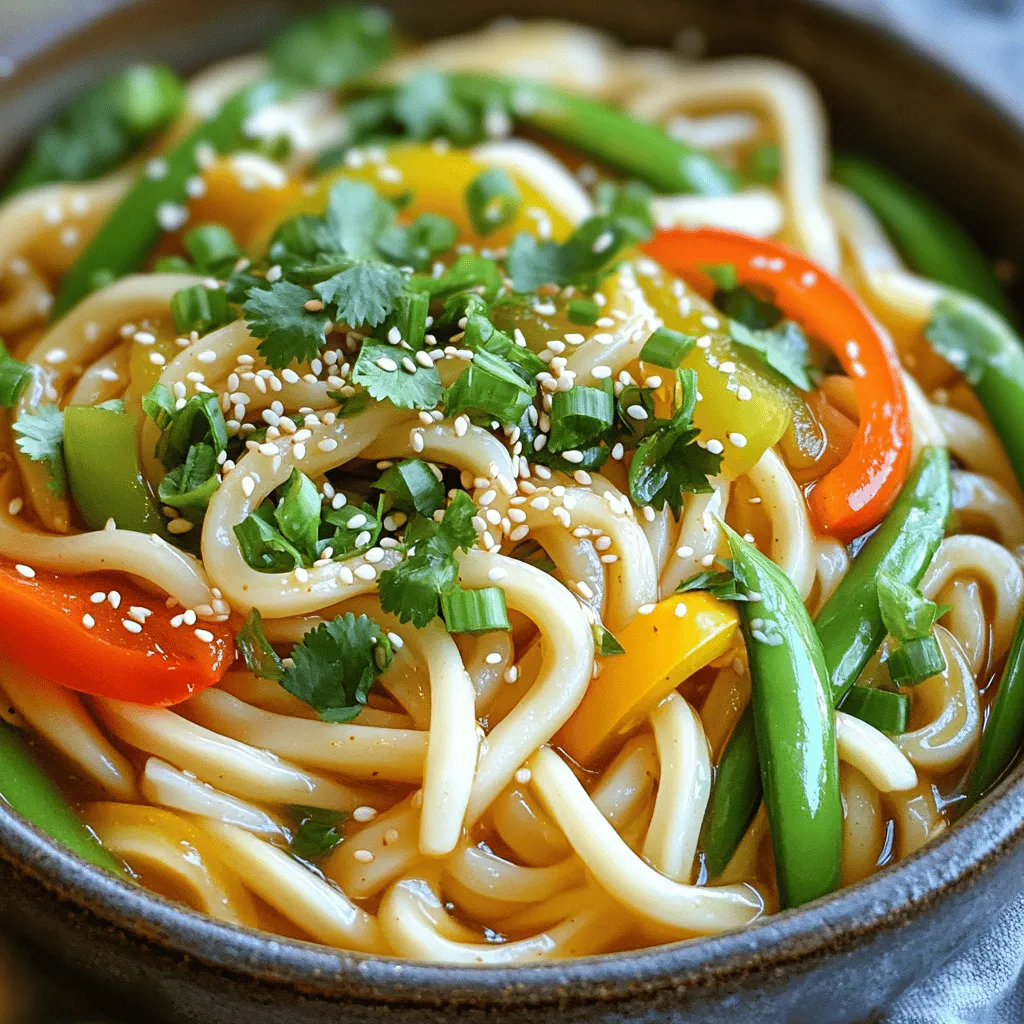
Are you ready to spice up your dinner? This Spicy Garlic Udon Noodles recipe is easy, tasty, and packed with
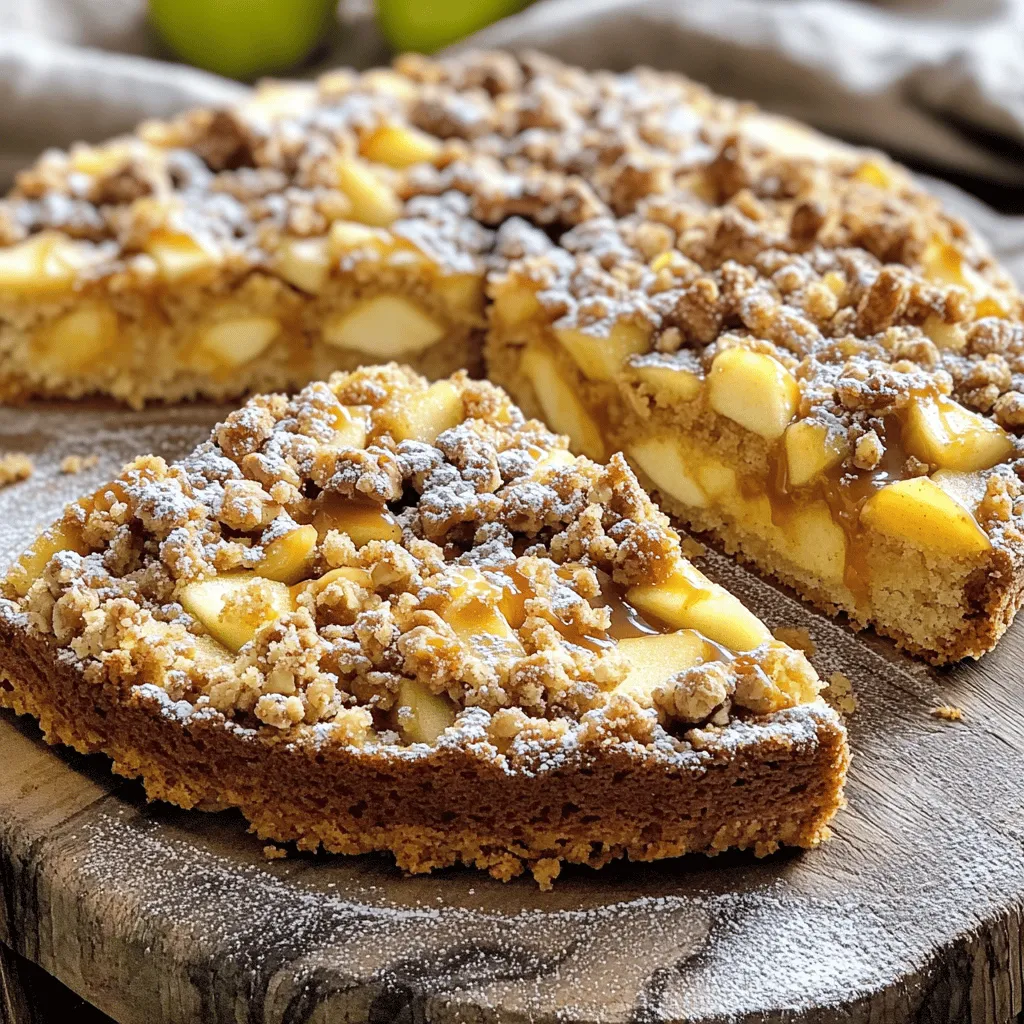
If you’re craving a warm and sweet dessert, you need to try this Caramel Apple Streusel Coffee Cake. It combines
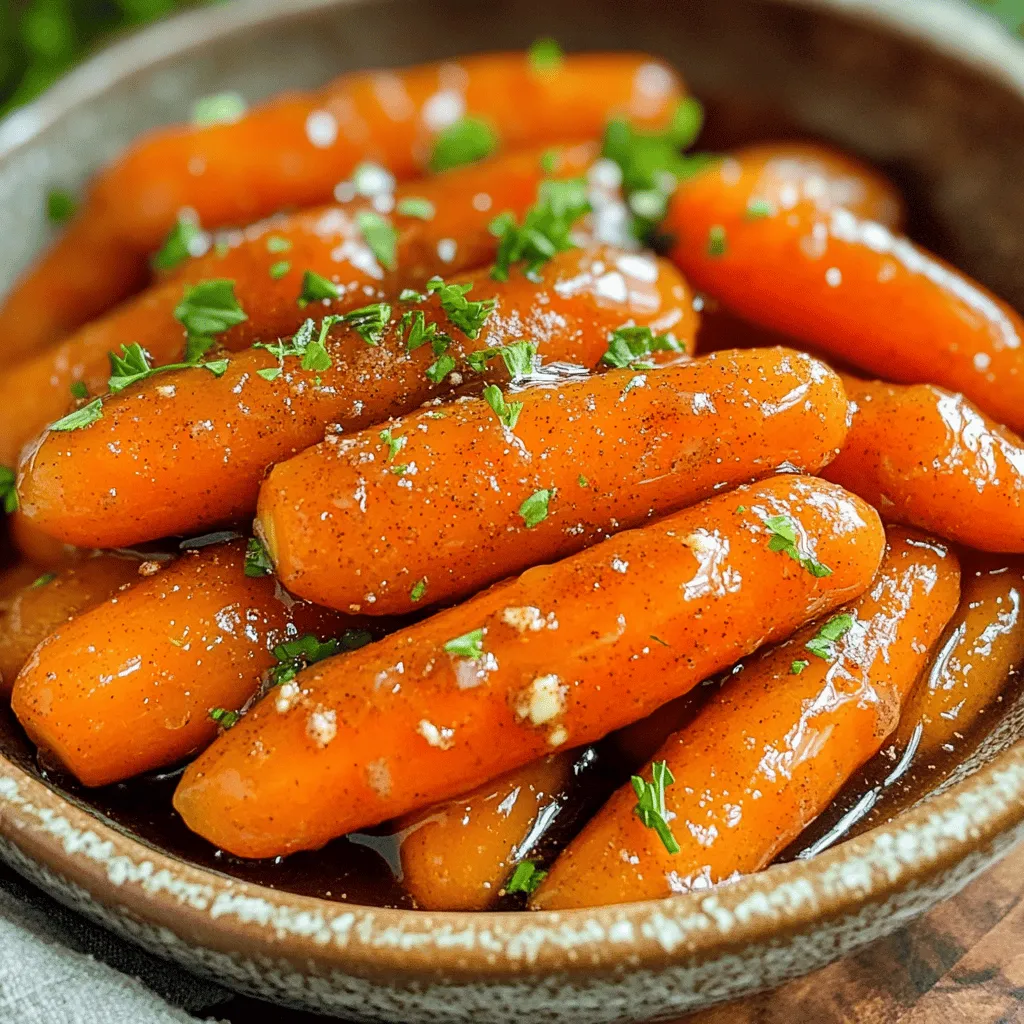
Looking for a delightful side dish that’s both easy and delicious? Slow Cooker Maple Glazed Carrots are your answer! With
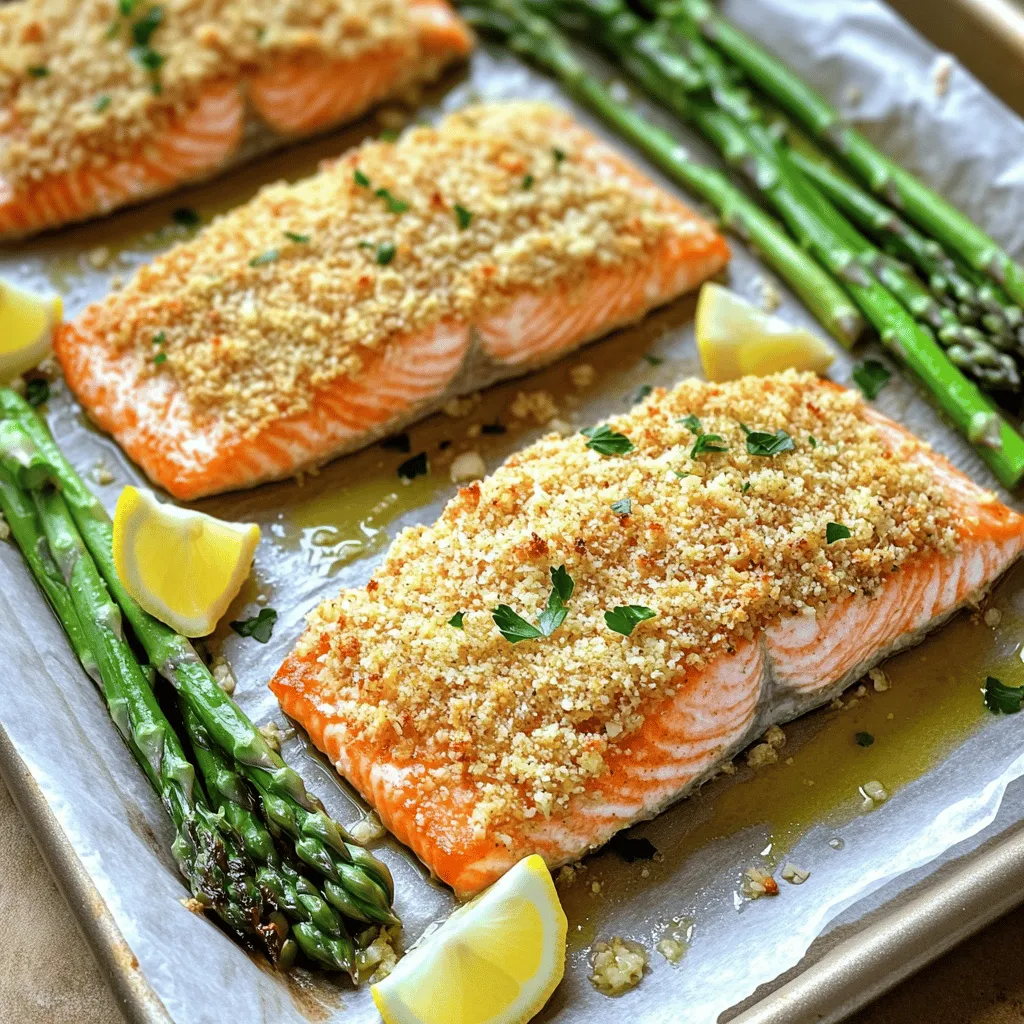
If you’re looking for a quick and tasty meal, this Garlic Parmesan Crusted Salmon Sheet Pan Delight is for you!
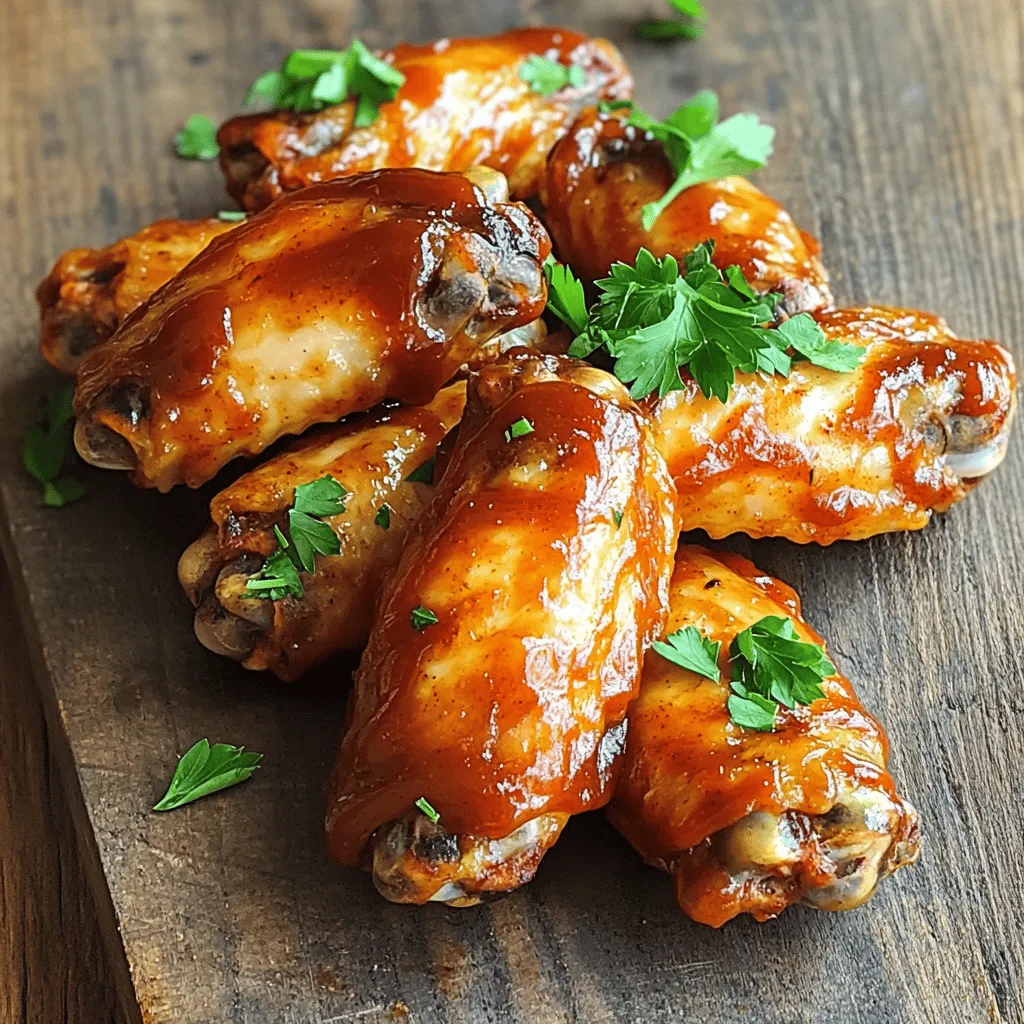
Get ready for a crispy, flavorful delight with Air Fryer BBQ Chicken Wings! These wings are quick to make and
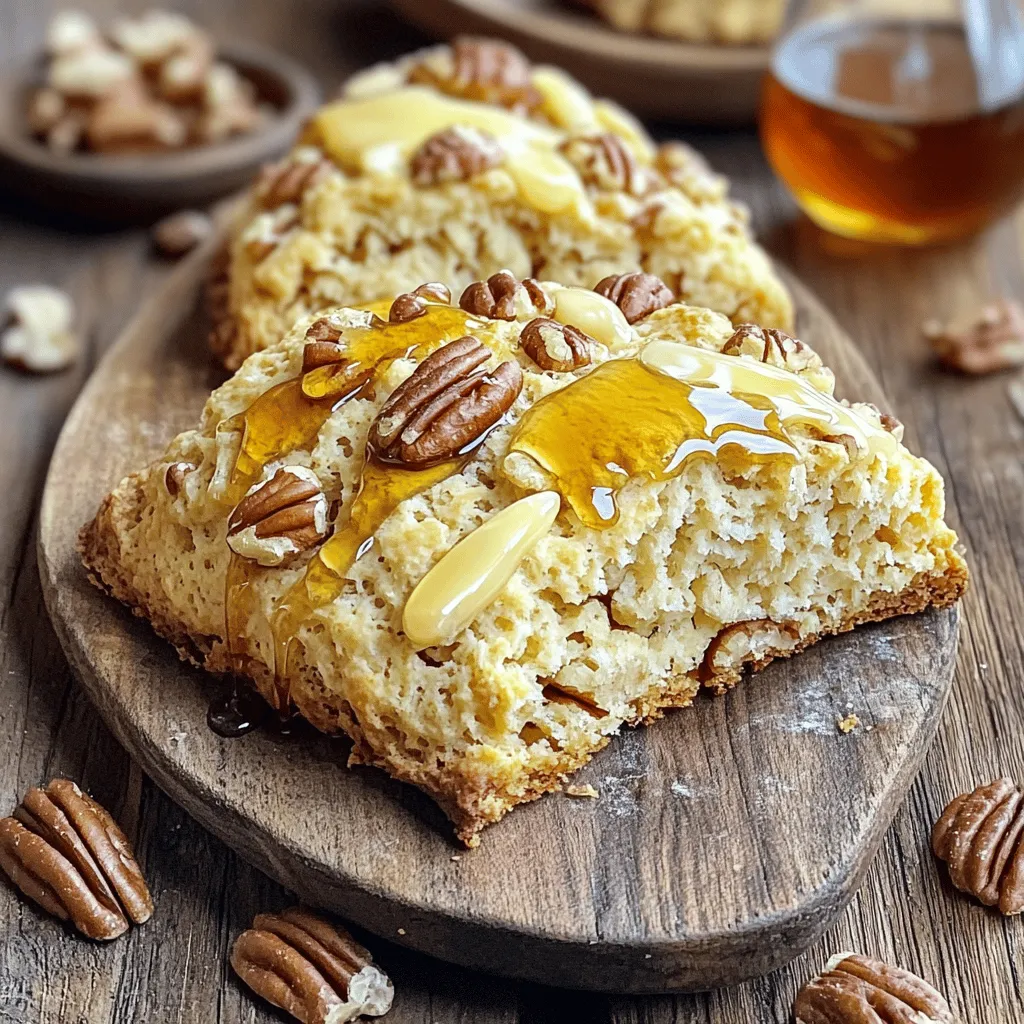
Welcome to the world of Maple Pecan Scones! If you love warm, flaky treats, you’re in for a delight. These
