Skip to content
DisclaimerTerms Of UseGDPR PolicyCookie Policy

easycookingbite

  • Home
  • Drinks
  • Appetizers
  • Dinner
  • Dessert
  • About
  • Contact
  • Privacy Policy
DisclaimerTerms Of UseGDPR PolicyCookie Policy

Lily

To make the Crispy Garlic Chicken Sandwich, you need a few key items. Here’s what you will need: - 2 boneless, skinless chicken breasts - 1 cup buttermilk - 3 cloves garlic, minced - 1 cup all-purpose flour - 1 teaspoon paprika - 1 teaspoon onion powder - ½ teaspoon salt - ½ teaspoon black pepper - ½ teaspoon cayenne pepper (optional for extra heat) - 1 cup breadcrumbs (panko for extra crunch) - Vegetable oil (for frying) - 4 hamburger buns - Lettuce leaves - Tomato slices - Mayonnaise or garlic aioli for spreading - Fresh parsley for garnish These ingredients create a flavorful, crispy chicken that is perfect for any meal. You can customize your sandwich with some fun extras. Here are a few ideas: - Sliced pickles for a tangy crunch - Avocado slices for creaminess - Jalapeños for some heat - Cheese slices for a rich flavor - Hot sauce for added spice Feel free to mix and match these toppings to make your sandwich special. Having the right tools makes cooking easier. Here’s what I suggest using: - A deep skillet to fry the chicken - Two mixing bowls for breading - A sharp knife for slicing ingredients - A cutting board for prep work - A meat thermometer to check chicken doneness - Paper towels for draining excess oil These tools will help you create the perfect Crispy Garlic Chicken Sandwich. You can find the full recipe to guide you through the steps. To start, you need to marinate the chicken. In a bowl, mix buttermilk, minced garlic, salt, and pepper. This mix adds flavor and keeps the chicken juicy. Place the chicken breasts into the bowl, making sure they soak well. Cover the bowl and refrigerate for at least 1 hour. For better taste, marinate overnight. Next, prepare the breading. Grab two bowls. In the first bowl, combine flour, paprika, onion powder, cayenne pepper, and a pinch of salt. This mix gives your chicken a nice kick. In the second bowl, pour in the breadcrumbs. I suggest using panko for an extra crunch. Now it’s time to fry the chicken. Heat vegetable oil in a deep skillet over medium-high heat. Once the oil is hot, take the marinated chicken out of the fridge. First, dredge each piece in the flour mix, shaking off the excess. Next, dip the chicken in the breadcrumbs. Press down to help them stick. Carefully add the breaded chicken to the hot oil. Fry for about 5-7 minutes on each side until golden brown and cooked through. The chicken should reach an internal temperature of 165°F. After frying, it's time to assemble the sandwich. Lightly toast your hamburger buns for extra flavor. Spread a good amount of mayonnaise or garlic aioli on the bottom half of each bun. Place a crispy chicken breast on top. Add some lettuce and tomato slices. Finally, cap it off with the other half of the bun. To make your sandwich look even better, sprinkle fresh parsley on top. Serve it hot with your favorite sides, like fries or a fresh salad. For more detailed steps, check the Full Recipe. Marinating chicken is key to flavor. Use buttermilk and garlic for great taste. Let the chicken soak for at least an hour. For best results, marinate overnight. This makes the chicken juicy and tender. Always cover the bowl to keep the chicken fresh. To get that perfect crunch, use panko breadcrumbs. They add a light, crispy texture. Coat the chicken in flour first. Then, dip it in the egg wash before using breadcrumbs. Press firmly to help the crumbs stick. Fry in hot oil for a golden finish. Heat the oil to the right temperature. It should be around 350°F (175°C). Always test the oil with a small piece of bread. If it bubbles, it's ready. Fry in small batches to avoid crowding. This helps the chicken cook evenly. Use a thermometer to check doneness. The chicken should reach 165°F (75°C). For a great finish, drain the fried chicken on paper towels. This keeps it crispy. For the full recipe, check out the detailed steps above. {{image_2}} If you want a kick, try a spicy garlic chicken sandwich. Just add cayenne pepper to the flour mix. This gives your chicken a nice heat. You can also mix hot sauce with the buttermilk for more flavor. This makes every bite a tasty surprise. Add jalapeños or spicy mayo to your sandwich for extra heat. You will love the blend of spice and garlic! Want a lighter option? You can bake the chicken instead of frying it. Simply coat the chicken as usual and place it on a baking sheet. Preheat your oven to 400°F (200°C) and bake for 20-25 minutes. Flip halfway through for even cooking. This method cuts down on oil and calories but keeps the crunch. Serve it with a side salad for a full meal. You can make a crispy cauliflower sandwich if you prefer veggies. Use cauliflower florets instead of chicken. First, coat the florets in the buttermilk mix. Then, bread them in the flour and breadcrumbs like you would the chicken. Fry or bake them until golden brown. This gives you a crunchy, flavorful sandwich that even meat lovers will enjoy. Add your favorite toppings for a tasty twist! For the full recipe, check out the Crispy Garlic Chicken Sandwich guide! To store leftover sandwiches, wrap them in plastic wrap or foil. Place them in an airtight container. This keeps them fresh and prevents them from drying out. Store them in the fridge for up to two days. If you want to keep them longer, consider freezing. When you're ready to eat your leftover sandwich, reheating it is easy. Preheat your oven to 350°F (175°C). Place the sandwich on a baking sheet. Heat for about 10-15 minutes until warm. This method keeps the bread crispy. You can also use a microwave, but it may make the bread soft. To freeze chicken breasts, let them cool completely first. Wrap each piece in plastic wrap. Then, place them in a freezer bag. Remove as much air as possible to avoid freezer burn. Frozen chicken can last up to three months. When you're ready to use it, thaw in the fridge overnight before cooking. For more details, check the full recipe. To make the chicken crispy, use panko breadcrumbs. They create a nice crunch. Use a good oil for frying. Heat the oil well before adding chicken. This helps the chicken fry evenly. You can use bone-in chicken, but it will take longer to cook. The cooking time increases because the bone holds heat. Keep an eye on the internal temperature. It should reach 165°F (75°C) for safety. I love serving this sandwich with crispy fries or a fresh salad. You can also pair it with coleslaw or sweet potato fries. They add great texture and flavor to the meal. To make this sandwich gluten-free, swap regular flour and breadcrumbs for gluten-free versions. You can find gluten-free all-purpose flour and panko at most stores. Ensure that all sauces used are also gluten-free. You can find the full recipe for the Crispy Garlic Chicken Sandwich above. It guides you through every step to make this delicious meal. Enjoy cooking! You learned how to make a crispy garlic chicken sandwich with easy steps. We covered important ingredients, cooking tips, and storage methods. You can personalize your sandwich with add-ins or variations, like spicy or vegetarian options. In the end, enjoy creating a delicious meal that suits your taste. Remember, practice makes perfect, so don't hesitate to try new ideas. Enjoy your cooking journey!

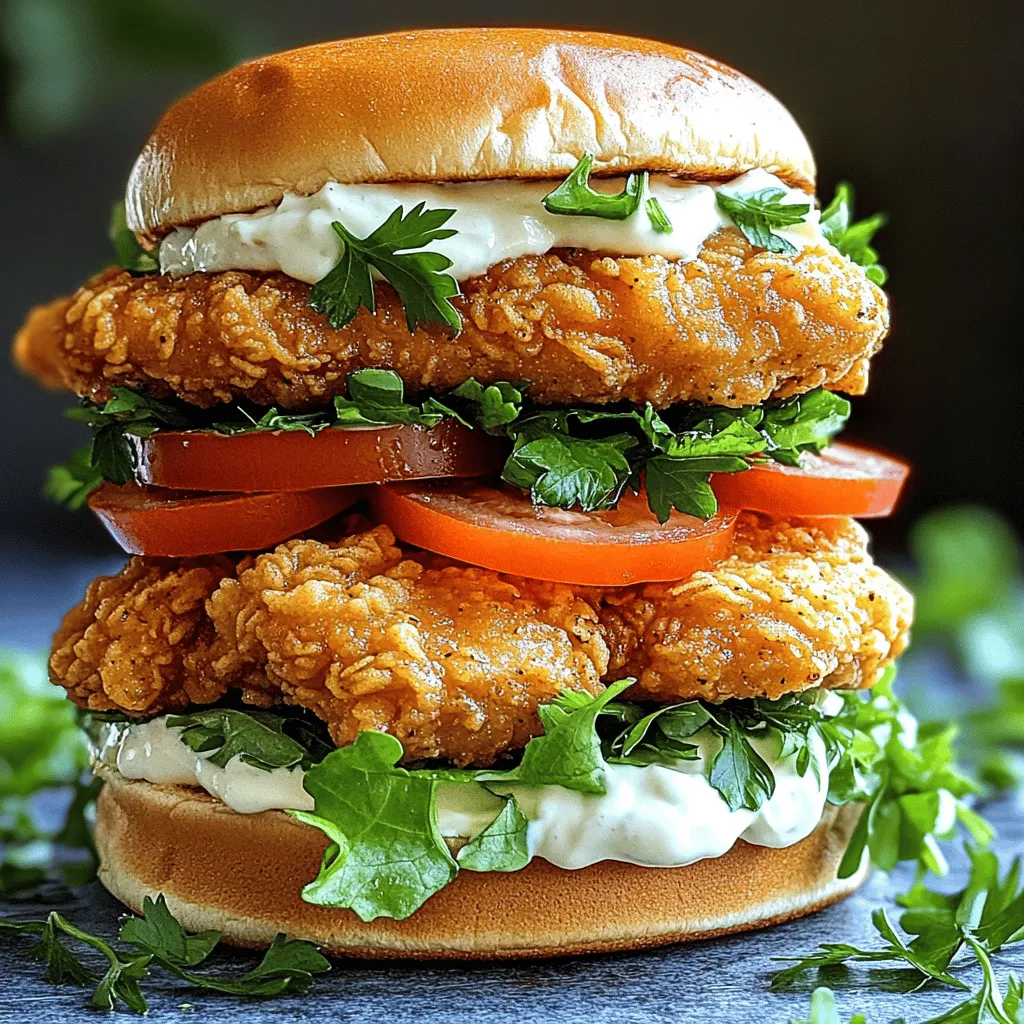
Crispy Garlic Chicken Sandwich Crunchy Flavor Boost

Are you ready to take your sandwich game to the next level? The Crispy Garlic Chicken Sandwich packs a crunch

- 8 corn tortillas - 1 cup black beans, rinsed and drained - 1 cup corn kernels (fresh or frozen) - 1 red bell pepper, diced - 1 zucchini, diced - 1 cup spinach, chopped - 1 small red onion, finely chopped - 2 cloves garlic, minced - 1 teaspoon ground cumin - 1 teaspoon smoked paprika - 1 cup enchilada sauce (store-bought or homemade) - 1 cup shredded cheese (cheddar or a dairy-free option) - Olive oil for sautéing - Fresh cilantro - Lime wedges - Optional side dishes (Mexican rice, avocado salad) Gather these items before you start cooking. The ingredients bring bold flavors and great color to your dish. Each veggie adds its unique taste. Corn and black beans give a hearty feel. The cheese adds creaminess, while spices boost the flavor. You can use store-bought sauce for ease. However, making your own enchilada sauce can add a personal touch. If you want to mix it up, try different veggies. Mushrooms or sweet potatoes work well too. For a spicy kick, add jalapeños to the mix. You can also adjust the cheese to suit your taste or dietary needs. This flexibility makes the recipe fun and personal. For the full experience, check the Full Recipe. - Preheat your oven to 375°F (190°C). - Heat olive oil in a large skillet over medium heat. - Add chopped red onion and minced garlic, cooking until translucent. - Stir in diced red bell pepper and zucchini, sauté for an additional 5 minutes. - Add black beans, corn, spinach, spices, and seasonings to the skillet. - Cook until the spinach wilts. - Spread enchilada sauce in a baking dish. - Fill and roll tortillas, placing them seam-side down in the dish. - Cover with remaining enchilada sauce and cheese. - Bake covered for 20 minutes, then uncover and bake an additional 10-15 minutes. This simple method makes tasty vegetarian enchiladas. For the complete process, check the Full Recipe. To make your enchiladas pop with flavor, feel free to adjust the spices. If you love heat, add more smoked paprika or a dash of chili powder. Want it milder? Simply cut back on these spices. For a richer enchilada sauce, try adding a tablespoon of olive oil and a pinch of sugar. This will deepen the flavor and balance the acidity. A splash of lime juice can also brighten the sauce and enhance the taste. Getting the right veggie texture is key. Sauté your onions and garlic just until they are soft and fragrant. This enhances their flavor and adds depth to your dish. When adding other veggies, like bell peppers and zucchini, cook them until they soften but still hold some crunch. This keeps your filling exciting. If you worry about tearing your tortillas, heat them first. Just warm them in a pan for a few seconds on each side. This makes them more pliable and easier to roll without breaking. Garnishing your enchiladas can take them to the next level. Top them with fresh cilantro and lime wedges for a pop of color and flavor. You can also add avocado slices or a dollop of sour cream to enhance richness. For side dishes, consider serving Mexican rice or a crisp avocado salad. Both dishes complement the enchiladas well. The rice adds heartiness, while the salad brings freshness and crunch. Remember, the full recipe can guide you through each step for these delicious vegetarian enchiladas! {{image_2}} For a vegan twist, consider using dairy-free cheese. Brands like Daiya or Violife melt well and taste great. You can also add more plant-based proteins. Try adding lentils or chickpeas for extra texture and nutrition. When choosing tortillas, go for gluten-free corn tortillas. They hold up well and taste amazing. To keep your recipe gluten-free, double-check your enchilada sauce. Some sauces may contain gluten. Always read the label. To change up the flavor, think about other veggies. Mushrooms and sweet potatoes add depth. You can also spice it up. Add jalapeños or a touch of chili powder for a kick. Adjust the level of heat to fit your taste. To store leftover enchiladas, let them cool first. Place them in an airtight container. This keeps them fresh and tasty. You can store them in the fridge for 3 to 4 days. If you want to enjoy them later, proper storage is key. To freeze enchiladas, wrap them tightly in plastic wrap. Then, place them in a freezer-safe bag or container. This helps prevent freezer burn. Enchiladas can stay frozen for up to 3 months. When you are ready to eat, thaw them overnight in the fridge. You can reheat enchiladas in the oven or the microwave. For the oven, preheat to 350°F (175°C). Cover the dish with foil to keep them moist. Heat for about 20 minutes. In the microwave, place them on a plate and cover with a damp paper towel. Heat in 1-minute intervals until warm. This keeps the flavor and texture nice. Enjoy your delicious enchiladas! For the full recipe, check out the details above. To add heat, consider these tips: - Mix in diced jalapeños or serrano peppers with the veggies. - Add a pinch of cayenne pepper to the filling. - Use a spicier enchilada sauce or add hot sauce to the sauce. - Try smoked chili powder for a smoky heat. These tweaks help you customize the spice level to your taste. Yes, you can prep these enchiladas ahead. Here are some ideas: - Prepare the vegetable filling and store it in the fridge for up to two days. - Assemble the enchiladas and cover them tightly before refrigerating. - You can keep them uncooked in the fridge for one day. - If you need to store them longer, freeze the assembled enchiladas. Just remember to thaw them overnight in the fridge before baking. These enchiladas pair well with: - Mexican rice, which adds a nice, filling touch. - A simple avocado salad for a fresh taste. - Black bean soup for more protein and flavor. - Chips and salsa for a crunchy side. - Refreshing drinks like horchata or agua fresca. These sides enhance your meal and make it more enjoyable. Yes, covering the enchiladas helps keep them moist. Here’s why: - The foil traps steam, preventing the tortillas from drying out. - It allows the cheese to melt evenly without burning. - After 20 minutes, removing the foil helps the cheese brown nicely. This method ensures your enchiladas come out soft and tasty. For the complete recipe, check out the Full Recipe. These vegetarian enchiladas are simple, tasty, and customizable. With fresh ingredients and easy steps, anyone can make them. Remember, you can tweak spices, veggies, or sauces to fit your taste. Store leftovers properly for future meals or freeze for later. Cooking should be fun, so explore different options. Enjoy crafting your own version of these enchiladas and savor every bite!

Vegetarian Enchiladas Flavorful and Easy Recipe

Craving a delicious meatless meal? You’re in the right place! This blog features an easy and flavorful Vegetarian Enchiladas recipe

To make the best teriyaki salmon bowls, you need fresh and tasty ingredients. Here’s a list: - Salmon fillets - Soy sauce - Honey - Rice vinegar - Fresh ginger - Garlic - Sesame oil - Cooked jasmine or brown rice - Steamed broccoli florets - Shredded carrots - Avocado - Garnishes (sesame seeds, green onions) These ingredients come together to create a dish that is both flavorful and healthy. The salmon gives you protein and healthy fats. The veggies add crunch and nutrients. The rice acts as a great base. Using fresh ginger and garlic in the sauce makes a big difference. They bring warmth and depth to the flavors. Honey balances the saltiness of the soy sauce. This makes the teriyaki sauce sweet and savory. You can find the full recipe [here](#) to see how these ingredients work together. To start, gather your ingredients for the teriyaki sauce. You will need soy sauce, honey, rice vinegar, grated fresh ginger, and minced garlic. In a small bowl, whisk these together until smooth. This tasty blend gives your salmon a sweet and savory flavor. Using fresh ginger and garlic makes a big difference in taste. Trust me, your taste buds will thank you! Next, heat sesame oil in a non-stick skillet over medium heat. Place your salmon fillets skin-side down in the skillet. Cook for about 4 to 5 minutes. This helps the skin get nice and crispy. After that, gently flip the fillets. Pour half of the teriyaki sauce over the salmon. Cook for another 3 to 4 minutes. Spoon some sauce over the salmon to keep it moist. When done, the salmon should flake easily with a fork. Now it’s time to put everything together! Start by adding a serving of rice to each bowl. I recommend using jasmine or brown rice for a nice touch. Next, add steamed broccoli, shredded carrots, and slices of avocado on top. Place the cooked salmon over the veggies and rice. Drizzle the remaining teriyaki sauce on everything. Finish by garnishing each bowl with sesame seeds and chopped green onions. This will make your dish look and taste amazing! For the full recipe, check out the section above. To cook salmon well, start with fresh fillets. Fresh salmon tastes better and is healthier. Always check for bright, shiny skin. When you cook, heat your pan before adding oil. Use medium heat for even cooking. Cook the salmon skin-side down for a nice crisp. Flip it gently to avoid breaking the fillets. Cook until it flakes easily with a fork. This usually takes about 8 to 10 minutes in total. To make your teriyaki salmon shine, think about layers of flavor. The teriyaki sauce is key; it’s sweet and salty. Add ginger and garlic for warmth and depth. You can also sprinkle a little chili flakes for heat. If you enjoy citrus, a squeeze of lime or lemon brightens the dish. Try using fresh herbs like cilantro or basil for a fresh twist. A beautiful plate makes the meal more enjoyable. Start with a base of rice in each bowl. Layer on the colorful veggies like broccoli and carrots. Place the salmon on top, then drizzle with extra teriyaki sauce. Garnish with sesame seeds and green onions for a nice touch. Use a small side of avocado for creaminess. This not only adds flavor but also makes your bowl look vibrant and inviting. For the full recipe, check the complete instructions above. {{image_2}} You can easily change some ingredients in your teriyaki salmon bowls. If you want a gluten-free option, try tamari instead of soy sauce. If honey is not your thing, maple syrup works well as a sweetener. You can also use coconut aminos for a lighter soy sauce alternative. For a tangy twist, swap rice vinegar for apple cider vinegar. Salmon is tasty, but you can use other proteins too. Chicken breast or thighs make great substitutes. They absorb flavors like salmon. Tofu is perfect for a vegetarian choice. Just press it to remove extra water, then marinate it in the teriyaki sauce. Shrimp is another fun option; it cooks quickly and adds a nice texture. The veggies in your bowl can change based on what you like. Instead of broccoli, use snap peas or bell peppers for crunch. Zucchini or squash will add a nice flavor and texture. You can even toss in some edamame for protein. Just remember to pick colorful veggies to make your bowl vibrant and tasty! For the full recipe, check out the [Full Recipe]. To store your leftover teriyaki salmon bowls, let them cool first. Place the bowls in airtight containers. Make sure to separate the salmon from the rice and veggies. This helps keep everything fresh. You can store them in the fridge for up to three days. When you're ready to eat, reheat the bowls gently. You can use a microwave or stovetop. If using a microwave, cover the bowl with a damp paper towel. Heat for 1-2 minutes, checking often to avoid overcooking. On the stovetop, warm them in a skillet over low heat. Add a splash of water if needed to steam the veggies. You can freeze the salmon and veggies for longer storage. Place them in freezer-safe bags or containers. Remove as much air as possible to prevent freezer burn. The teriyaki sauce can also be frozen. Just be aware that the texture of the veggies might change when thawed. For best quality, eat within one month. You can serve many sides with teriyaki salmon bowls. Some great options include: - Steamed edamame - Cucumber salad - Pickled vegetables - Seaweed salad - Miso soup These sides add fresh flavors and textures. They also balance the meal. Cooked salmon can last up to three days in the fridge. Make sure to store it in an airtight container. This keeps it fresh and safe to eat. If you want to keep it longer, freeze it. Frozen cooked salmon can last for about two to three months. Yes, you can make teriyaki sauce ahead of time. Store it in the fridge for up to a week. Just keep it in a sealed container. If you want to store it longer, you can freeze it. Thaw it before using it in your dishes. Absolutely! You can use any firm fish like tuna or halibut. These fish work well with teriyaki sauce. They also cook similarly to salmon. Just adjust the cooking time based on the thickness of the fillets. You can add many healthy toppings to your teriyaki salmon bowls. Consider these options: - Sliced radishes - Chopped cilantro - Sliced jalapeños - Sprouts These toppings boost flavor and nutrition. They also add a colorful touch to your meal. Yes, you can make a vegetarian version. Use tofu instead of salmon for protein. Tofu absorbs the teriyaki flavor well. You can also use grilled tempeh or seitan as alternatives. Just ensure to adjust cooking times for each option. Salmon is cooked when it flakes easily with a fork. The inside should be opaque and no longer translucent. You can also use a food thermometer. The internal temperature should reach 145°F. Yes! Meal prepping teriyaki salmon bowls is easy and convenient. Cook the salmon and veggies, then store them separately. Assemble the bowls when ready to eat. This keeps everything fresh and tasty. Jasmine and brown rice are both great options. Jasmine rice is fluffy and fragrant. Brown rice is nutty and whole grain. Both pair well with the teriyaki sauce and salmon. Choose based on your taste and health goals. Yes! You can add any veggies you like. Try bell peppers, snap peas, or zucchini. You can even add leafy greens like spinach or kale. More vegetables boost nutrition and flavor. They also make your bowl more colorful and fun. This article covered how to make delicious teriyaki salmon bowls. We looked at the ingredients, instructions, tips, and variations. You can easily customize these bowls to suit your taste. Remember to store leftovers properly for future meals. Cooking can be fun and creative. Enjoy your tasty creation and share it with friends and family. Simple dishes like this can bring joy to your table. Keep experimenting with flavors and ingredients. Happy cooking!

Teriyaki Salmon Bowls Flavorful and Healthy Meal

Looking for a quick meal that’s both flavorful and healthy? Teriyaki salmon bowls might be your answer! Packed with fresh

To make sweet and sour chicken, gather these items: - 1 lb chicken breast, diced - 1 red bell pepper, chopped - 1 green bell pepper, chopped - 1 cup pineapple chunks (fresh or canned) - 1 cup broccoli florets - 1/2 cup onion, sliced - 2 cloves garlic, minced - 1 tablespoon ginger, grated - 1/4 cup ketchup - 1/4 cup apple cider vinegar - 1/4 cup honey - 2 tablespoons soy sauce (low sodium) - 1 tablespoon cornstarch - 2 tablespoons water - 3 tablespoons vegetable oil - Salt and pepper to taste - Cooked rice, for serving If you need to swap some items, try these options: - Chicken breast can be replaced with tofu or shrimp. - Use any color bell pepper, like yellow or orange. - Swap pineapple with mango or peach for a different taste. - Broccoli can be replaced with snap peas or green beans. - Use agave syrup instead of honey for a vegan option. - For the sauce, you can use rice vinegar instead of apple cider vinegar. Sweet and sour chicken offers a balanced meal. Each serving has: - Calories: Approximately 350 - Protein: About 30g - Carbohydrates: Roughly 40g - Fat: Around 10g - Fiber: 3g This dish is high in protein and can be a tasty part of a healthy meal plan. To make the sweet and sour sauce, gather your ingredients first. You need ketchup, apple cider vinegar, honey, soy sauce, salt, and pepper. In a bowl, mix these ingredients well. The sauce combines sweet and tangy flavors that make this dish special. Set the sauce aside for later use. Next, heat 2 tablespoons of vegetable oil in a large skillet. Use medium-high heat for this step. Add the diced chicken breast to the pan. Cook the chicken for about 5 to 7 minutes until it turns golden brown. Make sure to stir occasionally so it cooks evenly. Once done, remove the chicken from the skillet and set it aside. In the same skillet, add the last tablespoon of oil. Sauté minced garlic and grated ginger for about 30 seconds. Then add the sliced onion and broccoli florets. Cook these for 2 to 3 minutes until they soften. Next, toss in the chopped red and green bell peppers and the pineapple chunks. Cook everything for another 2 minutes. After that, return the cooked chicken to the skillet. Pour the sweet and sour sauce over the mixture and stir well. To thicken the sauce, mix cornstarch and water in a small bowl. Add this slurry to the skillet while stirring gently. Cook for another 2 to 3 minutes, allowing the sauce to coat the chicken and veggies nicely. Serve hot over cooked rice. Enjoy your meal! To get the right flavor, balance is key. The sweet and sour sauce needs a mix of sweet and tangy. Use good-quality ketchup and apple cider vinegar. Honey adds sweetness without being too overpowering. Adjust the honey if you want it less sweet. You can also add a splash of hot sauce for a kick. This gives the dish a nice depth of flavor. For the best texture, use fresh chicken breast. Cut the chicken into small, even pieces. This helps it cook evenly. Sear the chicken in hot oil to get a nice golden crust. Do not overcrowd the pan; this can make it steam instead of sear. Once the chicken is cooked, remove it from the pan. This keeps it juicy and tender. Serve sweet and sour chicken over fluffy cooked rice. The rice soaks up the sauce well. You can add a sprinkle of sesame seeds for crunch. Fresh herbs like cilantro or green onions add color and flavor. Pair it with a side of steamed vegetables for a balanced meal. This dish is best enjoyed hot, right after cooking. For a fun twist, try it in a wrap or lettuce cup. {{image_2}} You can change the veggies in sweet and sour chicken. Try using snap peas, carrots, or zucchini. Each option adds a new taste and texture. I often swap out the broccoli for snap peas. They give a nice crunch. You can also add mushrooms for an earthy flavor. Feel free to mix and match your favorites. If you want a twist, switch the chicken for shrimp or tofu. Shrimp cooks quickly and adds a seafood touch. Tofu is great for a vegetarian option. Just make sure to press and dry it first. You can also use beef or pork. Each protein will bring its own flavor to the dish. You can make the sauce your own by changing some ingredients. Use orange juice instead of vinegar for a citrusy kick. Add chili sauce for some heat. If you want less sugar, try using less honey. You could also replace honey with agave nectar or maple syrup. Each change gives a fresh spin on the classic sauce. For the full recipe, check out the details above. After you make Sweet and Sour Chicken, let it cool down. Store it in an airtight container. Keep it in the fridge. It will stay fresh for up to three days. If you want the best taste, eat it within two days. You can freeze Sweet and Sour Chicken too! Place it in a freezer-safe container. Make sure to leave some space at the top. The sauce might expand. It will last for up to three months in the freezer. When you are ready to eat, thaw it in the fridge overnight. To reheat your sweet and sour chicken, use a skillet. Heat it over medium heat. Stir it often to prevent sticking. You can also use a microwave. Place it in a microwave-safe bowl. Heat for one to two minutes, stirring halfway. Add a splash of water if it seems dry. Enjoy your delicious meal! Sweet and Sour Chicken comes from Chinese cuisine. It blends sweet and tangy flavors. This dish has roots in Cantonese cooking. Many people enjoy it worldwide. Yes, you can make Sweet and Sour Chicken ahead of time. Store it in the fridge for up to three days. Reheat it gently on the stove. This helps keep the chicken tender. Sweet and Sour Chicken pairs well with various sides. Here are some ideas: - Steamed rice - Fried rice - Noodles - Spring rolls - Stir-fried vegetables These sides add more flavor and texture to your meal. Sweet and Sour Chicken can be a balanced meal. It has protein from chicken and vitamins from veggies. You can make it healthier by using less sugar and oil. Choose fresh ingredients for better nutrition. To reduce sweetness, cut back on honey or ketchup. Add more vinegar to increase tanginess. You can also use less pineapple. Adjust the balance to suit your taste. For the full recipe, check out the Sweet and Sour Chicken Delight section above. Enjoy this easy and tasty dish! This blog post has explored every aspect of making Sweet and Sour Chicken. We covered the key ingredients and how to adjust them. You learned how to create the sauce, cook the chicken, and sauté the veggies perfectly. Remember the tips for great flavor and texture, and consider the variations to suit your taste. Proper storage is crucial for freshness. With these insights, you can create a dish that you and your loved ones will enjoy. Dive in and start cooking!

Sweet and Sour Chicken Delicious Easy Dinner Recipe

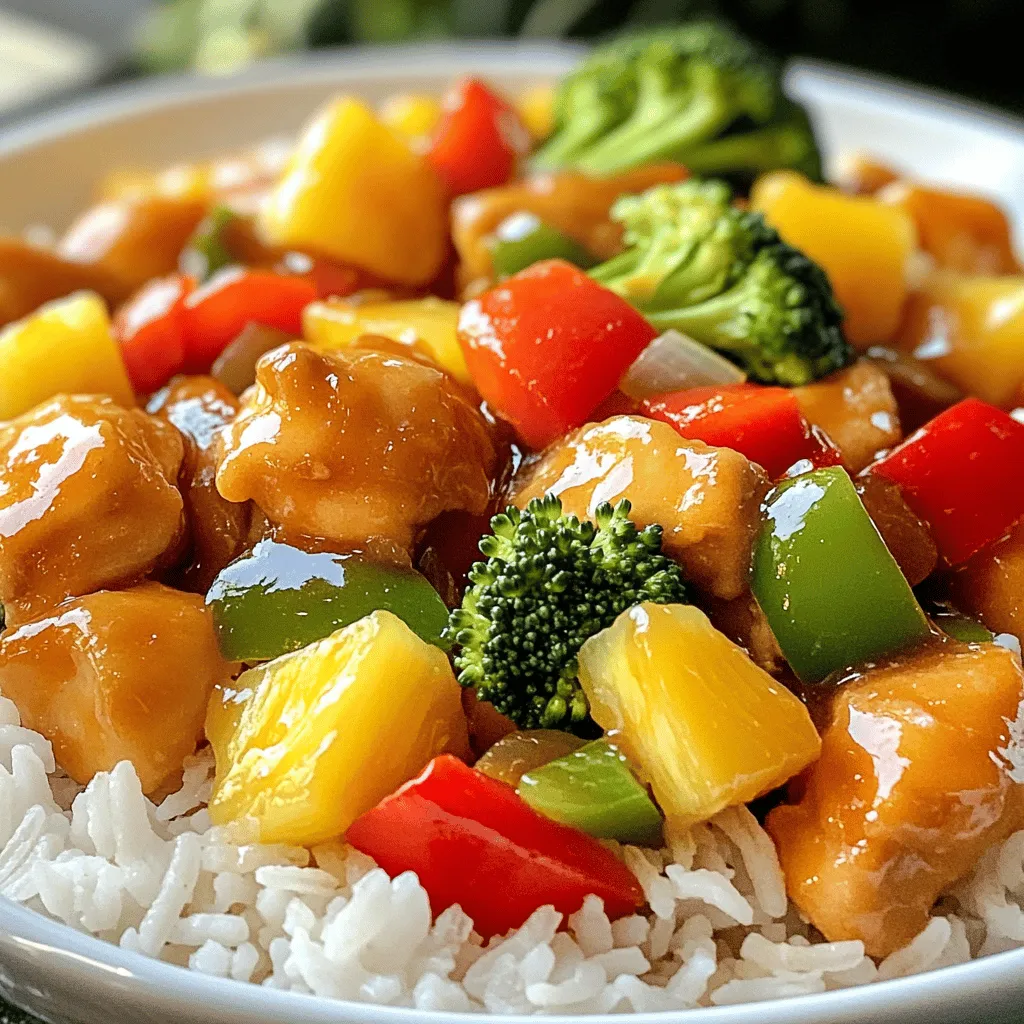
Are you craving a meal that’s both fun and easy to make? Look no further! Sweet and Sour Chicken is

- 200g fettuccine or your choice of pasta - 250g fresh spinach, washed and roughly chopped - 200g mushrooms, sliced (preferably a mix of cremini and button) - 1 small onion, finely chopped - 3 cloves garlic, minced - 200ml heavy cream - 50g grated Parmesan cheese - 2 tablespoons olive oil - 1 teaspoon nutmeg - Salt and black pepper to taste - Fresh parsley, chopped (for garnish) - Additional spices for flavor enhancement - Protein options like chicken or shrimp - Large pot for cooking pasta - Skillet for sautéing ingredients - Measuring cups and spoons When making creamy spinach and mushroom pasta, start with fresh ingredients. Fresh spinach gives a nice color and taste. Use a mix of mushrooms for depth. Fettuccine is my favorite pasta for this dish, but you can choose any type you like. Having a small onion and garlic is essential. They add a sweet and savory flavor. Heavy cream makes the sauce rich and smooth. Don't forget the nutmeg; it adds warmth to the dish. If you want to boost the flavor, consider adding spices like red pepper flakes or Italian herbs. You can also include proteins like chicken or shrimp for a heartier meal. For tools, a large pot is key for boiling the pasta. A skillet helps you sauté the veggies. Lastly, measuring cups and spoons ensure you get the amounts just right. This recipe is simple, yet it brings out the best in each ingredient. You can find the full recipe in the section above! - Cook the Pasta: Boil a large pot of salted water. Add 200g of fettuccine. Cook until al dente, about 8-10 minutes. Save 1 cup of pasta water before you drain. Set the pasta aside. - Sauté Vegetables: Heat 2 tablespoons of olive oil in a large skillet over medium heat. Add 1 small chopped onion. Cook until it turns soft, about 3-4 minutes. Add 3 minced garlic cloves and cook for 1 more minute. - Add Mushrooms: Toss in 200g of sliced mushrooms. Cook for 5-7 minutes until they brown and release moisture. Stir often to avoid burning. - Incorporate Spinach: Add 250g of roughly chopped spinach to the skillet. Cook while stirring until the spinach wilts, about 3-4 minutes. It should look bright green and tender. - Create the Sauce: Pour in 200ml of heavy cream. Stir well to mix. Add 1 teaspoon of nutmeg, salt, and black pepper to taste. Let the sauce simmer for a few minutes to thicken. - Combine Pasta and Sauce: Add the drained pasta to the skillet. Toss it well to coat with the creamy sauce. If the sauce is too thick, add some reserved pasta water until it's just right. - Final Seasoning: Stir in 50g of grated Parmesan cheese. Mix until it melts into the sauce. Taste and adjust any seasoning as needed. Enjoy this savory delight! You can find the full recipe above for more details. To get the perfect creaminess, add more or less heavy cream. If you want a lighter dish, use less cream. To make it richer, add more. Always taste as you go to ensure your sauce has the right flavor. For seasoning, start with salt and pepper. You can also add garlic powder or more spices. Nutmeg adds a nice touch. Be careful not to overdo it, as strong flavors can dominate. Sautéing is key to great flavor. Start with medium heat for the onion and garlic. It helps them soften and develop a nice color. Add the mushrooms after the onion is soft. This way, they get a nice brown crust. To prevent overcooking spinach, add it last. Stir it in and cook until just wilted. This keeps it bright and fresh. Overcooked spinach can turn mushy and lose its taste. For a beautiful plate, use large shallow bowls. Twirl the pasta for an elegant look. Top it with a sprinkle of black pepper and a bit of parsley. Garnishing with Parmesan adds flavor and looks great. Use a microplane to get fine shavings. A drizzle of olive oil gives a nice shine. For more details on creating this dish, check out the Full Recipe. {{image_2}} You can boost flavor by adding proteins. Grilled chicken or shrimp works well. They add a nice texture and taste. Swap out pasta types if you want. Whole grain pasta offers a hearty twist. Feel free to include other veggies. Bell peppers add sweetness and color. Zucchini brings a fresh crunch. Use seasonal produce for a fun change. Fresh asparagus or peas can brighten up the dish. If you're looking for vegan options, swap heavy cream for coconut milk. Nutritional yeast can replace Parmesan cheese for a cheesy flavor. For gluten-free needs, use gluten-free pasta. It still tastes great with the creamy sauce. For the full recipe, check the link. Enjoy exploring these variations! To keep your creamy spinach and mushroom pasta fresh, store it in an airtight container. Refrigerate it within two hours of cooking. If you want to save it for later, you can freeze it. Pour the pasta into a freezer-safe bag, and remove as much air as possible. When reheating, add a splash of water or cream. This keeps the sauce creamy and prevents it from drying out. In the fridge, your leftovers will last about three to four days. If you freeze the pasta, it can stay good for up to three months. Watch for signs of spoilage. If you see mold or notice an off smell, it’s time to toss it. You can prep ingredients ahead of time. Chop the onions, garlic, and mushrooms, and store them in the fridge. You can also wash and chop the spinach. This makes cooking on busy nights quick and easy. Use leftover pasta for a tasty lunch. Mix it with some olive oil and fresh veggies for a fast meal. What can I substitute for heavy cream? You can use whole milk or half-and-half for a lighter option. If you want to keep it rich, try using coconut cream. Each choice will change the flavor a bit but will still make a nice sauce. Can I use dried spinach instead of fresh? Dried spinach works, but it will not have the same taste or texture. If you use it, soak it first in warm water. Fresh spinach gives you a brighter flavor and a lovely texture in the dish. How do I know if my pasta is al dente? To check if your pasta is al dente, take a piece out and bite it. It should be firm but not hard. If it feels soft all the way through, it’s overcooked. What’s the best way to clean mushrooms before cooking? Wipe mushrooms with a damp cloth or paper towel. This method keeps them dry and prevents them from soaking up water. Do not rinse them under water, as they absorb moisture and lose flavor. Can I use frozen spinach instead of fresh? Yes, frozen spinach is fine. Just make sure to thaw it and drain any excess water. It can save time and is often just as nutritious as fresh spinach. What type of Parmesan cheese is best for this recipe? Freshly grated Parmesan is the best choice for flavor. It melts nicely into the sauce and adds a rich taste. If you can’t find fresh, pre-grated will work, but it may not melt as well. For the full recipe, check out the complete instructions. In this blog post, we explored how to make a tasty pasta dish. We covered the ingredients, step-by-step instructions, and tips for perfecting the sauce. You can mix in proteins and adjust for dietary needs too. Whether you serve it fresh or as leftovers, this dish shines. Remember, cooking should be fun and flavorful. Enjoy your meal, and don’t hesitate to try new twists!

Creamy Spinach and Mushroom Pasta Savory Delight

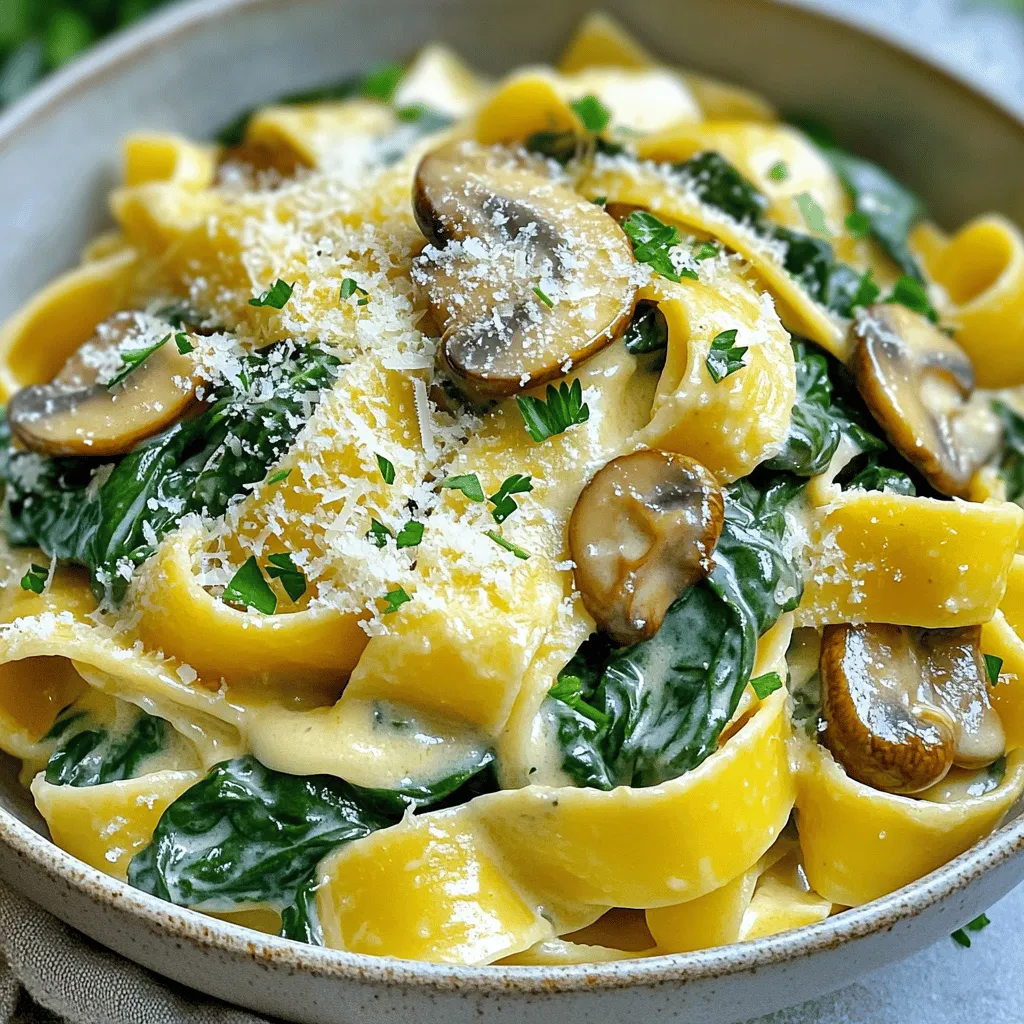
If you’re craving a quick yet delicious meal, look no further! My Creamy Spinach and Mushroom Pasta will satisfy your

To make a rich and creamy carbonara, you will need: - 12 oz spaghetti - 1 ripe avocado - 1/2 cup grated Parmesan cheese - 2 large eggs - 2 tablespoons olive oil - 3 cloves garlic, minced - Salt and pepper to taste - Fresh parsley, chopped for garnish - Zest of 1 lemon Using fresh ingredients makes a huge difference in taste. Fresh pasta, ripe avocados, and high-quality cheese bring out the best flavors. They add texture and richness to the dish. When you use fresh items, your carbonara will taste bright and lively. If you have dietary needs, you can swap some ingredients. Here are some ideas: - For gluten-free pasta, choose rice or quinoa noodles. - Replace eggs with a plant-based alternative like silken tofu for a vegan option. - Use nutritional yeast instead of Parmesan for a cheesy flavor without dairy. - If you want a lower-fat option, use Greek yogurt as a creamy base. These changes keep the spirit of carbonara while making it fit for everyone. Enjoy experimenting with flavors! Cooking spaghetti carbonara is simple and fun. Start by boiling water in a large pot. Add salt to the water. This step adds flavor to the pasta. Once the water boils, add 12 oz of spaghetti. Cook it until it's al dente, about 8 to 10 minutes. Remember, you want it firm but not hard. While the pasta cooks, prepare the avocado sauce. In a blender, add 1 ripe avocado, 1/2 cup of grated Parmesan cheese, and 2 large eggs. Next, pour in 2 tablespoons of olive oil and add 3 minced garlic cloves. Don't forget salt and pepper to taste. For a bright touch, add the zest of 1 lemon. Blend everything until it's smooth and creamy. When the spaghetti is ready, reserve 1 cup of the pasta water before draining it. This water helps make the sauce creamier. In a large skillet over medium heat, add the drained spaghetti. Pour the avocado mixture over the hot pasta. Toss everything well to combine. Use the reserved pasta water a little at a time. This helps you get the creaminess just right. Cook for one more minute. Stir it often so it heats through. Taste your dish and adjust the salt and pepper if needed. Serve the pasta right away. Garnish with chopped fresh parsley and extra Parmesan if you like. Enjoy your rich and creamy pasta delight! To make the best spaghetti carbonara, use these techniques: - Water Salting: Salt the boiling water well. It should taste like the sea. This step improves the flavor of the pasta. - Timing: Cook the pasta just right. Al dente is key. It holds up better with the sauce. - Mixing: When adding the avocado sauce, mix quickly. This keeps the pasta hot and creamy. - Pasta Water: Use the reserved pasta water wisely. It helps blend the sauce smoothly. Here are some tips to help you avoid mistakes when making spaghetti carbonara: - Don't Overcook the Pasta: Check the pasta often to avoid mushiness. - Blend Smoothly: Make sure the avocado sauce is creamy. Lumps can ruin the dish. - Heat Control: Avoid cooking on high heat when mixing the sauce. It can scramble the eggs. - Taste Before Serving: Always taste and adjust seasoning before serving. It makes a big difference. This guidance ensures your spaghetti carbonara is a hit every time. For the full recipe, check the details above. To make a rich and creamy sauce, use fresh ingredients. Always blend the avocado until smooth. This step helps create a velvety texture. When mixing, add reserved pasta water slowly. This way, you can control the creaminess. Taste as you go. Adjust salt and pepper for the best flavor. Use spaghetti for classic carbonara. Its long shape holds sauce well. Look for high-quality pasta made from durum wheat. This type cooks evenly and has a nice bite. If you want a twist, try whole grain or gluten-free options. Just make sure to follow the cooking time on the package. Timing is key when making carbonara. Start cooking the pasta first. It should finish just as you prepare the sauce. Use medium heat for the skillet. Too high heat can cook the eggs too fast, making them scramble. Mix everything quickly once the pasta is done. Serve right away for warm, creamy goodness. For more tips, check the Full Recipe. {{image_2}} Traditional spaghetti carbonara uses simple ingredients: pasta, eggs, cheese, and guanciale. This classic dish shines with its creamy texture, yet it is not made with cream. Instead, it relies on the eggs and cheese to create that rich sauce. Modern chefs love to play with this recipe. Some use pancetta or bacon instead of guanciale for a different taste. Others add cream for extra richness, despite it straying from tradition. You can also try different cheeses like Pecorino Romano or even a mix of cheeses for a unique flavor. If you want a meat-free version, you can easily adapt carbonara. For a vegetarian spin, replace guanciale with sautéed mushrooms or smoked tofu. This adds a savory note that mimics the richness of meat. For a vegan option, use a ripe avocado to create that creamy texture. Blend it with nutritional yeast, garlic, and spices for flavor. This gives you a delicious sauce without eggs or cheese. You can boost the nutrition of your carbonara by adding protein or veggies. Grilled chicken or shrimp works well for added protein. Just cook them separately and mix them in at the end. Vegetables like peas, spinach, or broccoli can add color and nutrients. Sauté them briefly and toss them with the pasta. This not only enhances the dish but also makes it more satisfying. For a full recipe that combines these ideas, check out the creamy avocado carbonara. It showcases how you can reinvent this classic dish while keeping it delicious! After enjoying your delicious spaghetti carbonara, you might have some left. To keep it fresh, place the pasta in an airtight container. This helps keep out air and moisture. Store it in the fridge for up to three days. Make sure it’s cool before you seal the container. If you leave it out too long, it may spoil quickly. When you are ready to eat your leftovers, reheat them gently. You can use the microwave or the stove. If using a microwave, cover it to keep moisture in. Heat it in short bursts, stirring in between. If using the stove, add a splash of water or broth. This helps bring back the creaminess. Stir until it's warm, but do not overcook it. This keeps the flavor nice and fresh. If you want to save spaghetti carbonara for later, freezing works well. First, let it cool completely. Then, place it in a freezer-safe container. You can also use freezer bags, making sure to remove extra air. It can stay in the freezer for about one month. To eat, just thaw it in the fridge overnight before reheating. Enjoy your rich and creamy pasta delight anytime! For the full recipe, check out the details above. Spaghetti Carbonara comes from Italy, specifically Rome. It has roots in the Roman countryside. The dish combines pasta, eggs, cheese, and pork. Some say it was made by coal miners, or "carbonari." The name reflects this connection. Today, it remains a favorite in Italian kitchens and around the world. You can prepare some parts of Spaghetti Carbonara in advance. Cook the pasta and cool it. Store it in the fridge for a day. Mix the egg and cheese sauce just before serving. This keeps the sauce creamy and fresh. If you combine everything too early, it can become dry. Spaghetti Carbonara pairs well with simple sides. A fresh salad adds crunch and color. Garlic bread complements the creamy pasta nicely. You can also serve steamed vegetables for balance. For drinks, a light white wine works great. Enjoy a meal that feels both cozy and elegant. In this guide, we explored how to make perfect Spaghetti Carbonara. We discussed fresh ingredients, easy cooking steps, and tips to avoid mistakes. I shared variations for different diets and how to store leftovers. Remember, great meals start with quality ingredients and proper techniques. With practice, you can master this classic dish. Enjoy experimenting and make it your own!

Spaghetti Carbonara Rich and Creamy Pasta Delight

If you’re craving a creamy pasta dish that’s both rich and satisfying, look no further than Spaghetti Carbonara. I’ll guide

- 1 ½ cups all-purpose flour - ½ cup unsalted butter, softened - 1/3 cup powdered sugar - 1 large egg yolk - 1 tablespoon cold water - 1/4 teaspoon salt - 1 cup granulated sugar - 1/2 cup fresh lemon juice (about 3-4 lemons) - Zest of 2 lemons - 4 large eggs - 1/2 cup unsalted butter, cut into cubes - 1/4 teaspoon turmeric (for color, optional) - Fresh berries (such as raspberries or blueberries) - Mint leaves The tart shell forms the base of this dessert. The butter and sugar mix gives it a sweet flavor. The egg yolk helps bind the dough. The cold water keeps it moist. When you add flour, mix until it forms a soft dough. The lemon curd is the star of this dish. The sugar and lemon juice balance the tartness. The zest adds a bright flavor. The eggs create a creamy texture. The butter makes it rich. You can add turmeric for a sunny hue, but it's not needed. For garnish, fresh berries add color and taste. Mint leaves provide a hint of freshness. This recipe is simple yet elegant. You can find the full recipe to guide you through every step. - Combine softened butter and powdered sugar in a bowl. - Add the egg yolk, cold water, and salt; mix well until smooth. - Gradually incorporate the flour to form a soft dough. - Press the dough evenly into the tart pan. Prick it with a fork. - Refrigerate the tart shell for 30 minutes before baking. - Bake at 350°F (175°C) for 20-25 minutes until lightly golden. - Whisk together the granulated sugar, lemon juice, lemon zest, and eggs in a saucepan. - Cook over medium-low heat, stirring continuously until thickened, about 8-10 minutes. - Stir in the butter until melted and smooth. Adjust color with turmeric if you want. - Pour the lemon curd into the cooled tart shell and smooth the top. - Refrigerate for at least 2 hours to set the curd. - Garnish with fresh berries and mint leaves just before serving. For the full recipe and detailed instructions, check out the [Full Recipe]. - Use butter that is at room temperature for easier mixing. - Chill the dough in the fridge for the best texture. - Stir the mixture continuously to avoid scrambling the eggs. - If you want a sweeter taste, add more sugar to the mix. - Serve the tart with a dollop of whipped cream or fresh fruit. - Pair it with a light dessert wine for a nice touch. {{image_2}} To make meringue, start with egg whites. Whip them until soft peaks form. Gradually add sugar, mixing until stiff peaks form. This means the mixture stands tall. Spread the meringue over the lemon curd. Use a spatula to create peaks for a nice look. Bake at 350°F until golden, about 10 minutes. For perfect meringue, make sure your bowl is clean and dry. Any grease can stop the meringue from rising. Use room temperature egg whites for the best results. Also, avoid overbeating. The texture should be glossy and smooth. Fresh berries add color and flavor. I love using raspberries or blueberries. They work well with the tartness of the lemon curd. You can also use strawberries for a sweet touch. Layer the berries on top of the lemon curd after it sets. Arrange them in a pattern for a beautiful look. You can mix them in the curd if you want a fruity twist. Just be gentle to keep the colors bright. Want to change up the flavor? Substitute lime juice or orange juice for a citrus twist. Both add a new taste while keeping it fresh. You can also add herbs like basil or mint. Try finely chopping basil and mixing it into the lemon curd. This adds a unique flavor that surprises your guests. Each bite will be a fun mix of sweet and herb. To keep your lemon curd tart fresh, wrap it tightly in plastic wrap. You can also use an airtight container. This keeps the tart safe from odors in the fridge. If you have leftovers, store them in the fridge for up to five days. If you want to save it for later, you can freeze it. Just slice the tart, wrap each piece, and place it in a freezer bag. This way, you can enjoy a slice anytime! In the fridge, the lemon curd tart lasts about five days. If frozen, it can last for up to three months. Check for signs of spoilage before eating. If the tart smells off or has a strange color, toss it. If you notice mold, it's best to discard it right away. Most people enjoy lemon curd tart cold, as the flavors shine. If you prefer it warm, gently reheat it. Use an oven set to 300°F (150°C). Heat for about 10 minutes. Keep an eye on it to avoid overcooking. You can serve it warm, but chilling it first enhances its tangy taste. Yes, you can make lemon curd tart ahead of time. I often prepare it a day before serving. This allows the flavors to blend well. Just store it in the fridge until you are ready to enjoy it. If you lack fresh lemons, you can use bottled lemon juice. Use it in a 1:1 ratio. However, fresh lemon juice gives the best flavor. You can also try lime juice for a different taste. A runny lemon curd tart often comes from undercooked lemon curd. Make sure to cook it until it thickens. It should coat the back of a spoon. You can also add more eggs to help it set better. Absolutely! Store-bought pie crust can save you time. Just make sure it fits your tart pan well. This option is perfect for quick prep without losing flavor. You can add fresh berries or mint leaves on top. This gives the tart a pop of color. You could also dust it with powdered sugar for an elegant touch. A drizzle of cream can enhance its beauty too. Traditional lemon curd tart is not gluten-free due to the flour in the crust. To make it gluten-free, use a gluten-free flour blend. You can also find pre-made gluten-free crusts that work well. This lemon curd tart recipe gives you a delightful treat from scratch. We covered the shell, filling, and garnishes. You learned tips for perfecting both the tart and curd. I shared delicious variations to keep it fresh and exciting. Remember, you can decorate with berries or meringue to impress. Enjoy the process of baking, and let your creativity shine. This tart is sure to please any crowd. Happy baking!

Lemon Curd Tart Tangy and Refreshing Dessert Delight

Craving a dessert that’s both tangy and refreshing? Look no further! In this guide, I’ll take you through making a

- 1 cup quinoa, rinsed - 2 cups vegetable broth - 1 cup cherry tomatoes, halved - 1 cucumber, diced - 1 bell pepper (red or yellow), diced - 1 cup chickpeas, canned and drained - 1/2 cup kalamata olives, pitted and halved - 1/2 red onion, finely chopped - 1 avocado, sliced - 1/4 cup fresh parsley, chopped - 2 tablespoons olive oil - 2 tablespoons lemon juice - 1 teaspoon dried oregano - Salt and pepper to taste This Mediterranean quinoa bowl bursts with color and flavor. I love how easy it is to make. You start with quinoa, which is a great source of protein. Rinse it well to remove any bitterness. Then, cook it in vegetable broth for added flavor. Next, chop up your veggies. Use fresh cherry tomatoes for sweetness. Dice a cucumber for crunch. A bell pepper adds a nice bite. Chickpeas give you protein and fiber. Don't forget the kalamata olives for a salty touch. The red onion adds a bit of sharpness, while the avocado gives creaminess. Finally, finish with fresh parsley. It brightens the dish and adds a pop of color. For the dressing, whisk together olive oil, lemon juice, oregano, salt, and pepper in a bowl. This simple dressing ties all the flavors together. You can find the full recipe in the previous sections. Enjoy crafting this vibrant bowl; it’s a meal you will love! Start by combining 1 cup of rinsed quinoa and 2 cups of vegetable broth in a medium saucepan. Heat it on high until it boils. Once it boils, reduce the heat to low. Cover the pan and let it simmer for about 15 minutes. The quinoa will absorb the broth and become fluffy. After 15 minutes, remove it from heat and let it sit for 5 minutes. Fluff the quinoa with a fork to separate the grains. While the quinoa cooks, grab a small bowl. Whisk together 2 tablespoons of olive oil, 2 tablespoons of lemon juice, 1 teaspoon of dried oregano, salt, and pepper. This dressing adds a burst of flavor to the bowl. Set it aside while you prepare the veggies. In a large mixing bowl, combine the fresh veggies. Add 1 cup of halved cherry tomatoes, 1 diced cucumber, 1 diced bell pepper, 1 cup of drained chickpeas, 1/2 cup of pitted and halved kalamata olives, 1/2 finely chopped red onion, and 1/4 cup of chopped fresh parsley. Once the quinoa is ready, add it to the large bowl. Pour in the prepared dressing and gently toss everything together. This will ensure that every bite is bursting with flavor. For the full recipe, check out the [Full Recipe]. To get the best texture, avoid overcooking the quinoa. When it cooks too long, it can turn mushy. Follow the cooking times closely for a fluffy result. After cooking, let it sit covered for five minutes. This helps it steam and fluff up nicely. You can make your dressing even better by trying different herbs. Fresh basil or mint can add a nice kick. If you want more tang, adjust the acidity with extra lemon juice. This enhances the bright flavors in your bowl. You can serve the Mediterranean quinoa bowl as a side dish or make it a main course. To make it more appealing, garnish with extra parsley or sliced avocado. This not only looks good but also adds flavor and texture. {{image_2}} You can boost the protein in your Mediterranean quinoa bowl by adding grilled chicken or shrimp. Both options add a nice flavor and make the dish more filling. If you prefer a vegetarian choice, try adding feta cheese for a creamy touch. For a vegan option, choose tofu or tempeh. They soak up flavors well and add a satisfying texture. Feel free to swap in different vegetables based on what's fresh and in season. Zucchini, asparagus, or spinach can work beautifully. You can even add fruits like pomegranate seeds or citrus slices for a sweet twist. These fruits add color and flavor, making your bowl even more appealing. To give your bowl some heat, try incorporating harissa. This spicy paste adds depth and warmth. You can also add nuts or seeds, like pine nuts or sunflower seeds, for extra crunch and nutrition. These little touches can elevate your dish, making it unique and exciting. For the full recipe, check the earlier section. To keep your Mediterranean quinoa bowl fresh, store leftovers in an airtight container. This helps prevent the bowl from absorbing other food odors. The ideal time to eat your leftovers is within 3-4 days. After that, the flavors may fade and the ingredients may lose their texture. If you want to save some for later, portion individual servings for freezing. This makes it easy to grab a healthy meal when you're short on time. To use frozen quinoa bowls, thaw them overnight in the refrigerator before reheating. This way, they stay tasty and retain their fresh feel. A Mediterranean Quinoa Bowl is a vibrant dish full of fresh flavors. It mixes cooked quinoa with vegetables and protein. You get tastes from tomatoes, cucumbers, olives, and chickpeas. This dish draws from the Mediterranean diet, known for its health benefits. Olive oil, lemon juice, and spices add depth to every bite. This bowl is colorful, healthy, and easy to make, perfect for any meal. Yes, you can use other grains for this bowl. Couscous is a great option for a softer texture. Farro gives a chewy bite and nutty flavor. Brown rice is also a good choice if you want something hearty. Just adjust the cooking time based on the grain you choose. Each grain will bring its unique taste to your Mediterranean bowl. Yes, this recipe is gluten-free because it uses quinoa. Quinoa is a seed, not a grain, and is safe for those with gluten issues. If you want to swap quinoa for another grain, make sure it is also gluten-free. Choices like rice or millet work well. Always check labels to ensure your ingredients are safe. This way, you can enjoy your bowl without worry. This blog post shared a simple recipe for a Mediterranean quinoa bowl. I covered the main ingredients, how to prepare the dressing, and step-by-step instructions. You learned tips for perfect quinoa and ways to mix it up with protein or seasonal veggies. Store your extras right for later enjoyment. Embrace this healthy meal in your kitchen. Experiment with new flavors and enjoy!

Mediterranean Quinoa Bowl Fresh and Flavorful Recipe

Looking for a fresh and tasty meal? Try my Mediterranean Quinoa Bowl! This dish is packed with healthy ingredients and

- 2 cups cooked chicken breast, shredded or diced - 4 cups mixed salad greens (such as arugula, spinach, and romaine) - 1 cup cherry tomatoes, halved - 1/2 cup cucumber, thinly sliced - 1/4 cup red onion, thinly sliced - 1/4 cup walnuts, chopped (or pecans) - 1/2 cup feta cheese, crumbled - 1/4 cup honey mustard dressing (store-bought or homemade) - Salt and pepper to taste - Fresh parsley, for garnish I love using fresh ingredients in this Honey Mustard Chicken Salad. Each item adds color and flavor. The chicken gives it a hearty touch. The salad greens offer crunch and nutrients. Cherry tomatoes brighten the dish with sweetness. Cucumbers add a refreshing bite, while red onions give a slight zing. Nuts like walnuts or pecans add great texture. Feta cheese brings a creamy, salty element that ties it all together. And, of course, the honey mustard dressing brings a sweet and tangy kick. This dish is not just tasty; it’s also healthy. Each ingredient contributes to a well-balanced meal. You can find the full recipe to guide you through every step. - Calories per serving: Approximately 350 - Macronutrient breakdown: - Proteins: 30g - Fats: 20g - Carbs: 15g This salad fits many dietary needs. It’s gluten-free and offers low-carb options if you skip the honey mustard dressing. You can swap out ingredients to suit your taste or dietary restrictions. Enjoy this bright, fresh meal any time! To make the chicken, you have several cooking methods. You can grill, bake, or poach it. - Grilling: This adds a nice smoky flavor. Preheat your grill. Season the chicken with salt and pepper. Cook until it is no longer pink. - Baking: Preheat the oven to 375°F. Place the chicken on a baking sheet. Season it and bake for about 20-25 minutes. - Poaching: Place the chicken in a pot with water. Bring to a gentle boil. Cook for 15-20 minutes until done. After cooking, let the chicken cool. Shred or dice it into bite-sized pieces. This makes the salad easier to eat. Now, let’s put the salad together. In a large bowl, combine the vegetables and chicken. - Vegetables: Use mixed salad greens, cherry tomatoes, cucumber, red onion, and walnuts. Toss them gently to mix. - Adding Chicken: Add the shredded chicken to the bowl. This adds protein and flavor. Next, it's time for the dressing. Drizzle the honey mustard dressing over the salad. Toss everything together until well coated. This makes every bite tasty. When serving, presentation matters. Use a large bowl or individual plates. This makes it look great. - Garnish: Add fresh parsley on top for a pop of color. - Accompanying Dishes: You can serve this salad with crusty bread or a side of fruit. These add a nice balance to the meal. For the full recipe and more details, check the [Full Recipe]. To make your honey mustard chicken salad pop, focus on seasoning. Use salt and pepper well. They boost the taste of every ingredient. Fresh herbs can also add great flavor. Try parsley or basil for a fresh lift. You can sprinkle some garlic powder or onion powder for added depth. These simple tweaks make a big difference. Prepping your ingredients ahead of time saves you effort. Chop your veggies the night before. Store them in the fridge in airtight containers. This way, you can just toss everything together when you’re ready to eat. For a super quick meal, use rotisserie chicken. Just shred it and mix it into your salad. It’s fast, and it tastes great! If you need alternatives for chicken, consider shrimp or tofu. Both give a nice flavor and texture. For a vegan option, chickpeas work wonderfully. They add protein and a hearty bite. If you want a lighter salad, you can skip the cheese or use a vegan cheese. These substitutes keep your salad fresh and fun! {{image_2}} You can switch up the protein in your salad. Try shrimp, tofu, or chickpeas. Each option brings a unique taste. If you choose shrimp, cook it quickly in a pan. For tofu, press it first for a firmer texture. Chickpeas are great when you want a hearty bite. Just rinse and drain them before adding to the mix. A homemade honey mustard dressing is easy to make. Just mix equal parts honey and mustard. Add a splash of vinegar for tang. Whisk in olive oil until smooth. This dressing pairs perfectly with the salad. You can also try a simple vinaigrette. Use olive oil, vinegar, salt, and pepper for a light option. Add seasonal fruits to brighten your dish. Apples or berries work well. They add sweetness and crunch. You can also include seasonal veggies. Think bell peppers in summer or roasted squash in fall. These additions keep the salad fresh and exciting. Enjoy exploring new flavors each season. To keep your honey mustard chicken salad fresh, store it in an airtight container. This helps prevent moisture loss and keeps the flavors intact. The salad lasts about three days in the fridge. After that, the greens may wilt, and the taste can change. For easy grab-and-go servings, portion your salad into smaller containers. This makes it simple to take for lunch or a quick snack. If you want to freeze it, it’s best to freeze only the chicken. The greens do not freeze well, so add them fresh later. If you need to reheat the chicken, use a microwave or skillet. Heat it gently to keep the texture nice. Avoid reheating the salad with greens, as they will wilt. It's best to serve the salad cold, keeping it fresh and crunchy. For those interested in the complete process, check the full recipe. To make honey mustard dressing, mix equal parts honey and Dijon mustard. Use 1/4 cup of each for a good amount. Add 2 tablespoons of apple cider vinegar for tanginess. Then, whisk in 1/4 cup of olive oil for a smooth texture. Adjust salt and pepper to taste. This dressing is sweet, tangy, and perfect for salads. Yes, you can prepare this salad in advance. Cook and shred your chicken the day before. Store it in the fridge. You can also chop your veggies and mix them in a bowl. Keep the dressing separate until you are ready to serve. This keeps everything fresh and crisp. Some great sides include: - Crusty bread or baguette - A light soup, like tomato or vegetable - Fresh fruit salad - Roasted veggies or sweet potato fries These sides pair well and make the meal more filling. In this blog post, we covered a delicious Honey Mustard Chicken Salad. We explored the key ingredients, step-by-step instructions, and storage tips. I shared ways to enhance flavor and suggested easy variations for your taste. This salad is versatile and fits many diets. Making it healthy and tasty can be simple with the right tips. Enjoy your cooking, and have fun creating your own twists on this meal!

Honey Mustard Chicken Salad Fresh and Tasty Meal

Are you ready for a fresh, tasty meal? This Honey Mustard Chicken Salad combines juicy chicken with crisp greens and

- 2 ripe bananas, frozen - 2 tablespoons creamy or crunchy peanut butter - 1 cup almond milk (or any milk of your choice) - 1 tablespoon honey or maple syrup (to taste) - 1/4 cup Greek yogurt (optional for creaminess) - 1/2 teaspoon cinnamon (optional) - A pinch of sea salt To make a Peanut Butter Banana Smoothie, you need a few key ingredients. Frozen bananas are the star of this smoothie. They add creaminess and chill to your drink. If you don’t have frozen bananas, just slice fresh ones and freeze them for a couple of hours. Next, choose your peanut butter. You can use creamy or crunchy, depending on your taste. Both add a rich, nutty flavor. Finally, add almond milk or your choice of milk to blend everything together. You can also make it sweeter by adding honey or maple syrup. Greek yogurt gives it a nice thickness. If you want to spice it up, toss in some cinnamon and a pinch of sea salt. All of these ingredients together create a delicious drink. For the full recipe, check out the Peanut Butter Banana Bliss Smoothie. - Peel and slice bananas. - Freeze bananas for optimal texture. Start by peeling your ripe bananas. I like to slice them into small pieces. This helps them freeze faster. Place the banana slices in a single layer on a plate or tray. Then, pop them in the freezer for about two hours. Frozen bananas add creaminess to the smoothie and make it taste amazing. - Combine all ingredients in the blender. - Tips for achieving a smooth consistency. Once your bananas are frozen, grab your blender. Add the frozen banana slices, peanut butter, and almond milk. I also like adding honey or maple syrup for sweetness. If you want a richer taste, add Greek yogurt. For extra flavor, a splash of vanilla extract and a pinch of sea salt work wonders. Blend everything on high until smooth. If the mix is too thick, add more almond milk slowly until you reach your desired texture. - Adjust sweetness if necessary. - Pour and serve immediately. After blending, taste your smoothie. If you want it sweeter, add a little more honey or maple syrup. Pour the smoothie into glasses and enjoy it right away. The flavors are best when it’s fresh! For the best peanut butter, I recommend using natural varieties. Look for options with just peanuts and salt. These types have rich flavor and smooth texture. You can choose creamy or crunchy based on your preference. If you want alternatives to almond milk, try oat milk or coconut milk. Both add great taste and creaminess. To achieve a creamy texture, use frozen bananas. They make the smoothie thick and smooth. Blend on high until everything is mixed well. If you see lumps, keep blending. You can also add more almond milk if the mix is too thick. A little at a time helps perfect the consistency. For an ideal presentation, use tall glasses. This showcases the beautiful color of your smoothie. You can garnish with a sprinkle of cinnamon or a few banana slices on top. This adds a nice touch and makes the drink more inviting. Enjoy your Peanut Butter Banana Bliss Smoothie right away for the best taste! {{image_2}} You can boost flavor in your peanut butter banana smoothie in fun ways. Try adding chocolate or cocoa powder for a rich taste. Just one tablespoon can transform your drink into a chocolate delight. If you want greens, spinach is a great choice. It blends well and adds nutrients without changing the flavor. A handful of fresh spinach gives you a healthy twist. If you're vegan, you can swap regular yogurt for a plant-based one. Almond milk works well here too. You can also use maple syrup instead of honey for sweetness. For those allergic to nuts, try using sunflower seed butter. It gives a similar flavor and is nut-free. Oat milk is another good choice for a creamy base. Want to make your smoothie more filling? You can add protein powder. Vanilla or chocolate flavors work best. Just a scoop can help you stay full longer. Other protein-rich ingredients include Greek yogurt or silken tofu. Both blend nicely and add creaminess to your smoothie. This way, your peanut butter banana smoothie becomes a great post-workout treat. For the complete recipe, check out the [Full Recipe]. To store leftover smoothie, pour it into a sealed jar. Make sure to leave some space at the top. This helps to prevent the smoothie from spilling as it expands. Keep it in the fridge for up to 24 hours. When ready to drink, shake the jar well. The smoothie might separate, but that’s normal. You can make smoothie packs for busy mornings. Just gather your ingredients and portion them into freezer bags. Include frozen bananas, peanut butter, and any extras you want. Label each bag with the date and contents. When you're ready to blend, just grab a pack. Add almond milk and blend while still frozen for a quick meal. A freshly made peanut butter banana smoothie is best enjoyed right away. However, if stored, it lasts about 24 hours in the fridge. If you freeze it, it can stay fresh for about one month. After that, the taste and texture might change. For the best flavor, enjoy it soon after making. Check out the Full Recipe for more details on making this delicious drink! You can use fresh bananas instead. Fresh bananas will work, but they will change the texture. To make it creamier, add some ice cubes. Just blend them with the other ingredients. You can also freeze fresh bananas ahead of time for later use. Peel and slice them first before freezing. Yes, you can easily make this smoothie dairy-free. Use almond milk, soy milk, or oat milk. These options taste great and keep the smoothie creamy. You can also try coconut milk for a tropical twist. Just pick your favorite non-dairy milk. To thicken your smoothie, add more frozen bananas or some Greek yogurt. You can also try adding a spoonful of oats. This will give your smoothie a nice, thick texture. If you want it creamier, use less milk when blending. Yes! This smoothie is great for meal prep. You can store it in the fridge for up to a day. Use a sealed jar to keep it fresh. If you want to freeze it, pour it into ice cube trays. You can blend the frozen cubes later for a quick treat. To lower the sugar, skip the honey or maple syrup. Use a sugar substitute like stevia or erythritol. You can also add a few drops of vanilla extract for extra flavor without the sugar. Be sure to taste as you go to find the right balance. This blog post covered how to make a tasty smoothie with simple ingredients. We discussed the main ingredients, like frozen bananas and peanut butter. I shared helpful steps for blending and serving, plus tips for choosing ingredients. You learned flavor variations and storage methods for your smoothies. Experiment and find what you love. Enjoy creating delicious smoothies that fit your tastes and needs!

Peanut Butter Banana Smoothie Quick and Easy Recipe

Looking for a tasty and easy way to kickstart your day? This Peanut Butter Banana Smoothie is your answer! With

Older posts
Newer posts
← Previous Page1 … Page47 Page48 Page49 … Page83 Next →

dsad

© 2025 easycookingbite • Built with GeneratePress

Our Policies

  • Copyright Policy
  • Cookie Policy
  • GDPR Policy
  • Privacy Policy
  • Disclaimer
  • Terms Of Use

More Information

  • Home
  • About
  • Contact
  • Appetizers
  • Dessert
  • Dinner
  • Drinks
©2025, easycookingbite About Back To Top