Skip to content
DisclaimerTerms Of UseGDPR PolicyCookie Policy

easycookingbite

  • Home
  • Drinks
  • Appetizers
  • Dinner
  • Dessert
  • About
  • Contact
  • Privacy Policy
DisclaimerTerms Of UseGDPR PolicyCookie Policy

Lily

- 2 boneless, skinless chicken breasts, thinly sliced - 3 medium zucchinis, spiralized into noodles - 4 cloves garlic, minced - 1 teaspoon freshly grated ginger These main ingredients form the heart of your dish. Chicken breasts provide protein, while zucchini noodles offer a low-carb alternative to pasta. Garlic and ginger add a punch of flavor, making every bite delightful. - 1 bell pepper, sliced (red, yellow, or orange) - 1 carrot, julienned The colorful bell peppers bring sweetness and crunch. Carrots add a lovely texture and bright color to the dish. Together, these veggies enhance both the taste and visual appeal. - 2 tablespoons soy sauce (low sodium) - 1 tablespoon sesame oil - 1 tablespoon olive oil - Salt and pepper to taste - 2 green onions, chopped, for garnish - Sesame seeds, for garnish Soy sauce gives a savory depth. Sesame oil adds a nutty flavor, while olive oil helps cook the chicken perfectly. Salt and pepper balance the dish, while green onions and sesame seeds make it look great. Each ingredient plays a role in creating a meal that is not just tasty but also pleasing to the eye. {{ingredient_image_1}} First, slice the chicken breasts thinly. This helps them cook evenly. Next, season the chicken with salt and pepper. This simple step adds great flavor. In a large skillet or wok, heat olive oil over medium-high heat. This oil will make the chicken crisp and tasty. Once the oil is hot, add the chicken. Cook it for 5-7 minutes. Stir often until the chicken turns golden brown. This browning gives the chicken flavor. Make sure it is cooked through. When done, remove the chicken from the skillet and set it aside. In the same skillet, pour in sesame oil. Add minced garlic and grated ginger. Sauté these for about 30 seconds. This step fills your kitchen with a lovely aroma. Next, add the sliced bell pepper and julienned carrot. Stir-fry these for 3-4 minutes. You want them to soften a bit but stay crisp. Now, it's time for the zucchini noodles. Gently fold them into the skillet. Stir quickly to mix them with the veggies. Cook for an additional 2-3 minutes. This keeps the noodles warm but still slightly crunchy. Finally, return the cooked chicken to the skillet. Pour in the soy sauce and toss everything together. Heat it all for about 2 more minutes, mixing well. Your dish is now ready to serve! To get the best taste, start with salt and pepper. Season your chicken well. I usually add a pinch more salt than I think I need. Once the chicken is cooked, taste the dish. If it feels flat, add a little more soy sauce. This brings out the flavors of garlic and ginger nicely. Always use high heat for stir-frying. This keeps the chicken juicy and the veggies crisp. Heat your skillet or wok until it’s very hot. This way, the chicken will brown well. Avoid crowding the pan; it leads to steaming instead of frying. Cook in batches if needed. To avoid sogginess, do not overcook the zucchini noodles. Cook them just enough to heat through. I like to add them last, after the other veggies. This keeps them firm and crunchy. Spiralize the zucchini just before cooking. This helps them stay fresh and bright. Pro Tips Use Fresh Ingredients: Always opt for fresh vegetables and chicken for the best flavor and texture in your stir fry. Don’t Overcook the Zucchini: Keep the zucchini noodles crisp by cooking them just until heated through, about 2-3 minutes. Customize Your Veggies: Feel free to add other vegetables like snap peas or broccoli for extra color and nutrition. Garnish for Flavor: A sprinkle of sesame seeds and chopped green onions adds crunch and enhances the dish's presentation. {{image_2}} You can easily swap chicken for shrimp or tofu. Shrimp cooks fast and adds a nice flavor. Use medium shrimp, peeled and deveined. Cook them until pink, about 3-4 minutes. Tofu offers a great plant-based option. Press and cube it, then cook until golden. Both options work well with this recipe! Feel free to add more veggies to your stir fry. Broccoli, snap peas, or bok choy can enhance the dish. You can also use mushrooms for an earthy taste. Just remember to cut them into small pieces. This way, they cook evenly and blend nicely with the zucchini noodles. You can boost the flavor by trying different sauces or spices. Add a splash of teriyaki sauce for sweetness. A dash of chili flakes adds heat if you like spice. You might also try adding lime juice for a zesty kick. Experimenting with flavors makes each dish unique and fun! To keep your Garlic Chicken Zucchini Noodles Stir Fry fresh, follow these tips: - Let the stir fry cool down first. - Place it in an airtight container. - Store it in the fridge for up to three days. - Label the container with the date, so you know when to use it. If you want to save some for later, freezing is a great option. Here’s how to do it: - Allow the stir fry to cool completely. - Use freezer-safe bags or containers. - Remove as much air as possible before sealing. - Store in the freezer for up to three months. - Remember, zucchini noodles may lose some texture when thawed. When it's time to enjoy your leftovers, reheating correctly is key: - Use a skillet over medium heat for best results. - Add a splash of water or broth to keep it moist. - Stir frequently to warm it evenly. - Microwave if you're in a hurry, but don’t overcook. - Ensure everything is heated through before serving. Yes, you can make this dish in advance. It works well for meal prep. Cook the chicken and veggies, then store them separately. Keep the zucchini noodles fresh until you’re ready to eat. When you want to enjoy it, just heat everything together in a skillet. This way, the noodles stay firm and tasty. Zucchini noodles, or zoodles, are low in calories. They provide vitamins A and C. They also have fiber, which helps digestion. Zoodles are a great option for gluten-free diets. They can help you feel full without high carbs. Plus, they add a nice crunch to your meals. Yes, using pre-made zucchini noodles is an option. They save time and effort. Look for them in the fresh produce section or the freezer aisle. If you use pre-made zoodles, check the cooking time. They may need less time in the pan. This can help keep them crunchy and fresh. This blog post covered a simple and tasty stir-fry with chicken and zucchini noodles. We discussed the key ingredients and cooking steps to help you create a delicious meal. Remember, you can switch proteins or add more veggies for variety. Store leftovers properly to keep them fresh. Enjoy the health benefits of this dish while trying different flavors. Cooking can be fun and easy with the right tips. Dive into your kitchen and give this recipe a try!

Garlic Chicken Zucchini Noodles Stir Fry Delight

Are you ready for a tasty twist on dinner? My Garlic Chicken Zucchini Noodles Stir Fry is a quick and

For these delightful muffins, gather the following ingredients: - 1 cup cornmeal - 1 cup all-purpose flour - 1 tablespoon baking powder - 1/2 teaspoon baking soda - 1/2 teaspoon salt - 1 cup buttermilk - 2 large eggs - 1/4 cup honey - 1/4 cup vegetable oil - 1 cup shredded sharp cheddar cheese - 2-3 jalapeños, finely chopped (adjust for spice preference) - 1/4 cup corn kernels (fresh or frozen) These components come together to create a sweet and spicy treat. You can take the flavor up a notch with: - 1 tablespoon fresh cilantro, chopped for garnish Adding cilantro gives the muffins a fresh touch and brightens the taste. Be mindful of common allergies when making these muffins. The recipe contains: - Wheat (from all-purpose flour) - Dairy (from buttermilk and cheese) - Eggs If anyone has allergies, consider alternative ingredients. Use gluten-free flour, plant-based milk, or egg replacers. Always check labels for hidden allergens. {{ingredient_image_1}} Start by preheating your oven to 400°F (200°C). This step ensures even cooking. Next, grease a muffin tin or use paper liners. Greasing helps prevent sticking and makes clean-up easier. In a large bowl, combine the dry ingredients. Use 1 cup of cornmeal, 1 cup of all-purpose flour, 1 tablespoon of baking powder, 1/2 teaspoon of baking soda, and 1/2 teaspoon of salt. Whisk them together until they’re well mixed. This step adds air and lightness to your muffins. In another bowl, mix the wet ingredients. Use 1 cup of buttermilk, 2 large eggs, 1/4 cup of honey, and 1/4 cup of vegetable oil. Stir them until smooth. This mixture adds moisture and flavor to your muffins. Pour the wet mix into the dry mix. Stir gently until just combined. Do not overmix, as this can make the muffins tough. Fold in 1 cup of shredded sharp cheddar cheese, 2-3 finely chopped jalapeños, and 1/4 cup of corn kernels. Spoon the batter into the muffin tin, filling each cup about 2/3 full. Bake for 15-18 minutes. To test for doneness, insert a toothpick into the center. It should come out clean. Once baked, let them cool in the tin for about 5 minutes before transferring them to a wire rack. Enjoy your flavorful muffins warm! If your muffins don’t rise, check your baking powder. It should be fresh. Also, avoid overmixing. This can make the muffins dense. If they turn out dry, try adding more buttermilk. This will add moisture and flavor. For a soft texture, use room-temperature eggs and buttermilk. This helps the batter mix well. Mix the dry and wet ingredients until just combined. A few lumps are okay. Fold in the jalapeños and cheese gently. This keeps your muffins light and fluffy. Serve these muffins warm for the best taste. They pair well with chili or soup. You can also enjoy them with honey butter. For a fresh touch, top with chopped cilantro. These options enhance the flavor and make your meal special. Pro Tips Adjust the Spice Level: If you prefer less heat, remove the seeds from the jalapeños before chopping. For a spicier kick, add extra jalapeños or use a spicier variety. Cheese Variations: Feel free to experiment with different cheese types such as pepper jack or Monterey jack for a unique flavor twist. Use Fresh Corn: If available, use fresh corn kernels for a sweeter taste and added texture. Just cut them off the cob and fold them into the batter. Storage Tips: Store any leftover muffins in an airtight container at room temperature for up to 3 days or freeze them for longer storage. Reheat in the oven for best results. {{image_2}} You can easily swap ingredients to fit your needs. If you're gluten-free, try using a gluten-free flour blend instead of all-purpose flour. For a dairy-free version, replace buttermilk with almond milk or oat milk. Use a plant-based cheese to keep it vegan while maintaining flavor. Honey can be swapped with maple syrup for a similar sweetness. Feel free to experiment with other veggies! Chopped bell peppers add sweetness and color. For a heartier muffin, include cooked and crumbled bacon or sausage. If you want a touch of freshness, add diced green onions or spinach. These ingredients keep the muffins exciting and flavorful. You can play with the balance of sweet and savory. To make it sweeter, add a bit more honey or even cornmeal. You might also try adding a handful of blueberries or diced apples. If you prefer a more savory muffin, increase the jalapeños or add spices like cumin or smoked paprika. Each change makes the muffins unique! To keep your jalapeño cheddar cornbread muffins fresh, store them in an airtight container. Place them at room temperature if you plan to eat them within two days. For longer storage, the fridge is a good choice. Just remember that the fridge can dry them out a bit. When you're ready to enjoy your muffins again, reheating is simple. Preheat your oven to 350°F (175°C). Wrap the muffins in aluminum foil to keep them soft. Heat for about 10 minutes or until warm. You can also use a microwave. Just heat them for 15-20 seconds. This works great if you’re in a rush! If you want to save some muffins for later, freezing is a smart option. First, let them cool completely. Then, wrap each muffin in plastic wrap. Place them in a freezer bag for extra protection. They will stay good for about three months. To thaw, simply take one out and let it sit at room temperature for about an hour. You can also reheat them straight from the freezer; just add a few extra minutes to your heating time. Enjoy your flavorful delight anytime! Yes, you can make these muffins ahead. Bake them and let them cool. Store the muffins in an airtight container. They will stay fresh for up to three days. You can also freeze them for longer storage. Just thaw them overnight in the fridge before serving. To adjust the spice level, change the number of jalapeños. For mild muffins, use only one jalapeño. If you want more heat, add two or three. Remove the seeds and membranes for a milder flavor. You can also add a pinch of cayenne pepper for extra kick. Yes, you can use different cheeses. Monterey Jack or pepper jack work well. These cheeses will give a nice flavor and melt well. You can even try a blend of cheeses for a unique taste. Just keep the amount the same, about one cup of cheese. These muffins are great with chili or soup. They also pair well with grilled meats. For a snack, enjoy them with butter or honey. You can even serve them with a fresh salad. The options are endless! In this post, we explored the ingredients, steps, tips, variations, and storage for Jalapeño Cheddar Cornbread Muffins. You learned how to create tasty muffins while considering allergies and personal tastes. Remember, small changes can lead to delicious results. With these methods, you can enjoy perfect cornbread muffins every time. Keep experimenting with flavors and ingredients, and always enjoy the process. Happy baking!

Jalapeño Cheddar Cornbread Muffins Flavorful Delight

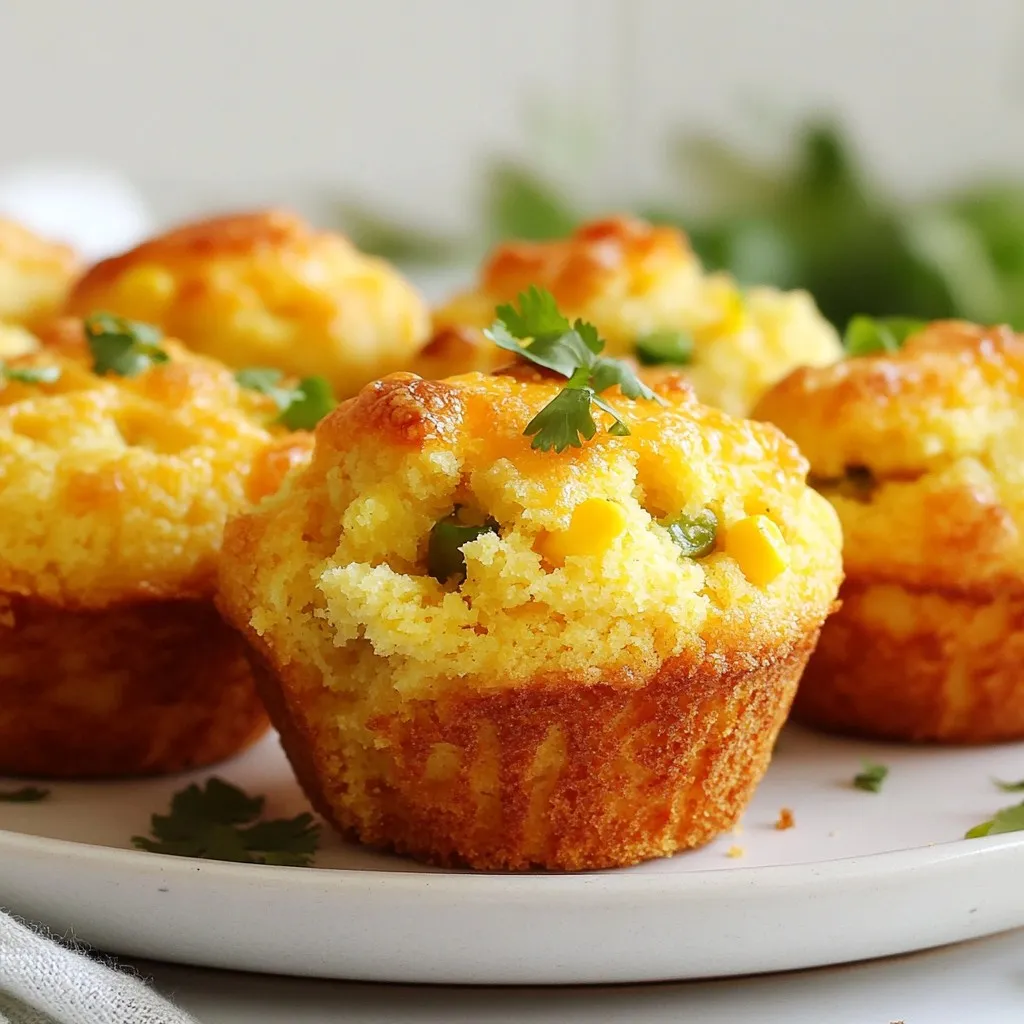
Welcome to your next favorite snack: Jalapeño Cheddar Cornbread Muffins! These muffins pack a punch of flavor, combining zesty jalapeños

- 2 cans (16 oz each) of refrigerated biscuit dough - 1/2 cup unsalted butter, melted - 4 cloves garlic, minced - 1 teaspoon Italian seasoning - 1 cup grated Parmesan cheese - 1 tablespoon fresh parsley, chopped (for garnish) - Salt and pepper to taste You need just a few simple items to create Garlic Parmesan Monkey Bread. First, get two cans of refrigerated biscuit dough. This is the base of our dish. You can find it in any grocery store. Next, you will need half a cup of unsalted butter. Make sure it is melted before you start mixing. Next, garlic is key for flavor. Four cloves of minced garlic will give the bread a great taste. You will also need one teaspoon of Italian seasoning. This adds a nice herbal note. Don’t forget the cheese! You need one cup of grated Parmesan cheese for that rich, cheesy goodness. For garnish, use one tablespoon of fresh parsley, chopped. Finally, add salt and pepper to taste. This will enhance all the flavors in the dish. Gathering these ingredients will set you up for a fun cooking experience. Enjoy making this easy and tasty recipe! {{ingredient_image_1}} 1. Preheat oven and prepare bundt pan Start by preheating your oven to 350°F (175°C). This step is key to getting the bread nice and golden. While the oven heats, grease a bundt pan with non-stick spray. This helps the bread come out easily later. 2. Combine garlic butter mixture In a small bowl, mix melted butter, minced garlic, Italian seasoning, salt, and pepper. Stir well until everything blends. This will give your monkey bread a rich flavor. 3. Cut and toss biscuit dough Open the two cans of refrigerated biscuit dough. Cut each biscuit into four pieces. Place the pieces in a large mixing bowl. Pour the garlic butter mixture over the biscuit pieces. Toss them gently until they are well-coated. 1. Layering biscuit pieces in the pan Take the coated biscuit pieces and start layering them in the greased bundt pan. Spread them out evenly. This helps them cook well without sticking together. 2. Pouring remaining garlic butter Once all biscuit pieces are in the pan, pour any leftover garlic butter over the top. This adds extra flavor and moisture to the bread. 3. Baking time and checking doneness Place the bundt pan in the preheated oven. Bake for 25-30 minutes. Check if the top is golden brown and the biscuits are cooked through. A toothpick should come out clean when inserted. 1. Cooling and inverting monkey bread After baking, let the monkey bread cool for 5-10 minutes. This makes it easier to handle. Carefully invert the bundt pan onto a serving plate. The bread should come out in one piece. 2. Adding garnish To finish, sprinkle fresh parsley on top. This adds a nice pop of color and freshness. Your Garlic Parmesan Monkey Bread is now ready to enjoy! To get the best golden crust, bake your monkey bread until it's a deep brown. Aim for about 25 to 30 minutes in the oven. Check it about halfway through to make sure it’s baking evenly. If some spots look pale, rotate the pan. For garlic and seasoning levels, taste as you mix. You can add more garlic for a stronger flavor. If you like it less garlicky, use fewer cloves. Italian seasoning adds great flavor too. Adjust it to suit your taste. Pair your monkey bread with tasty dipping sauces. A side of marinara or garlic butter works well. You can also try ranch dressing for a fun twist. For side dishes, consider a fresh salad. A simple green salad balances the rich flavors of the bread. Steamed veggies are another good choice. They add color and nutrients to your meal. To serve monkey bread, use a pretty platter. Invert the bundt pan onto the plate carefully. Let the bread fall out gently. Garnish with fresh parsley for a pop of color. You can also sprinkle extra Parmesan on top for added flair. This makes the dish look inviting and delicious. Pro Tips Use Fresh Garlic: Freshly minced garlic will give you a more intense flavor compared to pre-minced garlic. Aim for quality to enhance the overall taste of your monkey bread. Customize the Cheese: While Parmesan is a classic choice, feel free to mix in other cheeses like mozzarella or cheddar for a different flavor profile. Let It Rest: Allowing the monkey bread to cool for a few minutes before inverting it helps it hold its shape better and makes for easier serving. Presentation Matters: For an attractive presentation, garnish with extra parsley or even a sprinkle of additional Parmesan cheese right before serving. {{image_2}} You can make Garlic Parmesan Monkey Bread even more cheesy. Try adding different types of cheese. Cheddar, mozzarella, or gouda can create a fun twist. Mix and match to find your favorite blend. You can also add herbs or spices for extra flavor. Oregano, thyme, or red pepper flakes work well. These simple changes can make your dish unique and tasty. If you want a healthier option, use whole wheat biscuit dough. This swap keeps the bread hearty while adding fiber. You can also make it vegetarian. Just skip the butter and use olive oil instead. This change will still give you that rich flavor, without the animal products. You can give your monkey bread a seasonal flair. For holidays, think about flavors like cranberry or sage. You can also add seasonal vegetables. Spinach, roasted red peppers, or zucchini can bring freshness. These twists not only enhance the taste but also make your dish festive. To store leftovers, let the monkey bread cool first. Wrap it in plastic wrap or foil. You can also place it in an airtight container. This keeps it fresh. It will last in the fridge for about 3 days. Freezing is a great option if you want to keep monkey bread longer. First, let it cool completely. Then, wrap it in plastic wrap and foil. This prevents freezer burn. You can freeze it for up to 3 months. When ready to eat, thaw it in the fridge overnight. To reheat, preheat your oven to 350°F (175°C). Place the monkey bread in a baking dish. Cover it with foil to keep it moist. Heat for about 15 to 20 minutes. Check that it’s warm throughout. This helps maintain its texture and flavor. Garlic Parmesan Monkey Bread lasts about 3 days in the fridge. Make sure to store it in an airtight container. If you freeze it, it can last up to 2 months. To enjoy it later, wrap it well in plastic wrap and foil before freezing. Yes, you can prepare this dish ahead of time. You can cut the dough and mix it with the garlic butter. Then, place it in the bundt pan without baking it. Cover it well and store it in the fridge. When you are ready, bake it as usual. Some fun dips for monkey bread include marinara sauce, ranch dressing, and garlic aioli. You can also try cheese sauce or a spicy dip for extra flavor. These dips make the bread even more enjoyable. Absolutely! If you like, you can use your own homemade biscuit dough. Just make sure it is similar in size to the refrigerated dough. This way, it will bake evenly. You can add your favorite herbs or spices for a personal touch. This blog post covered how to make Garlic Parmesan Monkey Bread from start to finish. You learned about the key ingredients, step-by-step instructions, and tips to enhance flavor. We explored fun variations and storage options to keep your bread fresh. Now that you're ready to create this tasty dish, remember to have fun with it. Experiment with flavors and share it with friends and family. Enjoy your baking adventure!

Garlic Parmesan Monkey Bread Tasty and Easy Recipe

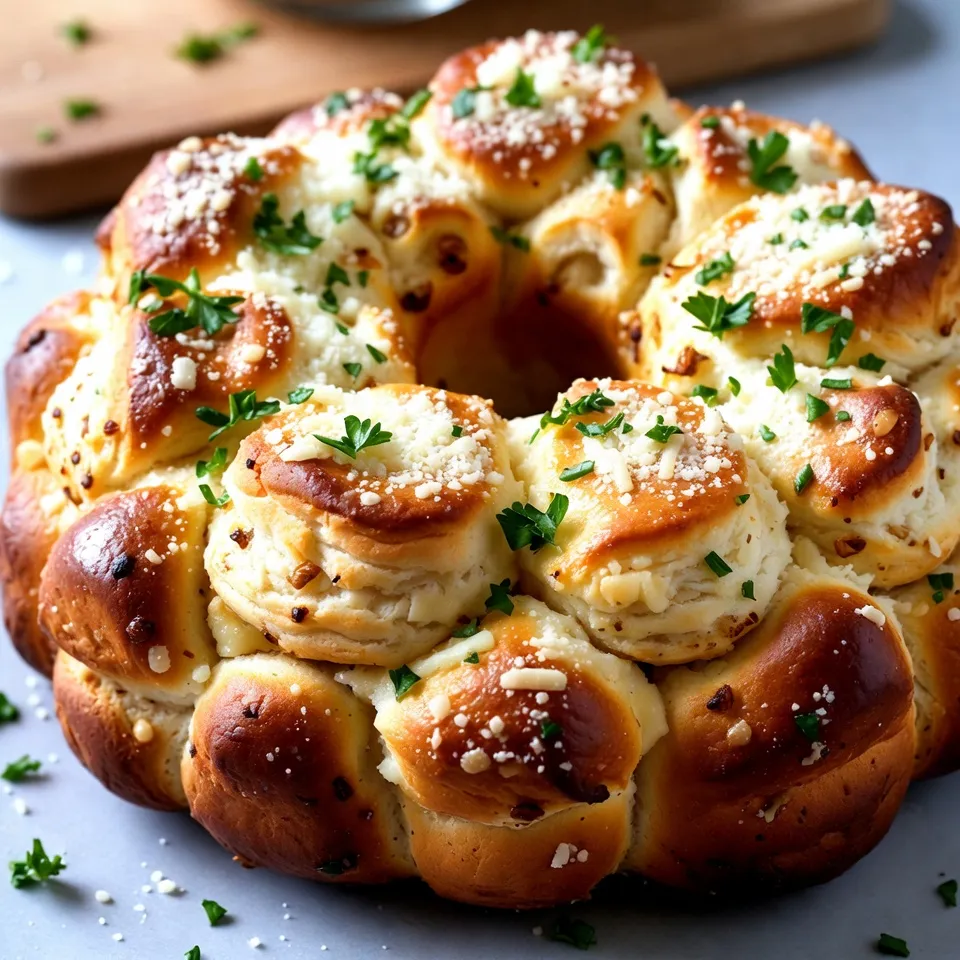
Looking for a fun and tasty snack? You’ve found it! This Garlic Parmesan Monkey Bread is simple to make and

To make this tasty stuffed Italian meatloaf, you need: - 1 lb ground beef - 1 lb ground pork (or ground turkey for a leaner dish) - 1 cup breadcrumbs - 2/3 cup grated Parmesan cheese - 1/2 cup fresh parsley, chopped - 1/2 cup onion, finely chopped - 2 cloves garlic, minced - 2 large eggs - 1 cup marinara sauce (plus more for topping) - 1 tsp dried oregano - 1 tsp dried basil - Salt and pepper to taste - 1 cup mozzarella cheese, shredded - Olive oil for frying These ingredients come together to create a hearty meatloaf that is both filling and flavorful. You can customize your meatloaf by using other ingredients. For a healthier option, try ground turkey instead of beef and pork. If you want more flavor, add diced bell peppers or mushrooms. You can also swap out the breadcrumbs for crushed crackers or oats if you like. Herbs and spices add great taste to your meatloaf. I use: - Dried oregano - Dried basil These herbs give the meatloaf a classic Italian flavor. You can also add red pepper flakes for a bit of heat or Italian seasoning for an extra kick. Don’t forget to season with salt and pepper to balance the flavors! {{ingredient_image_1}} First, preheat your oven to 350°F (175°C). This step warms the oven for even cooking. Next, heat some olive oil in a skillet over medium heat. Add finely chopped onion and minced garlic. Cook them for about 3-5 minutes, until they are soft and clear. Remove the skillet from the heat and let the mixture cool. This makes the base of your meatloaf flavorful. In a large bowl, combine the following ingredients: - 1 lb ground beef - 1 lb ground pork (or ground turkey for a leaner choice) - 1 cup breadcrumbs - 2/3 cup grated Parmesan cheese - 1/2 cup fresh parsley, chopped - 1/2 cup sautéed onion and garlic - 2 large eggs - 1 cup marinara sauce (plus more for topping) - 1 tsp dried oregano - 1 tsp dried basil - Salt and pepper to taste Mix everything well until it forms a uniform mixture. Make sure all the ingredients are combined. This mixture will create the meatloaf's main body and flavor. On a large piece of parchment paper, shape half of the meat mixture into a rectangle, about 1 inch thick. Sprinkle the shredded mozzarella cheese evenly over the center of the rectangle. Leave some space along the edges. Carefully lift one side of the parchment paper to roll the meat over the cheese. Tuck in the sides as you roll. Pinch the edges to seal the meatloaf. This step keeps the cheesy goodness inside. Place the rolled meatloaf seam-side down in a baking dish. Spread some marinara sauce over the top. Bake in your preheated oven for about 60-70 minutes. You want it to reach an internal temperature of 160°F (70°C). After baking, let the meatloaf rest for about 10 minutes before slicing. Serve warm, drizzling more marinara sauce over each slice if you like. Enjoy your delicious creation with a side of garlic bread or salad! Mixing the meatloaf well is key. Use your hands for the best results. It helps blend the flavors together. Don’t overmix, or the meat will become tough. Once mixed, shape the meat on parchment paper. Form it into a rectangle about one inch thick. Keep the edges even to help with rolling later. To get the cheese just right, use shredded mozzarella. Sprinkle it in the center of the meat rectangle. Leave space around the edges to prevent spills. When you roll the meat, tuck the cheese inside carefully. Pinch the seams to seal it tight. This keeps the cheese from leaking out while baking. Resting is important after baking. Let the meatloaf sit for ten minutes. This helps the juices settle. If you slice too soon, it might fall apart. Use a sharp knife for clean cuts. Serve with marinara sauce drizzled on top for extra flavor. Enjoy each slice with warmth and love! Pro Tips Use a Meat Thermometer: To ensure your meatloaf is perfectly cooked, use a meat thermometer to check for an internal temperature of 160°F (70°C). Sautéing Aromatics: Sautéing the onion and garlic before mixing them into the meat improves their flavor and ensures they are evenly distributed throughout the meatloaf. Resting Time: Allowing the meatloaf to rest for about 10 minutes after baking helps it hold its shape better when sliced. Customize Fillings: Feel free to experiment with different cheeses or add chopped spinach or roasted red peppers for extra flavor and nutrition! {{image_2}} You can swap the ground beef and pork for leaner meats. Ground turkey works great. It still gives you a nice flavor. You can also try ground chicken. Both options are lower in fat. They still keep the meatloaf juicy and tasty. Mozzarella is classic, but you can get creative. Try using ricotta for a creamy touch. Feta adds a tangy flavor that surprises the palate. You can also mix in sautéed spinach for added nutrition. Fresh herbs can brighten up the stuffing too. Just think about what you like! Marinara sauce is a staple, but let’s spice it up! You can add crushed red pepper for heat. A splash of red wine can deepen the flavor. Mixing in sautéed mushrooms gives a nice earthy taste. If you love the taste of fresh herbs, add basil or oregano right before serving. This can make your sauce stand out! To store leftover meatloaf, first let it cool. Wrap it tightly in plastic wrap or foil. You can also place it in an airtight container. Make sure to store it in the fridge. It stays fresh for about 3-4 days. If you want to enjoy it longer, freezing is a great option. When reheating your meatloaf, keep it moist. Preheat your oven to 350°F. Place the meatloaf in a baking dish. Add a splash of marinara sauce on top. Cover it with foil to keep it from drying out. Bake for about 20-25 minutes. Check that it’s warm all the way through before serving. To freeze meatloaf, slice it first for easier servings. Wrap each slice tightly in plastic wrap. Then, place the slices in a freezer bag. Remove as much air as possible. Label the bag with the date. Your meatloaf will keep well for up to 3 months. When ready to eat, thaw in the fridge overnight and reheat as mentioned above. Yes, you can make Stuffed Italian Meatloaf ahead of time. Prepare it up to the baking step. Cover it tightly and store it in the fridge for up to a day. When ready, bake it straight from the fridge. Just add a few extra minutes to the cooking time. Stuffed Italian Meatloaf pairs well with many sides. Here are some ideas: - Garlic bread - A simple green salad - Roasted vegetables - Creamy mashed potatoes - Pasta with marinara sauce These sides complement the flavors of the meatloaf and make a complete meal. To check if the meatloaf is done, use a meat thermometer. Insert it into the center of the loaf. It should read at least 160°F (70°C). If you don’t have a thermometer, you can cut into the meatloaf. The juices should run clear, and the meat should be no longer pink. Yes, you can use ground turkey instead of beef and pork. This makes the meatloaf leaner. However, turkey can be drier than beef or pork. To keep it moist, add a bit more marinara sauce or include extra cheese. This will help retain moisture while adding flavor. Stuffed Italian Meatloaf is a delicious, easy dish you can make at home. We covered the main ingredients and some fun variations. You learned how to prep, mix, shape, and bake your meatloaf. I shared tips for perfect cheese melting and slicing. Storing leftovers safely is simple too. Now, you can impress family and friends with your cooking skills. Experiment with flavors, and have fun with the recipe. Enjoy every tasty bite!

Stuffed Italian Meatloaf Easy and Tasty Recipe

Are you ready to elevate your dinner game? This Stuffed Italian Meatloaf is both easy and tasty! In this article,

- 4 large portobello mushrooms, stems removed - 1 cup cherry tomatoes, halved - 1 cup fresh mozzarella balls, halved - 1 cup fresh basil leaves, chopped - 2 tablespoons balsamic glaze - 3 tablespoons olive oil - Salt and pepper to taste - 1/4 teaspoon garlic powder - 1/4 teaspoon crushed red pepper flakes (optional) - Baking sheet - Parchment paper - Mixing bowl - Brush for olive oil When making Caprese stuffed portobellos, gathering the right ingredients is key. Start with large portobello mushrooms. Their size gives a sturdy base for stuffing. Look for mushrooms that are firm and fresh. Next, you’ll need cherry tomatoes. Halve them for easy mixing and bursting flavor. Fresh mozzarella balls, or bocconcini, add a creamy texture. Halve these too for a nice bite. Fresh basil leaves provide a bright, herbal note that ties the dish together. For seasoning, balsamic glaze adds a sweet and tangy kick. Olive oil keeps everything moist. Salt and pepper enhance the flavors. Garlic powder adds depth, while red pepper flakes bring a little heat, if you like. You will also need some basic kitchen tools. A baking sheet lined with parchment paper makes cleanup easier. A mixing bowl helps combine your filling, and a brush is handy for applying olive oil to the mushrooms. With these ingredients and tools, you are ready to create a delicious meal. Enjoy the process and the tasty results! {{ingredient_image_1}} 1. First, preheat your oven to 375°F (190°C). This step is key for perfect cooking. 2. Next, take a small bowl. Mix together 3 tablespoons of olive oil, 1/4 teaspoon of garlic powder, salt, and pepper. 3. Brush this tasty mixture onto the gill side of the portobello mushrooms. This adds flavor and helps with browning. 1. In a mixing bowl, combine 1 cup of halved cherry tomatoes, 1 cup of halved fresh mozzarella balls, and 1 cup of chopped fresh basil. 2. Drizzle the mixture with 2 tablespoons of balsamic glaze, then mix well. 3. Spoon the tomato and mozzarella mixture generously into each portobello cap, filling them to the top. 4. If you like some heat, sprinkle crushed red pepper flakes on top of the stuffed mushrooms. 1. Place the stuffed mushrooms on a baking sheet lined with parchment paper. 2. Bake them in the preheated oven for about 20 to 25 minutes. Look for tender mushrooms and melted, bubbly mozzarella. 3. Once done, remove the mushrooms from the oven and let them cool slightly. Drizzle with more balsamic glaze if you want extra flavor. To choose fresh mushrooms, look for large portobellos that feel firm. Their caps should be smooth, dry, and free from dark spots. The color should be rich brown. Give them a sniff; they should smell earthy and fresh. Adjusting seasoning is key. Start with salt and pepper; sprinkle to taste. If you want more flavor, add extra garlic powder or crushed red pepper flakes. Taste the stuffing before you fill the mushrooms. This lets you tweak the mix until it’s just right. Pair these stuffed portobellos with a light salad or grilled veggies. A simple arugula salad with lemon vinaigrette works great. You can also serve them with crusty bread to soak up the juices. For presentation, place the stuffed mushrooms on a rustic wooden platter. Drizzle some balsamic glaze over them and add fresh basil leaves for color. This simple touch makes your dish look gourmet. Want to change up the flavor? Try different toppings like pesto or sun-dried tomatoes. A sprinkle of Parmesan cheese can add a savory crunch. For a sweet twist, drizzle honey over the top before serving. You can also experiment with glazes. A balsamic reduction adds depth. Or, try a spicy chili oil for a kick. These small changes can make your dish even more exciting. Pro Tips Choose Fresh Ingredients: Always opt for the freshest mozzarella and basil for the best flavor and texture in your Caprese stuffed portobellos. Customize Your Fillings: Feel free to add other ingredients like diced bell peppers or olives to the tomato and mozzarella mixture for a unique twist. Don't Overbake: Keep an eye on the mushrooms while baking; you want them tender but not mushy, and the cheese bubbly but not browned. Serve Warm: These stuffed portobellos are best enjoyed warm, so serve them right out of the oven for maximum flavor and enjoyment. {{image_2}} You can switch up the cheese in this dish. Try goat cheese or feta for a tangy twist. These cheeses melt differently but add great flavor. You can also add other veggies. Spinach, bell peppers, or zucchini work well. For added protein, consider diced chicken or cooked sausage. These swaps can make the dish heartier. To make this dish vegan, use plant-based mozzarella. Ensure the balsamic glaze is also vegan-friendly. You can swap portobello mushrooms for large eggplants for a different base. For gluten-free needs, this recipe is already safe, but check all labels. This way, everyone can enjoy the meal. Change the herbs for a new taste. Try thyme or oregano instead of basil. You can also add spices like paprika or cumin for depth. A squeeze of lemon juice brightens the dish too. These small changes can lead to exciting new flavors, making each meal unique. To store leftovers, let the stuffed portobellos cool first. Then, place them in an airtight container. Store in the fridge for up to three days. They taste great even the next day! Just make sure to keep them covered to prevent drying out. For reheating, the oven works best. Preheat your oven to 350°F (175°C). Place the stuffed mushrooms on a baking sheet. Heat them for about 10-15 minutes until warm. This keeps the mushrooms soft and the cheese gooey. You can also use a microwave if you are in a hurry. Heat for about 1-2 minutes, but be careful; the texture may change. You can freeze Caprese stuffed portobellos! First, let them cool completely. Wrap each mushroom tightly in plastic wrap. Place them in a freezer-safe bag or container. They will stay fresh for up to two months. When ready to eat, thaw overnight in the fridge and reheat as mentioned above. Enjoy the same great flavor even after freezing! Yes, you can make Caprese stuffed portobellos ahead of time. To prep in advance, fill the mushrooms with the tomato and mozzarella mix. Cover them with plastic wrap. Store them in the fridge for up to a day. When ready, bake them straight from the fridge. You may need to add a few extra minutes to the baking time. Caprese stuffed portobellos pair well with many sides. Here are some great options: - A fresh green salad - Garlic bread or toasted baguette - Quinoa or couscous - Roasted vegetables These sides balance the rich flavors of the stuffed mushrooms. To tell if the mushrooms are done, look for a few signs: - The mushrooms should be tender. - The mozzarella should be melted and bubbly. - The edges of the mushrooms may turn golden brown. These cues mean your Caprese stuffed portobellos are ready to enjoy. You learned how to make Caprese stuffed portobello mushrooms from fresh ingredients. We covered everything, from the right mushrooms to how to bake them. Tips for storage and reheating will keep your dish tasty. Feel free to mix things up with different cheeses or vegetables. You can modify this recipe for any diet or taste. Enjoy your cooking! This dish will impress anyone at your table!

Caprese Stuffed Portobellos Flavorful and Easy Recipe

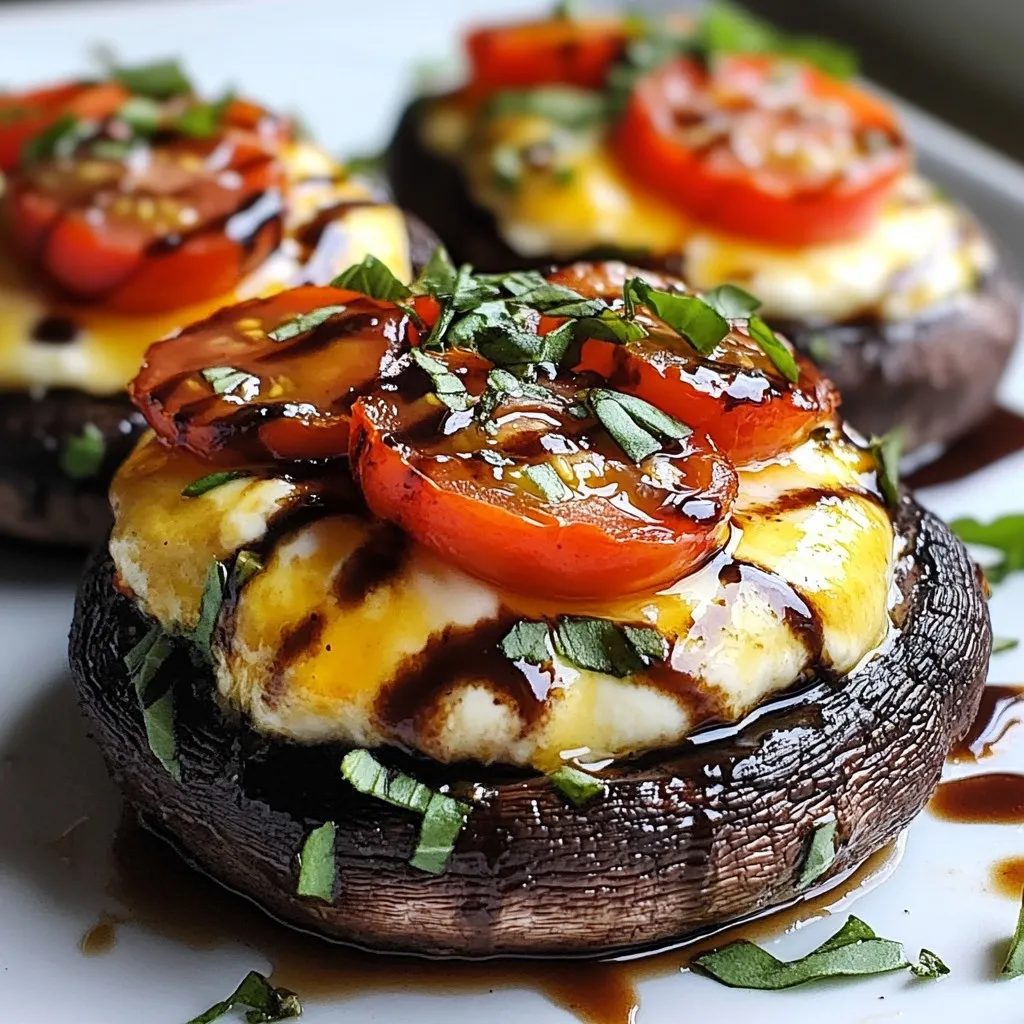
If you’re craving a dish that’s both fresh and easy, you need to try Caprese Stuffed Portobellos. These large mushrooms

- 12 oz fettuccine pasta - 2 large onions, thinly sliced - 4 cloves garlic, minced - 4 cups vegetable broth - 1 cup heavy cream - 1 cup grated Gruyère cheese (plus extra for topping) - 2 tablespoons olive oil - 1 teaspoon thyme (dried or fresh) - 1 teaspoon balsamic vinegar - Salt and pepper to taste - Fresh parsley, chopped (for garnish) - A large pot or deep skillet - A wooden spoon for stirring - A sharp knife for slicing onions - A cutting board - Measuring cups and spoons Gathering all these ingredients sets you up for a tasty dish. The fettuccine pasta is the base, while the onions bring sweetness. Garlic adds depth. Gruyère cheese makes it creamy and rich. Olive oil helps caramelize the onions. Thyme and balsamic vinegar elevate the flavors. Salt and pepper are key for seasoning. Fresh parsley adds a pop of color and freshness. To cook, you need a large pot or deep skillet. A wooden spoon helps mix everything well. A sharp knife and cutting board make slicing easy. Measuring cups and spoons ensure you use just the right amounts. With these tools, you’ll create a wonderful meal! {{ingredient_image_1}} Start by heating olive oil in a large pot. Use medium heat for this step. Add the thinly sliced onions. Stir them every few minutes. You want them to cook for about 10 to 15 minutes. Watch as they turn golden brown and soft. This brings out their sweet flavor. After the onions caramelize, add the minced garlic. Cook for two more minutes. The aroma will be amazing! Next, pour in the vegetable broth. Bring it to a gentle simmer. Add the fettuccine pasta. Make sure it is well submerged. Toss in thyme and balsamic vinegar. Stir everything together to combine. Cover the pot and let it cook. This takes about 10 to 12 minutes. Stir occasionally until the pasta is al dente. Most of the broth should be absorbed by now. Now it's time to make the dish rich and creamy. Reduce the heat to low. Slowly stir in the heavy cream. Then add the grated Gruyère cheese. Mix until everything melts together. If the pasta seems dry, add a splash of broth. Taste and season with salt and pepper. You'll find the perfect balance! Serve hot, topped with extra cheese and fresh parsley. Enjoy every creamy bite! To get sweet, golden onions, slice them thinly. Heat olive oil in a large pot. Add the onions and stir. Cook them on medium heat for 10-15 minutes. Stir often to avoid burning. If they start to stick, lower the heat. Caramelization brings out their natural sweetness. Don’t rush this step; it makes the dish shine. Taste is key in cooking. After you mix in the cream and cheese, try it. Add salt and pepper based on what you like. If you want more flavor, add a bit more thyme or balsamic vinegar. You can also sprinkle some red pepper flakes for heat. Make it your own! This pasta is perfect for meal prep. You can cook it a day before. Just follow the recipe and let it cool. Store it in an airtight container in the fridge. When ready to eat, reheat it gently on low heat. If it seems dry, add a splash of broth or cream. Enjoy your tasty pasta anytime! Pro Tips Caramelization is Key: Take your time with the onions. The deeper the caramelization, the richer the flavor of your pasta. Cheese Choice Matters: While Gruyère is traditional, feel free to mix with other cheeses like Fontina or Parmesan for a unique flavor. Texture Tips: For a creamier texture, reserve a bit of pasta cooking water to add if the dish becomes too thick. Herb Enhancement: Add fresh thyme or rosemary at the end for an aromatic finish that complements the dish beautifully. {{image_2}} You can easily make this dish vegetarian. Skip the heavy cream and use plant milk. Almond or oat milk works well here. For a vegan option, swap Gruyère cheese for vegan cheese. There are many brands that melt nicely. You can also add nutritional yeast for a cheesy flavor. Just mix it in before serving for extra taste. Gruyère cheese gives this dish a rich taste. However, you can try other cheeses. Mozzarella melts well and adds creaminess. Cheddar offers a sharp flavor that can spice things up. For a bold kick, use blue cheese or goat cheese. Each cheese brings a new twist, so feel free to experiment! Boost this meal by adding protein. Grilled chicken or shrimp pairs well with the pasta. For a meat-free option, add chickpeas or lentils. They will add texture and keep you full. You can also mix in veggies like spinach or bell peppers. These add color and nutrients, making this dish even better! To keep your leftover One Pot French Onion Pasta fresh, first let it cool down. Then, transfer it to an airtight container. Make sure to seal it tightly. Store it in the fridge for up to three days. This helps keep the flavors intact. When reheating, add a splash of vegetable broth or cream. This will help bring back the creamy texture. Heat it gently on the stove over low heat. Stir often to avoid sticking. You can also use a microwave. Just cover the bowl and heat in short bursts, stirring in between. To freeze, place the cooled pasta in a freezer-safe container. Leave some space at the top for expansion. It can last for up to three months in the freezer. When ready to eat, thaw it overnight in the fridge. Reheat as mentioned before for the best taste. You can use several types of pasta. Penne, rigatoni, or even spaghetti work well. Each type gives a different twist. If you want a twist, try egg noodles. They add a nice texture. Yes, you can use water. But, it will lack flavor. Broth adds depth and richness. If you don't have broth, consider using a mix of water and a seasoning cube. This option will enhance the taste a bit. To make this dish gluten-free, choose gluten-free pasta. Many brands offer options that taste great. Check the package for cooking times, as they can differ. Also, ensure the vegetable broth is gluten-free. Serve this pasta with a simple salad. A green salad with fresh veggies pairs well. You can also try garlic bread for a comforting side. For a heartier meal, consider roasted vegetables. The One Pot French Onion Pasta is a simple, tasty dish. We explored the key ingredients, ways to enhance flavors, and tools you'll need. I shared step-by-step instructions, tips for perfecting your pasta, and variations to suit your taste. Don't forget storage tips to keep leftovers fresh. Remember, this dish can fit vegetarian and vegan diets too. You now have all the tools to create a delicious meal. Enjoy the cooking process and savor every bite!

One Pot French Onion Pasta Flavorful Comfort Dish

Looking for a cozy dinner that warms your soul? Try my One Pot French Onion Pasta! This creamy, rich dish

To make Loaded Taco Potato Skins, you need simple and fresh ingredients. Here’s what you’ll need: - 4 large russet potatoes - 1 cup ground turkey or beef - 1 packet taco seasoning - 1 cup shredded cheddar cheese - 1 cup black beans - 1 cup diced tomatoes - ½ cup sour cream - ½ cup sliced jalapeños - ¼ cup chopped green onions - Olive oil - Salt and pepper Each ingredient plays a key role in creating rich flavors. The russet potatoes form the base, offering a sturdy and crispy shell. Ground turkey or beef adds protein and heartiness. Taco seasoning brings that classic taste, tying everything together. Next, the shredded cheddar cheese melts beautifully, creating a rich topping. Black beans and diced tomatoes boost texture and flavor. Sour cream adds a creamy finish, while jalapeños kick up the heat. Finally, green onions provide a fresh crunch and a pop of color. These ingredients work together to create a fun and tasty meal. Feel free to mix and match based on your taste! {{ingredient_image_1}} 1. Preheat your oven to 400°F (200°C). This helps cook the potatoes evenly. 2. Scrub the potatoes under cold water. Dry them well with a towel. 3. Pierce each potato several times with a fork. This lets steam escape while cooking. 4. Rub each potato with olive oil, salt, and pepper. This adds flavor to the skin. 1. Heat a skillet over medium heat. This ensures the meat cooks well. 2. Add the ground turkey or beef to the skillet. Cook until it is browned. 3. Use a spatula to break the meat apart as it cooks. This helps it brown evenly. 4. Stir in the taco seasoning. Follow the package instructions for best results. 1. When the potatoes are tender, take them out of the oven. Let them cool slightly. 2. Cut each potato in half lengthwise. Be careful, as they will be hot. 3. Scoop out some of the flesh, leaving a thin layer on the skin. This makes a bowl for the filling. 4. Brush the insides of the potato skins with olive oil. This keeps them crisp. 5. Place them cut side down on a baking sheet. Bake for 10-15 minutes until crispy. 1. Remove the potato skins from the oven and flip them over. 2. Spoon the cooked taco meat into each skin. Be generous with the filling! 3. Top each with black beans and diced tomatoes. Then sprinkle cheddar cheese on top. 4. Return the skins to the oven for 5-10 minutes. Watch for the cheese to melt and bubble. 5. Once out of the oven, drizzle sour cream over each skin. Top with jalapeños and green onions. To get crispy potato skins, oven temperature is key. Set your oven to 400°F (200°C) before baking. This high heat helps the skins crisp up nicely. Once you prepare the potatoes, rub them with olive oil. This adds flavor and aids in crisping. Don’t skip the salt and pepper; they make a big difference! You can take these loaded skins to the next level. Add creamy avocado or zesty salsa for extra flavor. If you like heat, toss in more jalapeños or a splash of hot sauce. Adjust the taco seasoning to your taste. You can even mix in some cumin or chili powder for a unique twist! These loaded potato skins shine as a main dish, but they pair well with sides. Serve them with a fresh side salad or tortilla chips. You can also place them on a colorful platter for a fun touch. Consider adding a few lime wedges for a burst of freshness. Enjoying them with friends makes them even better! Pro Tips Choose the Right Potatoes: For the best texture, use large russet potatoes as they have a fluffy interior and crispy skin when baked. Season Generously: Don't skimp on seasoning the potato skins; a good rub of olive oil, salt, and pepper enhances their flavor. Customize Your Toppings: Feel free to get creative with toppings! Add avocado, corn, or your favorite salsa for a personal touch. Serve Immediately: These potato skins are best enjoyed fresh out of the oven while the cheese is melty and the skins are crispy. {{image_2}} You can easily make this dish meat-free. Swap the ground turkey or beef for vegetables or tofu. Use a mix of bell peppers, zucchini, or mushrooms. Tofu can add a nice texture. Season your veggies with taco seasoning for flavor. If you like heat, add jalapeños or hot sauce. You can mix in fresh jalapeños with the toppings. For extra spice, try a spicy taco seasoning. This will give your skins a nice kick. Always adjust to your taste. Cheese can change the whole dish! While cheddar is great, try pepper jack for heat. You can also use Monterey Jack or even crumbled feta. Each cheese gives a unique flavor. Mix and match to find your favorite combination. To store your Loaded Taco Potato Skins, let them cool first. Place them in an airtight container. You can keep them in the fridge for up to three days. If you want to enjoy them later, freeze them. They can last for up to three months in the freezer. Just remember to wrap them well to prevent freezer burn. When reheating, I recommend using the oven. Preheat it to 350°F (175°C). Place the potato skins on a baking sheet. Heat them for about 10-15 minutes. This keeps the skins crispy and warm. If you use a microwave, they may get soggy. If you must use the microwave, heat them in short bursts. This helps keep some crispness. Yes, you can use other potatoes. Yukon golds work well for a creamier texture. Red potatoes add a nice color and hold their shape. Just remember to adjust baking time for smaller or larger potatoes. You can use ground chicken or pork for a different taste. If you want a meatless option, try black beans or lentils. Both options give you that hearty feel. Yes, you can prepare them ahead. Bake the potatoes and cool them. Store the cooked potatoes in the fridge for up to two days. When you’re ready, assemble and bake them before serving. Yes, this recipe is naturally gluten-free. Just check the taco seasoning packet to ensure it is gluten-free. You can also make your own seasoning to be safe. Loaded Taco Potato Skins are fun to make and tasty to eat. You learned how to prepare the potatoes, cook the meat, and assemble the skins. We also covered tips for crispy skins and tasty variations. You can swap ingredients or adjust spice levels to fit your taste. These skins are perfect for parties or a family meal. Enjoy your cooking adventure and share these delicious bites with friends. I can't wait to hear how yours turn out!

Loaded Taco Potato Skins Tasty and Easy Recipe

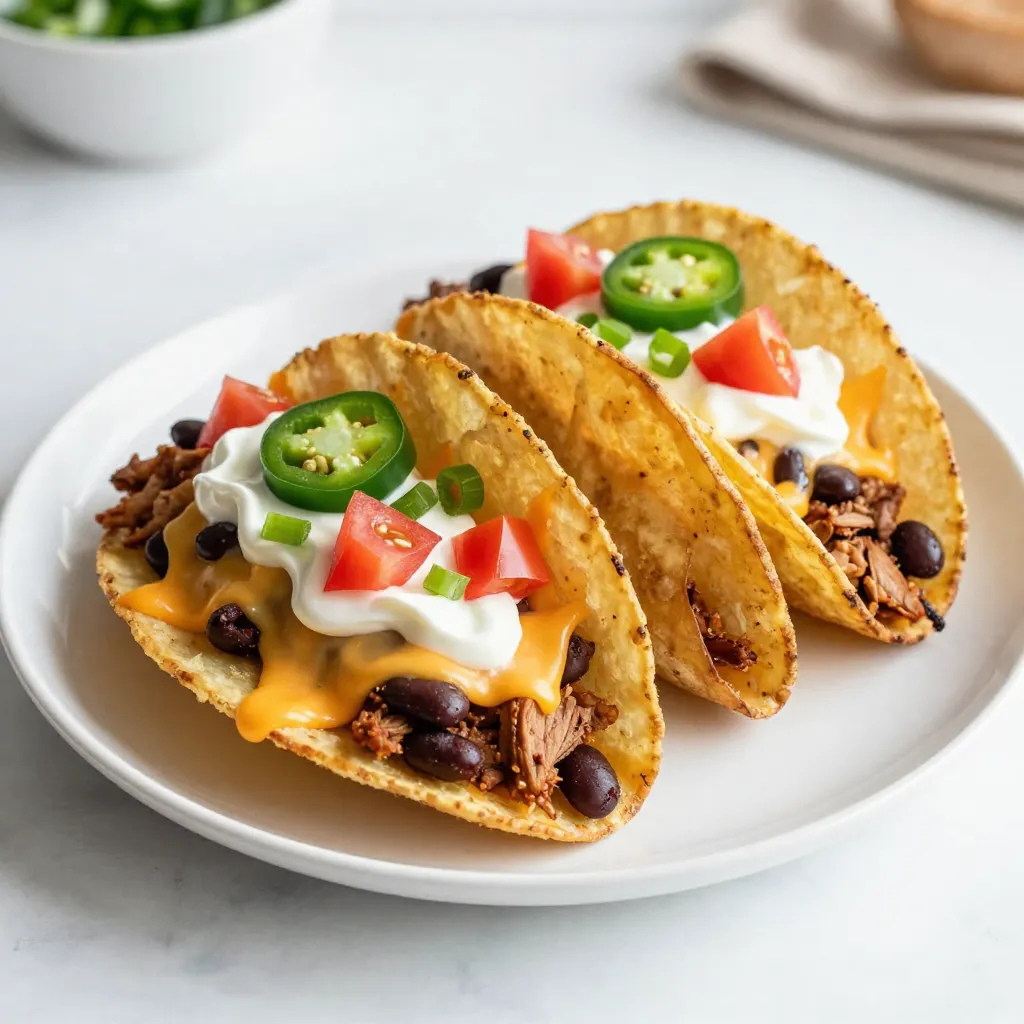
If you’re craving a tasty snack that’s both fun and easy to make, you’re in luck! Loaded Taco Potato Skins

- 8 oz rice noodles - 1/2 cup creamy peanut butter - 3 tablespoons soy sauce - 2 tablespoons lime juice - 2 tablespoons honey or maple syrup - 1 tablespoon sesame oil - 1-2 teaspoons sriracha - 1 cup shredded carrots - 1 red bell pepper, thinly sliced - 1 cup cucumber, julienned - 3 green onions, chopped - 1/4 cup chopped cilantro - Crushed peanuts for garnish To make Spicy Thai Peanut Noodles, gather your main ingredients first. Start with rice noodles, creamy peanut butter, soy sauce, lime juice, and honey. These five items are key to a rich flavor. Next, consider the optional ingredients. Adding sesame oil gives a nutty touch. Sriracha adds heat, while carrots, bell pepper, and cucumber bring crunch. Green onions and cilantro add freshness. Finally, crushed peanuts on top give a nice texture. These ingredients create a great balance of flavors. The peanut butter is creamy, while the soy sauce adds saltiness. Lime juice brings brightness, and honey adds sweetness. Together, they make a delightful sauce. {{ingredient_image_1}} To cook rice noodles, start by boiling water in a pot. Once the water is boiling, add the noodles. Cook them for about 4 to 6 minutes, or until they are soft. Stir them gently to prevent sticking. After cooking, drain the noodles in a colander. Rinse them under cold water to stop cooking. This helps keep the noodles firm and chewy. Set the rinsed noodles aside; they will mix well later. Next, it’s time to make the peanut sauce. In a medium bowl, combine 1/2 cup of creamy peanut butter with 3 tablespoons of soy sauce. Add 2 tablespoons of lime juice and 2 tablespoons of honey or maple syrup. Then, pour in 1 tablespoon of sesame oil. For the spice, add 1 to 2 teaspoons of sriracha. Mix everything together until it’s smooth and creamy. If you like it spicy, add more sriracha to taste. Now, let’s bring everything together. In a large bowl, combine the cooked rice noodles, 1 cup of shredded carrots, 1 sliced red bell pepper, and 1 cup of julienned cucumber. Pour the peanut sauce over this mixture. Toss everything gently so that the noodles and veggies are well coated in the sauce. This step is key to getting all those flavors to blend together. For the final touch, add in 3 chopped green onions and 1/4 cup of chopped cilantro. Toss lightly again to mix. This adds a fresh taste that brightens up the dish. To serve, place the noodle mixture into bowls. Finish with a sprinkle of crushed peanuts on top for crunch. You can also add a wedge of lime on the side for an extra zing! To avoid mushy noodles, cook them just until tender. Follow the package time closely. Rinse the noodles under cold water to stop cooking. This keeps them firm and springy. For storage, keep the noodles in an airtight container. Add a splash of oil to prevent sticking. This simple step makes serving easier later. Spice it up by adding garlic powder or red pepper flakes. This gives the noodles a nice kick. You can also mix in some chopped peanuts for a crunchy surprise. Pair the dish with lime wedges for a fresh twist. Squeezing lime juice over your noodles brightens the flavors. Prepare the veggies ahead of time. Slice the bell pepper and julienne the cucumber. Store them in the fridge until you’re ready to cook. For leftovers, place them in a container with a tight seal. Enjoy them within three days for the best taste. You can also reheat them on the stovetop. This keeps the noodles from getting too sticky. Pro Tips Adjust the Spice Level: Start with 1 teaspoon of sriracha and increase according to your taste. This ensures the dish is flavorful without being overpowering. Perfectly Cooked Noodles: Rinse the cooked noodles under cold water to stop the cooking process and prevent them from becoming mushy. Use Fresh Vegetables: Opt for fresh, crunchy vegetables for added texture and flavor. This enhances the overall taste and presentation of the dish. Garnish Creatively: Garnish with lime wedges and extra cilantro for a vibrant look. This not only adds visual appeal but also enhances the flavor when squeezed over the noodles. {{image_2}} You can boost your Spicy Thai Peanut Noodles with protein. Tofu is a great choice for a plant-based option. Use firm tofu for the best texture. Simply press it to remove extra water, then cube and pan-fry until golden. Toss it in with the noodles for added crunch. If you prefer meat, chicken and shrimp work well too. For chicken, use thin slices and cook until no longer pink. For shrimp, cook until they turn pink and curl up. Both options add great flavor and protein. Making this dish plant-based is easy. Just stick with tofu or add more veggies. Try edamame or chickpeas for protein. If you want a different sauce, use almond butter or sunflower seed butter. These substitutes keep the creamy texture you love. For toppings, consider sesame seeds or crushed nuts. They add more crunch and flavor. You can replace honey with maple syrup to keep it vegan-friendly. Adding regional vegetables can change the dish's flavor. Try bok choy, snap peas, or bell peppers for a fresh twist. Each vegetable brings a unique taste and texture. You can also switch up the noodles. Instead of rice noodles, use whole wheat noodles or even zucchini noodles. Each type gives a different feel to the dish while keeping it tasty and fun. To keep your Spicy Thai Peanut Noodles tasty, store them in an airtight container. Place the noodles and sauce together for the best flavor. Refrigerate them for up to four days. If you want to keep them longer, freeze the noodles and sauce separately. This method keeps the texture nice. Thaw frozen noodles in the fridge overnight before reheating. To reheat without losing texture, use the stovetop. Heat a pan over low heat and add a splash of water. Stir the noodles gently until warm. This keeps them from drying out. If you’re in a hurry, use the microwave. Heat in 30-second bursts, stirring in between. This way, you won’t overcook the noodles. If you have a peanut allergy, you can use sun butter or almond butter. These nut butters work well in the sauce. You might also try tahini, made from sesame seeds. Each option will give a different flavor, but they all taste great in the dish. The spice level can change based on your taste. The recipe calls for 1-2 teaspoons of sriracha. If you like it hot, add more sriracha. If you want it mild, use just a bit or skip it. You control the heat, so make it your way! Yes, you can make this dish ahead and enjoy it later. Cook the noodles and make the sauce in advance. Store them in the fridge separately. Mix them together when you're ready to eat. This dish tastes great even after a day or two! This blog post explored the tasty world of Spicy Thai Peanut Noodles. You learned about key ingredients like rice noodles and peanut butter. I shared step-by-step instructions for cooking and combining everything. I also gave tips for perfect noodles and ways to switch up the recipe. Remember, you can adjust flavors and add your favorite proteins. Whether you love cooking or just want a quick meal, these noodles are a great choice. Enjoy your cooking journey and make it your own!

Spicy Thai Peanut Noodles Flavorful and Easy Recipe

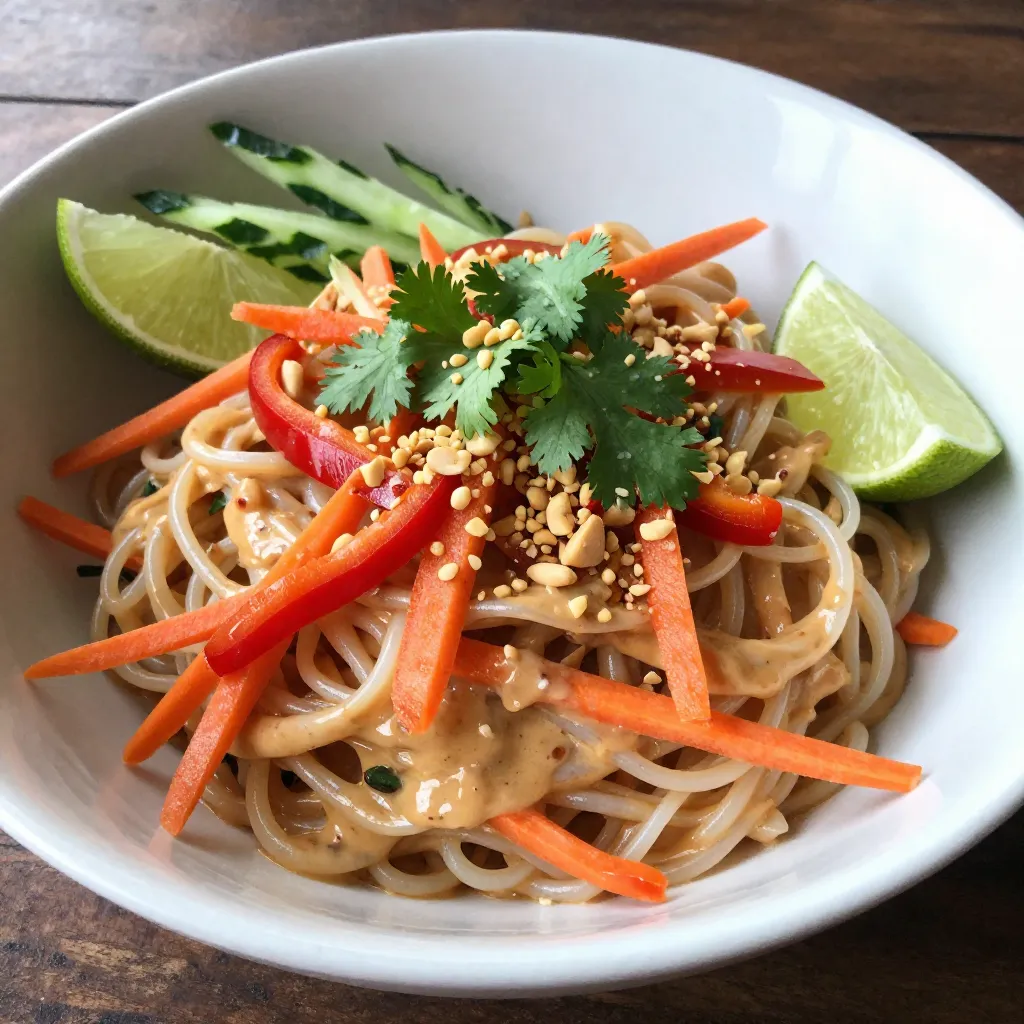
Craving a quick and tasty meal? Let me introduce you to Spicy Thai Peanut Noodles! This dish packs a punch

- 4 boneless, skinless chicken breasts - 1 tablespoon olive oil - 1 cup heavy cream - 1 cup sun-dried tomatoes (packed in oil, drained and chopped) - 1 cup freshly grated Parmesan cheese - 2 cups fresh spinach - 1 teaspoon garlic powder - 1 teaspoon onion powder - 1 teaspoon paprika - Salt and pepper to taste - Fresh basil leaves for garnish In this dish, the chicken breasts serve as the star. They get a nice sear, locking in flavor. The heavy cream creates a rich sauce that coats each bite perfectly. Sun-dried tomatoes add a burst of sweet and tangy notes. Fresh spinach brightens the dish with color and nutrients, making it feel light. The seasonings blend with the chicken to create layers of taste. Garlic powder, onion powder, and paprika give depth. A touch of salt and pepper enhances all the flavors without overpowering them. You can top the dish with fresh basil leaves for a pop of color. It also adds a fresh, herbal note that lifts the whole meal. {{ingredient_image_1}} Start by getting your chicken breasts ready. Take four boneless, skinless chicken breasts. Season both sides with garlic powder, onion powder, paprika, salt, and pepper. This adds great flavor. Make sure the spices coat the chicken well. Set the chicken aside while you heat the skillet. In a large skillet, heat one tablespoon of olive oil over medium-high heat. Once hot, add the seasoned chicken breasts. Cook them for about 5-7 minutes on each side. Look for a nice golden brown color. This means the chicken is cooking well. Once done, remove the chicken from the skillet and set it aside. In the same skillet, pour in one cup of heavy cream. Bring it to a gentle simmer. Stir in one cup of chopped sun-dried tomatoes and one cup of freshly grated Parmesan cheese. Mix until the cheese melts and the sauce is smooth. This creamy sauce is the star of this dish! Once your sauce is ready, add two cups of fresh spinach. Stir it into the sauce until wilted. The spinach adds color and nutrition. Make sure it’s well mixed in so every bite has a bit of green goodness. Now it’s time to bring back the chicken. Place it back in the skillet and spoon some sauce over each piece. Let it simmer for about 3-4 minutes. This helps the chicken soak up all that creamy flavor. Finally, remove the skillet from heat. Garnish your dish with fresh basil leaves. This adds a pop of color and flavor. Serve the Marry Me Chicken on creamy mashed potatoes or a fresh salad. Enjoy your flavorful dinner delight! To cook perfect chicken, start with even thickness. You can pound the chicken breasts to ensure they cook evenly. This keeps them juicy and tender. Use a meat thermometer to check for doneness. Aim for 165°F for safe eating. For extra flavor, let the chicken marinate for 30 minutes in the seasoning mix before cooking. This step adds depth to the taste. If your sauce is too thick, add a splash of chicken broth or more heavy cream. Stir well to combine. If it’s too thin, let it simmer for a few more minutes. The heat will help it thicken up. You want a creamy texture that clings to the chicken. Adjusting the sauce will elevate the dish. To make your Marry Me Chicken even better, consider adding fresh herbs. Chopped thyme or rosemary can add a lovely aroma. You could also sprinkle in red pepper flakes for some heat. For a tangy twist, add a squeeze of lemon juice before serving. These little tweaks can transform your dish into something truly special. Enjoy experimenting with flavors! Pro Tips Perfectly Sear Chicken: Ensure the skillet is hot before adding the chicken. This gives the chicken a nice golden crust and locks in moisture. Customize Your Sauce: Feel free to add additional herbs like thyme or oregano to the sauce for an extra layer of flavor. Use Fresh Ingredients: Fresh spinach and high-quality sun-dried tomatoes really elevate the dish's taste and presentation. Let It Rest: After cooking, allow the chicken to rest for a few minutes before serving. This helps retain its juices for a more succulent bite. {{image_2}} You can easily make Marry Me Chicken gluten-free. Just ensure your chicken broth is gluten-free. Use gluten-free flour to thicken the sauce if needed. The heavy cream, sun-dried tomatoes, and spices are all typically gluten-free. For a vegetarian version, swap chicken for hearty mushrooms or tofu. Use a mix of portobello and shiitake mushrooms for great taste. Sear them in olive oil until golden. Keep the sauce the same, as it pairs well with these flavors. Boost nutrition by adding vegetables. Consider bell peppers, zucchini, or broccoli. Just chop these veggies and add them to the skillet with the spinach. This addition adds color and flavor. Plus, it makes the dish even healthier. Store leftover Marry Me Chicken in an airtight container. Make sure it cools before sealing. Place the container in the fridge. It will stay fresh for up to three days. To reheat, use a skillet on low heat. Add a splash of cream or water to keep it moist. Stir often until it heats through. You can also microwave it in a safe dish. Cover it to trap steam and heat for one to two minutes. You can freeze Marry Me Chicken for later use. Place it in a freezer-safe container. It will last up to three months in the freezer. When ready to eat, thaw it overnight in the fridge. Reheat gently to enjoy the flavors again. Marry Me Chicken is a creamy, rich dish made with chicken, sun-dried tomatoes, and Parmesan. It gets its name from the idea that it’s so good, someone might want to propose after tasting it. The chicken is seasoned and cooked in a skillet, then bathed in a velvety cream sauce. This dish is a perfect blend of flavors and textures. Yes, you can prepare Marry Me Chicken ahead of time. Cook the chicken and sauce, then store them separately. Keep the chicken in the fridge for up to two days. You can reheat it on the stove or in the oven. Adding fresh spinach before serving keeps it vibrant and fresh. Marry Me Chicken pairs well with many sides. You can serve it over creamy mashed potatoes for a comforting meal. A vibrant mixed green salad adds freshness and crunch. Steamed vegetables or rice also complement the rich flavors of the chicken. To add some heat, sprinkle red pepper flakes into the sauce while it simmers. You can also use spicy sun-dried tomatoes or add diced jalapeños. For a kick, serve with a hot sauce on the side. Adjust the spice level to fit your taste. This blog post explored how to make Marry Me Chicken step by step. We covered key ingredients, from the main components to savory seasonings and garnishes. I shared tips for perfect cooking, adjusting sauce consistency, and tasty variations. You learned about storing and reheating leftovers too. In summary, Marry Me Chicken is a dish full of flavor and love. With this guide, you're ready to impress at your next meal. Enjoy sharing this delightful dish with family and friends. Happy cooking!

Marry Me Chicken Skillet Flavorful Dinner Delight

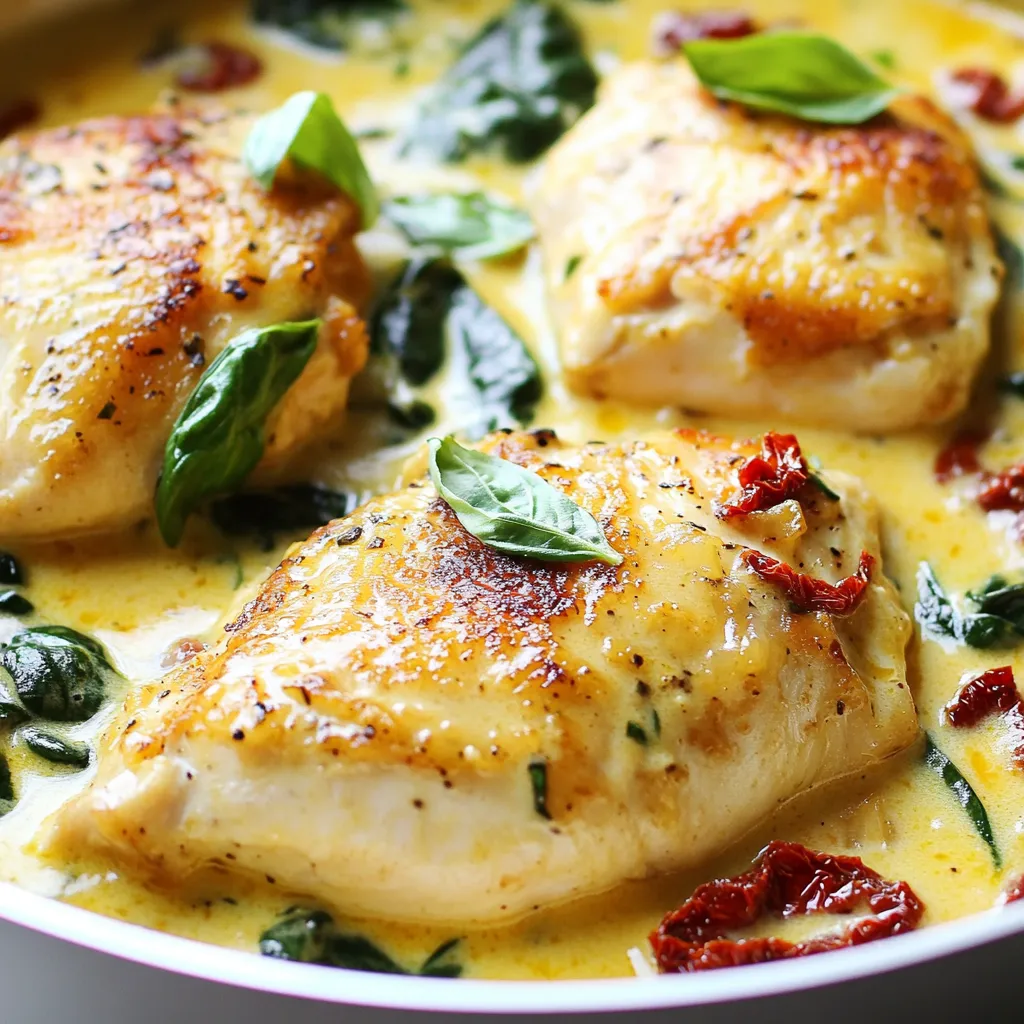
If you’re craving a dish that’s sure to impress, look no further than Marry Me Chicken Skillet! This tasty meal

- 8 oz cream cheese, softened - 1/2 cup powdered sugar - 1 teaspoon vanilla extract - 1 cup sour cream - 1 can (15 oz) cherry pie filling For this dip, cream cheese forms the base. It gives the dip a rich and creamy texture. I like to use softened cream cheese. This makes mixing easier. The powdered sugar adds sweetness. It balances the tang of the sour cream. Vanilla extract gives a warm flavor that brightens the dip. Sour cream adds smoothness and tang. Lastly, cherry pie filling gives a fruity burst. It sits on top, making it look pretty. - 1/2 cup chocolate chips (optional) - Graham crackers for dipping - Fresh fruit for dipping You can add chocolate chips for a sweet touch. They make the dip even more fun. Graham crackers are classic dippers. They give a nice crunch. Fresh fruit like strawberries or apples also works well. Fruit adds freshness to each bite. You can mix and match your dippers for variety. {{ingredient_image_1}} 1. Beat cream cheese until smooth Start by placing the softened cream cheese in a mixing bowl. Use an electric mixer to beat it. Keep mixing until it is creamy and smooth. This step is key to a great texture. 2. Gradually incorporate powdered sugar Now, take your powdered sugar. Slowly add it to the cream cheese while you mix. This helps to avoid lumps. Keep beating until the sugar blends fully into the cream cheese. 3. Mix in vanilla extract and sour cream Next, add the vanilla extract to the bowl. Then, mix in the sour cream. Keep beating until the mixture looks light and fluffy. This step adds flavor and creaminess. 1. Transfer mixture to a serving bowl Once your dip is ready, scoop it into a nice serving bowl. Spread it out evenly. This makes it look good for serving. 2. Top with cherry pie filling Now, take your cherry pie filling. Spoon it over the top of the cheesecake dip. Spread it gently to cover the dip. This adds sweetness and a pop of color. 3. Optional: sprinkle with chocolate chips If you like, sprinkle some chocolate chips over the cherries. This adds a nice touch and extra flavor. It makes the dip even more fun to eat. Serve this dip with graham crackers or fresh fruit. Enjoy your delicious cherry cheesecake dip! To get a creamy texture, start with soft cream cheese. You can leave it out for 30 minutes to soften. Use an electric mixer to beat the cream cheese until it is smooth. Then, add the powdered sugar slowly. This helps mix it well without lumps. If the dip feels too thick, add a little sour cream for creaminess. If you want to adjust the sweetness, taste the dip after mixing in the powdered sugar. Add more sugar if you like it sweeter. Just remember to mix well after each addition. Graham crackers are a classic dipper for cherry cheesecake dip. They add a nice crunch. You can also use fresh fruit like apple slices, strawberries, or bananas for a fresh twist. For a party, present the dip in a pretty bowl. Drizzle extra cherry filling on top. Add a sprig of mint for color. Arrange the graham crackers or fruit around the bowl. This makes it look inviting and fun! Pro Tips Room Temperature Cream Cheese: Ensure your cream cheese is at room temperature for a smoother and creamier dip. This will help it blend perfectly without lumps. Customize the Toppings: Feel free to swap out cherry pie filling for other fruit toppings, such as blueberry or strawberry, to match your taste preferences. Make Ahead: Prepare the cheesecake dip a few hours in advance and refrigerate it. This allows the flavors to meld together beautifully before serving. Serving Suggestions: Experiment with different dippers like pretzels, cookies, or even sliced apples for a fun twist on traditional graham crackers. {{image_2}} You can change the flavors of your cherry cheesecake dip. Try adding different fruit toppings. Strawberries and blueberries work great! They add a fresh taste and nice color. You can also use flavored extracts. Almond or lemon extract can give your dip a unique twist. Just add a few drops to the cream cheese mix. This small change can make a big difference. If you want a lighter dip, use low-fat cream cheese. It still tastes great but cuts some calories. You can also swap regular sugar for sugar substitutes. This option is better for those watching their sugar intake. If you need gluten-free options, choose gluten-free graham crackers. Fresh fruits like apple slices or banana pieces are also perfect for dipping. These substitutions let everyone enjoy the dip without worries. To keep your cherry cheesecake dip fresh, store leftovers in an airtight container. This helps prevent the dip from drying out. I recommend using a glass or plastic container with a tight lid. You can keep it in the fridge for up to three days. After that, the dip may lose its creamy texture and flavor. Can cherry cheesecake dip be frozen? Yes, you can freeze the dip, but keep in mind that the texture may change. To freeze, place the dip in a freezer-safe container. Make sure to leave some space at the top, as the dip may expand. Seal it tightly to avoid freezer burn. How to properly thaw and serve after freezing? When you're ready to enjoy it again, take the dip out of the freezer. Let it thaw in the fridge overnight. Once thawed, stir it gently to restore some creaminess. If needed, you can also add a little sour cream to help with the texture. Serve it with fresh graham crackers or fruit for dipping! You can swap sour cream with Greek yogurt. Greek yogurt gives a nice creaminess. Use the same amount as the sour cream. This change keeps the dip tasty and smooth. Yes, you can use fresh cherries! Just chop them into small pieces. Mix them with some sugar and a bit of lemon juice. This adds a great, fresh flavor. It’s a fun twist on the classic dip! Cherry cheesecake dip stays good for about 3-5 days. Make sure to store it in an airtight container. This keeps it fresh and tasty. Always check for any changes in smell or texture before eating. You now have a tasty guide for making cherry cheesecake dip. We covered key ingredients, preparation, and serving tips. You learned about flavor variations and how to store your dip. This dish is simple to make and fun for gatherings. Whether you prefer chocolate chips or fresh fruit, there are many ways to enjoy it. Remember to try new flavors and share with friends. Dive into this yummy treat and impress everyone. Your cherry cheesecake dip will be a hit!

Cherry Cheesecake Dip Delightful and Easy Recipe

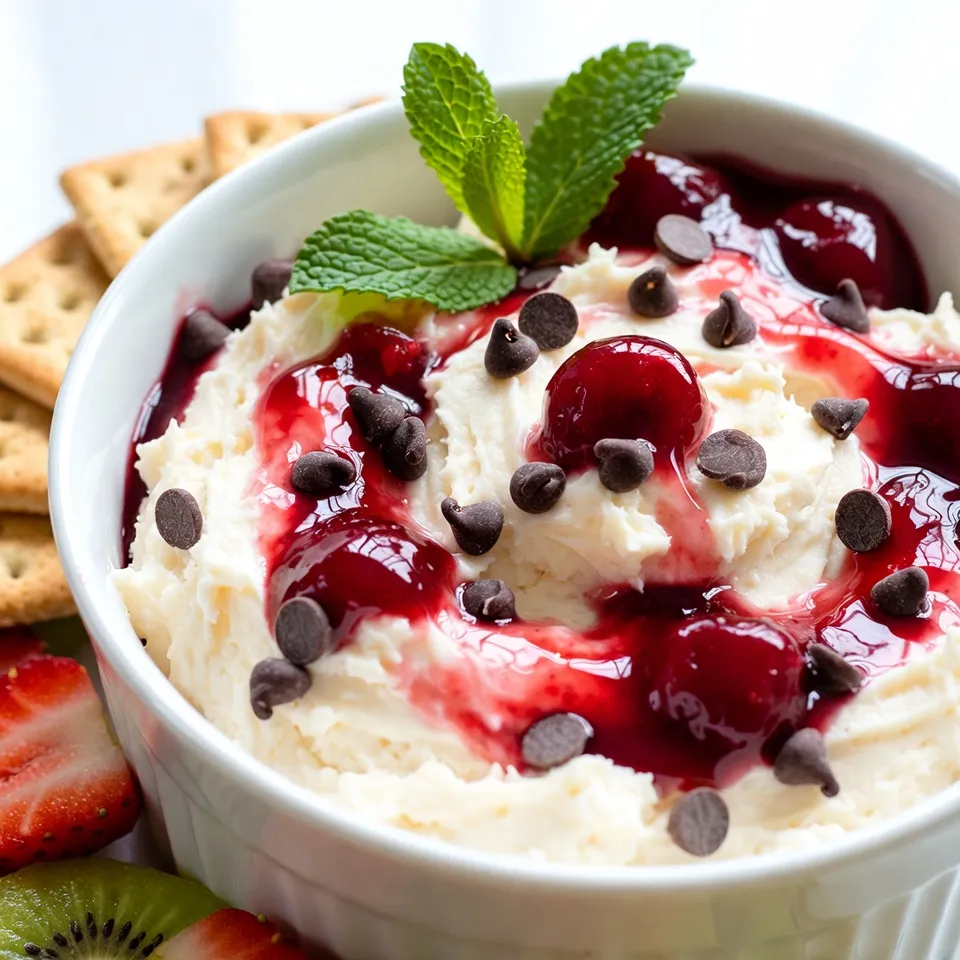
Get ready to delight your taste buds with my easy Cherry Cheesecake Dip recipe! This creamy, sweet dip combines classic

Older posts
Newer posts
← Previous Page1 … Page4 Page5 Page6 … Page164 Next →

dsad

© 2026 easycookingbite • Built with GeneratePress

Our Policies

  • Copyright Policy
  • Cookie Policy
  • GDPR Policy
  • Privacy Policy
  • Disclaimer
  • Terms Of Use

More Information

  • Home
  • About
  • Contact
  • Appetizers
  • Dessert
  • Dinner
  • Drinks
©2026, easycookingbite About Back To Top