Skip to content
DisclaimerTerms Of UseGDPR PolicyCookie Policy

easycookingbite

  • Home
  • Drinks
  • Appetizers
  • Dinner
  • Dessert
  • About
  • Contact
  • Privacy Policy
DisclaimerTerms Of UseGDPR PolicyCookie Policy

Lily

- 1 can (15 oz) chickpeas, drained and rinsed - 2 tablespoons olive oil - 1 teaspoon smoked paprika - 1 teaspoon garlic powder - 1 teaspoon cumin - Salt and pepper to taste - 1 cup quinoa, rinsed - 2 cups vegetable broth (or water) - 1 cup cherry tomatoes, halved - 1 avocado, sliced - 2 cups fresh spinach - 1/4 cup tahini - 2 tablespoons lemon juice - 1 tablespoon maple syrup (optional) - Sesame seeds for garnish This bowl is not only tasty but also healthy! A serving has around 450 calories. It packs about 15 grams of protein, thanks to the chickpeas and quinoa. You also get healthy fats from the avocado and tahini. Plus, it is rich in fiber, vitamins, and minerals, making it a balanced meal. If you don't have chickpeas, you can use black beans or lentils. Quinoa can be swapped for brown rice or farro. For the tahini, you can use almond butter or cashew cream. If you want a nut-free option, skip the tahini and drizzle with olive oil instead. Start by preheating your oven to 400°F (200°C). This step helps the chickpeas get nice and crispy. In a large mixing bowl, combine the drained chickpeas with olive oil, smoked paprika, garlic powder, cumin, salt, and pepper. Make sure the chickpeas are well coated. This mix gives them great flavor. Spread the seasoned chickpeas on a baking sheet in a single layer. Roast them in the oven for 25 to 30 minutes. Shake the pan halfway through to ensure they roast evenly. Keep an eye on them; you want them crispy and golden. While the chickpeas roast, it’s time to cook the quinoa. In a medium saucepan, bring 2 cups of vegetable broth to a boil. Using broth adds flavor to the quinoa. Once boiling, add 1 cup of rinsed quinoa. Reduce the heat to low and cover the pot. Let it simmer for about 15 minutes. After 15 minutes, check the quinoa. It should be fluffy and the liquid should be absorbed. Remove it from heat and let it sit covered for 5 more minutes. Fluff the quinoa with a fork before using it in your bowl. Now, let’s make a creamy tahini dressing. In a small bowl, whisk together 1/4 cup of tahini, 2 tablespoons of lemon juice, and a pinch of salt. If you want a touch of sweetness, add 1 tablespoon of maple syrup. If the dressing is too thick, add a little water until you reach your desired consistency. This dressing adds a rich, nutty flavor to the bowl. For the full recipe, check out the details above. Enjoy the process and make it your own! To make your chickpeas super crispy, start by drying them well. After rinsing, lay them on a paper towel. Pat them dry until no moisture remains. This step is key for that crunch. Use high heat when roasting. Preheat your oven to 400°F (200°C). Roast for 25-30 minutes and shake the pan halfway through. You can also try adding a bit more oil for extra crispiness. I love to play with flavors in this recipe. You can try different herbs and spices to change the taste. For a spicy kick, add cayenne pepper or chili powder. If you want a fresh twist, use fresh herbs like parsley or cilantro. You can also mix in some Italian seasoning for a cozy taste. Just remember, the more you experiment, the more fun your bowl will be! This Buddha bowl pairs well with many sides. I suggest adding some roasted vegetables like zucchini or bell peppers. You can also top your bowl with nuts for added crunch. A dollop of Greek yogurt can add creaminess, too. If you want something warm, serve it with a side of soup. Feel free to mix and match until you find your favorite combo. Check out the Full Recipe for more ideas! {{image_2}} You can easily make this dish vegan if you want. The recipe already uses plant-based items. The tahini dressing is creamy and rich without dairy. If you want more flavor, add a splash of soy sauce or coconut aminos. These options will keep your Buddha bowl tasty and 100% vegan. This Crispy Chickpea Buddha Bowl is naturally gluten-free. Use quinoa as your base, as it is gluten-free. If you want to add more crunch, try gluten-free grains like brown rice or millet. Always check labels on packaged ingredients to confirm they are gluten-free. This way, you can enjoy your meal without worry. Adding seasonal veggies can boost your bowl's flavor. In spring, toss in some fresh asparagus or peas. Summer is great for bell peppers and zucchini. In fall, roasted sweet potatoes or squash add a sweet touch. Winter greens like kale or Brussels sprouts are perfect for a hearty meal. Feel free to mix and match your favorites to keep it exciting. After enjoying your Crispy Chickpea Buddha Bowl, store leftovers right away. Place the quinoa, chickpeas, and veggies in separate, airtight containers. This keeps everything fresh and tasty. Make sure they cool to room temperature before sealing. You can keep them in the fridge for up to three days. When you're ready to eat your leftovers, reheating is simple. For quinoa, warm it in the microwave or on the stove. Add a splash of water to help it steam. Chickpeas can be crispy again if you roast them briefly in the oven. Heat them at 375°F (190°C) for about 10 minutes. This keeps them crunchy and delicious! In the fridge, your Buddha Bowl lasts about three days. If you want to keep it longer, freeze the chickpeas and quinoa. They can stay good for up to three months in the freezer. Just remember to thaw them in the fridge overnight before reheating. This way, you can enjoy this meal anytime! For a complete guide on how to make this dish, check out the [Full Recipe]. Yes, you can make the Crispy Chickpea Buddha Bowl ahead of time. The chickpeas stay crispy for a short time but can lose some crunch. You can roast them just before serving for the best texture. Cook the quinoa and prep the veggies in advance. Store these in separate containers in the fridge. When ready to eat, assemble the bowl and drizzle with the tahini dressing. If you want to switch from quinoa, you have options. Brown rice is a great choice. It has a nice chewy texture. Farro is another tasty grain. It adds a nutty flavor. You can also use couscous for a light and fluffy base. Each grain gives a different taste, so feel free to explore. To boost protein, consider adding cooked lentils or beans. They blend well with the chickpeas. You can also top your bowl with grilled chicken or tofu. Both are excellent sources of protein. For a quick option, sprinkle some nuts or seeds on top. This adds crunch and more protein. This blog post covered how to make a Crispy Chickpea Buddha Bowl. We highlighted key ingredients, cooking steps, and tips for extra flavor. I shared ways to customize the dish for vegan and gluten-free diets. Proper storage and reheating tips help keep leftovers tasty. Remember, cooking can be fun and simple. Enjoy trying new ingredients and flavors. Each bowl is a chance to create health and taste. Happy cooking!

Crispy Chickpea Buddha Bowl Flavorful and Healthy Meal

Craving a meal that’s both tasty and good for you? Meet the Crispy Chickpea Buddha Bowl! This vibrant dish is

To make roasted garlic mashed cauliflower, you need a few simple items. Here’s the detailed list of ingredients: - 1 large head of cauliflower, cut into florets - 6 cloves of garlic, unpeeled - 3 tablespoons olive oil - 1/4 cup unsweetened almond milk (or any milk of choice) - 2 tablespoons butter (or vegan butter for a dairy-free option) - Salt and pepper to taste - Fresh chives, chopped (for garnish) Each ingredient plays a key role. The cauliflower serves as the base, giving a creamy texture. Garlic adds a rich, sweet flavor when roasted. Olive oil gives a nice finish, while almond milk keeps it light. Butter adds a touch of richness, and seasoning enhances all the flavors. Fresh chives bring a pop of color and a mild onion taste. This combination makes a delightful side dish that pairs well with many meals. For the full recipe, check out Roasted Garlic Mashed Cauliflower. - Preheat the oven to 400°F (200°C). - Toss the cauliflower florets and garlic with olive oil, salt, and pepper. Preheating your oven is the first step. This helps the cauliflower cook evenly. Next, toss the cauliflower florets and unpeeled garlic in a bowl. Use enough olive oil to coat them well. Add a pinch of salt and pepper. This will enhance the flavors. - Spread the mixture on a baking sheet. - Roast for 25-30 minutes until tender and golden. Now, spread the cauliflower and garlic on a baking sheet. Make sure they are in a single layer. This helps them roast evenly. Roast them for about 25 to 30 minutes. You want the cauliflower to become tender and slightly golden. The garlic will become soft and sweet. - Squeeze roasted garlic into the cauliflower. - Blend with almond milk and butter until smooth. Once they are done roasting, let them cool a bit. Carefully squeeze the roasted garlic out of its skins into the bowl with the cauliflower. Then, transfer everything to a food processor. Add almond milk and butter for creaminess. Blend until smooth. You may need to scrape down the sides to ensure everything mixes well. Adjust the seasoning with more salt and pepper if needed. This creamy side dish is now ready to enjoy! For the full recipe, check the details above. To choose fresh cauliflower, look for tight and firm heads. The leaves should be bright green and crisp. Avoid any brown spots or soft areas. Roasting times can vary by oven. For most, 25-30 minutes at 400°F (200°C) works well. Check for tenderness by piercing with a fork. For a rich texture, consider using milk alternatives like unsweetened almond milk or oat milk. They add creaminess without overpowering the dish. Adjusting butter can improve texture. Try using 2 tablespoons of butter for a smooth finish. If you prefer a lighter option, reduce it to 1 tablespoon. To elevate flavor, add spices like garlic powder, onion powder, or smoked paprika. These can bring depth to your dish. Fresh herbs can brighten the dish. Chives work great as a garnish, adding a mild onion flavor. Try mixing in parsley or thyme for a fresh twist. For the Full Recipe, check the details above. {{image_2}} For a dairy-free version of roasted garlic mashed cauliflower, swap regular butter and milk for plant-based options. Use vegan butter and almond milk to keep the creamy texture. These substitutions work well and will not change the flavor much. They make the dish friendly for those avoiding dairy while keeping it delicious. You can easily boost the flavor of your mashed cauliflower. Adding cheese, like Parmesan or cheddar, creates a rich taste. Nutritional yeast is a great option too. It adds a cheesy flavor without dairy. Mixing in other vegetables can also bring new tastes. Try adding steamed broccoli or carrots for extra color and nutrition. These small changes can take your dish to the next level. Roasted garlic mashed cauliflower pairs well with many dishes. It complements proteins like chicken or fish nicely. For a vegan meal, serve it alongside roasted veggies or a hearty salad. If you want to create a loaded cauliflower version, top it with sautéed mushrooms, crispy bacon, or green onions. This makes the dish even more satisfying and fun. For the full recipe, check out the link above. To keep your roasted garlic mashed cauliflower fresh, use airtight containers. Glass or plastic containers work well. Make sure to leave some space at the top, as the dish may expand. You can store it in the fridge for up to 4 days. If you want it to last longer, consider freezing it. When reheating, the oven gives the best results. Preheat it to 350°F (175°C). Place the mashed cauliflower in an oven-safe dish and cover it. Heat for about 15-20 minutes until warm. If you use a microwave, place it in a bowl and cover loosely. Heat it in 30-second intervals, stirring between each. This will help keep the texture smooth. You can freeze the mashed cauliflower before or after blending. If freezing before blending, roast the cauliflower and garlic first. Let them cool, then store in a freezer bag. For freezing after blending, let it cool first, then place in a container. To thaw, place in the fridge overnight or use the microwave on low. This keeps the flavors intact. For best results, reheat after thawing for a creamy texture. Can I use frozen cauliflower? Yes, you can use frozen cauliflower. Just thaw and drain it well before cooking. The texture may differ slightly, but it still works great in this recipe. How can I make this recipe spicier? To spice things up, add red pepper flakes or a dash of hot sauce. You can also mix in jalapeños for extra heat. What are the health benefits of cauliflower? Cauliflower is low in calories and high in fiber. It is rich in vitamins C, K, and B6. It also contains antioxidants that help fight inflammation. Each serving of roasted garlic mashed cauliflower has about 120 calories. It offers 5 grams of carbs and 2 grams of protein. Compared to traditional mashed potatoes, it has fewer calories and carbs. This dish is a lighter option without losing flavor. This recipe is naturally gluten-free. Use gluten-free butter if needed. For a vegan option, replace regular butter with plant-based butter. Almond milk works well too. Enjoy this creamy side without any worries! This blog post covered how to make a creamy cauliflower dish. We went through the ingredients, step-by-step instructions, and tips for the best flavor. You learned how to roast cauliflower and make it creamy. Plus, you discovered variations and clever storage tips. Feel free to experiment with flavors and use leftovers in new meals. Enjoy your cooking!

Roasted Garlic Mashed Cauliflower Creamy Side Dish

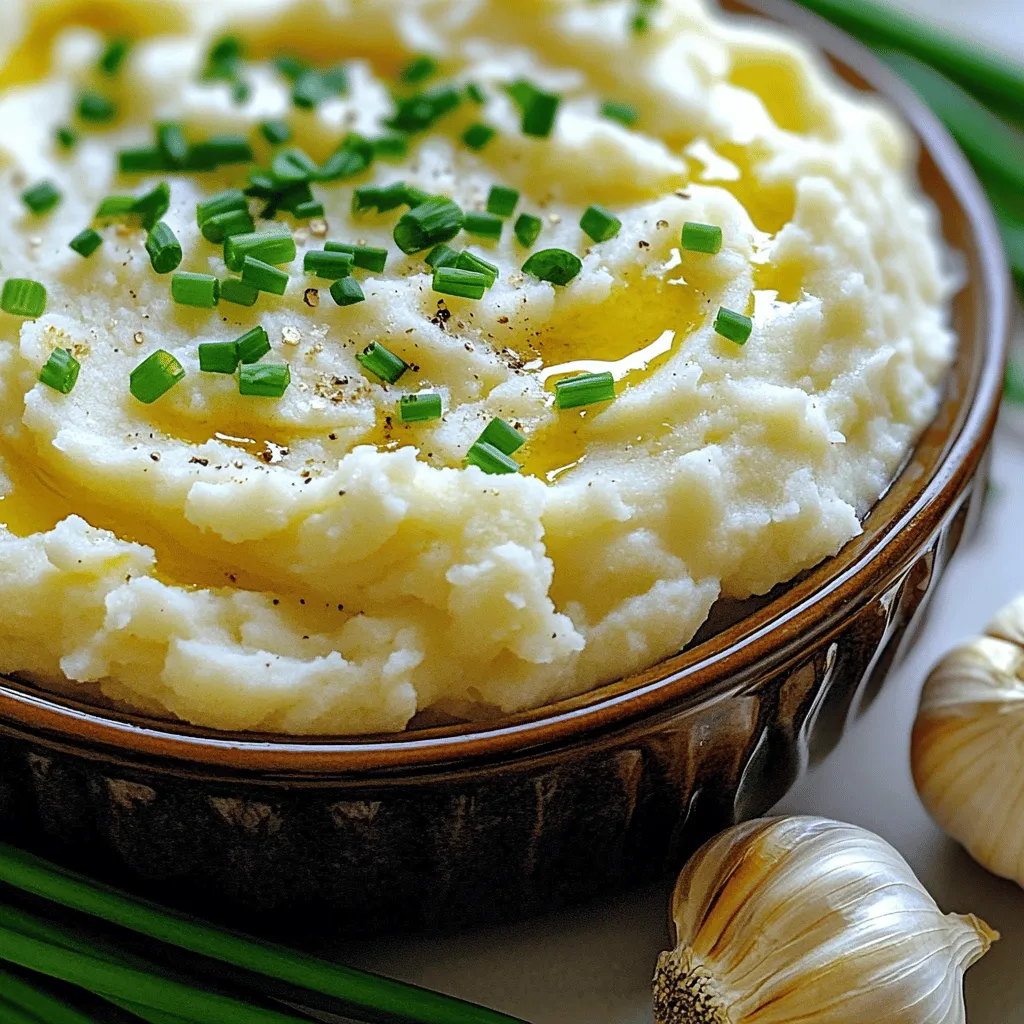
Looking for a creamy, delicious side dish that’s easy to make? I’ve got you covered with Roasted Garlic Mashed Cauliflower!

To make a Peach Caprese Salad, you need simple and fresh ingredients that shine on their own. Here’s the list of what you’ll need: - Fresh peaches - Mozzarella cheese - Fresh basil leaves - Balsamic glaze - Extra virgin olive oil - Seasoning (salt and black pepper) Each ingredient plays a key role in this salad. Fresh peaches bring sweetness and juice. Mozzarella cheese adds creaminess. Basil leaves give a fragrant touch. Balsamic glaze brings a tangy flavor, while olive oil adds richness. Salt and pepper enhance all the tastes. When you choose your peaches, pick ripe ones for the best flavor. The mozzarella should be fresh and soft. This salad is easy to make and perfect for any meal. You can find the full recipe to guide you through the steps. 1. Washing and slicing peaches: First, wash the peaches under cold water. This removes dirt and chemicals. Pat them dry with a towel. Cut each peach in half and remove the pit. Slice the peaches into even wedges. Aim for about 1/4 inch thick slices. This size will help them layer nicely. 2. Slicing mozzarella cheese: Next, take the fresh mozzarella cheese. Slice it into rounds. Make sure your slices match the thickness of the peach slices. This helps create a balanced look on the plate. 3. Layering peaches and mozzarella: Now, grab a large serving platter. Start by placing the peach slices on the platter. Alternate each peach slice with a mozzarella slice. This creates a lovely pattern. Keep going until you fill the platter. 4. Adding basil leaves: After layering, take fresh basil leaves. Tuck them between the peach and mozzarella layers. This adds a pop of green and enhances the flavor. Make sure to use whole leaves for the best look. 5. Drizzling with balsamic glaze and olive oil: With the salad layered, it’s time for dressing. Drizzle the balsamic glaze evenly over the salad. Next, add the extra virgin olive oil. This gives richness and depth to the flavors. 6. Seasoning and allowing to rest: Season the salad with salt and freshly cracked black pepper. This will boost the taste of the peaches and cheese. Let the salad sit for about 5 minutes. This helps the flavors meld together beautifully. For the full recipe, refer to the earlier section, and enjoy making this Peach Caprese salad! To make a great Peach Caprese salad, you need ripe peaches. Ripe peaches feel slightly soft and smell sweet. Unripe peaches are hard and lack flavor. I suggest checking your peaches at the store. Look for a mix of colors, like yellow and red. Summer is the best time to find juicy peaches. This is when they are in season and taste their sweetest. For the best layers, aim for equal amounts of peach and mozzarella. I like to use three peach slices per every four mozzarella slices. This balance makes each bite delicious. Make sure to slice them evenly. This helps the salad look nice and taste great. Arrange the slices in a circle on your serving platter. It creates a lovely visual effect. Place fresh basil leaves between the layers. This adds color and a nice herbal taste. Use a big wooden board or a colorful platter to serve your salad. This makes it look more inviting. You can slice the salad into smaller portions for easy serving. Consider pairing it with grilled chicken or a light soup. These dishes complement the salad well. You can also serve it with a fruity drink. A refreshing lemonade or iced tea goes perfectly with your meal. {{image_2}} You can give your Peach Caprese Salad a twist by adding nuts. Pine nuts add a nice crunch. Walnuts offer a rich flavor that pairs well with peaches. You can sprinkle them on top or mix them in. Another exciting option is to change the cheese. Feta brings a tangy taste that contrasts the sweet peaches. Burrata offers a creamy texture that can make every bite feel luxurious. Try both and see which one you like best! You can also adjust the ingredients based on what is fresh. In summer, use ripe peaches for sweetness. In winter, consider roasted fruits like pears or apples. Roasting brings out their natural sugars and adds warmth to the salad. Experiment with seasonal herbs too! In fall, thyme or sage can add a cozy feel. In spring, fresh mint can give your salad a bright taste. You can always adapt this dish to fit the season and your taste! For the full recipe, check out the Peach Caprese Salad 🥗 section. To keep your Peach Caprese Salad fresh, store it in the fridge. Place leftovers in an airtight container. This helps keep the flavors intact and prevents browning. The salad stays good for about two days. After that, the peaches may get mushy, and the cheese might dry out. If you have leftover peaches or mozzarella, don’t toss them! You can use them in fun ways. Try making a peach smoothie by blending peaches with yogurt and a bit of honey. For mozzarella, consider adding it to pasta. Toss cooked pasta with olive oil, leftover mozzarella, and any fresh herbs you have. You can also add salad leftovers to a grain bowl. Mix with quinoa, some greens, and a splash of balsamic glaze for a tasty meal. A Peach Caprese Salad is a fresh dish that combines sweet peaches with creamy mozzarella. The key ingredients are: - 3 ripe peaches, sliced - 8 ounces fresh mozzarella cheese, sliced - 1 cup fresh basil leaves - 2 tablespoons balsamic glaze - 2 tablespoons extra virgin olive oil - Salt and freshly cracked black pepper This salad is colorful and delicious. The peaches add a sweet touch, while the mozzarella provides creaminess. Fresh basil gives it a lovely aroma. Drizzling balsamic glaze and olive oil enhances the flavors. Yes, you can prepare parts of this salad ahead of time. Here are some tips: - Slice the peaches and mozzarella a few hours before serving. - Keep the slices in the fridge, covered, to stay fresh. - Wait to add the basil, balsamic glaze, and olive oil until just before serving. This way, the salad stays crisp and tasty. Pair this salad with light drinks and side dishes. Here are some suggestions: - Beverages: A crisp white wine like Sauvignon Blanc or a refreshing lemonade. - Side Dishes: Grilled chicken, crusty bread, or a light pasta dish. These pairings enhance the salad's fresh flavors and make a complete meal. Yes, you can easily customize this recipe. Here are some alternatives: - Gluten-Free: This salad is naturally gluten-free. Just avoid bread. - Vegan: Use a plant-based cheese instead of mozzarella. You can also skip the cheese entirely and add more peaches. These swaps let everyone enjoy this tasty salad. This blog post shared the fresh and tasty Peach Caprese Salad. We explored key ingredients like peaches and mozzarella. You learned the steps for preparation and assembly, along with some tips for the best results. Variations show how to twist the recipe. Storage information helps you keep leftovers fresh. This salad is easy and fun to make. Enjoy it at your next meal or gathering. Your taste buds will thank you!

Peach Caprese Salad Fresh and Flavorful Delight

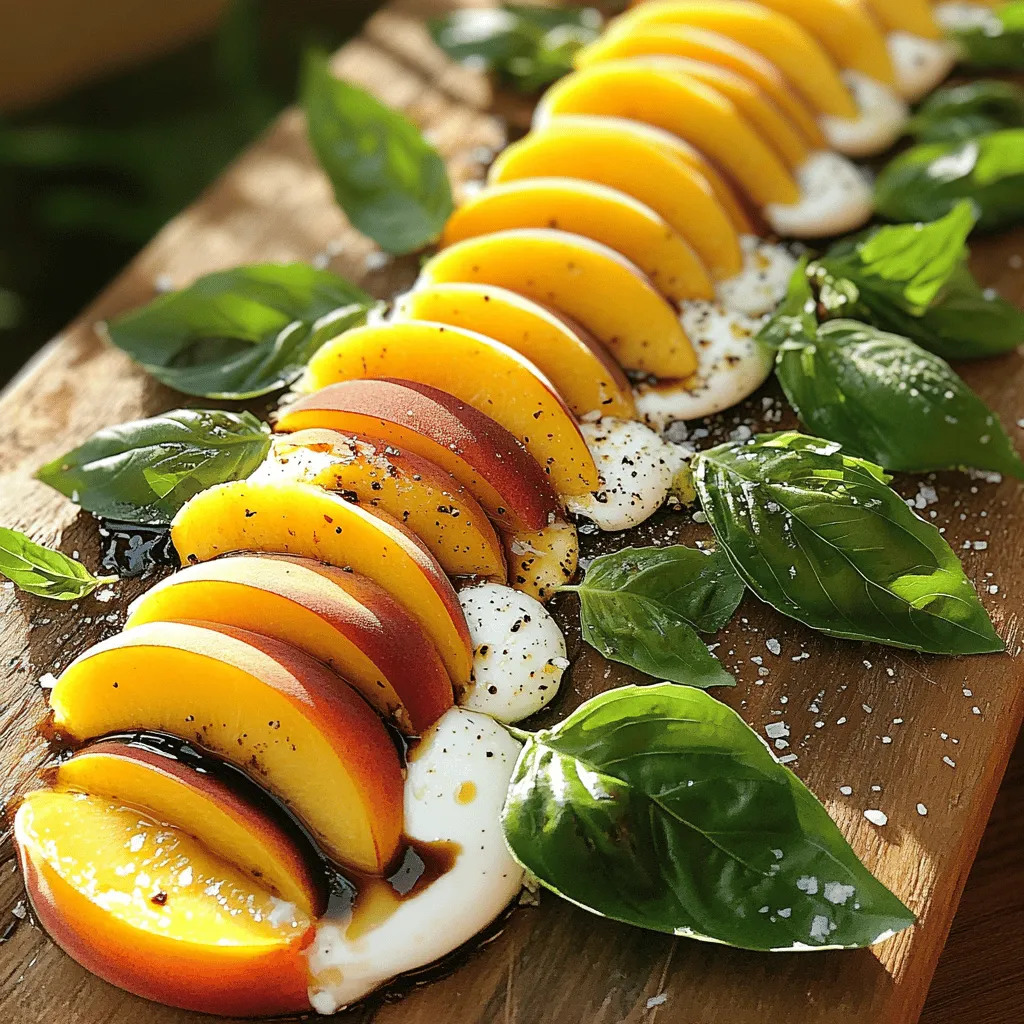
If you’re craving a fresh twist on a classic dish, Peach Caprese Salad is a must-try. This vibrant salad combines

To make this tasty snack, you need: - 2 cups edamame in pods (fresh or frozen) - 2 tablespoons olive oil - 4 cloves garlic, minced - 1 teaspoon red pepper flakes (adjust to taste) - 1 tablespoon soy sauce - 1 teaspoon sesame oil - 1 tablespoon rice vinegar - Salt to taste These ingredients give the edamame its spicy and savory flavor. The garlic adds a nice aroma, while the red pepper flakes bring the heat. You can tweak the taste with these seasonings: - Lime juice for a zesty kick - Ginger for a warm, spicy flavor - Miso paste for added umami - Chili oil for extra spice These additions let you customize the dish to your liking. Don’t be afraid to experiment! For the final touch, try these garnishes: - Chopped green onions for freshness - Toasted sesame seeds for crunch - Cilantro for a burst of color and flavor Garnishing adds visual appeal and enhances the overall taste. It makes the dish more enjoyable and fun to eat. For the full recipe, check out the detailed instructions. To start, you need edamame pods. You can use fresh or frozen pods. If you chose frozen, cook them as the package says. This usually takes about 5 minutes. After cooking, drain the pods and set them aside. This step makes sure your edamame is tender and ready for flavor. In a large skillet, pour in 2 tablespoons of olive oil. Heat it up over medium heat. Once hot, add 4 minced garlic cloves and 1 teaspoon of red pepper flakes. Stir them for about 1-2 minutes. The goal is to make the garlic fragrant and light golden. Be careful not to burn it, as burnt garlic can taste bitter. Now, it’s time to mix in the edamame. Add the cooked pods to the skillet and stir well. You want the edamame to be coated in the garlic oil. Next, drizzle in 1 tablespoon of soy sauce, 1 teaspoon of sesame oil, and 1 tablespoon of rice vinegar. Toss everything together for 2-3 more minutes. This ensures the edamame is hot and full of flavor. Finally, add salt to taste. Once done, transfer the mixture to a serving dish. Top it off with chopped green onions and toasted sesame seeds for a beautiful finish. For the complete recipe, check out the Full Recipe section. To get the best garlic flavor, use fresh garlic. Fresh garlic tastes much better than dried. Mince it finely for a stronger taste. Sauté the garlic until it's just golden. This helps release its natural oils. Don't cook it too long, or it can burn. Burnt garlic tastes bitter, and we want a nice, rich flavor. Spice is personal. Start with one teaspoon of red pepper flakes. You can always add more later. If you like it mild, skip the flakes. For a kick, try two or three teaspoons. Remember, the heat builds over time. Taste as you go, and adjust until it's just right for you. Spicy garlic edamame works great as a snack or appetizer. Serve it warm for the best taste. Pair it with rice or noodles for a full meal. It goes well with sushi or grilled meats too. Add a side of soy sauce for dipping. You can also serve it with a cold drink, like iced tea or beer. Enjoy it with friends or at your next gathering! {{image_2}} You can easily make Spicy Garlic Edamame vegan and gluten-free. The main ingredients are already plant-based. Use tamari instead of soy sauce. Tamari is gluten-free and adds a nice taste. You can also check the rice vinegar label to ensure it's gluten-free. This way, everyone can enjoy this tasty snack! Want to switch up the flavors? Try adding lime juice for a fresh twist. You can also mix in ginger for a zesty kick. Another option is to add a splash of chili oil for extra heat. Experiment with different spices like smoked paprika or cumin. Each choice gives a unique flavor to your edamame! To make your Spicy Garlic Edamame heartier, add cooked protein. You can toss in grilled chicken, shrimp, or even tofu. This addition makes it a great snack or light meal. It will satisfy your hunger while keeping the original flavors. Try these options to make your dish more filling and fun! After enjoying your spicy garlic edamame, store any leftovers in an airtight container. This keeps moisture out and helps maintain freshness. Place the container in the fridge. Use the leftovers within three days for the best taste. To reheat, you can use a skillet or microwave. If using a skillet, add a splash of olive oil over medium heat. Stir until heated through. This method keeps the flavor rich and the texture crisp. If you prefer the microwave, heat in short bursts of 30 seconds. Stir in between to avoid overcooking. If you want to freeze your spicy garlic edamame, it's best to do this before cooking. Blanch the pods in boiling water for two to three minutes, then cool them quickly in ice water. Drain and place them in a freezer-safe bag. Remove as much air as possible to prevent freezer burn. When you're ready to cook them, thaw and sauté as per the Full Recipe. Enjoy your spicy snack later! Edamame is packed with nutrients. One cup of cooked edamame has about: - Protein: 17 grams - Fiber: 8 grams - Fat: 8 grams - Carbohydrates: 14 grams - Vitamins: High in vitamin K and folate - Minerals: Good source of iron and calcium It is also low in calories, making it a great snack. Edamame provides essential amino acids. This makes it a good choice for plant-based diets. Yes, you can prepare Spicy Garlic Edamame ahead of time. Cook it, then cool it down. Store it in an airtight container. It stays fresh in the fridge for up to three days. When you are ready to eat, just reheat it. Use a skillet or microwave. This way, you keep all the great flavors. You can find edamame in the frozen foods section. Look for bags labeled "edamame pods." Many stores also have fresh edamame. Check the produce section. Some Asian markets sell it fresh or frozen. You can even find it in some health food stores. If you don’t see it, just ask a store worker for help. For a complete guide to making this dish, check out the Full Recipe. In this blog post, we explored the vibrant world of Spicy Garlic Edamame. You learned about key ingredients, cooking steps, and tips to enhance flavor. We also discussed variations, storage tips, and common questions. Remember, you can adjust spice levels and mix in proteins to make it your own. This dish is easy, tasty, and perfect for sharing. Enjoy making your spicy garlic edamame!

Spicy Garlic Edamame Flavorful Snack Recipe Guide

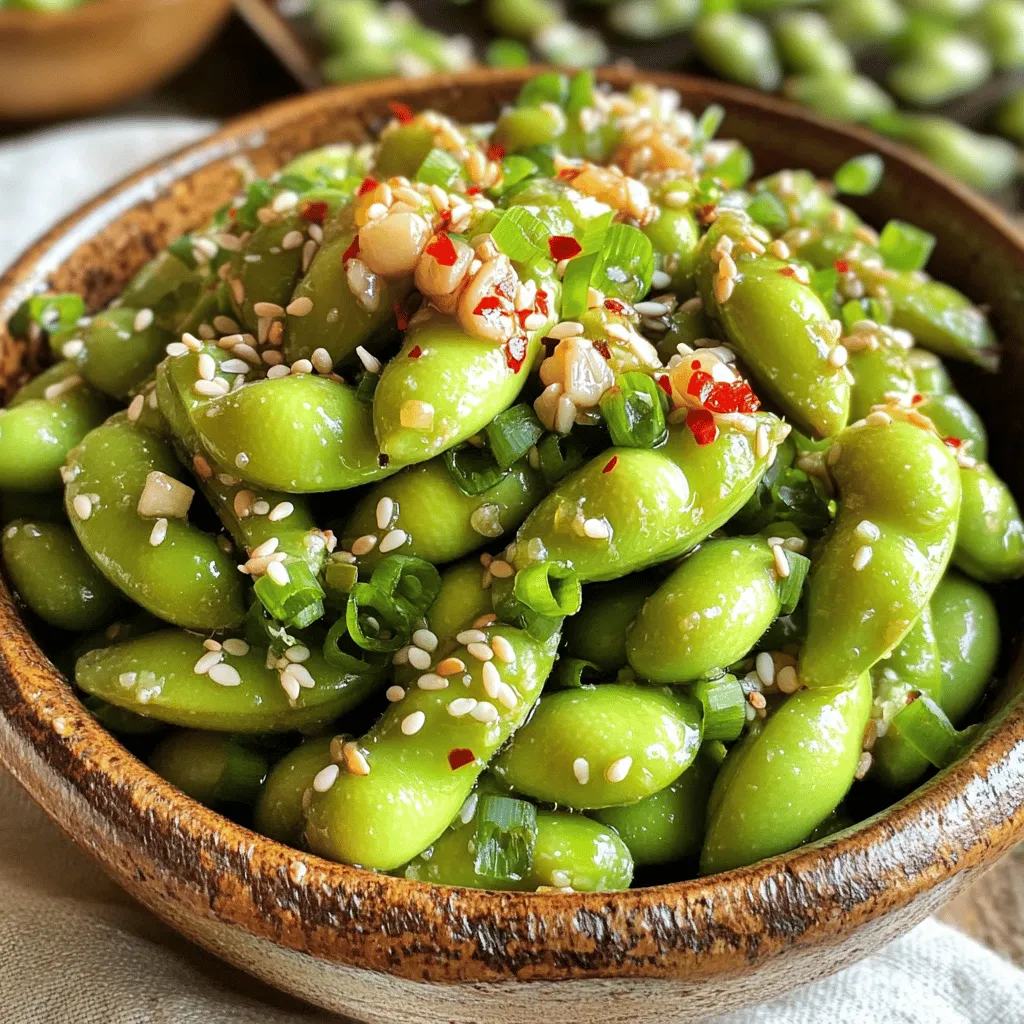
Snacking just got a whole lot better with my Spicy Garlic Edamame recipe! This guide will show you how to

When making Baked Eggplant Parmesan, you will need simple ingredients that create rich flavors. Here’s what you’ll gather: - 2 large eggplants, sliced into 1/2 inch rounds - 1 ½ cups marinara sauce - 2 cups shredded mozzarella cheese - 1 cup grated Parmesan cheese - 1 cup all-purpose flour - 3 large eggs, beaten - 2 cups panko breadcrumbs - Seasonings: salt, black pepper, dried oregano - Fresh basil (for garnish) - Olive oil spray These ingredients work together to make this dish a savory delight. The eggplant forms the base, while the cheeses create a creamy, cheesy layer. Marinara sauce adds a tangy touch. Using panko gives the eggplant a great crunch. Each ingredient plays a role in making this recipe special. Get ready to enjoy a comforting meal that feels like a restaurant dish at home. You can find the full recipe to guide you through the cooking process. Start by prepping the eggplant. Slice the two large eggplants into 1/2 inch rounds. This thickness helps them cook evenly. Place the slices in a colander and sprinkle them with salt. This step draws out moisture and bitterness. Let them sit for about 30 minutes. After that, rinse the slices under cold water. Pat them dry with paper towels to remove excess moisture. Next, set up your breading station. Use three shallow dishes. In the first dish, add 1 cup of all-purpose flour. The second dish should hold three beaten large eggs. In the third dish, mix 2 cups of panko breadcrumbs with one teaspoon of salt, one teaspoon of black pepper, and one tablespoon of dried oregano. Now it’s time to start breading the eggplant slices. Dip each slice first in the flour. This helps the egg stick better. Next, place it into the beaten eggs. Make sure the egg covers the entire slice. Finally, coat each slice in the breadcrumb mixture. Press the breadcrumbs onto the eggplant to ensure they stick well. Once breaded, arrange the slices in a single layer on a greased baking sheet. Lightly spray the tops with olive oil for a crispy finish. Bake the eggplant in your preheated oven at 375°F (190°C) for about 25 minutes. Flip the slices halfway through to ensure they brown evenly. They should come out golden and crispy. Next, it's time to layer the ingredients in a baking dish. Start by spreading a layer of marinara sauce at the bottom. Place the baked eggplant slices on top of the sauce. Then, sprinkle a layer of shredded mozzarella and grated Parmesan cheese. Repeat these layers until you use all the ingredients, finishing with a layer of cheese on top. For the final baking session, place the assembled Eggplant Parmesan in the oven. Bake for an additional 25-30 minutes. Look for the cheese to be bubbly and golden. You can find the full recipe here and enjoy your delicious creation! How to choose the best eggplants Look for firm, shiny skin. The eggplant should feel heavy for its size. Avoid any with soft spots or wrinkles. Smaller eggplants tend to be sweeter. Choose medium-sized ones for the best flavor and texture. Importance of salting the eggplant Salting eggplants is key. It pulls out moisture and bitterness. This means a better texture and taste. After salting, rinse the slices and pat them dry. This step makes your dish much better. Ensuring even browning To get even browning, space the eggplant slices well. Don’t overcrowd the baking sheet. Use a light spray of olive oil on each side. Flip them halfway through baking for a nice golden color. Tips for achieving crispy texture Use panko breadcrumbs for extra crunch. They are lighter and crispier than regular ones. Make sure to coat each slice well. A light spray of oil helps achieve that crunchy finish. Best side dishes to accompany Eggplant Parmesan Serve your Eggplant Parmesan with a fresh salad. Garlic bread or a side of pasta works well, too. For a lighter option, a simple vegetable medley can be great. Presentation ideas for serving Garnish with fresh basil for a pop of color. Serve in a nice dish to show off the layers. Cut into squares for easy serving. A sprinkle of extra cheese on top adds a nice touch. For the full recipe, check out the instructions above. Enjoy your cooking! {{image_2}} You can make Baked Eggplant Parmesan even healthier. For gluten-free options, swap regular breadcrumbs with gluten-free ones. You can find many brands that taste great. They help keep your dish crispy without the gluten. If you're looking for low-fat cheese, try part-skim mozzarella or reduced-fat Parmesan. These cheeses melt well and cut down on calories. You still get that cheesy goodness without the guilt! Want to take your Eggplant Parmesan to the next level? Try adding spices or vegetables to the layers. Fresh garlic or crushed red pepper can add a nice kick. You can also layer in spinach or mushrooms for extra flavor and nutrition. Using homemade marinara sauce can boost the taste even more. A simple sauce made with fresh tomatoes and herbs will shine. However, if you’re short on time, a good-quality store-bought sauce works too. For a great meal, pair your Eggplant Parmesan with a fresh salad. A simple salad with mixed greens and vinaigrette is perfect. You can also serve it with garlic bread for a classic touch. If you want more protein, add grilled chicken or shrimp on the side. This will make your meal more filling and balanced. Enjoy your delicious dish with friends or family! To keep your Baked Eggplant Parmesan fresh, store it in the fridge. Use an airtight container. This helps keep the flavors intact. You can enjoy the leftovers for up to three days. If you want to save it for later, you can freeze it. Wrap it tightly in plastic wrap and then in aluminum foil. This method prevents freezer burn. You can keep it frozen for up to three months. When you’re ready to eat your leftovers, reheating them right is key. The best method is to use the oven. Preheat your oven to 350°F (175°C). Place the Eggplant Parmesan in a baking dish. Cover it with foil to keep moisture in. Bake for about 20 minutes, or until heated through. If you prefer using a microwave, be careful. Use a microwave-safe dish. Heat it in short bursts, around 30 seconds. Check often to avoid sogginess. To keep the texture nice, try reheating in the oven whenever you can. Enjoy your delicious meal anytime! For the full recipe, check out the entire guide. Can I make Baked Eggplant Parmesan ahead of time? Yes, you can prepare it in advance. Just layer the eggplant and sauce in a baking dish. Cover it and store it in the fridge for up to 24 hours. When you're ready, bake it as usual. This helps the flavors marry nicely. What can I substitute for Parmesan cheese? If you need a substitute, try nutritional yeast for a vegan option. You can also use pecorino romano for a similar taste. Grated cheddar works well too, but it will change the flavor a bit. How can I make Eggplant Parmesan vegan-friendly? To make it vegan, use a flax egg or a commercial egg replacer instead of eggs. Choose non-dairy cheese for the layers, and make sure your marinara sauce is vegan. This way, you keep the dish tasty and plant-based. What is the total cooking time? The total cooking time is about one hour. This includes 25 minutes for baking the eggplant and an additional 25-30 minutes for the assembled dish. How long does it take to cool before serving? Let it cool for about 10 minutes before serving. This helps the layers set and makes it easier to slice. Caloric content per serving Each serving has around 350 calories. This can vary depending on the cheese and sauce you use. Common allergens in the recipe This recipe contains dairy, eggs, and gluten. If you have allergies, consider alternatives like gluten-free breadcrumbs and dairy-free cheese. In this article, we explored how to make Baked Eggplant Parmesan. We covered ingredients, preparation steps, and tips for perfecting your dish. I shared variations for healthier options and ways to store leftovers. Enjoying this rich meal can be simple and fun. With practice, you can create a delicious Eggplant Parmesan that everyone will love. Keep experimenting with flavors and techniques. Your kitchen will become a place of creativity and joy.

Baked Eggplant Parmesan Simple and Savory Delight

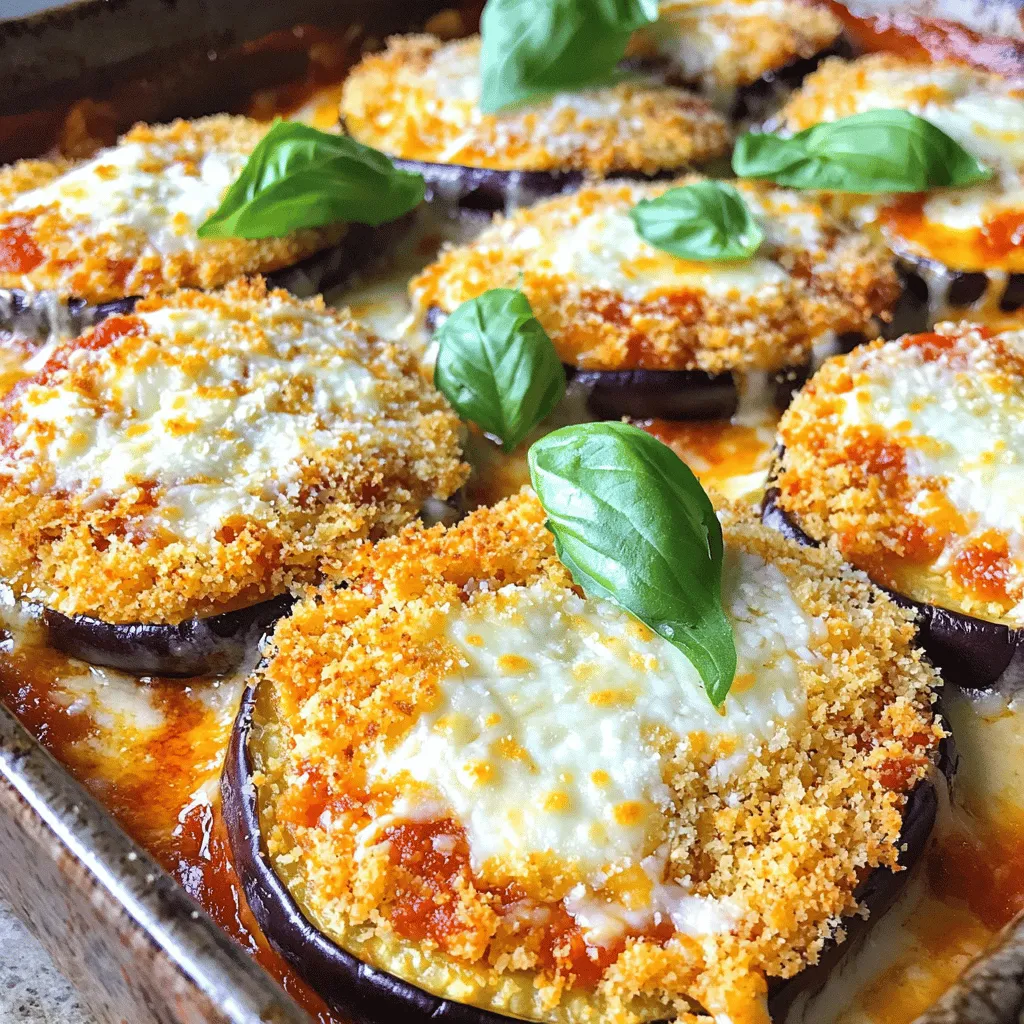
If you’re craving a hearty yet healthy dish, Baked Eggplant Parmesan is the answer. This simple recipe transforms eggplant into

For this recipe, you need: - 6 chicken thighs, skin-on and bone-in Chicken thighs are juicy and full of flavor. The skin helps keep them moist as they roast. The marinade gives the chicken its great taste. You will need: - 4 cloves garlic, minced - 2 lemons (zested and juiced) - 1 tablespoon fresh thyme leaves (or 1 teaspoon dried thyme) - 1 tablespoon olive oil - 1 teaspoon salt - 1/2 teaspoon black pepper - 1 teaspoon paprika The garlic adds a rich flavor. The lemon gives it a bright, fresh twist. Thyme adds earthiness, while olive oil helps the marinade stick. To make your dish look nice, use: - Fresh parsley, chopped (for garnish) Parsley adds color and a fresh taste. You can sprinkle it on just before serving to brighten up the plate. For the complete process, refer to the Full Recipe. First, you need to preheat the oven. Set it to 425°F (220°C). This high heat helps the chicken get crispy and golden. Next, let's make the marinade. In a big bowl, mix together: - 4 cloves garlic, minced - 2 lemons (zested and juiced) - 1 tablespoon fresh thyme leaves (or 1 teaspoon dried thyme) - 1 tablespoon olive oil - 1 teaspoon salt - 1/2 teaspoon black pepper - 1 teaspoon paprika Stir until everything is well combined. The bright flavors of lemon and garlic will shine through. Now, add the chicken thighs to the bowl. Make sure each thigh is coated with the marinade. If you can, let the chicken sit in the fridge for at least 30 minutes. For more flavor, marinate for up to 4 hours. When you’re ready, place the marinated thighs in a single layer on a baking dish, skin-side up. Pour any leftover marinade over the top. Put the dish in the oven. Roast for about 35-40 minutes. The chicken should reach an internal temperature of 165°F (75°C). The skin will be crispy and golden. Once the chicken is done, take it out of the oven. Let it rest for 5 minutes. This helps keep the juices inside. Before serving, sprinkle chopped fresh parsley on top. For the full recipe, check out Lemon Garlic Roasted Chicken Thighs 🧄. Enjoy your meal! To get that perfect crispy skin, you need high heat. Set your oven to 425°F (220°C). Make sure the chicken thighs are dry before marinating. Pat them with a paper towel. This helps the skin crisp up. When roasting, place the chicken skin-side up. This way, the fat renders off, making the skin golden and crunchy. Marination is key for flavor. I suggest marinating the chicken for at least 30 minutes. If you can, go for 4 hours. The longer they sit in the marinade, the better the taste. Use a mix of lemon juice, garlic, and herbs. It penetrates the meat, making every bite juicy and tasty. Check the chicken's doneness with a meat thermometer. Aim for an internal temperature of 165°F (75°C). This ensures your chicken is safe to eat. If you don’t have a thermometer, check that the juices run clear when pierced. The skin should be golden brown. This shows that your chicken is cooked perfectly. Enjoy the delicious results of your hard work with this Full Recipe! {{image_2}} You can change the flavor by using different herbs. Try rosemary for a woodsy taste. Oregano works well for a Mediterranean twist. Basil adds a sweet touch. Just swap out thyme for any of these herbs in your marinade. Fresh herbs bring bright flavors, but dried herbs are great too. If you like heat, add red pepper flakes to your marinade. A pinch gives a nice kick. You can also use cayenne pepper for more spice. If you prefer mild dishes, skip the heat. Adjust the salt and pepper to suit your taste. This recipe is flexible for all spice lovers. You can cook chicken thighs in many ways. For a grill option, marinate as usual and grill over medium heat. This gives a smoky flavor. You can also use a slow cooker. Cook on low for 6-8 hours for super tender chicken. Each method changes the taste, so try them all. For the complete recipe, check out the Full Recipe. After you enjoy your meal, cool the chicken first. Place leftovers in an airtight container. The chicken will stay fresh for up to four days in the fridge. Be sure to keep the skin on for better flavor when you reheat. If you want to save some for later, freezing is a great option. Wrap each chicken thigh tightly in plastic wrap. Then, put them in a freezer-safe bag. This method prevents freezer burn. You can freeze them for up to three months. When you're ready to eat your leftovers, there are a few ways to reheat them. For the best taste, use the oven. Preheat it to 350°F (175°C). Place the chicken on a baking sheet. Heat for about 20 minutes or until warmed through. You can also use the microwave, but the skin may not be as crispy. Enjoy your tasty chicken! For the complete recipe, check out the Full Recipe. You can serve this dish with many sides. Roasted vegetables pair well. Try carrots, broccoli, or Brussels sprouts. A fresh green salad also works great. You might enjoy adding a side of rice or quinoa. These add a nice texture and soak up the sauce. Lemon wedges can brighten the plate, too. This recipe is already gluten-free! The ingredients do not contain gluten. Just ensure any side dishes you serve are also gluten-free. Many grains and vegetables are naturally gluten-free. Always check labels if you use pre-made items, like broth or sauces. Yes, you can use chicken breasts. They will cook faster than thighs. Adjust the cooking time to about 25-30 minutes. Check for an internal temperature of 165°F (75°C). The flavor will still be delicious, but the breasts may be less juicy. You can marinate the chicken for 30 minutes to 4 hours. For the best flavor, aim for at least 2 hours. Longer marinating time lets the flavors soak in more. Just be careful not to exceed 4 hours, as the acid from the lemon can change the texture. This article covered tasty lemon garlic roasted chicken thighs. You learned about key ingredients, a simple recipe, and helpful tips for perfect results. I shared variations to keep meals exciting and storage tips for leftovers. Cooking can be fun and rewarding. With these steps, anyone can enjoy this dish. Remember, the right marinade and cooking method make all the difference. Embrace your kitchen skills and experiment. You’ll find meals can be both easy and delicious.

Lemon Garlic Roasted Chicken Thighs Flavorful Delight

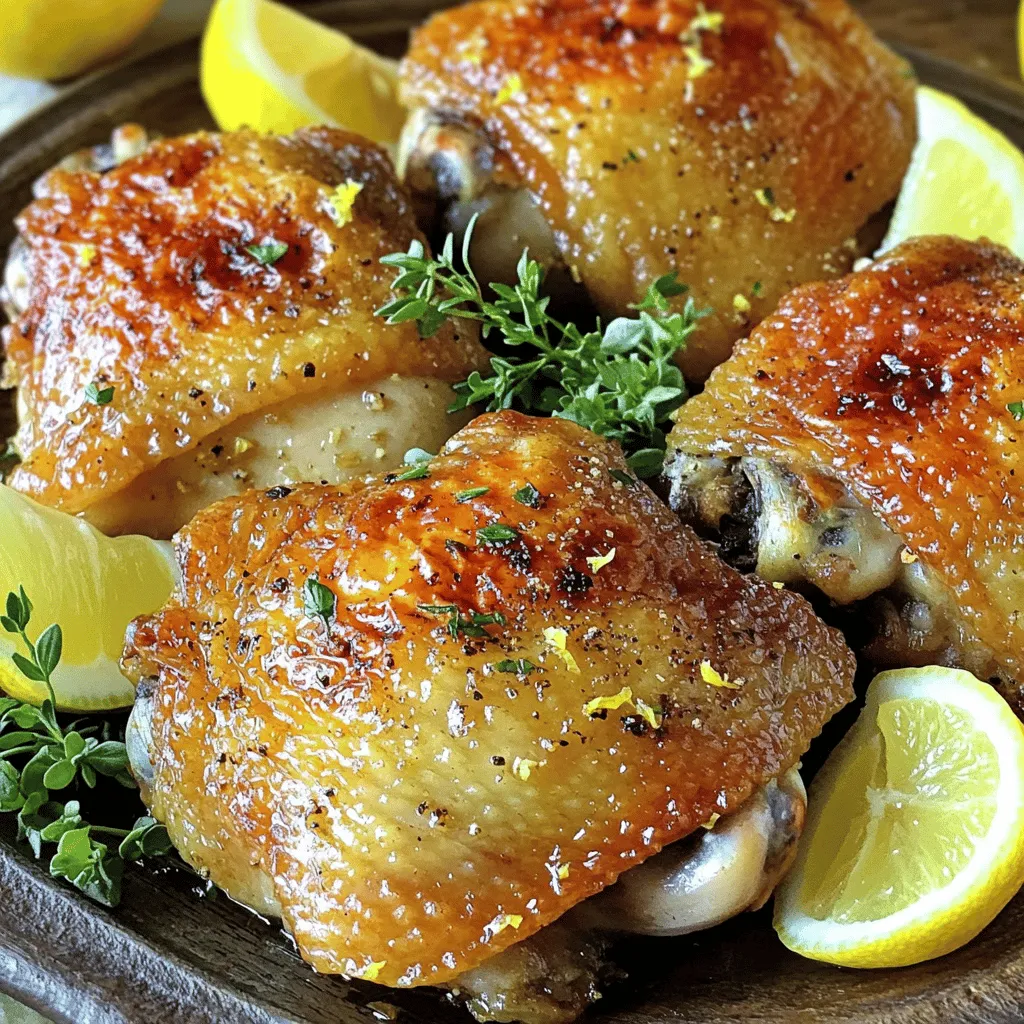
Get ready to transform dinner with my Lemon Garlic Roasted Chicken Thighs! This dish packs a punch with vibrant flavors

- Kale: Use fresh, dark green kale. Lacinato or curly kale works well. Look for firm leaves and avoid yellow ones. - Other key ingredients and their benefits: - Chickpeas: These add protein and fiber, helping you feel full. - Parmesan cheese: Provides a rich flavor and calcium. - Sunflower seeds: Great for healthy fats and a nice crunch. - Croutons: Add texture. You can use store-bought or make your own. - Dressing components: - Tahini: Adds creaminess and nutty flavor. - Lemon juice: Brightens the salad with acid. - Dijon mustard: Gives a tangy taste and depth. - Olive oil: Provides healthy fats and smoothness. - Garlic: Adds a punch of flavor. - Salt and pepper: Enhances all the flavors. This mix of ingredients creates a tasty and healthy meal. You can find the complete preparation steps in the Full Recipe. To start, you need to prepare the kale. First, wash the kale leaves well. Then, chop them into bite-sized pieces. Next, it’s time to massage the kale. Why massage? This step softens the leaves and makes them tasty. Just sprinkle a pinch of salt on the kale and use your hands. Massage for about 2-3 minutes. You should feel the leaves becoming tender. For the perfect texture, ensure you remove all tough stems. Always choose fresh, vibrant kale. Look for deep green leaves without any yellow or brown spots. This helps your salad taste great. Now, let’s move on to the dressing. In a small bowl, add the tahini, lemon juice, Dijon mustard, olive oil, minced garlic, salt, and pepper. Use a whisk to mix these ingredients. Whisking helps create a smooth blend. If the dressing is too thick, add a tablespoon of water. Taste it and adjust the flavors. You might like more lemon or salt, so feel free to experiment. After the dressing is ready, it’s time to combine the ingredients. Drizzle the dressing over the massaged kale. Toss gently until all the leaves are coated. This step is crucial for even flavor distribution. Next, fold in the roasted chickpeas and sunflower seeds. Add half of the shaved Parmesan cheese, mixing everything softly. For serving, transfer the salad to a large platter or individual bowls. Top it with croutons and the remaining Parmesan cheese. Finally, sprinkle fresh chopped parsley on top for a beautiful finish. Enjoy your Kale Caesar Salad immediately for the best taste and texture. Don’t forget to check out the Full Recipe for more tips! To make your Kale Caesar Salad pop with flavor, try these fun additions: - Add diced avocado for creaminess. - Incorporate cherry tomatoes for sweetness and color. - Toss in some bacon bits for a savory crunch. For seasonings, consider: - Freshly cracked black pepper for a bit of heat. - A sprinkle of smoked paprika for depth. - A squeeze of fresh lemon juice to brighten each bite. If you want a lighter dressing, swap tahini with: - Greek yogurt for a creamy, low-calorie option. - Plain hummus for a vegan-friendly choice. For gluten-free options, ensure your croutons are gluten-free. You can also skip them and add: - Nuts or seeds for crunch without gluten. - Grated nutritional yeast for a cheesy flavor that is also vegan. These tips will help you tailor your salad to fit your taste and health goals. For the complete recipe, check out the Full Recipe. {{image_2}} You can make your Kale Caesar salad more filling by adding proteins. Chicken is a classic choice. Grilled or roasted chicken adds a nice touch. Tofu is a great plant-based option. It absorbs flavors well and adds protein. You can also switch up the greens. Try adding spinach or arugula for a different taste. Other veggies like bell peppers or cucumbers can add crunch. These choices keep your salad fresh and exciting. Seasonal ingredients can really change your salad. In the fall, add roasted butternut squash for sweetness. In the summer, fresh tomatoes can brighten the dish. These swaps keep your salad aligned with the season. For special occasions, think about unique flavors. Adding spicy sriracha to the dressing can give it a kick. You can also sprinkle in some nuts or seeds for texture. These small changes make your salad stand out. For the full recipe, check out the details above. To keep your kale Caesar salad fresh, you must store it properly. First, place the salad in an airtight container. This helps prevent air from wilting the leaves. If you have dressing left, store it separately. The dressing can make the salad soggy over time. I recommend using glass containers since they do not retain odors. Also, keep the salad in the fridge. It should stay fresh for about 2-3 days. Can you freeze kale salad? No, freezing is not a good option for salads. When you freeze kale, it loses its crispness and flavor. If you really want to save it, try freezing just the roasted chickpeas. That way, you maintain the quality of the kale. If you do freeze it, use a freezer-safe bag. Remove as much air as possible. When ready to eat, thaw it in the fridge for a day before serving. A Kale Caesar Salad is packed with nutrients. Kale is rich in vitamins A, C, and K. It also has calcium and iron. Chickpeas add protein and fiber, making this salad filling. The Parmesan cheese gives you calcium and healthy fats. Overall, this salad supports your health with its balanced mix of nutrients. Yes, you can make Kale Caesar Salad ahead of time. To keep it fresh, store the dressing separately. Mix the salad just before serving. This keeps the kale crisp and prevents it from wilting. If you want to prepare it all at once, consider using a sturdier kale variety like Lacinato. This type holds up better in the fridge. Many dressings work well with kale salads. You can try a lemon vinaigrette for a light taste. A tahini-based dressing adds creaminess without dairy. For a spicy kick, use a chipotle dressing. You may also blend yogurt with herbs for a tangy twist. Experiment with flavors to find your favorite combination. For more ideas, explore recipes that suit your taste preferences. This blog post covered how to create a tasty Kale Caesar Salad. We discussed choosing the right kale and other ingredients that boost flavor and nutrition. You learned techniques for massaging kale and making a smooth dressing. We also explored fun tips to enhance flavors and healthier dressing options. Variations let you be creative with proteins and seasonal ingredients. Lastly, we shared how to store leftovers and answered common questions about nutrition and meal prep. Enjoy your kale salad, knowing it’s a tasty and healthy choice!

Kale Caesar Salad Tasty and Healthy Meal Option

Looking for a meal that’s both tasty and healthy? Look no further! The Kale Caesar Salad is a fresh twist

- Sweet potatoes: Use 2 medium sweet potatoes. Peel and dice them into small cubes for even cooking. - Black beans: One can (15 oz) of black beans works well. Rinse and drain them to remove extra sodium. - Spices and seasonings: This recipe needs ground cumin, paprika, garlic powder, chili powder, salt, and pepper. These spices add depth and warmth to the dish. - Tortilla options: Small corn tortillas are perfect for these tacos. Feel free to use flour tortillas if you prefer a softer bite. - Fresh herbs: Fresh cilantro enhances the flavor. If you’re not a fan, try parsley or green onions. - Vegetables: Diced red onion adds crunch. Sliced avocado brings creaminess. You can also add diced tomatoes or jalapeños for more flavor. - Sauces: Drizzle lime juice for brightness. You can also add hot sauce or a creamy dressing for extra zing. For the complete recipe, check out the [Full Recipe]. 1. Preheat your oven to 400°F (200°C). This heat is perfect for roasting sweet potatoes. 2. In a large bowl, combine the diced sweet potatoes with olive oil, ground cumin, paprika, garlic powder, chili powder, salt, and pepper. Toss the sweet potatoes until they are evenly coated with the oil and spices. 1. Spread the seasoned sweet potatoes on a baking sheet in a single layer. Roast them in the preheated oven for 25-30 minutes. Check them halfway through and stir for even cooking. They should be tender and slightly caramelized when done. 2. While the sweet potatoes roast, heat the black beans in a small saucepan over medium-low heat. Stir them gently and season with salt and pepper to your taste. 1. Warm the corn tortillas in a skillet or microwave until they become pliable. This step makes them easier to fill and fold. 2. To assemble the tacos, place a generous scoop of the roasted sweet potatoes on each tortilla. Follow this with a spoonful of black beans. 3. Top the tacos with diced red onion, fresh cilantro, and slices of avocado. 4. Serve the tacos with lime wedges on the side for squeezing over the top. This adds a bright flavor that complements the dish. For the full recipe, check out [Full Recipe]. To ensure your sweet potatoes roast perfectly, cut them into small, even pieces. This helps them cook evenly. I usually aim for about one-inch cubes. Toss them in olive oil and spices before roasting. This gives them a great flavor. Set your oven to 400°F (200°C) and roast for 25-30 minutes. Stir them halfway through to get a nice caramelization. Warming tortillas can change your taco game. You can heat them in a dry skillet over medium heat. Just warm each side for 30 seconds. If you prefer, wrap them in a damp paper towel and microwave for 20-30 seconds. This makes them soft and easy to fold. Want to add some heat? Try adding diced jalapeños or a pinch of cayenne pepper. They will bring a nice spicy kick. If you like smoky flavors, add a bit of smoked paprika to your spice mix. For more flavor, consider using fresh herbs like oregano or thyme. You can also mix in lime zest to brighten the dish. Experiment with different spices, such as taco seasoning or chipotle powder, to find what you like best. For even more ideas, check out the Full Recipe linked above. {{image_2}} You can easily adjust this recipe for different diets. If you want to make it vegan, just ensure all your ingredients are plant-based. The sweet potatoes and black beans are already vegan. Use corn tortillas, which are a great choice. They add flavor and are naturally gluten-free. If you need gluten-free options, stick with corn tortillas. You can find them in most stores. They work great with the sweet potato and black bean filling. If you want to switch up the main ingredients, there are many options. Instead of sweet potatoes, you can use butternut squash or even zucchini. Both can add a nice twist to your tacos. For black beans, try using pinto beans or chickpeas. They will still give you that hearty texture. You can also mix in other veggies like bell peppers, corn, or spinach for added flavor and color. These changes keep your tacos exciting and fun. Feel free to experiment with ingredients to find what you love best! For the full recipe, check out the Sweet Potato & Black Bean Tacos recipe. To store leftover tacos, place them in an airtight container. This keeps them fresh and prevents them from drying out. You can also wrap each taco in plastic wrap. This way, they stay safe in the fridge. Leftovers will last about 3 to 4 days in the fridge. After this time, they may lose flavor and texture. Always check for signs of spoilage before eating. When reheating tacos, you have a few options. The oven is a great choice. Preheat it to 350°F (175°C). Place the tacos on a baking sheet and heat them for about 10 minutes. This method helps keep the tortillas crisp. You can also use a skillet. Heat it over medium heat and place the tacos in it. Cook for about 2-3 minutes on each side. This method keeps the filling warm and the tortillas soft. To keep the flavor and texture, avoid microwaving them. Microwaving can make the tortillas chewy and the filling soggy. Enjoy your savory sweet potato and black bean tacos just as you made them! For the full recipe, refer to the Full Recipe section. How to make sweet potato and black bean tacos vegan? To make these tacos vegan, just skip the cheese and sour cream. Use plant-based toppings like avocado and fresh cilantro. You can also add salsa for extra flavor. Can I use frozen vegetables instead of fresh? Yes, you can use frozen sweet potatoes or black beans. Just thaw and drain them before cooking. The taste may differ slightly, but they will still be tasty. What sides pair well with sweet potato and black bean tacos? Great sides include rice, corn salad, or guacamole. You can also serve them with a fresh green salad. These sides add color and flavor to your meal. How can I prep these tacos in advance? You can roast the sweet potatoes a day ahead. Store them in the fridge and reheat them when ready to serve. You can also prep the toppings like diced onion and sliced avocado ahead of time. For the full recipe, check out the Sweet Potato & Black Bean Tacos. You now know how to make delicious sweet potato and black bean tacos. We covered the main ingredients, cooking steps, and storage tips. I shared ways to enhance flavor and adapt the recipe for different diets. These tacos are tasty and easy to make. You can customize them with your favorite toppings. I hope you feel inspired to try this dish. Enjoy your cooking adventure!

Savory Sweet Potato and Black Bean Tacos Recipe

Craving a tasty and healthy meal? You’ll love these Savory Sweet Potato and Black Bean Tacos! They’re packed with flavor

To make a tasty lemon garlic roasted chicken, you'll need these key items: - 1 whole chicken (about 4-5 pounds) - 4 cloves of garlic, minced - 2 lemons (1 for juice, 1 for wedges) - 4 tablespoons olive oil - 2 teaspoons dried thyme - 2 teaspoons dried rosemary - Salt and pepper to taste - Fresh parsley for garnish These ingredients create a bright and savory flavor. The lemon adds a zing, while the garlic gives depth. You can enhance your chicken with these extras: - Fresh herbs (like basil or oregano) - A splash of white wine - Sliced onions or shallots - A pinch of red pepper flakes for heat These options allow you to customize the flavor. Try them to find your favorite twist. Gather these tools before you start: - Roasting pan - Roasting rack - Small bowl for mixing - Sharp knife for carving - Meat thermometer Having the right tools makes cooking easier and more fun. They help ensure your chicken turns out perfect every time. For the full recipe, check the details provided above. Start by gathering your ingredients. You need a whole chicken, garlic, lemons, olive oil, thyme, rosemary, salt, and pepper. First, preheat your oven to 425°F (220°C). Next, pat the chicken dry with paper towels. This step is key for crispy skin. In a small bowl, mix minced garlic, olive oil, lemon juice, thyme, rosemary, salt, and pepper. This mix is your marinade. Rub it all over the chicken. Make sure to get it under the skin for deep flavor. Cut one lemon into wedges and stuff them inside the chicken along with some extra garlic if you like. Place the chicken breast-side up on a roasting rack in a pan. Roast it in your hot oven for about 1 hour and 20 minutes. Halfway through, baste the chicken with the juices from the pan. This keeps it moist and adds flavor. The chicken is done when the internal temperature reaches 165°F (75°C). A meat thermometer helps you check this easily. Once the chicken is cooked, take it out of the oven. Let it rest for at least 10-15 minutes before you carve. Resting allows the juices to settle, making each bite juicy. While it cools, you can prepare your sides. Fresh parsley makes a nice garnish. You can find the full recipe in the previous section to guide you through this delightful dish. To get that golden, crispy skin, start with a dry chicken. After washing, pat it dry with paper towels. This helps remove moisture that can make the skin soggy. Next, rub olive oil over the entire chicken. The oil helps the skin crisp up as it cooks. Make sure to sprinkle salt all over. Salt draws out moisture and creates a lovely crust. Lastly, roast the chicken at a high heat of 425°F (220°C) for the best results. Using a good marinade can make a big difference. I mix minced garlic, olive oil, lemon juice, thyme, and rosemary. This mix not only adds flavor but also tenderizes the meat. Rub the marinade all over the chicken, including under the skin. This way, the flavors soak in deeply. For extra zest, add lemon wedges inside the chicken cavity. The heat will release their juices, enhancing the flavor even more. Cooking time depends on the size of your chicken. For a whole chicken weighing 4-5 pounds, roast it for about 1 hour and 20 minutes. If your chicken is larger, you might need to cook it longer. Always check the internal temperature. It should reach 165°F (75°C) for safe eating. If you use smaller pieces, adjust the time down to about 30-40 minutes. Basting with pan juices halfway through cooking can also add moisture and flavor. For the full recipe, see the section above. {{image_2}} You can switch up the herbs for Lemon Garlic Roasted Chicken to find your perfect taste. Try using fresh herbs like basil or oregano instead of dried thyme and rosemary. Fresh herbs bring a bright flavor that can make the dish feel new. You can also add a touch of dill or tarragon for a unique twist. Just remember to use about three times the amount of fresh herbs as dried ones. An air fryer is a great tool for cooking Lemon Garlic Roasted Chicken. It cooks faster and gives you crispy skin. Start with the same marinade. Prepare the chicken as you normally would. Place it in the air fryer basket breast-side down first. Cook it at 360°F for about 30 minutes. Then flip it over and cook for another 30 minutes or until it reaches 165°F inside. Check the chicken often to avoid overcooking. If you love that rotisserie flavor, you can achieve it at home. Simply season your chicken with the lemon garlic marinade and let it sit for a while. If you own a rotisserie attachment, use it! Cook the chicken according to the rotisserie instructions. This method gives you juicy meat and crispy skin, just like the store-bought version. Serve it with your favorite sides for a complete meal. For the full details on making Lemon Garlic Roasted Chicken, check out the Full Recipe. After you enjoy your lemon garlic roasted chicken, store leftovers properly. Let the chicken cool to room temperature. Then, wrap it tightly in plastic wrap or foil. You can also place it in an airtight container. This keeps the chicken fresh for up to three days in the fridge. Make sure to keep any juices with the chicken. They add great flavor when reheating. Reheating leftover chicken can be tricky. You want to keep it moist and tasty. Preheat your oven to 350°F (175°C). Place the chicken in an oven-safe dish. Cover it with foil to lock in moisture. Heat for about 20 minutes or until warm. You can also use a microwave. Just be careful not to overheat. This can dry out the meat. If you want crispy skin, a quick broil at the end works wonders. Freezing is a smart way to save leftovers. Cut the chicken into pieces for easy use later. Place the pieces in freezer bags. Remove as much air as possible before sealing. Use labels with dates to keep track. The chicken can stay in the freezer for up to three months. When you’re ready to eat, thaw it in the fridge overnight. This keeps it safe and tasty. For quick meals, try using it in soups or salads. For the full recipe, check out the Lemon Garlic Roasted Chicken section above. Yes, you can use chicken parts. Thighs, breasts, and drumsticks all work well. Just adjust the cooking time. Chicken parts cook faster than a whole chicken. Aim for 30 to 45 minutes based on thickness. Ensure the internal temperature reaches 165°F (75°C) for safety. Absolutely! Marinating overnight adds depth to the dish. It allows the garlic and lemon to soak into the chicken. Just cover the chicken well and store it in the fridge. This method enhances flavor and tenderness for a truly delicious meal. Many sides go great with this chicken. Here are some ideas: - Roasted vegetables like carrots and potatoes - A fresh green salad with lemon vinaigrette - Garlic mashed potatoes for creaminess - Quinoa or rice for a hearty option These sides complement the bright flavors of the chicken perfectly. For the full recipe, check out the Lemon Garlic Roasted Chicken section. Lemon Garlic Roasted Chicken is simple and tasty. We covered key ingredients and cooking tools needed. I shared steps to prepare, cook, and check doneness. You learned tricks for crispy skin and flavor-packed marinades. I also gave storage tips for leftovers and fun variations like air fryer options. Enjoy this dish for any meal, and try different herbs for new tastes. Your family will love it!

Lemon Garlic Roasted Chicken Flavorful and Simple Recipe

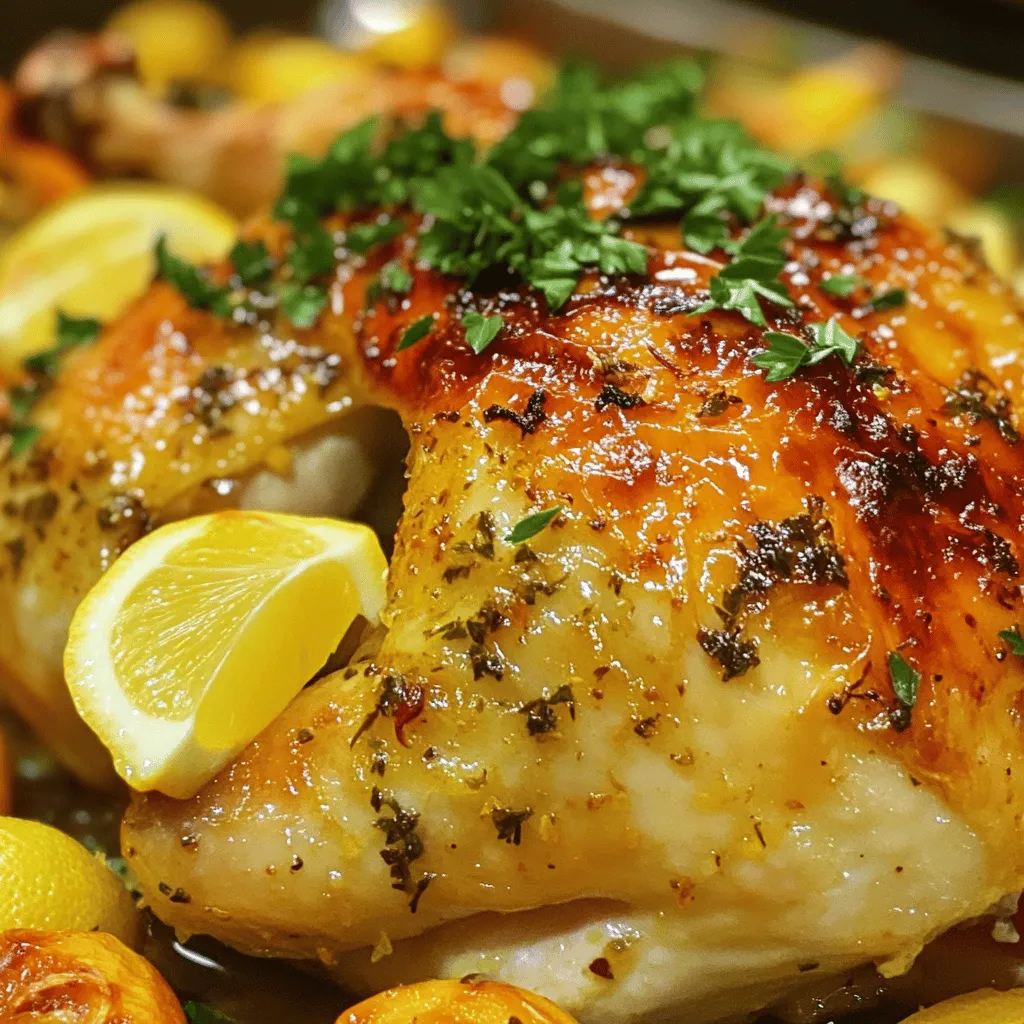
Looking for a dinner that impresses without the stress? My Lemon Garlic Roasted Chicken recipe is both simple and bursting

To make tasty vegetable sushi rolls, you need simple ingredients. Here’s what you'll need: - 1 cup sushi rice - 1 ¼ cup water - 2 tablespoons rice vinegar - 1 tablespoon sugar - ½ teaspoon salt - 4 nori sheets - 1 medium cucumber, thinly sliced - 1 medium carrot, julienned - ½ bell pepper (any color), thinly sliced - 1 avocado, sliced - ¼ cup pickled ginger (for serving) - Soy sauce (for dipping) These ingredients create a fresh and vibrant sushi roll. The sushi rice gives a nice base, while the veggies add crunch and color. You can change up your sushi rolls with these optional ingredients: - Radish sprouts - Cream cheese - Asparagus, blanched - Zucchini, julienned - Sesame seeds for garnish Feel free to mix and match based on what you like. Each ingredient adds its own flavor. Let's look at some nutritional benefits of the main ingredients: - Sushi rice: It provides a good source of carbs, giving you energy. - Cucumber: Low in calories and high in water, it keeps you hydrated. - Carrots: They are rich in beta-carotene, which is good for your eyes. - Avocado: Packed with healthy fats, it helps keep your heart healthy. - Bell pepper: Full of vitamins A and C, it boosts your immune system. These ingredients not only taste great but also keep you healthy. Enjoy making your vegetable sushi rolls with these fresh and flavorful ingredients! For the full recipe, check out the earlier section. To start, rinse the sushi rice under cold water. This step is key to removing extra starch. Keep rinsing until the water runs clear. Then, drain the rice well. Next, put the rinsed rice in a medium saucepan. Add 1 ¼ cups of water. Bring it to a boil over medium-high heat. Once it boils, cover the pot and reduce the heat to low. Cook for 15 minutes until all the water is gone. After cooking, let the rice sit for 10 minutes. This resting time is important. It helps the rice become fluffy. In a small bowl, mix 2 tablespoons of rice vinegar, 1 tablespoon of sugar, and ½ teaspoon of salt. Stir until the sugar and salt dissolve. Gently fold this mixture into the warm rice using a spatula. This adds flavor and helps cool the rice. Now, lay a sheet of nori shiny side down on a bamboo sushi mat or a clean board. Wet your hands to prevent the rice from sticking. Spread about ¾ cup of sushi rice evenly over the nori. Leave a 1-inch border at the top. Next, add your veggie fillings. Lay slices of cucumber, carrot, bell pepper, and avocado across the center of the rice. Make sure to spread them evenly for the best taste. Start rolling the sushi from the bottom. Use the mat to help shape it tightly. As you roll, press gently to keep everything in place. When you reach the top, seal the edge of the nori with a bit of water. This helps hold the roll together. After rolling, take a sharp knife and slice the roll into 6-8 pieces. Wipe the knife with a damp cloth between cuts. This keeps the slices neat. Repeat the process with the remaining nori sheets and fillings. Serve your vibrant veggie sushi rolls on a plate. Don’t forget to add pickled ginger and soy sauce for dipping. Enjoy your delicious creation from the Full Recipe! To make great sushi rice, start with high-quality short-grain rice. Rinse the rice well under cold water until the water runs clear. This step removes excess starch, which helps the rice stick together. After rinsing, cook the rice with the right water ratio. Use 1 cup of rice to 1.25 cups of water. Bring to a boil, then lower the heat and let it simmer for about 15 minutes. Once cooked, let it sit covered for 10 minutes. This resting time helps the rice steam and become fluffy. After resting, mix rice vinegar, sugar, and salt in a bowl. Fold this mixture into your warm rice gently. This adds flavor and gives the rice that sticky texture we love in sushi. Let it cool before using it in your rolls. To keep your sushi rolls fresh, wrap them in plastic wrap right after slicing. This prevents them from drying out. Store the rolls in the fridge if you don’t eat them right away. Eat them within a few hours for the best taste. If you have leftover sushi rice, store it in an airtight container. It can last for about 2 days in the fridge. Just reheat it gently before using it again to make rolls. Using the right tools makes sushi making easier. Here’s what I recommend: - Bamboo sushi mat: This helps you roll your sushi tight and neat. - Sharp knife: A sharp knife is key for clean cuts. - Rice cooker: This makes perfect sushi rice every time. - Plastic wrap: Use it to keep your rolls fresh. - Small bowls: These are great for holding your ingredients while you work. These tools will help you create beautiful and delicious vegetable sushi rolls. For the full recipe, check the details above! {{image_2}} You can mix and match many veggies for your sushi rolls. Try using: - Spinach or arugula for a fresh bite. - Sweet potato, steamed and sliced, for a creamy texture. - Radishes for a crunch and a peppery taste. - Zucchini, thinly sliced, adds a nice color and flavor. - Mushrooms, like shiitake, give an earthy taste. Feel free to switch out any of these for what you have. The goal is to enjoy every bite. While soy sauce is a classic choice, you can explore other flavors. Some fun options include: - Teriyaki sauce for a sweet and savory twist. - Spicy mayo made from mayo and sriracha for a kick. - Ponzu sauce, a citrusy option, adds brightness. - Sesame oil for a nutty flavor. These sauces can elevate your rolls and make each bite special. If you want gluten-free sushi, choose gluten-free soy sauce or tamari. You can also make sure the rice vinegar is gluten-free. For vegan rolls, stick to vegetables and avoid any fish or animal products. Always check the labels on sauces to ensure they fit your diet. With these choices, everyone can enjoy delicious sushi rolls, including those with dietary needs. Try the vibrant veggie sushi rolls for a fresh and tasty treat. For the full recipe, check out the provided details. To keep your vegetable sushi rolls fresh, start by wrapping them tightly in plastic wrap. This helps prevent air from drying them out. Place the wrapped rolls in an airtight container. Store them in the fridge if you plan to eat them later. Avoid stacking rolls on top of each other to prevent squishing. You can store vegetable sushi rolls in the fridge for about 1 to 2 days. After that, the rice and veggies may lose their texture. For best taste, try to eat the rolls as soon as possible. If you notice any off smells or changes in color, it’s best to discard them. Freezing sushi rice is easy. Spread the cooked rice on a tray to cool, then pack it in a freezer-safe bag. Squeeze out the air and seal it tightly. For nori, store it in a cool, dry place. Avoid freezing nori as it can become brittle. When you need the rice, thaw it in the fridge overnight before using it in your rolls. For the full recipe, check out the vibrant veggie sushi rolls section. Yes, you can use different rice types for sushi. Short-grain rice is best. It has the right stickiness for rolling. You can even use brown rice for a healthier option. Just remember that cooking times may vary. The best vegetables for sushi are fresh and colorful. Here are some great options: - Cucumber - Carrot - Bell pepper - Avocado - Radish - Spinach You can mix and match these for fun flavors and textures. To serve Vegetable Sushi Rolls at a party, follow these simple tips: - Slice the rolls into bite-sized pieces. - Arrange them nicely on a platter. - Add small bowls of soy sauce and pickled ginger. - Garnish with sesame seeds or wasabi for extra flair. These steps make your sushi look great and taste even better! You can find pre-made Vegetable Sushi Rolls at many grocery stores. Look in the deli or prepared foods section. Some sushi restaurants also offer takeout options. Just check the freshness and ingredients to ensure quality. For a great homemade option, try the Full Recipe for vibrant veggie sushi rolls! In this post, we explored how to make tasty vegetable sushi rolls. You learned about the main and optional ingredients, along with their nutrition. I shared clear steps for preparing sushi rice and assembling rolls. We also discussed tips for keeping your rolls fresh and tools you might need. Finally, I highlighted variations, storage tips, and answered common questions. By following these simple steps, you can enjoy delicious, homemade sushi. Remember, the best part is getting creative with your fillings! Enjoy rolling your own sushi rolls soon.

Vegetable Sushi Rolls Fresh and Flavorful Recipe

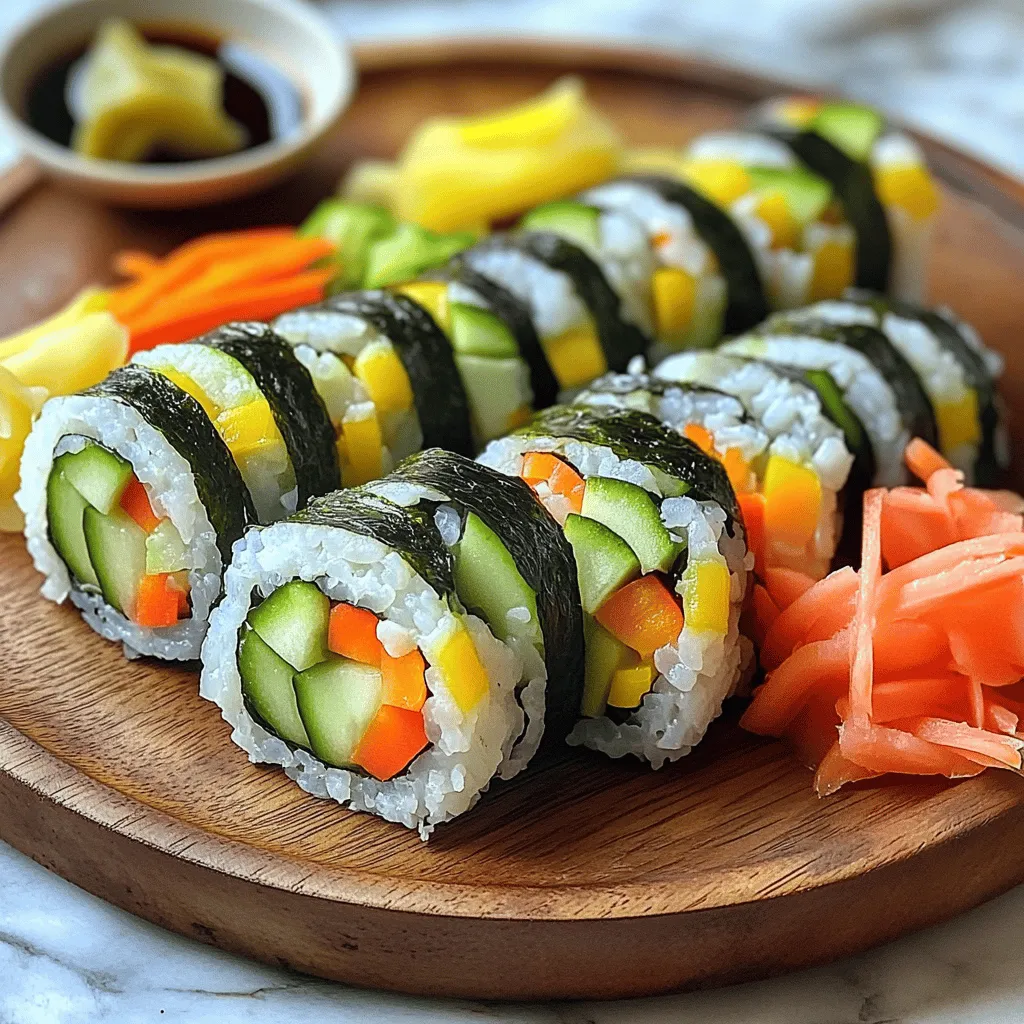
Are you ready to make fresh and flavorful vegetable sushi rolls? In this recipe, I’ll guide you step-by-step through creating

Older posts
Newer posts
← Previous Page1 … Page49 Page50 Page51 … Page83 Next →

dsad

© 2025 easycookingbite • Built with GeneratePress

Our Policies

  • Copyright Policy
  • Cookie Policy
  • GDPR Policy
  • Privacy Policy
  • Disclaimer
  • Terms Of Use

More Information

  • Home
  • About
  • Contact
  • Appetizers
  • Dessert
  • Dinner
  • Drinks
©2025, easycookingbite About Back To Top