Skip to content
DisclaimerTerms Of UseGDPR PolicyCookie Policy

easycookingbite

  • Home
  • Drinks
  • Appetizers
  • Dinner
  • Dessert
  • About
  • Contact
  • Privacy Policy
DisclaimerTerms Of UseGDPR PolicyCookie Policy

Lily

For Turkey and Spinach Stuffed Shells, gather these fresh and vibrant ingredients: - 20 large pasta shells - 1 pound ground turkey - 2 cups fresh spinach, chopped - 1 cup ricotta cheese - 1 cup shredded mozzarella cheese, divided - 1/2 cup grated Parmesan cheese - 1 egg, beaten - 1 teaspoon garlic powder - 1 teaspoon onion powder - 1 teaspoon Italian seasoning - Salt and pepper to taste - 3 cups marinara sauce - Fresh basil for garnish These ingredients work together to create a tasty dish. The combination of turkey and spinach brings protein and vitamins. The cheeses add creaminess and flavor. Each bite bursts with savory goodness. When you layer marinara sauce, it adds a rich taste. You will love how satisfying this meal is. You can find the Full Recipe in the following sections. 1. Preheat oven temperature: Set your oven to 375°F (190°C). This will ensure even cooking. 2. Cooking pasta shells: Boil water and cook the large pasta shells. Follow the package instructions until they are al dente. Drain them and let them cool slightly. 3. Cooking ground turkey and spinach: In a large skillet, heat over medium heat. Add one pound of ground turkey and cook until it turns brown. This takes about 5 to 7 minutes. Stir it well and break it into small pieces. Add 2 cups of chopped fresh spinach to the skillet. Cook until the spinach wilts, which takes about 2 to 3 minutes. 1. Mixing filling ingredients: In a large bowl, combine the cooked turkey and spinach. Add 1 cup of ricotta cheese, half of the 1 cup of shredded mozzarella cheese, and 1/2 cup of grated Parmesan cheese. Add 1 beaten egg, 1 teaspoon of garlic powder, 1 teaspoon of onion powder, 1 teaspoon of Italian seasoning, and salt and pepper to taste. Mix everything until it’s well-combined. 2. Stuffing the pasta shells: Take each pasta shell and spoon the turkey and spinach filling into it. Be generous with the filling to make each bite flavorful. 3. Layering marinara sauce: At the bottom of a baking dish, spread a layer of marinara sauce. This prevents the shells from sticking. Place the stuffed shells seam-side up in the dish. Pour the remaining marinara sauce over the shells. Sprinkle the rest of the mozzarella cheese on top. 1. Covering and baking: Cover the baking dish with aluminum foil. Bake for 25 minutes. 2. Final baking step for browning: Remove the foil and bake for another 10 to 15 minutes. This will make the cheese bubbly and golden brown. 3. Resting before serving: After baking, let the dish sit for a few minutes. This helps the flavors settle and makes serving easier. For a full guide on how to make Turkey and Spinach Stuffed Shells, refer to the Full Recipe. - Ensuring al dente pasta: Cook the pasta shells just until they are firm. This helps them hold the filling without breaking. Follow the package time closely. - Avoiding soggy stuffed shells: Drain the shells well after cooking. If they sit in water too long, they will absorb the liquid and become mushy. - Tips for cooking ground turkey: Use medium heat to cook ground turkey. Stir often to break up large chunks. Ensure it’s fully cooked before mixing with other ingredients. - Suggested seasonings to try: Add a pinch of red pepper flakes for heat. Fresh herbs like parsley or thyme can brighten the dish. - Adding extra cheese: Mix in more mozzarella or ricotta for a creamier filling. You can also sprinkle extra cheese on top before baking. - Using homemade vs. store-bought marinara: Homemade marinara can add a fresh taste. If you use store-bought, choose a brand with no added sugar. A good sauce makes a big difference! For the full recipe, check out the Turkey and Spinach Stuffed Shells. {{image_2}} When I create Turkey and Spinach Stuffed Shells, I love to make it fit different diets. Here are some easy changes: - Gluten-free pasta options: You can use gluten-free pasta shells. Many brands offer great options that hold up well in baking. - Vegetarian alternatives: Swap the ground turkey for lentils or black beans. This adds protein and keeps the dish hearty. - Dairy-free cheese substitutes: Use cashew cheese or almond-based cheese. They melt well and add a nice flavor. Adding new flavors can make your stuffed shells unique. Here are some fun ideas: - Adding different vegetables: Try adding mushrooms, bell peppers, or zucchini. They add color and nutrition. - Spicy stuffed shells with added heat: Add crushed red pepper or jalapeños to the filling. This gives your dish a tasty kick. - Different meat options: You can also use ground chicken or beef. Each holds its own flavor and texture. These variations let you enjoy Turkey and Spinach Stuffed Shells in new ways! If you want to try the full recipe, check it out in the article. To store leftovers of Turkey and Spinach Stuffed Shells, let them cool first. Place the shells in an airtight container. This keeps them fresh and safe to eat later. I recommend using glass or plastic containers. They work well and are easy to stack in the fridge. The shelf life in the refrigerator is about 3 to 5 days. Make sure to eat them within this time for the best taste. To freeze stuffed shells, follow these steps: First, let them cool completely. Then, layer the shells in a freezer-safe container. You can also use a freezer bag. Just remove as much air as you can. This helps prevent freezer burn. When you want to reheat from frozen, place them in the oven. Preheat the oven to 375°F (190°C) and cover with foil. Bake for about 30-40 minutes. Remove the foil in the last 10 minutes for a nice, bubbly top. For best practices, add a little extra sauce on top before freezing. This keeps everything moist and tasty. Can I make Turkey and Spinach Stuffed Shells ahead of time? Yes, you can prepare the stuffed shells in advance. Just stuff the shells and place them in a baking dish. Cover them and store them in the fridge. When you are ready, add sauce and bake. It saves time and makes dinner easy. What can I serve with stuffed shells? These stuffed shells pair well with a fresh salad. A simple green salad with a light vinaigrette works great. You might also serve garlic bread or a side of steamed veggies. These sides balance the meal nicely. How can I customize this recipe for kids? To make it kid-friendly, use less garlic and onion powder. You can add more cheese in the mix and on top. Kids often love more cheese. You can also use smaller pasta shells for easier eating. What do I do if my pasta shells break? If your pasta shells break, don’t worry! Use the pieces for layering in your baking dish. Just spread some sauce on the bottom and place broken pieces on top. It will still taste great and look good! How can I make the dish spicier? To add spice, mix in red pepper flakes into the filling. You can also use spicy Italian sausage instead of turkey. Another option is to add jalapeños to the mix. Adjust the heat to your liking! Why isn’t the cheese melting properly? If the cheese isn’t melting, check your oven’s temperature. It needs to be hot enough. Covering the dish while baking helps melt cheese faster. If it’s still not melting, try using a different type of cheese. Some melt better than others. For the full recipe, click here. This blog post covered tasty Turkey and Spinach Stuffed Shells. You learned about key ingredients, step-by-step instructions, and helpful tips. We also explored variations for different diets. Plus, I shared how to store leftovers and answered common questions. Making these stuffed shells offers a simple and fun meal. Try new flavors and make it your own! Enjoy cooking and share your results with others.

Turkey and Spinach Stuffed Shells Flavorful Dish

Looking for a tasty meal that’s easy to make? Turkey and spinach stuffed shells are the perfect dish! They mix

- 2 lbs chicken wings - 1/2 cup honey - 1/4 cup soy sauce - 4 cloves garlic, minced The main ingredients for honey garlic chicken wings are simple yet powerful. Chicken wings provide a great base. They soak up all the flavors. Honey brings sweetness that balances the salty soy sauce. Garlic adds an aromatic kick that makes these wings shine. Each bite bursts with flavor. - 1 tablespoon fresh ginger, grated - 1 tablespoon sesame oil - 2 tablespoons apple cider vinegar - 1/4 teaspoon black pepper - 1/2 teaspoon red pepper flakes (optional) In addition to the main ingredients, a few extra items can make a big difference. Fresh ginger gives a warm and zesty touch. Sesame oil adds a nutty flavor that enhances the dish. Apple cider vinegar brings acidity, cutting through the sweetness. Black pepper adds a hint of spice. Use red pepper flakes if you want heat. These extras create a well-rounded flavor profile. For the full recipe, check out the details above. First, gather your marinade ingredients. You will need honey, soy sauce, minced garlic, grated ginger, sesame oil, apple cider vinegar, black pepper, and optional red pepper flakes. In a large bowl, whisk these ingredients together until they blend well. This step is key. A good marinade adds flavor and tenderness to your chicken wings. Now it’s time to marinate the wings. Add the chicken wings to your marinade and toss them gently. Make sure every wing is covered. Cover the bowl with plastic wrap and place it in the fridge. Aim for at least one hour, but overnight gives the best flavor. The longer they sit, the more they soak up those tasty flavors. Next, preheat your oven to 400°F (200°C). While it heats, line a baking sheet with aluminum foil or parchment paper. This makes cleanup easy! After preheating, take the wings from the fridge. Place them in a single layer on the baking sheet. Remember to save some marinade for basting later. Bake the wings for 25 minutes. After that, flip them over and brush with the reserved marinade. Bake for another 15-20 minutes until they are golden and crispy. To make them extra crispy, broil the wings for 2-3 minutes. Watch them closely to avoid burning. Once done, remove them from the oven and garnish with chopped green onions and sesame seeds. These final touches make your wings look and taste amazing. Enjoy your sticky, sweet, and savory Honey Garlic Chicken Wings. For the full recipe, check the details above. Marinating your chicken wings is key to great flavor. I always recommend marinating overnight. This gives the wings time to soak up all the tasty goodness from the marinade. If you’re short on time, aim for at least one hour. It still helps, but overnight is best. To avoid overcooking your wings, keep an eye on the time. The wings will cook faster in the oven if they are smaller. Using a meat thermometer can help. Aim for an internal temperature of 165°F (74°C) for safety. Crispy chicken wings are the best! To achieve this, you can adjust your oven settings. Start by preheating your oven to 400°F (200°C). This is a great temperature for baking wings. Using the broiler at the end gives an extra crunch. After baking, turn on the broiler for 2-3 minutes. Keep a close watch during this time. The wings can burn quickly, so do not walk away. Serving chicken wings is fun! You can pair them with dips like ranch or blue cheese. These add a creamy touch that contrasts well with the sweet and savory wings. For sides, try serving with celery sticks or carrot sticks. They add a nice crunch and freshness. When plating, arrange the wings in a circle on a large plate. This makes a beautiful presentation. Sprinkle chopped green onions and sesame seeds on top for color and flair. For the full recipe, check the complete instructions! {{image_2}} You can change the flavor of these honey garlic chicken wings easily. Want a kick? Add some hot sauce or chili paste. You can try a sweet and spicy mix with honey and sriracha. This combination will give your wings a unique taste. For less heat, skip the red pepper flakes. You can adjust the heat level to match your taste. If you want a lighter dish, consider baking instead of frying. Baking gives you crispy wings without extra oil. It’s a simple swap that makes your meal healthier. You can also use low-sodium soy sauce. This way, you enjoy the same great flavor with less salt. It’s a small change that makes a big difference. You can cook honey garlic chicken wings in several ways. Barbecue grilling adds a nice smoky flavor. Just make sure to keep an eye on them so they don’t burn. You can also use an air fryer. This method cooks the wings faster and keeps them crispy. Each method brings something special to your meal. Try them all to find your favorite! You can store leftover honey garlic chicken wings in the fridge for up to four days. Keep them in the original container for the best flavor. Original containers keep the wings moist and tasty. Always seal them well to avoid drying out. To freeze the wings, follow these steps: 1. Allow the wings to cool completely. 2. Place them in a freezer-safe bag or container. 3. Remove as much air as possible before sealing. You can freeze the wings for up to three months. When you are ready to enjoy them, thaw the wings in the fridge overnight. Reheat them in the oven at 350°F (175°C) for about 15 minutes, or until hot. If you want to reuse the marinade, do so wisely. Cook it first to kill any germs. You can use it as a sauce for other dishes. However, be cautious; never use raw marinade again on cooked food. Always prioritize safety when dealing with raw meat and marinades. You can use maple syrup or agave nectar. Both give a sweet touch. Maple syrup adds a rich flavor. Agave nectar is lighter and less thick. They will change the taste slightly but still work well. Check the wings with a meat thermometer. The safe internal temperature is 165°F (74°C). Look for a golden brown color on the skin. The juices should run clear, not pink. This means they are fully cooked and ready to eat. Yes, you can! Marinate the wings a day ahead. This lets the flavors soak in. You can cook them later when you're ready. Just make sure to keep them in the fridge until you cook. Many local restaurants serve honey garlic chicken wings. Look for popular chains or Asian eateries. They often have this dish on their menu. Check online reviews to find the best spots near you. Honey garlic chicken wings are easy to make with simple ingredients. You learned how to prepare, marinate, and bake the wings for the best flavor. Remember to use tips for crispiness and explore variations for fun. You can store leftovers safely and reuse the marinade smartly. Enjoy this dish with your favorite dips or sides. Cooking should be fun and flavorful. Try out these steps, and impress your friends and family with your tasty wings!

Honey Garlic Chicken Wings Flavorful and Simple Dish

If you’re craving a dish that’s both flavorful and simple, look no further than honey garlic chicken wings! Packed with

To make a tasty Vegetable Lo Mein, gather these ingredients: - 8 oz egg noodles or lo mein noodles - 2 tablespoons vegetable oil - 2 cloves garlic, minced - 1 inch ginger, grated - 1 small bell pepper, julienned - 1 cup broccoli florets - 1 cup snap peas, chopped - 1 carrot, julienned - 1 small zucchini, julienned - 3 tablespoons soy sauce - 1 tablespoon sesame oil - 1 teaspoon chili paste (adjust to taste) - 2 green onions, sliced - Sesame seeds for garnish You can mix and match fresh ingredients based on what you have. For example: - Use soy sauce for tamari if you're gluten-free. - Swap out egg noodles for rice noodles. - Try bok choy instead of broccoli for a different crunch. - Use frozen vegetables if fresh ones aren't available. These changes still keep your dish delicious! Each serving of Vegetable Lo Mein has about: - Calories: 320 - Protein: 10g - Fat: 12g - Carbohydrates: 45g - Fiber: 4g This meal is healthy, packed with nutrients, and perfect for any day. You can find the full recipe linked above for step-by-step guidance. First, cook the noodles. I like to use egg noodles or lo mein noodles. Boil water in a pot. Add the noodles and cook until they are al dente. This usually takes about 4 to 6 minutes. Drain the noodles and set them aside. Keep them warm so they stay soft. Next, heat the vegetable oil in a large skillet or wok. Set the heat to medium-high. Add minced garlic and grated ginger. Sauté these for about 30 seconds. You want to smell the garlic and ginger, but don't burn them. This step adds a lot of flavor. Now it's time for the veggies. Add bell pepper, broccoli, snap peas, carrot, and zucchini to the skillet. Stir-fry them for about 5 to 7 minutes. You want the veggies to be tender-crisp, not mushy. This keeps them bright and fresh. Once cooked, add the noodles back to the skillet. Pour in soy sauce, sesame oil, and chili paste. Toss everything together for 2 to 3 minutes. Make sure the noodles get coated in the sauce. Finally, stir in the green onions. Serve hot and sprinkle sesame seeds on top. For the full details, check the Full Recipe. To get the best taste in your Vegetable Lo Mein, use fresh ingredients. Fresh veggies give a bright crunch. Choose soy sauce that is low in sodium. This lets the flavors shine without being too salty. For depth, add a bit of oyster sauce if you like. You can also mix in a splash of rice vinegar. It brings a nice tang. You need a few tools to make cooking easier. A large skillet or a wok works best for stir-frying. This helps cook the veggies quickly and evenly. A wooden spatula is great for tossing the ingredients. It won’t scratch your pan. A colander is handy for draining the noodles. Lastly, a good knife makes cutting the veggies quick and safe. Timing is key to great Vegetable Lo Mein. Start cooking the noodles first. They should be ready when you finish the veggies. Heat the oil in your pan before adding garlic and ginger. This helps release their flavors fast. Stir-frying the vegetables should take about 5 to 7 minutes. Keep them crisp, not mushy. When you mix in the noodles, toss them gently but quickly. This ensures every bite is full of flavor. {{image_2}} You can easily add protein to your Vegetable Lo Mein. Tofu is a great choice for a vegetarian twist. Use firm tofu for the best texture. Cut it into cubes and sauté it until golden. If you prefer chicken, use thin strips. Cook them in the pan before the vegetables. Shrimp is another tasty option. Just add them when you stir-fry the veggies. They cook quickly and add great flavor. Feel free to play with vegetables based on the season. In spring, add asparagus and baby bok choy. Summer is perfect for bell peppers and corn. In fall, try adding sweet potatoes or butternut squash. Winter calls for hearty greens like kale or Swiss chard. The key is to use fresh, colorful vegetables. This keeps your dish vibrant and exciting. If you need a gluten-free option, swap regular soy sauce for gluten-free soy sauce. You can also use rice noodles instead of egg noodles. They cook quickly and have a nice texture. Check the labels on all sauces and ingredients to ensure they are gluten-free. Enjoy your Vegetable Lo Mein without worry! For the complete recipe, follow the instructions above. To store your Vegetable Lo Mein, let it cool first. Then, place it in an airtight container. It will keep well in the fridge for up to three days. Make sure to separate any garnishes, like sesame seeds, before storing. This keeps them fresh and crunchy. To reheat, use a skillet on medium heat. Add a splash of water or oil to keep it moist. Stir often for about five minutes until heated through. You can also use a microwave. Heat in short bursts, stirring in between, until warm. Enjoy it just like fresh! If you want to freeze your Vegetable Lo Mein, pack it tightly in a freezer-safe container. It will last up to three months in the freezer. When ready to eat, thaw it overnight in the fridge. Reheat it in a pan or microwave. This method keeps the flavors bright and tasty. For the full recipe, check out the main section. The best type of noodle for Vegetable Lo Mein is either egg noodles or lo mein noodles. Egg noodles are soft and rich. They soak up flavors well. Lo mein noodles are slightly thicker and chewy. Both options work great in this dish. You can find them in most grocery stores. Choose based on your taste preference. Yes, you can make Vegetable Lo Mein ahead of time. This dish keeps well in the fridge. Prepare your Vegetable Lo Mein, then let it cool. Store it in an airtight container. It can last for about 3 days. When you're ready to eat, just reheat it. You can use a microwave or a stovetop. Add a splash of water to keep it moist. To make Vegetable Lo Mein spicier, add more chili paste. Start with a teaspoon and taste it. You can add more if you like it hot. Another option is to use fresh chili peppers. Sliced jalapeños or Thai birds' eye chilis add heat. You can also sprinkle red pepper flakes on top. Adjust the spice to your liking for the perfect kick. For the full recipe, check out the details above. You can make a tasty Vegetable Lo Mein with simple ingredients and easy steps. We covered the best noodles, fresh ingredient swaps, and nutritional info. I shared tips for authentic flavors and timing. You can customize it with proteins or seasonal veggies. Storing and reheating leftovers is quick and simple. Try out your own twist on this dish. Enjoy cooking and making Lo Mein that fits your taste!

Vegetable Lo Mein Flavorful and Easy Recipe Guide

Looking to make a delicious and simple Vegetable Lo Mein at home? You’re in the right place! This guide gives

To make Chocolate Chip Banana Muffins, you need the following ingredients: - 3 ripe bananas, mashed - 1/2 cup unsalted butter, melted - 3/4 cup brown sugar, packed - 1/4 cup granulated sugar - 2 large eggs - 1 teaspoon vanilla extract - 1 teaspoon baking soda - 1/2 teaspoon baking powder - 1/2 teaspoon salt - 1 1/2 cups all-purpose flour - 1 cup semi-sweet chocolate chips - 1/2 cup chopped walnuts (optional) Each ingredient plays a key role. Ripe bananas add natural sweetness and moisture. Unsalted butter gives richness. Brown sugar brings depth, while granulated sugar adds a nice lift. The eggs bind everything together, and vanilla enhances flavor. Baking soda and baking powder help muffins rise. Salt balances sweetness. All-purpose flour provides structure, and chocolate chips bring joy. Walnuts add crunch if you choose to use them. For the full recipe, check out the complete instructions. Enjoy making these tasty treats! First, preheat your oven to 350°F (175°C). This step warms your oven for even baking. Next, grab a muffin tray and line it with paper liners or lightly grease each cup. This helps the muffins come out easily. Now, mash three ripe bananas in a large bowl. Use a fork for this; it works great. Melt half a cup of unsalted butter in the microwave or on the stove. Mix the mashed bananas and melted butter together until creamy. In the same bowl, add three-quarters cup of brown sugar and a quarter cup of granulated sugar. Stir them in well until they blend smoothly. Next, add two large eggs, one at a time. Mix them in fully before adding one teaspoon of vanilla extract. This will give your muffins a lovely flavor. Now, we’ll add the dry ingredients. Sprinkle one teaspoon of baking soda, half a teaspoon of baking powder, and half a teaspoon of salt over the mixture. Stir it all together until just combined. Be careful not to over-mix! Next, gently fold in one and a half cups of all-purpose flour. Mix until you don’t see any flour streaks. It’s okay if some lumps remain. Finally, fold in one cup of semi-sweet chocolate chips. If you like, you can add half a cup of chopped walnuts too. Now it’s time to bake! Spoon the batter into the prepared muffin cups, filling each about three-quarters full. Place them in the oven and bake for 18 to 20 minutes. To check if they are done, insert a toothpick into the center of a muffin. If it comes out clean, they are ready. Once baked, remove them from the oven and let them cool in the pan for about five minutes. Then, transfer the muffins to a wire rack to cool completely. Enjoy your delicious muffins! Using ripe bananas is key for great flavor. They should be brown and soft. The sugars in ripe bananas add moisture and sweetness. This makes your muffins taste rich and delicious. Avoiding over-mixing the batter is also important. When you mix, do it gently. Over-mixing can make the muffins tough. Mix until you just see no flour. A few lumps are okay. This keeps your muffins light and fluffy. For presentation, serve your muffins warm. You can sprinkle some extra chocolate chips or walnuts on top. This adds a nice touch. A side of fresh fruit pairs well, too. It adds color and freshness to your plate. You can enjoy these muffins with a glass of milk or coffee. Both drinks balance the sweetness. They make a perfect snack or breakfast treat. For more tips, check out the [Full Recipe]. {{image_2}} You can make your muffins healthier with a few easy swaps. Using whole wheat flour gives your muffins more fiber. It adds a nutty flavor that blends well with bananas. You can also cut back on sugar. Try using half the amount or using honey as a sweetener. Honey adds sweetness without all the calories. Want to spice things up? Add cinnamon or nutmeg to your batter. Just a pinch can change the whole taste. You can also include dried fruits like raisins or cranberries for a fruity twist. Nuts, like walnuts or pecans, provide a nice crunch. These mix-ins can elevate the flavor and texture of your muffins. Feel free to get creative! To keep your chocolate chip banana muffins fresh, you have two main options: room temperature or refrigerated storage. If you plan to eat them within a few days, store them in an airtight container at room temperature. This keeps them soft and tasty. If you want to keep them longer, refrigerate them. Just remember, muffins may dry out a bit in the fridge. Wrap them tightly in plastic wrap or use a container that seals well. For even longer storage, you can freeze your muffins for later. Here's how: - Let the muffins cool completely. - Wrap each muffin in plastic wrap. - Place the wrapped muffins in a freezer-safe bag or container. - Label with the date and freeze for up to three months. When you're ready to enjoy your muffins again, reheating is simple. Here are the best methods: - Microwave: Place a muffin on a microwave-safe plate. Heat for about 10-15 seconds. Check to see if it’s warm enough. If not, add a few more seconds. - Oven: Preheat your oven to 350°F (175°C). Place the muffins on a baking sheet. Heat for about 5-10 minutes until warm. These methods will help keep your muffins soft and delicious! Enjoy your tasty treat! To check if your muffins are done, use a toothpick. Insert it into the center of a muffin. If it comes out clean, your muffins are ready. If the toothpick has batter on it, bake for a few more minutes. Remember, muffins can bake unevenly, so check a few. Yes, you can use frozen bananas. Just thaw them first and drain any extra liquid. Frozen bananas make muffins moist and sweet. They are great for baking, so do not hesitate to use them when fresh bananas are not available. Absolutely! To make these muffins vegan, replace the eggs with flax eggs. Mix 1 tablespoon of ground flaxseed with 2.5 tablespoons of water. Let it sit for five minutes until it thickens. For butter, use a plant-based alternative like coconut oil or vegan butter. These swaps keep your muffins delicious and vegan-friendly. For the complete recipe, check out [Full Recipe]. We covered tasty banana muffins today. You learned how to mix ripe bananas, sugars, and other ingredients. I shared tips for perfecting your muffins and even offered fun variations. You now know the best ways to store leftovers and reheat them. Baking these muffins is an easy way to enjoy a delicious treat. With the right methods, your muffins will turn out great every time. Now, grab those ingredients and start baking!

Chocolate Chip Banana Muffins Easy and Tasty Treat

Welcome to your new favorite baking adventure! Chocolate chip banana muffins are an easy and tasty treat. In this post,

- 1 lb beef sirloin, thinly sliced against the grain - 2 cups broccoli florets - 1 cup bell peppers (red or yellow), sliced - Soy sauce (low sodium) - Oyster sauce (or alternative for vegetarian) - Sesame oil - Garlic and ginger - Cornstarch, salt, and pepper - Sesame seeds and green onions for garnish To make a tasty beef and broccoli stir fry, you need fresh ingredients. Start with one pound of beef sirloin. Slice it thin against the grain for the best texture. Next, grab two cups of broccoli florets. These add a nice crunch and color. Also, include one cup of sliced bell peppers. Red or yellow will both work well. For the pantry staples, you will want low sodium soy sauce. This gives your dish the salty kick without too much sodium. You can also use oyster sauce, or choose a vegetarian option. Lastly, sesame oil adds a nutty flavor that really enhances the dish. For seasoning and garnishes, use fresh garlic and ginger for a strong flavor. You will need cornstarch to help thicken the sauce. Don’t forget salt and pepper to taste. Sesame seeds and sliced green onions make great garnishes, adding both flavor and a nice look to your plate. For the full recipe, check out the complete details. This mix of fresh and pantry ingredients creates a stir fry that is quick and full of flavor. To start, take your beef sirloin and slice it thinly against the grain. This helps it stay tender. In a large bowl, add the beef, 1 tablespoon of cornstarch, a pinch of salt, and pepper. Mix it well to coat the beef evenly. Let it marinate for about 15 minutes. This step adds flavor to the beef. Heat 1 tablespoon of olive oil in a large skillet or wok over medium-high heat. Once hot, add the marinated beef in a single layer. Cook for 2-3 minutes until browned on each side, then remove it from the pan and set it aside. In the same skillet, add 3 cloves of minced garlic and 1 tablespoon of minced ginger. Stir-fry for about 30 seconds until fragrant. Next, add 2 cups of broccoli florets and 1 cup of sliced bell peppers. Stir-fry for about 3-4 minutes. You want the broccoli to be bright green and tender-crisp. Return the beef to the skillet. Pour in 3 tablespoons of soy sauce, 2 tablespoons of oyster sauce, and 1/4 cup of beef broth. Stir everything together and cook for another 2-3 minutes. This helps the sauce thicken slightly. Drizzle 1 tablespoon of sesame oil over the stir fry and toss to combine. Taste the dish and adjust the seasoning with extra salt and pepper if needed. For a beautiful presentation, serve the stir fry hot. Garnish with sesame seeds and sliced green onions. For the complete recipe, refer to the Full Recipe section. To make a great stir fry, heat is key. High heat helps cook the beef quickly. It gives a nice sear and keeps the meat tender. If your pan isn't hot enough, the meat will steam instead of sear. This can make it chewy, not tasty. Avoid crowding the pan. When you add too much food, it lowers the heat. This makes the food cook unevenly. Cook in batches if you need to. This way, everything gets that nice char and flavor. You can add more veggies to your stir fry. Try carrots, snow peas, or mushrooms. They add color and crunch. You can also swap out the beef. Chicken, shrimp, or tofu work well too. For sauce, you can experiment. Try adding hoisin sauce for sweetness or chili paste for heat. Mixing soy sauce with rice vinegar adds a nice tang. These small changes can make a big difference! A good skillet or wok is a must. A non-stick surface helps food release easily. A wide pan allows for even cooking. If you can, invest in a well-made wok. It can handle high heat and gives great results. For utensils, use a spatula or wooden spoon. These tools help toss the food without damaging the pan. Tongs are also useful for flipping the beef. With the right tools, your cooking will be easier and more fun! For a full recipe of this dish, check the [Full Recipe]. {{image_2}} For a vegetarian twist, you can swap beef for tofu or tempeh. Both options soak up flavors well. Tofu is soft, while tempeh has a nutty taste. When making the sauce, replace oyster sauce with more soy sauce. You can add a splash of vegetable broth for depth. This keeps the dish rich and tasty without meat. To make this dish gluten-free, choose tamari instead of soy sauce. Tamari offers a similar taste but without gluten. Always check labels on sauces and broth. Some brands add gluten as a filler. Ensure all other ingredients, like cornstarch, are gluten-free. Fresh ingredients like broccoli and bell peppers are naturally gluten-free. This way, everyone can enjoy this meal. If you love heat, try adding chili flakes or fresh peppers. Start with a small amount to test the spice level. You can always add more later. Balance the heat by adjusting other seasonings. Use less soy sauce if you add hot elements. This keeps the dish flavorful without overwhelming your taste buds. To keep your beef and broccoli stir fry fresh, store leftovers in an airtight container. Make sure to cool it to room temperature before sealing. This helps prevent moisture buildup, which can make the food soggy. You can keep it in the fridge for up to three days. Freezing stir fry is simple. First, let it cool completely. Then, portion it into freezer-safe bags. Try to remove as much air as possible to prevent freezer burn. When you’re ready to eat, thaw it overnight in the fridge. Reheat in a pan over medium heat. Add a splash of water or broth to keep it moist. Meal prep makes busy days easier. You can make this stir fry ahead of time and store it for quick meals. Pair it with cooked rice or noodles for a complete dish. Store them separately to keep the noodles or rice from getting mushy. This way, you will have tasty meals ready to go! For more details, check out the Full Recipe. To enhance the flavors, try these tips: - Use fresh ginger and garlic for a stronger taste. - Add a splash of rice vinegar for acidity. - Toss in some red pepper flakes for a spicy kick. - Include a sprinkle of sesame seeds at the end for crunch. - Marinate the beef longer for deeper flavor. These small changes can make a big difference in your dish. Yes, you can use frozen broccoli. Frozen broccoli is quick and easy. It is picked at peak freshness and frozen right away. This keeps nutrients intact. However, fresh broccoli has a better texture and taste. If you use frozen, cook it for a shorter time to avoid mushiness. Beef and broccoli stir fry pairs well with: - Steamed jasmine rice - Fried rice for added flavor - Noodles for a heartier meal - A side of spring rolls for a crunchy bite These sides create a balanced and satisfying meal. Beef and broccoli stir fry lasts about 3 to 4 days in the fridge. Store it in an airtight container. Always cool it down before placing it in the fridge. If it smells off or looks weird, it’s best to toss it. Yes, beef and broccoli stir fry can be healthy. It offers a good balance of protein and vegetables. Beef provides iron and protein, while broccoli adds fiber and vitamins. Keep an eye on your sauce choices. Low-sodium soy sauce helps keep sodium levels in check. This dish can fit well into a balanced diet. For the full recipe, check out the Beef & Broccoli Delight. Beef and broccoli stir fry is a tasty and simple meal to make. You learned about the fresh ingredients needed and how to cook them in a few easy steps. I shared tips on stir-fry techniques and how to store leftovers. You can even try vegetarian or gluten-free options to suit your needs. This dish is both enjoyable and customizable. Enjoy making it at home and sharing it with family!

Beef and Broccoli Stir Fry Quick and Tasty Recipe

Are you ready to whip up a quick and tasty Beef and Broccoli Stir Fry? This dish is perfect for

To make a great vegetarian chili, you need some key ingredients. Here’s what you’ll need: - 1 tablespoon olive oil - 1 medium onion, diced - 2 cloves garlic, minced - 1 bell pepper (any color), diced - 2 carrots, diced - 2 stalks celery, diced - 1 zucchini, diced - 1 can (15 oz) black beans, drained and rinsed - 1 can (15 oz) kidney beans, drained and rinsed - 1 can (15 oz) diced tomatoes (with juice) - 1 cup corn kernels (fresh or frozen) - 2 tablespoons chili powder - 1 teaspoon cumin - 1 teaspoon smoked paprika - Salt and pepper to taste - 2 cups vegetable broth - Chopped fresh cilantro and avocado for garnish These ingredients give your chili a nice balance of flavors and textures. The beans add protein, while the veggies bring color and crunch. You can enhance your chili with a few extra ingredients. Consider adding: - Chopped jalapeños for heat - A squeeze of lime for brightness - Cornmeal for thickness - A splash of soy sauce for umami These additions can elevate your dish. Feel free to mix and match based on your taste. This chili is great for many diets. It is vegan and gluten-free. If you have specific needs, here are some tips: - Use low-sodium broth for less salt. - Swap beans for lentils for a different texture. - Add quinoa for extra protein and fiber. Customizing your chili can help it fit your dietary needs. Enjoy the process and make it your own! Check out the [Full Recipe] for more details. Start by gathering all your ingredients. This makes cooking easier. You will need: - 1 tablespoon olive oil - 1 medium onion, diced - 2 cloves garlic, minced - 1 bell pepper (any color), diced - 2 carrots, diced - 2 stalks celery, diced - 1 zucchini, diced - 1 can (15 oz) black beans, drained and rinsed - 1 can (15 oz) kidney beans, drained and rinsed - 1 can (15 oz) diced tomatoes (with juice) - 1 cup corn kernels (fresh or frozen) - 2 tablespoons chili powder - 1 teaspoon cumin - 1 teaspoon smoked paprika - Salt and pepper to taste - 2 cups vegetable broth - Chopped fresh cilantro and avocado for garnish Dice all the veggies into small, even pieces. This helps them cook evenly. Prepare your garlic by mincing it. Minced garlic adds great flavor. Heat the olive oil in a large pot over medium heat. Once hot, add the diced onion. Sauté it for about 3 to 4 minutes. You want it to turn translucent. Next, stir in the minced garlic. Cook it for about a minute. It should smell amazing! Now, add the bell pepper, carrots, and celery. Sauté these for about 5 to 7 minutes. You want them to soften up nicely. Add the diced zucchini and cook for another 2 to 3 minutes. Once all the veggies are tender, it’s time to add the beans and tomatoes. Stir in the black beans, kidney beans, and diced tomatoes with their juice. Now, toss in the corn, chili powder, cumin, and smoked paprika. Mix everything well to blend the flavors. Pour in the vegetable broth and bring the mixture to a boil. Once boiling, reduce the heat. Let it simmer for 25 to 30 minutes, stirring from time to time. This allows the flavors to come together. Season it with salt and pepper to your liking. When your chili is done, it should look colorful and thick. Serve it hot in bowls. For a nice touch, garnish each bowl with fresh cilantro and a few slices of avocado. You can pair your chili with crusty bread or serve it over rice. This makes for a complete and hearty meal. Enjoy the warmth and comfort of this delicious dish! For the full recipe, check out the details above. To make your chili really pop, use fresh herbs. Cilantro adds brightness. You can also squeeze in lime juice for a zesty kick. Adding a splash of soy sauce or liquid smoke gives depth. Experiment with different chili powders for unique heat levels. A pinch of sugar can balance the acidity of tomatoes too. One big mistake is not seasoning enough. Taste as you cook and adjust spices. Overcooking the vegetables can make them mushy. Keep them slightly crisp for a good texture. Also, don’t skip the simmering step. It melds flavors and improves taste. Lastly, avoid using too much salt early on. You can always add more later. Chili tastes great with crusty bread or rice. You can also serve it with cornbread for a cozy meal. For a fresh touch, add a side salad with light dressing. If you want a drink, try a cold beer or sparkling water. These pairings make your meal fun and filling. For more details on the recipe, check the Full Recipe. {{image_2}} You can mix and match beans to make your chili unique. Black beans add creaminess, while kidney beans provide a firm bite. Pinto beans offer a mild flavor. You can even use lentils for a twist! Each bean brings its taste and texture, so feel free to experiment. For a fun mix, try using three types of beans in one pot. This variation makes your chili richer and more colorful. Want more heat? You can add jalapeños or serrano peppers to the pot. Fresh peppers give a bright, spicy kick. If you prefer, try using crushed red pepper flakes for a warm glow. You can also add a splash of hot sauce at the end for extra oomph. Remember, spice levels can change with cooking time. Taste as you go, and adjust to your liking. Grains can make your chili heartier and add great texture. Quinoa is a fantastic choice; it cooks quickly and absorbs flavors well. If you want a chewier bite, try adding barley or farro. Just add them in step five with the beans and tomatoes. This will ensure they cook properly. Grains will keep you full and make the chili even more satisfying. If you want the full recipe, check it out! After enjoying your chili, let it cool down. Place it in a clean, airtight container. This helps keep it fresh. You can store it in the fridge for about 3 to 5 days. Just make sure the lid is on tight. This way, the flavors stay rich and tasty. When you're ready to eat the leftover chili, take it out of the fridge. Pour it into a pot and heat over medium heat. Stir the chili every few minutes. This helps it heat evenly. You can also use the microwave. Just put it in a bowl and cover it. Heat it for about 2 to 3 minutes, stirring halfway. Check that it's hot all the way through before eating. To keep chili longer, freezing is a great option. First, make sure it's completely cool. Then, pour it into a freezer-safe bag or container. Leave some space at the top, as it will expand when frozen. Label the bag with the date. You can freeze it for up to 3 months. When you're ready to eat, thaw it in the fridge overnight. Then, reheat as mentioned above. This way, you can enjoy your hearty chili later! For the full recipe, check out the main section. Vegetarian chili is packed with nutrients. It is full of fiber from beans and vegetables. Fiber helps with digestion and keeps you full. This dish also has vitamins from fresh veggies. Plus, it is low in fat, making it heart-friendly. You get protein from beans, which helps build muscles. Eating vegetarian chili can support a healthy lifestyle and weight. To spice up your chili, add fresh or dried chili peppers. You can also try hot sauce or cayenne pepper. For a smoky kick, mix in chipotle peppers. Just remember to start with a small amount. You can always add more if you want more heat. Taste as you go to find the right spice level for you. Yes, you can definitely use fresh vegetables. Fresh veggies can add great flavor and crunch. Just chop them up and toss them in the pot. Use about the same amount as in the recipe. For example, use two medium tomatoes instead of canned. Fresh corn can replace canned corn, too. Just make sure to cook them long enough to soften. Vegetarian chili lasts about 4 to 5 days in the fridge. Store it in an airtight container to keep it fresh. If you want to eat it later, you can freeze it. Frozen chili can last for up to 3 months. Just remember to label it with the date before freezing. When you're ready to eat, thaw it in the fridge overnight. You can find the full recipe for hearty rainbow vegetarian chili above. Enjoy your cooking! This chili recipe is packed with flavors and options. We covered essential and optional ingredients for the best taste. You learned the step-by-step cooking process and tips to avoid common mistakes. We explored variations, including different beans and grains for texture. Lastly, we showed how to store and reheat leftovers properly. Try making this chili your way. Enjoy a warm bowl of goodness soon!

Vegetarian Chili Hearty and Flavorful Comfort Dish

If you’re craving a warm and comforting dish, this vegetarian chili is for you. Packed with flavor and healthy ingredients,

- 1 cup frozen mixed berries (strawberries, blueberries, raspberries) - 1 ripe banana - ½ cup coconut milk (or your choice of milk) This berry smoothie bowl starts with simple and fresh ingredients. The frozen mixed berries give it a burst of flavor and color. They are easy to find and pack a ton of nutrients. I often use a mix of strawberries, blueberries, and raspberries. The ripe banana adds natural sweetness and creaminess. Coconut milk makes the bowl rich and smooth, but you can use any milk you prefer. - 1 tablespoon honey or maple syrup (optional) - ¼ cup granola - 2 tablespoons chia seeds - Fresh berries for topping (whole) - Sliced banana for garnish - Coconut flakes (unsweetened) for garnish You can sweeten the smoothie bowl with honey or maple syrup. This step is optional. If you want a crunch, add granola on top. Chia seeds are a great source of fiber and omega-3s, so I always include them. For decoration, top the bowl with fresh berries and sliced banana. Unsweetened coconut flakes add a nice touch too. These toppings not only enhance flavor but also make the bowl look beautiful. For the full recipe, check out the detailed instructions. - Step 1: Blend the ingredients Start by adding the frozen mixed berries, ripe banana, and coconut milk to a blender. If you want some sweetness, add honey or maple syrup. Blend until the mixture is smooth and creamy. If it feels too thick, just add a little more milk. It should be easy to pour. - Step 2: Pour into a bowl Once blended, carefully pour the smoothie into a bowl. Use the back of a spoon to smooth the top. This creates a nice base for your toppings. - Step 3: Add granola and chia seeds Now, sprinkle granola and chia seeds evenly over the top. This adds a crunchy texture and boosts nutrition. Make sure to cover the smoothie base well. - Step 4: Garnish with fresh fruits and coconut flakes Finally, decorate your smoothie bowl with fresh berries and sliced bananas. For an extra touch, sprinkle some coconut flakes on top. This makes your bowl look colorful and inviting. Enjoy creating your Berry Bliss Smoothie Bowl! For the complete recipe, check out the Full Recipe section. To get the right thickness, start with milk. If your smoothie is too thick, add more milk. If it’s too thin, add more frozen fruit. Frozen berries work best because they make the smoothie cold and thick. They also give a nice texture. The way you arrange your toppings matters. Start with granola, then add chia seeds. Place fresh berries and sliced banana on top. Finish with coconut flakes. This makes your bowl look pretty and colorful. Choosing the right bowl is key too. A wide, shallow bowl works best. This gives you more space for toppings. Plus, it looks great when you serve it. {{image_2}} You can change your smoothie bowl by using different berry mixes. For a Blueberry Banana Smoothie Bowl, blend 1 cup of frozen blueberries with 1 ripe banana. Add ½ cup of your favorite milk. This blend tastes sweet and creamy. It packs a good amount of antioxidants. Another option is the Strawberry Acai Bowl. Use 1 cup of frozen strawberries and 1 packet of acai puree. Blend them with ½ cup of almond milk for a refreshing twist. Top with sliced strawberries and granola for crunch. You can swap out some ingredients to make your smoothie bowl unique. Try using plant-based milk options like almond milk or oat milk. These can change the taste and texture. For toppings, consider other nuts or seeds. Instead of chia seeds, use hemp seeds or sliced almonds. They provide a different flavor and extra crunch. Get creative and find your favorite mix. For the full recipe, you can refer to the Berry Bliss Smoothie Bowl. To keep your smoothie fresh, store any leftover smoothie mix in an airtight container. Place it in the fridge. You can use it within 24 hours for the best taste. If you let it sit longer, it may separate. Just stir it before you drink. Fresh fruits and toppings need care too. Store fruits in the fridge. Keep them dry to avoid mold. Use a paper towel to absorb moisture in the container. This keeps them fresh. For toppings like granola, store them in a cool, dry place. Use a sealed bag or jar to keep them crunchy. Prepping smoothie packs makes mornings easy. Combine the frozen mixed berries, banana, and any extras in bags. Seal them and label with the date. You can freeze these packs for up to three months. When you’re ready to blend, just add coconut milk and blend. Safely freezing berries is important. Wash and dry your berries first. Then, spread them on a baking sheet. This prevents them from clumping. After they freeze, transfer them to bags. Store them in the freezer for smoothies or snacks. They can last up to six months. For the full recipe, check out the Berry Bliss Smoothie Bowl. How long can I store a smoothie bowl in the fridge? You can store a berry smoothie bowl in the fridge for about 1 to 2 hours. After that, it may lose its nice texture. The longer it sits, the more it separates. Can I make this smoothie bowl in advance? Yes, you can make the smoothie part ahead of time. Blend your ingredients and store the mix in the fridge for up to 2 hours. Add toppings right before serving for the best look and taste. Is the smoothie bowl healthy? Yes, a berry smoothie bowl is very healthy! It contains fruits, healthy fats, and fiber. This bowl is rich in vitamins and minerals. It can help you feel full and satisfied. How many calories are in a berry smoothie bowl? A typical berry smoothie bowl has about 300 to 400 calories. This can vary based on toppings and sweeteners. If you want to lower calories, skip the honey or use less granola. For the full recipe, check the ingredients listed above. This blog post covered how to make a delicious berry smoothie bowl. We explored key ingredients, optional toppings, and step-by-step instructions to create this treat. I shared tips on achieving the perfect texture and made suggestions for fun variations. You can easily store leftovers and even prep for later. Smoothie bowls are not just tasty; they can be healthy too. Now, get creative and enjoy making your own unique berry smoothie bowl! It's simple and fun, so dive in and blend up something amazing.

Berry Smoothie Bowl Fresh and Flavorful Recipe

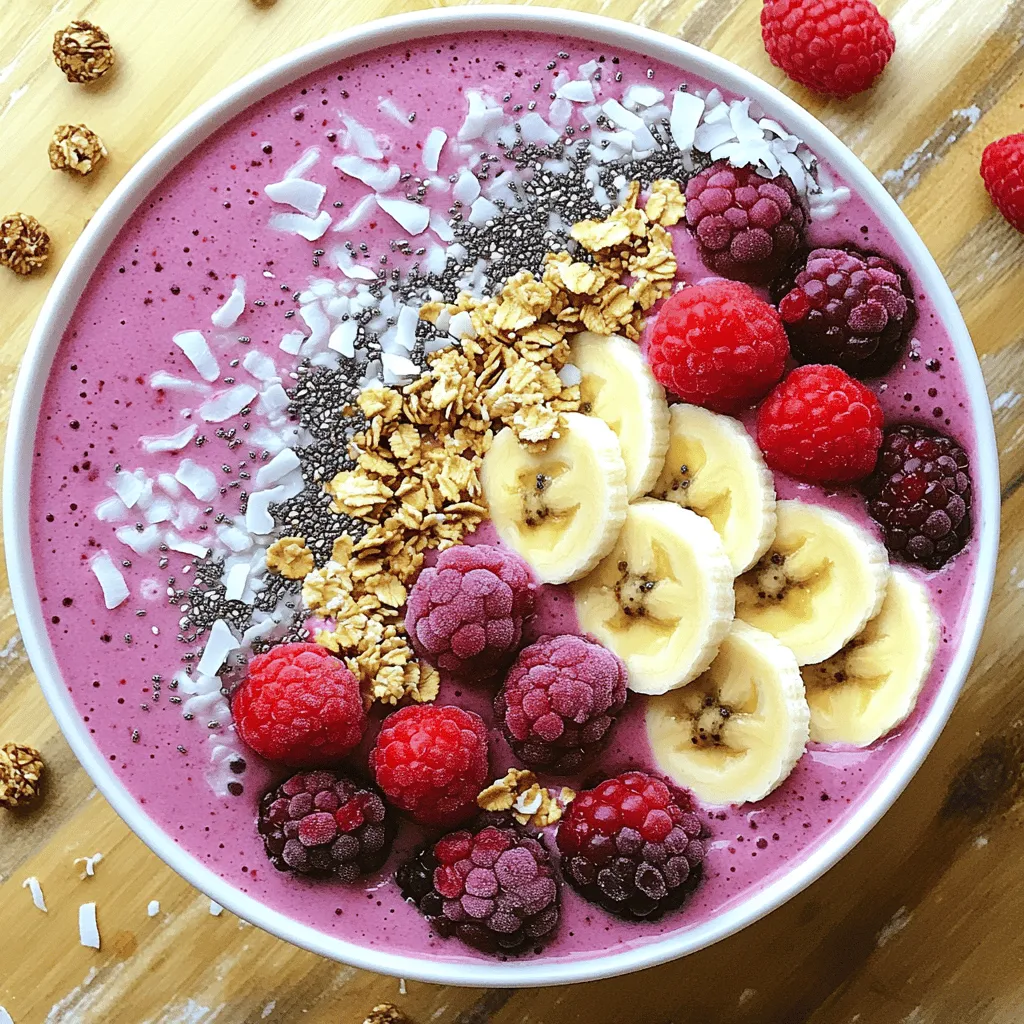
Looking for a quick, delicious breakfast? You’ll love this Berry Smoothie Bowl! It’s fresh, fruity, and super easy to make.

To make Cinnamon Sugar Tortilla Chips, you need a few simple items. Here’s what you will need: - 6 small flour tortillas - 1/4 cup granulated sugar - 1 tablespoon ground cinnamon - 1/4 cup unsalted butter, melted - Pinch of salt These ingredients work together to create a sweet and crunchy treat. The flour tortillas form the base, while the cinnamon and sugar provide that delightful sweetness. The melted butter helps the sugar mixture stick and adds richness. You can customize your chips with fun toppings and dips. Here are some tasty ideas: - Melted chocolate - Whipped cream - Fresh fruit like strawberries or bananas - Creamy yogurt These extras can enhance the flavor and make your snack even more enjoyable. You can mix and match to find your favorite combinations. Knowing the nutritional info can help you enjoy these chips mindfully. Here’s a rough idea of what one serving (about 8 chips) contains: - Calories: 200 - Total Fat: 10g - Saturated Fat: 6g - Carbohydrates: 28g - Sugar: 10g - Protein: 2g This snack is sweet and tasty but should be enjoyed in moderation. Pair it with a healthy dip for a balanced treat. For the full recipe, check out the details above and get ready to bake! First, you need to heat your oven. Set it to 350°F (175°C). While it warms up, grab a baking sheet. Line it with parchment paper. This helps the chips not stick. It also makes cleanup easy. Next, let’s make the sweet mix. In a small bowl, combine the granulated sugar, ground cinnamon, and a pinch of salt. Mix it well with a spoon. This blend will make your chips taste amazing. Set it aside for now. Now, take your flour tortillas. Brush both sides with melted butter. Make sure they are evenly coated. Then, sprinkle the cinnamon sugar mixture on both sides. Use enough to cover them well. Stack the tortillas on top of each other and cut them into 8 wedges, like triangles. Place these wedges on your baking sheet. Make sure they lay in a single layer without overlapping. Bake your tortilla chips in the oven for about 10-12 minutes. Watch them closely. They should turn golden brown and get crisp. Once done, take them out and let them cool. They will continue to crisp up as they cool. Serve them warm or at room temperature. For the full recipe, check the previous section. Enjoy your delightful crunchy snack! To get the best crunch, always use fresh tortillas. Dried-out tortillas won't crisp well. Brush both sides of the tortillas with melted butter. This adds flavor and helps the cinnamon sugar stick. When you cut the tortillas, make sure they are evenly sized. This ensures they bake at the same rate. Lastly, bake them in a single layer on the sheet. If they overlap, they will steam instead of crisp. One common mistake is using too much cinnamon sugar. A light sprinkle works best for flavor and crunch. Avoid baking them too long. Keep an eye on them to prevent burning. Don't overcrowd the baking sheet. This can lead to uneven cooking. Also, skip the parchment paper if you want a sticky mess! It helps to keep the chips from sticking. These chips are great on their own, but you can pair them with dips. Try serving them with chocolate sauce or fruit salsa. You can also enjoy them with whipped cream for a sweet treat. For a fun twist, serve them with ice cream. The warm chips contrast nicely with the cold ice cream. Don't forget to share with friends! They will love this crunchy snack. {{image_2}} You can give your cinnamon sugar tortilla chips a twist. Try adding a splash of vanilla extract to the melted butter. This adds a sweet, warm flavor. Another option is to mix in a pinch of nutmeg with the cinnamon. This spice brings a rich depth to the chips. You can also experiment with other spices like cardamom or ginger for a fun kick. The fun doesn’t stop with just cinnamon sugar! You can top these chips with chocolate or caramel sauce. If you love fruit, try fresh strawberries or bananas on top. For a creamy dip, consider whipped cream or yogurt. These toppings make the chips a treat for any gathering. If you're looking for healthier options, there are easy swaps. Use whole wheat tortillas instead of regular ones. This adds fiber and nutrients. You can also use coconut oil instead of butter. For a sugar substitute, try using honey or maple syrup. These changes can help make your snack a little lighter. For the full recipe, check out the original instructions. To keep your leftover tortilla chips fresh, store them in an airtight container. This will help prevent moisture from making them soggy. Line the bottom with paper towels to absorb any excess moisture. You can keep them at room temperature for up to two days. If you want them to last longer, consider refrigerating them. Just remember to bring them back to room temp before eating. If your chips lose some crunch, you can easily revive them. Preheat your oven to 350°F (175°C). Spread the chips in a single layer on a baking sheet. Bake for about 5-7 minutes. This quick heat will bring back their crispy texture. Avoid the microwave, as it can make them chewy. For longer storage, you can freeze your tortilla chips. Place them in a freezer-safe bag, making sure to remove as much air as possible. Properly stored, they can last for up to three months. When you’re ready to eat them, bake them directly from the freezer at 350°F (175°C) until warm and crisp. Enjoy your tasty snack anytime! Yes, you can use an air fryer for these chips. Air fryers cook food quickly and can make your chips crispy. To do this, brush the tortillas with butter and sprinkle them with cinnamon sugar. Then, arrange them in a single layer in the air fryer. Cook at 350°F for about 5-7 minutes. Watch them closely to avoid burning. The result will be a crunchy snack that’s just as tasty. To reheat your leftover chips, use an oven or an air fryer. This keeps them crispy. Preheat your oven to 350°F. Spread the chips on a baking sheet and heat for about 5 minutes. If using the air fryer, set it to 350°F and heat for about 3-4 minutes. Avoid microwaving them, as this makes chips soft. You can find pre-made cinnamon sugar tortilla chips at many grocery stores. Look in the snack aisle or near the bakery. Some health food stores may also carry them. If you want a unique flavor, check local specialty shops or online retailers. You can also make them at home using the full recipe for a fresher taste. Cinnamon sugar tortilla chips are easy and fun to make. We covered the right ingredients, step-by-step baking, and useful tips for the best results. You can add your favorite flavors or toppings to make them unique. Don't forget how to store and reheat your chips for the next time. With these simple steps, you can enjoy a tasty snack any day. Try these out in your kitchen, and you’ll see how great they turn out!

Cinnamon Sugar Tortilla Chips Delightful Crunchy Snack

If you love crunchy snacks, wait until you try these Cinnamon Sugar Tortilla Chips! They are simple to make and

The main components of this dish are simple yet flavorful. You need boneless chicken breast, fresh vegetables, soy sauce, and sesame oil. The chicken gives protein and a nice texture. Fresh vegetables bring color and crunch to the meal. Using fresh vegetables is key to great taste. When veggies are fresh, they hold their flavor and nutrients. This makes your stir fry not just tasty, but healthy too. The best choices include bell peppers, broccoli, sugar snap peas, and carrots. Each adds unique flavors and textures. You can enhance the stir fry with optional ingredients. Adding nuts like cashews or almonds gives a nice crunch. You might also use different sauces, like teriyaki or oyster sauce, for extra flavor. For dietary restrictions, consider swapping the chicken for tofu or shrimp. These options still give great taste and texture. If you want to avoid gluten, you can use gluten-free soy sauce. This way, everyone can enjoy the meal! Start by marinating the chicken. In a medium bowl, mix sliced chicken with soy sauce and a pinch of salt and pepper. Let it sit for 15 minutes. This helps the chicken soak up all those tasty flavors. Next, heat sesame oil in a large skillet or wok over medium-high heat. Add the marinated chicken. Cook it until golden brown and done, about 5 to 7 minutes. This method gives the chicken a nice sear, locking in the juices. Now, it's time to stir fry the vegetables. In the same skillet, add minced garlic and grated ginger. Sauté for about 30 seconds until you smell that great aroma. Then, toss in the sliced bell pepper, broccoli florets, sugar snap peas, and julienned carrots. Stir fry these for about 4 to 5 minutes. You want them to be tender-crisp, not mushy. This keeps your dish bright and fresh. Once the vegetables are ready, return the cooked chicken to the skillet. Toss everything together. If you prefer a thicker sauce, add the cornstarch mixture now. Stir for about 1 to 2 minutes until the sauce thickens. Finish with chopped green onions. Taste your stir fry and adjust the seasoning with extra soy sauce, salt, and pepper if needed. Serve it hot over cooked rice or noodles. This makes for a delightful meal! For the complete cooking process, check out the Full Recipe. To stir fry well, you need the right heat. Use a large skillet or a wok. Heat it on high. This helps the chicken and veggies cook fast. The goal is to keep them crisp. If the heat is too low, they will steam instead. If you face sticking, use enough oil. Sesame oil works great for flavor. If your food starts to burn, reduce the heat. Stir constantly to avoid any sticking. If you notice uneven cooking, cut your veggies to similar sizes. This helps them cook evenly. Adding more flavor is easy. You can use garlic and ginger, which brighten any dish. Soy sauce adds umami and saltiness. For a spicy kick, try chili flakes or sriracha. Mix in a bit of honey for sweetness. This balances the salty taste. Always taste as you cook. Adjust salt and sweetness as needed. Adding a splash of vinegar can also heighten flavors. Don't forget to garnish with green onions or sesame seeds for extra flair. For the full recipe, check out the detailed cooking steps. {{image_2}} You can swap chicken for many other proteins. Tofu is a great choice for a plant-based meal. It absorbs flavors well. Use firm or extra-firm tofu for the best texture. Beef is another option. Thinly slice flank or sirloin steak. Cook it just like the chicken, but reduce the cooking time to about 3-5 minutes. Shrimp cooks fast, so add it last. Cook shrimp for 2-3 minutes until they turn pink and opaque. Always adjust cooking times based on the protein. This way, you ensure everything is cooked just right. Feel free to get creative with vegetables! Seasonal veggies add fresh flavors. In spring, use asparagus or snap peas. In summer, swap in zucchini or bell peppers. In autumn, add sweet potatoes or butternut squash. Winter is great for carrots and Brussels sprouts. Pair bold flavors with milder ones. For example, combine spicy chili peppers with sweet bell peppers. This mix keeps your stir fry exciting and tasty. You can find the full recipe [here](#)
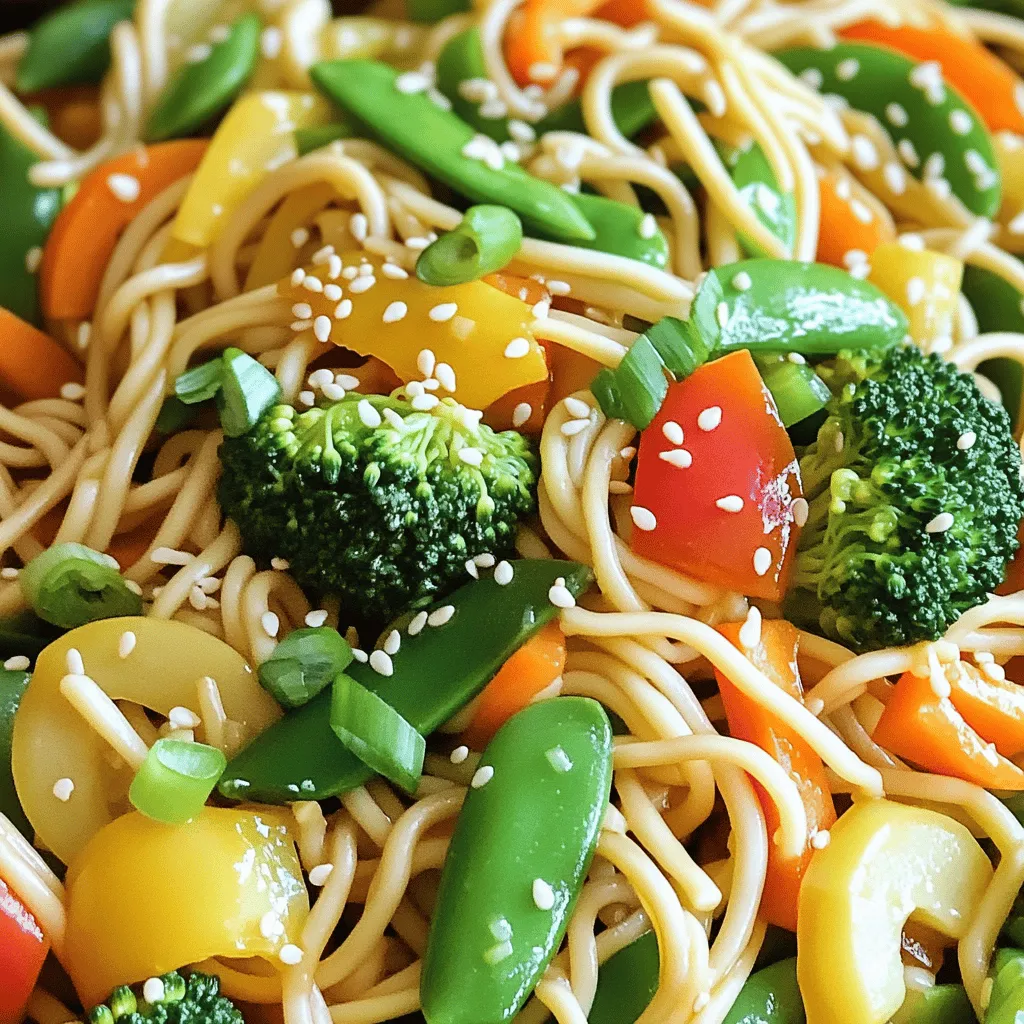
. After you enjoy your chicken and vegetable stir fry, store the leftovers right away. You want to keep them fresh. Here are some best practices: - Cool it down: Let the stir fry cool at room temperature for about 30 minutes. - Use airtight containers: Choose containers that seal well to prevent air from spoiling your food. - Label and date: Write the date on each container. This helps you know when you made it. Your stir fry can last in the fridge for about 3 to 4 days. If you want to keep it longer, consider freezing it. In the freezer, it can last up to 2-3 months. When you’re ready to eat your leftovers, reheating them properly is key. Here’s how to maintain their taste and texture: - Stovetop method: This is the best way! Heat a little oil in a pan over medium heat. Add the stir fry and cook until it’s hot. Stir it often to keep it from sticking. - Microwave method: If you’re in a hurry, use the microwave. Place your stir fry in a microwave-safe bowl. Cover it with a damp paper towel. Heat it in short bursts of 30 seconds, stirring in between. This keeps it from drying out. By following these tips, you can enjoy your chicken and vegetable stir fry even days later. For the complete cooking process, check out the Full Recipe. To make this dish gluten-free, use tamari instead of regular soy sauce. Tamari is a great choice. It has a similar taste but no gluten. You can also try coconut aminos. This option is naturally sweet and soy-free. Always check labels to ensure the products are gluten-free. Yes, you can prep this stir fry ahead of time. Marinate the chicken for flavor. You can do this the night before. Chop the vegetables and store them in the fridge. This saves time when you cook. Just remember to keep the chicken and veggies separate until cooking. White rice or brown rice works well with this stir fry. For noodles, try rice noodles or udon. To cook rice, rinse it and boil it for about 15 minutes. For noodles, follow the package instructions. This will give you a great base for your stir fry. Access the detailed recipe and cooking instructions for Chicken and Vegetable Stir Fry 🥦. You learned how to make a tasty chicken and vegetable stir fry. We covered key ingredients, like fresh veggies and chicken tips. You found ways to enhance flavors and swap ingredients for your diet. We also shared storage advice for leftovers and reheating methods. Now, you can enjoy a delicious meal anytime. Remember, stir fry offers flexibility, so have fun experimenting with your favorite flavors. Happy cooking!

Chicken and Vegetable Stir Fry Easy Flavorful Meal

Looking for a quick, tasty meal? This Chicken and Vegetable Stir Fry is perfect for you! With fresh veggies and

To make this healthy meal, gather these simple ingredients: - 1 cup rolled oats - 2 cups almond milk (or any milk of choice) - 1 apple, diced (preferably a sweet variety like Fuji or Honeycrisp) - 1 teaspoon ground cinnamon - 2 tablespoons maple syrup (or honey) - 1/4 cup Greek yogurt (optional, for creaminess) - 1/4 cup walnuts, chopped (or your favorite nuts) - A pinch of salt - Extra apple slices and cinnamon for topping Each ingredient in Apple Cinnamon Overnight Oats brings health benefits. - Rolled oats: They are high in fiber. This helps with digestion and keeps you full. - Almond milk: A low-calorie option, it is rich in vitamins and minerals. - Apples: Apples add sweetness and provide vitamins. They are also high in fiber. - Cinnamon: This spice may help lower blood sugar. It adds flavor without calories. - Maple syrup: A natural sweetener, it contains antioxidants. - Greek yogurt: This adds protein and creaminess. It’s good for your gut. - Walnuts: They are packed with healthy fats and can boost brain health. You can easily swap ingredients based on your needs: - Rolled oats: Use quick oats if you need them to soak faster. - Almond milk: Any milk works, like cow's milk or oat milk. - Apple: Any sweet apple will work, such as Gala or Granny Smith. - Maple syrup: Honey or agave syrup can replace maple syrup. - Greek yogurt: For a dairy-free option, use coconut yogurt. - Walnuts: Any nuts, like almonds or pecans, can be used. Now you have everything you need to get started on your Apple Cinnamon Overnight Oats. For the full recipe, check out the detailed instructions and enjoy a tasty and healthy meal! To make Apple Cinnamon Overnight Oats, start by gathering your ingredients. You will need rolled oats, almond milk, a diced apple, ground cinnamon, maple syrup, Greek yogurt, chopped walnuts, salt, and some extra apple slices for topping. In a medium bowl, mix the rolled oats and almond milk first. Then add the diced apple, ground cinnamon, maple syrup, and a pinch of salt. If you want creaminess, add Greek yogurt too. Stir everything well until it is nicely blended. Mixing is key to great overnight oats. Make sure you break up any clumps of oats. A sturdy spoon or spatula works best. You want every oat to soak up the milk and flavors. Mixing ensures you get a tasty bite every time you dig in. Take your time with this step. It’s worth it for the perfect blend of flavors! After mixing, divide the mixture into jars or containers. Use ones with lids for easy storage. Top each jar with chopped walnuts for crunch. Seal the jars and place them in the fridge. Let the oats sit overnight, or at least for four to six hours. This resting time helps the oats absorb the liquid. When ready to eat, stir the oats again. If they are too thick, add a splash of almond milk. Finish with apple slices and a sprinkle of cinnamon. Enjoy this healthy meal! For the full recipe, check the earlier section. To make the best overnight oats, start with rolled oats. They soak well and keep a nice texture. Use a good ratio of oats to liquid. I suggest one part oats to two parts milk. This ensures they stay creamy, not too runny. Mix all your ingredients well before refrigerating. Stirring lets the flavors blend. If you want more creaminess, add Greek yogurt. It makes the oats rich and smooth. Also, remember to add a pinch of salt. This helps balance the sweetness. You can boost the flavor of your overnight oats with extras. Try adding nuts for crunch. Chopped walnuts work great, but almonds or pecans are tasty too. Dried fruits like raisins or cranberries add sweetness and chewiness. Want a spice kick? Mix in nutmeg or ginger. You can also swap maple syrup for honey or agave. These small changes can make a big difference. Avoid using instant oats. They can turn mushy and lose texture. Stick to rolled oats for the best outcome. Don’t skip the soaking time. This step is key for the oats to absorb the milk and flavors. Also, watch your liquid amount. Too much can make your oats soupy. If it’s too thick, you can always add milk before eating. Lastly, remember to seal your containers well. This keeps the oats fresh and tasty overnight. For a full recipe, check out the Apple Cinnamon Overnight Oats 🥣. {{image_2}} You can play with flavors in your apple cinnamon overnight oats. Want a nutty twist? Add some almond butter or peanut butter to the mix. This will make it creamy and rich. For a fruity touch, toss in some berries or sliced bananas. These fruits add a pop of color and flavor. You can even swap apples for pears if you like. Each fruit brings a new taste to the dish. If you need a gluten-free option, use certified gluten-free oats. Most rolled oats are safe, but always check the label. You want to ensure there is no cross-contamination. Almond milk is naturally gluten-free, which is great for this recipe. The other ingredients, like maple syrup and nuts, are also gluten-free. This way, everyone can enjoy a tasty breakfast without worry. To make your overnight oats vegan, simply skip the Greek yogurt. Instead, add a bit more almond milk or use coconut yogurt for creaminess. You can also use agave syrup instead of honey. Both sweeteners will keep the taste sweet and enjoyable. With these simple swaps, you keep the dish healthy and plant-based. You can enjoy a delicious meal that fits your diet perfectly. Try these variations to keep your apple cinnamon overnight oats exciting. Each option allows you to explore new flavors while sticking to the healthy basics of the recipe. For the full recipe, check the previous section. To keep your Apple Cinnamon Overnight Oats fresh, store them in the fridge. Use airtight containers or jars. This helps keep out air and moisture, which can spoil your oats. Make sure the lids fit well. You can also keep them in the back of the fridge, where it's coolest. You can store your prepared overnight oats in the fridge for up to five days. After that, they may lose their taste and texture. If you notice any off smells or changes, it's best to toss them. Always check before you eat. When you want to enjoy your leftovers, you can eat them cold or warm them up. If you choose to reheat, place them in a microwave-safe bowl. Heat in short bursts, stirring in between, until warm. If the oats seem thick, add a splash of milk to loosen them. Enjoy them fresh and tasty! For the full recipe, check the earlier section. Apple Cinnamon Overnight Oats can stay fresh for up to five days in the fridge. Store them in airtight containers to keep out air and moisture. The oats will soak up the flavors and get softer over time. If you notice any odd smells or changes in color, throw them away. Yes, you can use instant oats, but the texture will change. Instant oats cook faster and become mushy more quickly than rolled oats. If you prefer a creamier mix, instant oats work well. Just adjust the liquid a bit, as they absorb more. Toppings can take your oats to the next level. Here are some great options: - Fresh fruit: berries, banana slices, or more diced apples - Nuts: almonds, pecans, or more walnuts for crunch - Seeds: chia seeds or hemp seeds for added nutrition - Sweeteners: a drizzle of honey or more maple syrup, if you like it sweet - Spices: a sprinkle of nutmeg or more cinnamon for extra flavor Mix and match based on your taste! This article covered how to make Apple Cinnamon Overnight Oats. We explored the key ingredients, their benefits, and substitutions. The step-by-step instructions guide you to the perfect dish. Useful tips help avoid common mistakes and improve flavors. Finally, variations and storage tips ensure you enjoy these oats longer. Remember, each bowl can be a new adventure. Try different flavors and toppings to make it yours. With practice, you'll master the art of overnight oats. Enjoy your tasty, healthy breakfast daily!

Apple Cinnamon Overnight Oats Healthy Simple Meal

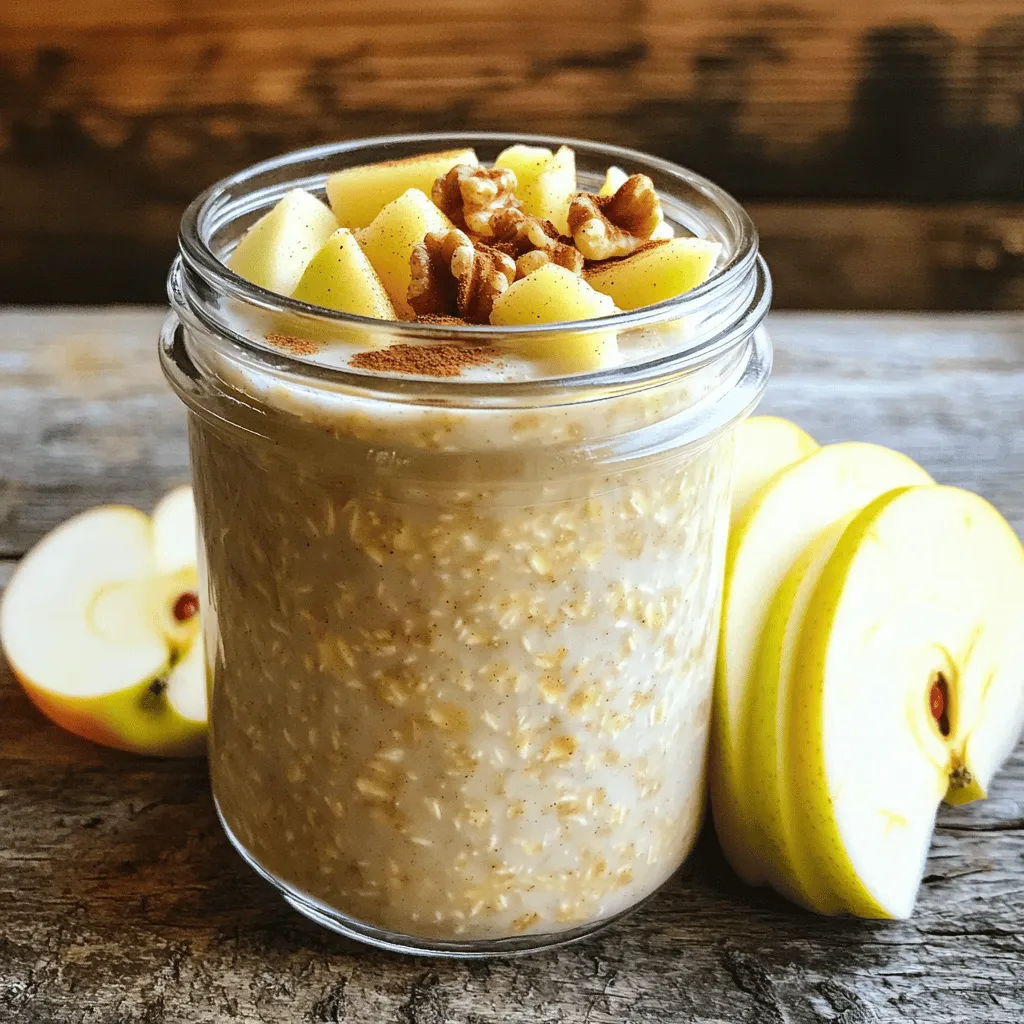
Start your day right with Apple Cinnamon Overnight Oats! This simple, healthy meal combines delicious flavors with vital nutrients. In

Older posts
Newer posts
← Previous Page1 … Page51 Page52 Page53 … Page83 Next →

dsad

© 2025 easycookingbite • Built with GeneratePress

Our Policies

  • Copyright Policy
  • Cookie Policy
  • GDPR Policy
  • Privacy Policy
  • Disclaimer
  • Terms Of Use

More Information

  • Home
  • About
  • Contact
  • Appetizers
  • Dessert
  • Dinner
  • Drinks
©2025, easycookingbite About Back To Top