Skip to content
DisclaimerTerms Of UseGDPR PolicyCookie Policy

easycookingbite

  • Home
  • Drinks
  • Appetizers
  • Dinner
  • Dessert
  • About
  • Contact
  • Privacy Policy
DisclaimerTerms Of UseGDPR PolicyCookie Policy

Lily

- 1 can (15 oz) chickpeas, rinsed and drained - 2 tablespoons olive oil - 1 teaspoon smoked paprika - 1/2 teaspoon cumin - Salt and pepper to taste - 4 cups mixed greens (spinach, arugula, romaine) - 1 cup cherry tomatoes, halved - 1 cucumber, diced - 1/4 red onion, thinly sliced - 1 avocado, sliced - 2 tablespoons tahini - 1 tablespoon lemon juice - Fresh herbs (parsley or cilantro) for garnish - Baking sheet - Mixing bowls - Whisk for the dressing The crispy chickpea salad is a fun dish to make. It is simple and packed with flavor. First, you need chickpeas. I use a can of chickpeas because they save time. Rinse and drain them well. You also need olive oil to help the spices stick. Smoked paprika adds a rich, warm flavor. Cumin gives it a nice touch. Don’t forget salt and pepper for taste. For the salad, I love using mixed greens. Spinach, arugula, and romaine are great choices. Cherry tomatoes add sweetness, while diced cucumber brings crunch. Thinly sliced red onion adds a bit of zing. Avocado is a must for creaminess. The tahini dressing ties it all together. It has a nutty flavor and pairs well with lemon juice. This simple dressing is easy to make with just a whisk. Gather these ingredients and tools, and you are ready to create this tasty salad. Check out the Full Recipe for step-by-step instructions. - First, preheat your oven to 400°F (200°C). This step is crucial for crispiness. - Next, take a can of chickpeas. Rinse and drain them well. In a bowl, mix the chickpeas with 2 tablespoons of olive oil. Add 1 teaspoon of smoked paprika, 1/2 teaspoon of cumin, and some salt and pepper to taste. Stir until all chickpeas are covered in the mix. - Spread the seasoned chickpeas on a baking sheet. Make sure they are in a single layer. This helps them cook evenly. - Bake them for about 25 to 30 minutes. Halfway through, take them out and stir. This stirring helps them get crispy all over. Keep an eye on them; you want them golden brown and crunchy. - While the chickpeas bake, prepare your salad base. In a large bowl, add 4 cups of mixed greens, 1 cup of halved cherry tomatoes, 1 diced cucumber, and 1 thinly sliced red onion. Toss them together gently. - Now, make the dressing. In a small bowl, whisk together 2 tablespoons of tahini, 1 tablespoon of lemon juice, a pinch of salt, and about 1 tablespoon of water. This will help thin it out. Adjust the taste as you like. - Once the chickpeas are done and have cooled for a bit, add them to the salad. - Drizzle the tahini dressing over the salad and toss it all together. Make sure everything is nicely coated. - For a beautiful finish, top it with sliced avocado and fresh herbs before serving. This adds color and flavor to your dish. For the full recipe, check the [Full Recipe]. Enjoy your delicious crispy chickpea salad! To get the best crunch from your chickpeas, start by draining and drying them well. After rinsing, lay them on a clean kitchen towel. Pat them dry to remove excess moisture. This step helps them crisp up in the oven. If you have time, let them sit for a bit to dry completely. Oven times may vary based on the model. Check your chickpeas around the 20-minute mark. If they aren’t golden yet, give them a few more minutes. Remember, every oven is different, so keep an eye on them. Stir halfway through for even cooking. You can boost the flavors in your crispy chickpea salad by adding spices. Try garlic powder, cayenne pepper, or even a hint of curry powder. These can add nice depth to your dish. You can also mix in other ingredients like bell peppers or radishes for extra crunch and color. If tahini isn’t your favorite, consider using a yogurt-based dressing. A simple vinaigrette made with olive oil, vinegar, and herbs can work wonders too. Experiment until you find what suits your taste best! This salad pairs well with proteins like grilled chicken or shrimp. You can also serve it with grains like quinoa or farro for a hearty meal. Mixing different textures makes the dish exciting. For a fun presentation, serve the salad in bowls, layering the ingredients. You can also use mason jars for an appealing grab-and-go option. Remember, how you present food can make it even more enjoyable! For the complete dish, check the Full Recipe! {{image_2}} You can make this salad even more exciting by switching up the legumes. Try black beans or lentils instead of chickpeas. Both pack a punch of protein and taste great. You can also add seasonal vegetables for fresh flavors. Think of adding bell peppers, zucchini, or corn. These veggies bring color and crunch to your plate. Make sure all the ingredients you choose are gluten-free. Most chickpeas and fresh vegetables are naturally gluten-free, but check labels just to be safe. If you want to add grains, quinoa or brown rice work well. Both give a nice texture and are gluten-free. For a Mediterranean vibe, add feta cheese or olives. Feta gives a creamy, salty taste, while olives add a briny kick. You can also mix in different herbs and spices. Oregano, basil, or dill can brighten your salad. These flavors will transport you to a sunny Mediterranean patio. For more details, check the [Full Recipe]. To store your crispy chickpea salad, use airtight containers. This keeps the salad fresh. Place the chickpeas in a separate container. They stay crispy longer that way. The salad will last in the fridge for about 3 days. However, the chickpeas may lose some crunch after a day. You can freeze chickpeas if you have extras. Spread them on a baking sheet and freeze until firm. After that, transfer them to a freezer bag. They can stay frozen for up to 3 months. When you’re ready to eat, let them thaw in the fridge overnight. Reheat in the oven to get them crispy again. To keep your salad fresh, keep ingredients separate until serving. This helps prevent sogginess. Add the dressing just before you eat. Also, store cut vegetables in their own container. This keeps them crisp and flavorful until you are ready to enjoy your meal. Yes, you can use dried chickpeas. First, soak them in water overnight. This helps them soften. After soaking, drain and rinse them. Then, boil them in fresh water for about one hour. Check for doneness; they should be tender. You can then season and bake them like canned chickpeas. This way, you get the same crispy texture. If your chickpeas are not crispy, check a few things. First, make sure they are dry. If they are wet, they won’t crisp up. Use a clean towel to pat them dry after rinsing. Next, spread them out evenly on the baking sheet. If they are crowded, they will steam instead of bake. Lastly, ensure they cook long enough. Check them at 25 minutes, and keep baking until golden. To prepare this salad in advance, you can cook the chickpeas ahead of time. Store them in an airtight container in the fridge. You can also wash and chop your veggies. Keep the greens, tomatoes, cucumber, and onion separate until you are ready to eat. This keeps everything fresh. The dressing can be made in advance too. Just store it in a jar in the fridge. If you want to skip tahini, try these simple dressings. Mix olive oil with balsamic vinegar for a quick option. A lemon vinaigrette works well too. Just whisk together lemon juice, olive oil, salt, and pepper. Another great choice is yogurt mixed with herbs. This gives a creamy texture and fresh taste. These alternatives keep your salad exciting. For the complete recipe, you can refer to the [Full Recipe]. This crispy chickpea salad is a simple, tasty dish you can enjoy anytime. You learned about the key ingredients, like chickpeas, fresh veggies, and tahini dressing. We covered step-by-step instructions, useful tips, and fun variations to match your tastes. Remember to store leftovers correctly to keep them fresh. Whether you stick to the original recipe or add your twist, this salad can fit any meal. Enjoy making this healthy option that brings flavor and joy to your plate!

Crispy Chickpea Salad Simple and Flavorful Meal

Do you crave a healthy meal that’s both simple and bursting with flavor? Look no further than my Crispy Chickpea

To make pumpkin spice energy balls, gather these simple ingredients: - 1 cup rolled oats - 1/2 cup pumpkin puree - 1/4 cup nut butter (almond or peanut) - 1/4 cup honey or maple syrup - 2 teaspoons pumpkin spice blend - 1/4 cup chia seeds - 1/2 cup chopped nuts (walnuts or pecans) - 1/4 cup mini chocolate chips (optional) - A pinch of salt These ingredients come together to create a tasty and healthy snack. Each ingredient brings its own health perks. - Rolled oats: They provide fiber. This helps with digestion and keeps you full longer. - Pumpkin puree: It is rich in vitamins A and C. These vitamins boost your immune system. - Nuts: They add healthy fats and protein. This can help with muscle repair and keeps your energy steady. - Chia seeds: They are high in omega-3 fatty acids. This is great for heart health. Together, these ingredients make a snack that fuels your body and keeps you feeling great. For a good snack, serve about 2 to 3 energy balls per person. This amount offers a nice balance of energy without being too heavy. If you need a quick pick-me-up, feel free to enjoy more! The full recipe yields 12 to 15 energy balls, so share them with friends or keep them for later. To make pumpkin spice energy balls, gather your ingredients first. In a large mixing bowl, combine: - 1 cup rolled oats - 1/2 cup pumpkin puree - 1/4 cup nut butter (almond or peanut) - 1/4 cup honey or maple syrup Mix these until smooth and even. Next, add: - 2 teaspoons pumpkin spice blend - 1/4 cup chia seeds - 1/2 cup chopped nuts (walnuts or pecans) - 1/4 cup mini chocolate chips (optional) - A pinch of salt Stir everything together until well combined. Once mixed, use your hands to form small balls, about 1 inch in size. If the mixture sticks to your hands, wet them slightly with water or oil. This helps form perfect balls. Chilling the energy balls is key. Place them on a parchment-lined baking sheet or plate. Refrigerate for at least 30 minutes. This time allows them to firm up. Chilling also enhances the flavors, making each bite more delicious. When ready to serve, arrange the energy balls on a rustic wooden board. For a fun touch, dust them lightly with extra pumpkin spice. Garnish with a few pumpkin seeds for added flair. This makes them look inviting and tasty. Enjoy these healthy snacks anytime! When making pumpkin spice energy balls, watch for a few common mistakes. First, do not rush mixing the ingredients. A good mix ensures all flavors blend well. If your mixture seems too dry, add a bit more pumpkin puree or honey. Conversely, if it’s too wet, sprinkle in more oats. Make sure your hands are slightly damp when shaping the balls. This helps prevent sticking. You can easily change the flavor of your energy balls. If you don't like peanut butter, try almond butter. You can also swap honey for maple syrup for a vegan option. Want more crunch? Add seeds like sunflower or pumpkin. For a chocolate kick, add cocoa powder or use dark chocolate chips. These simple swaps fit different tastes and diets. To keep the energy balls from sticking to your hands, wet them with a little water or oil. This trick makes shaping them much easier. Another tip is to chill the mixture for 10 minutes before rolling. It firms up the mix and helps your hands stay clean. If you find the mixture is still hard to manage, try using a cookie scoop. This tool helps form even balls with less mess. {{image_2}} You can switch up the flavors of your pumpkin spice energy balls. Try adding cinnamon for warmth or ginger for a zesty kick. You can also use different spices like cardamom or nutmeg. If you want more crunch, add some seeds like pumpkin or sunflower. You can even toss in some dried fruits, such as cranberries or raisins. They add sweetness and chewiness to the mix. Feel free to get creative and find your favorite blend! Making this recipe vegan is easy. Just swap the honey for maple syrup, which is plant-based. For a nut-free option, use sunflower seed butter instead of nut butter. You can also leave out the chopped nuts to keep it safe for those with nut allergies. These simple swaps help everyone enjoy a tasty snack without worry. You can adapt these energy balls for different seasons. In winter, add peppermint extract for a fresh flavor. During the summer, try using coconut flakes for a tropical twist. For Halloween, make them spooky with black cocoa powder or orange food coloring. You can even decorate them with festive sprinkles for special occasions. With these ideas, you can enjoy a seasonal treat all year round! To see the full recipe, check out the details above. To keep your pumpkin spice energy balls fresh, store them in an airtight container. A glass jar or a plastic container works well. This keeps air out, which helps maintain taste and texture. You can also place a piece of parchment paper between layers if you stack them. This prevents sticking. In the fridge, these energy balls last for about one week. If you want to keep them longer, the freezer is your best friend. They can stay fresh in the freezer for up to three months. Just make sure to label the container with the date. If you want to gift these energy balls, use small treat bags or decorative boxes. Line the bottom with parchment paper to keep them safe. You can also tie a ribbon around the package for a nice touch. This makes them look great and keeps them fresh. Yes, you can substitute pumpkin puree with several alternatives: - Sweet potato puree: It has a similar texture and flavor. - Applesauce: This adds moisture and sweetness. - Butternut squash puree: It works well and is packed with nutrients. - Carrot puree: This gives a different but tasty flavor. These options can change the taste but still keep the energy balls tasty. You can tell the energy balls are ready when the mixture holds together well. It should not be too sticky or too dry. Here are some tips: - Test the mixture: Press a small amount in your hand. It should form a ball without falling apart. - Chill before forming: Refrigerate the mixture for 10 minutes to firm it up. - Adjust as needed: If it’s too sticky, add more oats or chia seeds. If it’s too dry, add a bit more nut butter or honey. These tips help you get the right texture for your energy balls. Yes, these energy balls are gluten-free. The main ingredient, rolled oats, can be gluten-free if labeled as such. Make sure to choose certified gluten-free oats to avoid any gluten contamination. This recipe is great for anyone avoiding gluten. You can enjoy these energy balls without worry! To recap, this article covers how to make tasty energy balls with simple ingredients. You learned about key components like oats, pumpkin puree, and nut butter. We explored their health benefits and serving sizes. I shared step-by-step instructions for preparation, refrigeration, and serving ideas. We also discussed tips to avoid common mistakes, ways to customize your balls, and storage methods. In conclusion, these energy balls are fun to make and great for snacks. Enjoy experimenting with flavors and sharing them with others. Your healthy treat is just a recipe away!

Pumpkin Spice Energy Balls Healthy Snack Delight

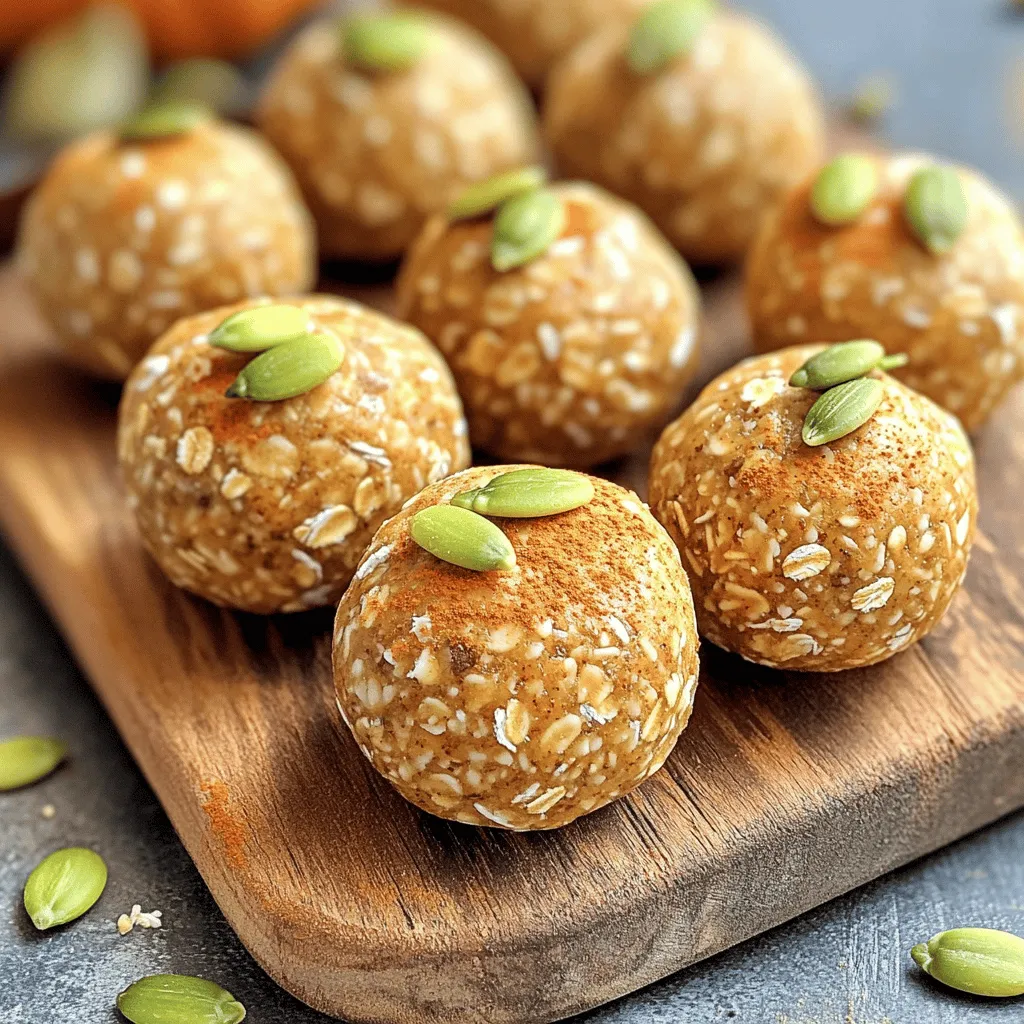
Are you looking for a tasty yet healthy snack? I’ve got just the thing! Pumpkin Spice Energy Balls combine delicious

- 1 large head of cauliflower - 1 cup all-purpose flour - 1 cup water - 1 teaspoon garlic powder - 1 teaspoon onion powder - 1 teaspoon paprika - 1 teaspoon cayenne pepper - Salt and pepper to taste - 1 cup buffalo sauce - 2 tablespoons olive oil - Optional: chopped celery and carrots for serving I love using fresh, crisp cauliflower for this recipe. It gives a great crunch. The flour and water form a nice batter. Garlic powder and onion powder add flavor without being too strong. Paprika gives a lovely color, and cayenne pepper brings the heat. Adjust the cayenne if you prefer milder bites. Salt and pepper are the finishing touches, enhancing all the flavors. Next, the buffalo sauce is what makes these bites addictive! You can use store-bought or make your own. Olive oil helps the sauce stick and adds richness. For serving, I recommend crunchy celery and carrots. They pair well with the spicy bites and add a fresh taste. You can also serve ranch or blue cheese dressing as a dip. This makes each bite even more delicious. To make these Buffalo Cauliflower Bites, you'll need some basic kitchen tools. A large mixing bowl is key for your batter. A baking sheet lined with parchment paper makes cleanup easy. A whisk helps mix the batter smoothly. Finally, a small bowl is great for mixing the buffalo sauce with olive oil. Preheat your oven to 450°F (230°C). This high heat helps the bites get crispy. You want them golden brown and crunchy on the outside. 1. First, preheat your oven to 450°F (230°C). This helps the bites cook evenly. 2. Line a baking sheet with parchment paper. This makes cleanup easy later. 3. In a large bowl, mix the flour, water, garlic powder, onion powder, paprika, cayenne pepper, salt, and pepper. Whisk until smooth. This batter will coat the cauliflower nicely. 1. Dip each cauliflower floret into the batter. Make sure it’s fully covered. 2. Place the coated florets on the baking sheet. Don’t overcrowd them. 3. Bake in the oven for 20-25 minutes. Look for a golden brown color and crispy texture. 1. While the cauliflower bakes, mix the buffalo sauce with olive oil in a small bowl. This adds flavor and richness. 2. Once the first bake is done, take the florets out. Let them cool for 5 minutes. 3. Toss the baked cauliflower in the buffalo sauce mix until they are well coated. 4. Return the sauced florets to the baking sheet. Bake for another 10-15 minutes. This step helps them caramelize. Enjoy these tasty bites right away! For a full recipe, check out the details above. To get the best crispiness, focus on your batter. Use equal parts of flour and water. Whisk them until smooth. If it's too thick, add a bit more water. A smooth batter coats the cauliflower well. For extra crunch, bake them at a high temperature. Preheat your oven to 450°F (230°C). This heat helps to create a crisp outer layer. Bake them for about 20-25 minutes first. After that, toss them in buffalo sauce and bake again for 10-15 minutes. This second bake caramelizes the sauce, giving you that crunch. To amp up the flavor, add more spices to your batter. Try smoked paprika for a deeper taste. You can also add a bit of cumin or chili powder for a kick. If you want a bold sauce, mix in some hot sauce with your buffalo sauce. For a homemade buffalo sauce, melt butter and mix it with hot sauce. You can adjust the heat by adding more or less hot sauce. This gives you control over the spice level. Garnish your Buffalo Cauliflower Bites with fresh herbs. Chopped parsley or cilantro adds a nice pop. Serve them on a platter with celery and carrots. This not only looks good, but also adds crunch. Pair your bites with dipping sauces. Ranch or blue cheese dressing works well. They balance the heat from the buffalo sauce. For a twist, try a yogurt-based sauce. It cools down the spice and adds creaminess. For the full recipe, check out the complete instructions above. {{image_2}} You can switch up how you cook buffalo cauliflower bites. An air fryer gives them a crispy texture with less oil. To use an air fryer, preheat it to 400°F (200°C). Place the coated cauliflower in a single layer. Cook for 10-12 minutes, shaking the basket halfway through. They will come out crispy and delicious! If you want a smoky flavor, try grilling them. Preheat your grill to medium heat. Brush the florets with a little oil and place them on the grill. Grill for about 8-10 minutes, turning occasionally. This method adds a great depth of flavor. If you need gluten-free options, use almond flour instead of all-purpose flour. Mix it with water and your spices to form a batter. This keeps the bites tasty and safe for gluten-sensitive folks. For vegan fans, skip the eggs and stick to the flour and water mix. Use plant-based buffalo sauce, which is easy to find. This way, you can enjoy buffalo cauliflower bites without any animal products. Buffalo sauce is a classic choice, but you can have fun with different sauces. Try BBQ sauce for a sweet twist or teriyaki for a tangy kick. Both options work well with the crispy cauliflower. You can also add toppings. Sprinkling cheese on top before the last bake adds a creamy touch. Fresh herbs like parsley or cilantro can brighten up your bites. Choose what you love, and make it your own! For the full recipe, refer to the earlier section. To keep your Buffalo Cauliflower Bites fresh, store them in the fridge. Use an airtight container to prevent sogginess. If you have a lot left, layer paper towels between the bites. This helps absorb extra moisture. They stay good for about 3 to 4 days in the fridge. When reheating, I suggest using the oven. Preheat it to 350°F (175°C). Spread the bites on a baking sheet. This way, they stay crispy. Bake for around 10 to 15 minutes. Check them often to avoid burning. You can also use an air fryer for this. Just set it to 350°F (175°C) for 5 to 7 minutes. If you want to freeze Buffalo Cauliflower Bites, let them cool first. Place them in a single layer on a baking sheet. Freeze them for about an hour to harden. Once firm, transfer them to a freezer bag. Remove as much air as possible. They can last up to 3 months in the freezer. To thaw, put them in the fridge overnight. For reheating, follow the same oven or air fryer steps as before. Enjoy these bites any time you want! How to make Buffalo Cauliflower Bites spicier? To add more heat, increase the cayenne pepper in the batter. You can also splash extra buffalo sauce on the bites after baking. I love adding hot sauce to the mix for a fiery kick that makes these bites unforgettable. Can I use frozen cauliflower florets? Yes, you can use frozen florets, but they require some prep. Thaw them, then pat them dry to remove excess moisture. This helps the batter stick better. You might need a few extra minutes in the oven for a crispy texture. What can I serve with Buffalo Cauliflower Bites? These bites pair well with veggies like celery and carrots. Dipping sauces like ranch or blue cheese dressing add delicious flavor. You can also serve them as a party snack with your favorite drinks. Caloric content per serving Each serving of Buffalo Cauliflower Bites has around 150 calories. This makes them a fun and healthier snack option compared to fried foods. Health benefits of cauliflower Cauliflower is low in calories and high in nutrients. It is rich in vitamins C and K. Plus, it has fiber that helps with digestion. Eating cauliflower can support overall health and wellness. Can I make this in advance? Yes! You can prepare the batter and coat the cauliflower ahead of time. Store it in the fridge for a few hours before baking. This allows the flavors to meld, making the bites even tastier. How to adjust for larger servings? To make more bites, simply double the recipe. Use two heads of cauliflower and adjust the batter accordingly. Just keep an eye on the baking time; larger batches may need extra time in the oven. For the full recipe, check out the complete instructions above! To make Buffalo Cauliflower Bites, you need simple ingredients and basic steps. This post covered everything from what you need to cook to storing leftovers. You learned tips for extra crunch and tasty variations. Now, you have the skills to make this dish your own. Enjoy experimenting with flavors and cooking methods. You'll impress anyone who tries your Buffalo Cauliflower Bites!

Buffalo Cauliflower Bites Tasty and Easy Snack Recipe

Looking for a tasty snack that’s easy to make? Try these Buffalo Cauliflower Bites! They give you all the bold,

- 1 cup red lentils, rinsed - 1 can (14 oz) coconut milk - 2 cups vegetable broth - 1 medium onion, diced - 2 cloves garlic, minced - 1 tablespoon grated ginger - 1 tablespoon red curry paste - 1 teaspoon ground turmeric - 1 teaspoon cumin - 1 teaspoon coriander - 1 carrot, diced - 1 red bell pepper, diced - 2 cups fresh spinach (or kale) - 2 tablespoons lime juice - Fresh cilantro, for garnish - Salt and pepper, to taste Gathering fresh ingredients makes this dish special. Red lentils are the star. They cook fast and add a rich texture. Coconut milk brings a creamy taste and a hint of sweetness. Using vegetable broth gives depth to the soup. Next, aromatics like onion, garlic, and ginger add flavor. These ingredients work together to create a great base. The spices—red curry paste, turmeric, cumin, and coriander—offer warmth and a little kick. It's important to use fresh spices for the best taste. Don’t forget the vegetables! Carrots and bell peppers add crunch and color. Spinach or kale brings in nutrients and a lovely green hue. Lime juice at the end brightens the soup. Fresh cilantro on top adds a nice touch. For the complete recipe, you can refer to the [Full Recipe]. Enjoy cooking! - Step 1: Sauté onion in oil Heat a tablespoon of oil in a large pot over medium heat. Add the diced onion. Sauté it for about five minutes. You want it to be soft and translucent. - Step 2: Add garlic and ginger Next, stir in the minced garlic and grated ginger. Cook this mix for one to two minutes. You will smell a lovely aroma as they heat up. - Step 3: Incorporate spices and cook Now, add the red curry paste, ground turmeric, cumin, and coriander. Stir well to coat the onion and garlic with spices. Cook this for one more minute to deepen the flavors. - Step 4: Combine broth and coconut milk Pour in the vegetable broth and coconut milk. Stir everything together and bring it to a simmer. This will form the base of your soup. - Step 5: Add lentils and vegetables Add the rinsed red lentils, diced carrot, and red bell pepper to the pot. Let it cook for about 20 to 25 minutes. Stir occasionally until the lentils and veggies are tender. - Step 6: Stir in spinach and season Once the soup thickens, stir in fresh spinach. Let it cook for an additional two to three minutes. Finally, remove it from the heat and add lime juice. Season with salt and pepper to taste. - Garnish with fresh cilantro Serve the soup hot and top it with fresh cilantro. This adds a bright flavor and a nice touch. - Suggestions for sides and pairings I love pairing this soup with warm naan or brown rice. These sides complement the flavors well. You could also serve a simple salad on the side for a refreshing crunch. For the full recipe, check out the detailed steps in the [Full Recipe]. Choosing the right lentils is key. I always use red lentils for this soup. They cook quickly and break down nicely. This gives the soup a creamy texture. Avoid using green or brown lentils; they take longer to cook and stay whole. Rinsing lentils is also important. This step removes dust and any small stones. It helps ensure your soup tastes clean and fresh. Just place them in a fine mesh strainer and rinse under cold water until the water runs clear. To make your soup even tastier, try adding extra spices. A pinch of cayenne can add heat. You can also use garam masala for a unique twist. These spices can deepen the flavors. For garnish, fresh herbs add brightness. Instead of cilantro, you can use parsley or mint. Both herbs give a fresh taste and a pop of color to your dish. If your soup is too thick, you can thin it out easily. Just add more vegetable broth or water. Stir well and let it heat for a few minutes. If the soup is too thin, you can thicken it. Simmer it longer to reduce the liquid. You can also blend a small portion and stir it back in. This gives a nice creaminess without changing the flavor. {{image_2}} You can change the type of lentils for this soup. Try green or brown lentils. They add a different texture and taste. You can also swap coconut milk for nut milk, like almond or cashew. This change makes the soup lighter but still creamy. If you need it gluten-free, use tamari instead of soy sauce. Most of the ingredients are already gluten-free. For vegan options, ensure your broth is vegan. This soup is naturally vegan, so you won’t need many changes. Want extra protein? Add tofu or chicken. Both options blend well with the flavors. You can also add more veggies like sweet potatoes or peas. They will add color and nutrition to your dish. Mixing in different vegetables keeps the soup fresh and exciting. For the full experience, check out the [Full Recipe](#). You can store coconut curry lentil soup in the fridge for about 4 to 5 days. To keep it fresh, use airtight containers. Glass jars or plastic containers work great for this. Make sure to let the soup cool before sealing the container. To freeze coconut curry lentil soup, let it cool completely. Then, pour it into freezer-safe bags or containers. Leave some space at the top, as the soup will expand when frozen. For thawing, place the soup in the fridge overnight. Reheat it on the stove over low heat until warm. Stir often to keep it smooth. For easy meal prep, chop your veggies and store them in the fridge. You can also rinse the lentils ahead of time. Leftover soup can be a base for many meals. Use it as a sauce over rice or quinoa. You can add cooked chicken or tofu for protein, too. Let your creativity shine! For the full recipe, check out the detailed instructions above. How long does coconut curry lentil soup last? Coconut curry lentil soup lasts about 4 to 5 days in the fridge. Store it in an airtight container. If you freeze it, it can last up to 3 months. Can I make this soup in advance? Yes, you can make this soup ahead of time. It tastes even better after the flavors meld. Just store it in the fridge and reheat when ready to serve. What can I use instead of red curry paste? If you don’t have red curry paste, use yellow curry paste or a mix of spices. Combine turmeric, cumin, and a bit of chili powder for a similar flavor. Can I use fresh lentils instead of dried? You can use fresh or canned lentils. If using canned lentils, add them later in cooking. This way, they don’t turn mushy. What are the health benefits of lentils? Lentils are high in protein and fiber. They help keep you full and support digestion. They are also rich in iron and folate. How many calories are in coconut curry lentil soup? One serving of coconut curry lentil soup has about 300 calories. This makes it a hearty and healthy meal option. For the full recipe with exact measurements, check out the [Full Recipe]. This blog post covers the key ingredients and steps to make coconut curry lentil soup. You will need red lentils, coconut milk, and fresh vegetables. We talked about cooking tips and how to adjust flavors. You can also get creative with substitutions to suit your taste. In closing, this recipe is simple to follow and offers many variations. It is perfect for anyone looking for a healthy, hearty meal. Enjoy making this soup and sharing it with others!

Coconut Curry Lentil Soup Hearty and Flavorful Meal

Are you craving a warm, cozy meal that’s both hearty and easy to make? Coconut Curry Lentil Soup is the

- 2 boneless, skinless chicken breasts - 8 ounces fettuccine pasta - 1 tablespoon olive oil - 3 cloves garlic, minced - 1 cup heavy cream - 1 cup freshly grated Parmesan cheese - ½ teaspoon Italian seasoning - Salt and pepper to taste - Fresh parsley, chopped (for garnish) Choose fresh chicken. Look for bright, pink meat. Avoid any with dark spots. Fresh fettuccine tastes best, but dried works too. Use real Parmesan cheese, not pre-grated. It melts better and adds more flavor. Select heavy cream for richness. Light cream won’t give the same creamy texture. Fresh garlic enhances taste. Whole cloves last longer than pre-minced. You can swap chicken for shrimp or tofu for a vegetarian option. If fettuccine isn’t available, use penne or spaghetti instead. For a lighter version, try half-and-half instead of heavy cream. Nutritional yeast can replace Parmesan for a vegan touch. If you lack Italian seasoning, use dried basil and oregano instead. Start by gathering all your ingredients. This makes cooking easier and more fun. You need chicken, pasta, garlic, cream, and cheese. Make sure you have salt and pepper ready too. Boil water in a large pot. Add salt to the water. Once it boils, add 8 ounces of fettuccine. Cook until the pasta is al dente, about 8-10 minutes. Reserve one cup of pasta water before draining. Set the pasta aside for later. Season two chicken breasts with salt, pepper, and Italian seasoning. Heat one tablespoon of olive oil in a large skillet over medium-high heat. Cook the chicken for about 6-7 minutes on each side. Check with a meat thermometer; it should read 165°F. Once cooked, let the chicken rest for a few minutes before slicing it into strips. In the same skillet, add three minced garlic cloves. Sauté for about one minute until fragrant. Then, pour in one cup of heavy cream. Let it simmer for 2-3 minutes. Gradually whisk in one cup of freshly grated Parmesan cheese. Mix until the sauce is creamy. If it’s too thick, add some of the reserved pasta water. Add the drained fettuccine to the Alfredo sauce. Toss until the pasta gets coated well. Place the sliced chicken on top and mix gently. Serve the dish right away. Enjoy your delicious Chicken Alfredo! For the full recipe and more tips, check out the [Full Recipe]. To get that creamy Alfredo sauce just right, focus on the cream and cheese. Start with heavy cream; it makes the sauce rich. Whisk in grated Parmesan cheese slowly. This helps it melt well. If your sauce gets too thick, don't worry! Add a bit of the reserved pasta water. This water adds flavor and keeps the sauce smooth. Cooking can get busy, but timing makes it easy. While the pasta cooks, focus on the chicken. Season it and cook it in the same skillet. This saves time and adds flavor to your chicken. Once the chicken is done, let it rest. This way, it stays juicy. Use this time to make your sauce. You’ll have everything ready at once! Want to kick up the flavor? Use fresh ingredients! Fresh garlic brings out a strong taste. You can also add a pinch of nutmeg to the sauce. It adds warmth and depth. For a twist, try spinach or sun-dried tomatoes. They add color and taste. Remember to check the seasoning. Adjust salt and pepper to your liking. Small changes make a big difference! For the full recipe, check the previous sections! {{image_2}} You can enjoy a vegetarian version of Chicken Alfredo. Simply swap the chicken for sautéed mushrooms or zucchini. Use the same Italian seasoning for flavor. You can also add spinach or broccoli for a pop of color and nutrients. This way, you still get a creamy and rich dish without meat. Want to boost the taste? Consider adding cooked bacon or pancetta for a savory twist. Sun-dried tomatoes add a nice tang. You can also use fresh herbs like basil or thyme. Mixing in peas or artichokes can give your dish a fun surprise. Feel free to mix and match to find your favorite combo. While fettuccine is classic, other pasta shapes work too. Try penne or rigatoni for a fun bite. Spaghetti also makes a tasty option, though it may not hold the sauce as well. For a gluten-free choice, use rice pasta. Each pasta brings a unique texture and experience to your Alfredo dish. After enjoying your Chicken Alfredo, let it cool. Place it in an airtight container. This keeps it fresh for up to three days in the fridge. If you want to save it longer, consider freezing. To reheat, place your Chicken Alfredo in a pot over low heat. Stir it gently to avoid burning. You can add a splash of cream or pasta water to help it become creamy again. Heat it until warm. If you freeze your Chicken Alfredo, use a freezer-safe container. It can last up to three months. When you’re ready to eat, thaw it in the fridge overnight. Reheat it slowly on the stove, adding liquid as needed. Always check if it tastes good before serving! To make Classic Chicken Alfredo, follow these steps: 1. Cook 8 ounces of fettuccine in boiling salted water. 2. Season 2 boneless chicken breasts with salt, pepper, and Italian seasoning. 3. Heat 1 tablespoon of olive oil in a skillet. 4. Cook the chicken for 6-7 minutes on each side. 5. Remove the chicken and slice it. 6. Sauté 3 minced garlic cloves in the same skillet. 7. Pour in 1 cup of heavy cream and simmer. 8. Whisk in 1 cup of grated Parmesan until creamy. 9. Toss the drained pasta in the sauce and add the chicken. For more details, check the Full Recipe. Chicken Alfredo comes from Italy. It began as a simple dish called Fettuccine Alfredo. The dish features fettuccine pasta with butter and cheese. Italian chef Alfredo di Lelio created it in the early 1900s. Americans later added chicken for protein, making it a favorite dish. Yes, you can use low-fat ingredients. Swap heavy cream for half-and-half or whole milk. Use reduced-fat cheese instead of regular Parmesan. The sauce may not be as rich, but it will still taste good. Yes, Chicken Alfredo is great for meal prep. Cook and store the chicken and pasta separately. Keep the sauce in a sealed container. Reheat everything together when you're ready to eat. This way, it stays fresh and tasty. Many sides pair well with Chicken Alfredo. Here are some ideas: - Garlic bread - Steamed broccoli - Caesar salad - Roasted vegetables These options add color and flavor to your meal. You can find the full recipe for Classic Chicken Alfredo in this article. It includes detailed steps and tips for perfecting this creamy delight. In this post, we explored the key ingredients for Chicken Alfredo and their quality tips. You learned to cook the pasta and chicken and make a creamy sauce. I shared tricks to enhance flavor and achieve perfect sauce consistency. We discussed variations, storage methods for leftovers, and answered common questions. With these steps and tips, you can make a delicious Chicken Alfredo easily. Enjoy cooking and sharing your dish with others!

Classic Chicken Alfredo Creamy Comfort Food Delight

Welcome to the world of Classic Chicken Alfredo, where creaminess meets comfort! If you crave a dish that warms your

For your lemon blueberry muffins, gather these ingredients: - 1 ½ cups all-purpose flour - 1 teaspoon baking powder - ½ teaspoon baking soda - ½ teaspoon salt - ½ cup unsalted butter, softened - ¾ cup granulated sugar - 2 large eggs - 1 teaspoon vanilla extract - Zest of 1 large lemon - ½ cup fresh lemon juice (about 2 lemons) - 1 cup fresh blueberries (or frozen, if preferred) - 1 tablespoon turbinado sugar (for topping) Choosing the best ingredients makes a big difference. For blueberries, pick plump, firm berries. Look for a deep blue color without any green or red spots. Fresh lemons should feel heavy for their size. The skin should be bright and smooth. This helps ensure your muffins are bursting with flavor. If you need to swap ingredients, here are some ideas: - Use gluten-free flour for a gluten-free option. - Replace butter with coconut oil or applesauce for a dairy-free version. - For a lower sugar alternative, try using a sugar substitute like monk fruit or stevia. Feel free to get creative while keeping the balance of flavors! If you want more details, check out the Full Recipe. 1. Preheat your oven to 375°F (190°C). This helps the muffins bake evenly. 2. Line a 12-cup muffin tin with paper liners or grease it lightly. This keeps muffins from sticking. 3. In a mixing bowl, whisk together the flour, baking powder, baking soda, and salt. Set this aside for later. 4. In a large bowl, cream the softened butter and sugar with an electric mixer. Mix until it is light and fluffy, about 3-4 minutes. 5. Add the eggs one at a time. Mix well after each addition. Then stir in the vanilla extract and lemon zest. 6. Gradually add the dry flour mixture into the wet mixture. Alternate with the fresh lemon juice. Start and end with the flour. Mix just until combined to prevent overmixing. 7. Gently fold in the blueberries. Be careful not to break them apart. 8. Divide the batter evenly among the muffin cups. Fill each cup about ¾ full. 9. Sprinkle a pinch of turbinado sugar over each muffin for a nice crunch. 10. Bake for 18-20 minutes. A toothpick inserted into the center should come out clean. 11. Allow muffins to cool in the tin for 5 minutes. Then transfer them to a wire rack to cool completely. When mixing, always start with the wet ingredients. Creaming the butter and sugar first makes a soft base. Adding eggs one by one ensures they mix in evenly. When combining dry and wet, alternate between them. This keeps the batter smooth. Mix just enough to combine. Overmixing can lead to tough muffins. To check if your muffins are done, insert a toothpick into the center. If it comes out clean, they are ready. Look for a golden-brown top and a springy feel. If they seem wet or gooey, bake a few minutes longer. Remember, every oven is different, so keep an eye on them. To make light and fluffy muffins, follow these steps: - Cream Butter and Sugar: Beat the softened butter with sugar until fluffy. This adds air and makes the muffins rise. - Don’t Overmix: Mix the dry and wet ingredients until just combined. Overmixing makes muffins tough. - Room Temperature Ingredients: Use room temperature eggs and butter. They blend better and help with rising. To keep your muffins fresh: - Airtight Containers: Place muffins in a sealed container. This helps maintain moisture. - Room Temperature: Store in a cool, dry place for up to three days. - Freezing: For longer storage, freeze muffins. Wrap each muffin in plastic wrap and place them in a freezer bag. They last up to three months. Serve your lemon blueberry muffins in fun ways: - Lemon Glaze: Drizzle with a simple lemon glaze for extra sweetness. - With Drinks: Pair with tea or coffee for a delightful breakfast or snack. - Garnish: Add a dusting of powdered sugar or a slice of lemon for extra flair. Try these tips to enhance your lemon blueberry muffin experience! For the full recipe, check [Full Recipe]. {{image_2}} You can easily adapt this recipe for gluten-free or vegan diets. For gluten-free muffins, swap all-purpose flour with a gluten-free blend. This blend often includes rice flour, tapioca starch, and potato starch. Make sure the blend has xanthan gum to help bind the muffins. For a vegan version, replace the eggs with flax eggs. Mix one tablespoon of ground flaxseed with three tablespoons of water. Let it sit for a few minutes until it thickens. Use a plant-based butter to replace the traditional butter. These changes keep the muffins delicious and fluffy. You can enhance the taste by adding nuts or chocolate. Chopped walnuts or pecans add a nice crunch. Stir in about half a cup of chopped nuts into the batter. If you love chocolate, try adding chocolate chips. About three-quarters of a cup of dark chocolate chips works well. They melt slightly, adding a rich flavor. You can switch blueberries for other fruits based on the season. Raspberries and strawberries are great options. Use the same amount of fruit as the blueberries. Raspberries add a tart flavor, while strawberries bring sweetness. Adjust the sugar amount if needed, based on the fruit's sweetness. This way, you can enjoy a new muffin each season. For the full recipe, check out the Zesty Lemon Blueberry Bliss Muffins 🫐 section. Each muffin has around 160 calories. They contain about 7 grams of fat, 23 grams of carbs, and 2 grams of protein. The fat mainly comes from butter, while the carbs come from sugar and flour. This balance makes them a tasty treat without being too heavy. Blueberries are full of antioxidants. They help protect your cells from damage. They also have vitamins that support your immune system. Lemons are high in vitamin C, which is good for your skin and helps you stay healthy. Together, they make these muffins not just tasty, but also good for you! You can cut down on sugar by using less or switching to a sugar substitute. For lower fat, try using applesauce instead of butter. You can also use Greek yogurt for added moisture without the fat. These swaps keep the muffins delicious while making them a bit healthier. Check the Full Recipe for more tips! How to avoid overmixing when making muffin batter? To avoid overmixing, mix just until combined. Start with the dry ingredients. Then, add the wet ingredients slowly. Use a spatula or wooden spoon for folding. This helps keep the batter light. Remember, some lumps are okay! Overmixing makes muffins tough. How long can lemon blueberry muffins be kept in the fridge? Lemon blueberry muffins can last for about a week in the fridge. Store them in an airtight container. This keeps them fresh and moist. You can also freeze them for up to three months. Just wrap each muffin tightly in plastic wrap before freezing. What can I do if my muffins turn out dense or dry? If your muffins are dense, check your mixing method. Overmixing can cause this problem. For dry muffins, you may need more wet ingredients next time. Add a splash of milk or an extra egg. You can also try reducing the baking time slightly. You’ve learned how to make delicious lemon blueberry muffins. We covered the right ingredients, including tips for selecting fresh produce and possible swaps. The step-by-step instructions guide you from mixing to baking. I shared helpful tricks for storing and serving your muffins, and we explored tasty variations to try. Remember, fresh ingredients make a big difference in taste. With these tips, you can create fluffy muffins that everyone will love. Happy baking!

Lemon Blueberry Muffins Flavorful and Easy Recipe

Lemon blueberry muffins are a delightful treat you can’t resist! I’ll guide you through an easy recipe that brings bright

When making honey garlic chicken thighs, you need some simple, fresh ingredients. Here’s what you’ll need: - 4 boneless chicken thighs - 1/3 cup honey - 3 cloves garlic, minced - 2 tablespoons soy sauce (low sodium recommended) - 1 tablespoon sesame oil - 1 teaspoon grated ginger - 1 teaspoon red pepper flakes (to taste) - Salt and pepper to taste - 1 tablespoon fresh cilantro, chopped (for garnish) - Sesame seeds (for garnish) These ingredients come together to create a sweet and savory dish that is hard to resist. Honey gives the chicken a rich sweetness, while garlic adds a punch of flavor. Soy sauce and sesame oil bring in some umami, and ginger offers a warming spice. The red pepper flakes add a kick, but you can adjust them to fit your taste. Using fresh cilantro and sesame seeds as a garnish makes the dish look beautiful. This dish is not only tasty but also easy to prepare. You can find the full recipe in the article, ensuring you have everything you need to make this meal a hit. - In a bowl, mix honey, minced garlic, soy sauce, sesame oil, grated ginger, red pepper flakes, salt, and pepper. This creates a rich and sticky marinade. - Put the chicken thighs into a resealable bag or a shallow dish. Pour the marinade over the thighs. Make sure each piece is coated well. - For the best flavor, marinate the chicken for at least 30 minutes. You can also marinate it for up to 4 hours for an even bolder taste. - First, preheat your oven to 400°F (200°C). This ensures even cooking. - Next, take the chicken from the marinade. Let any extra marinade drip off. Place the thighs on a baking sheet lined with parchment paper or a lightly greased dish. - Pour any leftover marinade over the chicken. Bake for about 25-30 minutes. The chicken should be cooked through with an internal temperature of 165°F (75°C). - To get a nice caramelized finish, broil the chicken for 2-3 minutes. Keep a close watch to avoid burning. - Once done, let the chicken rest for 5 minutes. This helps keep it juicy. - For a fresh touch, garnish with chopped cilantro and sesame seeds before serving. This adds flavor and makes the dish look great! Check out the Full Recipe for more details on making this dish. When choosing chicken thighs, you can pick between bone-in and boneless. Bone-in thighs have more flavor and stay juicy. Boneless thighs cook faster and are easier to eat. Next, think about skin-on versus skinless. Skin-on thighs give a crispy texture and added flavor. Skinless thighs are leaner and can be great for a lighter meal. To get maximum flavor, marinate your chicken for at least 30 minutes. If you have time, marinate for up to 4 hours. The honey and garlic will soak into the meat. Adjust spice levels by adding more or fewer red pepper flakes. This lets you control how spicy your dish becomes. If you prefer a milder taste, start with less and add more later. You can bake or grill the chicken thighs. Baking is easy and keeps the kitchen clean. Preheat your oven to 400°F (200°C) for the best results. If you choose to grill, keep an eye on the chicken. Grilling adds a smoky flavor that many love. Either way, use a meat thermometer to check the internal temperature. The chicken should reach 165°F (75°C) to be safe to eat. {{image_2}} You can use chicken breasts instead of thighs. Chicken breasts cook faster, so check them often. They are lean and still tasty with the honey garlic sauce. If you want a plant-based option, try tofu or tempeh. Press the tofu to remove extra water. Cut it into cubes for even cooking. Marinate it just like the chicken for full flavor. Feel free to tweak the sauce to your taste. Add red pepper flakes for a spicy kick or adjust the honey for more sweetness. If you want a unique twist, add citrus like lime or orange juice. This adds brightness to the dish. You can also mix in soy sauce or hoisin for extra umami flavor. Pair your honey garlic chicken thighs with simple side dishes. Rice or steamed vegetables work well. For a twist, make a honey garlic glaze to drizzle on the sides. This adds more flavor and looks great on the plate. Check out the Full Recipe for more ideas to elevate your meal. To store leftovers, let the chicken cool first. Place it in an airtight container. This keeps it fresh for up to three days. When reheating, use an oven or stovetop. This method helps keep the chicken moist. Heat it until the internal temperature reaches 165°F. You can also microwave it, but be careful of drying it out. If you want to freeze chicken thighs, wrap them tightly in plastic wrap. Then place them in a freezer bag. This helps prevent freezer burn. You can freeze them for up to three months. When you’re ready to use them, thaw in the fridge overnight. This keeps the chicken safe. After thawing, cook the chicken as you normally would. Enjoy your meal with the same great flavor! I suggest marinating chicken thighs for at least 30 minutes. For deeper flavor, you can marinate them for up to 4 hours. This lets the flavors soak in and makes the meat tender. Yes, you can use chicken breasts. They cook faster than thighs, so check them at around 20 minutes. The taste will be less rich since thighs have more fat. Adjust cooking time to avoid dry chicken. I love serving these thighs with steamed rice or quinoa. Roasted vegetables like broccoli or carrots also pair well. A fresh salad can add a nice crunch. You can also try mashed potatoes for a cozy meal. The chicken is fully cooked when it reaches an internal temperature of 165°F (75°C). Use a meat thermometer to check the thickest part of the thigh. This ensures it is safe to eat and juicy. This article shared easy steps to make honey garlic chicken thighs. We covered key ingredients, marinating, and baking tips. You learned how to select the best chicken and adjust flavors. You also discovered fun variations and storage tips. In closing, enjoy experimenting with this dish. Trust in your skills and have fun in the kitchen. Happy cooking!

Honey Garlic Chicken Thighs Flavorful and Easy Meal

Looking for a quick meal that bursts with flavor? Honey Garlic Chicken Thighs are your answer! This dish combines sweet

To make a delicious creamy tomato basil soup, gather these ingredients: - 2 tablespoons olive oil - 1 medium onion, chopped - 3 cloves garlic, minced - 1 can (28 oz) crushed tomatoes - 4 cups vegetable broth - 1 teaspoon sugar - Salt and pepper to taste - 1 cup heavy cream (or coconut cream for a dairy-free option) - 1 cup fresh basil leaves, chopped - Optional: ½ teaspoon red pepper flakes for added heat These ingredients create a rich, comforting soup that warms the soul. The olive oil adds depth, while the onion and garlic build a strong flavor base. Crushed tomatoes give the soup its classic taste. Vegetable broth brings in a savory note, and sugar balances the acidity. The heavy cream makes the soup creamy and rich, while fresh basil adds a bright, herbal touch. If you like a bit of heat, red pepper flakes can spice things up. This combination of flavors makes for a simple yet delightful dish. For the full recipe, refer to the details above. Each ingredient plays a key role in creating a tasty soup you'll love. 1. In a large pot, heat 2 tablespoons of olive oil over medium heat. 2. Add 1 medium onion, chopped, and sauté until soft, about 5 minutes. 3. Stir in 3 cloves of minced garlic and cook for 1 minute. 4. Add 1 can (28 oz) of crushed tomatoes to the pot. 5. Pour in 4 cups of vegetable broth and 1 teaspoon of sugar. 6. Season with salt and pepper to taste. 7. Bring the mixture to a simmer and let it cook for about 20 minutes. I love this step because it fills the kitchen with a wonderful aroma. The flavors meld together, creating a rich base for the soup. 1. Remove the pot from heat and let it cool slightly. 2. Using an immersion blender, puree the soup until smooth. You can also use a regular blender in batches. 3. Return the pureed soup to low heat in the pot. 4. Stir in 1 cup of heavy cream, or coconut cream for a dairy-free option. Blending is key here! It transforms the chunky mixture into a silky smooth soup. The cream adds richness and makes it even more comforting. 1. Add 1 cup of fresh basil leaves, chopped, to the pot. 2. Stir well to combine and taste the soup. Adjust seasoning if needed. 3. For serving, garnish each bowl with fresh basil leaves and a swirl of cream. For presentation, consider serving with crusty bread on the side. This soup looks beautiful and tastes even better. Check out the Full Recipe for more details! To boost the taste of your creamy tomato basil soup, try these simple tips. First, add a pinch of sugar. This helps balance the acidity of the tomatoes. You can also mix in a dash of balsamic vinegar for a richer flavor. If you want more heat, sprinkle in some red pepper flakes. Using fresh herbs makes a big difference. Fresh basil has a bright taste that dried basil lacks. Crush the leaves before adding them to release their oils. If you use dried herbs, add them earlier in cooking. They need time to release their flavor. Achieving the right consistency is key to a great soup. If your soup is too thick, add more vegetable broth. If it’s too thin, let it simmer longer to reduce. Stir it often to prevent sticking. For blending, an immersion blender works best. It allows you to blend right in the pot. If you use a standard blender, let the soup cool first. Blend in small batches to avoid spills. Pair your soup with crusty bread. It’s perfect for dipping and adds nice texture. A simple grilled cheese sandwich also makes a great side. For garnishing, use fresh basil leaves on top. A drizzle of cream adds a nice touch, too. You can even sprinkle some grated cheese for a savory finish. These small details make your dish look and taste amazing. Enjoy your creamy tomato basil soup! For the full recipe, check out Creamy Tomato Basil Bliss. {{image_2}} To make a vegan creamy tomato basil soup, swap out the heavy cream. You can use coconut cream or cashew cream instead. Both add a rich texture without dairy. For a flavor boost, try adding nutritional yeast. This gives a cheesy note without any animal products. You can also add a splash of lemon juice for brightness. Check all your ingredients to make sure they are gluten-free. Canned tomatoes and vegetable broth are usually safe. For thickening, skip the flour. Instead, blend some cooked potatoes into the soup. This adds creaminess without gluten. Another option is to use cornstarch mixed with water as a thickener. You can add unique flavors from other cuisines to your soup. For a Mediterranean twist, add olives and feta cheese. If you like a spicy kick, mix in some diced jalapeños. For an Italian flair, stir in some pesto. Each of these additions can change the taste and make the soup exciting. Try experimenting with different herbs too, like oregano or thyme. For the full recipe, check out the Creamy Tomato Basil Bliss. After making creamy tomato basil soup, let it cool to room temperature. This helps avoid steam buildup in your container. Transfer the soup into an airtight container. You can store it in the fridge for up to four days. If you want to keep it longer, freezing is a great option. For freezing, make sure the soup is fully cooled. Use freezer-safe containers or bags. Leave some space at the top for expansion. You can freeze the soup for up to three months. When you're ready to eat, just thaw it in the fridge overnight. To reheat the soup, you can use a saucepan. Heat it on medium-low. Stir often to keep it from sticking. If you prefer, you can microwave it too. Use a microwave-safe bowl and cover it with a paper towel. Heat it in short intervals, stirring in between. To freshen up the flavors, consider adding a bit of fresh basil or a splash of cream. This can brighten the taste. If the soup seems thick, add a little vegetable broth to loosen it up. For the complete recipe, check out the Full Recipe section. How long does creamy tomato basil soup last in the fridge? Creamy tomato basil soup lasts about 3 to 5 days in the fridge. Store it in an airtight container. For the best taste, eat it sooner rather than later. Can I use fresh tomatoes instead of canned? Yes, you can use fresh tomatoes! About 2 pounds of ripe tomatoes will work well. Just peel and chop them before adding to the pot. How can I make this soup spicier? To add spice, mix in red pepper flakes or a dash of hot sauce. Start with a small amount and taste as you go. What can I use instead of heavy cream? If you want a lighter option, use coconut cream or half-and-half. For dairy-free choices, almond milk or cashew cream work great too. Is there a substitute for basil? If you don’t have basil, try oregano or parsley. These herbs add a different but tasty flavor. Calories and nutritional benefits A serving of creamy tomato basil soup has around 300 calories. It also offers vitamins A and C, and is rich in antioxidants from tomatoes. How to make the soup healthier without sacrificing flavor To make it healthier, reduce the cream and add more veggies like carrots or spinach. You can also use low-sodium broth for less salt while keeping great taste. This creamy tomato basil soup is easy and fun to make. You can sauté fresh ingredients, blend them, and enjoy a warm bowl of comfort. Feel free to tweak the flavors or try the variations presented. Remember, this recipe fits well into various diets, like vegan and gluten-free. Store leftovers carefully, and don’t hesitate to reheat for a tasty meal again. Keep exploring different ingredients to make it your own. Enjoy how simple cooking can bring great flavor to your table.

Creamy Tomato Basil Soup Simple Flavorful Delight

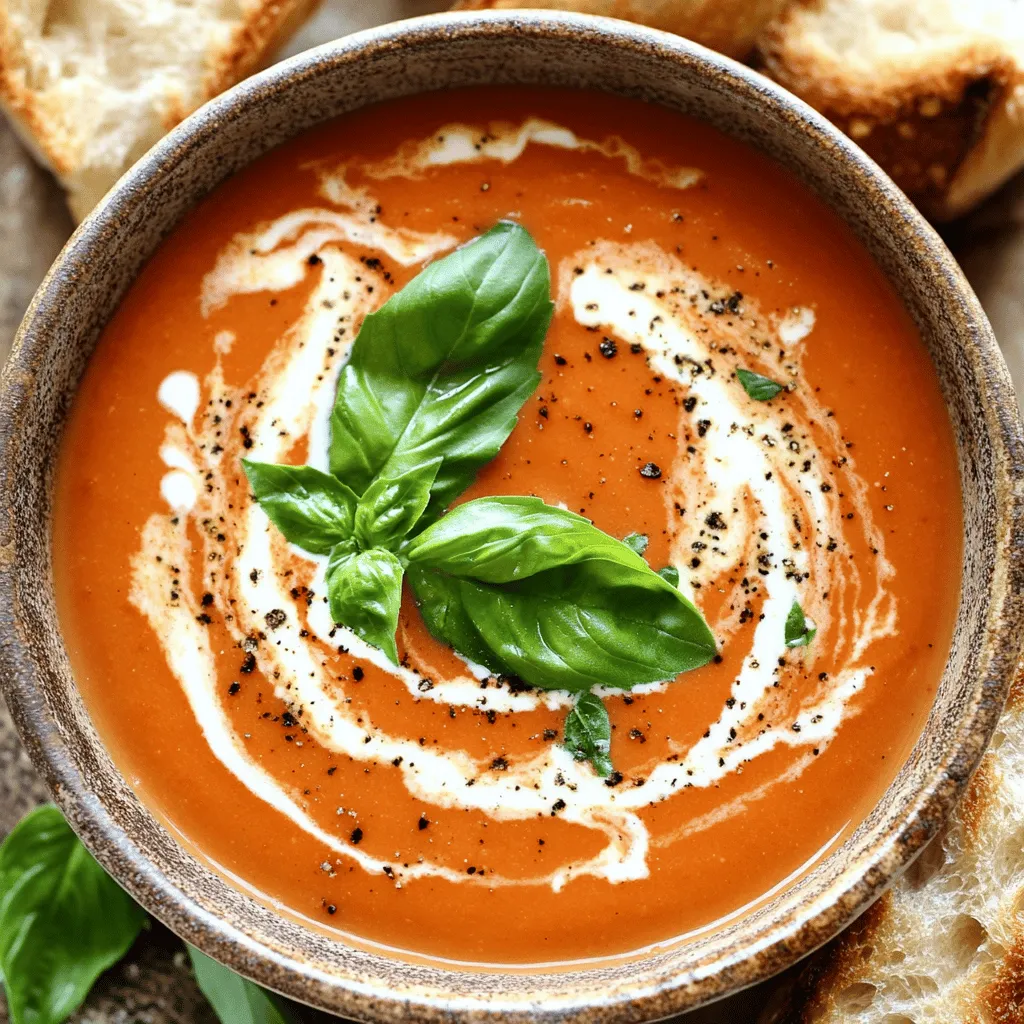
Are you craving a warm bowl of comfort? My Creamy Tomato Basil Soup is a simple joy you’ll want to

- 6 ripe peaches, peeled and sliced - 1 tablespoon lemon juice - Optional: Vanilla ice cream for serving - 1/2 cup granulated sugar - 1 teaspoon cinnamon - 1 tablespoon cornstarch - 1 teaspoon vanilla extract - 1 1/2 cups all-purpose flour - 1 tablespoon baking powder - 1/2 teaspoon salt - 1/4 cup cold unsalted butter, cubed - 3/4 cup milk - Extra sugar for topping - Baking dish (9x13 inch) - Mixing bowls - Pastry cutter or fork When making peach cobbler, fresh ingredients are very important. Use ripe peaches for the best flavor. The lemon juice helps bring out the sweetness. You can serve it with vanilla ice cream for a great treat. You also need some pantry staples. Granulated sugar sweetens the fruit. Cinnamon adds warmth and depth. Cornstarch thickens the peach filling. Vanilla extract gives a nice aroma. For the biscuit topping, you will need flour, baking powder, and salt. Cold butter is key for a flaky texture. Milk helps bring the dough together. Sprinkling extra sugar on top adds a sweet crunch. Gather your baking dish, mixing bowls, and a pastry cutter or fork. These tools help mix and shape the dough. This list makes sure you have everything for a perfect peach cobbler. For the full recipe, check out the Peach Paradise Cobbler. Start by washing and peeling the peaches. Slice them into thin pieces. In a large bowl, mix the peach slices with: - 1/2 cup granulated sugar (adjust for sweetness) - 1 teaspoon cinnamon - 1 tablespoon lemon juice - 1 tablespoon cornstarch - 1 teaspoon vanilla extract Stir well until the peaches are coated. This mix will bring out the natural sweetness. Now, transfer the peach filling into a greased 9x13 inch baking dish. Spread it evenly so it cooks well. In a separate bowl, measure out and whisk together the dry ingredients: - 1 1/2 cups all-purpose flour - 1 tablespoon baking powder - 1/2 teaspoon salt Next, take 1/4 cup of cold unsalted butter, cubed, and add it to the flour mix. Use a pastry cutter or your fingers to blend it until you see coarse crumbs. This step is key for a flaky biscuit. Slowly pour in 3/4 cup of milk. Stir just until the dough comes together. It should feel a bit sticky. Now it’s time to assemble! Using a spoon or your hands, drop spoonfuls of the biscuit dough over the peach filling. Don’t worry if some peaches peek through; it adds to the charm. For a nice touch, sprinkle extra sugar on top of the biscuit dough. Place the baking dish in your preheated oven at 375°F (190°C). Bake for 30-35 minutes. Keep an eye out for the biscuits to turn golden brown. You’ll also notice the peach filling bubbling up, which means it’s ready. When done, let it cool slightly before serving. Enjoy your warm peach cobbler with biscuit topping. For the full recipe, check the earlier section. To get the best biscuit topping, cold butter is key. Cold butter creates flaky layers in your biscuits. Make sure to keep it in the fridge until you are ready to mix. Another tip is to avoid overmixing your dough. If you mix too much, the biscuits can become tough. Mix just until the dough comes together. This will help keep your topping light and airy. You can enhance the flavor of your peach cobbler with different spices. Besides cinnamon, consider nutmeg or ginger for a warm twist. A pinch can change the whole dish. Adding a splash of almond extract can also boost the flavor. It adds a nice depth that pairs well with peaches. Just a little goes a long way! For the best experience, serve your peach cobbler warm. Top it with a scoop of vanilla ice cream. The cold ice cream melts into the warm cobbler, creating a delightful treat. Presentation matters too! Serve it in a bowl and sprinkle some cinnamon on top. This makes the dessert look inviting and delicious. Enjoy the beauty and taste of your peach cobbler! {{image_2}} You can easily switch up the fruit in your peach cobbler. Try using berries like blueberries or raspberries. They add a tangy twist to your dish. Apples also work well. Their crisp texture pairs nicely with the sweet peaches. If you want a mix, try a combination of peaches, apples, and berries. This mix gives you a fun, colorful cobbler with many flavors. If you need a gluten-free option, simply swap all-purpose flour with gluten-free flour. Look for a blend that works well for baking. You may also want to add a bit of xanthan gum to help with texture. Check other ingredients too. Some baking powders contain gluten, so pick one that is gluten-free. This way, everyone can enjoy your tasty cobbler. To make a vegan peach cobbler, replace the butter with a plant-based option. Coconut oil or vegan butter both work great. For the milk, use almond, oat, or soy milk. These swaps keep the flavor rich while making your dish plant-based. You can still enjoy all the goodness of peach cobbler without any animal products. To store leftover peach cobbler, let it cool first. Cover it tightly with plastic wrap or aluminum foil. You can also place it in an airtight container. This keeps it fresh and prevents it from drying out. In the fridge, it lasts about 3 to 4 days. If you want to freeze peach cobbler, follow these steps. First, let it cool completely. Cut it into portions for easy serving. Wrap each piece in plastic wrap, then place them in a freezer-safe bag. This way, it stays fresh for up to 3 months. To thaw, move it to the fridge overnight. For reheating, use the oven set at 350°F. Place the cobbler in an oven-safe dish. Cover it with foil to keep it moist. Heat for about 20 minutes, or until warm. When serving from the fridge, reheat the cobbler in the oven for the best results. This method keeps the biscuit topping crisp. If you use the microwave, heat it in short bursts to avoid sogginess. Always check the texture and flavor before serving. If it seems dry, add a scoop of vanilla ice cream on top for richness. Enjoy your peach cobbler with a perfect blend of warmth and sweetness! For the full recipe, refer to the earlier section. Look for a few clear signs to know if your peach cobbler is ready. First, check the biscuit topping. It should be golden brown and firm to the touch. Next, watch the peach filling. It needs to bubble around the edges of the dish. These bubbles show that the juices are hot and flavorful. If both these signs are present, your peach cobbler is done! Yes, you can use frozen peaches! Just remember to adjust the recipe slightly. First, thaw the peaches in a bowl. Drain any excess liquid to avoid a watery filling. When mixing the peaches with sugar, cinnamon, and lemon juice, use the same amounts. Frozen peaches may need a few extra minutes to bake. Check for the same signs of doneness: golden topping and bubbling filling. If your biscuit topping is too dry, don’t worry! You can fix it easily. Start by adding a bit more milk, one tablespoon at a time. Mix gently until the dough feels softer. Make sure you don't overmix, or it will get tougher. If you notice it during baking, you can brush the topping with melted butter or milk for extra moisture. Yes, you can make peach cobbler ahead! Prepare the filling and biscuit dough separately. Store each in the fridge for up to 24 hours. When you’re ready to bake, layer them in the baking dish. Bake as directed in the recipe. This way, you save time and still enjoy a warm dessert. Peach cobbler is a delightful dessert made with fresh peaches and a tender biscuit topping. We covered essential ingredients, easy steps, and tips for great results. Remember, using cold butter is key for perfect biscuits. You can customize your cobbler with different fruits or make it vegan. Store leftovers properly to enjoy later. Baking this sweet treat can bring joy to your table. Try it out, and savor each delicious bite!

Peach Cobbler with Biscuit Topping Simple and Delicious

Craving a warm, gooey dessert that’s simple to make? Look no further! This Peach Cobbler with Biscuit Topping is the

- 1 cup quinoa, rinsed - 2 cups vegetable broth (or water) - 1 can (15 oz) black beans, drained and rinsed - 1 cup corn kernels (fresh, frozen, or canned) - 1 red bell pepper, diced - 1 small red onion, diced - 2 cloves garlic, minced Quinoa is the star of the dish. It is a tiny grain that packs a big punch. It is high in protein and full of fiber. Black beans add a creamy texture and more protein. Fresh veggies like corn, red bell pepper, and onion bring color and crunch. - 1 teaspoon ground cumin - 1 teaspoon smoked paprika - Salt and pepper to taste Spices make this bowl special. Ground cumin gives a warm, earthy flavor. Smoked paprika adds a hint of smokiness. Salt and pepper enhance all the tastes, making the dish pop. - 1 avocado, sliced - Fresh cilantro - 1 lime, juiced Garnishes make a meal look great. Sliced avocado adds creaminess and healthy fats. Fresh cilantro gives a fresh taste. A squeeze of lime juice brightens the dish, making each bite refreshing. You can find the full recipe above to create your own Savory Quinoa and Black Bean Bowl. Start by rinsing 1 cup of quinoa under cold water. This helps remove any bitterness. In a medium saucepan, combine the rinsed quinoa with 2 cups of vegetable broth. Bring it to a boil over medium-high heat. Once it boils, reduce the heat to low, cover the pot, and let it simmer for about 15 minutes. You will know it’s done when the quinoa is fluffy and the liquid is absorbed. Fluff it gently with a fork to get that perfect texture. While the quinoa cooks, heat a large skillet over medium heat. You can add a splash of water or a bit of oil if you like. Add 1 small diced red onion and 1 diced red bell pepper to the skillet. Sauté these for about 5 minutes until they become soft. Next, add 2 minced garlic cloves, 1 teaspoon of ground cumin, and 1 teaspoon of smoked paprika. Stir for another minute. This step brings out the lovely flavors of the spices. Now it’s time to bring everything together! Stir in 1 can of drained black beans and 1 cup of corn. Cook this mixture for another 3-5 minutes until it is warmed through. Season with salt and pepper to taste. Once the quinoa is ready, gently mix it into the skillet with the black bean mixture. Squeeze fresh lime juice over the top to brighten the flavors. You can find the full recipe for the Savory Quinoa and Black Bean Bowl, including all the detailed steps and ingredients. Enjoy your delicious and healthy meal! To make the best quinoa, you must rinse it well. This removes the bitter coating. Use a fine-mesh strainer. Rinse under cool water for about 2 minutes. This simple step helps your quinoa taste great. Adjusting seasoning levels can change your dish. Start with the recipe's salt and pepper. After mixing, taste it. If you want more flavor, add more spices or salt. You can also add more lime juice for brightness. For a beautiful bowl, start with the quinoa and black bean mix. Use a large spoon to scoop it into the center of the bowl. Arrange the avocado slices on top. Sprinkle fresh cilantro over everything. This adds color and freshness. Choosing the right garnishes enhances your dish. Try adding sliced avocado, lime wedges, or a sprinkle of chili flakes. These not only look good but also add flavor. Prep ahead by washing and chopping your veggies. You can do this the night before. Store them in the fridge until you're ready to cook. This makes cooking faster and easier. Using canned black beans and corn saves time. They are ready to use and cut your prep time in half. If you prefer fresh, that works too, but it takes longer to prepare. For this Savory Quinoa and Black Bean Bowl, you can easily mix and match fresh or canned ingredients to suit your taste. {{image_2}} You can easily customize your savory quinoa and black bean bowl. Incorporating different proteins offers a fun twist. For example, grilled chicken adds a hearty touch. Alternatively, try diced tofu for a plant-based option. You can also boost the nutrition by adding greens. Spinach wilts nicely when mixed in. Kale adds a robust texture and color. To enhance the flavor, consider adding spices and herbs. Cilantro and parsley brighten the dish. You might enjoy a sprinkle of chili powder for some heat. Lemon zest can also add a fresh pop. For dressings or sauces, try a tangy vinaigrette. A drizzle of tahini adds creaminess and depth. If you want to switch things up, substitute quinoa with other grains. Brown rice offers a chewy texture and nutty flavor. Farro is another great choice, adding a unique bite. For gluten-free options, consider using millet or buckwheat. Both give a satisfying base without gluten. Store leftovers in an airtight container. This keeps them fresh and tasty. You can place the bowl in the fridge for up to four days. If you notice any strange smells or colors, it’s best to toss it out. To freeze, divide the dish into portions and place them in freezer-safe bags. Remove as much air as possible to avoid freezer burn. When you want to eat it, thaw in the fridge overnight. For reheating, microwave the bowl until hot. Stir halfway through to ensure even heating. Batch cooking is a great way to save time. Cook a large batch of quinoa on the weekend. You can store it in the fridge for up to five days. Keep the black beans and veggies separate to maintain their texture. Mix them together just before serving for the best taste. Check out the Full Recipe for more details! Quinoa is a superfood packed with protein. A cup of cooked quinoa has about 8 grams of protein. This makes it great for muscle growth and repair. It also has fiber, which helps digestion and keeps you full. Quinoa is rich in vitamins and minerals, too. It has iron, magnesium, and B vitamins, all important for your health. Eating quinoa can support heart health and help manage blood sugar levels. Yes, you can easily make this dish vegan! All the ingredients in the Savory Quinoa and Black Bean Bowl are plant-based. Use vegetable broth for extra flavor. You can skip the avocado if you're not a fan, or add extra veggies instead. This bowl is a great choice for anyone who wants a tasty vegan meal. You can easily scale this recipe up or down. If you want to serve more people, just double the ingredients. For fewer servings, cut the amounts in half. This recipe is flexible. You can make it fit your needs. Just remember to adjust the cooking times if you make a bigger batch. Enjoy your meal! This post covered a tasty quinoa dish. We talked about key ingredients like quinoa, black beans, and fresh veggies. I shared step-by-step cooking instructions and helpful tips for storing and serving. Cooking variations give you room to be creative. Finally, we answered common questions about nutrition and meal prep. With this recipe, you can enjoy a healthy meal tailored to your taste. Explore the flavors and make this dish your own! Enjoy your cooking journey!

Savory Quinoa and Black Bean Bowl Healthy Meal Idea

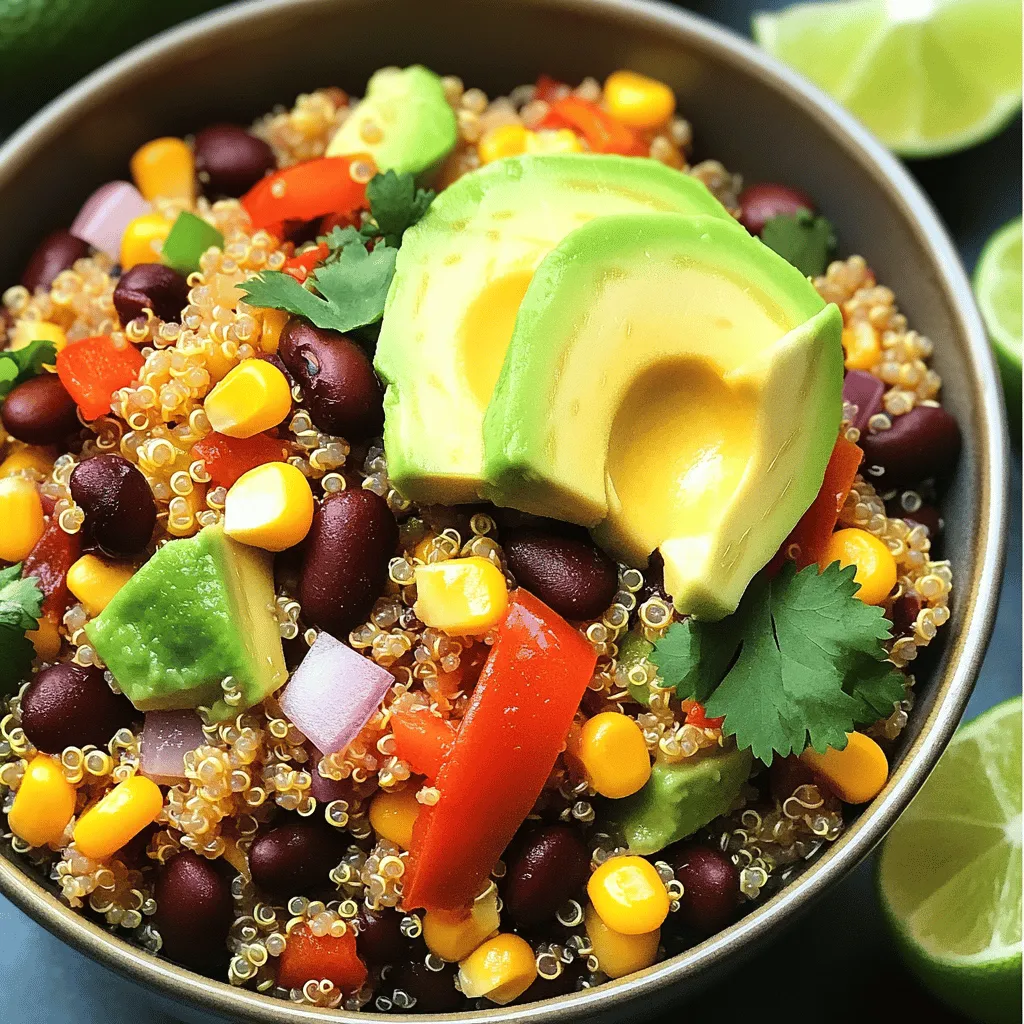
Looking for a simple, healthy meal idea? The Savory Quinoa and Black Bean Bowl is your answer! Packed with protein

Older posts
Newer posts
← Previous Page1 … Page55 Page56 Page57 … Page83 Next →

dsad

© 2025 easycookingbite • Built with GeneratePress

Our Policies

  • Copyright Policy
  • Cookie Policy
  • GDPR Policy
  • Privacy Policy
  • Disclaimer
  • Terms Of Use

More Information

  • Home
  • About
  • Contact
  • Appetizers
  • Dessert
  • Dinner
  • Drinks
©2025, easycookingbite About Back To Top