Skip to content
DisclaimerTerms Of UseGDPR PolicyCookie Policy

easycookingbite

  • Home
  • Drinks
  • Appetizers
  • Dinner
  • Dessert
  • About
  • Contact
  • Privacy Policy
DisclaimerTerms Of UseGDPR PolicyCookie Policy

Lily

To make a tasty vegan chocolate mug cake, you need these simple ingredients: - 4 tablespoons all-purpose flour - 2 tablespoons unsweetened cocoa powder - 4 tablespoons almond milk (or other plant-based milk) - 2 tablespoons maple syrup - 1 tablespoon vegetable oil (or melted coconut oil) - 1/4 teaspoon baking powder - 1/4 teaspoon vanilla extract - A pinch of salt - Vegan chocolate chips (optional, for extra indulgence) These ingredients come together quickly, making this recipe perfect for a sweet craving. You can make your mug cake even better with these add-ins: - A sprinkle of cinnamon for warmth - A tablespoon of peanut butter or almond butter for creaminess - A few chopped nuts for crunch - A handful of fresh berries or banana slices for fruity flavor These options let you customize your cake to fit your taste. If you need to swap ingredients, here are some great ideas: - Use whole wheat flour instead of all-purpose flour for added fiber. - Replace maple syrup with agave nectar or date syrup for sweetness. - If you don’t have almond milk, try soy milk, oat milk, or coconut milk. - You can use applesauce instead of oil for a lower-fat option. These substitutes keep your mug cake vegan and delicious while giving you choices! To start, grab a microwave-safe mug. This mug will hold your delicious cake. Next, add these dry ingredients into the mug: - 4 tablespoons all-purpose flour - 2 tablespoons unsweetened cocoa powder - 1/4 teaspoon baking powder - A pinch of salt Mix these well with a fork. Make sure there are no lumps. Now, it's time for the wet ingredients. Add: - 4 tablespoons almond milk (or other plant-based milk) - 2 tablespoons maple syrup - 1 tablespoon vegetable oil (or melted coconut oil) - 1/4 teaspoon vanilla extract Stir until smooth. If you want a richer taste, fold in vegan chocolate chips. Now, let’s cook! Place your mug in the microwave. Cook it on high for 30-40 seconds. Watch closely as it cooks. The cake will rise and look set but still moist. Remember, it will keep cooking a bit after you take it out. For the best mug cake, do not overcook it. Every microwave is different. You might need to adjust the time. If it seems a bit wet, it’s fine. Let the cake cool for one minute before eating. For added flavor, top it with more chocolate chips, whipped coconut cream, or fresh berries. Enjoy your quick and easy vegan chocolate mug cake! To make a great vegan chocolate mug cake, focus on key points. First, measure your ingredients accurately. Too much flour makes the cake dry. Next, mix well but don’t overdo it. Overmixing can create a tough texture. When microwaving, keep an eye on the time. Start with 30 seconds and check. If it looks wet, add more time in 10-second bursts. Avoid opening the microwave door too soon. The cake needs time to rise. Enjoy your mug cake warm for the best taste. Let it cool for one minute before eating. This helps avoid burns and lets the flavors settle. Pair it with whipped coconut cream or fresh berries. You can also sprinkle more vegan chocolate chips on top. This adds texture and richness. Share it with friends for fun! Mug cakes are great for quick treats. Want to boost the flavor? Try adding a pinch of cinnamon or nutmeg. These spices add warmth and depth. You can also mix in a tablespoon of nut butter. This makes the cake richer and creamier. For extra texture, fold in nuts or seeds. They add crunch and healthy fats. If you love fruit, add mashed banana or applesauce. This can make your cake moist and flavorful. Enjoy experimenting! You can find more ideas in the Full Recipe. {{image_2}} You can change the flavor of your vegan chocolate mug cake. Here are a few fun ideas: - Peanut Butter: Swirl in a tablespoon of peanut butter before cooking. It adds a rich, nutty taste. - Mint Chocolate: Add a few drops of peppermint extract in place of vanilla. This gives a fresh twist. - Coffee: Mix in a teaspoon of instant coffee granules for a mocha flavor. It enhances the chocolate taste. Feel free to mix and match these flavors. This way, you can find your favorite! If you need a gluten-free version, don’t worry! You can use gluten-free flour blends instead of all-purpose flour. Look for blends that work in equal amounts. Here are some great options: - Almond Flour: This gives a nutty flavor and moist texture. - Coconut Flour: Use only a little, as it absorbs more liquid. A tablespoon is often enough. - Oat Flour: Just grind oats into a fine powder. It works well for a light texture. Using gluten-free options makes this mug cake easy for everyone to enjoy! Toppings can make your mug cake even better! Here are some ideas for tasty additions: - Vegan Whipped Cream: A dollop on top adds creaminess. - Fresh Berries: Strawberries or raspberries give a bright, fruity flavor. - Nuts: Chopped walnuts or almonds add crunch and health benefits. - Coconut Flakes: Toasted coconut on top adds texture and sweetness. Feel free to mix and match these toppings to create your dream dessert! Enjoy the process of making this cake your own. For the full recipe, check out the details above. If you have leftover vegan chocolate mug cake, store it in a sealed container. Make sure it cools to room temperature first. You can keep it in the fridge for up to three days. For best results, cover the top with plastic wrap or a lid. This helps keep it moist. To reheat your mug cake, place it in the microwave. Heat it for 10 to 15 seconds. Check if it's warm enough. If not, heat it a bit more. Be careful not to overheat. This will make the cake dry. The mug cake stays fresh in the fridge for about three days. If you want to keep it longer, you can freeze it. Wrap the mug cake tightly in plastic wrap, then place it in a freezer bag. It can last for up to three months in the freezer. When you're ready to eat it, thaw it overnight in the fridge. Reheat it as needed. For the full recipe, you can refer back to the main article. Yes, you can make this mug cake in an oven. Preheat the oven to 350°F (175°C). Use an oven-safe mug or small ramekin. Bake for about 10-12 minutes. Check for doneness with a toothpick. It should come out clean. You can use different plant-based options. For milk, try soy, oat, or rice milk. Maple syrup can be swapped for agave syrup or date syrup. Use coconut oil instead of vegetable oil. For a gluten-free option, choose almond flour or gluten-free flour. The mug cake is done when it rises and looks set. It should feel soft but not wet. Use a toothpick to test. If it comes out clean, your cake is ready. Remember, it continues to cook a bit after you take it out. This guide showed you how to make a tasty vegan chocolate mug cake. You learned the key ingredients, step-by-step instructions, and helpful tips. I shared ways to avoid mistakes and different flavor ideas. Storing or reheating is easy with the tips provided. Remember, you can customize this cake to fit your taste. Enjoy experimenting and creating your perfect mug cake!

Vegan Chocolate Mug Cake Quick and Simple Recipe

Craving something sweet but short on time? This Vegan Chocolate Mug Cake is your answer! In just minutes, you can

To make chocolate hazelnut spread pancakes, you need simple ingredients that create a delightful taste. Here’s what you will need: - 1 cup all-purpose flour - 2 tablespoons sugar - 1 tablespoon baking powder - 1/4 teaspoon salt - 1 cup milk (or almond milk) - 1 large egg - 2 tablespoons melted butter (or coconut oil) - 1/2 cup chocolate hazelnut spread (plus more for serving) - Optional garnishes: chopped hazelnuts, fresh berries Each ingredient plays a key role. The flour gives structure, while sugar adds sweetness. Baking powder helps the pancakes rise. Salt balances flavors. Milk makes the batter smooth and creamy. The egg binds everything together, and melted butter adds richness. Chocolate hazelnut spread is the star. It adds a rich, sweet flavor that pairs perfectly with pancakes. Feel free to top your pancakes with chopped hazelnuts or fresh berries for extra crunch and freshness. For the full recipe and instructions, check out the Chocolate Hazelnut Spread Pancakes recipe. Enjoy crafting this easy morning treat! Start by gathering your dry ingredients. In a large mixing bowl, combine: - 1 cup all-purpose flour - 2 tablespoons sugar - 1 tablespoon baking powder - 1/4 teaspoon salt Whisk these together until they blend well. This mix helps the pancakes rise. Next, you will create your wet mix. In a separate bowl, whisk together: - 1 cup milk (or almond milk) - 1 large egg - 2 tablespoons melted butter (or coconut oil) Make sure the melted butter cools a bit. If it’s too hot, it can cook the egg. Whisk until everything is smooth. Now, it's time to bring the two mixtures together. Pour the wet mix into the dry mix. Gently fold them together with a spatula. Remember, it’s okay if there are a few lumps. Overmixing can make the pancakes tough. Next, add: - 1/2 cup chocolate hazelnut spread Fold it in gently to create swirls. Do not mix it completely! You want to see those chocolatey ribbons. Preheat a non-stick skillet or griddle over medium heat. Lightly grease it with butter or oil. Pour about 1/4 cup of batter onto the skillet for each pancake. Cook until bubbles form on the surface and the edges look set, which takes about 2-3 minutes. Flip the pancakes and cook for another 1-2 minutes until they are golden brown. Repeat this with the remaining batter. Keep your pancakes warm in a low oven if needed. Serve them hot, drizzled with more chocolate hazelnut spread, and top with chopped hazelnuts or fresh berries if you like. For the full recipe, check the detailed instructions provided above. Enjoy your delicious treat! To get fluffy pancakes, you must avoid overmixing. When you stir the batter, do it gently. A few lumps are okay. If you mix too much, the pancakes can turn out dense. The secret is to combine the wet and dry ingredients just until you see no dry flour. This keeps the air in, which makes them light and airy. These pancakes are best served warm. You can top them with extra chocolate hazelnut spread for a rich flavor. Add chopped hazelnuts for a crunchy texture. Fresh berries like strawberries or raspberries also pair well. They add a refreshing taste and bright color. You could even drizzle maple syrup on top for a sweet finish. If you want to make these pancakes a bit lighter, there are easy swaps. You can use whole wheat flour instead of all-purpose flour. This adds fiber and nutrients. For a lower-calorie option, try using unsweetened applesauce instead of melted butter. You can also replace regular milk with almond milk. These choices keep the flavor while making them healthier. For the full recipe, check out the detailed steps above. {{image_2}} If you want a nut-free treat, no worries! You can easily swap out the chocolate hazelnut spread. Try using a sunbutter or soy nut butter. Both options offer a creamy texture and rich flavor. You can also choose a chocolate spread made from rice or oat. These alternatives keep the fun without the nuts. Want to jazz up your pancakes? You can add spices to the batter. A pinch of cinnamon or nutmeg adds warmth. You could also mix in some vanilla extract for a sweet note. For a citrus kick, try adding orange zest. Each flavor will make your pancakes unique and tasty. How you serve your pancakes can change the game. You can stack them high for a tall treat. Drizzle extra chocolate hazelnut spread on top for extra yum. Consider layering them with fresh berries between the stacks. This adds color and freshness. You might even sprinkle chopped hazelnuts on top for a crunch. The way you present these pancakes makes them look even more delightful! For the full recipe, check out the detailed instructions above. To keep your pancakes fresh, store them in the fridge or freezer. If you have leftovers, let them cool first. Then, place the pancakes in a single layer on a plate. Cover them with plastic wrap or foil. You can also stack them with parchment paper in between to avoid sticking. For longer storage, use an airtight container. In the fridge, pancakes stay good for 3-4 days. If you freeze them, they last up to two months. Just remember to label the container with the date! For the best taste and texture, reheat pancakes in a skillet. Heat the skillet over low to medium heat. Add a tiny bit of butter or oil to prevent sticking. Place the pancakes in the skillet and cover it for a minute or two. This warms them evenly. You can also use a microwave. Place a pancake on a plate and cover it with a damp paper towel. Heat for 15-20 seconds. For a big batch, try using the oven. Preheat it to 350°F (175°C), then warm the pancakes on a baking sheet for about 10 minutes. For the full recipe, check out the Chocolate Hazelnut Spread Pancakes. Enjoy! Yes, you can easily make these pancakes vegan. For the egg, use a flaxseed egg. Mix 1 tablespoon of ground flaxseed with 2.5 tablespoons of water. Let it sit for a few minutes to thicken. For milk, use almond milk or oat milk. Instead of butter, coconut oil works well. These swaps keep the pancakes tasty and plant-based. To make your pancakes fluffy, do not overmix the batter. Lumps are fine! Also, use fresh baking powder. It helps create air pockets, making the pancakes rise. Let the batter rest for 5-10 minutes before cooking. This allows the flour to absorb moisture. These tips give you light and airy pancakes. If you want alternatives to chocolate hazelnut spread, try almond butter or peanut butter. You can also use a fruit spread or maple syrup for a different taste. Nut-free options like sunflower seed butter are great too. Each substitute brings a unique flavor, so feel free to experiment. These pancakes last about 3 days in the fridge. Store them in an airtight container to keep them fresh. For longer storage, you can freeze them for up to 2 months. Just place parchment paper between pancakes to prevent sticking. When ready to eat, reheat them in a toaster or microwave. These pancakes are simple and fun to make. We covered all the key ingredients, from flour to chocolate hazelnut spread. I shared step-by-step instructions and tips, so your pancakes come out fluffy and delicious. We also explored tasty variations and how to store any leftovers. Enjoy experimenting with flavors and toppings! With these tips, you'll always have a delightful breakfast ready.

Chocolate Hazelnut Spread Pancakes Easy Morning Treat

Start your day with a delicious twist! Chocolate Hazelnut Spread Pancakes are an easy morning treat you’ll love. With simple

- 2 cups almond flour - 1/4 cup coconut oil, melted (or unsalted butter) - 4 medium-ripe peaches, sliced The base of our galette comes from almond flour. It gives a nutty taste and a tender texture. You can use coconut oil or unsalted butter for the fat. I like coconut oil for its rich flavor. Fresh peaches are key for a juicy filling. Pick ripe peaches for the best taste. - 2 tablespoons brown sugar - 1 teaspoon cinnamon - 1/4 teaspoon vanilla extract Brown sugar adds sweetness and a slight caramel flavor. Cinnamon brings warmth and spice. A splash of vanilla extract rounds out the flavors beautifully. These three together create a delightful mix that enhances the peaches. - 1 tablespoon cornstarch for thickening - Additional almond flakes for topping - 1 egg, beaten (for egg wash) Cornstarch helps thicken the peach juices, making the filling less runny. Almond flakes on top give a nice crunch and extra nutty flavor. If you want a shiny crust, brush it with a beaten egg. This step makes the galette look golden and inviting. For the complete recipe, check out the [Full Recipe]. - Preheat the Oven: Start by preheating your oven to 375°F (190°C). This helps the galette cook evenly. - Line the Baking Sheet: Take a baking sheet and line it with parchment paper. This prevents sticking and makes cleanup easy. - Combine Dry Ingredients: In a mixing bowl, add 2 cups of almond flour and 1/4 teaspoon of salt. Mix them well. - Add Wet Ingredients: Next, pour in 1/4 cup of melted coconut oil, 2 tablespoons of maple syrup, and 1/4 teaspoon of vanilla extract. Mix until you have a smooth dough. - Shape the Crust: Place the dough between two sheets of parchment paper. Roll it out into a 12-inch circle, about 1/4 inch thick. Transfer this to your lined baking sheet. - Prepare the Peach Filling: In another bowl, take 4 sliced peaches. Toss them with 2 tablespoons of brown sugar, 1 teaspoon of cinnamon, and 1 tablespoon of cornstarch until they are well coated. - Fold and Assemble: Spoon the peach filling into the center of the rolled crust. Leave a 2-inch border around the edges. Fold the crust over the peaches, making pleats as you go to create a rustic look. Now you're ready to bake your Peach Galette with Almond Crust! For the full recipe, check the previous section. To get a great almond crust, use chilled coconut oil or butter. Cold fat makes the crust flaky. If your fat is warm, the crust may turn out dense. Mix your dough just enough to combine the ingredients. Overmixing can make your crust tough. Aim for a soft dough that holds together well. Choosing ripe peaches is key for the best flavor. Look for peaches that feel slightly soft and smell sweet. If fresh peaches are not available, you can use canned or frozen peaches. Just make sure to drain any excess liquid before adding them to your galette. This will keep the crust from getting soggy. Keep an eye on your baking time. Each oven is different, so start checking around 30 minutes. You want a golden crust and bubbling peaches. If the crust browns too fast, cover it with foil. Adjust your oven temperature if needed. If your galette browns too quickly, lower the heat slightly. This will help your galette bake evenly. {{image_2}} You can switch up the fruit for fun. Berries like blueberries or strawberries work great. They add a nice color and taste to the galette. Tropical fruits are awesome too! Think mangoes or pineapples for a sunny twist. Just remember to adjust the sugar based on the fruit's sweetness. If you need gluten-free options, almond flour is perfect. It makes a great base for the crust. For a vegan option, swap the egg wash for a plant-based milk. You can also replace the coconut oil with a vegan butter substitute. These changes keep the flavors rich and satisfying. Want to make your galette stand out? Try adding herbs like thyme or mint. They can add a fresh taste to the sweet peaches. You can also fold in nuts, like walnuts or pecans, into the filling for added crunch. This gives your galette an interesting texture and flavor. To keep your peach galette fresh, store it in the refrigerator. Place it in an airtight container or cover it with plastic wrap. This method keeps it safe from drying out. If you want to freeze it, slice the galette first. Wrap each slice in plastic wrap, then place them in a freezer bag. This way, you can enjoy a slice anytime. When you're ready to eat your galette, you can use the oven or microwave. For the oven, preheat it to 350°F (175°C). Place the galette on a baking sheet and heat for about 10-15 minutes. This method helps keep the crust crisp. If you choose the microwave, heat it for about 30 seconds to 1 minute. The crust may become a bit soft, so the oven is best for texture. In the fridge, your peach galette lasts about 3-4 days. After that, it may spoil. Look for signs like a change in color or an off smell. If the peaches look mushy or the crust is hard, it’s time to toss it. Enjoy your peach galette while it’s fresh for the best taste! For the full recipe, check out the detailed instructions above. The Peach Galette takes about 55 minutes to make. You will spend around 20 minutes prepping the ingredients. The baking time is about 30 to 35 minutes. This makes it a quick and easy dessert to enjoy. Yes, you can use frozen peaches for the galette. Just make sure to thaw them first. Drain any excess liquid to keep the crust from getting soggy. Frozen peaches may be softer than fresh ones, so adjust your baking time if needed. You can serve the Peach Galette with many tasty options. A scoop of vanilla ice cream adds a creamy touch. Whipped cream also works well for a light and fluffy addition. You could even drizzle some honey for extra sweetness! For a fun twist, try serving it with yogurt or a dollop of mascarpone cheese. Peach galette combines simple ingredients and steps to create a delicious dessert. Using fresh peaches, almond flour, and flavor enhancers like cinnamon elevates the dish. Remember to pick ripe peaches for the best taste. Store leftovers properly to keep them fresh. These tips ensure a perfect peach galette every time. Enjoy experimenting with different fruits and flavors. Your kitchen can be filled with tasty aromas and smiles. Make this dessert your own, and savor each bite.

Peach Galette with Almond Crust Deliciously Simple Recipe

If you’re craving a sweet treat that hits all the right notes, try this Peach Galette with Almond Crust! This

Eggplant Parmesan Bake is simple yet packed with flavor. Here’s what you need: - 2 medium eggplants, sliced into 1/2-inch rounds - 1 teaspoon salt - 2 cups marinara sauce - 2 cups shredded mozzarella cheese - 1 cup grated Parmesan cheese - 1 cup breadcrumbs (preferably Italian seasoned) - 3 tablespoons fresh basil, chopped (plus extra for garnish) - 1 teaspoon garlic powder - 1 teaspoon dried oregano - 1/2 teaspoon black pepper - 2 large eggs, beaten - Olive oil for drizzling Each ingredient adds a special touch to the dish. The eggplant serves as the star. It brings a meaty texture that pairs well with the rich marinara sauce. I love using fresh basil for its bright flavor. The cheeses melt beautifully, making each bite creamy and savory. Breadcrumbs add a crunchy topping, giving a nice contrast to the soft eggplant. Using high-quality olive oil enhances the taste. The seasoning, like garlic powder and oregano, adds depth. Each layer of ingredients builds flavor, making this dish truly delightful. For the full recipe, check out the detailed instructions included. Salting the eggplant Start by slicing your eggplants into 1/2-inch rounds. Lay them on a baking sheet lined with paper towels. Sprinkle 1 teaspoon of salt over the slices. Let them sit for 30 minutes. This step helps draw out moisture and bitterness. Rinsing and drying After 30 minutes, rinse the eggplant slices under cold water. This removes excess salt. Then, pat them dry with a clean kitchen towel. This makes them ready for the next steps. Combining ingredients In a shallow bowl, beat 2 large eggs. Add 1 teaspoon of garlic powder, 1 teaspoon of dried oregano, and 1/2 teaspoon of black pepper. Whisk the mixture until well combined. This will coat the eggplant slices nicely. Dipping and coating process Take each eggplant slice and dip it into the egg mixture. Make sure both sides are coated. Then, press the slice into 1 cup of breadcrumbs. This gives the eggplant a tasty, crunchy layer. Assembly instructions Grab a 9x13-inch baking dish. Start by spreading a layer of marinara sauce on the bottom. Place a layer of the breaded eggplant slices on top. Sprinkle with 2 cups of shredded mozzarella and 1 cup of grated Parmesan cheese. Add a sprinkle of chopped fresh basil. Repeat these layers until you use all ingredients. Finish with a layer of sauce and remaining cheeses. Baking times and temperatures Cover the dish with aluminum foil. Bake in a preheated oven at 375°F (190°C) for 25 minutes. After that, remove the foil and bake for another 15 minutes. Look for bubbling and golden cheese on top. Your Eggplant Parmesan Bake is now ready! For the full recipe, check the earlier sections. When choosing eggplants, pick ones that feel firm and heavy. Small to medium eggplants work best. They have fewer seeds and taste sweeter. Look for shiny skin with no blemishes. A dull skin may mean the eggplant is old and bitter. Fresh eggplants will have a green stem. Avoid ones that feel soft or squishy. To get a great crust, sauté the breaded eggplant slices in olive oil. Heat your skillet before adding the slices. Cook them for about 3-4 minutes on each side. This method gives you a crispy outside and a tender inside. If you prefer not to fry, bake the slices instead. Place them on a baking sheet and drizzle with olive oil. Bake at 375°F (190°C) for 25 minutes. This method still gives a nice crunch with less oil. To boost the taste, add fresh herbs like thyme or rosemary. You can also try red pepper flakes for a spicy kick. Garlic adds depth, so consider using fresh minced garlic. Another idea is to mix in some chopped olives or sun-dried tomatoes. These additions make each bite more exciting. Don’t forget to sprinkle more fresh basil on top for a burst of flavor. These small changes can transform your dish into something special. For the complete recipe, check out the Full Recipe. {{image_2}} You can easily make this dish vegetarian or vegan. For a vegetarian option, keep the cheese and eggs. To go vegan, substitute the eggs with flaxseed meal or a commercial egg replacer. Use vegan cheese for the mozzarella and Parmesan. These swaps keep the flavor rich while catering to different diets. You can make this Eggplant Parmesan Bake your own by adding more veggies. Spinach adds a nice green touch. Mushrooms bring an earthy flavor. You can also try zucchini or bell peppers for extra crunch. Just sauté your chosen veggies before layering them in the dish. If you're feeling creative, switch up the sauce. Pesto gives a fresh and vibrant taste. It pairs well with the eggplant and cheese. You can also use Alfredo sauce for a creamy twist. Both options add a new layer of flavor to the dish. Check out the Full Recipe for more ideas! Store your leftover Eggplant Parmesan Bake in an airtight container. This keeps it fresh and tasty. Place it in the fridge right after it cools. It will last for about three to four days. If you want, you can cover it with foil or plastic wrap before sealing. This extra layer helps keep moisture in. Freezing is a great way to save this dish for later. First, let the bake cool completely. Cut it into individual portions. Wrap each piece tightly in plastic wrap, then in aluminum foil. This method helps prevent freezer burn. Store it in the freezer for up to three months. When you’re ready to enjoy it, thaw it in the fridge overnight before reheating. To reheat your Eggplant Parmesan Bake, use the oven for the best results. Preheat your oven to 350°F (175°C). Place the bake in a baking dish and cover it with foil. Heat it for about 20 minutes or until hot. This helps keep the cheese melty and the eggplant tender. If you prefer, you can microwave individual portions, but the oven gives a better texture. Enjoy every bite! Yes, you can prepare Eggplant Parmesan Bake ahead of time. Here are some tips: - Slice the eggplants and salt them a few hours before cooking. - Layer the dish in advance, but don’t bake it yet. - Cover it tightly with foil and store it in the fridge. - Bake it when you are ready to serve. This saves time on busy days. To get uniform slices of eggplant, follow these tips: - Use a sharp knife for clean cuts. - Cut the eggplants into 1/2-inch rounds for even cooking. - Try to keep the slices the same thickness. This ensures they cook evenly. - If you want, you can cut them into cubes for a different texture. Making Eggplant Parmesan Bake gluten-free is easy. Here’s what to do: - Substitute regular breadcrumbs with gluten-free ones. - You can also use crushed gluten-free crackers. - Check your marinara sauce to ensure it’s gluten-free. - Use fresh herbs instead of dried if preferred. This keeps the flavors bright. Eggplant skin is edible and flavorful. Here’s what to consider: - The skin adds texture to the dish, so it’s fine to leave it on. - Some find the skin a bit tough, especially on larger eggplants. - If you prefer, you can peel the eggplant for a creamier bite. - Experiment to see which texture you enjoy more in your Eggplant Parmesan Bake. For more details on making this dish, check out the full recipe. You now have a complete guide to making Eggplant Parmesan. We covered the ingredients, step-by-step instructions, and helpful tips. You learned how to choose the best eggplant, achieve a crispy crust, and customize the dish. There are options for vegetarians and vegans too. Remember to store leftovers properly to keep them fresh. With these details, you can confidently create a delicious Eggplant Parmesan Bake. Enjoy the process and the tasty results!

Eggplant Parmesan Bake Simple and Savory Delight

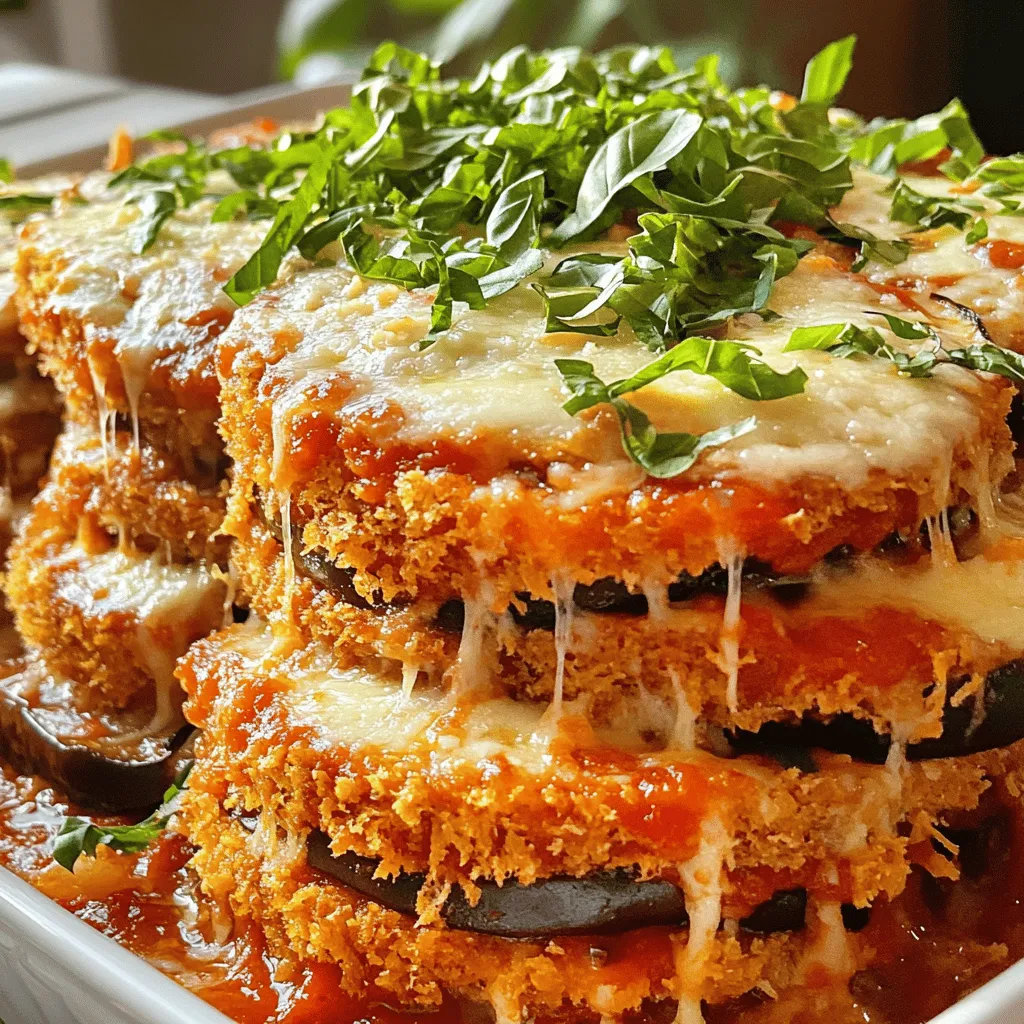
If you love comfort food, you’ll adore my Eggplant Parmesan Bake. This simple recipe layers savory eggplant with rich marinara

- 1 cup red lentils, rinsed - 1 can (14 oz) coconut milk - 4 cups vegetable broth - 1 medium onion, chopped - 2 cloves garlic, minced - 1 tablespoon fresh ginger, grated - 1 tablespoon curry powder - 1 teaspoon turmeric powder - 1 teaspoon cumin powder - 1 red bell pepper, diced - 1 cup chopped kale or spinach - 2 tablespoons olive oil - Salt and black pepper to taste - Fresh cilantro for garnish - Juice of 1 lime When you gather these ingredients, you set the stage for a warm and cozy dish. Red lentils bring protein and fiber, making this soup filling. Coconut milk adds a creamy texture and a touch of sweetness. Using vegetable broth boosts the flavor without meat. Onions, garlic, and ginger create a rich base. The spices—curry, turmeric, and cumin—bring warmth and depth. Fresh greens like kale or spinach add color and nutrients, while the lime juice brightens every bite. I love how these ingredients come together to create a soup that is not just tasty but also healthy. You can find the full recipe for Coconut Curry Lentil Soup above, which guides you in crafting this dish step by step. - Step 1: Heat 2 tablespoons of olive oil in a large pot over medium heat. - Step 2: Add 1 medium chopped onion and sauté for about 5 minutes until it turns soft. - Step 3: Stir in 2 minced garlic cloves and 1 tablespoon of grated ginger. Cook for another 1-2 minutes until you smell the aroma. Then, sprinkle in 1 tablespoon of curry powder, 1 teaspoon of turmeric, and 1 teaspoon of cumin. Mix well for 1 minute. - Step 4: Toss in 1 diced red bell pepper along with 1 cup of rinsed red lentils. Stir until everything mixes well. - Step 5: Pour in 4 cups of vegetable broth and 1 can of coconut milk. Stir again to combine all the flavors. - Step 6: Bring the pot to a gentle simmer. Cover it and cook for 20-25 minutes until the lentils become tender. - Step 7: Once the lentils are soft, add 1 cup of chopped kale or spinach. Stir until the greens wilt, which takes about 2-3 minutes. - Step 8: Just before serving, add the juice of 1 lime. This gives a fresh kick to the dish. - Step 9: Ladle the soup into bowls and top with fresh cilantro for a beautiful touch. Enjoy your warm, nourishing Coconut Curry Lentil Soup! For the complete recipe, check out the [Full Recipe]. - How to prevent lentils from overcooking: To keep lentils firm, watch the cooking time. Red lentils cook fast, about 20-25 minutes. Check them often. If they start to break down, take them off the heat. - Best methods for sautéing vegetables: Use a large pot and heat oil on medium. Add onions first. Sauté until they turn soft and clear. Then toss in garlic and ginger. Stir for just a minute to keep them fresh and fragrant. - Suggested spices for extra flavor: Besides curry powder, you can add a pinch of cayenne for heat. Try adding garam masala or coriander for more depth. Fresh herbs like basil or mint can brighten the soup. - Add-ins for protein or heartiness: For more protein, mix in cooked chicken, shrimp, or chickpeas. If you want a heartier soup, add diced sweet potatoes or carrots. These will cook well and add sweetness. - How to serve and garnish the soup: Serve the soup hot in bowls. Garnish with fresh cilantro and a squeeze of lime. A swirl of coconut cream on top looks nice too. - Pairing suggestions with sides: This soup works well with crusty bread or rice. A simple green salad can also add freshness to the meal. Enjoy it with a side of naan for an extra treat. Find the full recipe for Coconut Curry Lentil Soup to make this delightful dish! {{image_2}} You can switch greens or veggies in this soup. Instead of kale, try spinach or Swiss chard. If you want more crunch, add diced carrots or zucchini. For a fun twist, use butternut squash or sweet potatoes. If you need a substitute for coconut milk, consider almond or cashew milk. Use a bit of coconut cream for a richer taste, or blend silken tofu for creaminess. These swaps keep the soup tasty and creamy. This soup works well for both vegans and vegetarians. If you want it vegan, use vegetable broth and coconut milk. For vegetarians, you can add dairy, like yogurt, for creaminess. If you need gluten-free options, this recipe is naturally gluten-free. Just ensure that your vegetable broth is also gluten-free. There are plenty of tasty options available at stores. Want to add heat? Toss in chopped chilies or jalapeños. Start with a small amount, then taste as you go. This way, you control the spice level just right for you. You can also choose how creamy or chunky you want your soup. For a creamier texture, blend part of the soup before adding greens. If you like it chunky, leave it as is and add more veggies. Adjust the recipe to fit your taste! You can find the full recipe for Coconut Curry Lentil Soup [here](#). Store leftover soup in the fridge. Use an airtight container to keep it fresh. Make sure the soup cools down before sealing it. This keeps the flavor and texture intact. You can freeze the soup for later. For best results, let it cool completely. Use freezer-safe containers or bags. Leave space at the top of the container for expansion. To thaw, place it in the fridge overnight. Reheat on the stove over medium heat. Stir often to heat evenly. Coconut Curry Lentil Soup lasts about 4 to 5 days in the fridge. Look for signs of spoilage. If the soup smells off or has a strange color, throw it out. Always trust your senses when it comes to food safety. Can I make Coconut Curry Lentil Soup in a slow cooker? Yes, you can! Start by sautéing the onion, garlic, and ginger in a pan. Then, add them to the slow cooker. Toss in the rest of the ingredients, cover, and cook on low for 6-8 hours. This method gives the flavors time to blend well. Is this recipe suitable for meal prep? Absolutely! This soup stores well. You can make a big batch and keep it in the fridge for up to five days. Just store it in airtight containers for easy grab-and-go lunches. What is the best type of lentils to use? Red lentils work best for this soup. They cook quickly and break down to create a creamy texture. You can also use green or brown lentils, but they take longer to cook and won't be as smooth. What to do if the soup is too thick or thin? If your soup is too thick, add more vegetable broth or water until you reach the desired consistency. If it’s too thin, let it simmer uncovered for a few extra minutes. This will help it thicken. How to adjust flavors if too spicy? If your soup is too spicy, add a bit more coconut milk or a spoonful of sugar. This will cool down the heat and balance the flavors nicely. What to serve with Coconut Curry Lentil Soup? This soup pairs well with warm naan bread or rice. You can also serve it with a simple salad for a fresh touch. Best toppings to elevate the dish Try adding fresh cilantro, a squeeze of lime, or sliced avocado on top. A dollop of yogurt can add creaminess too. These toppings bring extra flavor and texture to your bowl. This blog post showed you how to make Coconut Curry Lentil Soup from scratch. We covered the essential ingredients, easy steps, and helpful tips for flavor and presentation. You saw variations to suit different diets and learned how to store leftovers to keep them fresh. Enjoy your soup and impress others with your cooking skills! Now, share it with friends and family for smiles around the table.

Coconut Curry Lentil Soup Savory and Nourishing Dish

Looking for a warm, hearty meal that’s both easy to make and delicious? Coconut Curry Lentil Soup is your answer!

- 4 ears of fresh corn, husked - 2 tablespoons olive oil - 1 teaspoon chili powder - 1/2 teaspoon smoked paprika - 1/2 teaspoon garlic powder - 1 lime, juiced and zested - Salt to taste - 1/4 cup crumbled feta cheese (optional) - Fresh cilantro, chopped (for garnish) When I make chili lime grilled corn, I love using fresh corn. It offers the best flavor. Start with four ears of corn. Husk them well, removing all silk. Next, I mix my spices. You need two tablespoons of olive oil to keep the corn moist. Add one teaspoon of chili powder for heat. Include half a teaspoon of smoked paprika for that nice, smoky taste. Don't forget half a teaspoon of garlic powder for extra depth. For the zest, one lime is key. Juice it and zest it too. This brightens up the dish. Finally, season with a pinch of salt. You can add crumbled feta cheese if you want a creamy touch. Top with fresh cilantro for a pop of color and flavor. This mix is what makes the corn so tasty. If you want to check out the full recipe, it has all the steps to bring this dish to life! To start, husking corn is easy. Grab an ear of corn and pull down the green leaves. Remove all the silk threads. Make sure no strands are left. A clean ear helps the flavors mix well. You can soak the corn in water for 10 minutes. This adds moisture and helps steam it while grilling. It makes the corn nice and soft. For the seasoning, gather these ingredients: - 2 tablespoons olive oil - 1 teaspoon chili powder - 1/2 teaspoon smoked paprika - 1/2 teaspoon garlic powder - 1 lime, juiced and zested - Salt to taste In a small bowl, whisk the olive oil, chili powder, smoked paprika, garlic powder, lime juice, lime zest, and salt. Whisk until the mixture is smooth. Make sure all the spices mix well. This blend gives the corn a zesty kick. Next, heat your grill to medium-high. Place the husked corn on the grill. Grill for about 10-15 minutes. Turn the corn every few minutes. This helps it cook evenly and get a nice char. You want it tender with brown marks. For the best flavor, brush the chili lime mixture on the corn while grilling. This seals in the taste. Once done, remove the corn from the grill and add optional feta cheese. Garnish with fresh cilantro and an extra squeeze of lime. Enjoy this fresh and tasty summer treat! To grill corn evenly, start with a clean grill. Preheat it to medium-high. Husk the corn well, removing all silk. If you soak the corn for 10 minutes, it helps steam while grilling. Place the corn directly on the grill. Turn it every few minutes. This keeps it from burning. Cook for about 10 to 15 minutes. You know the corn is done when it’s tender and has nice char marks. For extra flavor, try adding smoked paprika or cayenne pepper. You can also use fresh herbs, like oregano or basil. If you want less heat, reduce the chili powder. For a zesty kick, squeeze more lime juice over the corn. Taste as you go and adjust the seasoning to fit your style. Serve the corn on a large platter for a fun look. Garnish with fresh cilantro and lime wedges. You can sprinkle crumbled feta cheese on top for a creamy touch. This dish pairs well with grilled meats or spicy tacos. It’s also great for picnics or summer barbecues. For more ideas, check the Full Recipe for inspiration. {{image_2}} You can spice up your corn with more heat. Add extra chili powder or cayenne pepper to the mix. This gives the corn a nice kick. If you prefer sweet flavors, try a sweet corn version. Mix lime juice with honey for a delicious glaze. This adds a lovely balance of sweet and tangy. For a vegan option, skip the feta cheese. Instead, add nutritional yeast for a cheesy flavor. You can also use a dairy-free butter substitute in the chili lime mix. If you need gluten-free options, rest assured. All ingredients here are gluten-free, so enjoy them without worry. You don’t have to grill the corn. You can use a stovetop pan for grilling or broiling. This method gives you a nice char, just like the grill. If you want a quicker option, try the Instant Pot. Steam the corn for about 3 to 5 minutes. This method keeps the corn tender and juicy. For more tips and details, check the Full Recipe. To keep your grilled corn fresh, first let it cool down. Once it's cool, wrap each ear in plastic wrap. You can also place the corn in an airtight container. This helps keep out air and moisture. Store it in the fridge. Grilled corn stays fresh for about 3 to 5 days. If you want to enjoy it later, consider freezing it. Wrap it well before freezing. It can last up to 3 months in the freezer. When you are ready to eat the leftover corn, there are a few ways to reheat it. The best way is to use the grill again. Heat the grill to medium heat. Grill the corn for about 5 minutes, turning it often. This method brings back the flavor and texture. You can also use the microwave. Just place the corn on a plate and cover it with a damp paper towel. Heat it for 1 to 2 minutes. This method is quick, but it may not keep the charred flavor. Another option is to use a stovetop pan. Heat the pan on medium heat and add a little olive oil. Cook the corn for about 3 to 4 minutes, turning it until warm. Enjoy your chili lime grilled corn just like when it was fresh! For the full recipe, check out the recipe section above. You should grill corn for about 10 to 15 minutes. Turn it every few minutes. This helps it cook evenly. Look for nice char marks and tender kernels. The corn should be bright yellow when done. If you want a smoky flavor, let it grill longer. Yes, you can use frozen corn. However, it will taste different than fresh corn. If you use frozen corn, thaw it first. Pat it dry to remove excess moisture. This helps it grill better. Fresh corn has a sweet crunch. Frozen corn can be softer but still tasty. Chili lime grilled corn pairs well with many dishes. Here are some great options: - Tacos or burritos for a fun meal. - Grilled meats like chicken or steak. - Fresh salads to balance the flavors. - Rice or quinoa for a hearty side. - Guacamole for a creamy dip. Enjoy your chili lime grilled corn with these tasty options! For the full recipe, check out the detailed instructions above. This blog post shared a simple way to grill corn with chili and lime. You learned about the best ingredients, step-by-step instructions, and tips for great grilling. Remember to try the flavor variations and dietary options that fit your needs. When you store leftovers, keep them fresh for later. Enjoy your grilled corn as a side dish or snack. Don't be afraid to experiment and make this recipe your own. Happy grilling!

Chili Lime Grilled Corn Flavorful Summer Delight

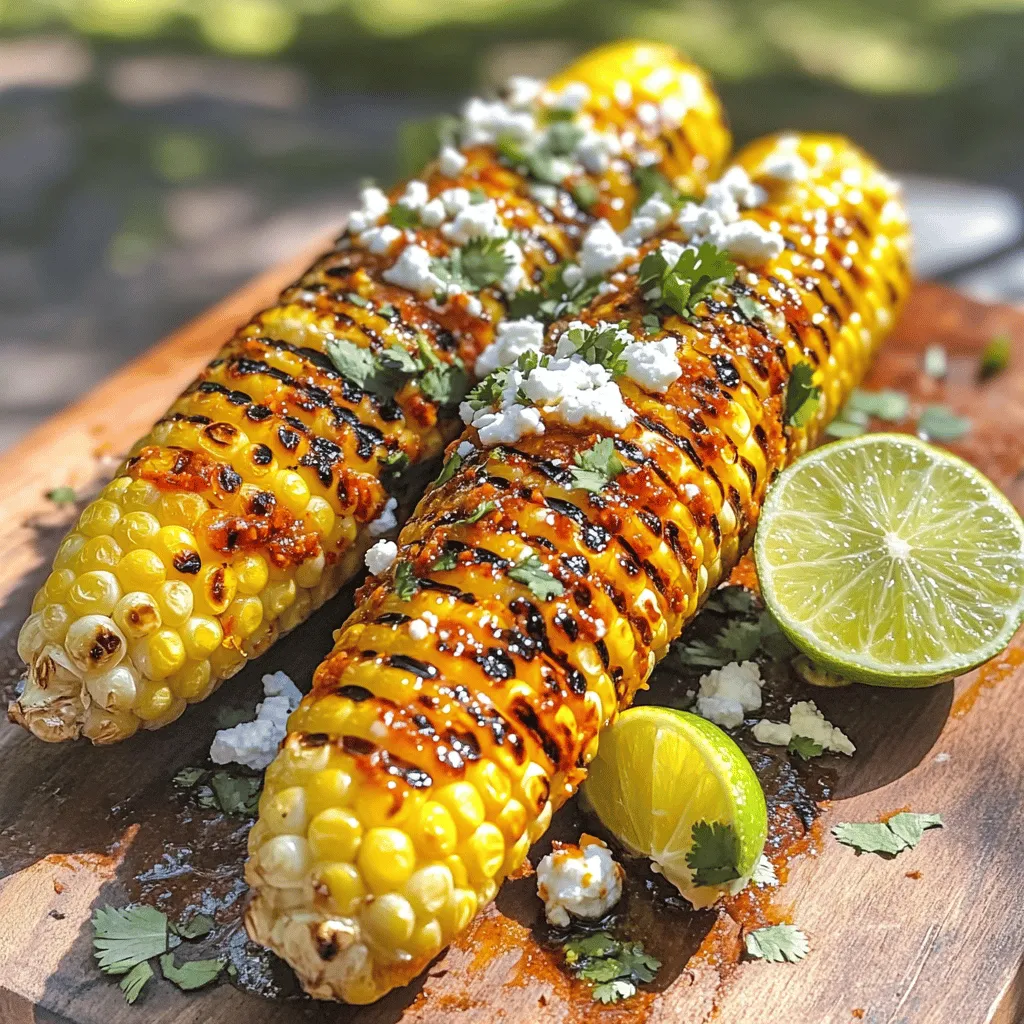
Summer is the perfect time to fire up the grill and savor fresh flavors. One of my favorite treats is

- 1 lb Brussels sprouts, trimmed and halved - 3 tablespoons olive oil - 1/4 cup pure maple syrup - 1 tablespoon balsamic vinegar - 1/2 teaspoon garlic powder - Salt and black pepper to taste - 1/4 cup pecans, roughly chopped (optional) - Fresh thyme for garnish To make great maple glazed Brussels sprouts, start by selecting the best sprouts. Look for bright green, firm sprouts with no yellow leaves. Smaller Brussels sprouts usually taste sweeter. Bigger ones can be bitter. Using pure maple syrup is key. It brings a rich, natural sweetness. Avoid imitation syrup, as it lacks flavor and quality. Pure maple syrup pairs perfectly with the savory notes of the sprouts. This balance makes your dish shine. For a complete guide, you can check out the Full Recipe. 1. Preheat the oven: Start by preheating your oven to 400°F (200°C). This high heat helps create that lovely caramelization. 2. Prepare the Brussels sprouts: Trim the ends of the Brussels sprouts and cut them in half. This makes them cook evenly and allows the glaze to stick. 1. Tossing and coating the sprouts: In a large bowl, mix the halved Brussels sprouts with olive oil, maple syrup, balsamic vinegar, garlic powder, salt, and black pepper. Toss well until every sprout gets a nice coat of glaze. 2. Spreading and arranging on a baking sheet: Line a baking sheet with parchment paper. Spread the coated Brussels sprouts in a single layer. Make sure they have space to roast properly. 1. Timing and temperature for perfect roasting: Roast the Brussels sprouts in the preheated oven for 20-25 minutes. They should be tender and have a nice golden edge. 2. Stirring for even caramelization: Halfway through roasting, give the sprouts a good stir. This ensures that all sides get that tasty caramelization. These steps will lead you to a delicious dish that shines on any table. For more details, check the Full Recipe. To make your maple glazed Brussels sprouts shine, balance the sweet and savory. The pure maple syrup adds sweetness, while the balsamic vinegar brings in a tangy kick. This mix makes each bite exciting. Use quality balsamic vinegar for the best taste. A little goes a long way in enhancing flavor. Soggy Brussels sprouts can ruin the dish. To avoid this, do not overcrowd the baking sheet. Spread them out in a single layer. This allows hot air to circulate and promotes even cooking. Stir them halfway through roasting to ensure they cook evenly. You want them crisp and caramelized. Garnishing can elevate your dish. Fresh thyme adds a pop of color and flavor. Just sprinkle it on right before serving. For a crunchy texture, toss in some pecans. They add a nice contrast to the soft Brussels sprouts. Serve them warm alongside your favorite proteins for a complete meal. {{image_2}} You can easily substitute ingredients in this recipe. If you run out of maple syrup, try using honey or agave syrup. Both add sweetness and flavor. You can also switch nuts. Pecans give a nice crunch, but walnuts or almonds work too. This dish can fit many diets. To make it vegan, ensure you use plant-based maple syrup. All the other ingredients are already vegan. For gluten-free options, check the balsamic vinegar. Most brands are gluten-free, but it's good to read labels. Feel free to mix in other seasonal veggies. Carrots, sweet potatoes, or squash add color and taste. You can spice things up for holidays. Adding cinnamon or nutmeg brings warmth for winter dishes. Experimenting with flavors makes this dish fun and unique! To keep your maple glazed Brussels sprouts fresh, store them in the fridge. Place them in an airtight container. This helps prevent moisture loss and keeps them tasty. If you want, you can also line the container with a paper towel to absorb extra moisture. Use glass or plastic containers with tight-fitting lids. These containers help maintain the flavor and texture of your sprouts. Make sure they are clean and dry before adding the sprouts. To enjoy your Brussels sprouts again, reheat them properly. The best way to keep their taste and texture is in the oven. Preheat your oven to 350°F (175°C). Spread the sprouts on a baking sheet and heat for about 10 to 15 minutes. If you’re short on time, you can use the microwave. Place the sprouts in a microwave-safe bowl and cover with a plate. Heat in short bursts of 30 seconds. Stir in between to heat evenly. However, know that the oven keeps them crispier than the microwave. Yes, you can freeze maple glazed Brussels sprouts. But they taste best when fresh. If you want to freeze them, let them cool first. Place the cooled sprouts in a freezer-safe bag. Squeeze out the air before sealing. For thawing, move the sprouts to the fridge overnight. Reheat in the oven or microwave as described earlier. Enjoy them later with great flavor! To make this dish, start by preheating your oven to 400°F (200°C). In a bowl, mix halved Brussels sprouts with olive oil, maple syrup, balsamic vinegar, garlic powder, salt, and pepper. Toss well to coat the sprouts. Spread them on a baking sheet in a single layer. Roast for 20-25 minutes and stir halfway through. This helps them cook evenly. If you want a crunchy bite, add pecans in the last 5 minutes. Once done, garnish with thyme. Maple glazed Brussels sprouts pair well with many meals. They shine alongside roasted chicken or turkey. Serve them with pork chops for a tasty contrast. They also work great with quinoa or rice for a vegetarian option. Add a fresh salad on the side for balance. The sweet and savory flavors fit into many dishes. Yes, you can prep these sprouts ahead of time. Trim and halve them, then toss with the olive oil and seasonings. Store them in a sealed container in the fridge for up to a day. When you're ready to cook, spread them on a baking sheet and roast. This makes busy nights easier and keeps flavors fresh. One serving of maple glazed Brussels sprouts contains about 150 calories. They offer fiber and vitamins C and K. The healthy fats from olive oil help with nutrient absorption. Adding pecans boosts protein and healthy fats too. This dish is both tasty and good for you. You can find the complete Maple Glazed Brussels Sprouts recipe [Full Recipe]. In this article, I shared a simple way to make maple glazed Brussels sprouts. You learned about fresh ingredients and cooking steps, from prep to serving. I also covered tips for flavor, storage, and variations, ensuring your dish shines. The right balance of sweet and savory elevates this recipe. Remember, using fresh ingredients makes a big difference. Try these tips to enjoy a delicious side dish. With practice, you'll impress everyone at the table. Enjoy your cooking journey and have fun experimenting!

Maple Glazed Brussels Sprouts Tasty and Easy Recipe

If you love tasty vegetables, you’ve got to try my Maple Glazed Brussels Sprouts recipe. This dish perfectly blends sweet

To make Zesty Shrimp and Grits, you need a few simple ingredients. Here’s what you’ll need: - 1 cup stone-ground grits - 4 cups water - 1 cup shredded sharp cheddar cheese - 1 lb shrimp, peeled and deveined - 2 tablespoons olive oil - 2 cloves garlic, minced - 1/2 teaspoon smoked paprika - 1 teaspoon Cajun seasoning - 1/4 teaspoon cayenne pepper (adjust to taste) - 1/2 bell pepper, finely chopped (red or yellow for sweetness) - 2 green onions, sliced - 1 tablespoon lemon juice - Salt and pepper to taste - Fresh parsley, chopped (for garnish) These ingredients blend together to create a dish that is both creamy and zesty. The stone-ground grits give a lovely texture. The shrimp brings a nice protein kick, while the spices add depth. I love using smoked paprika and Cajun seasoning for that true Southern flavor. When you gather these ingredients, make sure they are fresh. Fresh shrimp and vegetables can elevate the taste. And don’t forget to have fun while cooking! You can find the full recipe for Zesty Shrimp and Grits to guide you through the steps. 1. First, grab a medium saucepan. Pour in 4 cups of water and add a pinch of salt. 2. Heat the water on high until it reaches a rolling boil. This step is key to perfect grits. 3. Once boiling, slowly whisk in 1 cup of stone-ground grits. This helps avoid lumps. 4. Turn the heat down to low and let it simmer. Stir occasionally for about 20-25 minutes. 5. When the grits are creamy, stir in 1 cup of shredded sharp cheddar cheese until melted. 1. While the grits cook, heat 2 tablespoons of olive oil in a large skillet over medium heat. 2. Add 2 cloves of minced garlic and sauté for about 1 minute. You’ll smell the garlic soon! 3. Next, toss in 1/2 finely chopped bell pepper. Cook for 2-3 minutes until it softens. 4. Now, add 1 lb of peeled shrimp into the skillet. Sprinkle with 1/2 teaspoon smoked paprika, 1 teaspoon Cajun seasoning, and 1/4 teaspoon cayenne pepper. 5. Squeeze in 1 tablespoon of lemon juice, then cook for 3-4 minutes until the shrimp turn pink. 1. Once the shrimp are cooked, season the mixture with salt and pepper to taste. 2. Remove from heat and sprinkle with sliced green onions for a fresh touch. 3. To serve, spoon the creamy cheese grits onto each plate. 4. Top the grits with the zesty shrimp mixture. 5. Finally, garnish with fresh parsley for a pop of color and flavor. For the full recipe, check out the details provided earlier. Enjoy your delicious creation! Using stone-ground grits makes a big difference. They offer a rich, hearty flavor. Instant grits cook fast but lack depth. For the best taste, choose stone-ground. To avoid lumps, whisk the grits slowly into boiling water. Stir continuously as they cook. This keeps the mixture smooth and creamy. If lumps form, use a whisk to break them up. Marinating shrimp beforehand adds great taste. A mix of lemon juice and spices works well. For a zesty kick, let the shrimp soak for at least 30 minutes. This infuses flavor and makes the dish pop. Adjust spice levels to your liking. Start with the basic amounts, then taste. If you want more heat, add extra cayenne or Cajun seasoning. You control the flavor! Garnishing with fresh parsley adds color and brightness. Simply chop it finely and sprinkle it on top. This makes your dish look fresh and inviting. For serving suggestions, pair shrimp and grits with a side salad. A crisp salad complements the creamy grits and zesty shrimp. Try a light vinaigrette to balance the flavors. For the full recipe, check out the complete details in the earlier sections. {{image_2}} You can change up the cheese for your shrimp and grits. Goat cheese adds a tangy kick. Feta cheese gives a nice crumbly texture. Both options create a different taste. If you want extra creaminess, add sour cream. It makes the dish rich and smooth. Want to switch things up? Use chicken or sausage instead of shrimp. Both options bring their own flavors. If you prefer a vegetarian dish, leave out the meat. You can use mushrooms or zucchini for a hearty bite. This keeps the dish filling while staying meat-free. Add more color and taste to your dish. Incorporating spinach or diced tomatoes boosts nutrition. These ingredients provide freshness and a burst of flavor. You can also use fresh herbs like basil or cilantro. They add a bright taste that elevates the dish. For the complete dish, refer to the Full Recipe for Zesty Shrimp and Grits. To keep your zesty shrimp and grits fresh, store them in an airtight container. This way, they stay tasty and safe. Place the container in the fridge right after cooling. You can enjoy your leftovers for up to three days. If you want to freeze shrimp and grits, here’s what to do. First, let the dish cool completely. Then, portion it into freezer-safe bags. Remove as much air as possible to prevent freezer burn. You can freeze it for up to three months. When you’re ready to eat, take the bag out of the freezer. Thaw it in the fridge overnight. Then, reheat in a pot over medium heat. Add a splash of water or broth to keep it creamy. Enjoy your meal just like fresh! For the full recipe, check the details above. If your grits are too watery, don’t worry! You can fix this easily. First, add a pinch of dry grits to the pot. Stir well and let it cook for a few minutes. This helps absorb the extra water. If they still seem runny, cook them a bit longer while stirring. This will thicken them up. Yes, you can prepare shrimp and grits ahead of time. Cook the grits and shrimp separately. Store the grits in a sealed container in the fridge. Keep the shrimp in another container. When ready to serve, just reheat both parts. This way, your meal stays fresh and tasty. Definitely! Frozen shrimp can work great in this recipe. Just remember to thaw them first. You can do this by placing them in cold water for about 15 minutes. Once thawed, you can cook them just like fresh shrimp. They will still taste delicious! To reheat shrimp and grits, use a stovetop method. Heat a skillet over low heat. Add a splash of water or broth to keep the grits creamy. Stir often until warmed through. For shrimp, add a bit more oil if needed. This keeps everything moist and flavorful. You can find the full recipe for Zesty Shrimp and Grits in the main section of this article. It has all the details you need to whip up this tasty dish! This dish is a blend of creamy grits and flavorful shrimp. We've covered the ingredients, cooking steps, and tips to enhance your meal. You can personalize it with different cheeses and proteins. From storage tips to FAQs, you have all you need. I hope you feel ready to try this tasty recipe. Enjoy your time in the kitchen and savor every bite!

Zesty Shrimp and Grits Flavorful Southern Delight

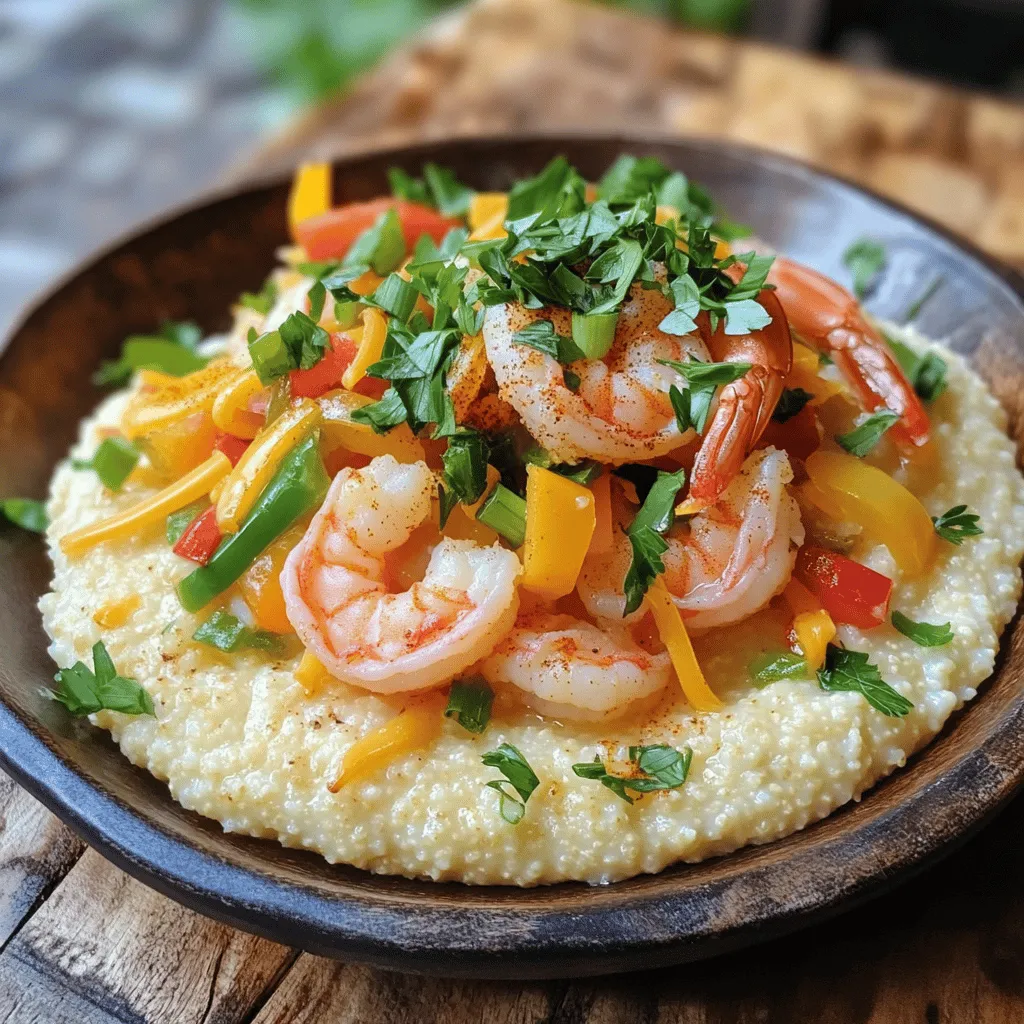
Are you ready to spice up your dinner routine? Zesty Shrimp and Grits is a classic Southern dish that brings

- 1 block firm tofu - 2 tablespoons cornstarch - 2 tablespoons olive oil I always start with the star of the show: the tofu. A block of firm tofu gives the best texture. Press the tofu first to remove excess water. This step helps create that crispy goodness. Then, I coat it with cornstarch. This ingredient makes the tofu crispy when baked. Drizzling olive oil adds flavor and helps with browning. - 1 cup cooked quinoa - 1 cup baby spinach - 1 cup shredded carrots - 1/2 cup cherry tomatoes, halved Next, I pick vegetables and grains for the bowl. Cooked quinoa serves as a hearty base. It’s full of protein and fiber. I add baby spinach for color and nutrients. Shredded carrots bring sweetness and crunch. Finally, I include halved cherry tomatoes for freshness. These ingredients create a mix of flavors and textures that make each bite exciting. - 1/4 cup tahini - 1 tablespoon lemon juice - 1 teaspoon garlic powder - Salt and pepper to taste Dressings tie everything together. I use tahini for a creamy texture. Adding lemon juice gives it a zesty kick. Garlic powder adds depth, while salt and pepper enhance the flavors. You can adjust these seasonings to fit your taste. A well-balanced dressing makes the bowl truly special. For the complete recipe, refer to the Full Recipe. First, preheat your oven to 400°F (200°C). This step is key for crispy tofu. While it heats, line a baking sheet with parchment paper. This helps with easy cleanup. Now, take your block of firm tofu and press it to remove excess water. Cut the tofu into small cubes. In a bowl, mix the cubed tofu with cornstarch, olive oil, garlic powder, smoked paprika, soy sauce, salt, and pepper. Stir gently until each piece gets coated well. Spread the seasoned tofu cubes onto your prepared baking sheet. Make sure they are in a single layer. This helps the tofu crisp up nicely. Bake in your hot oven for 25-30 minutes. Halfway through, flip the tofu to ensure even crispiness. You want them golden brown and crunchy when done. While the tofu bakes, prepare your serving bowls. Start with a layer of cooked quinoa as the base. Next, add baby spinach, shredded carrots, and crispy tofu cubes. Then, place sliced avocado and halved cherry tomatoes on top. Finally, drizzle the tahini dressing over everything. Garnish with fresh herbs like cilantro or parsley. Enjoy your beautiful, healthy Buddha bowl! For the full recipe, check the earlier section. To get crispy tofu, start by pressing it well. Place the tofu block on a clean towel. Add another towel on top and place a heavy pan on it. Let it sit for about 15 to 30 minutes. This removes excess water and helps it crisp up. Next, coat the tofu in cornstarch. This step is key. The cornstarch creates a nice crust when baking. It absorbs moisture and gives your tofu a delightful crunch. Feel free to mix and match ingredients in your Buddha bowl. Instead of quinoa, try brown rice or farro. You can also add other veggies, like bell peppers. Try roasted sweet potatoes for a different taste. Don't be afraid to get creative! If you like beans, toss in chickpeas for extra protein. Use whatever you have on hand. To make your bowl even tastier, add spices or herbs. Try some cumin or fresh basil for a twist. You can also use different dressings. Swap tahini for a spicy peanut sauce or a zesty vinaigrette. Experiment with flavors to find what you love. Each option brings a new taste experience. Make your bowl your own! {{image_2}} You can swap tofu for tempeh or chickpeas. Tempeh has a nutty flavor and a firmer texture. Chickpeas add creaminess and are rich in protein. Mixing beans like black beans or kidney beans also boosts protein. Each choice offers unique flavors and nutrition. If you want a grain swap, try brown rice or farro instead of quinoa. Brown rice gives a chewy texture, while farro has a nutty taste. For a low-carb option, use cauliflower rice. It’s light and absorbs flavors well, making your bowl fresh and satisfying. Changing vegetables based on the season can enhance your bowl. In summer, use fresh tomatoes or cucumbers. In fall, roast sweet potatoes or butternut squash. You can also mix roasted and raw veggies to create different textures. This keeps your dish exciting and flavorful. To keep your Buddha bowl fresh, store leftovers in the fridge. Use airtight containers. This helps prevent moisture from getting in and sogginess. When you reheat crispy tofu, use an oven or air fryer. This method keeps the tofu crispy, unlike microwaving. You can prep the ingredients ahead of time. Chop your veggies and store them in separate containers. Cook your quinoa and let it cool before storing. When you're ready to eat, just assemble your bowls for quick meals throughout the week. This saves time and makes healthy eating easy. In the fridge, your Buddha bowl lasts about 3 to 4 days. If you want to store it longer, freeze the tofu and quinoa separately. They can last up to 3 months in the freezer. Look out for signs of spoilage, like a sour smell or mold. If you see any, it’s best to toss it out. Yes, you can make this bowl ahead of time. Cook the tofu and grains first. Store them separately from the veggies. This will keep the tofu crispy. You can prep the tahini dressing too. Just mix it when you are ready to serve. The bowl will taste fresh and delicious. To make the tahini dressing, whisk together the tahini and lemon juice. Add a pinch of salt. Then, mix in a little water to get the right thickness. Stir until smooth. You can adjust the flavor by adding more lemon juice or salt. This dressing adds a creamy touch to the bowl. Yes, this recipe is gluten-free. Use gluten-free soy sauce, or substitute with tamari. The other ingredients, like tofu, quinoa, and veggies, are naturally gluten-free. Enjoy this bowl without worrying about gluten. You can add many toppings to your Buddha bowl. Try roasted sweet potatoes or chickpeas. Fresh herbs like basil or mint work well too. You can also add nuts or seeds for crunch. The options are endless, so mix and match what you like. This recipe is already vegan! Tofu, quinoa, and veggies are all plant-based. The tahini dressing is also vegan. Enjoy this healthy and colorful meal knowing it's good for you and the planet. Check out the Full Recipe for more details. This blog post explored making a Crispy Tofu Buddha Bowl. We covered main ingredients like firm tofu, quinoa, and fresh veggies. You learned how to prepare, bake, and assemble the bowl for a tasty meal. I shared tips for crispy tofu and ideas for customizing your bowl. Remember, experimenting with flavors and textures can make your meal unique. Enjoy creating your own Buddha Bowl for a healthy and delicious option!

Crispy Tofu Buddha Bowl Healthy and Simple Recipe

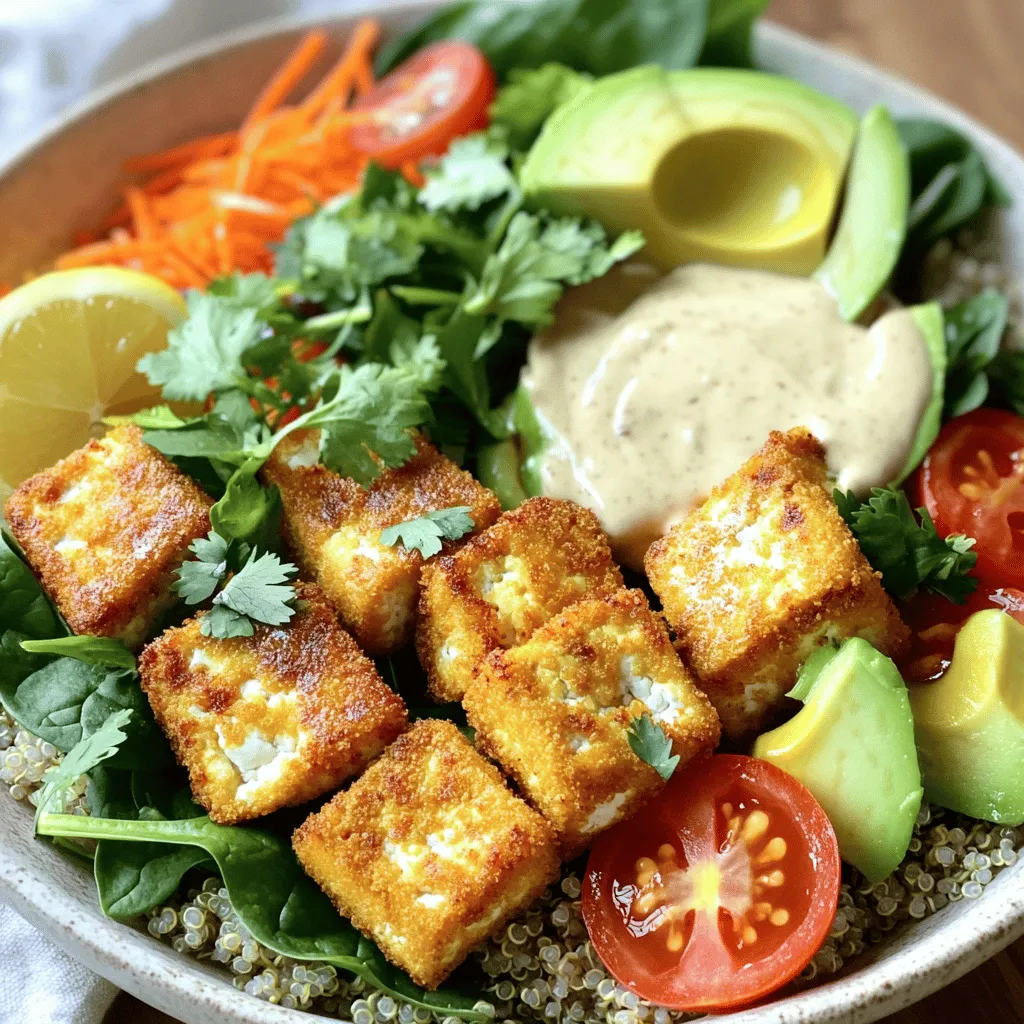
Looking for a healthy and tasty meal? Try my Crispy Tofu Buddha Bowl! This simple recipe packs flavor and nutrition

To make honey garlic chicken stir-fry, you need these main items: - 1 lb (450g) boneless chicken breast, sliced thin - 2 tablespoons honey - 3 tablespoons soy sauce - 3 cloves garlic, minced - 1 tablespoon fresh ginger, minced - 1 cup bell peppers (red and yellow), sliced - 1 cup broccoli florets - 1 medium carrot, julienned - 2 tablespoons vegetable oil - 1 tablespoon sesame seeds (for garnish) - Salt and pepper to taste - Cooked jasmine rice or noodles, for serving You can add some extra flavors with these optional items: - Green onions, chopped - Red pepper flakes for heat - Peas or snap peas for crunch - A squeeze of lime juice for brightness If you have dietary needs, here are some easy swaps: - Use tofu instead of chicken for a plant-based option. - Swap soy sauce for tamari to make it gluten-free. - Replace honey with maple syrup for a vegan choice. - Choose brown rice or quinoa instead of white rice for a healthier grain. For the full recipe, check out the complete instructions above to create this delicious dish! First, gather all your ingredients. You will need: - 1 lb (450g) boneless chicken breast, sliced thin - 2 tablespoons honey - 3 tablespoons soy sauce - 3 cloves garlic, minced - 1 tablespoon fresh ginger, minced - 1 cup bell peppers (red and yellow), sliced - 1 cup broccoli florets - 1 medium carrot, julienned - 2 tablespoons vegetable oil - 1 tablespoon sesame seeds (for garnish) - Salt and pepper to taste - Cooked jasmine rice or noodles, for serving Next, wash and prep your veggies. Slice the bell peppers, julienne the carrot, and break the broccoli into small florets. Mince the garlic and ginger. This helps the flavors blend well when you cook. Now, season your chicken. Sprinkle it with salt and pepper. Heat 1 tablespoon of vegetable oil in a large skillet or wok over medium-high heat. When the oil is hot, add the chicken. Stir-fry until it turns golden brown, about 5-7 minutes. Make sure it cooks all the way through. Once done, remove the chicken from the skillet and set it aside. This keeps it juicy and tender. In the same skillet, add the other tablespoon of vegetable oil. Toss in the sliced bell peppers, broccoli, and carrot. Stir-fry the veggies for about 3-4 minutes. You want them to be tender-crisp. This gives your dish a nice texture. Next, return the cooked chicken to the skillet. Pour the honey-garlic sauce over everything. Toss it well so that the chicken and veggies are coated. Cook for an extra 2 minutes until the sauce thickens slightly. Finally, remove the skillet from heat. Sprinkle sesame seeds on top before serving. Serve your stir-fry over jasmine rice or noodles. Enjoy your flavorful meal! For the full recipe, check out the details above. To get the best flavor and texture in your Honey Garlic Chicken Stir-Fry, focus on fresh ingredients. Use fresh garlic and ginger for a strong taste. Cut the chicken into thin slices. This helps it cook quickly and evenly. Stir-frying at high heat seals in the juices. Keep everything moving in the skillet for even cooking. Taste the sauce before adding it. Adjust the honey or soy sauce to match your liking. One big mistake is overcooking the chicken. It should be golden brown, not dry. Another error is not prepping your veggies. Chop everything before you start cooking. This way, you won’t rush and burn your food. Don’t forget to add the sauce at the right time. Adding it too soon can make it too thick. Lastly, avoid overcrowding the pan. Cook in batches if needed to ensure even cooking. A large skillet or wok is key for this recipe. It allows for high heat and good movement. A wooden spoon or spatula works best for stirring. Use a sharp knife for slicing chicken and veggies. A cutting board is essential for safe prep. Finally, have some measuring spoons ready for the sauce. These tools help you create a delicious meal. For the full recipe, check out the details above. {{image_2}} You can switch up the veggies in your Honey Garlic Chicken Stir-Fry. Try green beans, snap peas, or zucchini. Each one adds a different taste and texture. You can even add mushrooms for a rich, earthy flavor. Just remember, keep the cooking time similar so everything cooks evenly. This way, your meal stays colorful and fun! If you want to change the protein, tofu or shrimp work great. Tofu soaks up all the honey garlic sauce. It gives a nice, chewy bite. Shrimp cooks quickly and adds a sweet seafood taste. Use the same method as with chicken. Just adjust the cooking time for shrimp, as it only takes a few minutes to cook through. You can enhance the flavor of your stir-fry with spices. Try adding red pepper flakes for some heat. A pinch of five-spice powder gives a warm, sweet note. You can also add fresh herbs, like basil or cilantro, for brightness. These little tweaks can make your dish unique and exciting. Explore different flavors to find your favorite! Store your leftover Honey Garlic Chicken Stir-Fry in an airtight container. This keeps it fresh and tasty. Place it in the fridge within two hours of cooking. It will stay good for about three to four days. To keep it safe, make sure the temperature in your fridge is below 40°F (4°C). If you want to store your stir-fry for longer, freezing is a great option. Let the stir-fry cool completely before you freeze it. Use freezer-safe containers or bags. This way, you can keep it for up to three months. When you're ready to enjoy it, simply thaw it overnight in the fridge. To reheat your stir-fry, use a skillet over medium heat. This helps the chicken and veggies stay juicy. You can add a splash of water or broth to prevent it from drying out. Stir it often until it's heated through. If you prefer the microwave, use a microwave-safe dish. Cover it with a lid or microwave-safe wrap, and heat in short intervals to avoid overcooking. Honey Garlic Chicken Stir-Fry can last about 3 to 4 days in the fridge. To keep it fresh, store it in an airtight container. Make sure it cools down before you seal it. This helps prevent condensation and keeps the food from getting soggy. Yes, you can prepare this dish in advance. Cook the chicken and veggies, then store them separately from the sauce. When you are ready to eat, just heat everything together and add the sauce. This method keeps your stir-fry fresh and tasty. Absolutely! You can use maple syrup or agave nectar as sweeteners. Both will add a nice sweetness. If you prefer a sugar alternative, try using brown sugar or coconut sugar. Each option will give a slightly different flavor but still taste great. I recommend serving this stir-fry over jasmine rice or noodles. Both pair well with the sweet and savory sauce. You can also add a side of steamed vegetables for extra nutrition. For a crispy touch, consider serving with spring rolls or dumplings. To add heat, include some red pepper flakes or a dash of hot sauce. Start with a small amount, then taste and adjust as needed. If you want more spice, fresh chili peppers are a great choice. Just chop them up and stir them in when you add the sauce. If you want to try out this delicious meal, check out the Full Recipe to get started! This blog post covered the key ingredients and step-by-step instructions for making Honey Garlic Chicken Stir-Fry. You learned about optional ingredients, substitutions, and tips to perfect the dish. Remember to avoid common mistakes and use the right tools. Overall, this dish is flexible and tasty. Feel free to experiment with veggies and proteins. Your stir-fry can impress anyone at the table. Enjoy your cooking journey!

Honey Garlic Chicken Stir-Fry Flavorful Meal Idea

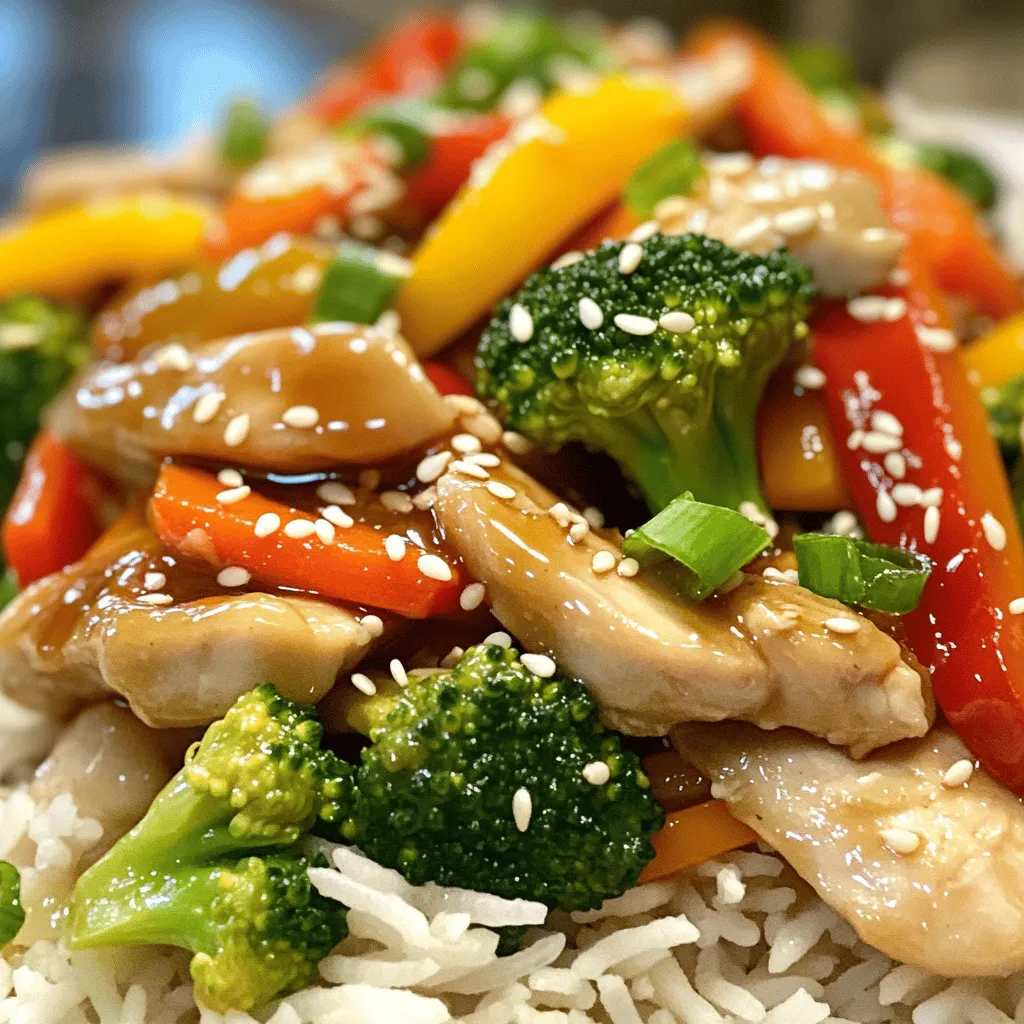
Are you ready to whip up a delicious Honey Garlic Chicken Stir-Fry? This quick and easy meal idea packs a

Older posts
Newer posts
← Previous Page1 … Page56 Page57 Page58 … Page83 Next →

dsad

© 2025 easycookingbite • Built with GeneratePress

Our Policies

  • Copyright Policy
  • Cookie Policy
  • GDPR Policy
  • Privacy Policy
  • Disclaimer
  • Terms Of Use

More Information

  • Home
  • About
  • Contact
  • Appetizers
  • Dessert
  • Dinner
  • Drinks
©2025, easycookingbite About Back To Top