Skip to content
DisclaimerTerms Of UseGDPR PolicyCookie Policy

easycookingbite

  • Home
  • Drinks
  • Appetizers
  • Dinner
  • Dessert
  • About
  • Contact
  • Privacy Policy
DisclaimerTerms Of UseGDPR PolicyCookie Policy

Lily

- 2 boneless skinless chicken breasts - 2 tablespoons Dijon mustard - 2 tablespoons pure maple syrup - 1 tablespoon olive oil - 1 teaspoon garlic powder - 1 teaspoon thyme (dried or fresh) - 2 medium sweet potatoes, peeled and diced - 1 cup broccoli florets - 1 tablespoon balsamic vinegar - 1/4 cup chopped pecans - Fresh parsley for garnish The main ingredients create a great mix of flavors. The chicken gets a sweet and tangy kick from the Dijon mustard and maple syrup. The sweet potatoes add a creamy texture and a hint of sweetness. Broccoli gives a fresh crunch. The pecans provide a nutty bite, while balsamic vinegar adds a nice finish. - Additional seasonings - Other vegetables for roasting - Toppings and garnishes You can customize your bowl with extra seasonings like paprika or cumin. Feel free to add other vegetables like carrots or bell peppers. Top your bowl with avocado or feta cheese for added taste. - Calories per serving: Approximately 450 - Macronutrient breakdown: - Protein: 30g - Carbohydrates: 50g - Fats: 15g This bowl is a balanced meal. The chicken provides lean protein, and the sweet potatoes offer fiber. Broccoli adds vitamins and minerals. Using pure maple syrup gives a natural sweetness without refined sugars. {{ingredient_image_1}} - Preheat your oven to 425°F (220°C). - In a bowl, mix 2 tablespoons Dijon mustard, 2 tablespoons pure maple syrup, 1 tablespoon olive oil, 1 teaspoon garlic powder, 1 teaspoon thyme, salt, and pepper. - Coat 2 boneless, skinless chicken breasts in the marinade. Let them sit for at least 15 minutes. - Peel and dice 2 medium sweet potatoes into bite-sized cubes. - Toss the diced sweet potatoes with a drizzle of olive oil, salt, and pepper. - Spread them evenly on a baking sheet. - Roast the sweet potatoes for about 20 minutes, until they are tender and slightly caramelized. - Heat a skillet over medium-high heat. - Add the marinated chicken breasts to the hot skillet. - Cook for 6-7 minutes on each side. The chicken should be golden brown and reach an internal temperature of 165°F (75°C). - Once cooked, remove the chicken and let it rest for a few minutes before slicing. - For the broccoli, use 1 cup of florets. - In the last few minutes of roasting sweet potatoes, add the broccoli to a steamer basket. - Steam the broccoli for about 4-5 minutes until it is bright green and tender. - Start with a base of roasted sweet potatoes in your serving bowl. - Add sliced chicken on top of the sweet potatoes. - Next, add a portion of steamed broccoli. - Drizzle with 1 tablespoon balsamic vinegar and sprinkle with 1/4 cup chopped pecans for crunch. - Garnish your bowl with fresh parsley for added color. - Serve your Maple Dijon Chicken Sweet Potato Bowl warm and enjoy! - Marinate the chicken for at least 15 minutes. This helps the flavors soak in well. - If you want more flavor, add extra mustard or maple syrup. Taste as you mix. - For juicy chicken, sear in a hot skillet for a nice crust. Use medium-high heat. - When roasting vegetables, space them out on the tray. This helps them get crispy. - Make sure the chicken reaches an internal temperature of 165°F (75°C). Use a meat thermometer. - For sweet potatoes, roast them until they are soft and slightly caramelized. Check them at 20 minutes. Pro Tips Marinate for Maximum Flavor: Allow the chicken to marinate for at least 30 minutes or even overnight for a deeper flavor infusion. Perfectly Roasted Sweet Potatoes: Make sure the sweet potatoes are evenly cut to ensure they cook at the same rate, achieving that perfect caramelization. Steam Broccoli for Brightness: Steaming broccoli instead of boiling helps retain its vibrant color and nutrients, making it more appealing. Add Texture with Pecans: Toast the pecans before adding them to the bowl for an extra crunch and enhanced flavor. {{image_2}} You can change the chicken if you want. Try tofu or turkey for a twist. Tofu gives a great texture. Turkey adds a leaner protein. If sweet potatoes are not available, use butternut squash or carrots. Both options bring sweetness and color. These swaps keep the dish exciting and tasty. Adding spices or herbs can boost flavor. Try paprika for a smoky kick. Fresh herbs like basil or cilantro add freshness. You can also swap pecans for walnuts or almonds. Each nut gives a different crunch and taste. Mix and match to find your favorite combo. You can switch the bowl to a salad if you like. Just add leafy greens for a lighter meal. Another option is to serve it with grains like quinoa or brown rice. Grains add a nutty flavor and extra fiber. These changes can make the meal feel new each time. To keep your Maple Dijon Chicken Sweet Potato Bowl fresh, store leftovers in the fridge. Use airtight containers. Make sure the bowl cools down before sealing. This helps keep moisture in and avoids sogginess. When reheating, use the oven for best results. Preheat your oven to 350°F (175°C). Place the bowl in a dish and cover with foil. Heat for about 15 minutes. This keeps the chicken juicy and the sweet potatoes soft. You can use the microwave too. Place the bowl on a microwave-safe plate. Heat in 1-minute intervals until warm. Stir in between to help heat evenly. Watch closely to avoid drying out the chicken. Yes, you can freeze this bowl! It’s great for meal prep. To freeze, let the bowl cool completely. Then, place it in a freezer-safe container. Seal tightly to prevent freezer burn. To thaw, move the bowl to the fridge overnight. Reheat using the oven or microwave. This way, your dish stays tasty and safe to eat. To boost the flavor, try adding a splash of lemon juice. It brightens the taste. You can also use more garlic powder or even minced garlic. Marinating longer than 15 minutes helps too. If you have time, let the chicken sit in the marinade for an hour or overnight. This allows the flavors to soak in better. Yes, you can use fresh herbs! Fresh thyme adds a nice touch. Use about three times the amount of fresh herbs. For thyme, that means one tablespoon of fresh for one teaspoon of dried. Just chop them finely before mixing them in the marinade. Fresh herbs bring a vibrant taste and aroma. If you don't have maple syrup, try honey or agave nectar. Both will add sweetness. You can also use brown sugar dissolved in a bit of warm water. This mimic the syrup's flavor. Just remember that each sweetener has a different sweetness level, so adjust to taste. Making this bowl gluten-free is easy. Ensure your Dijon mustard is gluten-free. Most brands are, but check the label. Use gluten-free balsamic vinegar too. All the other ingredients are gluten-free, so you'll be good to go! You can prepare this dish ahead of time! Cook the chicken and sweet potatoes, then store them in the fridge. They will last for about three to four days. You can also chop the vegetables in advance to save time. Just reheat everything together before serving. This makes meal prep simple! You can create a tasty, healthy dish by following these steps. We explored key ingredients, including chicken and sweet potatoes, that enhance flavor and nutrition. Optimal cooking methods ensure your meal is delicious and safe. Feel free to swap ingredients or try different flavors to make it your own. Remember to store and reheat leftovers properly for the best taste. With these tips, you’re set to impress at mealtime. Enjoy your cooking adventure!

Maple Dijon Chicken Sweet Potato Bowl Delight

Looking for a delicious and healthy meal that’s easy to make? The Maple Dijon Chicken Sweet Potato Bowl is just

To make Marry Me Ditalini Sausage Pasta, gather these simple ingredients: - 8 ounces ditalini pasta - 2 tablespoons olive oil - 1 pound Italian sausage (mild or spicy) - 1 small onion, finely chopped - 3 cloves garlic, minced - 1 red bell pepper, diced - 1 can (14.5 ounces) diced tomatoes (with juice) - 1 cup chicken broth - 1 teaspoon dried oregano - 1 teaspoon red pepper flakes (optional) - Salt and pepper to taste - 1 cup fresh spinach - 1/2 cup grated Parmesan cheese - Fresh basil leaves for garnish Each ingredient plays a key role in building flavor. The ditalini pasta gives a fun shape and texture. Olive oil adds richness, while Italian sausage brings hearty flavor. The onion and garlic build a savory base. Red bell pepper adds sweetness and color. Diced tomatoes provide acidity and moisture. Chicken broth enhances the sauce, making it rich. Oregano and red pepper flakes add aromatic notes. Fresh spinach gives a nice pop of green and nutrients. Grated Parmesan cheese provides a salty finish. Finally, fresh basil leaves brighten the dish. Using these ingredients, you can create a meal that delights everyone at the table. {{ingredient_image_1}} To start, fill a large pot with water and bring it to a boil. Once the water is boiling, add a generous pinch of salt. This step is key to flavoring your pasta. Next, add 8 ounces of ditalini pasta to the pot. Cook it according to the package instructions until it is al dente. This usually takes about 8-10 minutes. Once cooked, drain the pasta and set it aside. In a large skillet, heat 2 tablespoons of olive oil over medium heat. When the oil is hot, add 1 pound of Italian sausage, either mild or spicy, based on your taste. Use a wooden spoon to break it apart. Cook the sausage until it turns brown and is no longer pink. This should take about 5-7 minutes. The sausage adds a rich flavor that makes this dish special. Once the sausage is cooked, stir in a finely chopped small onion and 3 cloves of minced garlic. Cook these until the onion becomes soft and translucent, about 3-4 minutes. Then, add 1 diced red bell pepper to the skillet. Cook for another 2-3 minutes until the bell pepper is tender. The colors and scents of the vegetables will brighten your dish. Now, it’s time to create the sauce. Add a can of 14.5 ounces of diced tomatoes, including the juice, and 1 cup of chicken broth to the skillet. Sprinkle in 1 teaspoon of dried oregano, and add salt and pepper to taste. If you like heat, consider adding 1 teaspoon of red pepper flakes. Stir everything well and bring it to a simmer. Let it simmer for about 5 minutes to blend the flavors. Next, add the cooked ditalini pasta and 1 cup of fresh spinach to the skillet. Gently stir everything together. This will help the spinach wilt into the warm pasta and sauce. Cook for about 2 minutes until the spinach is just wilted. This step adds both nutrition and color to your dish. Finally, remove the skillet from the heat. Mix in 1/2 cup of grated Parmesan cheese until it is well blended. This cheese brings a creamy texture and rich taste. Taste your dish and add more salt and pepper if needed. To serve, divide the pasta among plates or place it in a large bowl. Garnish with fresh basil leaves and extra Parmesan if you like. Enjoy your delicious Marry Me Ditalini Sausage Pasta! When picking sausage, you can choose between mild or spicy. Mild sausage gives a rich flavor without much heat. Spicy sausage adds a nice kick that warms the dish. I recommend using Italian sausage for the best taste. Brands like Johnsonville or Aidells work well. To make the sauce perfect, you can adjust the flavors. If it tastes too bland, add more salt or pepper. For thickness, let the sauce simmer longer. You can also add dried herbs like basil or thyme. If you want extra heat, add red pepper flakes. Start with a small amount, then taste and adjust. Cooking pasta al dente means it’s firm but not hard. To achieve this, boil ditalini in salted water for about 7-9 minutes. Stir often to prevent sticking. Once done, drain the pasta but do not rinse. Rinsing washes away the starch that helps the sauce stick. Pro Tips Choose Your Sausage Wisely: The flavor of the dish largely depends on the type of Italian sausage you use. Opt for high-quality, fresh sausage for the best taste. Customize the Heat: If you love a bit of spice, feel free to increase the amount of red pepper flakes or use spicy Italian sausage for an extra kick! Fresh Ingredients Matter: Whenever possible, use fresh spinach and high-quality Parmesan cheese. Fresh ingredients enhance the overall flavor and texture of the dish. Cooking Pasta Perfectly: Always cook pasta until al dente for the best texture. It will continue to cook slightly when mixed with the sauce, ensuring it doesn’t become mushy. {{image_2}} You can switch up the protein in Marry Me Ditalini Sausage Pasta for a new taste. Ground turkey or chicken works well. They provide a lighter option while still keeping the dish hearty. If you want a meat-free meal, try vegetarian sausage. It offers similar flavors and texture and pairs great with the sauce. Feel free to get creative with the vegetables in your pasta. You can add zucchini, mushrooms, or even kale. Each adds a unique flavor and boosts nutrition. Seasonal vegetables are also fun to use. In spring, fresh asparagus adds a nice crunch. In the fall, roasted butternut squash brings sweetness. Cheese can change the dish's flavor and creaminess. Instead of Parmesan, try mozzarella for a melty bite. Feta cheese adds a tangy twist that contrasts nicely with the sausage. If you follow a vegan diet, choose a nut-based cheese. Many options melt well and taste great, too. To keep your Marry Me Ditalini Sausage Pasta fresh, store leftovers in an airtight container. This helps prevent the pasta from drying out. Place it in the fridge within two hours of cooking. It will last for 3 to 4 days in the fridge. Always check for any off smells or changes in texture before eating. You can freeze this pasta dish if you want to save some for later. Let it cool completely before packing it into freezer-safe containers. Make sure to leave some space at the top of the container, as the pasta will expand. It will stay good in the freezer for about 2 to 3 months. To use it, move the container to the fridge overnight to thaw. You can also thaw it in the microwave for quicker results. When you want to reheat the pasta, use low heat on the stove. This keeps the texture nice. Add a splash of chicken broth or water to help bring back some moisture. Stir the pasta gently as you heat it. If using the microwave, cover the dish to trap steam. This method keeps your pasta from drying out. Enjoy your meal just like the first time! To make Marry Me Ditalini Sausage Pasta gluten-free, you can use gluten-free ditalini pasta. There are many brands available that offer great taste and texture. You can also use other gluten-free pasta shapes like rice or quinoa pasta. For gluten-free cooking, always check labels. Some sauces and broths may contain gluten. Use certified gluten-free chicken broth for safety. Also, clean your cooking space and utensils to avoid cross-contamination. Yes, you can make this dish ahead of time. Prepare the pasta and sauce, then store them separately in the fridge. Keep the pasta in a sealed container. Store the sauce in a different container. This helps prevent the pasta from becoming mushy. When you are ready to eat, reheat the sauce on the stove. Warm it gently over low heat. Add a splash of water or broth if it gets too thick. Cook the pasta in boiling water for a few minutes to warm it up. Then combine both for a delicious meal. You can serve this pasta with a fresh green salad. A simple salad with mixed greens and a light vinaigrette works well. Garlic bread is another great choice. It adds a nice crunch and pairs perfectly with the pasta. For extra flavor, consider serving roasted vegetables on the side. They bring color and nutrients to the meal. You can also add a sprinkle of fresh basil on top of your dish for added taste and presentation. This blog post guided you through making Marry Me Ditalini Sausage Pasta. You learned about the key ingredients, step-by-step cooking, and tips for success. We explored variations, storage, and answered common questions. Trying different proteins or veggies can add your unique twist. This dish is simple and full of flavor. Enjoy making it again and again! A delicious meal awaits that you can share with loved ones. Happy cooking!

Marry Me Ditalini Sausage Pasta Flavorful Dinner Dish

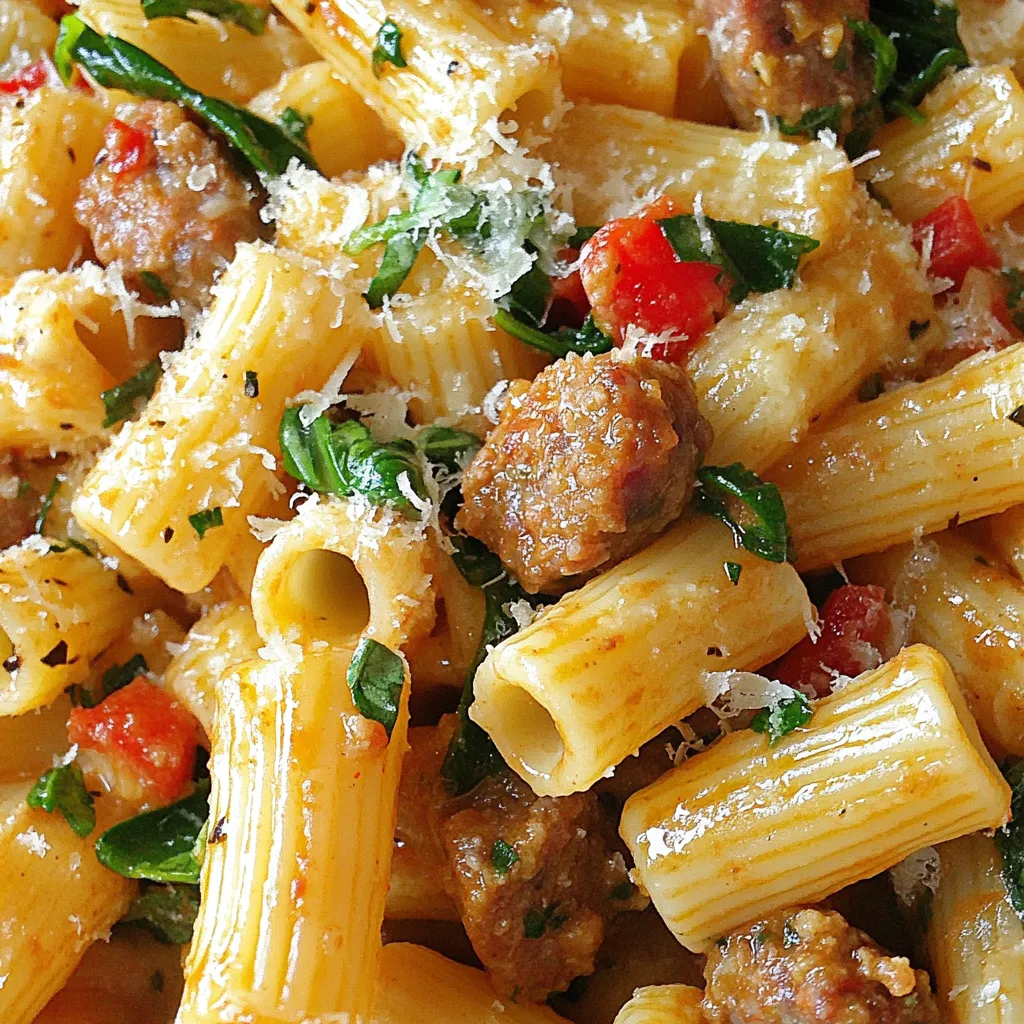
If you’re looking for a delicious dinner that impresses, try Marry Me Ditalini Sausage Pasta. This dish combines tender pasta,

To make Caprese stuffed avocados, gather these ingredients: - 2 ripe avocados - 1 cup cherry tomatoes, halved - 1 cup fresh mozzarella balls, drained - 1/4 cup fresh basil leaves, chopped - 2 tablespoons balsamic glaze - 1 tablespoon olive oil - Salt and pepper to taste - 1 teaspoon dried oregano (optional) When measuring ingredients, use a dry measuring cup for solids and a liquid cup for liquids. For fresh herbs, pack them lightly in the cup to get a good amount. When slicing cherry tomatoes, a sharp knife helps to avoid squishing them. Keep your ingredients as fresh as possible for the best flavor. If you can’t find fresh mozzarella, try using feta or goat cheese for a tangy twist. For balsamic glaze, mix balsamic vinegar with a touch of honey or maple syrup. If you want a lighter option, skip the cheese altogether or use a vegan cheese substitute. You can also swap out basil for parsley or cilantro if you prefer a different taste. Start by cutting the avocados in half. Use a sharp knife to slice through the skin. Carefully twist the two halves to separate them. Remove the pit using a spoon or knife. Scoop out a bit of the flesh to make room for the filling. Set the avocado halves aside on a plate. In a medium bowl, add the halved cherry tomatoes, fresh mozzarella balls, and chopped basil leaves. This mix brings fresh flavor to your dish. Drizzle olive oil and balsamic glaze over the mixture. Season with salt, pepper, and oregano if you like. Gently toss everything together. Make sure all ingredients are well mixed. Now, generously stuff each avocado half with this Caprese mixture. Let some of it overflow for a nice look. For the finishing touch, drizzle any leftover balsamic glaze over the stuffed avocados. This adds a glossy finish and extra flavor. You can sprinkle more fresh basil leaves on top for a pop of color. Serve these beautiful stuffed avocados right away. Enjoy this tasty meal idea! For the full recipe, refer to the recipe above. One serving of Caprese stuffed avocados has about 450 calories. You get this from the avocados, cheese, and olive oil. The healthy fats in avocados help keep you full. Each serving offers important nutrients: - Fat: 36g - Protein: 12g - Carbohydrates: 24g - Fiber: 11g - Sugars: 4g These nutrients come from fresh ingredients, making the meal both tasty and healthy. The ingredients in this dish provide great health benefits: - Avocados: They are high in healthy fats. They support heart health and lower cholesterol levels. - Cherry Tomatoes: These are rich in vitamins A and C. They can boost your immune system. - Mozzarella: This cheese offers calcium and protein. It helps in building strong bones. - Basil: This herb has anti-inflammatory properties. It can help reduce stress and improve digestion. - Balsamic Glaze: It adds flavor without extra calories. It may help with blood sugar control. You can find the full recipe for Caprese stuffed avocados in the article. Enjoy this dish knowing it is both delicious and healthy! {{image_2}} To make Caprese stuffed avocados, you need ripe avocados. Ripe avocados should feel slightly soft when you press them gently. If they feel hard, they are not ready yet. You can speed up ripening by placing them in a paper bag with a banana or apple. This method works because these fruits give off ethylene gas, which helps avocados ripen faster. Always check your avocados before using them. If they are overripe, they may be brown inside and not taste good. If you have any leftover stuffed avocados, store them in the fridge. Cover them tightly with plastic wrap to keep them fresh. To slow browning, squeeze some lemon juice over the exposed avocado flesh before wrapping. This juice acts as a barrier against air. Use these leftovers within a day for the best taste. If you wait too long, the avocado may spoil, and that’s no fun! Presentation is key for this dish! Start by placing the stuffed avocados on a nice plate. Add a drizzle of balsamic glaze around the plate for a pop of color. You can also sprinkle some extra basil leaves on top for a fresh look. For a gourmet touch, use a sprinkle of sea salt. This adds a bit of crunch and enhances the flavors. Remember, we eat with our eyes first, so make it look good! You can find the full recipe [here]. You can add other tasty fillings to your Caprese stuffed avocados. Try adding cooked chicken for protein. If you want more crunch, add diced cucumbers. You can also mix in roasted red peppers or artichoke hearts. Each choice gives a new twist to the dish. To enhance the flavors, consider adding spices. Red pepper flakes can add heat. A pinch of garlic powder gives a lovely aroma. You can also mix in some pesto for a rich flavor. These small changes can make a big difference in taste. If you have dietary needs, you can easily adjust this recipe. For a vegan option, use dairy-free cheese or skip it altogether. If you're gluten-free, this dish is naturally safe. You can also make it low-carb by using fewer tomatoes. Remember, the goal is to enjoy the meal while fitting your diet. For the complete recipe, check out the Full Recipe section. If you want to swap out mozzarella, try using feta cheese. Feta adds a tangy taste. You can also use goat cheese for a creamy texture. Both options work well with the other flavors. To make this recipe vegan, simply leave out the mozzarella. You can replace it with vegan cheese or skip cheese altogether. Use extra chopped herbs for flavor. Add some avocado to keep it creamy. Yes, you can prepare the filling ahead of time. Store the tomato and basil mixture in the fridge. Just stuff the avocados right before serving. This keeps them fresh and tasty. Avoid cutting the avocados too early to prevent browning. You learned about all the key parts of making a great avocado dish. We covered ingredients, measurements, and even substitutes. I shared step-by-step instructions to guide your cooking. You now know how to add fun variations and make healthy choices. Remember, ripe avocados are crucial for great taste. Use these tips to impress at your next meal. Enjoy experimenting and making this dish your own!

Caprese Stuffed Avocados Tasty and Easy Meal Idea

Looking for a fresh and quick meal idea? Try my Caprese Stuffed Avocados! This simple dish combines creamy avocados, ripe

To make Lemon Garlic Roasted Asparagus, gather these simple items: - Fresh asparagus - Olive oil - Garlic - Lemon zest and juice - Sea salt and black pepper - Optional ingredients: red pepper flakes and Parmesan cheese Fresh asparagus is key. Look for bright green stalks that are firm and straight. When you trim the ends, cut off about an inch. This helps remove any tough parts. Next, we need olive oil. It adds rich flavor and helps the asparagus cook evenly. Garlic gives a nice kick, so use fresh cloves and mince them well. Lemon zest and juice brighten the dish. The zest adds a punch of citrus, while the juice gives it a refreshing taste. Sea salt and black pepper are essential for flavoring. They enhance all the other tastes in the dish. If you like a bit of heat, sprinkle some red pepper flakes on top. For a cheesy touch, add grated Parmesan cheese. It melts nicely and adds depth to the dish. These ingredients come together to create a tasty side dish. Check the [Full Recipe] for more details on how to prepare this delicious meal! First, set your oven to 425°F (220°C). This temperature helps the asparagus roast well. Preheating is key for even cooking. While it heats, you can prepare the asparagus. Grab a bunch of fresh asparagus. Trim the ends to remove any tough parts. Place the trimmed asparagus in a large bowl. Add 3 tablespoons of olive oil. Toss in 3 cloves of minced garlic, lemon zest, and lemon juice. Sprinkle 1 teaspoon of sea salt and 1/2 teaspoon of black pepper. If you like spice, add 1/4 teaspoon of red pepper flakes. Mix everything gently to coat the asparagus well. Now, spread the asparagus on a lined baking sheet. Make sure they are in a single layer. This step ensures they roast evenly. Place the baking sheet in the oven. Roast for 12-15 minutes. Halfway through, stir the asparagus for even cooking. The asparagus should be tender and slightly caramelized. If you want, sprinkle 2 tablespoons of grated Parmesan cheese on top. Return it to the oven for another 2-3 minutes to melt the cheese. Once done, take it out and place it on a serving plate. Garnish with fresh parsley for a bright touch. This recipe is simple yet full of flavor. You can find the full recipe above. Choose bright green asparagus with firm, straight stalks. Look for tightly closed tips. Avoid any that are limp or have dark spots. Fresh asparagus should snap when bent. If you find thin spears, these can be sweeter. Thicker spears offer a heartier bite. Buy from local markets to get the freshest options. Roasting asparagus at a high temperature brings out its natural sweetness. Preheat your oven to 425°F (220°C) for best results. Toss the asparagus evenly in olive oil and seasonings. Spread them out on the baking sheet. Avoid crowding to let them roast well. Turn them halfway through to ensure even cooking. You want them tender with a bit of crispness. Lemon garlic roasted asparagus pairs well with many dishes. Serve it as a side for grilled chicken or fish. It also complements pasta dishes nicely. For a fun twist, top it with grated Parmesan after roasting. Finish with a sprinkle of fresh parsley for color. You can find the full recipe linked here to guide you further. {{image_2}} Cheese can elevate your Lemon Garlic Roasted Asparagus. Parmesan is a classic, but you can try others too. Feta adds a tangy twist. Goat cheese gives creaminess and flavor. Sprinkle cheese on the asparagus before roasting. For a strong flavor, use blue cheese. Remember to adjust the amount, so it does not overpower the dish. Want more heat? Add spices to your asparagus mix. Cayenne pepper gives a bold kick. You can use chili powder for a milder option. If you enjoy a smoky flavor, try smoked paprika. For a fresh taste, add a pinch of lemon pepper. Adjust the spice level to fit your taste. You can roast asparagus in different ways. Try grilling for a smoky flavor. Toss the asparagus on a hot grill for 5-7 minutes. Air frying is another great method. It gives crispy edges with less oil. If you prefer a faster option, use a stovetop skillet. Sauté in olive oil over medium heat for about 5-8 minutes. Each method offers a unique taste, so feel free to experiment! For the full recipe, check the earlier section. To keep leftover asparagus fresh, place it in a sealed container. You can also wrap it in a damp paper towel and put it in a plastic bag. This method helps keep the asparagus crisp. Store it in the fridge. Use it within 3 to 4 days for the best taste. When reheating asparagus, the oven works best. Preheat your oven to 350°F (175°C). Place the asparagus on a baking sheet and heat for about 10 minutes. You can also use a skillet. Heat it on medium heat and stir until warm. This keeps the taste and texture nice. Freezing asparagus is easy but requires a few steps. First, wash and trim the asparagus. Blanch it in boiling water for 2 to 3 minutes. After blanching, place it in ice water to stop cooking. Drain and dry the asparagus well. Then, pack it in airtight bags. Frozen asparagus can last up to 8 months. When you're ready to use it, thaw it in the fridge or cook it straight from frozen. You can find the Full Recipe for Lemon Garlic Roasted Asparagus in the earlier sections. Yes, you can use frozen asparagus. Just remember to thaw it first. Frozen asparagus may not be as crisp as fresh. If you use it, roast for a shorter time. Check it often to avoid overcooking. To make this dish vegan, skip the Parmesan cheese. You can also add nutritional yeast for a cheesy flavor. This keeps your roasted asparagus light and plant-based. The garlic and lemon will still add great taste. You can add many spices to your asparagus. Try garlic powder or onion powder for depth. Paprika adds warmth and color. You could also use thyme or rosemary for a fresh herb taste. Experiment with what you like best! You now know the key ingredients and steps to make roasted asparagus. Fresh asparagus, olive oil, and garlic are must-haves for great flavor. Remember to preheat your oven and prepare the asparagus well. Use my tips for perfect roasting and explore variations to keep it exciting. Storing and reheating leftovers is easy with my advice. With these insights, you can enjoy this simple yet delicious dish anytime. It's nutritious and versatile, making it a great addition to any meal. Enjoy your culinary journey with asparagus!

Lemon Garlic Roasted Asparagus Flavorful Side Dish

If you’re looking for a bright and tasty side dish, you’ve found it! Lemon garlic roasted asparagus packs flavor in

To make pumpkin spice overnight oats, you need simple ingredients. Here’s what you will need: - 1 cup rolled oats - 1 cup almond milk (or any milk of choice) - ½ cup canned pumpkin puree - 1 tablespoon maple syrup - 1 teaspoon pumpkin spice blend - ½ teaspoon vanilla extract - ¼ cup Greek yogurt (optional) - A pinch of salt - Chopped nuts and dried cranberries for topping Each ingredient plays a key role. Rolled oats provide a hearty base, while almond milk keeps it creamy. Canned pumpkin adds rich flavor and nutrition. Maple syrup sweetens the mix, and pumpkin spice brings warmth. Vanilla extract adds depth. Greek yogurt is optional but makes it extra creamy. Salt enhances all the flavors. You can customize toppings too. Chopped nuts add crunch, while dried cranberries give a sweet pop. For more texture, feel free to add seeds or fresh fruit. This recipe is all about balance between flavors and textures. Check out the Full Recipe for more details on how to make this delicious dish! Start by combining your rolled oats and almond milk in a medium bowl. Mix them well until they blend smoothly. Next, add the pumpkin puree. This will give your oats that rich, fall flavor. Then, it’s time to add the maple syrup. You can adjust the amount based on how sweet you like it. Now, sprinkle in the pumpkin spice blend and vanilla extract. These will enhance the pumpkin taste. If you want creaminess, add Greek yogurt. Finally, add a pinch of salt to balance the flavors. Stir everything until it’s creamy and well combined. Now, it’s time to divide the mixture. Use two jars or airtight containers. Make sure to leave some space at the top for toppings. Seal the jars tightly. Place them in the fridge overnight. If you can’t wait, give them at least four hours. This time allows the oats to soak up the milk and flavors. When morning comes, take out your jars. Stir the oats well before serving. If they seem too thick, add a splash of almond milk to loosen them up. Now, it’s time for toppings. You can add chopped nuts or dried cranberries for extra crunch and flavor. You can find the full recipe linked here for more details. Enjoy every bite of your pumpkin spice overnight oats! You can easily change the sweetness of your oats. Start with one tablespoon of maple syrup. Taste the mixture. If you want it sweeter, add more syrup. Just remember, a little goes a long way. You can also try honey or agave if you prefer those flavors. To boost the taste, use fresh spices. Fresh cinnamon and nutmeg add a warm kick. Pre-mixed pumpkin spice is handy, but fresh spices give more depth. Try grating fresh nutmeg or using whole cinnamon sticks. This small change can make a big difference in flavor. Serving your overnight oats in clear jars looks great. You can see the layers of oats and toppings. This makes your breakfast more fun. Add a sprinkle of pumpkin spice on top for flair. Chopped nuts and dried cranberries not only taste good but also add color. You can enjoy the beauty of your food while eating. For the complete recipe and more tips, check out the Full Recipe. {{image_2}} If you want a dairy-free option, skip the Greek yogurt. Use coconut yogurt instead. This keeps the creaminess while making it vegan. You can also add extra almond milk to reach your preferred texture. Coconut yogurt adds a nice flavor that pairs well with pumpkin spice too. To jazz up your oats, consider adding chocolate chips or nuts. Chocolate chips give a sweet, rich taste that kids love. Nuts add crunch and healthy fats. Try walnuts or pecans for a warm touch. Mix in a handful before you refrigerate. It’s a fun way to change the flavor and texture. For a seasonal twist, try adding apple pie spice. This spice brings warmth and a lovely aroma. Just swap out the pumpkin spice for apple pie spice in your recipe. You can even add diced apples for extra texture. It’s a great way to celebrate fall flavors in every bite. To keep your pumpkin spice overnight oats fresh, store them in airtight jars or containers. Make sure the lids seal tight. This helps keep out air and moisture. Place them in the fridge right after making them. They will stay tasty for several days. If you notice any change in smell or color, it’s best to toss them out. You can freeze overnight oats for later use. To do this, fill your jars or containers, but leave space at the top. Oats expand when frozen. Seal them well and place them in the freezer. When you want to eat them, move a jar to the fridge the night before. This way, they thaw slowly. You can also microwave them for a quick warm-up. When stored properly, your overnight oats will last up to five days in the fridge. If frozen, they can stay good for about three months. After that, the taste may change. Always check before eating. These simple steps help ensure you enjoy your pumpkin spice overnight oats at their best! For the full recipe, check the details above. Yes, you can use quick oats. Quick oats cook faster and absorb liquid more quickly. This makes them softer. The texture will be creamier than rolled oats. If you want a chewier bite, stick to rolled oats. Overnight oats last up to five days in the fridge. Store them in airtight containers. Always check for any signs of spoilage before eating. If they smell off or look strange, toss them out. Absolutely! You can add many toppings. Consider using: - Fresh fruit like bananas or berries - Chopped nuts for crunch - Seeds like chia or flaxseed - Coconut flakes for sweetness - A drizzle of honey or nut butter Mix and match to find your favorite combination! For a full recipe, check out the complete guide. Overnight oats are easy to make and delicious. You learned about the basic ingredients and how to combine them. We also discussed tips to enhance flavor and make the dish your own. Don't forget the fun variations for every season. These oats are great for breakfast or a snack. They are healthy, filling, and save time. Enjoy your tasty creations!

Pumpkin Spice Overnight Oats Easy and Delicious Recipe

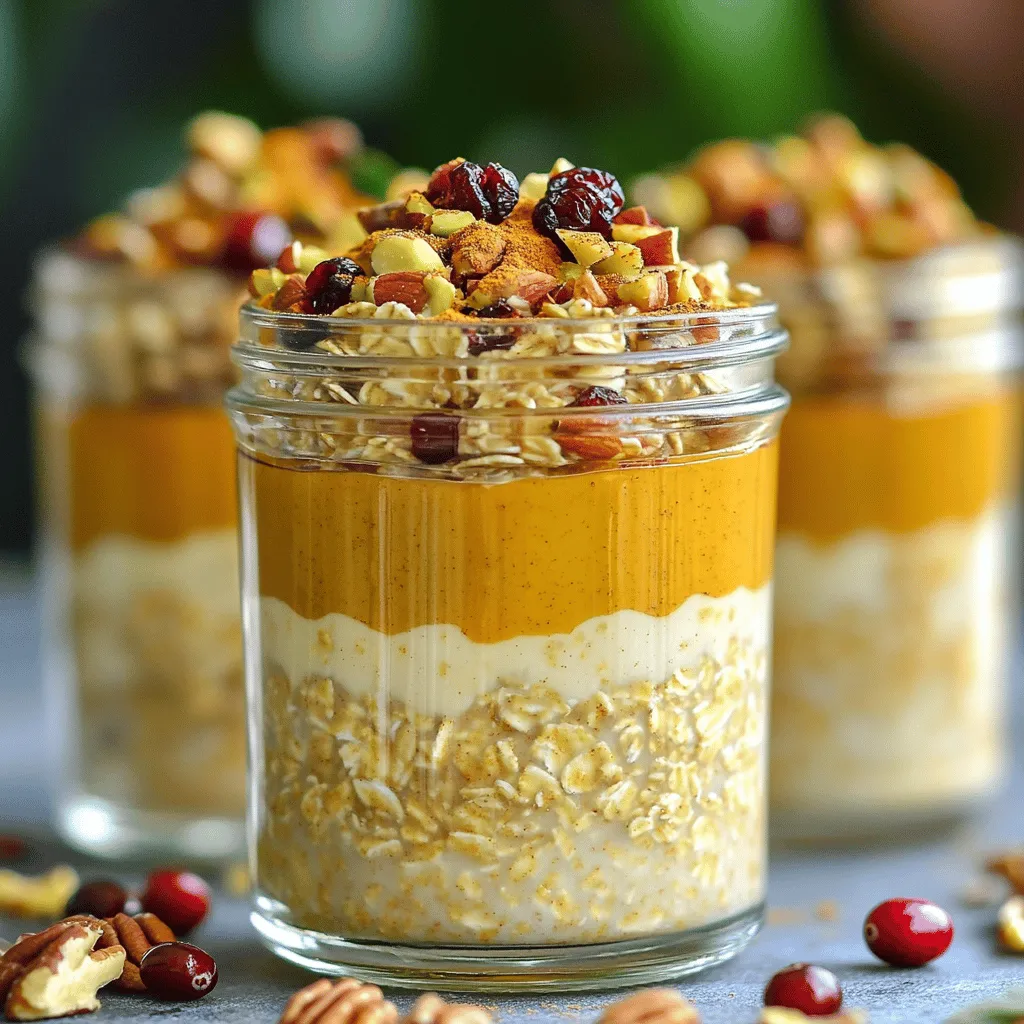
Fall is here, and that means it’s pumpkin spice season! If you’re looking for a quick, tasty breakfast, my Pumpkin

To make zesty zucchini noodles with pesto, gather these items: - 4 medium zucchinis, spiralized - 1 cup fresh basil leaves - 1/2 cup raw walnuts - 1/4 cup nutritional yeast - 2 cloves garlic, minced - 1/2 cup extra virgin olive oil - Salt and pepper to taste - 1 cup cherry tomatoes, halved - 1/2 cup grated Parmesan cheese (optional for non-vegan) Sometimes, you might not have all the ingredients. Here are some swaps: - Use pine nuts instead of walnuts for a traditional pesto taste. - Swap nutritional yeast with grated hard cheese for a rich flavor. - If you don't have basil, try spinach or arugula instead. - Use sunflower seeds if you need a nut-free option. - Any olive oil can work, but choose extra virgin for the best flavor. This dish is not only tasty but also healthy. Here's a quick look at the nutrition: - Each serving has about 200 calories. - It contains healthy fats from the olive oil and walnuts. - Zucchini offers fiber and vitamins. - The pesto adds a burst of flavor without many added carbs. Eating this meal can help you feel full and satisfied. Enjoy the fresh taste and health benefits! For the full recipe, check out the detailed instructions provided above. To start, we need to turn zucchinis into noodles. Grab four medium zucchinis. Use a spiralizer to create the noodles. If you don’t have a spiralizer, a julienne peeler works too. After spiralizing, set the noodles aside. This step is quick and helps us get ready for the next part. Now, let's make the pesto. In a food processor, add one cup of fresh basil leaves, half a cup of raw walnuts, and two minced garlic cloves. Pulse these until they are finely chopped. Next, we add the nutritional yeast. This gives a cheesy flavor without dairy. With the processor running, slowly drizzle in half a cup of extra virgin olive oil. This step makes your pesto smooth and creamy. Don't forget to season with salt and pepper to taste. It’s time to bring everything together. In a large skillet, heat the zucchini noodles over medium-low heat. Pour in the pesto and gently toss the noodles to coat them well. Cook for just 2-3 minutes. You want the noodles to be tender but still crunchy. After that, fold in one cup of halved cherry tomatoes. Cook for another minute to warm them up. Now, it’s ready to serve! Plate your zoodles and add grated Parmesan cheese if you like. Enjoy this colorful and tasty dish! For full details, check the Full Recipe. To make your pesto shine, use fresh basil. It gives the sauce a bright taste. Toast the walnuts lightly for added flavor. This step brings out their nutty goodness. Use good quality olive oil for the best results. It enhances the overall flavor of your pesto. Blend the ingredients until smooth, but don't over-process. A few small bits add texture. Serve your zucchini noodles warm for the best taste. A large bowl works great for serving. Garnish with fresh basil leaves for color. A drizzle of olive oil on top looks stunning. If you enjoy cheese, add grated Parmesan for extra richness. Cherry tomatoes add a sweet burst of flavor. You can also serve this dish with grilled chicken or shrimp for protein. To vary the dish, add nuts or seeds for crunch. Pine nuts or sunflower seeds are great choices. For a spicy kick, sprinkle red pepper flakes. Try adding lemon zest for a bright finish. If you want more veggies, mix in some spinach or arugula. A hint of fresh lemon juice can brighten the entire dish. For the complete recipe, check out the Full Recipe section. {{image_2}} If you want a vegan option, skip the Parmesan cheese. The nutritional yeast gives a cheesy flavor. You can also use cashews instead of walnuts for a creamier pesto. Blend soaked cashews with your other pesto ingredients. This swap keeps it rich and tasty. To make this dish heartier, add proteins. Grilled chicken or shrimp pairs well with zucchini noodles. For a plant-based choice, try chickpeas or tofu. Cook them separately and toss them in with the zoodles and pesto. This adds great texture and keeps you full. Feel free to use seasonal veggies. In summer, add fresh cherry tomatoes for sweetness. In fall, try roasted butternut squash for a warm flavor. You can also mix in spinach or kale for added nutrients. These swaps keep the dish fresh and exciting throughout the year. Store leftover zucchini noodles in an airtight container. They can stay fresh for up to three days. To keep them crisp, avoid adding sauce until you are ready to eat. Place a paper towel in the container to absorb excess moisture. You can freeze zucchini noodles, but they will lose some texture. To freeze, blanch the noodles in boiling water for one minute. Then, cool them in ice water, drain, and pack in freezer bags. They will last for about two months. When ready, thaw in the fridge overnight before cooking. Reheat zucchini noodles gently. Use a skillet over low heat to warm them. Add a splash of water or olive oil to prevent sticking. Heat for about three to four minutes, stirring often. If you want to reheat with pesto, do it quickly to avoid overcooking the noodles. For the full recipe, check out Zesty Zucchini Noodles with Pesto. You can store zucchini noodles in the fridge. Place them in an airtight container. They can last for about three days. To keep them fresh, avoid adding salt before storing. Salt makes them soggy. If you want to freeze them, blanch the noodles first. This helps keep their color and texture when thawed. Yes, you can make zucchini noodles ahead of time. Spiralize the zucchinis and store them in the fridge. Just remember to keep them dry. Wet noodles can become mushy. If you plan to enjoy them later, make the pesto too. Store it in a separate container. This way, you can mix them together right before serving. Zucchini noodles with pesto are very versatile. You can pair them with grilled chicken or shrimp for extra protein. For a vegetarian option, add roasted chickpeas or sautéed mushrooms. If you want more veggies, toss in bell peppers or spinach. You can also serve them with a side salad or garlic bread for a complete meal. For the full recipe, check out the Zesty Zucchini Noodles with Pesto. This blog post covered how to make delicious zucchini noodles with pesto. We shared ingredient lists, easy steps, and useful tips. Remember, you can swap ingredients to fit your taste. Enjoy making it vegan or adding proteins for a boost. Store leftovers safely in the fridge or freezer. Feel confident in serving these healthy noodles at any meal. Get creative with your flavor and enjoy every bite!

Zucchini Noodles with Pesto Flavorful and Simple Dish

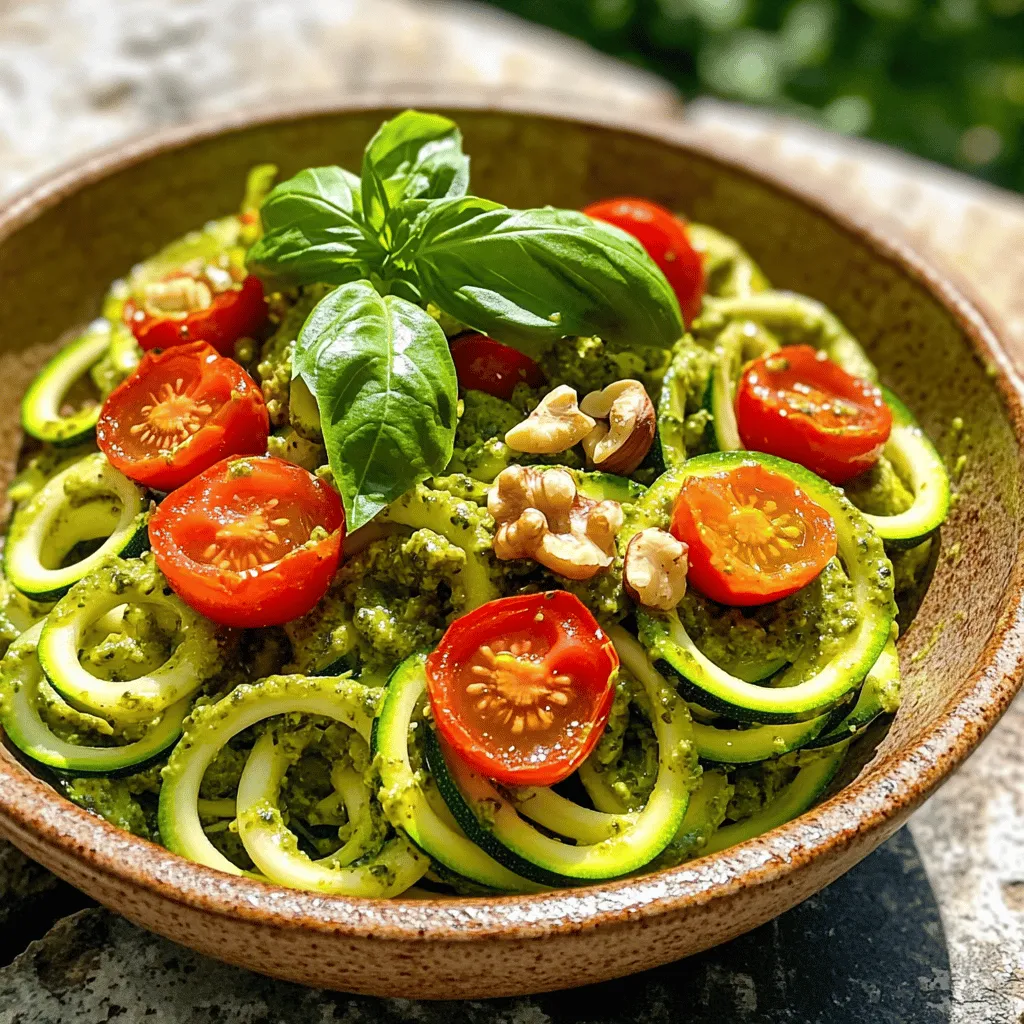
Looking for a quick and tasty meal? Zucchini Noodles with Pesto hits the spot! This dish is not only simple

Here’s what you need to make delicious Coconut Cream Pie Bars: - 1 cup all-purpose flour - 1/2 cup unsweetened shredded coconut - 1/4 cup powdered sugar - 1/2 cup unsalted butter, softened - 1 (14 oz) can coconut milk - 1/2 cup granulated sugar - 3 large eggs - 1/4 cup cornstarch - 1 teaspoon pure vanilla extract - 1/2 teaspoon salt - 1/4 cup sweetened shredded coconut, toasted (for topping) - Whipped cream (for serving, optional) Gather these ingredients for a tasty dessert. Each one plays a key role in creating a rich, creamy flavor. The all-purpose flour helps form a sturdy crust. The coconut milk adds a luscious creaminess that sets this dish apart. Unsweetened shredded coconut gives a nice texture, while the sweetened shredded coconut on top adds a lovely crunch. Using powdered sugar in the crust makes it sweet and tender. You can choose to add whipped cream on top for extra creaminess. This adds a fun touch to each bite. If you follow the Full Recipe, you’ll create a treat that’s both simple and satisfying. Enjoy making these bars—each bite will take you to a tropical paradise! 1. Preheat your oven to 350°F (175°C). Grease an 8x8 inch baking dish. This helps prevent sticking. 2. In a medium bowl, mix the flour, unsweetened shredded coconut, powdered sugar, and softened butter. Use your hands or a fork to combine until the mixture is crumbly. 3. Press this crumbly mixture evenly into the bottom of the greased baking dish. This forms a nice crust. 4. Bake the crust for about 15 minutes, or until it is lightly golden. Once it's done, remove it and let it cool slightly. 1. In another bowl, whisk together the coconut milk, granulated sugar, eggs, cornstarch, pure vanilla extract, and salt. Make sure the mixture is smooth and well combined. 2. Pour this coconut mixture evenly over the cooled crust. This will be the creamy filling. 1. Bake the bars for another 25-30 minutes. They should be set and lightly golden on top. 2. After baking, let the bars cool at room temperature. Then, refrigerate them for at least 2 hours. This helps them firm up nicely. 3. Once chilled, cut the bars into squares. Sprinkle with toasted shredded coconut before serving. For extra delight, add a dollop of whipped cream if you like. This entire process makes Coconut Cream Pie Bars a simple and delicious treat that you can enjoy! For the full recipe, check the link above. To make sure your crust is flaky, start with cold butter. Cut it into small cubes before mixing it with the flour. This helps create a nice, crumbly texture. Press the crust firmly into the baking dish. This step helps it hold together. Bake it just until it's lightly golden. For a smooth filling texture, whisk the coconut milk, sugar, and eggs well. Make sure there are no lumps. Cornstarch helps thicken the filling, so mix it in slowly. This avoids clumps. When serving your bars, a sprinkle of toasted coconut adds great flavor and crunch. You can also add a dollop of whipped cream on top. This makes the bars feel extra special. Pair these bars with fresh fruit, like pineapple or berries. The sweet and tart flavors work well together. Serve them with a cup of coffee or tea for a perfect treat. One common mistake is overbaking or underbaking the bars. Keep an eye on them while baking. They should be set in the center and lightly golden on top. Accurate ingredient measurements are key. Use a kitchen scale if possible. It ensures your crust and filling turn out just right. Too much flour can make the crust dry, while too little can make it fall apart. For the full recipe, check out the details on how to create these delicious Coconut Cream Pie Bars! {{image_2}} You can make your Coconut Cream Pie Bars even better with simple tweaks. Adding citrus zest gives a fresh twist. Try lime or lemon zest to brighten the flavor. You can also use different extracts. Instead of vanilla, try almond extract for a deeper taste. These small changes can make a big difference! Want to make your bars gluten-free? Swap the all-purpose flour for almond flour or a gluten-free blend. This keeps the texture nice while meeting dietary needs. If you need dairy-free options, use coconut cream in place of butter and regular milk. These swaps keep the rich coconut flavor while making it friendly for more diets. Seasonal fruits can add fun to your bars. In summer, try mangos or berries on top. For fall, add pumpkin spice or chopped apples. You can even create holiday-themed bars! Use crushed peppermint for winter or orange zest for spring. These ideas make your Coconut Cream Pie Bars festive and fun all year round! To keep your coconut cream pie bars fresh, store them in the fridge. Use an airtight container to protect them from drying out. If you want to save them for later, you can freeze them too. Wrap each bar in plastic wrap, then put them in a freezer-safe bag. This helps keep them tasty. Here are some tips for keeping your bars fresh: - Always let the bars cool completely before storing. - Avoid stacking the bars directly on top of each other; use parchment paper between layers. - When frozen, eat them within three months for the best flavor. At room temperature, your coconut cream pie bars last about two days. Keep them in a cool, dry place. In the fridge, they stay fresh for up to one week. This makes them perfect for meal prep or a sweet snack throughout the week. If you freeze them, they can last for about three months. Just remember to thaw them in the fridge before serving. Enjoy these tasty treats any time! For the full recipe, check out the Coconut Dream Bars. Yes, you can use fresh coconut. Fresh coconut adds a nice texture and flavor. Grate the fresh coconut fine to mix well with the other ingredients. Do note that fresh coconut may add more moisture, so adjust baking time if needed. The bars are done when the filling is set and lightly golden on top. A toothpick inserted in the center should come out clean. If it’s sticky, give it a few more minutes. Let them cool completely for best results. You can reduce the sugar. Try cutting the granulated sugar by half. This will make the bars less sweet but still tasty. You can also use a sugar substitute if you prefer. Yes, you can make these bars ahead of time. They store well in the fridge. Make them a day or two before serving for great flavor. Just remember to chill them for at least two hours. To cut the bars neatly, use a sharp knife. Dip the knife in warm water before each cut. This helps get clean edges. Wipe the knife with a towel between cuts for best results. In this blog post, we explored how to make Coconut Cream Pie Bars. We covered essential ingredients, step-by-step instructions, and tips for the best results. You learned about delicious variations and how to store these treats. These bars are simple to make and perfect for any occasion. With the right steps, you can create a sweet dessert that will impress. Enjoy making your Coconut Cream Pie Bars, and don’t hesitate to experiment!

Coconut Cream Pie Bars Simple and Delicious Treat

If you love sweet treats, you’ll adore these Coconut Cream Pie Bars! They mix a buttery crust with creamy coconut

Gather these simple ingredients for your caramel apple nachos. They are easy to find and fun to use. - 2 large apples (Granny Smith or Honeycrisp) - 1 cup granola - ½ cup caramel sauce - ¼ cup mini chocolate chips - ¼ cup crushed nuts (walnuts, almonds, or pecans) - ½ teaspoon cinnamon (optional) - Whipped cream (optional for drizzling) Each ingredient adds its own special touch. The apples give a crisp bite. Granola adds crunch. Caramel sauce brings sweetness. Chocolate chips add extra joy. Nuts give you a nice texture. Cinnamon can warm up the flavors. Whipped cream makes it feel fancy. You can find the full recipe for more details on how to prepare this delightful treat. First, wash the apples well. You want to remove any dirt. Then, slice the apples into thin wedges. Keeping the skins on adds flavor. It also gives you some extra nutrients. Next, lay the apple slices on a large platter. Make sure they are in a single layer. This helps with even toppings. Now, drizzle caramel sauce over the apple slices. Ensure each slice gets a nice coating. Now, it’s time to add toppings! Start by sprinkling granola over the apples. The granola adds a nice crunch. Then, scatter mini chocolate chips on top. They give a sweet touch. If you like nuts, add crushed walnuts, almonds, or pecans. For an extra flavor boost, sprinkle a little cinnamon. Lastly, drizzle whipped cream before serving. This makes it even more delightful! Enjoy your caramel apple nachos right away for the best taste. For the best flavor and crunch, I recommend using Granny Smith or Honeycrisp apples. Granny Smith apples are tart and crisp, while Honeycrisp apples are sweet and juicy. Both types hold up well when sliced. When slicing apples, use a sharp knife for clean cuts. Cut each apple into thin wedges. Keeping the skin on adds flavor and nutrients. If you worry about browning, toss slices in a bit of lemon juice. Making your caramel sauce is easy! Here’s a simple recipe: - Ingredients: - 1 cup sugar - 6 tablespoons butter - ½ cup heavy cream - 1 teaspoon vanilla extract Instructions: 1. In a saucepan, heat sugar over medium heat. Stir until melted and golden. 2. Add butter and stir until melted. 3. Slowly pour in the heavy cream while stirring. 4. Remove from heat and mix in vanilla. You can store this caramel sauce in a jar. Keep it in the fridge for up to two weeks. Just warm it up before using! Make your caramel apple nachos look amazing! Start by arranging the apple slices in a circular pattern on a large platter. Drizzle caramel sauce evenly over the top. For a fun touch, use colorful sprinkles or edible glitter as a garnish. You can also top with fresh mint leaves for a pop of green. This makes your dish not only tasty but beautiful too! {{image_2}} You can make caramel apple nachos even more fun! Try different toppings like: - Crushed cookies (Oreo or graham crackers) - Sliced bananas or strawberries - Shredded coconut - Drizzles of peanut butter or chocolate sauce Seasonal fruits can also add flair. In fall, use pears or figs. In summer, fresh berries work great too. These variations keep your dessert fresh and exciting. If you need a nut-free option, skip the nuts. Use seeds like pumpkin or sunflower instead. They add crunch without the allergens. For a vegan treat, use dairy-free caramel and chocolate chips. You can make your nachos just as delicious while meeting dietary needs. Caramel apple nachos are perfect for parties or movie nights. They are fun to share and easy to make. I love serving them at fall gatherings or Halloween parties. Pair your nachos with drinks like apple cider or hot chocolate. These drinks complement the sweet and creamy flavors of the nachos perfectly. Enjoy the mix of tastes and textures! To keep your caramel apple nachos fresh, use an airtight container. This will help keep the apples crisp and the toppings intact. Store the nachos in the fridge for up to two days. However, I recommend enjoying them right after making them. The longer they sit, the softer they become. If you need to reheat your nachos, do so gently. Place them on a plate and warm them in the microwave for about 10 to 15 seconds. Check them often to avoid overheating. Do not reheat them too much, or the apples will get mushy. Avoid the oven, as it can dry out the ingredients. You can freeze the components, but not the finished nachos. Apples may become watery when thawed. For best results, freeze the caramel sauce and toppings separately. Use freezer-safe bags for storage. When you're ready to enjoy, thaw the sauce and toppings in the fridge overnight before assembling your nachos. Yes, you can prepare some parts ahead. Slice the apples and store them in water with lemon juice. This keeps them fresh and bright. You can also make the caramel sauce in advance. Just warm it up before serving. Assemble the nachos right before you eat. This keeps everything crunchy and tasty. Granny Smith and Honeycrisp are top choices. Granny Smith offers a tart taste that balances the sweet caramel. Honeycrisp gives a sweet crunch, making each bite delightful. Choose apples that are firm and fresh. This way, your nachos stay crisp. Use fewer toppings or opt for lighter choices. Swap the caramel sauce for a yogurt dip. Choose a low-calorie granola or nuts. You can also leave out the whipped cream. These changes still keep the flavor while cutting calories. Yes, just select gluten-free granola. Most nuts and fruits are gluten-free, so you're safe there. Check labels on your caramel sauce to ensure it’s gluten-free as well. Making these small changes allows everyone to enjoy this treat without worry. Caramel apple nachos are a fun and tasty treat. We explored the key ingredients, from fresh apples to toppings and sauces. We also learned how to prepare, store, and serve them. You can add your twist with different flavors or dietary options. Enjoy these nachos at parties or as a sweet snack. Remember, the best memories happen around good food. So get creative, share them with friends, and make delicious moments!

Caramel Apple Nachos Delightful and Easy Treat

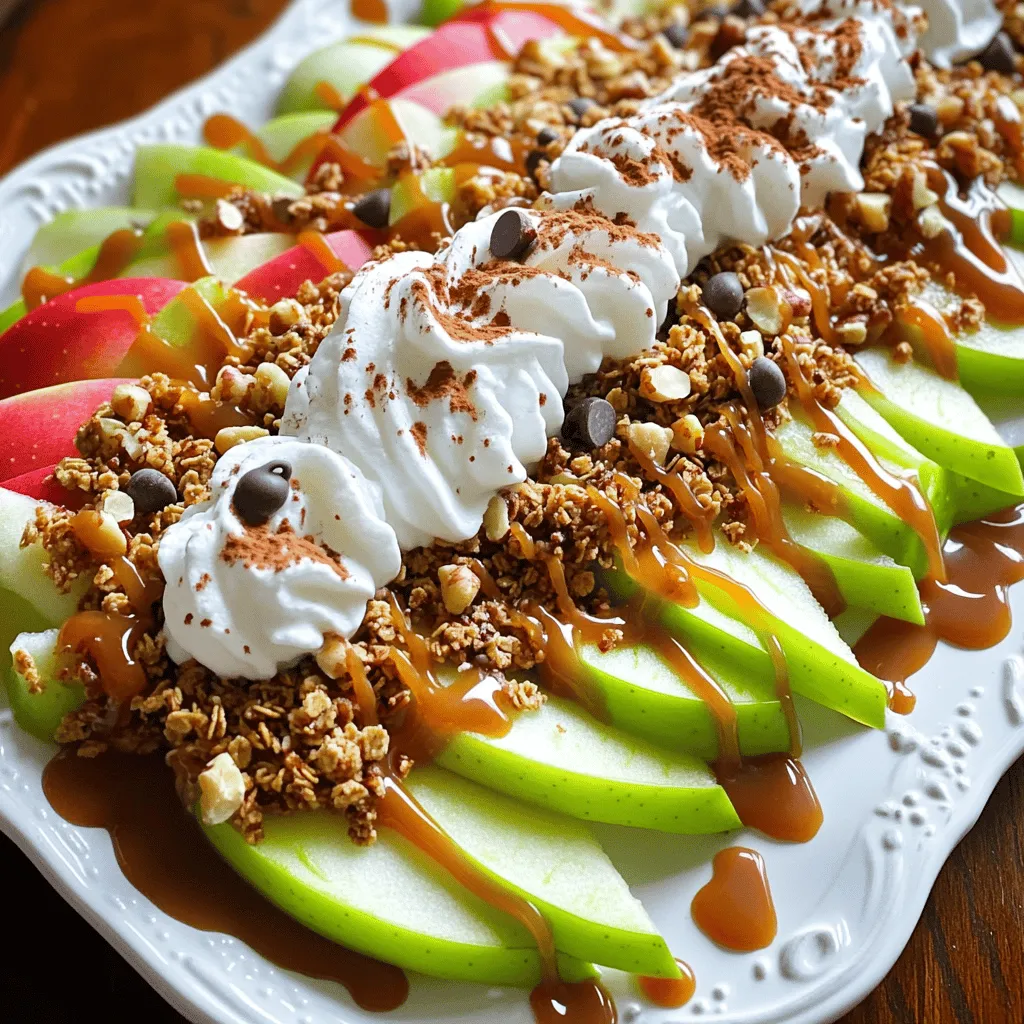
Craving a fun and tasty snack? You’re in the right place! Today, I’ll show you how to make Caramel Apple

When making chocolate chip banana bread, having the right ingredients is key. Here’s what you need: - 3 ripe bananas, mashed - 1/2 cup unsalted butter, melted - 1/2 cup granulated sugar - 1/4 cup brown sugar, packed - 2 large eggs, at room temperature - 1 teaspoon vanilla extract - 1 teaspoon baking soda - 1/2 teaspoon salt - 1 1/2 cups all-purpose flour - 1 cup semi-sweet chocolate chips - 1/2 cup chopped walnuts (optional) Each ingredient plays a special role. The ripe bananas add moisture and sweetness. The butter gives richness. Both sugars create a nice balance of flavor. The eggs help bind everything together. Vanilla extract adds warmth. Baking soda helps the bread rise. Salt enhances the taste of the other flavors. The flour gives structure. The chocolate chips bring joy, and walnuts add crunch if you choose to include them. This simple list leads to a delicious treat. You’ll find that using fresh, ripe bananas makes a big difference in flavor. For the best results, measure everything accurately. This ensures your chocolate chip banana bread turns out moist and delicious, exactly as you want it. Check out the Full Recipe for detailed steps to prepare your tasty loaf! 1. First, preheat your oven to 350°F (175°C). This helps bake the bread evenly. 2. Next, take a 9x5-inch loaf pan and grease it. You can also line it with parchment paper. This makes it easy to remove the bread later. 3. In a large bowl, mash the ripe bananas. Add the melted butter to the bananas. Mix them well until they are smooth. 4. Now, add the granulated sugar and brown sugar to the banana mix. Stir until combined. 5. In a separate bowl, beat the eggs. Add the eggs and vanilla extract to the banana mixture. Mix everything until smooth. 1. Sprinkle baking soda and salt over your wet mix. Gently stir to incorporate these dry ingredients. 2. Then, add the flour to the bowl. Carefully fold it in until just combined. Do not overmix; this keeps the bread soft. 3. Finally, gently fold in the chocolate chips and walnuts if you choose to use them. Make sure they are evenly distributed. 1. Pour the batter into your prepared loaf pan. Use a spatula to smooth the top. 2. Bake in the preheated oven for 55–65 minutes. To check if it’s done, insert a toothpick in the center. It should come out clean. 3. Once baked, let it cool in the pan for about 10 minutes. Then, transfer it to a wire rack to cool completely before slicing. This ensures the best texture. For the complete list of ingredients and detailed steps, refer to the Full Recipe. - Ensure bananas are ripe for best flavor. Ripe bananas have brown spots. They add sweetness and moisture. - Avoid overmixing the batter. Mix until just combined. This keeps your bread soft and fluffy. - Serve warm with butter. This adds richness and flavor that everyone loves. - Garnish with extra chocolate chips or powdered sugar. Both make the bread look fancy and taste great. - Not greasing the pan properly. This can cause the bread to stick. Use butter or cooking spray. - Using cold ingredients instead of room temperature. Cold eggs and butter can make the batter lumpy. Always let them sit out first. For a full recipe, check the detailed steps provided above. Enjoy your baking! {{image_2}} You can easily change the taste of your chocolate chip banana bread. Swap regular chocolate chips for dark chocolate or white chocolate for a fun twist. Dark chocolate adds a rich flavor, while white chocolate brings sweetness. You can also toss in dried fruits like cranberries or raisins. They add a chewy texture and burst of flavor that works well with bananas. For a healthier option, use whole wheat flour instead of all-purpose flour. This swap gives your bread more fiber and nutrients, and it still tastes great. If you want to cut back on sugar, try using honey or maple syrup instead of granulated sugar. Both options add a nice, natural sweetness to your bread. If you or someone you know has dietary restrictions, there are great options. For those who need gluten-free bread, replace all-purpose flour with a gluten-free blend. Make sure it works for baking to get the right texture. If you want a vegan version, use flax eggs instead of regular eggs. Flax eggs are easy to make and work well in baked goods. You can also use plant-based butter to keep the bread dairy-free. For the full recipe, check out the details above. You can keep chocolate chip banana bread at room temperature for a few days. Make sure to store it in an airtight container. This way, it stays moist and fresh. If you have hot weather, put it in the fridge to prevent spoilage. For long-term storage, freeze the banana bread. Wrap it tightly in plastic wrap or aluminum foil. Then place it in a freezer-safe bag. It can last for up to three months in the freezer. To thaw, take it out and leave it at room temperature for a few hours. You can also thaw it overnight in the fridge. When reheating banana bread, use the microwave or oven. For the microwave, heat it for about 15-20 seconds per slice. If you want it warm in the oven, preheat to 350°F (175°C) and bake for 10 minutes. This keeps the texture soft and the flavor rich. Enjoy your treat fresh and warm! You can tell banana bread is done by checking the center. Insert a toothpick into the middle. If it comes out clean, the bread is ready. The top should be golden brown, and the edges should pull away from the pan. If it looks too wet, bake it a bit longer. Yes, you can use frozen bananas! Just thaw them first and mash them well. Frozen bananas often have extra moisture, so you may need to reduce the butter slightly. They work great and add natural sweetness to your bread, making it even more delicious. To prevent sinking, avoid overmixing your batter. Mix just until combined. Also, make sure your baking soda is fresh. This helps the bread rise properly. Lastly, bake it at the right temperature and time. A hot oven ensures it sets well. Banana bread pairs well with many things. Spread a bit of butter on warm slices for rich flavor. You can also add cream cheese or peanut butter for a tasty twist. Enjoy it with coffee or tea for a cozy snack. Add slices to breakfast or dessert plates for fun. For the full recipe, check out the detailed steps above! This blog post covered how to make tasty banana bread. You learned about the key ingredients, steps to prepare, and baking tips. You also discovered variations and storage tips to keep your bread fresh. Banana bread is fun and easy to make. Use ripe bananas for the best flavor. Don’t rush; enjoy the process and share your bread with friends. Whether you stick to the classic recipe or try new flavors, it’s sure to be a hit!

Chocolate Chip Banana Bread Moist and Delicious Treat

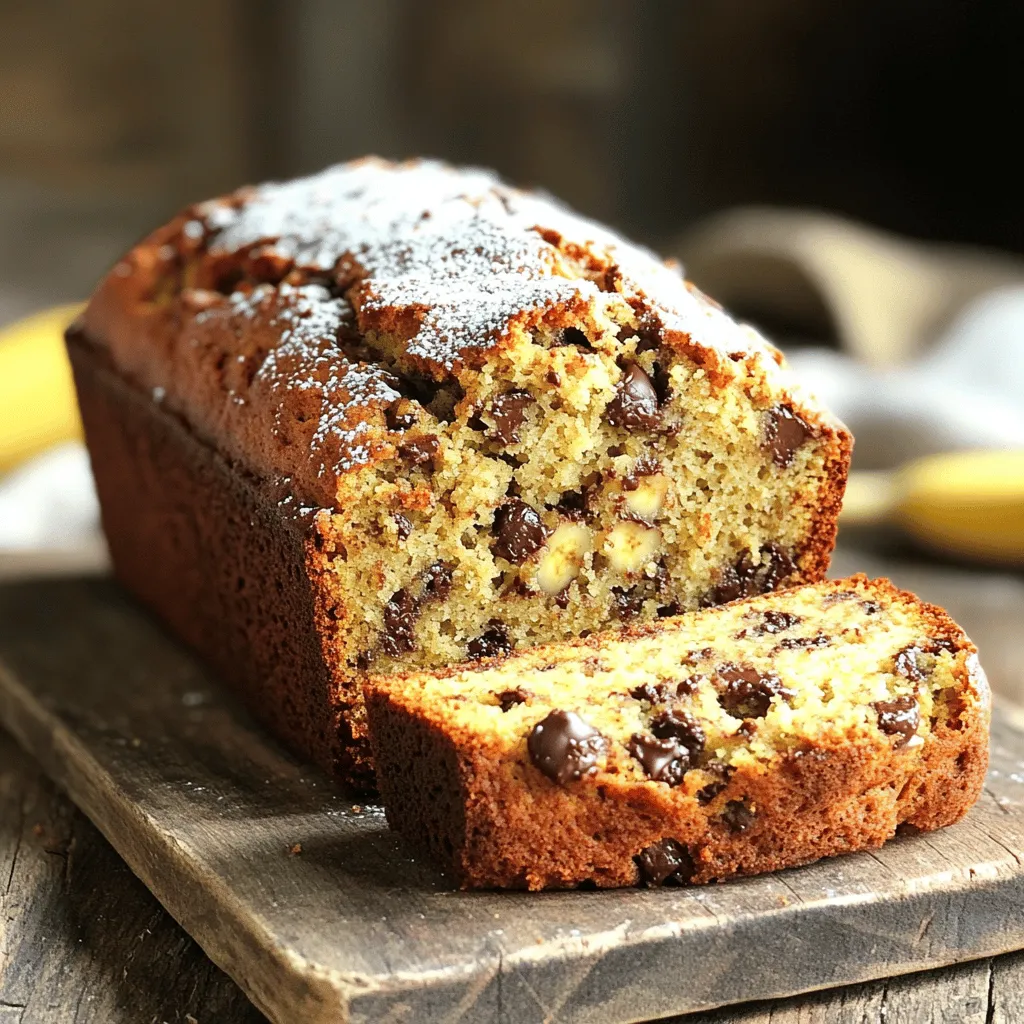
Are you ready to bake the most moist and delicious chocolate chip banana bread? This classic treat is perfect for

- 1 pound shrimp, peeled and deveined - 3 tablespoons honey - 2 tablespoons fresh lime juice - 1 teaspoon lime zest - 2 cloves garlic, minced - 1 teaspoon ground cumin - 1/2 teaspoon chili powder - Salt and pepper to taste Shrimp forms the heart of this dish. It cooks quickly and takes on flavor well. Honey and lime give it a sweet and tangy twist. The garlic, cumin, and chili powder add depth. Salt and pepper round out the taste. - 8 small corn tortillas - 1 avocado, sliced - 1 cup red cabbage, shredded - Fresh cilantro, for garnish - Lime wedges, for serving Toppings add freshness and crunch. Avocado brings creaminess. Red cabbage adds color and texture. Cilantro gives a burst of flavor. Lime wedges enhance the taste with a squeeze. 1. In a bowl, combine honey, lime juice, lime zest, minced garlic, cumin, chili powder, salt, and pepper. 2. Mix well to create a marinade. 3. Add shrimp to the marinade, ensuring they are well coated. 4. Let it marinate for 15-20 minutes. Marinating is key. It makes the shrimp juicy and full of flavor. The time allows the spices to soak in. 1. Heat a skillet over medium heat. 2. Once hot, add the marinated shrimp. 3. Cook for 2-3 minutes on each side. 4. Shrimp should turn pink and opaque when done. Watch for color change. This shows the shrimp is cooked just right. Overcooking can make shrimp tough. 1. Warm tortillas in a pan or wrap in foil. 2. Place in a preheated oven at 350°F (175°C) for about 5 minutes. 3. To assemble, place shrimp on each tortilla. 4. Top with red cabbage, avocado slices, and cilantro. Warm tortillas make a big difference. They hold the filling better and taste better too. Enjoy these tacos with lime wedges for a zesty kick! {{ingredient_image_1}} For the best flavor, marinate the shrimp for 15-20 minutes. This time allows the shrimp to soak up all the tasty honey and lime mix. If you want to change it up, try using agave syrup instead of honey. You can also add orange zest for a fun twist. When cooking shrimp, adjust the time based on their size. Smaller shrimp need less time, around 2 minutes per side. To avoid rubbery shrimp, do not overcook them. They should turn pink and opaque. Pair your tacos with a fresh side salad or chips and salsa. For drinks, I suggest a light beer or a refreshing limeade. These will complement the flavors in your shrimp tacos perfectly. You can swap shrimp for other seafood. Fish works well, like tilapia or cod. Scallops are also a great choice. Each seafood type has a unique taste. Adjust cooking times to ensure they cook well. Fish usually needs 2-4 minutes per side. Scallops take about 3-4 minutes per side. Always check for doneness. The seafood should be opaque and flake easily. If you want a plant-based taco, you can use mushrooms or jackfruit. Both options absorb flavors well. You can also use grilled vegetables like zucchini or bell peppers. For added texture, try black beans or chickpeas. Replace honey with agave syrup for a vegan touch. Lime and spices will keep the flavors bright and fresh. Want more heat? Add chopped jalapeños to the marinade. You can also drizzle some hot sauce on top. This gives a nice kick. If you prefer milder tacos, skip the chili powder. Instead, try adding a pinch of cumin for flavor without heat. Remember to adjust based on your taste. Enjoy customizing your tacos! Pro Tips Marinate for Flavor: Ensure the shrimp are marinated for at least 15-20 minutes to absorb all the delicious flavors of the honey and lime. Perfectly Cooked Shrimp: Cook the shrimp just until they turn pink and opaque to avoid them becoming tough and rubbery. Warm Tortillas: Warming the corn tortillas enhances their flavor and makes them more pliable for easy folding. Fresh Garnish: Don’t skip the fresh cilantro and lime wedges; they brighten the dish and add a refreshing contrast to the sweet shrimp. {{image_2}} To store your Honey Lime Shrimp Tacos, place the leftovers in an airtight container. Make sure the shrimp are cooled to room temperature before sealing. This helps keep them fresh. Cooked shrimp can last in the fridge for up to three days. After this, they may lose quality and flavor. If you want to save your tacos for later, freezing is a great option. Start by letting the shrimp cool completely. Place them in a freezer-safe bag. Remove as much air as you can to prevent freezer burn. These can last for about three months in the freezer. When you’re ready to eat, thaw the shrimp in the fridge overnight. This keeps the texture nice. When it's time to reheat your shrimp, do it gently. You can use a skillet over low heat. This method helps keep the shrimp from getting tough. Heat them for about five minutes, stirring often. You can also use a microwave. Just heat for 30 seconds at a time, checking in between. Always watch the shrimp closely to avoid overcooking. Overcooked shrimp can become rubbery and lose their taste. Enjoy your fresh and tasty tacos! Each serving of honey lime shrimp tacos has about 300 calories. The shrimp are protein-rich, providing around 25 grams of protein. You also get healthy fats from the avocado, which adds about 10 grams. The tacos have around 35 grams of carbs, mostly from the corn tortillas and veggies. Shrimp is low in calories and high in protein. It also has important nutrients like selenium and vitamin B12. Avocado is a great source of healthy fats. It helps improve heart health and keeps you full. Red cabbage is rich in fiber and vitamins. Eating it can boost your immune system and improve digestion. You can make low-calorie swaps in this recipe. Use less honey or skip the avocado for fewer calories. For gluten-free options, use corn tortillas, which are naturally gluten-free. Always check the labels to be sure. This way, everyone can enjoy these tasty tacos! Yes, you can use frozen shrimp. Just make sure to thaw them first. To thaw shrimp, place them in a bowl of cold water. Change the water every 10 minutes until they are fully thawed. This usually takes about 30 minutes. You can also thaw shrimp overnight in the fridge. Avoid using hot water, as it can cook the shrimp unevenly. If you need a substitute for honey, try maple syrup or agave nectar. Both have a sweet taste and work well in this dish. Using maple syrup may add a slight flavor change, but it can still taste great. Agave nectar is milder and blends well with the other flavors in the tacos. Shrimp cook quickly. You know they are done when they turn pink and opaque. The texture should be firm but not rubbery. Check the center of the shrimp; it should be white and no longer translucent. Cook them for about 2-3 minutes on each side. If they curl up tightly, they may be overcooked. This article covered how to make shrimp tacos, from marinating the shrimp to adding tasty toppings. I shared tips for cooking shrimp perfectly and adjusting flavors for different preferences. You can also store leftovers or swap ingredients for variety. Remember, enjoy shrimp tacos baked with your unique twist. Use this guide to create delicious meals that suit your taste and lifestyle choices. Happy cooking!

Honey Lime Shrimp Tacos Flavorful and Fresh Dish

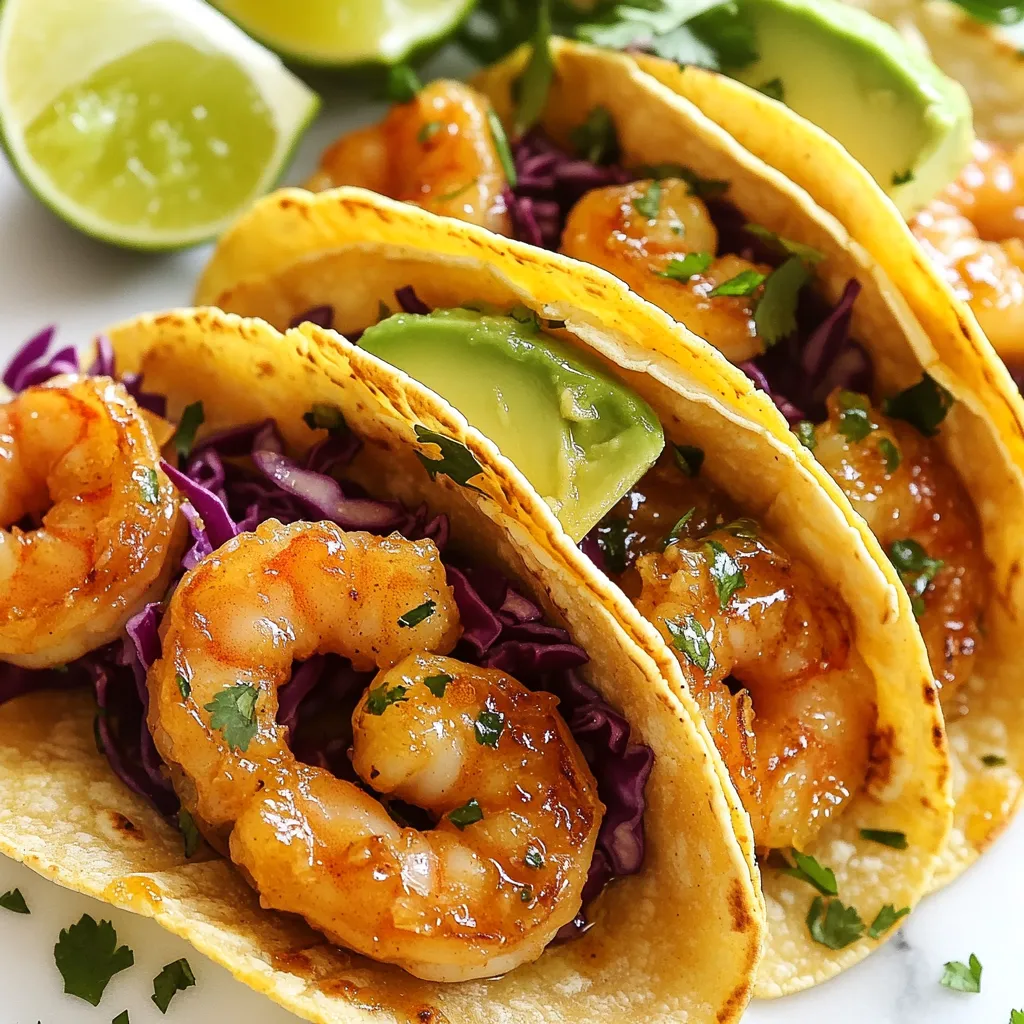
If you’re craving a dish that’s both fresh and packed with flavor, look no further than Honey Lime Shrimp Tacos!

Older posts
Newer posts
← Previous Page1 … Page95 Page96 Page97 … Page137 Next →

dsad

© 2025 easycookingbite • Built with GeneratePress

Our Policies

  • Copyright Policy
  • Cookie Policy
  • GDPR Policy
  • Privacy Policy
  • Disclaimer
  • Terms Of Use

More Information

  • Home
  • About
  • Contact
  • Appetizers
  • Dessert
  • Dinner
  • Drinks
©2025, easycookingbite About Back To Top