Skip to content
DisclaimerTerms Of UseGDPR PolicyCookie Policy

easycookingbite

  • Home
  • Drinks
  • Appetizers
  • Dinner
  • Dessert
  • About
  • Contact
  • Privacy Policy
DisclaimerTerms Of UseGDPR PolicyCookie Policy

Lily

- 2 medium sweet potatoes, peeled and diced - 1 can (15 oz) black beans, rinsed and drained - 1 can (14 oz) diced tomatoes (with juices) - 1 medium onion, chopped - 2 cloves garlic, minced - 1 bell pepper (any color), chopped - 1 tablespoon chili powder - 1 teaspoon cumin - 1 teaspoon smoked paprika - 1/2 teaspoon cinnamon - 2 cups vegetable broth - 1 tablespoon olive oil - Salt and pepper to taste Sweet potatoes bring a natural sweetness and creamy texture. Black beans add protein and fiber, making this chili hearty. Diced tomatoes offer acidity and balance. Onions and garlic provide a base of flavor that makes every bite satisfying. Bell peppers add a crunch and sweetness that complements the other ingredients. The spices, like chili powder and cumin, create warmth and depth. - Fresh cilantro - Sour cream or Greek yogurt - Tortilla chips or crusty bread Garnishing your chili adds a pop of color and flavor. Fresh cilantro brightens each bowl. A dollop of sour cream or Greek yogurt adds creaminess and cuts through the spice. Pairing with tortilla chips or crusty bread gives you that satisfying crunch. For the full recipe, refer to the earlier section. Start by gathering your ingredients. You will need sweet potatoes, black beans, diced tomatoes, onion, garlic, and bell pepper. - Sweet Potatoes: Peel and dice two medium sweet potatoes into small cubes. - Onion and Garlic: Chop one medium onion and mince two cloves of garlic. - Bell Pepper: Chop one bell pepper. You can choose any color you like. - Spices: Measure out chili powder, cumin, smoked paprika, and cinnamon. This preparation helps your cooking flow smoothly. 1. Heat the Oil: In a large pot, heat one tablespoon of olive oil over medium heat. 2. Sauté Onion and Garlic: Add the chopped onion. Cook until it is soft and translucent, about five minutes. Then, stir in the minced garlic and chopped bell pepper. Cook for another two to three minutes until fragrant. 3. Add Sweet Potatoes and Spices: Next, add your diced sweet potatoes, chili powder, cumin, smoked paprika, and cinnamon. Stir everything well so that the sweet potatoes get coated with the spices. 4. Combine with Tomatoes and Broth: Pour in one can of diced tomatoes with their juices and two cups of vegetable broth. Stir to mix. Bring this mixture to a boil. 5. Simmer Until Tender: Once it boils, lower the heat. Cover the pot and let it simmer for about 25 minutes. Check the sweet potatoes; they should be tender. 1. Stir in Black Beans: After the sweet potatoes are done, add one can of rinsed and drained black beans. 2. Adjust Seasonings: Taste your chili. Add salt and pepper as needed to enhance the flavor. 3. Presentation Recommendations: Serve your chili in bowls. Garnish with fresh cilantro. A dollop of sour cream or Greek yogurt adds creaminess. Pair it with crusty bread or tortilla chips for some extra crunch. This recipe makes a warm, comforting meal that you and your loved ones will enjoy. For the full recipe, check out Sweet Potato & Black Bean Chili. To make your sweet potato and black bean chili even tastier, try adjusting the spices. If you like more heat, add a pinch of cayenne pepper or some diced jalapeños. For a richer taste, use smoked paprika instead of regular paprika. Fresh herbs can also boost flavor. Fresh cilantro adds zest, while fresh lime juice brightens every bite. When it comes to ingredients, using fresh veggies will give your chili a vibrant taste. However, canned black beans and diced tomatoes save time and still work well. Rinse the beans well to remove excess salt. This helps keep the chili balanced. For the best chili, choose a heavy-bottomed pot or a Dutch oven. These pots heat evenly, preventing burning. Start by sautéing your onions and garlic until soft. This step adds depth to your chili. After adding your sweet potatoes and spices, remember to stir well. Simmering is key to blending flavors. Let the chili cook slowly over low heat. This allows the sweet potatoes to soften and the spices to infuse. Don't rush this step—good chili takes time! Meal prep can make cooking easier. Chop your sweet potatoes, onions, and peppers ahead of time. Store them in the fridge for quick access. You can also cook a larger batch and freeze half for later. Using a slow cooker or Instant Pot can save time too. Just toss all ingredients in and let them cook while you do other things. This method also makes the flavors meld beautifully. For a full recipe, check out the Sweet Potato & Black Bean Chili. {{image_2}} You can easily make this Sweet Potato and Black Bean Chili vegan. The recipe is already plant-based. Just skip any dairy toppings. Instead, try avocado or lime juice for added flavor. For gluten-free options, this chili is perfect as is. All the ingredients are naturally gluten-free. Just ensure your vegetable broth is also gluten-free. Feel free to swap out black beans for other beans like kidney or pinto beans. Each bean adds its own flavor and texture. You can also add more vegetables. Corn, zucchini, or carrots work well. Changing spices can boost your chili’s taste. Add cayenne for heat or oregano for earthiness. Experiment with fresh herbs like basil or thyme for a twist. This chili pairs well with crusty bread or tortilla chips. These options add great crunch and flavor. You can also serve it over rice or quinoa for a hearty meal. If you have leftovers, think outside the bowl. Use the chili as a filling for tacos or burritos. You can even mix it into scrambled eggs or on top of baked potatoes. For the full recipe, check out the earlier section. It will guide you through making this delicious chili step-by-step. Store your chili in an airtight container. This keeps it fresh and tasty. You can keep it in the fridge for up to five days. If you want it to last longer, consider freezing it. To freeze your chili, let it cool completely first. Then, use freezer-safe containers or bags. Remove as much air as possible before sealing. This helps prevent freezer burn. When you're ready to eat, thaw it overnight in the fridge. You can reheat chili on the stovetop or in the microwave. For the stovetop, pour it into a pot and heat over medium. Stir often to keep it from sticking. For the microwave, use a microwave-safe bowl. Heat in one-minute bursts, stirring in between. This keeps the texture nice and smooth. Enjoy your Sweet Potato and Black Bean Chili warm and flavorful! You can serve this chili with many sides. Here are some great options: - Crusty bread or rolls - Tortilla chips - Rice or quinoa - A fresh green salad - Cornbread These sides add texture and balance the flavors of the chili. Yes, you can make this chili ahead of time. It's a great meal prep option. The flavors deepen as it sits. Store it in the fridge for up to four days. You can also freeze it for up to three months. Just thaw and reheat before serving. Meal prepping makes busy nights easier. To add heat, try these options: - Add diced jalapeños to the pot. - Stir in cayenne pepper. - Use hot chili powder instead of regular. - Top with spicy salsa or hot sauce. These adjustments will give your chili a nice kick. Yes, you can use fresh black beans. However, cooking dried beans takes longer. Soak them overnight and boil until tender. Canned beans are quicker and easier. They are already cooked, just rinse and add them to the chili. This chili can be kid-friendly. To adjust the flavors: - Reduce the spice level by using less chili powder. - Serve it with toppings like cheese or sour cream. - Pair it with mild sides like bread or rice. These tips help make it more appealing to children. Sweet potato and black bean chili is nourishing and easy to make. We covered main ingredients, prep, and cooking steps, plus tips to enhance flavor. You can adapt the recipe for your diet and store leftovers well. Enjoy this chili alone or with toppings like sour cream or fresh cilantro. With simple swaps and additions, this dish can fit any palate. Dive in and make this chili today; it's a warm hug in a bowl.

Sweet Potato and Black Bean Chili Flavorful Comfort Food

Craving a hearty meal that warms your soul? Sweet Potato and Black Bean Chili is the perfect comfort food. It’s

- 1 pound ground turkey - 1/2 cup bread crumbs - 1/4 cup grated Parmesan cheese - 1/4 cup fresh parsley, chopped - 1 egg, beaten - 2 cloves garlic, minced - 1 teaspoon onion powder - 1 teaspoon Italian seasoning - 2 cups marinara sauce (store-bought or homemade) - 1 tablespoon olive oil When making turkey meatballs, I start with fresh, quality ground turkey. It gives the meatballs a nice flavor and keeps them moist. I mix in bread crumbs for texture. This helps the meatballs hold their shape. Next, I add grated Parmesan cheese. It adds a salty, nutty taste. Fresh parsley brings a bright note. I always use a beaten egg to bind everything together. For seasoning, I use minced garlic for a rich aroma. Onion powder gives depth, while Italian seasoning brings classic flavor notes. Salt and pepper enhance all the tastes. Don’t forget the marinara sauce! You can use store-bought or homemade. Olive oil adds a nice finish. When I drizzle it over the meatballs before baking, it helps them brown beautifully. For the full recipe, check out the complete guide. Enjoy your cooking! 1. Preheat the oven to 400°F (200°C). This step ensures the meatballs cook evenly. 2. In a large bowl, combine: - 1 pound ground turkey - 1/2 cup bread crumbs - 1/4 cup grated Parmesan cheese - 1/4 cup fresh parsley, chopped - 1 egg, beaten - 2 cloves garlic, minced - 1 teaspoon onion powder - 1 teaspoon Italian seasoning - Salt and pepper to taste Mix until just combined. Don’t overwork the meat; this keeps them tender. 3. Form the mixture into 1-inch meatballs using your hands. Place them on a baking sheet. 1. Arrange the meatballs on the baking sheet, giving them space. 2. Drizzle with 1 tablespoon of olive oil. This helps them get golden brown. 3. Bake the meatballs for about 20 minutes. They should be cooked through and lightly browned. 1. While the meatballs bake, heat 2 cups of marinara sauce in a saucepan over medium heat. Stir occasionally. 2. Once the meatballs are ready, add them to the sauce. Gently stir to coat them well. Let them simmer for 5 minutes. This method creates a rich flavor in the meatballs and sauce. You can find the Full Recipe to guide you through each step. - Avoid overmixing: Mix just until combined. Overmixing makes meatballs tough. - Best baking temperature and time: Bake at 400°F (200°C) for about 20 minutes. This gives a nice brown color. - Meatball size recommendations: Aim for 1-inch meatballs. This size cooks evenly and is easy to eat. - Homemade vs. store-bought sauce: Homemade sauce is great, but store-bought saves time. Both can be tasty. - Enhancing jarred marinara: Add garlic, herbs, or red pepper flakes to boost flavor. A splash of wine can also add depth. For the full details on making these meatballs shine, check the Full Recipe. {{image_2}} You can give your turkey meatballs a unique twist by adding different spices or herbs. For a warm kick, try adding red pepper flakes. If you want a fresh taste, use chopped basil or thyme. These small changes can make a big difference in flavor. Cheese-stuffed meatballs are another fun idea. To make these, take a small piece of mozzarella cheese and wrap the meat around it. When you bake them, the cheese melts and adds a creamy center. This makes each bite a tasty surprise! When it comes to serving turkey meatballs, you have plenty of choices. For pasta, you can use spaghetti, penne, or even zoodles for a low-carb option. Each type of pasta can change the meal's feel and texture. If you're in the mood for something different, try serving the meatballs on sub rolls. Top them with marinara sauce and melted cheese for a hearty sandwich. This makes a great lunch or dinner option. You can find the full recipe to help you create these delicious meals. To keep your turkey meatballs fresh, store them in the fridge. Place them in an airtight container. This way, they stay moist and tasty. You can store them for up to three days. If you want to keep them longer, consider freezing. Just make sure they cool down first. This helps prevent ice crystals. When it’s time to enjoy your leftovers, reheating is easy. The best way is to use the oven. Preheat it to 350°F (175°C). Place the meatballs on a baking sheet and cover them with foil. Heat for about 15 minutes. If you prefer the microwave, use a microwave-safe dish. Heat in short bursts, checking often to avoid overcooking. For longer storage, freeze your meatballs. Place them in a freezer-safe bag or container. They can last up to three months. When you're ready to eat, thaw them overnight in the fridge. Then follow the reheating steps above. Enjoy your Easy Turkey Meatballs with Marinara from the Full Recipe! To keep your turkey meatballs moist, use these tips: - Add ingredients: Use bread crumbs, cheese, and egg to bind and add moisture. - Don’t overmix: Mix gently. Overworking the meat makes it tough. - Use fat: Add olive oil to the mixture for richness. - Bake properly: Bake at 400°F (200°C) for 20 minutes to keep them juicy. - Simmer in sauce: After baking, let the meatballs sit in marinara. This adds moisture and flavor. Yes, you can use chicken! Here’s what to know: - Flavor: Chicken has a milder taste. You might want to add more spices. - Texture: Ground chicken may be softer than turkey. Adjust your cooking time. - Cooking: Follow the same steps in the recipe. Just swap the turkey for chicken. Serving turkey meatballs can be fun and creative. Here are some ideas: - Pasta: Serve over spaghetti or your favorite pasta with marinara. - Sub rolls: Place meatballs in a sub roll, top with melted cheese for a meatball sub. - Salad: Add meatballs to a salad for a protein boost. - Skewers: Make meatball skewers for a fun appetizer at parties. For the full recipe, check out the Zesty Turkey Meatballs with Marinara. Enjoy cooking! Making turkey meatballs is simple and fun. You can create moist, tasty meatballs with just a few ingredients. We covered everything from the main ingredients to tips for perfect cooking. Don’t forget to try some variations to keep it exciting. You can easily store leftovers for later. Enjoy delicious meals by following these steps and tricks. Now you have all you need to impress with your cooking skills!

Easy Turkey Meatballs with Marinara Flavor Boost

If you’re looking for a simple and tasty meal, you’ve come to the right place! These easy turkey meatballs with

- 2 medium zucchinis, grated - 1 cup shredded mozzarella cheese - 1/2 cup grated Parmesan cheese - 1/2 cup all-purpose flour - 2 large eggs - 1/4 cup green onions, finely chopped - 2 cloves garlic, minced - 1 teaspoon dried oregano - 1/2 teaspoon salt - 1/4 teaspoon black pepper - Olive oil for frying - Fresh herbs (parsley, cilantro) - Red pepper flakes for heat These ingredients create a tasty base for savory cheesy zucchini fritters. Start with fresh zucchinis; they need to be grated well. This step helps to bring out their flavor. Next, the mozzarella and Parmesan add a rich, cheesy taste. The flour binds everything together, while the eggs help with structure. Green onions and garlic give each bite a burst of flavor. Oregano adds a nice touch of herbiness. Salt and pepper balance the flavors perfectly. For frying, olive oil gives a great crispiness and flavor to the fritters. If you want to enhance the taste, consider adding fresh herbs or red pepper flakes. Fresh herbs like parsley or cilantro brighten the dish. Red pepper flakes add a nice kick for those who enjoy some heat. For the full recipe, follow the steps to make these delightful fritters. To start, you need to prepare the zucchini. Grate the zucchinis using a box grater or a food processor. After grating, put the zucchini in a clean kitchen towel. Squeeze out as much moisture as possible. Removing this moisture is very important. If you don’t, your fritters will be soggy. You want them crispy and light. Next, let’s mix the ingredients. In a large bowl, combine the grated zucchini, shredded mozzarella, grated Parmesan, all-purpose flour, eggs, chopped green onions, minced garlic, oregano, salt, and black pepper. Use a spatula or spoon to mix well. Make sure everything is evenly mixed. The mixture should be thick but not dry. If it feels too loose, add a little more flour. Now, it’s time to cook the fritters. Heat a large skillet over medium heat. Add a few tablespoons of olive oil to the skillet. You need enough oil to coat the bottom but not drown the fritters. Once the oil is hot, use a tablespoon or small scoop to drop the zucchini mixture into the skillet. Flatten each dollop slightly with the back of the spoon. Cook for about 3-4 minutes on each side. Look for a golden brown color for perfect crispiness. When done, place the fritters on a plate lined with paper towels. This will soak up any extra oil. Repeat until you cook all the mixture. Add more olive oil as needed. For the full recipe, check out the Savory Cheesy Zucchini Fritters section. Squeezing out moisture is key to great fritters. Zucchinis hold a lot of water. If you skip this step, your fritters turn mushy. Here’s how to do it right: - Grate the zucchinis and place them in a clean kitchen towel or cheesecloth. - Squeeze it tightly to remove as much liquid as you can. Watch out for these pitfalls: - Don’t rush the squeezing; it makes a big difference. - Avoid adding too many other wet ingredients. Stick to the recipe to keep it balanced. Getting the right texture is all about balance. You need to mix the cheese and flour just right. Here are my tips: - Use equal parts cheese and flour for a good base. - Too much cheese can make them too soft, while too little will be dry. For crispy edges, try these cooking tips: - Heat your skillet well before adding oil. - Cook each fritter for about 3-4 minutes on each side. This gives a nice golden crust. These fritters shine with the right dips and sides. Here are my favorites: - Serve with sour cream or Greek yogurt for a creamy touch. - A sprinkle of fresh herbs adds color and taste. For a complete meal, pair the fritters with: - A light salad with citrus dressing. - Roasted veggies for added flavor and nutrition. For the full recipe, check out the complete guide. {{image_2}} You can add more veggies to boost nutrition. Carrots and bell peppers work well. Grate a carrot and mix it in with the zucchini. This adds color and sweetness. You can also chop bell peppers finely and include them. They bring a nice crunch and flavor. Herbs are another great way to change the taste. Consider adding fresh parsley or cilantro. These herbs can brighten up the dish. You might also try basil or thyme for a different twist. Just chop them finely and mix them into the batter. If you need a gluten-free option, switch the all-purpose flour. Almond flour or chickpea flour can be great substitutes. These alternatives add flavor and nutrition. They also keep the fritters light and crispy. Cheese choices can vary too. Try using a dairy-free cheese if you prefer. Look for options that melt well. Nutritional yeast can give a cheesy taste without dairy. It’s a smart choice for flavor and health. To make these fritters vegan, you need substitutes for eggs and cheese. For eggs, use flaxseed meal mixed with water. This mix binds the ingredients well. You can also use unsweetened applesauce as a binder. For cheese, opt for plant-based cheese. This keeps the cheesy flavor without animal products. You can also add nutritional yeast for extra flavor. This helps maintain the rich taste of the fritters. Check out the Full Recipe for more ideas on how to customize your fritters. To keep your fritters fresh, choose the right containers. Use airtight containers. This helps prevent moisture loss. For the best results, let the fritters cool completely before storing. Place parchment paper between layers to avoid sticking. For refrigeration, store them in the fridge. They will stay good for up to three days. If you want to keep them longer, freezing is the way to go. Use freezer-safe bags or containers. Make sure to squeeze out as much air as possible. When it's time to eat your fritters again, reheating is key. The best way to keep them crispy is by using a skillet. Heat a small amount of oil over medium heat. Add the fritters and cook for a few minutes on each side. This method keeps the edges nice and crunchy. You can also use a microwave, but it may not keep them crispy. If you choose this method, place a paper towel under the fritters. This helps absorb moisture. Heat them in short bursts of 30 seconds. Check often to avoid overcooking. For the full recipe of these delicious Savory Cheesy Zucchini Fritters, make sure to check out the complete guide! To prepare these fritters in advance, start by grating your zucchinis. After grating, squeeze out the moisture using a clean towel. This step helps keep the fritters crispy. Next, mix all the ingredients in a bowl as per the Full Recipe. You can store this mix in the fridge for up to a day. When you're ready to cook, just heat the skillet and fry the fritters. This way, you save time while keeping the taste fresh and delicious. Yes, you can bake these fritters for a healthier option! Preheat your oven to 400°F (200°C). Line a baking sheet with parchment paper. Shape the fritters and place them on the sheet. Brush the tops lightly with olive oil for a nice crisp. Bake for about 20-25 minutes, flipping halfway. This method gives you a lighter fritter while still keeping some crunch. You can boost the flavor of your fritters with many spices! Consider adding: - Fresh herbs like parsley or dill for a bright taste. - Red pepper flakes for a spicy kick. - Paprika for a smoky flavor. - Lemon zest for a fresh zing. These additions can really enhance your fritters and make them unique. Leftover fritters can last up to three days in the fridge. Store them in an airtight container to maintain freshness. If you want to keep them longer, you can freeze them. Just make sure to place parchment paper between layers. They can last up to three months in the freezer. When you're ready to enjoy them, reheat in a skillet to keep them crispy. This article shared a simple recipe for savory cheesy zucchini fritters. You learned about key ingredients and preparation steps. We covered tips to avoid sogginess and variations for diets like gluten-free and vegan. Creating these fritters can be fun and tasty. With the right techniques, you achieve a crispy texture and rich flavor. Explore different ingredients to make it your own. Enjoy these fritters as a snack or side dish!

Savory Cheesy Zucchini Fritters Crispy and Delicious

If you’re tired of boring snacks, it’s time to spice things up! My Savory Cheesy Zucchini Fritters are crispy, tasty,

To create the perfect creamy spinach and artichoke dip, you need a few simple ingredients. Each one adds unique flavor and texture. Here’s what you will need: - 1 cup fresh spinach, chopped - 1 cup canned artichoke hearts, drained and chopped - 1/2 cup cream cheese, softened - 1/2 cup sour cream - 1/2 cup mayonnaise - 1 cup shredded mozzarella cheese, divided - 1/4 cup grated Parmesan cheese - 2 cloves garlic, minced - 1/4 teaspoon red pepper flakes (optional for heat) - Salt and pepper to taste - Fresh parsley, chopped for garnish These ingredients blend together to create a rich and creamy dip. The artichokes give a nice bite, while the spinach adds freshness. The cheeses melt into a gooey goodness that makes this dip a hit. You can find the full recipe for this delightful dish in the Full Recipe section. 1. Preheat oven and mix base ingredients: Start by preheating your oven to 375°F (190°C). In a mixing bowl, combine 1/2 cup cream cheese, 1/2 cup sour cream, and 1/2 cup mayonnaise. You want this mixture to be creamy and smooth. 2. Incorporate remaining ingredients: Next, stir in 1 cup of chopped spinach, 1 cup of drained and chopped artichoke hearts, and 2 minced garlic cloves. Add half of the 1 cup of shredded mozzarella cheese, 1/4 cup grated Parmesan cheese, and season with salt, pepper, and optional red pepper flakes. Mix until everything is well blended. 3. Transfer and bake the mixture: Pour the mixture into a baking dish. Spread it evenly and top with the remaining mozzarella cheese. Bake for 20-25 minutes. Look for a golden, bubbling dip. - Oven baking method: This is the classic way to make creamy spinach and artichoke dip. It gives the dip a rich, warm texture and a nice golden crust. - Stovetop variation: If you're short on time, you can cook the dip on the stovetop. Simply mix all ingredients in a skillet over low heat. Stir until melted and creamy. - Slow cooker instructions: For a party, consider using a slow cooker. Combine all ingredients in the slow cooker. Cook on low for 2-3 hours. This method keeps the dip warm and ready to serve. Remember to check the [Full Recipe] for more details and tips! To get that perfect creamy texture, you need to pick the right cheeses. I love using cream cheese, sour cream, and mozzarella. Cream cheese gives a rich base, while mozzarella adds a lovely stretch. You can also switch things up by trying ricotta or goat cheese for a different taste. If you want to skip cream cheese, consider using Greek yogurt. It adds creaminess and a bit of tang. Adding herbs and spices can really boost the flavor of your dip. Fresh garlic adds a nice punch. You can also try adding a pinch of cayenne pepper for a kick. For a herby twist, mix in some chopped basil or oregano. You can also add optional ingredients like diced jalapeños or cooked bacon. Each choice adds a unique touch to your dip. You can make this dip ahead for easy hosting. To freeze it, prepare the dip and place it in an airtight container. When you’re ready to serve, just thaw it in the fridge overnight. Bake it as usual for a warm, creamy treat. If you want to prep early but not freeze, mix everything and keep it in the fridge. Just bake it right before your guests arrive. This way, you’ll have more time to enjoy the party. For the complete recipe, check the Full Recipe section. {{image_2}} You can make this dip fit different diets. For a gluten-free option, just use gluten-free chips or bread for dipping. The dip itself is naturally gluten-free. If you want a vegan version, swap the cream cheese, sour cream, and mayonnaise for plant-based alternatives. Use cashew cream or tofu for the creamy base. Also, choose a vegan mozzarella cheese. These changes keep the dip creamy and delicious. You can play around with the cheeses in this dip. Try using gouda or cheddar for a new flavor. Mixing different cheeses can create a rich taste. You can also add more veggies. Consider bell peppers, mushrooms, or kale. These vegetables add color and nutrition. They will also blend well with the spinach and artichokes. If you want to add some meat, cooked chicken or bacon works great. These ingredients add a savory touch to the dip. For spice lovers, mix in some diced jalapeños or extra red pepper flakes. This will give the dip a nice kick. You can adjust the heat to your liking. For the full recipe, check out the Creamy Spinach and Artichoke Dip. After you enjoy the dip, store any leftovers in the fridge. Use an airtight container. This keeps the dip fresh for up to three days. If you want to save it longer, freezing is a great option. To freeze, place the dip in a freezer-safe container. Leave some space at the top for expansion. You can freeze it for up to three months. When you’re ready to eat, thaw it in the fridge overnight before reheating. To reheat your dip without drying it out, use the oven for best results. Preheat the oven to 350°F (175°C). Place the dip in an oven-safe dish. Cover it with foil to keep it moist. Heat for about 15-20 minutes or until warm. If you’re in a hurry, you can use the microwave. Place the dip in a microwave-safe bowl. Heat it in 30-second intervals, stirring between each. This helps heat it evenly and keeps it creamy. For a delicious treat, enjoy your creamy spinach and artichoke dip warm with chips or veggies. For the full recipe, check the earlier section. You can serve this dip with many tasty dippers. Here are some great options: - Tortilla chips - Pita bread - Sliced veggies like carrots, celery, or bell peppers - Breadsticks - Crackers These dippers add crunch and fun. You can mix and match based on what you like. Yes, you can prepare this dip ahead. Here’s how: - Make the dip mix and put it in a baking dish. - Cover it and store in the fridge for up to two days. - When ready, just bake it as directed in the Full Recipe. This makes it easy for parties or gatherings. You’ll know the dip is done when it looks bubbly and golden. Look for these signs: - The cheese on top should be melted and slightly browned. - The edges may bubble, showing it’s hot inside. Let it cool a little before serving. This dip can be a bit rich, but you can make it healthier. Here are some tips: - Use low-fat cream cheese or Greek yogurt instead of sour cream. - Add more spinach for extra nutrients. - Use less cheese to cut down on calories. These small changes can help make it lighter while keeping the flavor. This blog post outlined a delicious Creamy Spinach and Artichoke Dip. We covered key ingredients, step-by-step cooking methods, and helpful tips for flavor and storage. Whether you make it creamy, spicy, or healthy, there’s a version for everyone. Don't forget to try different cheeses or serve it with your favorite dippers. Enjoy this dip at your next gathering or simply as a tasty snack. With all these options, you can create something special every time. Happy cooking!

Creamy Spinach and Artichoke Dip Flavorful Delight

Craving a tasty treat that will wow your friends? Let me introduce you to my Creamy Spinach and Artichoke Dip.

To make Nutella-Stuffed Banana Bread, gather the following ingredients: - 3 ripe bananas, mashed - 1/2 cup unsalted butter, melted - 1/2 cup brown sugar - 1/4 cup granulated sugar - 2 large eggs - 1 tsp vanilla extract - 1 tsp baking soda - 1/2 tsp salt - 1 1/2 cups all-purpose flour - 1/2 cup Nutella (or more to taste) - Optional: chopped hazelnuts for topping These ingredients create a moist and rich bread. The ripe bananas are key. They add natural sweetness and make the bread soft. The combination of brown and granulated sugar gives a nice balance of flavor. Melted butter brings richness, while eggs provide structure. Nutella is the star here. It adds a creamy, chocolatey surprise in every slice. You can adjust the amount of Nutella based on your taste. If you love chocolate, add more! Using optional chopped hazelnuts on top gives a nice crunch. It also adds a nutty flavor that pairs well with Nutella. You can find all these ingredients in your local grocery store. For the full recipe, you can check the detailed instructions to bring this delightful dish to life. 1. Preheat the oven and prepare the loaf pan: Start by setting your oven to 350°F (175°C). Grease a 9x5 inch loaf pan with butter or non-stick spray. This step helps the bread slide out easily later on. 2. Mash bananas and mix with other wet ingredients: In a bowl, mash 3 ripe bananas with a fork. Aim for a smooth texture. Next, add 1/2 cup of melted unsalted butter. Stir until they blend well. Then, mix in 1/2 cup of brown sugar and 1/4 cup of granulated sugar. Follow with 2 large eggs and 1 tsp of vanilla extract. Make sure everything is well combined. 3. Combine dry ingredients and fold into the batter: In another bowl, sprinkle 1 tsp of baking soda and 1/2 tsp of salt over 1 1/2 cups of all-purpose flour. Stir these dry ingredients together. Gradually fold this mix into your wet batter. Be gentle! Over-mixing can make the bread tough. 1. Pouring and spreading Nutella: Pour half of your banana bread batter into the loaf pan. Create a well in the middle. Now, take 1/2 cup of Nutella and spoon it into the well you made. Spread it evenly for a gooey center. 2. Topping the batter before baking: Carefully pour the rest of the batter over the Nutella. Use a spatula to smooth the top. If you like, you can sprinkle chopped hazelnuts on top for extra crunch. 1. Ideal baking times and temperature: Place the loaf pan in the preheated oven. Bake for 55-65 minutes. The bread should rise and turn a golden brown color. 2. Checking for doneness with a toothpick: To check if your banana bread is done, insert a toothpick in the center. If it comes out clean, your bread is ready. If not, give it a few more minutes and test again. For the full recipe, you can always refer back to the complete list of ingredients and instructions. Enjoy the process of creating this delightful treat! To ensure your banana bread stays moist, always use very ripe bananas. The riper the bananas, the more flavor and moisture they add. Look for bananas that are brown and soft. They will mix well into the batter. Avoid over-mixing the batter. When you add flour, mix just until it is combined. Over-mixing can make the bread tough. A few lumps are okay! Serve the banana bread warm for the best taste. Drizzle some melted Nutella on top. This adds a rich touch. A sprinkle of powdered sugar makes it look fancy. You can also add chopped hazelnuts for a nice crunch and extra flavor. Do not use unripe bananas. This makes the bread less sweet and moist. Always check the ripeness before you start. Make sure your oven temperature is correct. An oven that is too hot can burn the bread. Use an oven thermometer if needed. This helps to bake the banana bread evenly. {{image_2}} You can easily customize your Nutella-stuffed banana bread! Adding spices like cinnamon or nutmeg gives it a warm taste. Just a teaspoon of cinnamon can make a big difference. If you love nuts, try adding chopped walnuts or pecans. They add crunch and flavor, making each bite even better. If you need gluten-free banana bread, swap regular flour for gluten-free flour. It works well and keeps the bread soft. For those who prefer vegan options, use flax eggs instead of regular eggs. Mix one tablespoon of flaxseed meal with three tablespoons of water for each egg. Also, choose dairy-free butter to keep it vegan-friendly. If you want to change the chocolate flavor, try using different spreads. Peanut butter or almond butter can be delicious substitutes for Nutella. They bring a different taste but still pair well with bananas. Additionally, using dark chocolate chips can enhance the richness of the bread. They melt beautifully and create a decadent experience. For the full recipe, check out the details above! You can store leftover banana bread at room temperature. Wrap it in plastic wrap to keep it fresh. Place it in a cool, dry spot. If you want to keep it longer, put it in the fridge. This helps it last a bit more. Just remember, the bread may become a bit dry in the fridge. Freezing banana bread is easy. First, let it cool completely. Then, wrap it tightly in plastic wrap. After that, place it in a freezer bag or an airtight container. This keeps out air and moisture. When you want to eat it, take it out of the freezer. Let it thaw in the fridge overnight or at room temperature for a few hours. Banana bread lasts about 3 to 4 days at room temperature. In the fridge, it can last up to a week. If you freeze it, it can last for about 3 months. Watch for signs of spoilage. If you see mold or if it smells off, throw it away. Enjoy your Nutella-stuffed banana bread fresh and tasty! For the full recipe, check out the earlier sections. To check if your banana bread is done, use a toothpick. Insert it into the center of the loaf. If it comes out clean, your bread is ready. You can also look for some visual cues. The top should be golden brown and slightly springy to the touch. A well-baked loaf will pull away from the sides of the pan. Yes, you can prepare this banana bread in advance. Make the batter and store it in the fridge for up to 24 hours. Just don’t add the Nutella yet. When you're ready to bake, pour the batter into the pan and add Nutella as directed. You can also bake the bread ahead of time. Just cool it completely and wrap it tightly. Store it at room temperature for up to three days. Overripe bananas are perfect for many recipes! You can use them in smoothies, pancakes, or oatmeal. You could also make banana muffins or banana pancakes. If you want something different, try making banana ice cream. Just freeze the bananas and blend them until creamy. They are a great base for many sweet treats! You’ve learned how to make delicious Nutella-stuffed banana bread, from gathering ingredients to baking the perfect loaf. I shared tips for keeping it moist and avoiding common mistakes. Try different flavors and toppings to make it your own. Remember, you can store leftovers or even freeze them for later. Enjoy baking this tasty treat, and let your creativity shine in the kitchen!

Nutella-Stuffed Banana Bread Irresistible Delight

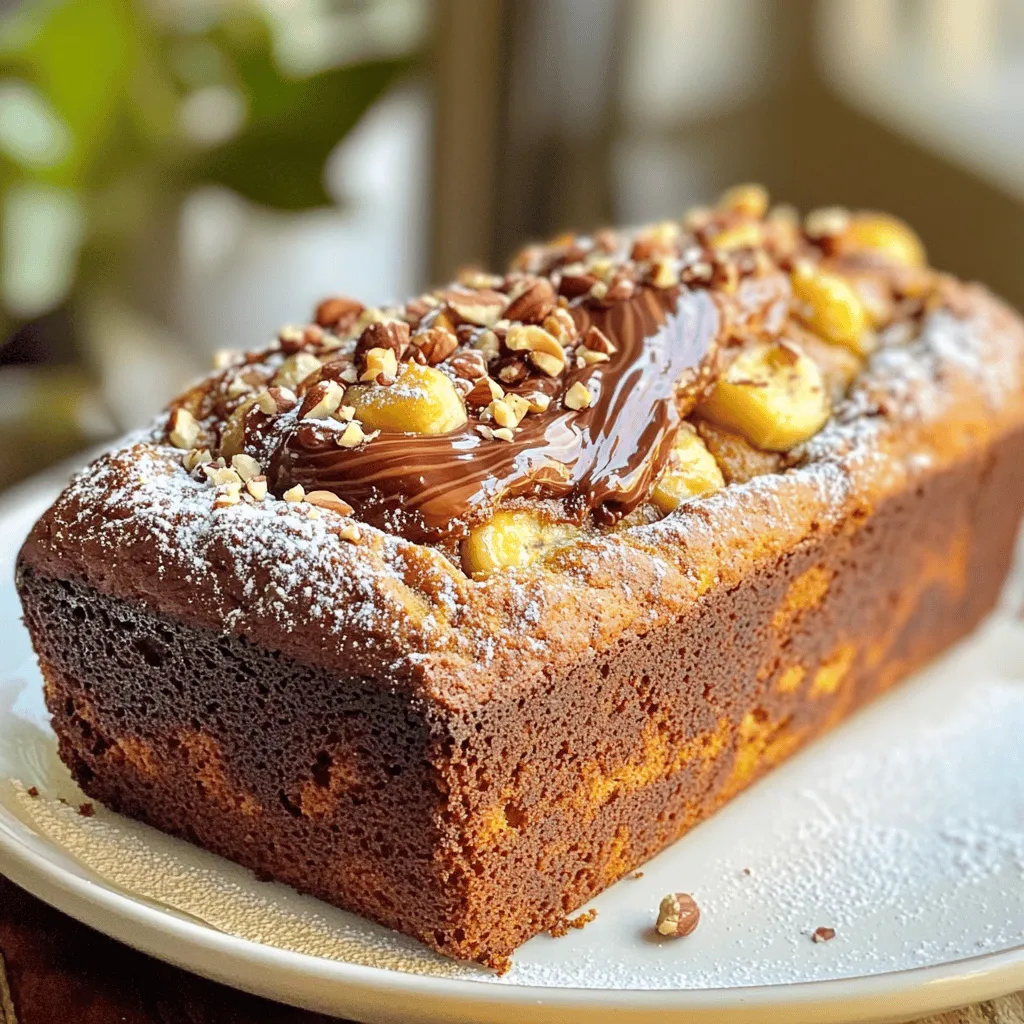
If you love banana bread, wait until you try this Nutella-stuffed version! Imagine tender, sweet bananas baked to perfection with

To make Zesty Lemon Garlic Shrimp, gather these simple ingredients: - 1 pound large shrimp, deveined and peeled - 4 cloves garlic, minced - 2 tablespoons olive oil - 1 tablespoon unsalted butter - Zest of 1 lemon - Juice of 2 lemons - 1 teaspoon red pepper flakes (adjust to taste) - Salt and pepper to taste - 2 tablespoons fresh parsley, chopped - Lemon wedges for serving You can easily swap some ingredients. Here are a few ideas: - Instead of fresh shrimp, use frozen shrimp. Just thaw them first. - If you don’t have garlic, garlic powder works too. Use about 1 teaspoon. - You can replace olive oil with any cooking oil you prefer. - For a richer taste, use ghee instead of butter. - If you like it less spicy, skip the red pepper flakes. Choosing the right shrimp is key. Here’s how to pick the best: - Look for shrimp with a firm texture. They should feel springy when pressed. - Fresh shrimp should have a mild sea smell, not a strong fishy odor. - Check the color. Fresh shrimp often have a pink hue or a slight sheen. - If possible, buy shrimp with the shells on. They stay fresher longer. - Ask your fishmonger about the shrimp’s origin. Wild-caught shrimp often taste better. For the full recipe, follow the steps to create this zesty dish! First, gather all your ingredients. You will need: - 1 pound large shrimp, deveined and peeled - 4 cloves garlic, minced - 2 tablespoons olive oil - 1 tablespoon unsalted butter - Zest of 1 lemon - Juice of 2 lemons - 1 teaspoon red pepper flakes (adjust to taste) - Salt and pepper to taste - 2 tablespoons fresh parsley, chopped - Lemon wedges for serving Next, mix the shrimp with garlic, lemon zest, lemon juice, and red pepper flakes in a large bowl. Add salt and pepper to taste. Make sure to coat the shrimp well. Let this mix sit for about 15 minutes. This step helps the shrimp soak up all the zesty flavors. Now, heat the olive oil and butter in a large skillet over medium heat. Wait until the butter melts and starts to bubble. Then, add the marinated shrimp. Spread them out in a single layer. This helps them cook evenly. Cook the shrimp for 2-3 minutes on each side. You want them to turn pink and opaque. Once they are cooked, take the skillet off the heat. Stir in the chopped parsley for a fresh flavor boost. To get the best shrimp, keep these tips in mind: - Use fresh shrimp for the best taste. - Do not overcrowd the pan. This allows even cooking. - Cook until just pink and opaque. Overcooking makes shrimp tough. - Adjust red pepper flakes to your spice level. For the full recipe, check out the complete instructions! Enjoy your cooking! When making Zesty Lemon Garlic Shrimp, avoid cooking shrimp too long. Overcooked shrimp turn tough and rubbery. Always watch the color change closely. They should be pink and opaque when done. Also, don’t skip the marinating step. This helps the shrimp soak up the lemon and garlic flavors. To add a twist, try adding herbs like thyme or basil. You can also mix in a splash of white wine while cooking. For a smoky taste, consider adding smoked paprika. Want heat? Increase the red pepper flakes. Each adjustment gives your dish a unique flair. Serve your shrimp over a bed of fluffy rice or pasta. They pair well with a fresh green salad. You can also add crusty bread to soak up the delicious sauce. For a complete meal, serve with grilled veggies or a lemony quinoa salad. Check out the Full Recipe for more ideas! {{image_2}} You can add vegetables to boost the flavor and nutrition of your dish. Bell peppers, zucchini, or asparagus work well. Just chop them into bite-sized pieces. Sauté them in the skillet before adding the shrimp. This adds color and texture. You can also use broccoli or snap peas for a fresh crunch. Want a kick? Add more red pepper flakes! Start with one teaspoon and taste. If you like heat, add more. You can also try fresh chopped chili peppers. Jalapeños or serranos add great flavor. For a smoky touch, use smoked paprika. Just remember to adjust the other spices to balance the heat. Grilling is a fun way to cook this dish. Marinate the shrimp as before. Then, thread them onto skewers. Grill for about 2-3 minutes on each side. This gives a nice char and smoky flavor. If you prefer baking, place the shrimp on a baking sheet. Bake at 400°F for 8-10 minutes. This method keeps the shrimp juicy and tender. You can try these methods for a tasty twist on the classic recipe. For the full recipe, check out the section above. After enjoying your zesty lemon garlic shrimp, let any leftovers cool. Place them in an airtight container. Store in the fridge for up to three days. Make sure to keep the shrimp and sauce together for best taste. When you're ready to eat the leftovers, reheat them gently. You can use a skillet on low heat. Add a splash of water or olive oil to keep them moist. Stir often until they are hot. Avoid using high heat, as it can overcook the shrimp. If you want to save your shrimp for later, freezing is a great option. Place cooled shrimp in a freezer-safe bag. Remove as much air as you can before sealing. They can last up to three months in the freezer. When you're ready to use them, thaw in the fridge overnight. Reheat gently as mentioned before. Enjoy your meal anytime! For the full recipe, check out the details above. Cooking shrimp is quick! It takes about 2-3 minutes per side. You want them pink and opaque. Overcooking makes them tough. Keep an eye on your shrimp as they cook. Yes, you can use frozen shrimp! Just thaw them first. Place shrimp in cold water for about 10-15 minutes. Then, pat them dry before cooking. This helps the shrimp absorb the lemon and garlic flavors better. You have many tasty options! Here are some ideas: - Rice or quinoa for a filling base - Pasta tossed in olive oil or garlic - A fresh green salad with lemon dressing - Crusty bread to soak up the juices - Steamed vegetables for a healthy side These pairings make your meal balanced and delicious. Check out the Full Recipe for more details! This blog post shows you how to make Zesty Lemon Garlic Shrimp. We covered ingredients, cooking steps, and tips for tasty shrimp. Remember to choose fresh shrimp for the best flavor. Avoid common mistakes to get it right every time. You can tweak the recipe by adding veggies or making it spicy. Store leftovers well to enjoy later. Now, you're ready to make this dish with confidence. Happy cooking!

Zesty Lemon Garlic Shrimp Flavorful and Easy Recipe

If you’re craving a quick and tasty meal, look no further than my Zesty Lemon Garlic Shrimp. This dish is

- 2 cups all-purpose flour - 1/2 cup warm milk - 1/4 cup granulated sugar - 2 1/4 teaspoons active dry yeast (1 packet) - 1/4 cup unsalted butter, melted - 1 large egg - 1/2 teaspoon salt The base of these cinnamon rolls is simple but essential. All-purpose flour gives the rolls structure. Warm milk helps activate the yeast, making the rolls fluffy. Sugar feeds the yeast and adds sweetness. Active dry yeast is key for rising. Unsalted butter provides rich flavor, and the egg adds moisture. Salt balances the sweetness. - 1/2 cup Biscoff cookie butter - 1/4 cup brown sugar - 1 tablespoon cinnamon - 1/4 cup chopped walnuts or pecans (optional) - 1/2 cup powdered sugar (for icing) - 2 tablespoons milk (for icing) The star of this recipe is Biscoff cookie butter. It adds a unique flavor that makes these rolls special. Brown sugar and cinnamon create a warm, sweet topping. You can add nuts for a nice crunch if you like. For icing, powdered sugar and milk mix perfectly for a sweet drizzle. For the full list of ingredients and steps, check out the Full Recipe. To start, I activate the yeast. In a small bowl, I mix warm milk with sugar. Next, I sprinkle the yeast on top and let it sit for about 5-10 minutes. You'll see it bubble and foam, which means it's ready. In a large bowl, I mix the flour and salt. I create a well in the center. Then, I add the melted butter, egg, and the yeast mixture. I mix it all together until combined. Now, I knead the dough for about 5-7 minutes. I want it smooth and elastic. If it feels too sticky, I add a bit more flour. After kneading, I place the dough in a greased bowl and cover it with a damp cloth. I let it rise in a warm spot for about 1 hour, or until it doubles in size. Once the dough is ready, I punch it down to release the air. I roll it out on a floured surface into a rectangle, about 1/4 inch thick. Next, I spread Biscoff cookie butter evenly over the dough. I leave a small border around the edges for easier rolling. In a small bowl, I mix brown sugar with cinnamon. I sprinkle this mix all over the Biscoff cookie butter. If I want some crunch, I add chopped nuts too. Starting from one edge, I roll the dough tightly into a log. I slice it into 12 equal pieces and place them in a greased baking dish. I cover them with a cloth and let them rise for another 30 minutes. While the rolls rise, I preheat my oven to 350°F (175°C). After the second rise, I place the rolls in the oven. I bake them for about 20-25 minutes. They should turn golden brown when done. For extra sweetness, I prepare the icing. I whisk together powdered sugar and milk until smooth. Once the rolls cool for a few minutes, I drizzle the icing over them. This method ensures that you get soft, gooey rolls full of flavor. For the full recipe, check out the complete instructions. To get the best texture, knead the dough for about six minutes. This makes it smooth and elastic. If the dough sticks to your hands, add a little flour. The right amount of flour is key, especially with humidity. If it’s humid, you may need a bit more flour. In dry weather, use less. You can make these rolls even tastier by adding spices like nutmeg or ginger. A splash of vanilla extract can boost the flavor too. If you want a crunch, mix in some chopped walnuts or pecans. They add a nice texture and complement the Biscoff cookie butter well. Serve your rolls warm for the best flavor. Drizzle icing over the top for a sweet touch. You can also add extra Biscoff cookie butter on the side for dipping. For a fun look, sprinkle some crushed cookies on top. This adds color and makes your rolls stand out on the table. {{image_2}} You can easily mix up the flavors of your Biscoff cookie butter cinnamon rolls. One fun twist is adding chocolate chips. Just sprinkle them on top of the cookie butter before rolling. The sweet chocolate pairs well with the spiced cookie butter. You can also make these rolls a fall favorite. Adding pumpkin spice to the filling gives them a warm, cozy taste. It’s perfect for cool autumn days when you want something special. If you need to make these rolls vegan, it's simple! Swap the egg with a flax egg made from one tablespoon of ground flaxseed mixed with three tablespoons of water. Use plant-based milk and vegan butter instead of regular. You can also make these rolls gluten-free. Just replace the all-purpose flour with a gluten-free blend. Make sure the blend has xanthan gum for the best texture. These adjustments let everyone enjoy the deliciousness! To keep your Biscoff cookie butter cinnamon rolls fresh, store them in an airtight container. Make sure to cool them completely before sealing. This helps avoid sogginess. You can keep them at room temperature for about two days. If you want them to last longer, store them in the fridge for up to a week. To enjoy warm rolls again, use the oven or microwave. For the oven, preheat it to 350°F (175°C). Place the rolls on a baking sheet and cover them with foil. Heat for about 10 minutes. This keeps them soft and fluffy. If you prefer the microwave, place a roll on a plate and cover it with a damp paper towel. Heat it for 15-20 seconds. This helps keep the texture nice. Enjoy your rolls like they are fresh from the oven! Can I use homemade Biscoff cookie butter? Yes, you can use homemade Biscoff cookie butter. Just make sure it has a similar texture and flavor. This can give your rolls a personal touch. What can I do with leftover Biscoff cookie butter? Leftover Biscoff cookie butter is great on toast, pancakes, or as a dip for fruits. You can also swirl it into yogurt or oatmeal for added flavor. How can I make these ahead of time? You can prepare the dough a day before. Let it rise, then store it in the fridge. The next day, let it come to room temperature and bake. Can I freeze the cinnamon rolls? Yes, you can freeze the cinnamon rolls. After baking, let them cool completely. Wrap them tightly in plastic wrap and foil. They last up to three months in the freezer. Why didn’t my rolls rise? If your rolls didn’t rise, check the yeast. It might be old or not activated. Make sure the milk is warm, not hot, when mixing. How to fix dry or dense rolls? Dry or dense rolls can happen from too much flour or not enough liquid. Next time, measure flour carefully and add a bit more liquid if needed. What if I overbaked my cinnamon rolls? If you overbake your cinnamon rolls, they may be dry. To help, drizzle some icing over them. This adds moisture and sweetness to each bite. For the full recipe and more details, see the [Full Recipe]. Making Biscoff cookie butter cinnamon rolls is simple and fun. You learned about key ingredients, step-by-step instructions, and helpful tips. I shared flavor variations and storage tips to keep your rolls fresh. Remember, baking is about experimenting, so feel free to try new things. Enjoy the delicious taste of your rolls and share them with others. It’s a treat everyone will love!

Biscoff Cookie Butter Cinnamon Rolls Delightful Treat

Biscoff Cookie Butter Cinnamon Rolls are the perfect blend of sweet and spice. Imagine fluffy, warm rolls filled with rich

- 1 medium head of cauliflower - 1 cup all-purpose flour (or gluten-free option) - 1 cup water - Garlic powder - Onion powder - Smoked paprika - Cayenne pepper - Salt - Buffalo sauce - Chopped green onions - Celery sticks To make Buffalo cauliflower bites, you start with a fresh head of cauliflower. Cut it into bite-sized florets. Cauliflower is great for this dish since it absorbs flavors well. You'll also need flour and water to create a tasty batter. For seasonings, I suggest adding garlic powder, onion powder, and smoked paprika. These spices give a warm, savory touch. A bit of cayenne pepper will add heat, so adjust it to your taste. Finally, salt enhances all the flavors. Buffalo sauce is the star of this dish. You can use store-bought or make your own. Either way, it brings that classic tangy flavor. Don’t forget the optional garnishes! Chopped green onions add color and crunch. Celery sticks make a perfect side. They cool down the heat and add a fresh bite. This simple list of ingredients makes it easy to create a crispy and flavorful snack. You can find the Full Recipe for more detailed steps and tips. Enjoy your cooking! 1. Preheat your oven to 450°F (230°C). This heat will help the bites get crispy. 2. Line a baking sheet with parchment paper. This makes cleanup easy later. 3. In a large bowl, mix together these ingredients: - 1 cup all-purpose flour (or gluten-free flour) - 1 cup water - 1 teaspoon garlic powder - 1 teaspoon onion powder - 1 teaspoon smoked paprika - ½ teaspoon cayenne pepper - ½ teaspoon salt Whisk until smooth. 1. Take each cauliflower floret and dip it into the batter. Let the excess batter drip off. 2. Place the coated florets on the baking sheet. Make sure to leave space between each piece. This helps them cook evenly. 1. Bake the cauliflower for 25 minutes. Flip the pieces halfway through to ensure they get golden and crispy. 2. While the cauliflower bakes, melt 2 tablespoons of unsalted butter in a small pan over low heat. 3. Once melted, add 1 cup of buffalo sauce and stir well. Set this aside for later. 1. After the first baking phase, take out the cauliflower. Drizzle the buffalo sauce over the hot florets. 2. Toss gently to coat each piece evenly in the sauce. 3. Return the bites to the oven and bake for another 10 minutes. This will make them extra crispy. 4. Once done, let them cool a bit before serving. You can garnish with chopped green onions and serve with celery sticks. For the full recipe, check [Full Recipe]. Enjoy your delicious Buffalo Cauliflower Bites! To make your Buffalo Cauliflower Bites crispy, start with a hot oven. Preheat to 450°F (230°C) for the best results. Use parchment paper on your baking sheet. This prevents sticking and helps with crispiness. Flipping the florets halfway through baking is key. This ensures even cooking and browning. Use tongs to turn them carefully without breaking apart. To boost flavor, consider adding more spices. Try smoked paprika or extra garlic powder. Experiment with cumin or chili powder for a twist. You can choose between homemade and store-bought buffalo sauce. Homemade sauce is simple and fresh. Mix melted butter with hot sauce for a quick version. Store-bought is faster but may lack depth. Choose what fits your time and taste. Pair these bites with your favorite dips. Ranch or blue cheese dressing works great. Celery sticks add freshness and crunch. For plating, use a large platter. Arrange the cauliflower bites in a circle. Garnish with chopped green onions for color. You can even drizzle extra sauce on top for a nice touch. Try serving with craft beers or fizzy drinks. The flavors balance well, making your snack even better. Enjoy these bites with friends for a fun gathering! {{image_2}} You can make buffalo cauliflower bites fit your taste. To control the heat, adjust the cayenne pepper. Use less cayenne for a milder flavor. If you like it hot, add more. You can also swap out the buffalo sauce. Try different hot sauces for varied flavors. Each one brings a unique kick. Not everyone can use regular flour. You can use gluten-free flour as a great option. This keeps it tasty for those with dietary needs. For a dairy-free option, swap butter for vegan butter. You can also explore other vegetables. Try using broccoli or Brussels sprouts for a twist. Each vegetable brings its own fun flavor. Get creative with how you serve buffalo cauliflower bites. You can make a buffalo cauliflower salad. Toss the bites with fresh greens and your favorite dressing. Another fun idea is buffalo cauliflower tacos. Place the bites in soft tortillas and add toppings. Try avocado, salsa, or cabbage. These options keep it fresh and exciting. For the full recipe, you can refer back to the main section. To store leftover Buffalo Cauliflower Bites, let them cool first. Place them in an airtight container. They will stay fresh for about three days in the fridge. Make sure to keep them in a single layer if possible. This helps to keep them from getting too soggy. If you want to freeze these bites, let them cool completely. Place them in a freezer-safe bag or container. They can last up to three months in the freezer. For best results, freeze them in single layers, so they don’t stick together. When you're ready to enjoy the bites again, use the oven for the best texture. Preheat your oven to 375°F (190°C). Place the bites on a baking sheet and heat for about 10-15 minutes. This keeps them crispy. If you use a microwave, they might get soggy. For a quicker method, you can use the microwave, but the texture won't be the same. To keep the bites crispy, try to reheat them in the oven after microwaving. For the full recipe, click [here](#). For a gluten-free option, you can use several kinds of flour. Here are a few great choices: - Almond flour - Coconut flour - Chickpea flour - Rice flour Each flour has its own taste and texture. Almond flour gives a nutty flavor, while coconut flour adds a slight sweetness. Chickpea flour is hearty and works well for binding. Rice flour is light and crispy. Yes, you can make Buffalo Cauliflower Bites ahead of time. Here’s how: 1. Prepare the cauliflower as usual but do not bake it yet. 2. After coating the florets with batter, place them on a baking sheet. 3. Cover and refrigerate for up to 24 hours. 4. When ready to cook, bake them straight from the fridge. 5. Follow the baking instructions, adding a few extra minutes if needed. You can also bake them ahead and store in the fridge. To reheat, place them in the oven at 375°F (190°C) for about 10 minutes. Making homemade buffalo sauce is easy and quick. Here’s a simple recipe: 1. In a small saucepan, melt ½ cup of unsalted butter over low heat. 2. Once melted, remove from heat and stir in 1 cup of hot sauce. 3. Add a splash of vinegar for extra tang. 4. Mix well until smooth. Feel free to adjust the heat level by adding more hot sauce or cayenne pepper. This sauce works great with Buffalo Cauliflower Bites. You can find the full recipe for the bites above! In this post, we explored how to make delicious Buffalo Cauliflower Bites. We covered main ingredients, seasonings, preparation steps, and cooking tips. We also discussed variations and storage methods for your bites. Remember, you can customize the spice level and try different sauces. With a few simple steps, you can enjoy a fun, tasty snack. Enjoy your cooking, and share this recipe with friends for a great culinary experience!

Buffalo Cauliflower Bites Crispy and Flavorful Snack

Are you ready for a snack that’s crispy, spicy, and full of flavor? Buffalo Cauliflower Bites are the perfect treat!

- 1 whole chicken (about 4-5 pounds) - Fresh herbs for garnish (like parsley or thyme) - 4 tablespoons olive oil - 2 teaspoons sea salt - 1 teaspoon black pepper - 1 tablespoon garlic powder - 1 tablespoon onion powder - 1 tablespoon dried thyme - 1 tablespoon dried rosemary - 1 tablespoon dried oregano - 1 lemon, halved - 1 head of garlic, halved To create the perfect savory herb roasted chicken, gather these key ingredients. Start with a whole chicken, which should weigh between 4 and 5 pounds. This size cooks evenly and stays juicy. Fresh herbs like parsley or thyme will add a nice touch for garnish. Next, you will need seasonings and oil. Olive oil keeps the chicken moist and helps the skin crisp up. The sea salt and black pepper enhance flavors. Garlic powder and onion powder bring depth to the dish. Thyme, rosemary, and oregano add a lovely herbal note. Lastly, for flavor infusers, use a lemon and a head of garlic. Halve the lemon to release its juice and aroma. The garlic will roast beautifully, adding sweetness to the dish. You can find the full recipe with instructions to make this delightful meal. Enjoy the process and the wonderful smells that fill your kitchen! - Preheat the oven to 425°F (220°C). - Pat the chicken dry with paper towels. This step helps the skin get crispy. - Combine olive oil and herbs in a bowl. Use thyme, rosemary, and oregano for great taste. - Add seasonings like salt and pepper. Mix thoroughly until it becomes a paste. - Rub the herb mixture on the chicken. Make sure to cover the entire surface. - Stuff the chicken with lemon and garlic. This adds flavor as it cooks. - Roast in the oven for 1 hour and 15 minutes. Look for a golden brown skin. - Check internal temperature. It should be 165°F (75°C) for safe eating. - Let the chicken rest before carving. This helps keep it juicy and flavorful. For a complete guide with all details, refer to the Full Recipe. To get the best crispy skin on your chicken, start by drying it well. Use paper towels to pat the chicken dry. Moisture on the skin can cause it to steam instead of roast. Next, ensure even seasoning. I like to rub the seasoning mixture under the skin, too. This method helps flavor the meat and makes the skin crispy. Using fresh herbs makes a big difference. Fresh herbs like rosemary and thyme add a bright taste. If you use dried herbs, make sure they are fresh, too. You can also marinate the chicken for extra flavor. A good marinating time is about 2 hours. This allows herbs and spices to soak into the meat. The cooking time can change based on the size of your chicken. A smaller chicken may need less time, while a larger one needs more. Aim for about 20 minutes per pound. Always use a meat thermometer to check doneness. The chicken is safe to eat when it reaches 165°F (75°C). This way, you avoid overcooking or undercooking. For the complete method, check the Full Recipe. {{image_2}} You can switch up the herbs for a fresh twist. Try using basil for a sweet touch, or cilantro for something bright. Each herb brings its own flavor to the dish. You can also experiment with unique seasoning blends. Cajun spices add a zesty kick, while lemon pepper gives a bright, citrusy zing. These alternatives can make your savory herb roasted chicken feel new and exciting. Roasting is a classic method for this dish, but slow cooking can also work well. Slow cooking makes the meat very tender and juicy. If you prefer a smoky flavor, consider grilling your chicken. Grilling gives the chicken a nice char and adds depth to the flavor. Both methods can lead to a delicious outcome, so choose what fits your mood. Pair your savory herb roasted chicken with tasty side dishes. Roasted vegetables make a colorful and healthy addition to your plate. A fresh salad can also balance the richness of the chicken. To enhance the flavor, consider serving with sauces or gravies. A lemon herb sauce or a rich gravy can elevate your meal. These additions make each bite even more delightful. For the full recipe, check out the details provided. To keep your savory herb roasted chicken fresh, store it properly. First, let the chicken cool down at room temperature for about 30 minutes. Next, place it in an airtight container or wrap it in plastic wrap. This helps to prevent moisture loss and keeps the chicken safe from germs. Leftover chicken lasts about 3 to 4 days in the fridge. Be sure to check for any off smells or discoloration before eating. If you notice any, it's best to throw it away. If you want to keep the chicken longer, freezing is a great option. Cut the chicken into pieces for easier storage. Wrap each piece tightly in plastic wrap and then place them in a freezer-safe bag. This helps to prevent freezer burn. To thaw the chicken, move it from the freezer to the fridge a day before you plan to eat it. This keeps the texture nice. You can also thaw it in cold water if you're short on time. Just make sure to cook it right after thawing. When reheating, you want to keep your chicken juicy. The best way is to use the oven. Preheat it to 350°F (175°C). Place the chicken in a baking dish and add a splash of broth or water. Cover it with foil to lock in moisture. Heat for about 20 minutes or until warm. Avoid using the microwave if you can. It often dries out the chicken. If you must use it, heat in short bursts and check often. This way, you can enjoy your savory herb roasted chicken just like the first time! To keep the chicken juicy, start by drying it well. This helps the skin crisp up. Next, rub the herb mixture under the skin and inside the cavity. This allows the flavors to seep in. Cooking at a high heat, like 425°F, helps seal in moisture. Make sure to let the chicken rest after cooking. This step allows the juices to redistribute for the best bite. Yes, you can use smaller birds like cornish hens. Adjust the cooking time to about 45 minutes. If you choose smaller birds, check the internal temperature to ensure doneness. Smaller birds will cook faster, so keep an eye on them. Pair your roasted chicken with sides like: - Roasted vegetables (carrots, potatoes, and Brussels sprouts) - A fresh garden salad - Creamy mashed potatoes - Steamed green beans These sides complement the chicken well and add color to your plate. To check if the chicken is done, use a meat thermometer. Insert it into the thickest part of the thigh. The temperature should read 165°F. If you don’t have a thermometer, pierce the chicken and look for clear juices. If the juices run clear, it’s ready to serve. Roasting a whole chicken is simple and rewarding. You now know which ingredients to use and how to prepare the perfect chicken. From seasoning with herbs to roasting techniques, each step improves flavor. Remember, drying the chicken is key for crispy skin. Feel free to try different herbs and cooking methods to make it your own. Proper storage ensures you enjoy delicious leftovers too. Follow these tips, and you will impress everyone with your cooking skills. Enjoy your next meal!

Savory Herb Roasted Chicken Flavorful Dinner Recipe

Looking for a tasty dinner idea? My Savory Herb Roasted Chicken recipe will wow your family. Using fresh herbs and

To make this tasty dip, you need these key ingredients: - 1 cup all-purpose flour (heat-treated for safety) - 1/2 cup unsalted butter, softened - 3/4 cup brown sugar, packed - 1/4 cup granulated sugar - 1 teaspoon vanilla extract - 1/2 teaspoon salt - 1 cup mini chocolate chips - 8 ounces cream cheese, softened - 1/4 cup powdered sugar - 1/4 cup milk (as needed for consistency) - Extra chocolate chips for garnish Each ingredient plays a big role. The flour gives the dip its cookie dough feel. The butter and cream cheese add creaminess. The sugars create the sweet taste we love. To make your dip even better, you can try these optional add-ins: - A pinch of cinnamon for warmth - Chopped nuts like walnuts or pecans for crunch - A dash of sea salt to balance sweetness These extras can change the flavor and texture. They also make your dip unique each time you make it. If you need to swap ingredients, here are some ideas: - Use coconut oil instead of butter for a dairy-free option. - Replace cream cheese with a vegan cream cheese for a plant-based dip. - Substitute almond flour for all-purpose flour for a gluten-free version. These swaps keep the flavor strong while meeting dietary needs. You can enjoy this dip no matter your taste or preference. For the full recipe, check the earlier section. To make this dip, start by gathering your ingredients. You will need: - 1 cup all-purpose flour (heat-treated for safety) - 1/2 cup unsalted butter, softened - 3/4 cup brown sugar, packed - 1/4 cup granulated sugar - 1 teaspoon vanilla extract - 1/2 teaspoon salt - 1 cup mini chocolate chips - 8 ounces cream cheese, softened - 1/4 cup powdered sugar - 1/4 cup milk (as needed for consistency) - Extra chocolate chips for garnish Begin by putting the softened butter, brown sugar, and granulated sugar in a mixing bowl. Beat these ingredients with an electric mixer until they are creamy and well combined. Next, add the softened cream cheese and vanilla extract. Mix until the texture is smooth and fluffy. Now, it’s time to add the heat-treated flour and salt. Mix these in gradually, and stop as soon as they are combined. If your dip feels too thick, add a bit of milk. This will help you reach the smooth, creamy texture that makes this dip so delightful. After that, gently fold in the mini chocolate chips. Make sure they are evenly spread throughout the mixture. This step is key for that cookie dough experience in every bite. Once your dip is ready, transfer it to a fun, colorful bowl. Top it with some extra chocolate chips for a tasty decoration. For serving, I like to arrange a platter with assorted dippers, like graham crackers, pretzels, or fresh fruit slices. This makes the dip not just delicious but also fun to eat! You can also chill the dip for about 30 minutes to enhance the flavor. For more details on this recipe, check out the Full Recipe. To make the best chocolate chip cookie dough dip, avoid using raw flour. Always heat-treat it first. This step keeps your dip safe and tasty. Next, be careful not to overmix. Overmixing can make the dip tough. Mix just until all ingredients are combined. Finally, watch your measurements. Too much butter or sugar can make the dip too greasy. The key to a smooth dip is the right balance of ingredients. Start with softened cream cheese and butter. This helps mix everything easily. If your dip feels too thick, add milk little by little. You want a creamy texture that is easy to dip. If it is too runny, add a bit more heat-treated flour. You can add fun flavors to your dip! Try mixing in some peanut butter for a twist. You can also add a pinch of cinnamon for warmth. If you like nuts, chopped walnuts or pecans add a nice crunch. Want a chocolate boost? Toss in extra mini chocolate chips. Mix and match to find your perfect flavor! For the full recipe, check out the instructions listed above. {{image_2}} To make a gluten-free version of this dip, swap the all-purpose flour for a gluten-free blend. Many brands work well, so choose one that suits your taste. Make sure it is heat-treated to keep it safe. This version still tastes great and is safe to eat! For a vegan chocolate chip cookie dough dip, replace the cream cheese with a dairy-free cream cheese. Use vegan butter instead of regular butter. You can also replace the milk with almond milk or oat milk. These swaps keep the dip creamy while meeting vegan needs. Do you want to mix things up? Try adding peanut butter for a nutty flavor. Just mix in half a cup of creamy peanut butter along with the other ingredients. Or, for a minty twist, stir in some peppermint extract. A teaspoon will do. These fun flavors can make your dip even more exciting! You can find the full recipe in the main article. To keep your chocolate chip cookie dough dip fresh, store it in an airtight container. Press plastic wrap directly onto the surface of the dip before sealing. This method prevents air from drying it out. Place the container in the fridge. Enjoy your dip within three days for the best taste. If you want to save some dip for later, freezing is a great option. First, spoon the dip into a freezer-safe container. Make sure to leave some space at the top for expansion. Seal it tightly and label it with the date. You can freeze the dip for up to three months. When ready to use, thaw it in the fridge overnight. Stir well before serving. The shelf life of your dip depends on how you store it. In the fridge, it lasts about three days. If frozen, use it within three months for the best flavor. Always check for any off smells or changes in texture before eating. For the best experience, enjoy the dip fresh and share it with friends. This recipe is perfect for parties or a fun snack at home. Use the full recipe for the best results! No, you should not eat raw flour. Raw flour can have harmful bacteria. Always heat-treat your flour to kill any germs. To heat-treat flour, spread it on a baking sheet. Bake it at 350°F for about 5 minutes. Let it cool before mixing it into your dip. You can serve this dip with many tasty dippers! Here are some great ideas: - Graham crackers - Pretzels - Apple slices - Strawberries - Vanilla wafers - Mini marshmallows These dippers add fun flavors and textures. They make your dip even more enjoyable! To adjust sweetness, you can change the sugars used. If the dip is too sweet, try reducing the brown sugar or granulated sugar. If you want it sweeter, add more powdered sugar. Always taste the dip as you mix to find your perfect balance. Yes, you can make this dip ahead of time! It stays fresh in the fridge for about 3 days. Just cover it tightly with plastic wrap. When ready to serve, stir it well. You may need to add a splash of milk for the right texture. Enjoy this delightful treat when you want! For the full recipe, check out the details above. You now have a complete guide to making Chocolate Chip Cookie Dough Dip. You learned about essential ingredients and fun add-ons. The step-by-step instructions help you mix and serve the dip well. Tips and tricks show how to avoid mistakes and customize flavors. You can even explore gluten-free and vegan options. Lastly, proper storage and answers to your questions ensure your dip stays fresh. Enjoy your dip, and make every gathering sweet with this treat!

Chocolate Chip Cookie Dough Dip Delightful Treat Recipe

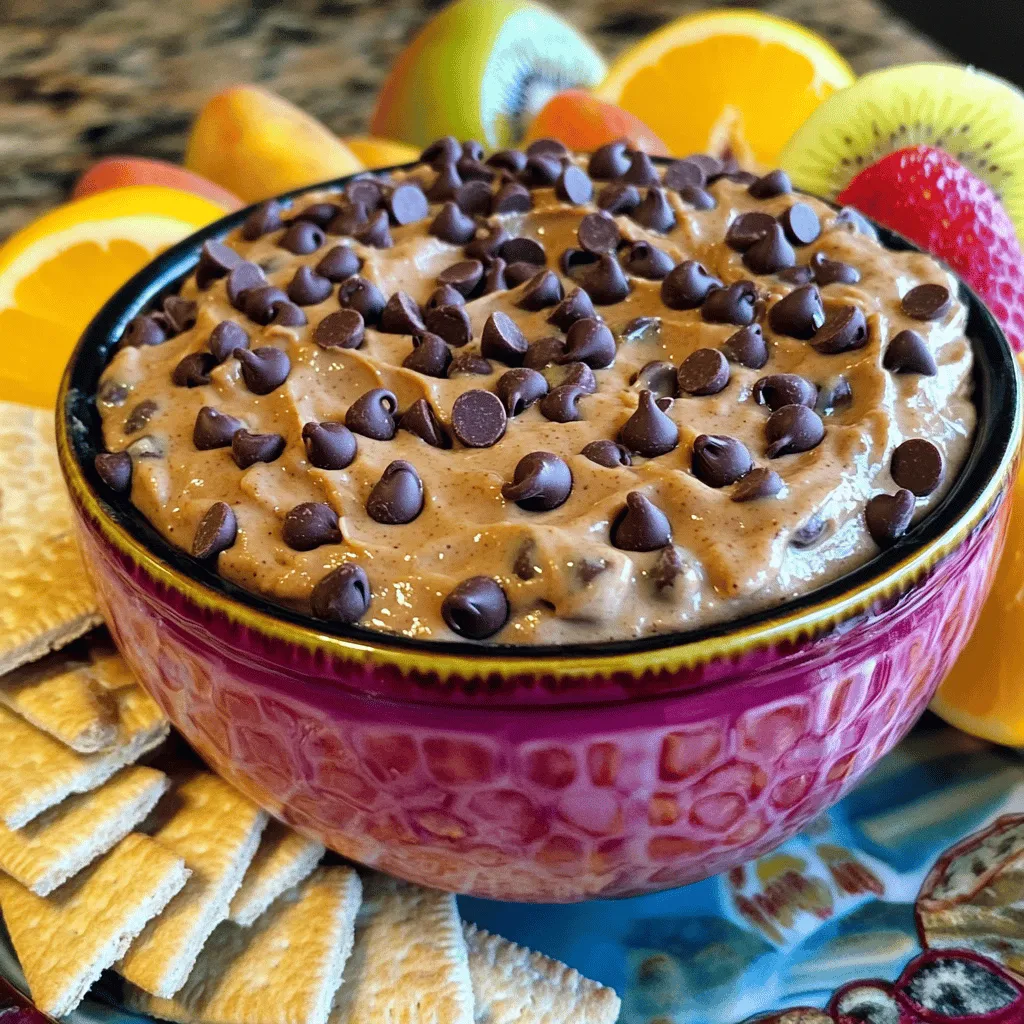
Are you ready to indulge in a sweet treat that’s creamy and delicious? This Chocolate Chip Cookie Dough Dip is

Older posts
Newer posts
← Previous Page1 … Page12 Page13 Page14 … Page29 Next →

dsad

© 2025 easycookingbite • Built with GeneratePress

Our Policies

  • Copyright Policy
  • Cookie Policy
  • GDPR Policy
  • Privacy Policy
  • Disclaimer
  • Terms Of Use

More Information

  • Home
  • About
  • Contact
  • Appetizers
  • Dessert
  • Dinner
  • Drinks
©2025, easycookingbite About Back To Top