Skip to content
DisclaimerTerms Of UseGDPR PolicyCookie Policy

easycookingbite

  • Home
  • Drinks
  • Appetizers
  • Dinner
  • Dessert
  • About
  • Contact
  • Privacy Policy
DisclaimerTerms Of UseGDPR PolicyCookie Policy

Lily

- 1 can (15 oz) chickpeas, drained and rinsed - 2 medium potatoes, diced - 1 large onion, chopped - 3 cloves garlic, minced - 1 tbsp ginger, grated - 1 can (14 oz) coconut milk - 1 cup vegetable broth - 2 tomatoes, chopped - 2 tbsp curry powder - 1 tsp cumin seeds - 1/2 tsp turmeric powder - 1/2 tsp red chili powder (adjust for spice preference) - Salt to taste - 2 tbsp vegetable oil - Fresh cilantro leaves for garnish You can add some extra spices or veggies to make the dish even better. Consider these: - 1 green bell pepper, diced - 1 cup spinach or kale - 1/2 cup peas - 1 tbsp lemon juice for brightness - Fresh ginger slices for a zing Pair your curry with simple sides for a complete meal. Here are some great options: - Steamed rice, white or brown - Warm naan bread or pita - A fresh cucumber salad - A side of yogurt or raita for coolness With these ingredients, you can create a vibrant and hearty Chickpea and Potato Curry. Check out the Full Recipe for step-by-step cooking details! To start, gather all your ingredients. You will need: - 1 can (15 oz) chickpeas, drained and rinsed - 2 medium potatoes, diced - 1 large onion, chopped - 3 cloves garlic, minced - 1 tbsp ginger, grated - 1 can (14 oz) coconut milk - 1 cup vegetable broth - 2 tomatoes, chopped - 2 tbsp curry powder - 1 tsp cumin seeds - 1/2 tsp turmeric powder - 1/2 tsp red chili powder - Salt to taste - 2 tbsp vegetable oil - Fresh cilantro leaves for garnish Next, peel and dice the potatoes. Chop the onion, mince the garlic, and grate the ginger. Set them aside in bowls for easy access. Heat the vegetable oil in a large pot over medium heat. Add the cumin seeds and sauté them until they sizzle. This will wake up their flavor. Now, add the chopped onion. Cook it for about five minutes until it turns translucent. Stir in the garlic and ginger next. Cook them for another 1-2 minutes until they smell great. Add the diced potatoes next. Season them with salt, turmeric, curry powder, and red chili powder. Mix well to coat the potatoes in spices. Then, add the chopped tomatoes and cook for 2-3 minutes until they soften. Pour in the vegetable broth and coconut milk. Stir everything together and bring it to a boil. After it boils, reduce the heat to low. Add the chickpeas and cover the pot. Let the curry simmer for 20-25 minutes. This helps the potatoes become tender and absorb all the flavors. After simmering, check the seasoning. Add more salt or spices if needed. If the curry is too thick, add more broth or water to reach your desired consistency. Once it is done, remove the pot from the heat. Garnish the curry with fresh cilantro leaves. Serve this delicious dish in shallow bowls, alongside rice or warm naan. Enjoy your Chickpea and Potato Delight Curry! For the full recipe, refer back to the ingredients section. To make your chickpea and potato curry pop with flavor, use fresh spices. Always buy whole spices when you can. Toast them lightly in the oil before adding other ingredients. This unlocks their full taste. You can also add a squeeze of lemon juice or lime at the end. This brightens the dish and adds a nice zing. Fresh herbs like cilantro make great garnishes. They add color and a fresh taste to every bite. Choose waxy potatoes for this dish, like red or Yukon gold. They hold their shape well during cooking. Cut them into even-sized pieces so they cook evenly. After you add them to the pan, stir well to coat them with spices. This helps them absorb all the flavors. Check the potatoes for doneness after about 20 minutes. They should be tender but not mushy. If they are hard, let them simmer longer. One common mistake is under-seasoning. Always taste your curry before serving. Adjust the salt and spices to your liking. Another mistake is overcooking the chickpeas. Canned chickpeas are already cooked, so add them later in the process. This keeps them firm and prevents them from falling apart. Lastly, don’t skip the garnish. A sprinkle of cilantro or a slice of lime makes a big difference. For the full recipe, check out the Chickpea & Potato Delight Curry. {{image_2}} Chickpea and potato curry is naturally vegan and gluten-free. You only need the right ingredients. Use coconut milk for creaminess. Make sure to check your curry powder. Some brands add gluten. If you want more protein, add tofu or tempeh. Both options fit well in this dish. You can also swap out vegetable broth for a homemade one. This keeps it fresh and healthy. Spice levels are easy to adjust. Start with the basic recipe using one teaspoon of red chili powder. If you like heat, add more. You can also use fresh chili peppers for a kick. Just chop them finely and add them with the onions. If you want less spice, cut back on the chili powder. You can also add a spoon of sugar. This helps balance the heat and gives a nice flavor. Feel free to get creative with veggies. Carrots, peas, or bell peppers work well. Just chop them small and add them when you cook the potatoes. You can also try spinach or kale. They wilt nicely in the curry. This adds color and nutrients. Mixing in vegetables increases the dish’s flavor and texture. Plus, it makes your meal more filling. The full recipe gives you a solid base to start from. To keep your Chickpea and Potato Curry fresh, let it cool first. Once it’s cool, transfer it to an airtight container. Store it in the fridge for up to three days. If you know you won’t eat it soon, consider freezing. It’s a great way to save time later. When freezing, use freezer-safe containers or bags. Divide the curry into single portions. This makes it easier to thaw just what you need. It can last for up to three months in the freezer. Label the containers with the date. This way, you know when to use them. To reheat, you can use the microwave or a pot on the stove. For the microwave, place the curry in a bowl and cover it. Heat it in short bursts, stirring in between. This helps it heat evenly. If using the stove, add a splash of water to prevent sticking. Heat over low heat until warm. Enjoy your delicious curry! For the full recipe, check out the earlier section. You can serve Chickpea and Potato Curry with many tasty sides. Here are some ideas: - Steamed rice - Warm naan bread - Quinoa - Roti or chapati - A fresh salad - Yogurt or raita These sides balance the flavors and add texture. They also soak up the rich sauce. I love to serve the curry in shallow bowls. Garnish with cilantro and a wedge of lime for extra zest. Yes, you can use dried chickpeas! Just soak them overnight in water. Then, cook them until soft before adding to the curry. This may take about 1-2 hours. Remember to drain and rinse before using. Dried chickpeas can add a nice, fresh flavor. They also make your curry heartier. To add spice, you have a few options: - Increase the red chili powder - Add fresh chopped green chilies - Use a hot curry blend - Stir in a dash of hot sauce Start with small amounts and taste as you go. This way, you can control the heat. Enjoy experimenting with spice levels to find your perfect balance! For even more tips, check out the Full Recipe. This blog post covered everything you need for Chickpea and Potato Curry. We explored key ingredients, cooking steps, and tips for great flavor. You learned ways to adapt the recipe for different diets. We also discussed how to store leftovers properly. In conclusion, make this curry your own. Try new ingredients and enjoy each bite. Cooking is fun, and your meals can be packed with taste. Enjoy your culinary journey!

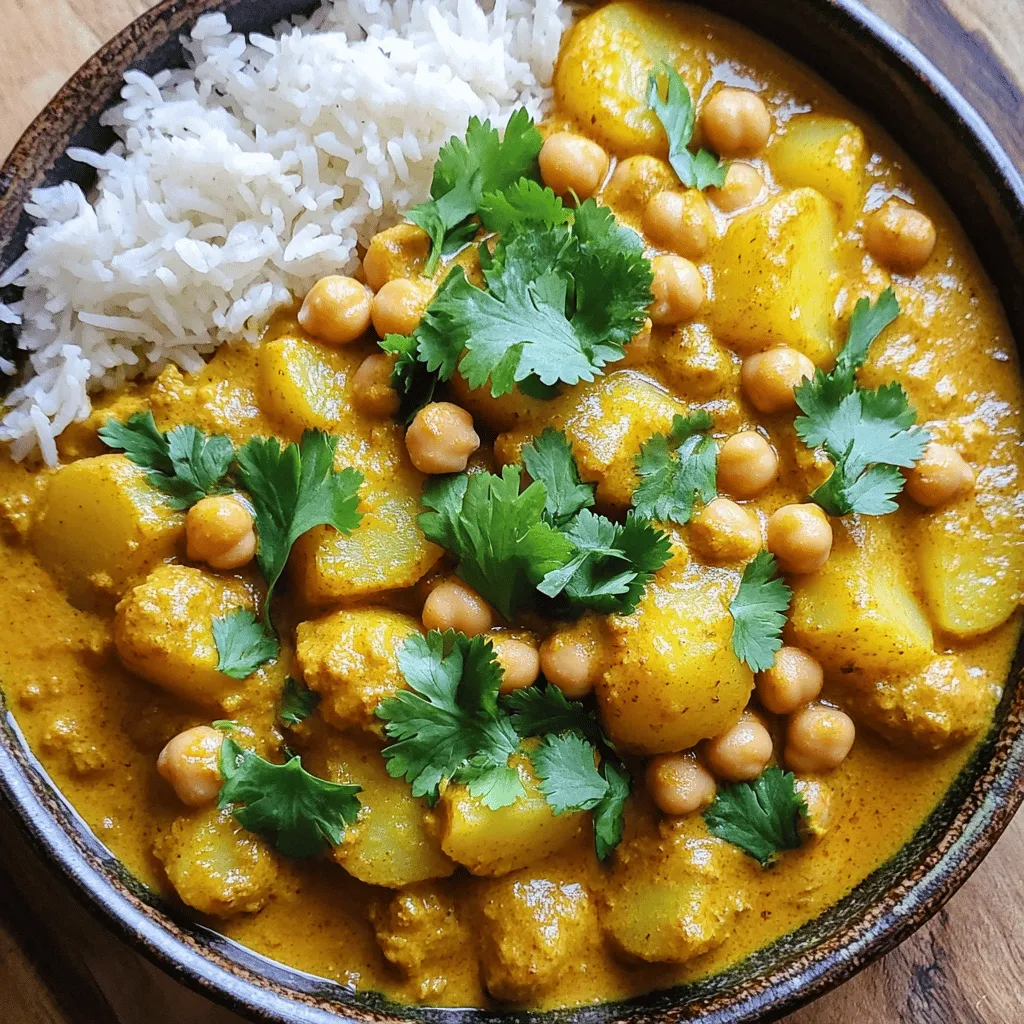
Chickpea and Potato Curry Flavorful and Easy Recipe

Craving a dish that’s both tasty and simple? This Chickpea and Potato Curry is the answer! Packed with flavor and

To make Cheese Tteokbokki, you need some key ingredients. Here’s a list: - 300g Korean rice cakes (tteok) - 1 cup fish cakes, sliced - 2 tablespoons gochujang (Korean chili paste) - 1 tablespoon gochugaru (Korean chili flakes) - 1 tablespoon soy sauce - 1 tablespoon sugar - 3 cups water or anchovy broth - 1 tablespoon sesame oil - 1 cup mozzarella cheese, shredded - 2 green onions, chopped - 1 tablespoon sesame seeds, for garnish These ingredients create the perfect balance of sweet, spicy, and cheesy flavors. The rice cakes give a chewy texture, while the fish cakes add depth. You can add a few optional ingredients to boost the taste. Here are some ideas: - 1 tablespoon minced garlic for a savory punch - 1 tablespoon of gochujang sauce for extra heat - Chopped veggies like cabbage or carrots for more texture Feel free to mix and match based on your taste! These ingredients can bring your dish to the next level and add more color. For a beautiful finish, consider these suggested toppings: - Additional shredded mozzarella cheese for extra gooeyness - Chopped green onions for freshness - Sesame seeds for a nice crunch Presentation matters! Serve your Cheese Tteokbokki in a shallow bowl or sizzling hot stone dish. It makes the dish look appealing and inviting. You can also add a side of pickled radish for a refreshing contrast. Enjoy your meal! For the full recipe, check the details on the Cheese Tteokbokki Delight! To start, soak the rice cakes in warm water for about 30 minutes. This helps them soften. If you use fresh rice cakes, you can skip this step. Next, slice your fish cakes into bite-sized pieces. This makes them easy to mix with the other ingredients. In a large pan, mix water or anchovy broth with gochujang, gochugaru, soy sauce, and sugar. Stir this well. This creates a thick, spicy sauce. Bring this mixture to a gentle boil over medium heat. The sauce will bubble and smell amazing! Once the sauce is boiling, add the soaked rice cakes and fish cakes. Mix gently to coat all the pieces with sauce. Lower the heat and let it simmer for 10-15 minutes. Stir occasionally. The rice cakes should become chewy and tender. When the cooking is done, drizzle sesame oil over the dish and stir again. Now, sprinkle shredded mozzarella cheese on top. Cover the pan with a lid for 2-3 minutes. This melts the cheese nicely. Finally, remove the lid and garnish with chopped green onions and sesame seeds. This adds flavor and looks great! For the full recipe, check the previous section. Enjoy your cheesy tteokbokki while it’s hot! To get that perfect cheesy stretch, use fresh mozzarella. Shred it yourself for better melting. You can also mix in some cheddar for added flavor. Keep the heat low when you melt the cheese. This helps it melt slowly and evenly. Always cover the pan for a few minutes after adding the cheese. This traps steam and helps it melt perfectly. One common mistake is overcooking the rice cakes. They should be chewy, not mushy. Make sure to soak hard rice cakes properly before cooking. Another mistake is adding too much sauce. Start small and add more if needed. This way, your tteokbokki won’t drown in sauce. Lastly, don’t skip the sesame oil. It adds a nice nutty flavor. Serve your Cheese Tteokbokki in a shallow bowl. This shows off the gooey cheese. You can also use a sizzling hot stone dish for a fun twist. Pair it with pickled radish for a crunchy contrast. A side of kimchi can add a spicy kick. Enjoy it hot for the best experience. For more details, check out the Full Recipe. {{image_2}} If you love heat, this spicy version is for you. Start with the same base recipe, but add more gochujang and gochugaru. You can also toss in sliced jalapeños for extra kick. This will make your Cheese Tteokbokki really pop with flavor. The spice balances the creamy cheese perfectly. For those who prefer less heat, you can easily tone it down. Use less gochujang and gochugaru. Instead, add a splash of sweet soy sauce for depth. You can also mix in a bit of honey. This will keep the dish tasty without the spice. It’s a great option for kids or anyone avoiding spice. Want a vegetarian take? Swap out the fish cakes for tofu or mushrooms. They soak up the sauce well and add a nice texture. You can also add seasonal veggies like bell peppers or zucchini. These options keep the dish light and fresh. It’s a fun way to enjoy Cheese Tteokbokki while staying plant-based. For the full recipe, check out Cheese Tteokbokki Delight! To keep your cheese tteokbokki fresh, let it cool down first. Place it in an airtight container. Seal it tightly to prevent air from ruining the flavor. You can store it in the fridge for up to three days. If you follow this method, your dish stays tasty and ready for later. When reheating, I suggest using a pan. Add a splash of water to help steam the dish. Heat over low to medium heat, stirring gently. This way, the cheese melts back into its creamy goodness. Avoid using a microwave if possible, as it may dry out the rice cakes. If you want to save your dish for a longer time, freezing is a great option. First, let the tteokbokki cool completely. Then, portion it into freezer-safe bags or containers. Remove as much air as you can before sealing them. You can store it in the freezer for up to a month. When you’re ready to eat, thaw it in the fridge overnight before reheating. This keeps the flavors intact and makes for a quick meal. For the full recipe, check out Cheese Tteokbokki Delight. For Tteokbokki, use cylindrical rice cakes called "tteok." They are chewy and perfect for this dish. Look for fresh tteok at Asian markets or online. Dried or frozen tteok works too. Just soak them in warm water before cooking to soften. Yes, you can skip fish cakes if you want. The dish will still taste great with just rice cakes and cheese. You can add vegetables like cabbage or mushrooms for more flavor. This makes the meal lighter and suitable for vegetarians. Check out local Korean restaurants or food trucks. They often have delicious Cheese Tteokbokki on their menu. Look for places with good reviews online. You can also search for food blogs that recommend restaurants near you. If you're feeling adventurous, try making your own using the full recipe! Cheese Tteokbokki is a tasty dish with a mix of flavors and textures. We covered key ingredients, from rice cakes to delicious sauces. I shared tips for perfecting the cheese and avoiding common mistakes. You can also explore variations, like spicy or vegetarian options. Storing and reheating leftovers ensures you can enjoy it again. Embrace the fun of making Cheese Tteokbokki. With practice, you'll master this dish and impress your friends!

Cheese Tteokbokki Delight Simple and Flavorful Recipe

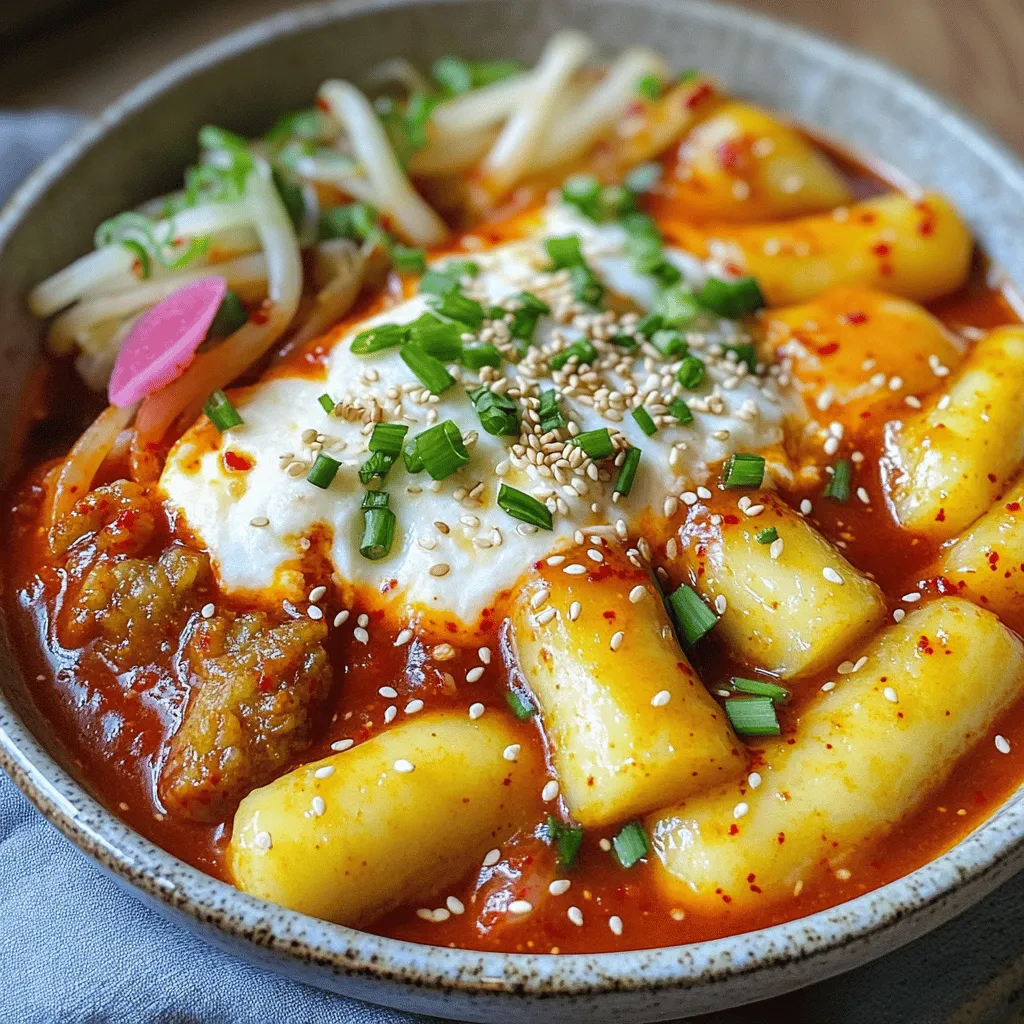
Are you ready to spice up your dinner with a cheesy twist? Cheese Tteokbokki is a delightful, flavorful dish that’s

To make Garlic Parmesan Baked Shrimp, you'll need a few simple ingredients. Here's the list: - 1 pound large shrimp, peeled and deveined - 4 tablespoons unsalted butter, melted - 4 cloves garlic, minced - 1 teaspoon smoked paprika - 1 teaspoon lemon zest - ½ cup grated Parmesan cheese - ¼ cup panko breadcrumbs - 2 tablespoons fresh parsley, chopped - Salt and black pepper to taste - Lemon wedges for serving Each ingredient brings its own flavor to the dish. The large shrimp provide a sweet, tender base. The butter and garlic make a rich sauce. Smoked paprika adds a hint of warmth, while lemon zest brightens the flavors. Parmesan cheese gives a nice, salty crunch. Panko breadcrumbs add a crisp texture, and fresh parsley brings color and freshness. I recommend using fresh shrimp for the best taste. But frozen shrimp can work too. Just be sure to thaw them fully before cooking. If you want to make this recipe even easier, you can use pre-minced garlic. You can find the full recipe and instructions to create this delicious dish. Start by setting your oven to 400°F (200°C). Preheating is key. It ensures your shrimp cook evenly and turn out perfectly. In a mixing bowl, combine the melted butter, minced garlic, smoked paprika, and lemon zest. Stir well to blend the flavors. This garlic butter mixture gives the shrimp a rich taste. Add the peeled and deveined shrimp to the bowl. Toss them in the garlic butter mixture. Make sure every shrimp gets coated well. Sprinkle with salt and black pepper to taste. Transfer the shrimp to a baking dish. Spread them out evenly. This helps them cook well and get crispy. In another bowl, mix the grated Parmesan cheese, panko breadcrumbs, and chopped parsley. This will be the crunchy topping. Sprinkle this mix generously over the shrimp in the baking dish. Place the baking dish in the preheated oven. Bake for 12-15 minutes. The shrimp should turn pink and opaque. The topping will turn golden brown. When done, remove it from the oven. Let it cool for a minute before serving. Enjoy your delicious Garlic Parmesan Baked Shrimp! For a complete guide, check out the Full Recipe. Choosing fresh shrimp is easy. Look for shrimp with a firm texture. They should smell like the ocean, not fishy. The shells should be clean and shiny. If you buy them with shells on, check for black spots. These spots mean the shrimp are old. If possible, buy wild-caught shrimp. They have better flavor than farmed shrimp. Baking time is key for juicy shrimp. Cook at 400°F (200°C) for 12-15 minutes. Shrimp turn pink when they are ready. They should look opaque, not clear. Overcooking makes shrimp tough. Keep an eye on them while they bake. If you want a crispy topping, broil for the last minute. This adds a nice crunch without drying out the shrimp. Seasonings make a big difference in taste. Garlic and lemon zest boost flavor in this dish. Smoked paprika adds a warm, smoky touch. You can try adding chili flakes for heat. Fresh herbs like parsley brighten the dish. Don't forget salt and pepper for balance. Mix and match seasonings to find your perfect flavor. For more ideas, check out the Full Recipe. {{image_2}} You can make this dish spicy by adding red pepper flakes. Just one teaspoon can add a nice kick! Mix the flakes with the garlic butter before coating the shrimp. If you love heat, try using a spicy seasoning blend instead. The addition of fresh jalapeños can also spice things up. For a fresh twist, add lemon juice and fresh herbs. Use about two tablespoons of lemon juice in the garlic butter mix. Then, add herbs like basil or thyme for a fragrant taste. These bright flavors balance well with the cheese and garlic. This version is perfect for summer days. You can easily make this dish heartier by adding vegetables. Consider using asparagus, bell peppers, or zucchini. Cut the veggies into bite-sized pieces and toss them in the garlic butter mix. Spread them evenly in the baking dish with the shrimp. This adds color and nutrients, making your meal more filling. Be sure to check out the Full Recipe for more details! To keep your Garlic Parmesan Baked Shrimp fresh, place leftovers in an airtight container. You can store them in the fridge for up to three days. Make sure the shrimp cool down before sealing the container. This helps keep the shrimp juicy and flavorful. When you are ready to enjoy the leftovers, reheating is simple. Preheat your oven to 350°F (175°C). Place the shrimp in a baking dish and cover it with foil. Heat for about 10 minutes or until warm. This method keeps the shrimp from drying out. You can also use a microwave. Heat them in short bursts of 30 seconds until warm. Just be careful not to overcook them. If you want to keep the shrimp longer, you can freeze them. First, let the shrimp cool completely. Then, place them in a freezer-safe bag or container. Make sure to remove as much air as possible before sealing. Frozen shrimp can last for up to three months. When ready to eat, thaw them in the fridge overnight before reheating. Enjoy a taste of your Garlic Parmesan Baked Shrimp anytime! For the full recipe, check out the earlier section. Yes, you can use frozen shrimp. Just thaw them first. Put them in a bowl of cold water for about 15 minutes. This helps them defrost quickly. Once thawed, pat them dry before using. This step keeps your dish from becoming watery. You can serve Garlic Parmesan Baked Shrimp with many sides. Here are some great options: - Rice or quinoa for a filling base. - A fresh green salad for a light touch. - Garlic bread to soak up the tasty sauce. - Steamed veggies for added crunch. These sides balance the rich flavors of the shrimp. Shrimp cook fast. They are done when they turn pink and opaque. You can also check their shape; they curl into a C shape. If they curl tightly, they may be overcooked. Keep an eye on them while baking. Yes, you can prep this dish ahead. Mix the shrimp with the garlic butter and place them in the baking dish. Cover it and store it in the fridge. When ready to bake, just sprinkle the topping and put it in the oven. This saves time for busy days. For the full recipe, check out the link above. This recipe shows how to make Garlic Parmesan Baked Shrimp. You learned about the key ingredients, step-by-step baking, and tips for great flavor. Variations let you get creative, and storage advice helps keep leftovers fresh. Enjoy this dish with friends and family. It’s simple yet delicious. With practice, you’ll master it quickly. Now, get cooking!

Garlic Parmesan Baked Shrimp Quick and Easy Recipe

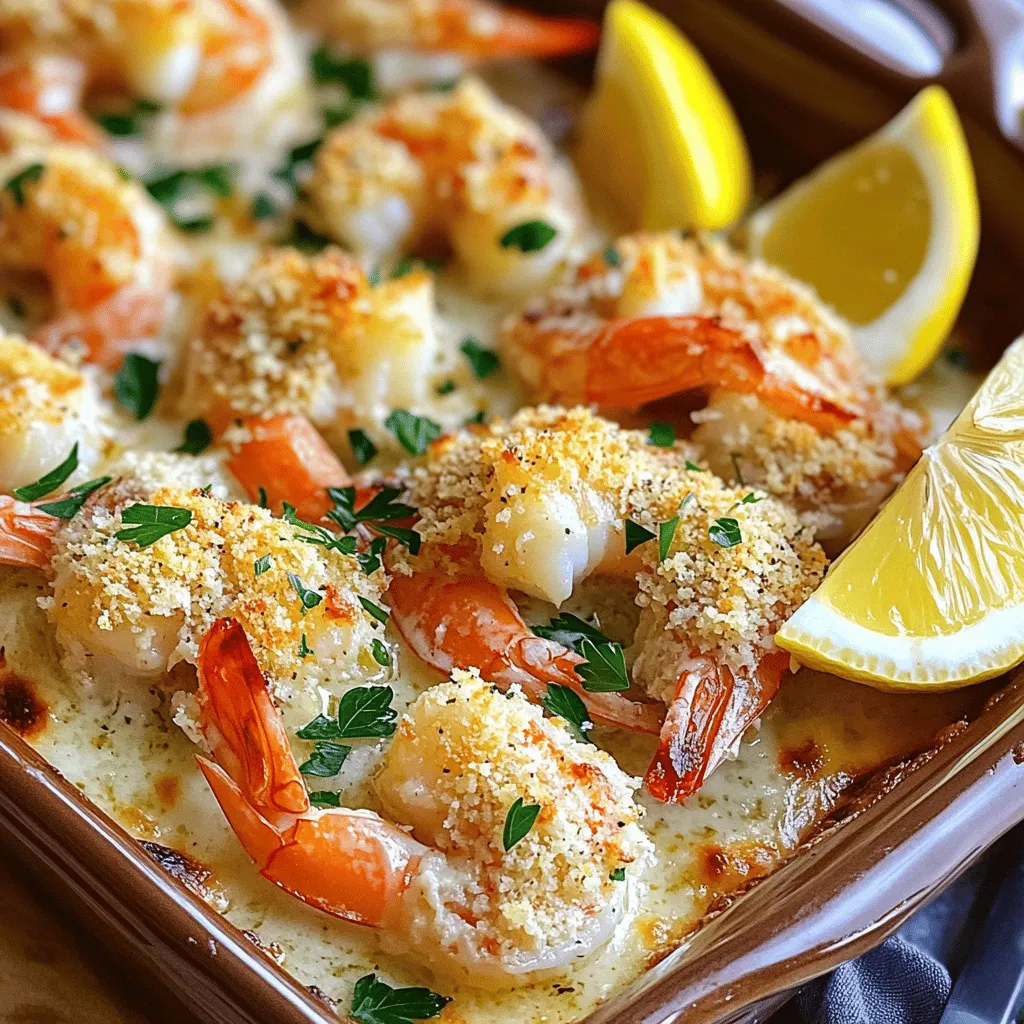
Are you ready to enjoy a delicious meal in under 30 minutes? This Garlic Parmesan Baked Shrimp recipe is quick,

- 1 cup pancake mix - 1/2 cup water - 2 tablespoons maple syrup - 1/2 teaspoon cinnamon - 4 slices of cooked bacon - 4 eggs - 4 slices American cheese - Butter for cooking - Powdered sugar (optional, for dusting) To start, you need some key ingredients for a great McGriddle Muffin. First, pancake mix is essential. It forms the base of the muffin. You will also need water and maple syrup to mix into the batter. The syrup adds a sweet taste that pairs well with savory flavors. A touch of cinnamon gives the pancakes a warm spice. Next, bacon is a must. It adds a crispy, salty crunch. You can choose any type of bacon you like. I prefer thick-cut for more flavor. Eggs are also crucial. They provide richness and protein in each muffin. American cheese is my choice for this recipe. It melts nicely and gives a creamy texture. You can add optional toppings too, like hot sauce or extra syrup. Dusting with powdered sugar adds a sweet finish, but it’s up to you! These ingredients come together to create a tasty breakfast. You can find the full recipe below for detailed instructions. To make the pancake batter, start by mixing the pancake mix, water, maple syrup, and cinnamon in a large bowl. Stir until everything is well combined. The batter should be smooth but slightly thick. If it's too runny, add a bit more pancake mix. This helps it hold together better when cooking. Tips for a successful batter: - Use cold water for a fluffier texture. - Don’t overmix; a few lumps are okay. Heat a non-stick skillet over medium heat. Lightly grease it with butter. Pour the batter into the skillet to form four small pancake rounds, about 4 inches wide. Cook until bubbles form on the surface, which takes about 2-3 minutes. Then, flip the pancakes and cook for another 2 minutes until they turn golden brown. Remove them from the skillet and set aside. Technique for pouring and flipping pancakes: - Use a measuring cup for even sizes. - Flip gently to keep the shape. In the same skillet, cook the bacon until crispy. This should take about 5-7 minutes. Remove the bacon and let it drain on paper towels. Next, crack the eggs into the skillet. Cook them sunny-side up or to your liking. Add a pinch of salt and pepper for flavor. Using the same skillet for flavor efficiency: - This adds a nice taste from the bacon to your eggs. - Less cleanup is always a bonus! Now it’s time to build your McGriddle Muffins! On the bottom half of a pancake, layer a slice of cheese, a piece of bacon, and an egg. Then, place another pancake on top to finish the muffin stack. Layering ingredients correctly: - Start with cheese to help it melt. - Ensure the egg is centered to avoid spills. For an extra touch, lightly dust the tops of the muffins with powdered sugar if you want. This adds a sweet finish that pairs well with the savory flavors. Serve the muffins warm for the best taste. Enjoy them fresh for a delightful breakfast treat! - Overmixing the batter: Mix just until combined. If you stir too much, your pancakes will be tough. Keep it light and simple. - Under/overcooking the pancakes: Cook until bubbles form on the surface. Flip carefully and watch for golden brown color. This step is key to perfect pancakes. - Recommended skillet types: A non-stick skillet is best. It helps prevent sticking and makes flipping easy. I love using cast iron for a nice sear. - Importance of using non-stick surfaces: Non-stick surfaces make cooking stress-free. You won't have to worry about your pancakes tearing when you flip them. - Pairing ideas for beverages: Enjoy your McGriddle Muffins with coffee or fresh juice. Milk is also a great choice. These drinks balance the sweetness of the maple syrup. - Garnishes to enhance the presentation: A light dusting of powdered sugar adds a lovely touch. You can also garnish with fresh fruit like berries for color and flavor. {{image_2}} You can make McGriddle Muffins even more fun. Try adding fruits like blueberries or bananas right into the batter. Chocolate chips also work well for a sweet twist. For protein, swap out the bacon for sausage or turkey bacon. Each choice adds new layers of flavor. If you need gluten-free options, look for a gluten-free pancake mix. Many brands offer tasty mixes that work great. For cheese, try dairy-free cheese alternatives. They melt nicely and keep the muffins creamy without dairy. Want a smaller treat? Make mini McGriddle Muffins! Use a tablespoon of batter instead of a full scoop. These bite-sized muffins are perfect for kids or snacks. Just keep an eye on the cooking time. They may need just a minute less to cook through. Building these small stacks is just as fun! To keep your McGriddle Muffins fresh, store them in the fridge. Place them in an airtight container. This helps maintain their taste and texture. If you have many muffins, use separate layers of parchment paper. This prevents sticking. When you're ready to eat, reheat your muffins in a skillet. This keeps the pancakes soft and the cheese melty. Heat them over low to medium heat. Flip them often to avoid burning. If you want to use a microwave, wrap them in a damp paper towel. This helps keep moisture and prevents sogginess. Enjoy your tasty breakfast treat! To make McGriddle Muffins, you start with simple ingredients. First, mix 1 cup pancake mix, 1/2 cup water, 2 tablespoons maple syrup, and 1/2 teaspoon cinnamon. This creates a smooth batter. Next, heat a skillet and grease it with butter. Pour the batter into 4 small rounds. Cook until bubbles form, then flip them over. While the pancakes cool, cook 4 slices of bacon until crispy. In the same skillet, crack 4 eggs and cook them sunny-side up. Now, assemble your muffins. Take a pancake, add a slice of cheese, a piece of bacon, and an egg on top. Finish with another pancake. This method gives you warm, tasty muffins that capture breakfast perfectly. You can find the full recipe for more details. Yes, you can freeze McGriddle Muffins! To freeze them, let the muffins cool completely. Wrap each muffin tightly in plastic wrap and then place them in a freezer bag. This keeps them fresh. When you want to eat them, take a muffin from the freezer. Remove the wrap and reheat in a microwave or skillet until warm. This way, you can enjoy a homemade breakfast anytime. One McGriddle Muffin has about 350 calories. It contains 15 grams of fat, 30 grams of carbs, and 12 grams of protein. This makes it a filling breakfast option. If you want to reduce calories, consider using less bacon or cheese. You can also swap whole eggs for egg whites to cut down on fat. McDonald's McGriddle Muffins are found at most McDonald's locations. They are usually on the breakfast menu. However, some places may not serve breakfast all day. You can check the menu online or call your local restaurant to see if they have them available. McGriddle Muffins differ from traditional McGriddles mainly in size and texture. McGriddle Muffins are smaller and easier to hold. The pancakes are thicker in traditional McGriddles, giving a fluffier bite. Both choices are sweet and savory, but muffins provide a unique twist with their layered ingredients. The combination of layers in the muffins also adds fun to each bite. McGriddle muffins are fun and easy to make at home. You need simple ingredients like pancake mix, eggs, and bacon. Follow the steps to prepare batter, cook pancakes, and layer your muffins. Remember to avoid common mistakes like overmixing the batter. You can also customize flavors or make mini versions for snacks. Store leftovers properly and reheat them to keep their taste. Now, you can enjoy tasty homemade McGriddle muffins anytime!

McGriddle Muffins Tasty Breakfast Delight Recipe

Craving a delicious breakfast that’s quick and fun to make? Look no further! McGriddle Muffins combine fluffy pancakes, crispy bacon,

- 1 lb (450g) chicken breast, cut into bite-sized pieces - 1 cup buttermilk or plain yogurt - 1 cup all-purpose flour - 1 tsp paprika - 1 tsp garlic powder - 1 tsp onion powder - ½ tsp cayenne pepper (adjust to taste) - Salt and pepper to taste - ½ cup mayonnaise - 2 tbsp sweet chili sauce - 1 tbsp sriracha (adjust for heat preference) - 1 tbsp honey - 1 tsp lime juice When I make crispy Bang Bang chicken, I focus on fresh, quality ingredients. I love using chicken breast for its tenderness. The buttermilk or yogurt gives a great flavor and helps keep the chicken juicy. The all-purpose flour creates a nice crispy coating when fried. The blend of spices adds warmth and depth. I use paprika, garlic powder, onion powder, and cayenne pepper to get the perfect kick. For the sauce, I mix mayonnaise with sweet chili sauce for creaminess and sweetness. Sriracha gives it that needed heat, which I can adjust based on my mood. Honey adds a touch of sweetness, and lime juice brightens everything up. You can find the Full Recipe for a detailed guide on making this dish. To start, you need to marinate the chicken. In a large bowl, combine the chicken pieces with buttermilk and a pinch of salt and pepper. This will help make the chicken tender and juicy. Cover the bowl and place it in the refrigerator. Let it sit for at least 30 minutes, but for the best flavor, aim for 1 to 2 hours. While the chicken marinates, prepare the coating. In another bowl, mix together the all-purpose flour, paprika, garlic powder, onion powder, cayenne pepper, and a pinch of salt and pepper. This mixture adds a tasty crunch to your chicken. Next, heat oil in a deep skillet or frying pan. Aim for about 2 inches of oil, heated to 350°F (175°C). This temperature is key for crispy chicken. Once hot, take the marinated chicken out of the fridge. Allow excess buttermilk to drip off. Dredge each piece in the flour mixture until fully coated. Shake off any extra flour before frying. Carefully place the coated chicken pieces into the hot oil in batches. Fry them for about 4 to 5 minutes or until they turn golden brown and crispy. Use a slotted spoon to transfer the cooked chicken to a plate lined with paper towels to absorb extra oil. Now, it’s time for the Bang Bang sauce. In a separate bowl, whisk together mayonnaise, sweet chili sauce, sriracha, honey, and lime juice. Mix until smooth and well-combined. This sauce adds a sweet and spicy kick. In a large mixing bowl, add your crispy chicken. Drizzle half of the Bang Bang sauce over it. Toss gently to coat all the chicken pieces evenly. You can add more sauce if you like it saucy! Transfer the crispy Bang Bang chicken to a serving platter. For a nice touch, garnish with chopped green onions and sesame seeds. Pair it with lime wedges for a fresh squeeze that brightens the dish. Enjoy your Crispy Bang Bang Chicken! You can find the Full Recipe for more detailed instructions. To get that perfect crunch, oil temperature is key. Heat the oil to 350°F (175°C). Use a thermometer for accuracy. If the oil is too cool, the chicken will absorb oil and become soggy. If too hot, the coating can burn before cooking the chicken. Avoid overcrowding the pan. Fry chicken in small batches. This helps maintain the oil’s heat and ensures even cooking. If you add too much chicken at once, the temperature drops. This can lead to less crispy results. Marinating the chicken is crucial for flavor and moisture. I recommend marinating for at least 1-2 hours. Longer marination allows the buttermilk to tenderize the meat and add richness. You can also try different marinades. For example, use yogurt mixed with spices, or a soy sauce blend for a different twist. Each option adds unique flavor. Pair Crispy Bang Bang Chicken with tasty side dishes. I love serving it with jasmine rice or a fresh salad. The coolness of the salad balances the heat of the sauce. For plating, create a fun presentation. Use a large platter and arrange the chicken in a pile. Drizzle some Bang Bang sauce over the top and sprinkle with chopped green onions and sesame seeds. Add lime wedges for a fresh squeeze. This not only looks great but also makes the dish more interactive and fun! {{image_2}} To make your Bang Bang Chicken spicier, adjust the sriracha levels. Start with one tablespoon and add more if you like heat. You can also add spices like cayenne or chili powder. These will boost the heat and flavor. Just remember, taste as you go to get it just right! If you want a healthier dish, consider baking instead of frying. Bake the chicken at 400°F (200°C) for about 20 minutes. You can also use almond flour instead of all-purpose flour. This swap lowers carbs and adds a nice nutty flavor. For a gluten-free version, almond flour works wonders! Want to switch things up? You can use shrimp instead of chicken. Just coat and fry them like the chicken. For a vegetarian option, try using cauliflower. Cut the cauliflower into bite-sized pieces and follow the same coating and frying steps. It’s a great way to enjoy the flavors without meat! For the full recipe, check out the Crispy Bang Bang Chicken section! To keep your crispy Bang Bang chicken fresh, store it in an airtight container. This keeps moisture out and maintains texture. I suggest placing parchment paper between layers to prevent sticking. You can keep it in the fridge for up to 3 days. After that, the chicken may lose its crunch. When it's time to enjoy leftovers, you want them crispy again. The best way is to use an oven. Preheat your oven to 375°F (190°C). Place the chicken on a baking sheet and heat for about 10-15 minutes. This method helps keep the chicken crunchy. You can also use an air fryer for 5-7 minutes at the same temperature. Freezing is a great option if you have extra chicken. First, place the cooked chicken on a baking sheet in a single layer. Freeze it for about 1-2 hours until solid. Then, transfer the pieces to a freezer bag. Make sure to remove as much air as possible. You can freeze the chicken for up to 2 months. To thaw, leave it in the fridge overnight. Reheat using the oven or air fryer to restore that crispy texture. Bang Bang Chicken is a crispy dish. It features fried chicken coated in a creamy sauce. The sauce is sweet and spicy, making it very tasty. This dish comes from Asian cuisine and has become popular worldwide. Yes, you can! Use gluten-free flour for the coating. Some good options include almond flour or rice flour. These will still give you a nice crunch. Make sure your sauces are also gluten-free. To make the sauce milder, reduce the sriracha. You can also add more mayonnaise or honey. This will balance the heat and keep it creamy. Taste as you go to find the right level for you. Bang Bang Chicken has roots in Chinese cuisine. The name comes from the sound of the cooking process. Some say it refers to the way chefs pound the chicken. Others believe it relates to the bold flavors of the dish. Absolutely! Chicken thighs can add more flavor and moisture. They also stay juicy when cooked. Just cut them into bite-sized pieces like the breasts. You can use the same cooking method for both cuts. Bang Bang Chicken is a fun dish, packed with flavor and crunch. We explored the main ingredients like chicken, buttermilk, and spices, plus a tangy sauce that brings it all together. You learned step-by-step instructions for marinating, coating, and frying, ensuring your chicken comes out crispy. Remember, tips and tricks, like proper oil temperature, help achieve the best results. Whether you opt for spicy, healthier, or veggie versions, you can enjoy this dish in many ways. Get creative and savor every bite!

Crispy Bang Bang Chicken Tasty and Fun Dinner Recipe

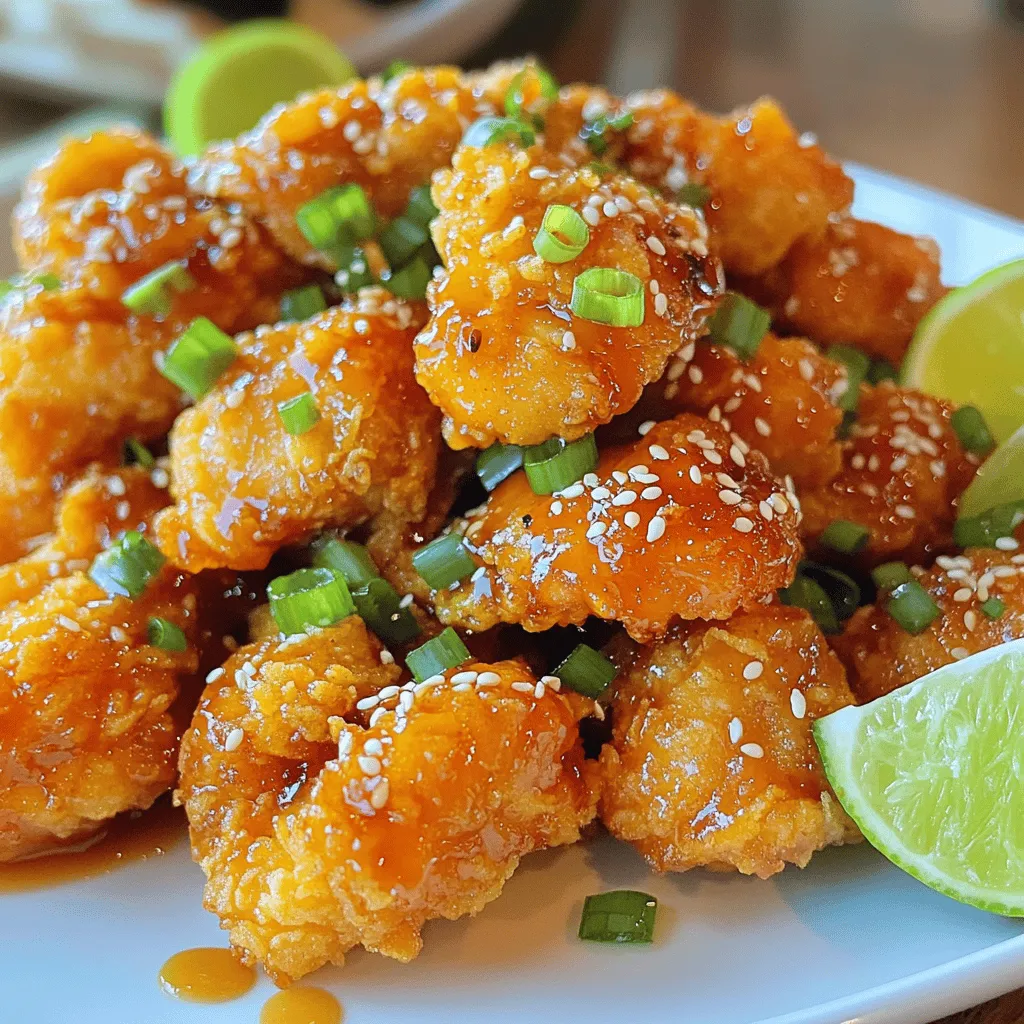
Ready to elevate your dinner game? This Crispy Bang Bang Chicken recipe is a must-try! With juicy chicken coated in

Here are the key ingredients you will need to make a veggie-loaded tortellini soup: - 1 tablespoon olive oil - 1 medium onion, diced - 2 cloves garlic, minced - 2 medium carrots, sliced - 2 stalks celery, chopped - 1 bell pepper (any color), diced - 1 zucchini, diced - 1 cup spinach, chopped - 1 can (14 oz) diced tomatoes, with juice - 6 cups vegetable broth - 1 teaspoon dried oregano - 1 teaspoon dried basil - Salt and pepper to taste - 9 oz fresh or frozen cheese tortellini - Grated Parmesan cheese for serving (optional) - Fresh parsley or basil for garnish This recipe uses fresh and pantry ingredients. You can swap out some veggies if you want. For example, add green beans or kale instead of zucchini. You can also mix in leftover veggies from your fridge. The soup is very flexible, so feel free to get creative! For the full recipe, check out the instructions provided above. Enjoy your cooking adventure! 1. Start with a large pot and heat 1 tablespoon of olive oil over medium heat. 2. Add 1 diced medium onion. Sauté it for 3-4 minutes until it turns clear. 3. Next, mix in 2 minced garlic cloves. Cook for 1 more minute. Watch it closely to avoid burning. 4. Now, add 2 sliced carrots and 2 chopped celery stalks. Sauté these for about 5-6 minutes until they soften. 5. Toss in 1 diced bell pepper and 1 diced zucchini. Stir well and cook for 4-5 minutes. You want them tender but not mushy. 6. Pour in 1 can of diced tomatoes with their juice, along with 6 cups of vegetable broth. Add 1 teaspoon each of dried oregano and basil. Season with salt and pepper. 7. Bring the mixture to a boil. Once it bubbles, turn down the heat. Let it simmer for 10-15 minutes. This helps the flavors mix well. 8. Add 9 oz of fresh or frozen cheese tortellini. Cook them as per package instructions, usually 3-5 minutes until they float. 9. Stir in 1 cup of chopped spinach. Let it wilt in the hot soup for a couple of minutes. 10. Taste your soup and adjust the seasoning if needed. 11. Ladle the soup into bowls. Top it with grated Parmesan cheese and fresh parsley or basil if you like. The heat should start at medium for sautéing. This lets the veggies soften. Once the soup boils, lower the heat to simmer. Simmering is key! It blends the flavors and makes the soup rich. Keep it at a low boil for best results. For images or videos, show each step. Start with the pot of veggies, then the boiling soup, and finally, the finished dish. The soup should look bright and colorful with tender veggies and floating tortellini. The aroma will make it hard to wait! To make your veggie-loaded tortellini soup even tastier, try adding some herbs and spices. I suggest: - Spices: Add a pinch of red pepper flakes for heat. A dash of smoked paprika adds depth. - Herbs: Fresh thyme or rosemary can enhance the soup's aroma. You can also mix in fresh basil at the end for brightness. For protein, consider: - Beans: White beans or chickpeas will add fiber and protein. - Meats: Shredded rotisserie chicken or diced sausage can make it heartier. Getting the right soup consistency is key. Here are my tips: - Consistency: If the soup seems too thick, add more vegetable broth until you reach your desired texture. A little extra broth can make a big difference. - Tortellini doneness: Cook the tortellini until they float to the top. This means they are ready. Don’t overcook them, or they can become mushy. Pair your soup with these options to make it a full meal: - Bread: Serve with crusty bread or garlic bread for dipping. - Salad: A light green salad can balance the meal. For garnishes, I recommend: - Cheese: Top with grated Parmesan for a rich flavor. - Herbs: Fresh parsley or basil adds a pop of color and freshness. This is where the magic of the soup really shines. Enjoy the full recipe for all the details! {{image_2}} You can make this soup fit your diet easily. For gluten-free options, look for gluten-free tortellini. Many stores offer great alternatives made from rice or quinoa. They taste just as good! If you want a vegan version, swap the cheese tortellini for a plant-based option. You can also skip the Parmesan cheese on top or use a vegan cheese alternative. This keeps the soup tasty and friendly for all diets. Using seasonal vegetables can make this soup even better! In spring, add peas or asparagus. In summer, try fresh corn or green beans. In fall, sweet potatoes add a nice touch. In winter, root vegetables like parsnips work well. If you have leftover veggies, toss them in! Almost any vegetable can work. Just make sure to cut them into small pieces so they cook evenly. Changing the broth can change the whole soup. Instead of vegetable broth, try mushroom broth for a richer taste. Chicken broth also adds a nice depth, if you’re not keeping it vegan. For garnishing, you can use different types of cheese. Besides Parmesan, try mozzarella or feta. Each cheese adds its own unique flavor, making your soup even more special. For the full recipe, check the earlier section! Store your veggie-loaded tortellini soup in an airtight container. This keeps it fresh and tasty. The ideal temperature is below 40°F (4°C). When you want to reheat, pour the soup into a pot. Heat it on low until it warms up. Stir often to avoid sticking. You can also use a microwave for quick reheating. Just make sure to cover the bowl to prevent splatters. To freeze the soup, let it cool completely first. Pour it into freezer-safe containers. Leave some space at the top for expansion. Seal the containers tightly. Label them with the date for easy tracking. When you are ready to enjoy it, take a container from the freezer. Thaw it in the fridge overnight. For reheating, use a pot over low heat. Stir it until hot. You can also microwave it if you prefer. Your veggie-loaded tortellini soup stays fresh in the fridge for about 4-5 days. In the freezer, it can last up to 3 months. Just remember, the longer it sits, the more the flavors may change. Always check for any signs of spoilage before eating. What is the best type of tortellini to use? I recommend using cheese tortellini. It adds a nice, creamy flavor. You can also try meat tortellini for a heartier soup. Fresh tortellini cooks faster than frozen, so keep that in mind. Can I use frozen vegetables in the soup? Yes, you can use frozen vegetables. They are easy and save time. Just add them straight to the pot. They will cook and blend well with the other ingredients. How to make it spicier? Add crushed red pepper flakes or a dash of hot sauce. You can also include fresh jalapeños for a kick. Start with a little and taste as you go. Tips for making a larger batch? To make more soup, double all the ingredients. Use a larger pot for cooking. Adjust the cooking time as needed, but keep an eye on the tortellini. General health benefits of the ingredients This soup is packed with veggies! Carrots, spinach, and tomatoes provide vitamins and fiber. Olive oil adds healthy fats. The tortellini gives you carbs for energy and some protein. Caloric content per serving Each serving has about 300-350 calories. This can change based on the tortellini type and added cheese. It’s a filling meal that won’t weigh you down. For the full recipe, check the previous section! This blog post about Veggie-Loaded Tortellini Soup gives you a solid recipe and tips. You learned about different ingredients, cooking steps, and how to make it just right. We explored variations for diets and seasons, plus storage tips to keep your soup fresh. With these ideas, you can make a tasty soup that fits your needs. Enjoy creating your own version and sharing it with others. Happy cooking!

Veggie-Loaded Tortellini Soup Flavorful and Easy Meal

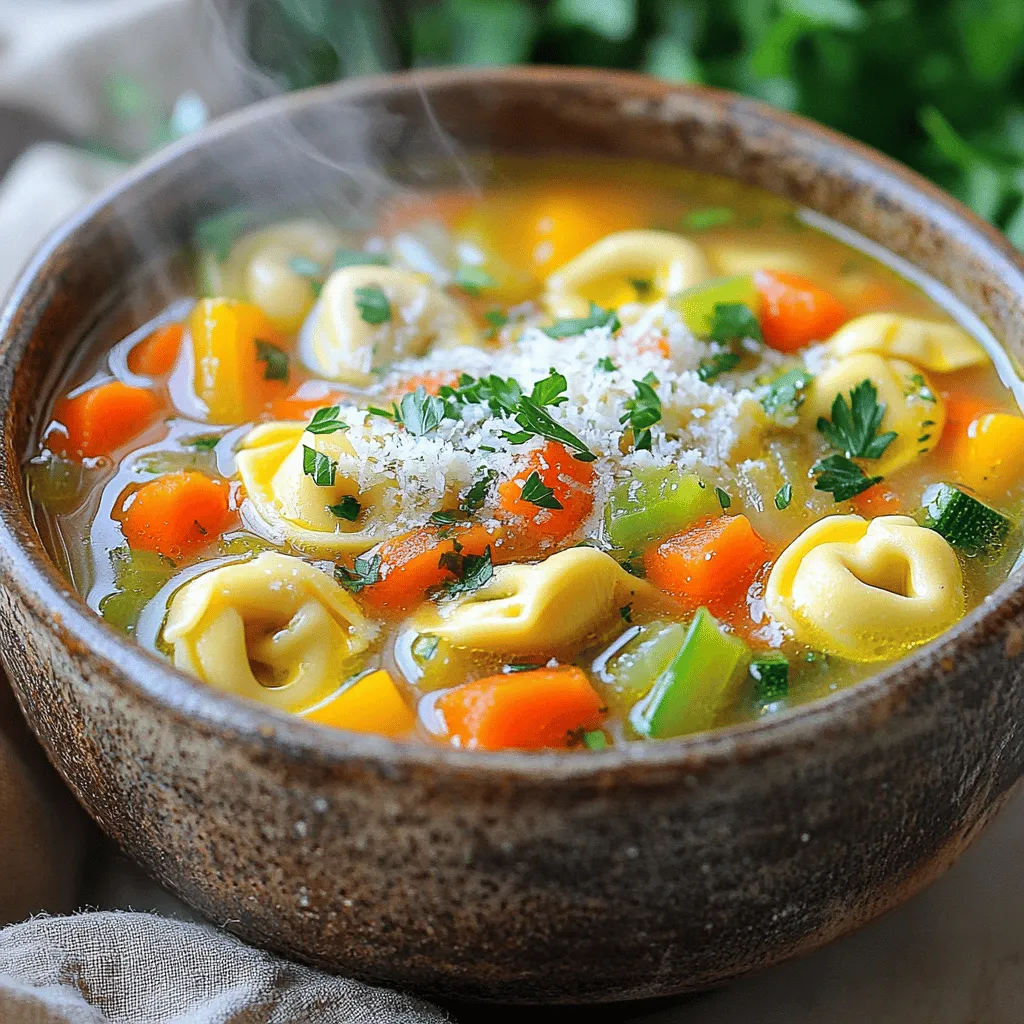
Are you ready to whip up a meal that bursts with flavor and nutrition? My Veggie-Loaded Tortellini Soup is a

To make Creamy Broccoli Chicken Penne, gather simple ingredients. This dish is quick, tasty, and filling. It takes only 30 minutes to prepare. You will love how creamy and flavorful it is. This recipe serves four people. - 8 oz penne pasta - 2 cups broccoli florets - 1 lb chicken breast, diced - 1 cup heavy cream - 1 cup chicken broth - 1 cup grated Parmesan cheese - 2 cloves garlic, minced - 1 tablespoon olive oil - Salt and pepper to taste - 1 teaspoon Italian seasoning - Red pepper flakes (optional, for heat) - Fresh parsley, chopped (for garnish) If you need swaps for this recipe, you have options. For pasta, use any short shape, like fusilli or bowtie. Instead of chicken, try shrimp or tofu for a different flavor. Use low-fat milk if you want a lighter sauce. Instead of heavy cream, you can also use half-and-half. If you lack Parmesan, any hard cheese like Pecorino works well too. First, boil water in a large pot. Add a pinch of salt to the water. Once the water is boiling, add 8 oz of penne pasta. Cook it according to the package directions until it is al dente. During the last 2-3 minutes of cooking, add 2 cups of broccoli florets. This ensures they stay bright and crisp. After cooking, drain the pasta and broccoli together. Set them aside while you prepare the chicken and sauce. In a large skillet, pour in 1 tablespoon of olive oil. Heat it over medium heat. Once hot, add 1 lb of diced chicken breast. Sprinkle it with salt, pepper, and 1 teaspoon of Italian seasoning. Cook the chicken for 6-8 minutes. You want it to be well browned and fully cooked. When done, remove the chicken from the skillet and set it aside. This step adds great flavor to the dish. In the same skillet, add 2 cloves of minced garlic. Sauté for about 1 minute until you smell its sweet aroma. Next, pour in 1 cup of chicken broth and bring it to a simmer. Let it reduce for 3-4 minutes. Then, stir in 1 cup of heavy cream. Mix well to combine. Gradually add 1 cup of grated Parmesan cheese while stirring. This creates a rich and creamy sauce. If you like a little heat, add some red pepper flakes. Finally, return the chicken to the skillet. Add the drained penne and broccoli. Toss everything together until well coated in that creamy sauce. Adjust the seasoning if needed. For the full recipe, you can refer back to the earlier section. Enjoy your creamy broccoli chicken penne! To make a great sauce, you need the right balance. Start with chicken broth and let it simmer. This step helps build flavor. When you add heavy cream, stir it in slowly. This keeps the sauce smooth. If it feels too thick, add a splash of broth. If it's too thin, let it cook a bit longer. The goal is a creamy, rich sauce that clings to the pasta. For juicy chicken, avoid overcooking. Sauté the diced chicken on medium heat. Season it well with salt and pepper. Cook for about 6-8 minutes until it's golden brown. The chicken should be cooked through but still moist. Letting it rest after cooking helps too. This keeps the juices inside, making every bite tender. Using the right tools can make cooking easier. Here are my top picks: - Large pot for boiling pasta - Skillet for sautéing chicken and making the sauce - Wooden spoon for stirring - Measuring cups for accuracy - Sharp knife for dicing chicken and chopping veggies Having these tools ready will make your cooking process smooth and fun. For the full recipe, check out the detailed instructions above. {{image_2}} You can boost the taste of your creamy broccoli chicken penne by adding more veggies. Try sweet bell peppers, carrots, or even peas. These add color and nutrition. Just chop them small so they cook quickly. You can add them while cooking the chicken or toss them in with the pasta. This way, they soak up the sauce and flavor. If you want to switch things up, use shrimp or tofu instead of chicken. Shrimp cooks fast and adds a nice seafood touch. Just sauté them until they turn pink and tender. For a vegetarian option, use firm tofu. Cube it and pan-fry until golden. Both options work well with the creamy sauce, keeping every bite tasty. While penne is great, feel free to experiment with other pasta shapes. Fusilli or farfalle can give a fun twist to the dish. Their shapes help catch the sauce, making it extra yummy. You can even use whole wheat pasta for added fiber. Each shape brings a new texture, making your meal exciting every time you cook it. For the full recipe, check out the ingredients and instructions above! After you enjoy your creamy broccoli chicken penne, store leftovers properly. First, let the dish cool down. Then, place it in an airtight container. This keeps the flavors fresh. You can store it in the fridge for up to three days. If you want to keep it longer, consider freezing it. When you reheat your creamy broccoli chicken penne, do it slowly to keep the taste. Use a skillet on low heat. Stir often to ensure even warming. You can add a splash of chicken broth or cream. This helps revive the creamy texture. Microwaves work too. Heat in short bursts and stir in between. Freezing is great for future meals. To freeze, pack the dish in a freezer-safe container. Make sure it is well sealed. You can freeze it for up to three months. When you want to eat it, thaw it overnight in the fridge. Then, reheat it using the techniques above. This way, you get a tasty meal without much effort later on. Yes, you can make Creamy Broccoli Chicken Penne ahead of time. Cook the pasta and chicken, then mix everything together. Store it in the fridge for up to two days. When you're ready to eat, just reheat it on the stove. Add a splash of cream or broth to keep it creamy. This makes dinner easy on busy nights. To make this dish healthier, you can use whole grain penne. This option has more fiber and nutrients. Swap heavy cream for Greek yogurt or low-fat cream. You can also add more vegetables like bell peppers or spinach. These changes cut calories and boost vitamins without losing flavor. You still get a tasty meal that feels light. Creamy Broccoli Chicken Penne pairs well with a simple side salad. Try a mix of greens with olive oil and lemon juice. Garlic bread also makes a nice side for this dish. If you want more veggies, roasted carrots or green beans work great too. These sides balance the creaminess of the pasta and add color to your plate. This blog post covered how to make Creamy Broccoli Chicken Penne. We explored the full recipe, ingredient substitutions, and step-by-step instructions. I shared tips for a perfect sauce and juicy chicken. You can try variations with different veggies, proteins, and pasta. Lastly, I provided storage tips to keep the meal fresh. Enjoy experimenting with this dish to suit your taste. You’ll impress yourself with your cooking skills.

Creamy Broccoli Chicken Penne Tasty Easy Dinner Dish

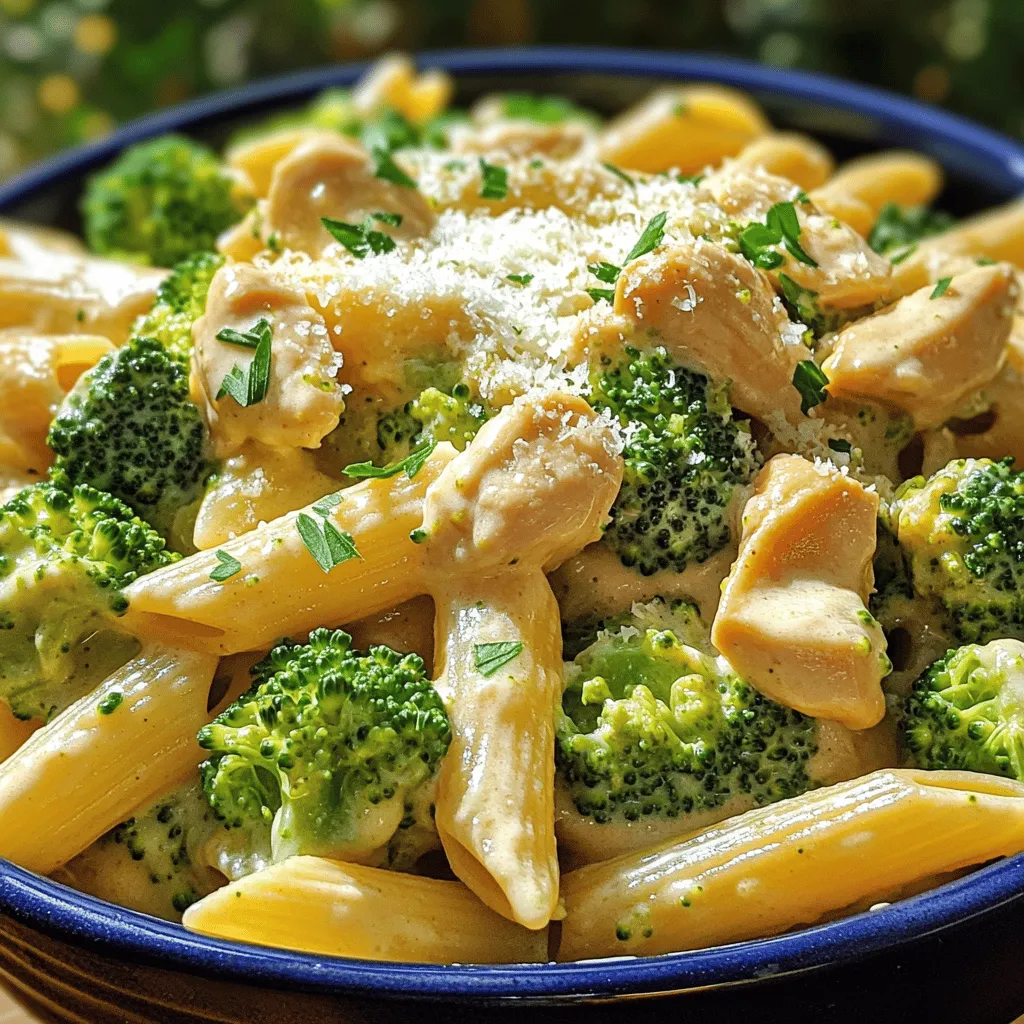
Are you ready to whip up a delicious, easy dinner? My Creamy Broccoli Chicken Penne is the answer! This dish

To make these tasty mini cheesecakes, you need a few key items: - 8 ounces cream cheese, softened - 1/2 cup granulated sugar - 1/2 teaspoon vanilla extract - 2 large eggs - 1/3 cup sour cream - 1 teaspoon lemon zest - 1/2 cup graham cracker crumbs - 3 tablespoons unsalted butter, melted - Extra sugar for the brûlée topping These ingredients work together to create a smooth and creamy cheesecake. The cream cheese gives it that rich taste, while the graham cracker crust adds a nice crunch. You can add some fun twists to your mini cheesecakes with these extras: - Fresh fruit like berries or mango - Chocolate chips for a sweet surprise - A splash of liqueur, like orange or coffee These additions can give your cheesecakes a unique flair and surprise your guests. To create your mini crème brûlée cheesecakes, you will need: - Muffin tin - Cupcake liners - Mixing bowls - Electric mixer - Kitchen torch or broiler - Spatula Having the right tools makes the process easier and helps you achieve great results. You can find the full recipe to guide you through the steps of making these delightful desserts. Start by preheating your oven to 325°F (160°C). This helps set the right temperature for baking. Next, line a muffin tin with cupcake liners. This step makes it easy to remove the cheesecakes later. In a small bowl, mix the graham cracker crumbs with melted butter. You want the mix to look like wet sand. Take about a tablespoon of this mixture and press it down firmly in each cupcake liner. This crust will give your cheesecakes a tasty base. Grab a large mixing bowl. Beat the softened cream cheese and granulated sugar together until smooth. Add in the vanilla extract and mix it well. This is where the base flavor comes from. Next, add the eggs one at a time, mixing well after each. This keeps your batter light and fluffy. Now, it's time to fill the lined muffin tin. Spoon the cheesecake batter over the prepared crusts. Fill each cup about 3/4 full. This allows room for the cheesecakes to rise while baking. Place the muffin tin in the oven and bake for 18-20 minutes. You want the centers to be set but still a bit jiggly. After baking, turn off the oven and leave the cheesecakes inside for 10 more minutes. This helps prevent cracking. Once cooled, let them sit at room temperature before refrigerating for at least 4 hours or overnight. This step helps the flavors meld beautifully. To get that creamy texture, start with room temperature cream cheese. Cold cream cheese can make the batter lumpy. Mix until smooth, then add eggs slowly. This keeps air in the batter, making it light. Also, do not overmix the batter once you add eggs. Overmixing can create a dense cheesecake. One big mistake is not preheating the oven. Always preheat to 325°F (160°C). This helps the cheesecakes bake evenly. Another mistake is baking too long. They should be slightly jiggly in the middle when you take them out. Let them cool in the oven for ten minutes to prevent cracks. For the perfect brûlée topping, use a thin layer of sugar. Too much sugar can burn easily. When using a torch, keep it moving to avoid hot spots. If you don’t have a torch, broil them for just a minute. Watch closely to avoid burning the sugar. Enjoy your mini crème brûlée cheesecakes with a crispy top! For the complete recipe, check out the Full Recipe. {{image_2}} You can easily switch up the flavors in your mini crème brûlée cheesecakes. For a chocolate version, add 1/2 cup of melted chocolate to the cream cheese mixture. This adds a rich taste that chocolate lovers will adore. If you want berry flavors, mix in 1/2 cup of fresh berries or berry puree. Raspberries and blueberries work great. You can also top the cheesecakes with whole berries for added flair. While graham crackers are classic, you can try other bases. For a cookie crust, use crushed Oreos or vanilla wafers. Mix them with melted butter, just like the graham crackers. If you prefer a gluten-free option, almond flour or gluten-free cookies can make a tasty crust. Simply combine them with melted butter and press them into the muffin tin. Toppings can make your mini cheesecakes even more special. Consider adding a dollop of whipped cream for a light touch. A drizzle of chocolate sauce or berry sauce adds flavor and looks pretty. For a crunchy element, sprinkle crushed nuts or toffee bits on top. These add texture and extra taste to each bite. Feel free to explore these variations to create your perfect mini crème brûlée cheesecakes. For the full recipe, check the section above. To keep your mini crème brûlée cheesecakes fresh, store them in the fridge. Place them in an airtight container. This will help prevent them from drying out. They stay good for about three days. Make sure to keep the brûlée topping separate, as it can lose its crunch. If you want to save some for later, freezing works well. Wrap each cheesecake in plastic wrap tightly. Then, place them in a freezer-safe bag. They will last up to two months in the freezer. When you’re ready to eat them, thaw them overnight in the fridge. To reheat your cheesecakes, avoid the microwave. It can make them too soft. Instead, place them in a preheated oven at 350°F (175°C) for about 10 minutes. This keeps their texture nice. Always brûlée the tops again just before serving for that perfect finish. For the full recipe, check out the details above! You can store mini crème brûlée cheesecakes in the fridge for up to five days. Keep them in an airtight container for best results. This helps maintain their creamy texture and flavor. Yes, you can make these cheesecakes a day or two ahead. Just remember to brûlée the tops right before serving. This keeps the sugar crunchy and fresh. If you lack a kitchen torch, use your oven's broiler. After adding sugar on top, place them under the broiler for about a minute. Stay nearby to prevent burning. To simplify, you can skip the brûlée topping. Just serve the cheesecakes chilled. They still taste great without the caramelized sugar layer. Yes, for a dairy-free version, use vegan cream cheese and coconut cream. For gluten-free, swap graham crackers with gluten-free options. These changes keep the flavors while meeting dietary needs. For the full recipe, refer to the provided instructions. You learned about making Mini Crème Brûlée Cheesecakes today. We discussed essential ingredients, tools, and step-by-step instructions. I shared tips to avoid common mistakes and variations to suit your taste. Don’t forget the storage tips for keeping your treats fresh. These cheesecakes can be delicious and fun to make. With practice, you will impress friends and family with your skills. Enjoy baking and savoring every bite!

Mini Crème Brûlée Cheesecakes Delightful Dessert Recipe

Are you ready to impress your guests with a dessert that’s both elegant and easy? Mini Crème Brûlée Cheesecakes combine

For this recipe, you need 1 pound of fresh shrimp. Make sure they are peeled and deveined. Fresh shrimp adds a sweet taste and a nice texture. You can find them at your local market or seafood shop. Here’s a list of other ingredients you will need: - 1/2 cup breadcrumbs (plus extra for coating) - 1/4 cup green onions, finely chopped - 2 cloves garlic, minced - 1 tablespoon ginger, grated - 1 egg, beaten - 1 tablespoon soy sauce - 1 teaspoon lime juice - Salt and pepper to taste - Vegetable oil, for frying These ingredients help create a mixture that is flavorful and holds together well. To make the sweet chili sauce, gather these ingredients: - 1/2 cup sweet chili sauce - 1 tablespoon lime juice - 1 teaspoon sesame oil - 1 teaspoon sriracha (optional for heat) The sweet chili sauce pairs perfectly with the crispy shrimp balls, adding a tangy touch. You can adjust the heat by adding or skipping the sriracha. For the full recipe, check the entire article. To start, gather your ingredients. Place the fresh shrimp, breadcrumbs, green onions, garlic, ginger, beaten egg, soy sauce, lime juice, salt, and pepper into a food processor. Pulse the mixture until it combines well. It should still have some texture, not a smooth paste. This mix gives the shrimp balls great flavor. Now, take a small amount of the shrimp mixture and roll it into a ball. Aim for a size close to a golf ball. It’s fun to do this by hand. You can feel the mix and shape it just right. Place each ball on a plate as you go. This step helps them hold together when frying. Next, heat vegetable oil in a large skillet. Get it to about 350°F (175°C). Carefully add the shrimp balls in batches. Do not overcrowd the pan; this helps them fry evenly. Cook for about 4-5 minutes. They should turn golden brown. Use a slotted spoon to lift them out and place them on paper towels to drain. This frying method gives you that crispy texture that is so satisfying. For the complete details on how to make these crispy shrimp balls, check out the Full Recipe. To get the best crunch, use fresh shrimp. Fresh shrimp gives a better texture than frozen. When mixing, pulse just enough to keep some chunkiness. This helps with the crispiness when frying. Coat your shrimp balls evenly with breadcrumbs. The more coverage, the crunchier they will be. For an extra layer, you can double coat them. First, dip in egg, then roll in breadcrumbs again. Use hot oil for frying. The right temperature is key. Aim for 350°F (175°C). If the oil is too cool, the balls will soak up oil and become soggy. Fry in small batches to keep the oil hot. Prep your shrimp mixture ahead of time. You can make it the night before and store it in the fridge. This way, when you're ready to cook, everything is ready to go. Use a food processor for quick chopping. It saves time on mixing the shrimp and veggies. Just pulse until you see a good blend. Consider using store-bought sweet chili sauce. It cuts down on prep time. You can still add lime juice and sesame oil for a personal touch. Making your own sweet chili sauce is easy. Just mix sweet chili sauce with lime juice, sesame oil, and sriracha if you like heat. This simple blend adds a fresh zing. Taste your sauce before serving. Adjust the sweetness or heat to suit your taste. If it's too sweet, a dash of lime juice will balance it out. Serve the sauce in a small bowl next to your shrimp balls. This way, it’s easy to dip and enjoy. Don’t forget to use the Full Recipe for more tips on preparation! {{image_2}} If you want a kick, add more heat to your shrimp balls. Use fresh jalapeños or red pepper flakes. Mix them into the shrimp mixture. This will give your dish a nice spicy punch. You can also try using spicy sriracha in the sweet chili sauce. Adjust it to your taste. Want a healthier option? You can bake the shrimp balls instead of frying them. Preheat your oven to 400°F (200°C). Place the shrimp balls on a baking sheet lined with parchment paper. Spray them lightly with cooking oil. Bake for about 20 minutes or until golden and crisp. This method cuts down on oil and calories. You can switch some ingredients if you need to. If you don’t have shrimp, try using crab or a firm fish. For a gluten-free option, use gluten-free breadcrumbs. You can replace soy sauce with coconut aminos for a soy-free version. These swaps keep the flavors rich while catering to your needs. For the complete recipe, check out the Full Recipe section. To keep your crispy shrimp balls fresh, store them in an airtight container. Let them cool completely before you store them. Layer parchment paper between the shrimp balls to prevent sticking. Keep them in the fridge if you plan to eat them within three days. For longer storage, consider freezing. When reheating shrimp balls, use an oven for the best results. Preheat your oven to 350°F (175°C). Place the shrimp balls on a baking sheet and heat for about 10-15 minutes. This method keeps them crispy. You can also use an air fryer at 350°F (175°C) for 5-7 minutes. Avoid the microwave, as it can make them soggy. Freezing is a great option if you want to save some shrimp balls for later. After forming the balls, place them on a baking sheet in a single layer. Freeze them for about an hour until solid. Then, transfer the frozen shrimp balls to a freezer bag. They can last up to three months in the freezer. When you're ready to eat, cook them straight from frozen. Just add a few extra minutes to your frying time. Follow the full recipe for tips on cooking from frozen. You can tell the shrimp balls are cooked when they are golden brown. They should feel firm and bounce back when you press them lightly. If you cut one open, it should be opaque inside, not translucent. Cooking usually takes about 4-5 minutes in hot oil. Always use a thermometer to check the oil temperature. This helps ensure even cooking. Yes, you can prepare the shrimp balls in advance. After forming them, place the balls on a tray. Cover the tray with plastic wrap and store it in the fridge for up to 24 hours. If you want to store them longer, freeze the balls on the tray first. Once frozen, transfer them to a freezer bag. They can stay fresh for up to three months. Crispy shrimp balls pair well with many sides. Here are some ideas: - Fresh salad with a light dressing - Steamed rice or jasmine rice - A side of vegetable stir-fry - Sliced cucumbers or carrots for crunch - Extra sweet chili sauce for dipping Feel free to explore different combinations! You learned how to make delicious shrimp balls from fresh shrimp and other key ingredients. We covered how to prepare, form, and fry these tasty treats. Remember the tips for maximum crispiness and variations like spicy or baked shrimp balls. Proper storage and reheating keep them fresh. Feel free to make them ahead and serve with your favorite sauces. Enjoy your cooking tips and new recipes!

Crispy Shrimp Balls with Sweet Chili Sauce Delight

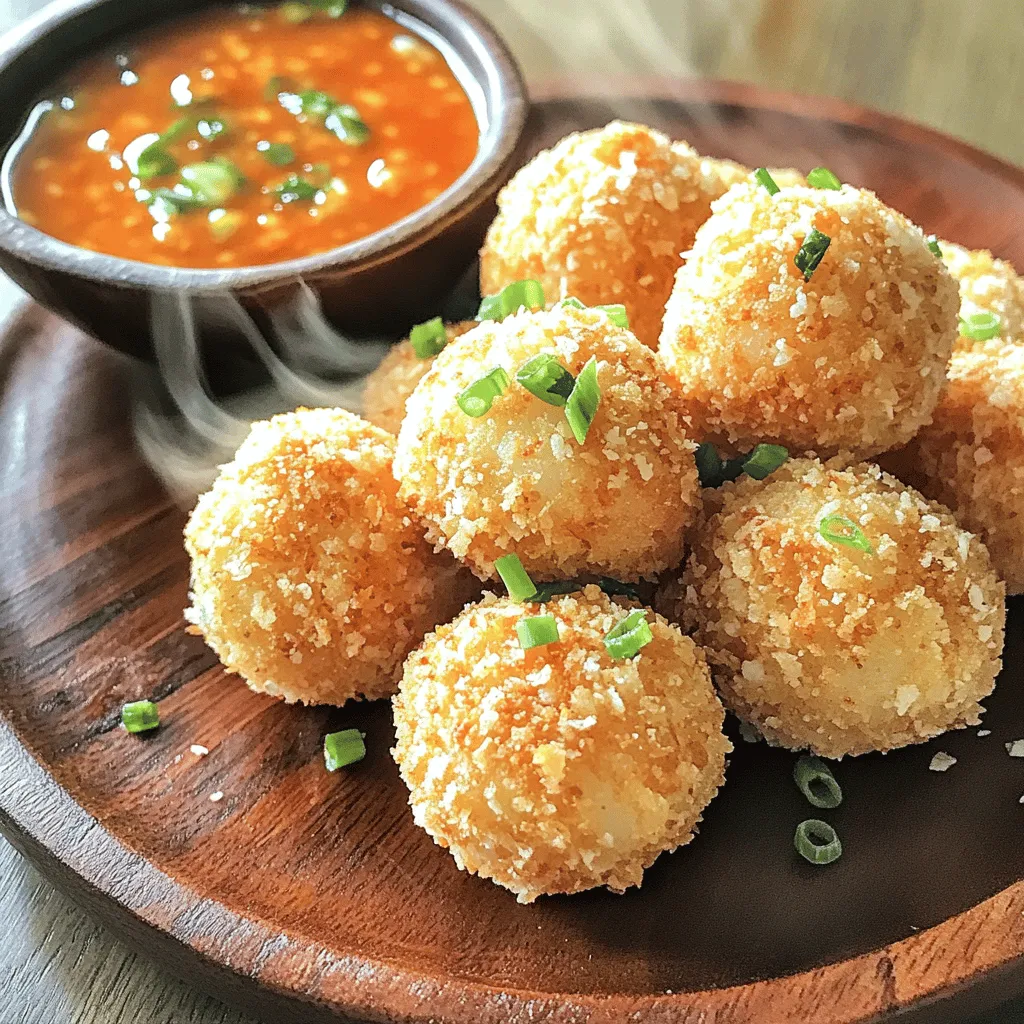
Are you ready to impress your taste buds? In this post, I’ll show you how to make crispy shrimp balls

- 2 egg whites - 1/2 cup granulated sugar - 1/4 teaspoon cream of tartar - 1 teaspoon vanilla extract - A pinch of salt - Optional: food coloring for tinting Precise measurements matter. They ensure your frosting turns out perfect every time. Use dry measuring cups for the sugar. A liquid measuring cup works best for the vanilla extract. A kitchen scale is great for exact measures, especially for sugar. If you want to avoid eggs, try aquafaba. Aquafaba is the liquid from canned chickpeas. It whips up just like egg whites. For a healthier touch, consider using coconut sugar or a sugar substitute like stevia. These options can cut down on calories while keeping sweetness. First, gather your kitchen tools and ingredients. You need a heatproof mixing bowl, a whisk, and an electric mixer. Make sure your bowl is clean and dry. This helps the egg whites whip up nicely. Next, set up your double boiler. Fill a saucepan with about an inch of water. Heat it on medium until it simmers gently. Place your mixing bowl over the saucepan. Ensure the bottom of the bowl does not touch the water. This setup helps control the heat and prevents burning. When whisking the egg whites, use a steady hand. Keep whisking until the sugar dissolves completely. This usually takes about 3 to 4 minutes. You want the mixture warm but not hot. To check, touch it gently with your finger. Look for signs of perfect texture. The mixture should look shiny and smooth. Once it feels warm, it’s time to remove it from the heat. After removing the bowl, use an electric mixer. Beat the mixture on high speed for 3 to 4 minutes. You want to see stiff peaks form. The frosting should look glossy and hold its shape. Now, add in the vanilla extract. Mix it in until fully combined. If you want color, add a few drops of food coloring. Gently fold it in to avoid deflating the frosting. For the full recipe, check out the section above. Enjoy your delicious 7-minute marshmallow frosting! To create stiff peaks, you need the right temperature and mixing speed. Start with room temperature egg whites. They whip better and faster. Use a high-speed mixer once your mixture is warm and foamy. If you see a gritty texture, it means the sugar isn't dissolved. Just keep whisking until smooth. If peaks aren’t forming, try increasing the mixing speed. If you see liquid forming, you might have over-whipped. Don’t worry! Just gently fold in some fresh egg whites to fix it. Heat matters for this frosting. Use a double boiler to control the heat. Keep the water simmering, not boiling. Too much heat can cook the egg whites. Stir your mixture constantly to keep it even. Timing is key, too. Aim for about 7 minutes total from the start of cooking to finished frosting. This ensures a light and fluffy texture. This frosting is great for cakes and cupcakes! Spread it on your favorite cake for a sweet finish. It pairs well with chocolate, vanilla, or fruit flavors. You can also pipe it onto cupcakes for a lovely look. Try adding sprinkles or crushed nuts on top for extra texture. If you want to get creative, mix in some crushed candy or chocolate chips before decorating. This will add flavor and fun! For the full recipe, check out the link provided. {{image_2}} You can easily change the flavor of your 7-minute marshmallow frosting. Try adding different extracts. Almond or mint extract can give your frosting a unique twist. Just a teaspoon will do. This small change can create a big flavor boost. For chocolate lovers, mix in cocoa powder. Start with about two tablespoons of unsweetened cocoa. Blend it in when you add the vanilla. This will give your frosting a rich chocolate flavor. You can adjust the amount to suit your taste. Adding color to your frosting is simple and fun. For pastel colors, use a tiny amount of food coloring. A drop or two will create a lovely shade. Mix it in gently to avoid over-coloring. If you prefer bold colors, add more drops. Just remember to mix well after each addition. You can also use natural food coloring alternatives. Beet juice or matcha powder are great choices for natural hues. They add color and a hint of flavor. You can make frosting fit any season or holiday. For spring, add lemon zest or floral extracts. This gives a fresh, bright taste. For Halloween, try adding orange food coloring. It pairs well with pumpkin-flavored treats. Think about desserts that work well with this frosting. Cupcakes, cookies, and cakes are perfect choices. This frosting adds a fluffy, sweet touch. You can even use it to fill pastries or layer in a cake. Each bite will be a delight! For the full recipe, check out 7-Minute Marshmallow Frosting. To store unused frosting, keep it in an airtight container. This helps maintain freshness. If you leave it out, it can dry out quickly. At room temperature, it lasts up to 2 hours. If you need to store it longer, place it in the fridge. In the fridge, it can stay fresh for up to a week. If you have leftover frosting, you can refresh it. Just beat it with a mixer until it’s fluffy again. This brings back its nice texture. You can also use leftovers in other recipes. Try spreading it on cookies or mixing it into a cake batter for extra sweetness. To keep your frosting smooth, avoid humidity. Sugar can crystallize when it’s too humid. Store it in a cool, dry place. If you notice any crystallization, gently reheat the frosting. This helps dissolve the sugar again and keeps it smooth. Making 7-Minute Marshmallow Frosting is quick! It takes about 10 minutes in total. You spend around 5 minutes preparing the ingredients. The cooking time is about 3 to 4 minutes. Then, you mix for another 3 to 4 minutes. You’ll get fluffy frosting ready to use in no time! Yes, you can make this frosting ahead of time. However, it's best to use it right away. If you must store it, keep it in an airtight container. It will stay good at room temperature for up to 2 hours. After that, it may lose its fluffy texture. If you don’t have cream of tartar, you can use lemon juice or vinegar. Use 1 teaspoon of either for every 1/4 teaspoon of cream of tartar. These substitutes help stabilize the egg whites. However, the texture may not be as fluffy as with cream of tartar. You can definitely tint your frosting! To do this, add a few drops of food coloring. Mix it gently to avoid deflating the frosting. Start with a small amount and add more if needed. This way, you can achieve your desired color without losing that lovely fluff! This article covered everything you need for perfect 7-Minute Marshmallow Frosting. We explored ingredients, measuring tips, and alternative options. I shared step-by-step instructions for prepping and whipping the frosting. You learned temp control, decorating ideas, and how to store extras. With these tips, you can make amazing frosting that suits any treat. Get creative with flavors and colors to match your desserts. Enjoy your baking adventure, and remember, practice makes perfect!

7-Minute Marshmallow Frosting Quick and Simple Recipe

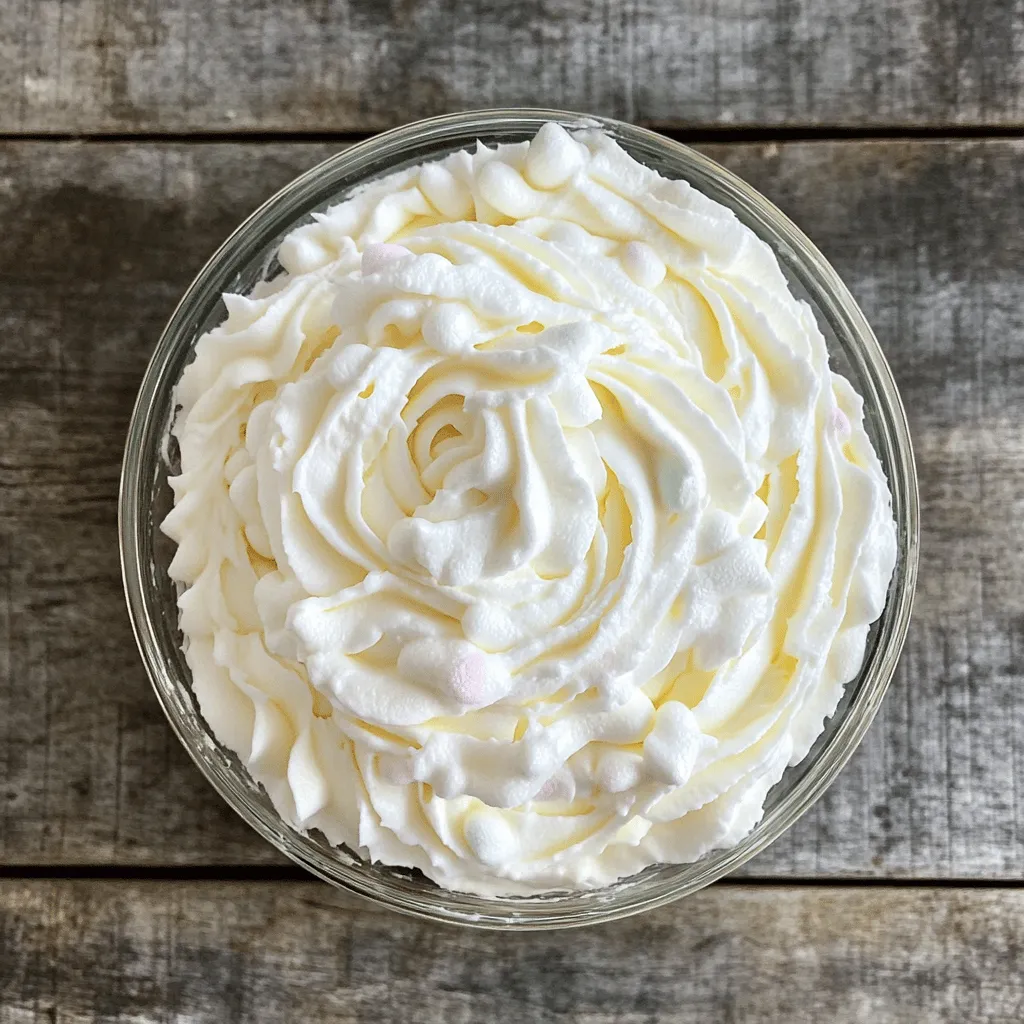
Looking for a quick and simple way to elevate your desserts? This 7-Minute Marshmallow Frosting recipe is just what you

Older posts
Newer posts
← Previous Page1 … Page18 Page19 Page20 … Page32 Next →

dsad

© 2025 easycookingbite • Built with GeneratePress

Our Policies

  • Copyright Policy
  • Cookie Policy
  • GDPR Policy
  • Privacy Policy
  • Disclaimer
  • Terms Of Use

More Information

  • Home
  • About
  • Contact
  • Appetizers
  • Dessert
  • Dinner
  • Drinks
©2025, easycookingbite About Back To Top