Skip to content
DisclaimerTerms Of UseGDPR PolicyCookie Policy

easycookingbite

  • Home
  • Drinks
  • Appetizers
  • Dinner
  • Dessert
  • About
  • Contact
  • Privacy Policy
DisclaimerTerms Of UseGDPR PolicyCookie Policy

Lily

For this recipe, you need 1 pound of fresh shrimp. Make sure they are peeled and deveined. Fresh shrimp adds a sweet taste and a nice texture. You can find them at your local market or seafood shop. Here’s a list of other ingredients you will need: - 1/2 cup breadcrumbs (plus extra for coating) - 1/4 cup green onions, finely chopped - 2 cloves garlic, minced - 1 tablespoon ginger, grated - 1 egg, beaten - 1 tablespoon soy sauce - 1 teaspoon lime juice - Salt and pepper to taste - Vegetable oil, for frying These ingredients help create a mixture that is flavorful and holds together well. To make the sweet chili sauce, gather these ingredients: - 1/2 cup sweet chili sauce - 1 tablespoon lime juice - 1 teaspoon sesame oil - 1 teaspoon sriracha (optional for heat) The sweet chili sauce pairs perfectly with the crispy shrimp balls, adding a tangy touch. You can adjust the heat by adding or skipping the sriracha. For the full recipe, check the entire article. To start, gather your ingredients. Place the fresh shrimp, breadcrumbs, green onions, garlic, ginger, beaten egg, soy sauce, lime juice, salt, and pepper into a food processor. Pulse the mixture until it combines well. It should still have some texture, not a smooth paste. This mix gives the shrimp balls great flavor. Now, take a small amount of the shrimp mixture and roll it into a ball. Aim for a size close to a golf ball. It’s fun to do this by hand. You can feel the mix and shape it just right. Place each ball on a plate as you go. This step helps them hold together when frying. Next, heat vegetable oil in a large skillet. Get it to about 350°F (175°C). Carefully add the shrimp balls in batches. Do not overcrowd the pan; this helps them fry evenly. Cook for about 4-5 minutes. They should turn golden brown. Use a slotted spoon to lift them out and place them on paper towels to drain. This frying method gives you that crispy texture that is so satisfying. For the complete details on how to make these crispy shrimp balls, check out the Full Recipe. To get the best crunch, use fresh shrimp. Fresh shrimp gives a better texture than frozen. When mixing, pulse just enough to keep some chunkiness. This helps with the crispiness when frying. Coat your shrimp balls evenly with breadcrumbs. The more coverage, the crunchier they will be. For an extra layer, you can double coat them. First, dip in egg, then roll in breadcrumbs again. Use hot oil for frying. The right temperature is key. Aim for 350°F (175°C). If the oil is too cool, the balls will soak up oil and become soggy. Fry in small batches to keep the oil hot. Prep your shrimp mixture ahead of time. You can make it the night before and store it in the fridge. This way, when you're ready to cook, everything is ready to go. Use a food processor for quick chopping. It saves time on mixing the shrimp and veggies. Just pulse until you see a good blend. Consider using store-bought sweet chili sauce. It cuts down on prep time. You can still add lime juice and sesame oil for a personal touch. Making your own sweet chili sauce is easy. Just mix sweet chili sauce with lime juice, sesame oil, and sriracha if you like heat. This simple blend adds a fresh zing. Taste your sauce before serving. Adjust the sweetness or heat to suit your taste. If it's too sweet, a dash of lime juice will balance it out. Serve the sauce in a small bowl next to your shrimp balls. This way, it’s easy to dip and enjoy. Don’t forget to use the Full Recipe for more tips on preparation! {{image_2}} If you want a kick, add more heat to your shrimp balls. Use fresh jalapeños or red pepper flakes. Mix them into the shrimp mixture. This will give your dish a nice spicy punch. You can also try using spicy sriracha in the sweet chili sauce. Adjust it to your taste. Want a healthier option? You can bake the shrimp balls instead of frying them. Preheat your oven to 400°F (200°C). Place the shrimp balls on a baking sheet lined with parchment paper. Spray them lightly with cooking oil. Bake for about 20 minutes or until golden and crisp. This method cuts down on oil and calories. You can switch some ingredients if you need to. If you don’t have shrimp, try using crab or a firm fish. For a gluten-free option, use gluten-free breadcrumbs. You can replace soy sauce with coconut aminos for a soy-free version. These swaps keep the flavors rich while catering to your needs. For the complete recipe, check out the Full Recipe section. To keep your crispy shrimp balls fresh, store them in an airtight container. Let them cool completely before you store them. Layer parchment paper between the shrimp balls to prevent sticking. Keep them in the fridge if you plan to eat them within three days. For longer storage, consider freezing. When reheating shrimp balls, use an oven for the best results. Preheat your oven to 350°F (175°C). Place the shrimp balls on a baking sheet and heat for about 10-15 minutes. This method keeps them crispy. You can also use an air fryer at 350°F (175°C) for 5-7 minutes. Avoid the microwave, as it can make them soggy. Freezing is a great option if you want to save some shrimp balls for later. After forming the balls, place them on a baking sheet in a single layer. Freeze them for about an hour until solid. Then, transfer the frozen shrimp balls to a freezer bag. They can last up to three months in the freezer. When you're ready to eat, cook them straight from frozen. Just add a few extra minutes to your frying time. Follow the full recipe for tips on cooking from frozen. You can tell the shrimp balls are cooked when they are golden brown. They should feel firm and bounce back when you press them lightly. If you cut one open, it should be opaque inside, not translucent. Cooking usually takes about 4-5 minutes in hot oil. Always use a thermometer to check the oil temperature. This helps ensure even cooking. Yes, you can prepare the shrimp balls in advance. After forming them, place the balls on a tray. Cover the tray with plastic wrap and store it in the fridge for up to 24 hours. If you want to store them longer, freeze the balls on the tray first. Once frozen, transfer them to a freezer bag. They can stay fresh for up to three months. Crispy shrimp balls pair well with many sides. Here are some ideas: - Fresh salad with a light dressing - Steamed rice or jasmine rice - A side of vegetable stir-fry - Sliced cucumbers or carrots for crunch - Extra sweet chili sauce for dipping Feel free to explore different combinations! You learned how to make delicious shrimp balls from fresh shrimp and other key ingredients. We covered how to prepare, form, and fry these tasty treats. Remember the tips for maximum crispiness and variations like spicy or baked shrimp balls. Proper storage and reheating keep them fresh. Feel free to make them ahead and serve with your favorite sauces. Enjoy your cooking tips and new recipes!

Crispy Shrimp Balls with Sweet Chili Sauce Delight

Are you ready to impress your taste buds? In this post, I’ll show you how to make crispy shrimp balls

- 2 egg whites - 1/2 cup granulated sugar - 1/4 teaspoon cream of tartar - 1 teaspoon vanilla extract - A pinch of salt - Optional: food coloring for tinting Precise measurements matter. They ensure your frosting turns out perfect every time. Use dry measuring cups for the sugar. A liquid measuring cup works best for the vanilla extract. A kitchen scale is great for exact measures, especially for sugar. If you want to avoid eggs, try aquafaba. Aquafaba is the liquid from canned chickpeas. It whips up just like egg whites. For a healthier touch, consider using coconut sugar or a sugar substitute like stevia. These options can cut down on calories while keeping sweetness. First, gather your kitchen tools and ingredients. You need a heatproof mixing bowl, a whisk, and an electric mixer. Make sure your bowl is clean and dry. This helps the egg whites whip up nicely. Next, set up your double boiler. Fill a saucepan with about an inch of water. Heat it on medium until it simmers gently. Place your mixing bowl over the saucepan. Ensure the bottom of the bowl does not touch the water. This setup helps control the heat and prevents burning. When whisking the egg whites, use a steady hand. Keep whisking until the sugar dissolves completely. This usually takes about 3 to 4 minutes. You want the mixture warm but not hot. To check, touch it gently with your finger. Look for signs of perfect texture. The mixture should look shiny and smooth. Once it feels warm, it’s time to remove it from the heat. After removing the bowl, use an electric mixer. Beat the mixture on high speed for 3 to 4 minutes. You want to see stiff peaks form. The frosting should look glossy and hold its shape. Now, add in the vanilla extract. Mix it in until fully combined. If you want color, add a few drops of food coloring. Gently fold it in to avoid deflating the frosting. For the full recipe, check out the section above. Enjoy your delicious 7-minute marshmallow frosting! To create stiff peaks, you need the right temperature and mixing speed. Start with room temperature egg whites. They whip better and faster. Use a high-speed mixer once your mixture is warm and foamy. If you see a gritty texture, it means the sugar isn't dissolved. Just keep whisking until smooth. If peaks aren’t forming, try increasing the mixing speed. If you see liquid forming, you might have over-whipped. Don’t worry! Just gently fold in some fresh egg whites to fix it. Heat matters for this frosting. Use a double boiler to control the heat. Keep the water simmering, not boiling. Too much heat can cook the egg whites. Stir your mixture constantly to keep it even. Timing is key, too. Aim for about 7 minutes total from the start of cooking to finished frosting. This ensures a light and fluffy texture. This frosting is great for cakes and cupcakes! Spread it on your favorite cake for a sweet finish. It pairs well with chocolate, vanilla, or fruit flavors. You can also pipe it onto cupcakes for a lovely look. Try adding sprinkles or crushed nuts on top for extra texture. If you want to get creative, mix in some crushed candy or chocolate chips before decorating. This will add flavor and fun! For the full recipe, check out the link provided. {{image_2}} You can easily change the flavor of your 7-minute marshmallow frosting. Try adding different extracts. Almond or mint extract can give your frosting a unique twist. Just a teaspoon will do. This small change can create a big flavor boost. For chocolate lovers, mix in cocoa powder. Start with about two tablespoons of unsweetened cocoa. Blend it in when you add the vanilla. This will give your frosting a rich chocolate flavor. You can adjust the amount to suit your taste. Adding color to your frosting is simple and fun. For pastel colors, use a tiny amount of food coloring. A drop or two will create a lovely shade. Mix it in gently to avoid over-coloring. If you prefer bold colors, add more drops. Just remember to mix well after each addition. You can also use natural food coloring alternatives. Beet juice or matcha powder are great choices for natural hues. They add color and a hint of flavor. You can make frosting fit any season or holiday. For spring, add lemon zest or floral extracts. This gives a fresh, bright taste. For Halloween, try adding orange food coloring. It pairs well with pumpkin-flavored treats. Think about desserts that work well with this frosting. Cupcakes, cookies, and cakes are perfect choices. This frosting adds a fluffy, sweet touch. You can even use it to fill pastries or layer in a cake. Each bite will be a delight! For the full recipe, check out 7-Minute Marshmallow Frosting. To store unused frosting, keep it in an airtight container. This helps maintain freshness. If you leave it out, it can dry out quickly. At room temperature, it lasts up to 2 hours. If you need to store it longer, place it in the fridge. In the fridge, it can stay fresh for up to a week. If you have leftover frosting, you can refresh it. Just beat it with a mixer until it’s fluffy again. This brings back its nice texture. You can also use leftovers in other recipes. Try spreading it on cookies or mixing it into a cake batter for extra sweetness. To keep your frosting smooth, avoid humidity. Sugar can crystallize when it’s too humid. Store it in a cool, dry place. If you notice any crystallization, gently reheat the frosting. This helps dissolve the sugar again and keeps it smooth. Making 7-Minute Marshmallow Frosting is quick! It takes about 10 minutes in total. You spend around 5 minutes preparing the ingredients. The cooking time is about 3 to 4 minutes. Then, you mix for another 3 to 4 minutes. You’ll get fluffy frosting ready to use in no time! Yes, you can make this frosting ahead of time. However, it's best to use it right away. If you must store it, keep it in an airtight container. It will stay good at room temperature for up to 2 hours. After that, it may lose its fluffy texture. If you don’t have cream of tartar, you can use lemon juice or vinegar. Use 1 teaspoon of either for every 1/4 teaspoon of cream of tartar. These substitutes help stabilize the egg whites. However, the texture may not be as fluffy as with cream of tartar. You can definitely tint your frosting! To do this, add a few drops of food coloring. Mix it gently to avoid deflating the frosting. Start with a small amount and add more if needed. This way, you can achieve your desired color without losing that lovely fluff! This article covered everything you need for perfect 7-Minute Marshmallow Frosting. We explored ingredients, measuring tips, and alternative options. I shared step-by-step instructions for prepping and whipping the frosting. You learned temp control, decorating ideas, and how to store extras. With these tips, you can make amazing frosting that suits any treat. Get creative with flavors and colors to match your desserts. Enjoy your baking adventure, and remember, practice makes perfect!

7-Minute Marshmallow Frosting Quick and Simple Recipe

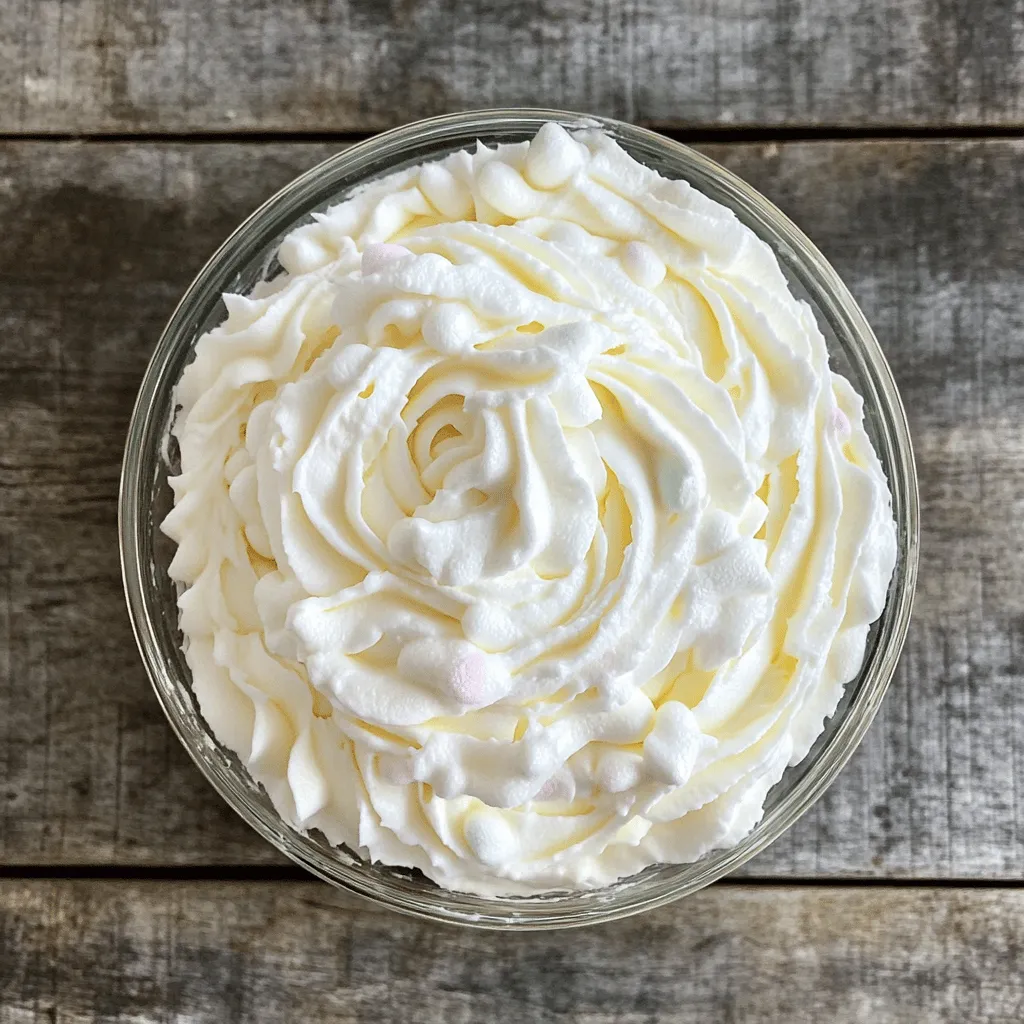
Looking for a quick and simple way to elevate your desserts? This 7-Minute Marshmallow Frosting recipe is just what you

- 1 cup dried chickpeas (soaked overnight) - 1 small onion, chopped - 2 cloves garlic, minced - 1/4 cup fresh parsley, chopped - 1/4 cup fresh cilantro, chopped - 1 tsp ground cumin - 1 tsp ground coriander - 1/2 tsp baking soda - 1/2 tsp salt - 1/4 tsp black pepper - 3 tablespoons flour (all-purpose or chickpea flour) - Cooking spray or olive oil spray I love using dried chickpeas for falafel. They give a better texture than canned ones. Soak them overnight in water. This step is key! After soaking, drain and rinse them well. This helps remove any dirt or dust. Next, chop your onion and garlic. Fresh ingredients make a big difference. I also use parsley and cilantro for a bright flavor. These herbs add color and taste to the falafel. Spices are vital for flavor. Ground cumin and coriander give warmth and depth. Baking soda helps the falafel rise and stay light. The salt and black pepper add just the right kick. For binding, I mix in flour. You can use all-purpose flour or chickpea flour. It helps hold everything together. Finally, I use cooking spray to help them crisp up in the air fryer. For the full recipe, check out the detailed steps to make these tasty snacks! Start by soaking the chickpeas in water overnight. This helps them soften. After soaking, drain and rinse the chickpeas well. It’s important to ensure they are dry. Wet chickpeas can make the mixture too mushy. In a food processor, put the soaked chickpeas, chopped onion, minced garlic, parsley, and cilantro. Add the spices: cumin, coriander, baking soda, salt, and pepper. Pulse the mixture until it is finely ground but still has texture. Scrape down the sides of the food processor as you blend. This keeps everything well mixed. Next, transfer the mixture to a bowl. Stir in the flour until it blends well. If it feels too wet, add a bit more flour. You want it to hold its shape when formed. Use your hands to shape the mixture into small balls or patties, about the size of a golf ball. Aim for 12 to 15 falafels. Preheat your air fryer to 375°F (190°C) for about 5 minutes. This step helps them cook evenly. Place the falafel balls in the air fryer basket in a single layer. They should not touch. Lightly spray the tops with cooking spray. Cook the falafel for 12-15 minutes. Flip them halfway through cooking. They should be golden brown and crispy when done. After cooking, let them cool for a minute before serving. Enjoy your crispy air fryer falafel! For further details, see the Full Recipe. To get the right texture, check the mixture after blending. If it feels too wet, it won't hold shape. You can fix this by adding flour. Start with one tablespoon at a time until it feels just right. The mix should be sticky but not gooey. Want to boost the taste? Try adding extra spices like paprika or cayenne for heat. A bit of lemon zest can brighten the falafel too. If you like it spicy, a dash of hot sauce works great. Do not overcrowd the air fryer. This can lead to uneven cooking. Place falafel balls in a single layer, leaving space around each. When using different air fryer models, cooking times may vary. Keep an eye on them and adjust as needed. For example, if they look golden but feel soft, give them a couple more minutes. {{image_2}} You can easily change the flavor of your falafel. Adding Mediterranean herbs like oregano and thyme can brighten the taste. You can also mix in spices like paprika or sumac for extra depth. Want more color and nutrients? Try adding vegetables like spinach or grated carrot. These changes create a unique twist on the classic falafel. If you want to switch things up, consider using black beans instead of chickpeas. Black beans give a different taste and texture. Lentils are another great option. They cook faster and add a soft, creamy texture. Both choices keep your falafel tasty and nutritious. Falafel is versatile and pairs well with many sauces. Try tahini for a nutty flavor or tzatziki for a cool touch. You can serve falafel in wraps with fresh veggies or salads for a complete meal. It also makes a great appetizer at parties. The options are endless! For the full recipe, check out the detailed instructions. To keep your leftover falafel fresh, place them in an airtight container. Refrigerate the container right away. This keeps moisture out and helps the falafel stay tasty. You can store them for up to four days. If you want to save falafel for longer, freezing works great. First, let the falafel cool completely. Then, arrange them in a single layer on a tray. Freeze them for about an hour. Once frozen, transfer the falafel into a freezer-safe bag or container. They can last up to three months in the freezer. To enjoy your falafel again, reheating is key. The best way to reheat falafel is in the air fryer. Set the air fryer to 350°F (175°C) and heat for about 5 to 7 minutes. This method helps the falafel stay crispy instead of soggy. You can also use an oven for reheating. Place the falafel on a baking sheet and heat at 375°F (190°C) for around 10 minutes. Check them often to avoid overcooking. Falafel stays fresh in the fridge for about four days. Always check for signs of spoilage before eating. If you see any mold, or if they smell off, it’s best to toss them. When falafel ages, they lose their crispy texture. They may also become dry. If that happens, you can still reheat them, but they might not taste as good as fresh. Always trust your senses when deciding if food is still good! Yes, you can use canned chickpeas. They save time and are easy to find. Pros of using canned chickpeas: - Already cooked, so no soaking is needed. - Convenient and quick to prepare. Cons of using canned chickpeas: - They may be softer, which can change the texture. - Canned chickpeas can have added salt or preservatives. If you choose canned chickpeas, rinse them well. This helps reduce sodium and improves flavor. Air frying uses hot air to cook food, while frying uses oil. Air frying is healthier. Health benefits of air frying: - Uses less oil, reducing fat and calories. - Creates crispy food without the mess of oil. - Preserves nutrients better than deep frying. Air frying makes it easy to enjoy crispy falafel without guilt. Look for a golden brown color on the outside. The inside should be warm and soft. Tips for checking doneness: - Use a fork to break one open; it should not be doughy. - Cook for 12-15 minutes, flipping halfway for even crispiness. Trust your senses. If it smells great and looks golden, it’s ready! Yes, falafel can be made gluten-free. Use gluten-free flour instead of regular flour. Suggestions for gluten-free flour options: - Chickpea flour is a great choice. - Almond flour can add a nutty flavor. - Oat flour works well too, just ensure it’s gluten-free certified. Experiment with these options to find the taste you love! For the full recipe, check out the detailed steps above. In this article, we explored making falafel in an air fryer. We covered the key ingredients like chickpeas, herbs, and spices. You learned the steps for mixing and shaping the falafel. We also shared tips for perfecting texture and flavor. Lastly, we discussed storage and reheating methods. Falafel is flexible; tweak it to match your tastes. Enjoy making this healthy, tasty dish!

Air Fryer Falafel Tasty and Healthy Snack Idea

Are you in search of a tasty and healthy snack? Look no further! Air Fryer Falafel is the perfect choice.

- 1 lb boneless skinless chicken breast - 1 cup panko breadcrumbs - 1/2 cup all-purpose flour - 1 teaspoon garlic powder - 1 teaspoon paprika - Salt and pepper to taste - 1/2 cup mayonnaise - 1 tablespoon Sriracha - 1 tablespoon honey - 6 slider buns - Lettuce leaves (for garnish) - Pickled jalapeños (optional) To make Bang Bang Chicken Sliders, we start with the chicken. I use boneless, skinless chicken breast. This cut ensures a tender bite. You’ll want to cut the chicken into small pieces, about the size of your slider buns. Next, we need our breading. I prefer panko breadcrumbs. They give a nice crunch. The all-purpose flour helps the breading stick. For flavor, I add garlic powder and paprika. This mix of spices adds depth and warmth. Now, let’s talk about the Bang Bang sauce. This sauce is creamy with a kick. I mix mayonnaise, Sriracha, and honey together. The honey balances the heat from the Sriracha. Adjust the Sriracha amount based on your spice level. When it comes to assembly, the slider buns need to be warm and toasted. Add your fried chicken, drizzle with the Bang Bang sauce, and top with lettuce. If you like heat, add pickled jalapeños. They bring a zesty flavor that pairs well. This recipe is about bold flavors and fun bites. You can find the complete instructions in the Full Recipe. Enjoy making these sliders! To start, cut the chicken breast into slider-sized pieces. Aim for pieces about 2 inches long. Next, pat the chicken dry with a paper towel. This step helps the breading stick better. Now, set up three bowls. In the first bowl, add the flour, salt, pepper, garlic powder, and paprika. Mix it well. In the second bowl, crack and beat one large egg. In the third bowl, place the panko breadcrumbs. This setup makes breading easy and quick. Heat a skillet over medium-high heat. Add enough oil to cover the bottom, about 1/4 inch deep. When the oil is hot, add the breaded chicken pieces in batches. Fry each side for 3-4 minutes until they turn golden brown. After frying, place them on paper towels to drain excess oil. In a small bowl, mix together the mayonnaise, Sriracha, and honey. Stir until the mixture is smooth. Taste it and adjust the spice level according to your liking. You can add more Sriracha for extra heat. Lightly toast the slider buns until they are warm. On the bottom half of each bun, place one piece of fried chicken. Drizzle a generous amount of Bang Bang sauce over the chicken. Next, add a crisp lettuce leaf. If you like, top it off with pickled jalapeños for some extra zing. To get crispy Bang Bang Chicken, the oil temperature matters. Use a deep skillet and heat oil to 350°F. This ensures a golden finish. Use a thermometer for accuracy. If the oil is too cold, the chicken will soak up grease. If too hot, it will burn. Cook chicken in batches. This keeps the oil temperature steady. Overcrowding the pan lowers the heat. Fry about three pieces at a time. Cook each side for 3-4 minutes until golden. Remove them and let them drain on paper towels. The Bang Bang Sauce can be even better! Add a splash of lime juice for zest. You can mix in some minced garlic for a kick. Want more heat? Toss in extra Sriracha or chili flakes. For a creamier sauce, use more mayo. If it’s too thick, add a little water or more lime juice. Adjust the spice level to your taste. The goal is a perfect blend of creaminess and spice. Bang Bang Chicken Sliders pair well with many sides. Serve them with crispy sweet potato fries. Fresh coleslaw adds a crunchy texture. You can also try a light salad for balance. For drinks, iced tea or lemonade works great. If you prefer something stronger, a light beer is a good choice. These flavors enhance your slider experience and make the meal special. {{image_2}} To make your sliders extra spicy, you can add more Sriracha or chili flakes. This boosts the heat and adds great flavor. Start by mixing in an extra teaspoon of Sriracha into the Bang Bang sauce. If you want more kick, sprinkle some chili flakes on the chicken before frying. Adjust the spice to suit your taste. If you want a lighter version, try baking the chicken instead of frying it. Preheat your oven to 400°F (200°C). Place the breaded chicken on a lined baking sheet. Bake for about 20 minutes or until golden brown. Another option is to swap mayonnaise for Greek yogurt in the Bang Bang sauce. This change makes it creamier and adds protein without the extra fat. For a plant-based twist, substitute the chicken with plant-based meat. Many brands offer great options that mimic chicken well. You can also create a plant-based Bang Bang sauce using vegan mayo and your favorite hot sauce. This way, everyone can enjoy the sliders, regardless of their diet. For the full recipe, check out the section above. To keep your Bang Bang Chicken Sliders fresh, cool them down first. Place them in an airtight container. This will help maintain their taste and texture. You can store them in the fridge for up to three days. If you want to keep them longer, consider freezing. When reheating, aim to keep the sliders crispy. The best method is to use the oven. Preheat it to 350°F (175°C). Place the sliders on a baking sheet. Heat for about 10 minutes. This method keeps the buns from getting soggy. Avoid the microwave for reheating, as it can make the sliders soft and mushy. To freeze assembled sliders, wrap each one tightly in plastic wrap. Then place them in a freezer bag. This prevents freezer burn. They can stay frozen for up to three months. When you are ready to eat, remove them from the freezer. Let them thaw overnight in the fridge. After thawing, reheat them in the oven for best results. Enjoy your Bang Bang Chicken Sliders again! Bang Bang Chicken Sliders are small sandwiches filled with crispy chicken and spicy sauce. This dish blends Asian and American flavors. It became popular in the U.S. for its crunchy texture and bold taste. The "bang bang" name comes from the spicy sauce that makes your taste buds dance. Yes, you can! You can prepare the chicken and sauce in advance. Just keep the chicken in the fridge after cooking. The sauce can also stay fresh in a jar. Assemble the sliders right before serving. This keeps the buns from getting soggy. To make gluten-free sliders, swap regular buns for gluten-free buns. You can find these at most stores. For the breading, use gluten-free breadcrumbs instead of panko. Check the flour label and use a gluten-free option, like almond flour or coconut flour. If you want a different sauce, try a spicy mayo or sweet chili sauce. You can mix mayonnaise with hot sauce for a quick option. For a smoky flavor, use chipotle sauce. Each sauce gives a unique taste to the sliders. You now have a complete guide to making Bang Bang Chicken Sliders. We discussed the key ingredients, from chicken and spices to the delicious sauce. Each step showed how to prepare, fry, and assemble these tasty sliders. Remember, you can adjust the spice and make variations to fit your taste. Whether you fry, bake, or go plant-based, these sliders can please anyone. Enjoy exploring different flavors and sides to make this dish your own!

Bang Bang Chicken Sliders Flavor-Packed Delight

Are you ready to elevate your game day gathering? Bang Bang Chicken Sliders are a flavor-packed delight that combines crispy

To make these tasty White Cheddar Spinach Chicken Burgers, gather these ingredients: - 1 lb ground chicken - 1 cup fresh spinach, finely chopped - 3/4 cup white cheddar cheese, shredded - 1/2 cup breadcrumbs - 1/4 cup grated Parmesan cheese - 1 egg - 2 cloves garlic, minced - 1 teaspoon onion powder - 1 teaspoon salt - 1/2 teaspoon black pepper - 1 tablespoon olive oil - Burger buns - Lettuce, tomato, and condiments (optional for serving) The essential ingredients for these burgers are ground chicken, spinach, and white cheddar cheese. The chicken gives the burger its base. Spinach adds color and nutrients. White cheddar cheese melts beautifully, giving a rich flavor. The optional ingredients include the burger buns and toppings like lettuce and tomato. You can adjust these based on your taste. Use any condiments you love for extra flavor. If you need to swap out some ingredients, here are a few ideas: - Ground chicken: You can use ground turkey or lean beef instead. - White cheddar cheese: Try mozzarella or gouda for a different taste. - Breadcrumbs: Oat flour or crushed crackers can work as a substitute. - Egg: A flax egg (1 tablespoon ground flaxseed mixed with 2.5 tablespoons water) can replace the egg for a vegan option. These swaps keep the recipe fun and flexible. For the full recipe, check the detailed instructions and tips. To make these white cheddar spinach chicken burgers, start with a large mixing bowl. Combine the ground chicken, chopped spinach, shredded white cheddar cheese, breadcrumbs, grated Parmesan cheese, egg, minced garlic, onion powder, salt, and black pepper. Mix everything well with your hands until just combined. Be careful not to overmix, as this can make the patties tough. Next, divide the mixture into four equal parts. Shape each part into a patty, about 1/2 inch thick. This thickness helps them cook evenly. Heat olive oil in a large skillet over medium heat. When the oil is hot, carefully add the patties. Make sure there is enough space between each patty. Cook them for about 5-6 minutes on each side. Use a meat thermometer to check that the internal temperature reaches 165°F (75°C). The outside should be golden brown. While the last batch cooks, toast the burger buns in a separate pan if you like. Once the patties are done, assemble your burgers. Place each chicken patty on a toasted bun. Add toppings like lettuce, tomato, and any condiments you prefer. To make the best patties, keep a few tips in mind. First, wet your hands with water before shaping the patties. This helps prevent the mixture from sticking to your hands. Second, try to make the patties uniform in size. This way, they cook evenly and look great on a plate. Lastly, make a small indent in the center of each patty. This helps them hold their shape while cooking and prevents them from puffing up. You can cook these burgers in two ways: on a skillet or on a grill. Skillet Method: This method gives you a nice brown crust. Use medium heat and add olive oil. The skillet method is quick and easy, perfect for weeknight dinners. Grill Method: Grilling adds a smoky flavor. Preheat your grill to medium heat. Cook the patties for about 5-6 minutes on each side. This method can be messy but adds a great taste. Both methods yield tasty burgers, so choose the one that fits your cooking style. For the full recipe, check out the complete details to create these delicious white cheddar spinach chicken burgers! To keep your chicken burgers moist, use a few simple steps. First, do not overmix the meat. Overmixing makes the burgers tough. Just mix until everything is combined. Adding spinach and cheese also helps keep them juicy. Cook the burgers on medium heat to avoid drying them out. For great flavor, you can try different seasonings. Garlic powder and paprika add a nice kick. If you like herbs, try adding dried oregano or thyme. You can also mix in a splash of Worcestershire sauce for extra depth. Taste as you go to find your perfect blend. These burgers pair well with many sides. Sweet potato fries bring out the cheese flavor. A fresh salad adds a nice crunch. You can also serve them with coleslaw or grilled veggies for a colorful plate. Try different combinations to find your favorite! For the complete recipe, check out the Full Recipe section. {{image_2}} You can switch up the cheese in these burgers. If you want a different taste, try using mozzarella or feta. Mozzarella gives a mild flavor and nice stretch. Feta adds a salty kick, which pairs well with spinach. You can even mix cheeses for a fun twist. Feel free to add more veggies to the mix. Diced bell peppers or mushrooms can boost flavor and nutrition. You can also add grated carrots for a slight sweetness. Just remember to chop them finely. This keeps the burger juicy and tasty. For those who love heat, try adding jalapeños. You can chop fresh jalapeños and mix them into the burger mix. If you prefer less heat, use pickled jalapeños. They give a nice tang without being too spicy. This spicy twist makes the burgers even more exciting. Try these variations to make your White Cheddar Spinach Chicken Burgers unique and delicious. For the Full Recipe, check out the detailed instructions above. To keep your leftover burgers fresh, let them cool down first. Then, place them in an airtight container. This will help lock in the flavor and moisture. Store the burgers in the fridge for up to three days. If you want to enjoy them later, consider freezing them. When you're ready to eat your leftovers, reheat the burgers properly. The best way is to use the skillet. Heat a little oil over medium heat, then add the burger. Cook for about 3-4 minutes on each side until warmed through. You can also use the microwave, but it might make them a bit soggy. If you prefer a crispy texture, stick to the skillet. For meal prep, freezing is a great option. After shaping the patties but before cooking, place them on a baking sheet lined with parchment paper. Freeze them until solid, then transfer them to a freezer bag. Label the bag with the date. You can freeze them for up to three months. When ready to cook, thaw overnight in the fridge before cooking as usual. This keeps your meal prep easy and tasty! You can find the full recipe for these delicious burgers [Full Recipe]. You can serve these burgers with many tasty sides. Sweet potato fries are a great choice. They add a sweet and savory touch. A fresh salad also works well. You might try a mix of greens, tomatoes, and cucumbers. For a fun twist, serve them with coleslaw. It gives a crunchy texture that pairs nicely. Don't forget to add your favorite condiments on the side. Ketchup, mustard, or even a tangy aioli can enhance the flavor. To check if your chicken burgers are done, use a meat thermometer. The internal temperature should reach 165°F (75°C). This ensures the chicken is safe to eat. You can also check the color. The meat should be white, not pink. If you cut into the burger, the juices should run clear. These tips help you serve perfectly cooked patties every time. Yes, you can make these burgers ahead of time. Prepare the patties and store them in the fridge. They can last for one to two days. If you want to keep them longer, freeze them. Just wrap each patty in plastic wrap before freezing. When ready to cook, thaw them overnight in the fridge. Then, cook as directed in the Full Recipe. This makes meal prep easy and saves time on busy days. In this article, I covered the ingredients, cooking steps, and helpful tips for chicken burgers. I also shared ways to vary recipes and store leftovers. Remember, using fresh ingredients and proper cooking methods makes a big difference. Experiment with flavors and create your own twist on these burgers. Enjoy making and sharing delicious meals! Keep these tips in mind for tasty, juicy results every time. Happy cooking!

White Cheddar Spinach Chicken Burgers Flavorful Treat

Are you ready to elevate your burger game? These White Cheddar Spinach Chicken Burgers are not just a meal; they’re

- 1 can refrigerated cinnamon roll dough (8 rolls) - 2 large eggs - 1/4 cup milk - 1/2 teaspoon vanilla extract - 1 teaspoon ground cinnamon - 1 tablespoon sugar - 1 tablespoon butter - Maple syrup for serving - Powdered sugar (for dusting, optional) - Add-ins like chocolate chips or nuts - Vanilla or almond extract for enhanced flavor - Fresh fruit for serving Gathering the right ingredients makes cooking fun. You will need a can of refrigerated cinnamon roll dough. This gives you eight rolls. The rolls will form the base of our bites. Next, grab two large eggs and a quarter cup of milk. This mix helps bind the dough. Don’t forget one teaspoon of ground cinnamon to give that warm spice flavor. A tablespoon of sugar adds sweetness, while a tablespoon of butter is perfect for sautéing. To serve, maple syrup is a must. You can also use powdered sugar for a sweet dusting. If you're feeling creative, consider optional add-ins. Chocolate chips or nuts can add great texture. A splash of vanilla or almond extract boosts the flavor too. Fresh fruit can make your bites even more special, adding color and freshness. Check out the [Full Recipe] for all the details! First, preheat your oven to 350°F (175°C). This helps cook the bites evenly. Then, line a baking sheet with parchment paper. This step makes cleanup easy. Next, open the can of cinnamon rolls. Carefully separate each roll and cut them into quarters. These bite-sized pieces make for easy eating. In a medium bowl, whisk together two large eggs. Add 1/4 cup of milk to make it creamy. Then, stir in 1/2 teaspoon of vanilla extract and 1 teaspoon of ground cinnamon for flavor. Finally, mix in a tablespoon of sugar. This sweet touch helps balance the cinnamon. Now, it’s time to sauté the cinnamon roll pieces. In a skillet, melt 1 tablespoon of butter over medium heat. Once melted, gently toss in the soaked cinnamon roll pieces. Cook them for about 2-3 minutes until they turn slightly golden. You may need to do this in batches to avoid overcrowding. After sautéing, transfer the pieces to the prepared baking sheet. Spread them evenly for better baking. Bake in the preheated oven for 8-10 minutes. Look for them to puff up and get golden brown. This is when they achieve that perfect texture. Once baked, let them cool slightly. If you like, dust with powdered sugar for a sweet finish. Serve warm with maple syrup drizzled on top for dipping. This adds a lovely touch to your sweet morning treat. For the full recipe, feel free to check the section above. - Ensure even coating of cinnamon roll pieces: When you toss the cinnamon roll bites in the egg mix, do it gently. You want every piece well-coated to get that sweet flavor in each bite. - Adjust cooking time based on stove heat: Every stove heats differently. If your bites are not golden in time, give them a few more minutes. Just keep an eye on them to avoid burning. - Pair with fresh fruit or yogurt: Fresh berries or sliced bananas add a nice touch. They balance the sweetness of the cinnamon rolls. Yogurt also works well for a creamy contrast. - Drizzle with flavored syrup variations: Try maple syrup for a classic taste. You can also use caramel or chocolate syrup for a fun twist. - Cool completely before storing: Let your bites cool down to room temperature. This step helps keep them from getting soggy. - Recommended storage method: Store them in an airtight container in the fridge. They stay fresh for up to three days. Reheat in the oven or microwave before serving. {{image_2}} You can add fun twists to your cinnamon roll bites. Here are two easy ideas: - Chocolate chip cinnamon roll bites: Toss in mini chocolate chips with the cinnamon roll pieces for a sweet surprise. The melted chocolate adds a rich flavor. - Nutty cinnamon roll bites: Add chopped nuts like pecans or walnuts for a crunchy texture. They give a nice contrast to the soft rolls. Change your cinnamon roll bites with the seasons to keep things fresh. Here’s how: - Pumpkin spice cinnamon roll bites for fall: Mix in pumpkin spice with the egg mixture. This will give your bites a warm, cozy flavor perfect for autumn. - Lemon zest for a refreshing summer twist: Add zest from a lemon to the egg mix. The bright citrus flavor will lighten up your bites on hot days. You can enjoy these bites even if you have specific dietary needs. Consider these options: - Gluten-free options and substitutions: Use gluten-free cinnamon rolls. Many brands offer tasty options that work well. - Vegan adaptation using egg replacers and dairy-free milk: Swap eggs for a flaxseed mixture. Use almond or oat milk instead of regular milk for a vegan version. Explore these variations to make your cinnamon roll French toast bites even more delightful! For the complete recipe, check out the Full Recipe. Each serving of Cinnamon Roll French Toast Bites contains about 300 calories. You get 10 grams of fat, 40 grams of carbs, and 6 grams of protein. The sugar content is around 15 grams, which comes from the cinnamon rolls and added sugar. This treat is rich in flavor but should be enjoyed in moderation. You can make this dish healthier by using low-sugar or sugar-free ingredients. Look for sugar-free cinnamon roll dough at your store. Whole grain cinnamon rolls offer more fiber. They keep you full longer and add a nutty taste. You can also use unsweetened almond milk instead of regular milk for a dairy-free option. If you want fewer servings, cut the recipe in half. Use just four rolls and adjust the other ingredients. If you want to control portions, use small bowls for serving. Serve with a few pieces on each plate. This way, you can enjoy the treat without overindulging. For more details on the recipe, check the Full Recipe. How do you make Cinnamon Roll French Toast Bites? To make these bites, you start with a can of cinnamon roll dough. Cut each roll into quarters. Then, mix eggs, milk, vanilla, cinnamon, and sugar in a bowl. Toss the roll pieces in this mixture. Sauté them in butter until golden, then bake for 8 to 10 minutes. For detailed steps, check the Full Recipe. Can you freeze Cinnamon Roll French Toast Bites? Yes, you can freeze them! Once they cool, place the bites in a freezer-safe bag. They can last up to three months in the freezer. When ready to eat, just reheat in the oven or microwave. What are the best toppings for Cinnamon Roll French Toast Bites? Maple syrup is a classic choice. You can also try whipped cream, fresh berries, or a drizzle of chocolate sauce. Powdered sugar adds a nice touch too. Why are my cinnamon roll bites soggy? Soggy bites often come from too much egg mixture. Make sure to coat the pieces lightly. Let them soak for only about 5 minutes. This helps avoid excess moisture. What can I do if they don’t brown properly? If they don’t brown, check your oven temperature. You may need to bake them a bit longer. You can also broil them for a minute or two for a golden finish. How long to bake for different serving sizes? For 4 servings, bake for 8 to 10 minutes. If you double the recipe, extend the baking time by a few minutes. Just watch for a golden color. Can the prep time be shortened? You can shorten prep time by using pre-cut cinnamon rolls. Also, mixing the egg mixture while the oven heats can save a few minutes. In this post, we explored a fun and tasty way to enjoy cinnamon roll bites. We went through the ingredients, step-by-step instructions, and helpful tips for perfecting this dish. You learned about variations, healthier options, and common questions. Now, you have the tools to create delicious bites for any occasion. Get creative and enjoy this sweet treat with family and friends!

Cinnamon Roll French Toast Bites Sweet Morning Treat

Are you ready to elevate your breakfast game? Cinnamon Roll French Toast Bites are a sweet twist on a classic

- 1 ½ cups fresh strawberries, hulled and sliced - 1 ½ cups whole wheat flour - ½ cup unsweetened applesauce The main ingredients create a base that is both tasty and healthy. Fresh strawberries add natural sweetness and vibrant color. Whole wheat flour gives the cake a hearty texture and boosts fiber. Unsweetened applesauce replaces oil, keeping the cake moist without extra fat. - Honey or maple syrup can be swapped with stevia or agave nectar for less sugar. - For a creamy touch, low-fat Greek yogurt can be replaced with dairy-free yogurt. - If gluten is a concern, almond flour or coconut flour works well in place of whole wheat flour. These substitutes help you tailor the cake to fit your diet. They keep the flavors rich while making it healthier. - Each slice has about 150 calories. - It provides 3 grams of protein, 2 grams of fat, and 26 grams of carbs. - Fresh strawberries are high in vitamin C, which supports the immune system. Whole wheat flour adds fiber, helping digestion. Unsweetened applesauce lowers sugar while keeping it moist. Knowing the nutrition facts helps you enjoy the cake guilt-free. Each bite is not only delicious but also packed with health benefits. For the complete recipe, check out the Full Recipe section. 1. Preheat your oven to 350°F (175°C). 2. Grease and flour an 8-inch round cake pan. You can also use parchment paper for easy removal. 3. In a medium bowl, mix together the dry ingredients. Combine 1 ½ cups whole wheat flour, 1 teaspoon baking powder, ½ teaspoon baking soda, and ¼ teaspoon salt. Whisk until well mixed. 1. In a large bowl, create the wet mixture. Combine ½ cup unsweetened applesauce, ½ cup honey or maple syrup, 2 large eggs, and 1 teaspoon vanilla extract. Beat until smooth. 2. Stir in ½ cup low-fat Greek yogurt into the wet mixture. Ensure it is fully blended. 3. Gradually add the dry mix into the wet ingredients. Fold gently until just combined. Be careful not to overmix. 4. Gently fold in 1 ½ cups fresh strawberries. Save a few for garnish. 1. Pour the batter into the prepared cake pan. Spread it evenly with a spatula. 2. Bake in the preheated oven for 25-30 minutes. To check for doneness, insert a toothpick into the center. It should come out clean. 3. Once baked, remove the cake from the oven. Let it cool in the pan for 10 minutes. Then transfer it to a wire rack to cool completely. This process leads to a delightful dessert. If you want to see the full recipe, check the earlier section. Enjoy your baking! To boost the taste of your skinny strawberry cake, try using different extracts. Almond extract adds a lovely nutty touch. Lemon extract brings a bright, zesty note. You can also add optional spices like cinnamon or nutmeg for warmth. A pinch of these spices can make your cake even more special. Make your cake shine with creative garnishing options. Fresh strawberries on top look beautiful and fresh. You can also add a dollop of whipped Greek yogurt next to each slice. For special occasions, serve each slice on colorful plates. This makes your cake not only tasty but also fun to eat. One common mistake is overmixing the batter. This can make your cake tough. Instead, gently fold the ingredients together until just combined. Another mistake is not checking the baking time. Keep an eye on your cake. Use a toothpick to check for doneness. If it comes out clean, your cake is ready! {{image_2}} You can easily make a vegan version of Skinny Strawberry Cake. Just swap the eggs for flax eggs. Mix one tablespoon of ground flaxseed with three tablespoons of water for each egg. This will keep the cake moist and tasty. Use maple syrup instead of honey for sweetness. Both options make your cake plant-based and still delicious. To lower sugar and calorie content, use stevia or monk fruit sweetener. These options give you sweetness without the extra calories. You can also reduce the applesauce to cut down on sugar. Your cake will still have great flavor, just with fewer calories. Want to mix things up? Add other fruits like blueberries or raspberries. They pair well with strawberries and add a new twist. You can also make a fun chocolate version. Just fold in cocoa powder or mini chocolate chips. This gives your cake a rich flavor that chocolate lovers will enjoy. If you like nuts, add walnuts or pecans for a crunchy texture. They provide healthy fats and make the cake more filling. The possible flavor combinations are endless, so feel free to get creative! For healthy frosting alternatives, use Greek yogurt mixed with a bit of honey. This will give you a creamy topping that’s lighter than traditional frosting. You can also whip up some coconut cream as a dairy-free option. Both choices add a nice touch without too much sugar. Fresh fruit toppings are a great idea too. Use sliced strawberries or a mix of your favorite berries. They look pretty and add natural sweetness. You can even sprinkle a little powdered sugar on top for a lovely finish. These options make your Skinny Strawberry Cake even more appealing and tasty! For the complete recipe, check out the [Full Recipe]. To keep your Skinny Strawberry Cake fresh, let it cool completely. Once cooled, wrap it well. Use plastic wrap or aluminum foil. This helps keep moisture in and prevents drying out. You can also use an airtight container. Make sure it is clean and dry before placing the cake inside. To freeze your cake, first slice it into pieces. Wrap each slice in plastic wrap tightly. Then, place the wrapped slices in a freezer bag. This protects them from freezer burn. When you want to enjoy a slice, take it out. Let it thaw in the fridge overnight for best results. You can also leave it at room temperature for about an hour. In the fridge, your cake lasts about five days. After that, it may start to go bad. Look out for mold or a sour smell. If you see any signs of spoilage, it’s best to throw it away. Enjoy your delicious Skinny Strawberry Cake while it’s fresh! For the full recipe, refer to the earlier section. Yes, you can use frozen strawberries. They work well if fresh ones are not available. Just remember to thaw and drain them before adding to the batter. This helps avoid extra moisture. If you don't drain them, your cake might become soggy. Frozen strawberries can also be chopped into smaller pieces for even mixing. You may need to reduce the baking time slightly, so keep an eye on your cake. To make this cake gluten-free, swap the whole wheat flour with a gluten-free flour blend. Look for blends that contain rice flour, almond flour, or coconut flour. These options work well and keep the cake light. Another good choice is oat flour, which adds a nice flavor. Always check the package to ensure it is certified gluten-free. You may need to adjust the liquid in the recipe slightly, as some blends absorb more moisture. If you don't have applesauce, you can use several other fruit purees. Mashed bananas are a great option. They add natural sweetness and moisture. You can also use pureed pears or even pumpkin puree for a warm, spicy flavor. Yogurt can work too, but it may change the cake’s texture. Experiment to find what you like best. Each replacement brings its own unique taste and texture to the cake. In this post, we discussed how to make a delicious skinny strawberry cake. We covered key ingredients like fresh strawberries and whole wheat flour. I shared easy preparation steps and baking tips to help you succeed. Remember to use alternatives for dietary needs and try fun flavor combinations. With proper storage, you can enjoy this cake longer. Overall, this recipe is a healthier twist on a classic favorite, making it perfect for any occasion. Try it out and enjoy!

Skinny Strawberry Cake Delightfully Healthy Treat

Craving a sweet treat but want to keep it healthy? Let me introduce you to my Skinny Strawberry Cake—a delightful

- 1 large loaf of Italian bread - 1 cup cooked chicken, shredded - 1 cup Alfredo sauce - 1 cup mozzarella cheese, shredded - 1/2 cup Parmesan cheese, grated - 4 cloves garlic, minced - 1/2 cup unsalted butter, softened - 2 tablespoons fresh parsley, finely chopped - Salt and pepper to taste When making Chicken Alfredo Stuffed Garlic Bread, choosing the right ingredients is key. The Italian bread should be crusty on the outside and soft inside. This helps hold the filling and gives a great texture. - Alternatives for chicken: You can use rotisserie chicken for ease or even shredded turkey. Pulled pork or mushrooms can work for different flavors. - Options for Alfredo sauce: You can use store-bought Alfredo sauce for quick prep. If you prefer homemade, a simple mix of butter, cream, and cheese works well. - Dairy-free cheese options: If you want a dairy-free version, look for plant-based cheese that melts well. Nut-based cheeses can also be a good option. Using the right ingredients makes this dish shine. The blend of flavors gives you that creamy, cheesy goodness. Each bite is a delightful experience that you won't forget. For the full recipe, check out the details above. 1. Preheating the oven Start by preheating your oven to 375°F (190°C). This ensures even cooking and a nice crisp. 2. Preparing the chicken Alfredo mixture In a bowl, mix together the shredded chicken, Alfredo sauce, mozzarella, and Parmesan. Add salt and pepper to taste. Stir until everything is well blended. 3. Preparing the garlic butter In a separate bowl, combine the softened butter, minced garlic, and chopped parsley. Mix until smooth. This garlic butter will give the bread a rich flavor. 1. Cutting and hollowing the Italian bread Take your large loaf of Italian bread and cut it in half lengthwise. Use your hands or a spoon to scoop out most of the soft inside. Keep the bread you scoop out for later use, like making bread crumbs. 2. Stuffing the bread with the Alfredo mixture Generously spoon the chicken Alfredo mixture into each half of the hollowed bread. Make sure to spread it evenly for the best taste. 1. Baking time and temperature Place the stuffed bread halves on a baking sheet lined with parchment paper. Bake in the preheated oven for about 15-20 minutes. Look for a bubbly and golden top. 2. Tips for achieving a golden top To get that perfect golden crust, you can broil the bread for the last minute. Just watch closely so it doesn’t burn. Enjoy your Chicken Alfredo Stuffed Garlic Bread! For the complete recipe, check out the Full Recipe section above. To ensure your cheese melts just right, use fresh mozzarella. Fresh cheese melts beautifully and gives a nice stretch. Grate your cheese instead of using pre-shredded. Pre-shredded cheese has additives that can affect melting. Mix in a bit of cornstarch with the cheese to keep it from clumping. This trick helps the cheese stay smooth and creamy in your Chicken Alfredo stuffed garlic bread. For flavor, add a pinch of garlic powder and some Italian herbs. They boost the taste and make each bite delicious. A touch of cayenne pepper gives a nice kick. Fresh herbs like basil or oregano brighten the dish, making it even more special. Pair your Chicken Alfredo stuffed garlic bread with a crisp green salad. A simple side of mixed greens with a light vinaigrette works well. You can also serve it with roasted vegetables for a hearty meal. For a fun twist, try adding a side of marinara sauce for dipping. For presentation, serve the bread on a wooden board. It adds warmth and charm. Garnish with chopped parsley for a pop of color. You can slice the bread into pieces for easy sharing, making it a perfect party food. If your bread ends up soggy, try toasting it lightly before stuffing. This creates a barrier that helps keep the bread crisp. Make sure your Alfredo sauce isn't too watery. If it is, reduce it on the stove until thick. For cheese clumping, ensure your cheese is finely shredded. Mixing it with cornstarch before adding it to the sauce also helps. If you notice clumps while baking, stir the mixture well before stuffing. This simple fix can save your dish from a cheesy disaster. {{image_2}} You can easily change the filling in your Chicken Alfredo Stuffed Garlic Bread. - Vegetarian options: Swap the chicken for sautéed mushrooms, spinach, or artichokes. Add extra cheese for a rich taste. - Spicy chicken Alfredo: Use spicy chicken seasoning or add diced jalapeños. This packs a punch and makes it exciting. You can transform this dish into something new and fun. - Transforming the recipe into a casserole: Layer your chicken Alfredo mixture in a baking dish. Top it with garlic bread crumbs and bake until golden. This gives a crunchy top and is great for sharing. - Making mini stuffed breads for appetizers: Use small rolls instead of a large loaf. Stuff them with the same mixture. They are perfect for parties and easy to eat. Feel free to explore these variations to create your own perfect dish, based on the full recipe! To keep your Chicken Alfredo Stuffed Garlic Bread fresh, follow these steps: - Refrigeration guidelines: Store leftover stuffed garlic bread in an airtight container. It lasts up to 3 days in the fridge. Make sure it cools down first. This keeps it from getting soggy. - Freezing instructions: If you want to freeze it, wrap the bread tightly in plastic wrap. Then, place it in a freezer bag. It can stay frozen for up to 3 months. When you’re ready to eat, just thaw it in the fridge overnight. - Best methods for reheating stuffed garlic bread: The best way to reheat is in the oven. Preheat to 350°F (175°C). Place the bread on a baking sheet. Heat it for about 10-15 minutes. This restores the crispy crust. - Maintaining texture and flavor: If you use a microwave, the bread may get soft. To avoid this, place a damp paper towel over the bread. Heat in short bursts of 30 seconds. Check often to keep it from getting too hot. Enjoy your tasty leftovers! Can I make Chicken Alfredo Stuffed Garlic Bread ahead of time? Yes, you can prepare Chicken Alfredo Stuffed Garlic Bread in advance. Just make the filling and spread the garlic butter on the bread. Cover it tightly and store it in the fridge. Bake it when you're ready to eat. This saves time and keeps it fresh. What can I serve with Chicken Alfredo Stuffed Garlic Bread? You can pair it with a fresh green salad or a side of steamed veggies. A light tomato soup also works well. These sides balance the rich flavors of the stuffed bread. How long does it take to cook from frozen? If you freeze the stuffed bread, it takes about 25 to 30 minutes to bake. Preheat the oven to 375°F (190°C) and bake until golden and bubbly. This way, you enjoy a warm meal without much wait. Dietary considerations and ingredient modifications For dietary needs, you can use gluten-free bread. Also, consider dairy-free cheese and Alfredo sauce. These options help make this dish suitable for various diets. Can I substitute the bread type? Yes, feel free to use different bread types. French bread or ciabatta works well. Just pick a loaf that can hold the filling without breaking apart. This adds a fun twist to the classic recipe. For the full recipe, check out the details above. Enjoy your cooking! This blog post guided you through making Chicken Alfredo Stuffed Garlic Bread. We covered key ingredients, how to prep, assemble, and bake the dish. I shared valuable tips, like ingredient swaps and serving ideas. You can also explore variations, storage, and common questions to enhance your cooking. In my view, this recipe is a fun twist on classic flavors. Try it, share, and enjoy!

Chicken Alfredo Stuffed Garlic Bread Simple Delight

Are you ready for a dish that will wow your taste buds? Chicken Alfredo Stuffed Garlic Bread is a fun

To make Voodoo Fries, you need simple and tasty ingredients. Here’s the full list: - 4 large russet potatoes, cut into fries - 2 tablespoons olive oil - 1 teaspoon smoked paprika - 1 teaspoon garlic powder - 1 teaspoon onion powder - 1 teaspoon cayenne pepper (adjust to taste) - Salt to taste - 1 cup shredded pepper jack cheese - 1 jalapeño, sliced (optional for garnish) - ¼ cup sour cream - 2 tablespoons green onions, sliced - 1 tablespoon fresh cilantro, chopped You can swap russet potatoes for sweet potatoes for a healthier option. Olive oil can be replaced with canola oil or avocado oil if you prefer. If you want less spice, use less cayenne pepper or pick a milder cheese like mozzarella. For a creamier touch, substitute sour cream with Greek yogurt. This gives you a lighter feel but still keeps the taste. Feel free to mix and match to fit your taste! 1. Preheat the Oven: Start by preheating your oven to 425°F (220°C). This step is key for crispiness. 2. Prepare the Potatoes: Rinse the cut fries under cold water. This helps remove starch, making fries crispier. Pat them dry with a kitchen towel. 3. Season the Fries: In a large bowl, toss the fries with: - 2 tablespoons olive oil - 1 teaspoon smoked paprika - 1 teaspoon garlic powder - 1 teaspoon onion powder - 1 teaspoon cayenne pepper (adjust to taste) - Salt to taste Mix until the fries are evenly coated. This blend gives Voodoo Fries their unique flavor. 1. Spread the Fries: Lay the seasoned fries in a single layer on a baking sheet lined with parchment paper. Avoid stacking them to promote even cooking. 2. Bake for Crispiness: Bake for 30-35 minutes. Halfway through, flip the fries. This is crucial for getting that golden brown color. 1. Assemble the Voodoo Fries: After baking, take the fries out. Immediately sprinkle 1 cup shredded pepper jack cheese over them. Return to the oven for about 5 minutes. This melts the cheese perfectly. 2. Garnish for Presentation: While the cheese melts, prepare the toppings. Slice 1 jalapeño, chop 1 tablespoon fresh cilantro, and slice 2 tablespoons green onions. 3. Complete the Dish: Once the cheese is bubbly, take the fries out. Top with jalapeños, a drizzle of ¼ cup sour cream, green onions, and cilantro. Serve your Voodoo Fries hot for the best taste. For a fun touch, place them in a rustic bowl or on a colorful platter. To make great Voodoo Fries, start with the right technique. Use russet potatoes for the best texture. Cut them evenly so they cook uniformly. Rinse the fries to remove extra starch. This helps them crisp up nicely. After rinsing, dry them well with a towel. Toss the fries with olive oil and spices in a big bowl. Adjust the spice level to suit your taste. If you love heat, add more cayenne pepper. For a milder flavor, cut back on the cayenne. You can also try other spices like chili powder or cumin to mix things up. Getting the cheese to melt just right makes a big difference. After baking the fries, sprinkle the cheese on top while they are still hot. This helps the cheese melt perfectly. Bake for five more minutes to achieve that gooey texture. If you want to switch things up, try other cheese options. Cheddar adds a sharp flavor. Mozzarella gives a stretchy texture. You can even use a vegan cheese if you prefer. Use a sturdy baking sheet lined with parchment paper. This helps prevent sticking and makes cleanup easier. A large bowl is perfect for mixing the fries and spices. You'll want a good knife for cutting the potatoes. A cutting board is essential for safety. Consider a mandoline slicer for even fry sizes. This tool helps you cut the potatoes quickly and uniformly. A spatula is great for flipping the fries halfway through cooking. With the right tools, you can make your Voodoo Fries even better. Check out the Full Recipe for more tips! {{image_2}} You can customize Voodoo Fries with many tasty toppings. Try adding crispy bacon for a savory crunch. Guacamole adds a creamy touch and fresh flavor. Other great toppings include jalapeños, diced tomatoes, or even chili. Each choice boosts the flavor and texture. Mix and match to find your favorite combo! You can cook Voodoo Fries in different ways. Baking gives them a crispy texture without much oil. Frying makes them extra crunchy but uses more oil. If you have an air fryer, use it for a healthier option. The air fryer cooks the fries quickly and keeps them crispy. Whichever method you choose, the flavor stays amazing! Want to make this dish vegetarian? Swap out the cheese for a plant-based version. You can also use sweet potatoes for a twist. For a low-carb option, try using zucchini or eggplant instead of potatoes. These swaps keep the spirit of Voodoo Fries while fitting your diet. Enjoy experimenting with flavors and textures! To keep your Voodoo Fries fresh, store them in an airtight container. This helps prevent moisture and keeps them crispy. Let the fries cool to room temperature. Then, transfer them to the container and seal it tight. You can keep them in the fridge for up to three days. This way, you can enjoy those great flavors later! To reheat your fries and keep them crispy, use the oven. Preheat it to 400°F (200°C). Spread the fries on a baking sheet in a single layer. Heat them for about 10-15 minutes. This helps restore their crunch. If you prefer a quicker method, you can use the microwave, but they may turn soft. For the best results, the oven is your friend! If you want to freeze your Voodoo Fries, first, let them cool completely. Spread them out on a baking sheet in a single layer. Place the sheet in the freezer for about an hour. This prevents them from sticking together. Once frozen, transfer the fries to a freezer bag. They can last for up to three months. To enjoy, thaw them in the fridge overnight. Then reheat them in the oven for that crispy texture. Voodoo Fries are loaded fries with a spicy twist. They originated from Louisiana, where flavors mix. You can find them in many restaurants and food trucks. These fries often feature cheese, spices, and tasty toppings. Yes, you can prep Voodoo Fries ahead of time. Cut the potatoes and soak them in water. This keeps them crisp. Season the fries and store them in the fridge. Just remember to bake them fresh for the best taste. The spice level can vary in Voodoo Fries. Cayenne pepper adds heat, but you can adjust it. Use less cayenne for milder fries. You can also add more toppings like sour cream to cool it down. Enjoy the flavor! In this article, we broke down how to make Voodoo Fries from start to finish. We covered the ingredients, offered step-by-step baking instructions, and shared top tips for perfect fries. You learned about variations, storage info, and answered common questions. Voodoo Fries are fun and easy to make. They can be customized to fit your tastes. With the right techniques, you can enjoy these crispy fries anytime. Now it’s your turn to bring some spice and creativity into your kitchen!

Voodoo Fries Irresistible Flavor You Can’t Resist

Are you ready to dive into the world of Voodoo Fries? This dish bursts with flavors you won’t forget. Combining

To make Louisiana BBQ shrimp, you need some key items. Here’s the list: - 1 lb large shrimp, deveined and shell-on - 4 tablespoons unsalted butter - 4 tablespoons olive oil - 5 cloves garlic, minced - 1 tablespoon Cajun seasoning - 1 teaspoon smoked paprika - 1 teaspoon Worcestershire sauce - 1 teaspoon hot sauce - 1 tablespoon lemon juice - 1/4 cup chicken broth - 2 green onions, chopped (for garnish) - Fresh parsley, chopped (for garnish) - Crusty French bread (for serving) These ingredients work together to create a rich, flavorful dish. You can change this recipe to fit your taste. Here are some optional ideas: - Add diced bell peppers for crunch. - Toss in some chopped tomatoes for freshness. - Use different hot sauces for unique heat levels. - Substitute shrimp with chicken or fish for variety. These options allow you to make the dish your own. Having the right tools makes cooking easier. Here’s what I recommend: - A large skillet for cooking the shrimp. - A sharp knife for chopping and mincing. - A cutting board for safe prep. - Measuring spoons for accuracy. - Tongs for flipping the shrimp. - A spoon for stirring the sauce. With these tools, you will be ready to create a delicious meal. For the full recipe, check the details above. To start, gather your ingredients. Here’s what you need: - 1 lb large shrimp, deveined and shell-on - 4 tablespoons unsalted butter - 4 tablespoons olive oil - 5 cloves garlic, minced - 1 tablespoon Cajun seasoning - 1 teaspoon smoked paprika - 1 teaspoon Worcestershire sauce - 1 teaspoon hot sauce - 1 tablespoon lemon juice - 1/4 cup chicken broth - 2 green onions, chopped (for garnish) - Fresh parsley, chopped (for garnish) - Crusty French bread (for serving) Now, heat a large skillet over medium heat. Add the olive oil and butter. Let them melt until bubbly. This mix gives a great base for your shrimp. Next, toss in the minced garlic. Sauté for one minute. Watch closely, so the garlic does not burn. After that, stir in your Cajun seasoning, smoked paprika, Worcestershire sauce, and hot sauce. Let the spices bloom for about 30 seconds. This step makes the flavors pop! Then, add the shrimp. Arrange them in a single layer. Cook for 2-3 minutes on one side. When they turn pink, flip them over. Next, pour in the chicken broth and lemon juice. Reduce the heat slightly and let it simmer for 3-4 minutes. This allows the shrimp to soak up all the tasty sauce. Now, taste the mixture. If you want more heat, add a dash of hot sauce. Once the shrimp are cooked and curled, remove the skillet from heat. Top it off with chopped green onions and parsley. Serve this dish hot with crusty French bread. You’ll want to soak up all that delicious sauce! To cook shrimp perfectly, always use fresh shrimp. They taste best and have a nice texture. Avoid overcooking your shrimp. They cook quickly, so stay close. Once they turn pink and curl, they’re done. Using a meat thermometer can help too. Cook shrimp to an internal temperature of 120°F. This ensures they are tender and juicy. Louisiana BBQ shrimp pairs well with several sides. Here are a few ideas: - Crusty French bread (to soak up the sauce) - Steamed rice (to balance the flavors) - A fresh green salad (for a light touch) - Grilled vegetables (to add more color) These sides will elevate your meal and balance the bold flavors of the shrimp. Enjoy! When making Louisiana BBQ shrimp, seasoning is key. Start with the Cajun seasoning. This blend brings a warm kick. If you want to make your own, mix paprika, cayenne, garlic powder, and thyme. Use fresh garlic, as it adds a rich flavor. Don't rush the spices; let them bloom in the oil. This step enhances the taste. Taste your sauce before adding shrimp. Adjust the seasoning to suit your preference. Some like it hot, while others prefer mild. To adjust the spice level, add hot sauce slowly. Start with one teaspoon and taste. You can always add more if needed. If you want less heat, skip the hot sauce or use less Cajun seasoning. Lemon juice can help balance strong spices too. It adds brightness and cuts through heat. One common mistake is overcooking the shrimp. Shrimp cook fast. They turn pink in just a few minutes. Remove them from heat once they curl. Another mistake is using dull spices. Fresh spices give the best flavor. Store spices in a cool, dark place. Also, don’t skip the crusty French bread. It’s perfect for soaking up the sauce. Enjoy every last drop! {{image_2}} You can change the flavor by using different spice blends. If you want a milder taste, try a mix of garlic powder, onion powder, and thyme. For a bolder flavor, use extra cayenne pepper or even a dash of curry powder. Each blend gives the dish a unique twist. This makes it fun to experiment. You don’t have to stick to just the skillet. You can grill the shrimp for a smoky flavor! To do this, marinate the shrimp first and place them on skewers. Baking is also a great option. Simply spread the shrimp in a baking dish and pour the sauce over them. Bake at 375°F for about 15 minutes. Both methods create tasty results. Serve Louisiana BBQ shrimp with crusty French bread. The bread is perfect for soaking up that rich sauce. You can also pair it with rice for a filling meal. A fresh green salad or coleslaw works well too. These sides balance the dish and add a nice crunch. If you want a drink, a cold beer or sweet tea complements the shrimp perfectly. Enjoy your meal! After you enjoy your Louisiana BBQ shrimp, let any leftovers cool down. Place them in an airtight container. This helps keep them fresh. Store the container in the fridge. Use the leftovers within three days for the best taste. To reheat, I suggest using a skillet. Add a splash of chicken broth to the pan. Heat over medium heat. This keeps the shrimp moist and flavorful. Stir gently until the shrimp are warm. Avoid using the microwave if you can. It tends to make shrimp rubbery. If you want to save your shrimp for later, freezing works well. First, cool the shrimp completely. Then, place them in a freezer-safe bag. Squeeze out as much air as possible before sealing. They can last up to three months in the freezer. When ready to eat, thaw in the fridge overnight before reheating. This keeps the texture nice and tender. Louisiana BBQ Shrimp comes from New Orleans. It mixes Cajun and Creole styles. The dish has roots in coastal cooking. Chefs made it using shrimp and spices they had. It is not grilled, despite the name. Instead, it is cooked in a rich sauce. The sauce often has butter, garlic, and spices. This dish shows the bold flavors of Louisiana. Yes, you can use peeled shrimp. However, shell-on shrimp adds flavor. The shells hold in the juices. If you remove them, you may miss some taste. If you prefer peeled shrimp, use them in the recipe. Just adjust cooking time to avoid overcooking. Cook them until they turn pink. Some top spots for this dish include: - Casamento's: Known for its fresh seafood. - Mr. B's Bistro: A classic choice with great sauce. - The Olde Nola Cookery: Offers a unique twist on the dish. Each place has its own take on Louisiana BBQ Shrimp. Trying different spots can be fun and tasty. To make a vegetarian version, use mushrooms instead of shrimp. Mushrooms have a great texture and soak up flavors well. Use the same spices and sauce from the original recipe. You may also add veggies like bell peppers or zucchini. Cook them until tender, then serve with crusty bread. The full recipe for Louisiana BBQ Shrimp takes about 25 minutes. You need just 10 minutes to prep. This recipe serves four people. Enjoy the rich flavors and aromas as you cook. The ingredients include: - 1 lb large shrimp, deveined and shell-on - 4 tablespoons unsalted butter - 4 tablespoons olive oil - 5 cloves garlic, minced - 1 tablespoon Cajun seasoning - 1 teaspoon smoked paprika - 1 teaspoon Worcestershire sauce - 1 teaspoon hot sauce - 1 tablespoon lemon juice - 1/4 cup chicken broth - 2 green onions, chopped - Fresh parsley, chopped - Crusty French bread for serving This dish is delicious and simple to make! In this blog post, we explored the essential ingredients and tools to perfect Louisiana BBQ Shrimp. You learned the preparation steps, tips for tender shrimp, and common mistakes to avoid. We also discussed variations and how to store leftovers. As you cook, remember to have fun and get creative. Adjust flavors to suit your taste. The joy of cooking lies in experimenting, so dive in and enjoy every bite of your delicious shrimp dish!

Louisiana BBQ Shrimp Delightful and Easy Recipe

Are you ready to spice up your dinner table? Louisiana BBQ Shrimp is a rich, flavorful dish that’s surprisingly easy

Older posts
Newer posts
← Previous Page1 … Page50 Page51 Page52 … Page63 Next →

dsad

© 2025 easycookingbite • Built with GeneratePress

Our Policies

  • Copyright Policy
  • Cookie Policy
  • GDPR Policy
  • Privacy Policy
  • Disclaimer
  • Terms Of Use

More Information

  • Home
  • About
  • Contact
  • Appetizers
  • Dessert
  • Dinner
  • Drinks
©2025, easycookingbite About Back To Top