Skip to content
DisclaimerTerms Of UseGDPR PolicyCookie Policy

easycookingbite

  • Home
  • Drinks
  • Appetizers
  • Dinner
  • Dessert
  • About
  • Contact
  • Privacy Policy
DisclaimerTerms Of UseGDPR PolicyCookie Policy

Lily

- 4 medium ripe tomatoes - 2 tablespoons olive oil - Salt and black pepper - 1 teaspoon dried oregano - 4 slices of rustic whole-grain bread - 1 cup fresh baby spinach - 1 avocado - 1 tablespoon balsamic glaze (optional) - 1/2 cup raw cashews (soaked) - 1 clove garlic - 2 tablespoons lemon juice - 1 tablespoon olive oil - Salt to taste - Water for consistency When I make roasted tomato sandwiches with vegan aioli, I focus on fresh, high-quality ingredients. The tomatoes are the star. I prefer medium ripe tomatoes for their sweet taste. They roast beautifully and become juicy. I drizzle the tomatoes with olive oil, then season them with salt and black pepper. Dried oregano adds a nice earthy flavor. I roast them until they are tender and slightly caramelized. This takes about 25 to 30 minutes in a preheated oven. While the tomatoes roast, I prepare the vegan aioli. Soaked cashews create the creamy base. I blend the cashews with garlic, lemon juice, and olive oil. This mix is smooth and delicious. I add salt and a little water to reach the right thickness. For the bread, I use rustic whole-grain. It has a hearty texture that holds all the toppings well. After toasting the bread, I layer it with fresh baby spinach, roasted tomatoes, and sliced avocado. A drizzle of balsamic glaze gives a sweet touch. You can find the full recipe for these delightful sandwiches in the section above. Enjoy each bite of this vibrant meal! - Set your oven to 400°F (200°C). This temperature helps to roast the tomatoes perfectly. - Cut your tomatoes in half and place them cut side up on a baking sheet. - Drizzle 2 tablespoons of olive oil over them. - Sprinkle some salt, black pepper, and 1 teaspoon of dried oregano on top. - Roast them for about 25 to 30 minutes. They should be tender and slightly caramelized. - While the tomatoes roast, drain and rinse 1/2 cup of soaked cashews. - In a blender, add the cashews, 1 clove of garlic, 2 tablespoons of lemon juice, and 1 tablespoon of olive oil. - Blend all the ingredients until smooth. Add water if needed to reach a creamy consistency. - Taste and adjust the salt as needed. - After roasting the tomatoes, toast 4 slices of rustic whole-grain bread until golden brown. - You can use the oven or a toaster for this step. - Spread a thick layer of vegan aioli on one side of each slice of toast. - On two slices, add a handful of fresh baby spinach, the roasted tomatoes, and avocado slices. - If you want, drizzle a bit of balsamic glaze over the tomatoes for extra flavor. - Place the other slices of bread on top to create a sandwich. - Slice in half and serve warm. This simple yet tasty recipe will delight your taste buds. Check out the full recipe for more details! Choose the right tomatoes for great flavor. Look for medium ripe tomatoes. They should feel firm but slightly soft. This balance gives you a sweet taste when roasted. Heirloom tomatoes are a great option, too, as they add a rich flavor. Always roast them cut side up. This helps keep their juices in, making them even tastier. For the vegan aioli, soak your cashews for two hours. This makes them soft and easy to blend. Start with one clove of garlic for flavor. You can adjust the taste by adding more garlic if you like. When blending, add water little by little. This helps you reach the perfect creamy texture. Taste it while blending to make sure it fits your needs. Pair your roasted tomato sandwiches with sides for a full meal. A fresh garden salad goes well with this dish. You can also serve it with crunchy chips or sweet potato fries. These sides add nice textures and flavors to your meal. Don't forget to include a drink! A cool lemonade or iced tea complements these sandwiches perfectly. Check out the Full Recipe to explore more about this delightful dish! {{image_2}} You can add many tasty ingredients to your roasted tomato sandwiches. Here are a few ideas: - Fresh sprouts: They add a nice crunch and flavor. - Basil or cilantro: These herbs brighten the sandwich. - Red onion slices: They give a sharp taste that pairs well. - Pickled jalapeños: For those who love some heat. - Sliced cucumbers: They add a refreshing touch. Feel free to mix and match these toppings based on your taste. Each addition can change the flavor and texture. If you need a gluten-free option, choose bread made from gluten-free grains. Here are some great choices: - Rice bread: It has a soft texture and works well. - Corn tortillas: They can be used for a wrap style. - Chickpea flour bread: It offers a hearty bite. These alternatives maintain a good texture and flavor. They let you enjoy the sandwich without gluten. To elevate the taste of your roasted tomato sandwich, consider adding some extra spices or sauces. Here are some suggestions: - Smoked paprika: This spice adds a smoky flavor. - Red pepper flakes: A pinch of these can boost heat. - Vegan pesto: Spread it on the bread for a fresh twist. - Hummus: This spreads easily and adds creaminess. Experiment with these enhancements to find your perfect flavor. Each one brings something unique and delicious to the table. To keep your leftover sandwiches fresh, wrap them tightly in plastic wrap. You can also use a container with a lid. Store them in the fridge for up to two days. When ready to eat, reheat them in the oven at 350°F (175°C) for about 10 minutes. This warms the bread and keeps it crispy. To store roasted tomatoes, let them cool completely. Place them in an airtight container. Add a drizzle of olive oil to help preserve their moisture. They can last in the fridge for up to a week. If you want to keep them longer, freeze them in a single layer on a baking sheet. Once frozen, transfer them to a freezer bag. They will stay good for up to three months. Vegan aioli can be stored in the fridge for up to five days. Keep it in a sealed jar or container. If it thickens, add a little water or lemon juice to adjust the texture. For long-term storage, consider freezing the aioli in ice cube trays. Once frozen, transfer the cubes to a bag. They will last for about three months. Yes, you can use different types of tomatoes for this recipe. Each type gives a unique taste. For instance, beefsteak tomatoes are juicy and sweet. Roma tomatoes are firmer and great for roasting. Cherry tomatoes are small and burst with flavor. Feel free to mix them up! To make the aioli nut-free, swap cashews with silken tofu. Tofu blends smoothly and keeps the aioli creamy. You can also use sunflower seeds, which work well too. Just soak them before blending for the best texture. These sandwiches pair well with many sides. Try serving them with a fresh garden salad. Crispy potato chips or sweet potato fries are also great choices. For drinks, a chilled lemonade or iced tea will complement the flavors nicely. You can prep components ahead for easy assembly later. Roast the tomatoes and store them in the fridge. Make the vegan aioli and keep it in an airtight container. You can even toast the bread just before serving for a crunchy bite. This blog post guides you through making a delicious sandwich featuring roasted tomatoes and vegan aioli. We covered key ingredients, step-by-step instructions, tips for perfecting each part, and storage information. You now have the tools to create a flavorful meal. Enjoy customizing your sandwich with different toppings or flavors. Remember, cooking is about experimenting and having fun. Dive in, and make this recipe your own!

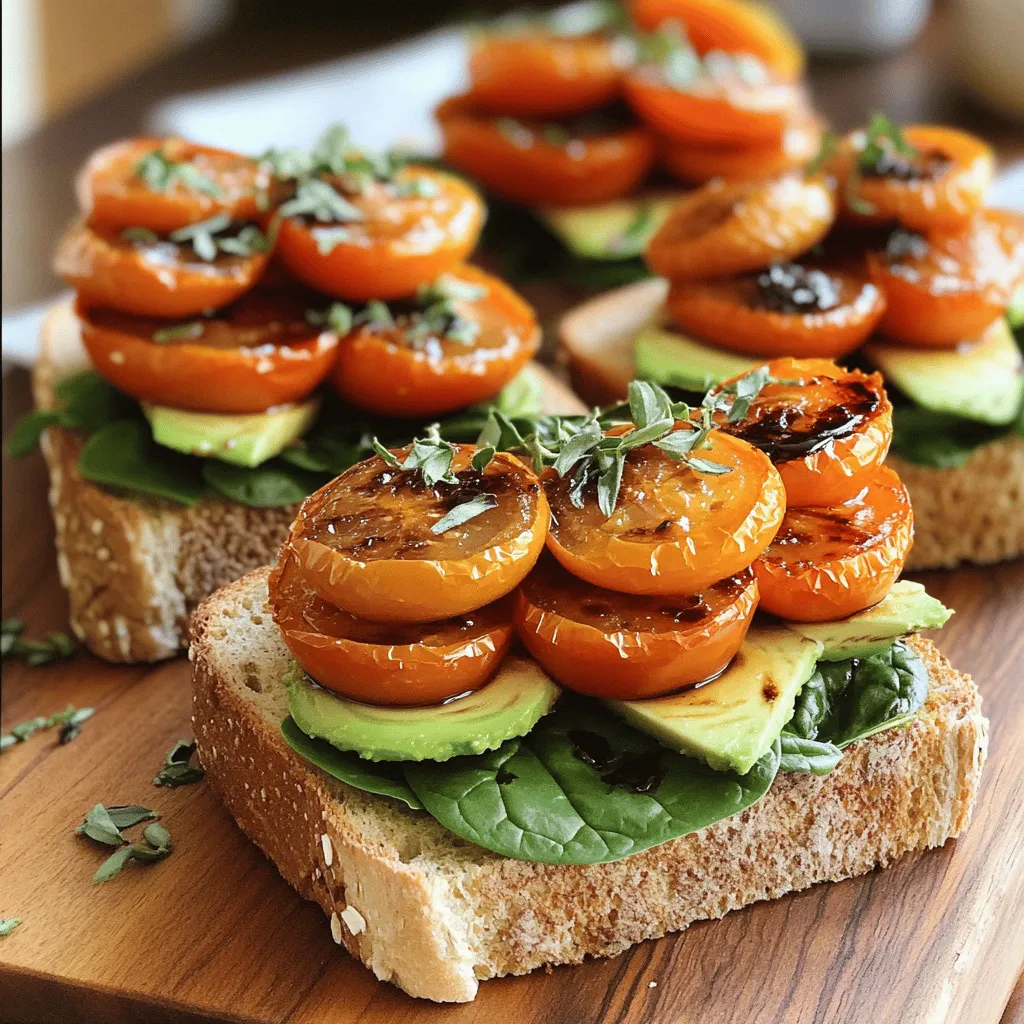
Roasted Tomato Sandwiches with Vegan Aioli Delight

If you love fresh, bold flavors, you’re in for a treat! My Roasted Tomato Sandwiches with Vegan Aioli are a

- 1 lb flank steak, thinly sliced against the grain - 1 cup fresh spinach leaves - 1 red bell pepper, sliced into thin strips - ½ cup feta cheese, crumbled The flank steak is the star here. It’s lean and tender, which makes it perfect for rolling. Fresh spinach adds a nice crunch and color. The red bell pepper gives sweetness and a lovely crunch. Feta cheese brings a creamy contrast to the dish. - 3 tablespoons balsamic vinegar - 2 tablespoons olive oil - 2 cloves garlic, minced - 1 teaspoon dried oregano The marinade is key for flavor. Balsamic vinegar gives a rich sweetness. Olive oil adds moisture and helps the spices stick. Garlic brings a punch of flavor, while oregano adds a hint of earthiness. - Salt and black pepper to taste - Toothpicks or kitchen twine for securing Don’t forget salt and pepper! They enhance all the flavors. You’ll need toothpicks or kitchen twine to keep your rolls tight while cooking. This helps keep the filling inside and makes for a perfect bite every time! For the full instructions on how to make these delicious steak rolls, check out the Full Recipe. To start, you need to mix the marinade. In a bowl, whisk together: - 3 tablespoons balsamic vinegar - 2 tablespoons olive oil - 2 cloves garlic, minced - 1 teaspoon dried oregano - Salt and black pepper to taste Once mixed, add the sliced flank steak to the bowl. Make sure each piece is well coated in the marinade. Let this sit for at least 30 minutes. This adds great flavor and helps tenderize the meat. While the steak marinates, prepare the filling. In a separate bowl, combine: - 1 cup fresh spinach leaves - 1 red bell pepper, sliced into thin strips - ½ cup feta cheese, crumbled Mix these ingredients well. The spinach adds color and freshness. The feta brings a creamy, tangy taste that works well with the steak. Now it’s time to assemble the rolls. Preheat your grill or grill pan over medium-high heat. Remove the steak from the marinade, but save that marinade for later. Lay the steak slices flat on a clean surface. Take about a tablespoon of the filling mixture and place it at one end of each steak slice. Roll the steak tightly around the filling. Secure each roll with a toothpick or kitchen twine. This keeps everything inside during cooking. Place the rolls on the preheated grill. Cook for about 4-5 minutes on each side for medium-rare. Brush the reserved marinade on the rolls during the last minutes of cooking for extra flavor. After cooking, let the rolls rest for about 5 minutes. Then, carefully remove the toothpicks. Slice the rolls into bite-sized pieces. Drizzle any remaining balsamic glaze on top if you like. Check out the Full Recipe for complete details! To achieve the perfect doneness for your steak rolls, use a meat thermometer. Aim for 130°F for medium-rare. Cook the rolls for about 4-5 minutes on each side. This gives you a nice sear while keeping the inside juicy. Securely wrapping your steak rolls is key. Lay a slice of steak flat on a clean surface. Place the filling at one end. Then, roll it tightly. Use a toothpick or kitchen twine to hold it together. This keeps all the tasty filling inside while cooking. When serving your steak rolls, a wooden platter looks great. It gives a rustic feel. Garnish with fresh herbs like parsley or basil. A drizzle of balsamic glaze adds a nice touch. You can also serve with roasted vegetables or a light salad. This makes a complete meal that looks beautiful on the table. Want to spice things up? You can add extra flavors to your marinade. Try adding a pinch of red pepper flakes for heat. Smoked paprika gives a nice depth. You can also mix in some fresh herbs like thyme or rosemary. These spices can make your steak rolls even more exciting. Experiment to find your favorite mix! For the full recipe, check the section above. {{image_2}} You can change the filling in your steak rolls. Try using different vegetables or cheeses. For example, swap spinach for kale or arugula. You can use roasted mushrooms instead of bell peppers for a rich flavor. Goat cheese can replace feta if you like a tangy kick. These swaps can make each meal unique and exciting. You can cook these steak rolls in different ways. The grill gives a great smoky flavor. If you don’t have a grill, you can use a grill pan or even bake them in the oven. To bake, preheat your oven to 400°F. Place the rolls in a baking dish and brush with extra marinade. Bake for about 20 minutes or until cooked through. If you need gluten-free options, check your marinade ingredients. Most balsamic vinegar is gluten-free, but always read labels. You can also make these rolls low-carb by skipping the cheese or using zucchini strips instead of steak. This keeps the dish light and healthy while still tasting great. For the complete dish, try the Full Recipe to explore more! To keep your Balsamic Glazed Steak Rolls fresh, let them cool first. Place them in an airtight container. This helps to lock in moisture and flavor. Store the container in the fridge. They will stay good for about three days. When you’re ready to eat the leftovers, choose the right method. The best way is to use a skillet. Heat it over medium heat and add a splash of water. This adds steam and keeps the rolls juicy. Cook for about 5 minutes, turning them gently. You can also use a microwave, but be careful. Heat them in short bursts to avoid drying out the meat. Want to save some for later? You can freeze Balsamic Glazed Steak Rolls. First, wrap each roll in plastic wrap. Then, place them in a freezer-safe bag. Be sure to remove as much air as you can. These rolls can last up to three months in the freezer. When you're ready to eat, thaw them in the fridge overnight before reheating. Enjoy your flavorful meal anytime! For Balsamic Glazed Steak Rolls, flank steak is the best choice. It is thin and flavorful. Other good cuts include sirloin and skirt steak. These options also work well for rolling. If you prefer a tender cut, consider using ribeye. Ribeye adds rich flavor, but it can be pricier. Always choose a cut that you enjoy. Yes, you can prepare these rolls ahead of time. Marinate the steak and prepare the filling. Store them separately in the fridge. You can assemble the rolls just before cooking. This saves time and makes cooking easier. If stored properly, they can last for up to two days in the fridge. Just remember to let the steak sit at room temperature for about 15 minutes before grilling. Marinate the steak for at least 30 minutes. This time allows the flavors to sink in. If you have more time, marinating for up to two hours enhances the taste. Avoid marinating too long, as it can change the texture. A well-timed marination brings out the best in your steak. For the full recipe, check out the cooking instructions above! Balsamic glazed steak rolls are a tasty dish made with simple ingredients. We covered the main items like flank steak, spinach, bell pepper, and feta. The marinade of balsamic vinegar, olive oil, garlic, and oregano gives great flavor. I shared tips on cooking, presenting, and even variations you can try. These rolls are easy to make and fun to customize. Enjoying them will make your meal special. Cook, share, and savor every bite.

Balsamic Glazed Steak Rolls Flavorful and Simple Dish

Looking for a tasty dish that’s easy to make? Try my Balsamic Glazed Steak Rolls! They pack bold flavor from

For this dish, you need 1 pound of fresh sea scallops. They should be patted dry. This helps create a nice, golden crust when you cook them. Fresh scallops are sweet and tender. Look for scallops that feel firm to the touch and smell like the ocean. You will need 2 tablespoons of olive oil and 1 tablespoon of unsalted butter. Olive oil adds flavor and helps with searing. The butter gives a rich taste to the sauce. Use a mix of both for the best result. Heat them in a skillet until shimmering, which means they are hot enough for cooking. Season the scallops with salt and freshly ground black pepper to taste. This simple seasoning really brings out the natural sweetness. For the sauce, you will also need 2 minced garlic cloves, 1 tablespoon of rinsed and drained capers, and the juice and zest of 1 lemon. Finally, add 1 tablespoon of chopped fresh parsley for color and freshness. All these ingredients combined create a bright and zesty flavor that pairs perfectly with the scallops. For the full recipe, check the details above. First, take your fresh sea scallops. Make sure they are patted dry. This helps them sear better. Season both sides with salt and black pepper. Use just enough to enhance the flavor without overpowering it. Set them aside while you prepare your pan. Heat 2 tablespoons of olive oil in a large skillet. Use medium-high heat until the oil shimmers. Carefully place the scallops in the skillet. Be sure to space them out. This avoids overcrowding. Sear them for about 2-3 minutes on each side. Look for a golden brown color. They should be opaque in the center. Once cooked, remove the scallops and set them aside on a warm plate. In the same skillet, reduce the heat to medium. Add 1 tablespoon of unsalted butter and let it melt. Scrape up any brown bits from the bottom of the pan. This adds flavor. Add 2 minced garlic cloves and sauté for about 30 seconds. You want it fragrant but not burnt. Stir in 1 tablespoon of rinsed and drained capers, the juice, and zest of 1 lemon. Cook for an additional minute to meld the flavors. Remove the skillet from heat and stir in 1 tablespoon of chopped fresh parsley. Finally, return the scallops to the skillet, coating them gently in the sauce. Serve immediately with the lemon caper sauce drizzled over. For a full recipe, check the section above. To get a nice crust on scallops, start with dry scallops. If they are wet, they won't sear well. Season both sides with salt and pepper. Heat olive oil in your skillet until it shimmers. Place scallops in the pan without crowding them. This helps them brown evenly. Sear for 2-3 minutes per side. Look for a golden-brown color. Remove them once they are opaque in the center. This gives you the best texture. For a great sauce, use fresh ingredients. Fresh garlic adds a strong flavor. Saute it until fragrant but not burnt. The capers bring a salty bite, which contrasts nicely with the lemon. Use both lemon juice and zest for depth. The zest adds brightness and aroma. Stir everything together in the skillet after cooking the scallops. This blends the flavors well. Plating is key for impressing guests. Place scallops in a circular pattern on the plate. Drizzle the lemon caper sauce over them. This creates a beautiful look. Add a sprinkle of parsley for color. A lemon wedge on the side adds flair. It makes the dish pop. For more details on the complete method, check the Full Recipe. {{image_2}} You can make your dish even better by adding vegetables. I love pairing scallops with asparagus. Just sauté the asparagus in the same pan after cooking the scallops. You can also add peas or spinach for a pop of color. Serve the scallops on a bed of sautéed greens for a fresh touch. If you want a heartier side, try roasted potatoes or quinoa. Both options go well with the sauce and add texture. If you want to change things up, you can try different sauces. A garlic butter sauce is rich and tasty. Simply melt butter and add minced garlic, then pour it over the scallops. Another option is a creamy dill sauce. Mix sour cream, dill, and lemon juice for a tangy flavor. For a spicy kick, consider a chipotle sauce made with mayonnaise and chipotle peppers. Each sauce gives a new twist to the dish. You don’t have to stick to just pan-searing. Grilling scallops adds a nice smoky flavor. Preheat your grill and cook the scallops for about 2-3 minutes on each side. You can also bake them. Place the seasoned scallops in a baking dish and drizzle with olive oil. Bake at 400°F for about 10 minutes. Both methods keep the scallops tender while adding unique flavors. You can explore these cooking styles with the full recipe for pan-seared scallops with lemon caper sauce. Store leftover scallops in an airtight container. Place them in the fridge within two hours of cooking. They stay fresh for up to two days. Make sure to keep the lemon caper sauce separate if you can. This helps keep the scallops from getting soggy. Reheat scallops gently to avoid overcooking. Use a skillet over low heat. Add a splash of olive oil or water to help keep them moist. Heat for about two to three minutes until warm. You can also use a microwave, but do it in short bursts. Check often to ensure they don't overcook. You can freeze scallops if you need to. Wrap them tightly in plastic wrap or foil. Place them in a freezer bag to prevent freezer burn. The lemon caper sauce can also be frozen. Store it in a separate container. They will last up to three months in the freezer. Thaw them in the fridge before reheating for the best taste. For the complete cooking process and tips, check the Full Recipe for Pan Seared Scallops with Lemon Caper Sauce. You can tell when scallops are cooked by their color and texture. They should turn golden brown on the outside and opaque in the center. If they feel firm but slightly springy when pressed, they are ready. The cooking time is usually 2-3 minutes on each side. When they are done, they should no longer be translucent. Yes, you can use frozen scallops for this recipe. Make sure to thaw them properly first. Place them in the fridge overnight or run them under cold water. Pat them dry well before cooking. This step helps them sear better and prevents excess water in the pan. If you don't have capers, you can use green olives as a substitute. Chop them finely to mimic the flavor and texture of capers. Another option is to use pickles, which can also add a tangy flavor. Adjust the amount based on your taste preference. For more ideas, check out the Full Recipe. You now know how to cook fresh sea scallops and make a tasty lemon caper sauce. We covered all the steps, from picking the right ingredients to perfect plating. You can even try different flavors and techniques. Remember, the key to great scallops is in the sear. Follow my tips for best results. Enjoy your meal, and don't be afraid to experiment with new sides and sauces! Your scallop dish can impress anyone.

Pan Seared Scallops with Lemon Caper Sauce Delight

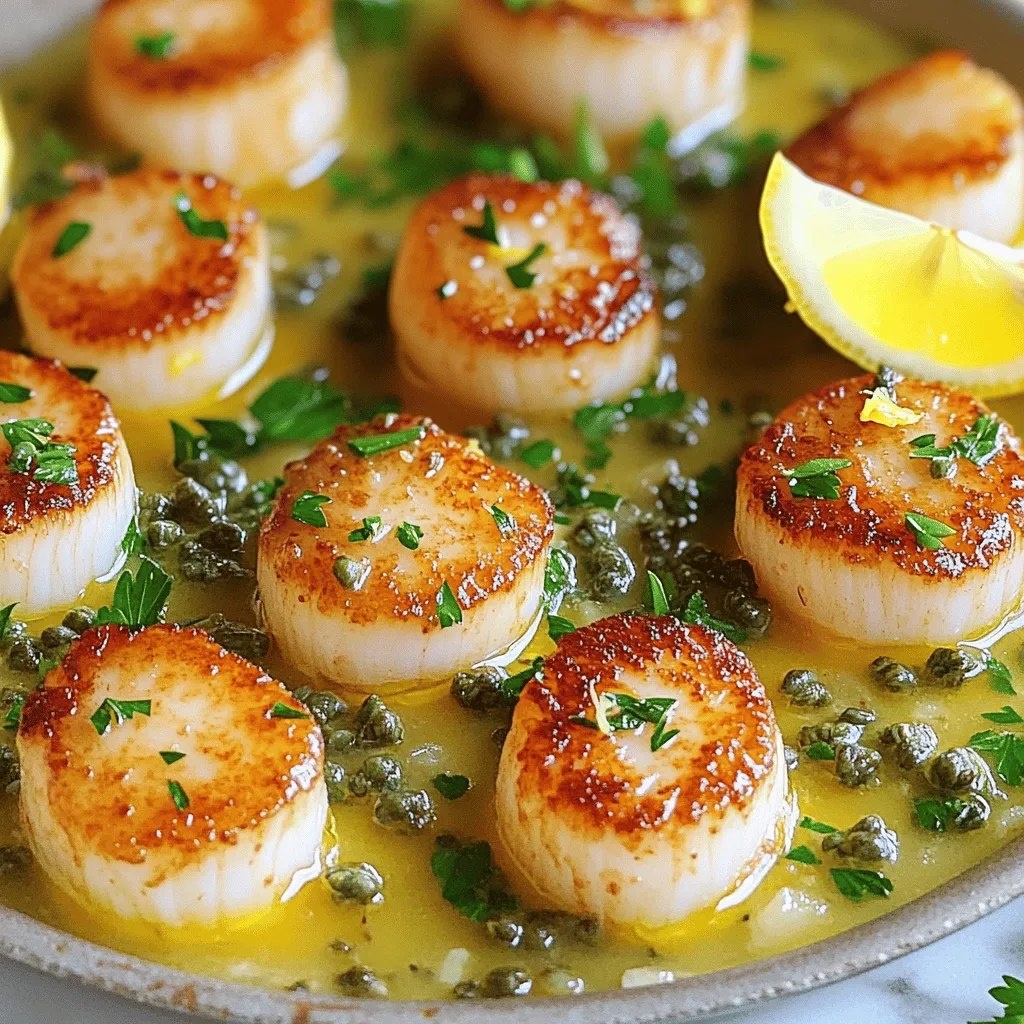
Welcome to my guide on making Pan Seared Scallops with Lemon Caper Sauce! If you love seafood, scallops are a

- 2 cups penne pasta - 1 lb chicken breast, diced - 2 tablespoons olive oil - 1 teaspoon garlic powder - 1 teaspoon onion powder - Salt and pepper to taste - 1 cup heavy cream - 1/2 cup ranch dressing - 1/2 cup grated Parmesan cheese - 1 cup cherry tomatoes, halved - 1/4 cup chopped fresh parsley To make creamy chicken ranch pasta, you need these key ingredients. The penne pasta serves as the perfect base for this dish. I love using chicken breast because it cooks quickly and stays juicy. The olive oil adds richness to the chicken. Garlic powder and onion powder enhance the flavor without extra steps. The heavy cream and ranch dressing create the delicious sauce. The Parmesan cheese adds a nice cheesy flavor. I often toss in cherry tomatoes for a fresh burst of flavor. Finally, fresh parsley brightens the dish and adds color. - Additional seasonings (e.g., Italian herbs) - Extra vegetables (e.g., spinach, bell peppers) If you're feeling adventurous, you can add optional ingredients. Italian herbs can give a nice twist. Extra veggies like spinach or bell peppers add nutrition and color to the dish. Customize it to fit your taste! You can find the full recipe in the main article. To cook penne pasta perfectly, start by boiling water in a large pot. Add a pinch of salt to the water. Once the water is boiling, add the penne. Cook it according to the package instructions, usually around 8-10 minutes. Stir occasionally to prevent sticking. When it's done, drain the pasta but save 1/2 cup of the pasta water. This water is starchy and helps the sauce stick later. For juicy chicken, heat 2 tablespoons of olive oil in a large skillet over medium heat. Add 1 pound of diced chicken breast. Sprinkle it with 1 teaspoon of garlic powder, 1 teaspoon of onion powder, and some salt and pepper. Sauté the chicken for about 6-8 minutes. Cook it until it turns golden brown and is no longer pink in the center. This step adds great flavor and keeps the chicken moist. To prepare a creamy ranch sauce, pour 1 cup of heavy cream and 1/2 cup of ranch dressing into the skillet with the chicken. Stir well and bring it to a gentle simmer. Gradually mix in 1/2 cup of grated Parmesan cheese. This cheese makes the sauce thick and creamy. If the sauce is too thick, add some of the reserved pasta water to reach your desired consistency. When combining the pasta with the sauce, gently fold the cooked penne into the creamy chicken ranch sauce. This method is better than mixing, as it helps keep the pasta intact. Next, add 1 cup of halved cherry tomatoes for a pop of color and taste. Mix until just combined. Finally, garnish with 1/4 cup of chopped fresh parsley. This adds freshness and a vibrant look to your dish. - Prepping ingredients ahead of time: Chop your chicken and veggies the night before. This makes cooking faster. You can also measure out spices in small bowls. - One-pan cooking for easy cleanup: Use a large skillet for everything. You cook the chicken, make the sauce, and mix in the pasta all in one place. This saves you time on washing dishes. - Suggestions for additional spices and herbs: Try adding Italian seasoning or crushed red pepper for a kick. Fresh basil or oregano can also brighten the dish. - Tips on adjusting the consistency of the sauce: If your sauce is too thick, add a splash of the reserved pasta water. This helps it coat the pasta better. You want a creamy texture that clings to every bite. - Ideas for complementary sides: A simple side salad with greens and tomatoes pairs well. Garlic bread also makes a great side. - Best dishes to pair with creamy chicken ranch pasta: Serve with a light white wine, like Pinot Grigio, for a lovely balance. You can also have it with a chilled lemonade for a refreshing twist. For the full recipe, check the [Full Recipe] section. {{image_2}} You can switch up the protein in your creamy chicken ranch pasta. Try using turkey instead of chicken for a leaner option. Shrimp adds a nice seafood twist and cooks quickly. If you prefer plant-based meals, tofu works well too. Just be sure to press the tofu to remove excess water. For a meatless version, add extra veggies like bell peppers and spinach. These options keep the dish flavorful and fun. For those who want a vegan option, look for plant-based ranch dressing. Many brands make tasty vegan ranch that fits right in. You can also change the cheese. Use dairy-free cheese or a mix of nutritional yeast for a cheesy flavor. Mixing in cream cheese adds a rich texture too. This way, you can enjoy creamy chicken ranch pasta that meets different diets. Pasta shapes can change the whole dish. While penne is great, try rotini or farfalle for fun twists. These shapes catch the sauce beautifully. If you need gluten-free options, look for brown rice or quinoa pasta. These pastas have good flavor and texture. They make it easy to enjoy creamy chicken ranch pasta without gluten. For more details on making this dish, visit the [Full Recipe]. To keep your creamy chicken ranch pasta fresh, store it in an airtight container. Make sure it cools to room temperature before sealing. This way, you avoid condensation, which can make it soggy. In the fridge, your pasta dish lasts about 3 to 4 days. Always check for signs of spoilage, like off smells or discoloration, before eating leftovers. You can freeze creamy chicken ranch pasta, but there are some key points to know. Cream-based dishes can change texture when frozen. To freeze, place the pasta in a freezer-safe container, leaving some space at the top for expansion. It stays good in the freezer for about 2 to 3 months. When you're ready to eat, thaw the pasta overnight in the fridge. Reheat it gently on the stove or in the microwave. If the sauce seems thick, add a splash of milk or broth to loosen it up. This keeps the pasta creamy and delicious! To make this dish gluten-free, substitute regular pasta with gluten-free penne. Many brands offer great options. You can also check the ranch dressing label. Some dressings contain gluten. Choose a gluten-free ranch dressing to keep the flavors intact. Yes, you can prep this dish ahead of time. Cook the pasta and chicken in advance. Store them separately in the fridge. When you're ready to eat, mix them with the sauce. This method keeps everything fresh and tasty. If you want a change, try other dressings. Caesar dressing adds a nice twist. You can also make your own ranch with yogurt, herbs, and spices. This gives you control over flavors and health benefits. Absolutely! Kids love creamy textures and flavors. To make it even more appealing, cut the chicken into smaller pieces. You can also add fun shapes of pasta, which kids enjoy. If the dish feels too rich, add a splash of lemon juice. You can also stir in some fresh spinach or arugula. These add a nice touch of acidity and freshness to the meal. Yes, you can! For a slow cooker version, add your raw chicken, pasta, and sauce ingredients. Cook on low for 4-6 hours. Stir in cheese at the end for a creamy finish. This method is easy and keeps everything tender. For the full recipe, check out the details above! We discussed how to make creamy chicken ranch pasta, covering required and optional ingredients. I shared step-by-step instructions, tips for flavor, and storage methods. You learned how to customize this dish with different proteins and sauces while ensuring it remains delicious. This meal is easy to prepare and great for any occasion. You can enjoy cooking and impress your family with this tasty recipe. Now, dive into your kitchen and create this dish!

Creamy Chicken Ranch Pasta Tasty and Easy Recipe

Are you ready to dive into a creamy, savory delight? My Creamy Chicken Ranch Pasta recipe is not just tasty

To make cinnamon sugar pecans, gather these ingredients: - 2 cups pecan halves - 1/2 cup granulated sugar - 1 teaspoon ground cinnamon - 1/4 teaspoon salt - 1 egg white - 1/2 teaspoon vanilla extract - 1 tablespoon water These simple ingredients blend well to create a tasty snack. You can customize your pecans with these fun add-ins: - A pinch of cayenne for heat - Chopped nuts for extra crunch - A splash of maple syrup for sweetness - A sprinkle of cocoa powder for a chocolate twist These options can add different flavors and textures to your recipe. Accurate measuring is key for the best results. Here are some tips: - Use dry measuring cups for sugar and nuts. - Use a liquid measuring cup for water and egg whites. - Level off dry ingredients with a straight edge. - Check your spice measurements carefully for balance. Getting these amounts right helps ensure your pecans taste perfect! For the full recipe, check out the main article. Start by gathering all your ingredients. You will need: - 2 cups pecan halves - 1/2 cup granulated sugar - 1 teaspoon ground cinnamon - 1/4 teaspoon salt - 1 egg white - 1/2 teaspoon vanilla extract - 1 tablespoon water Make sure everything is ready before you begin. Preheating the oven is the first step. Set it to 350°F (175°C). Line your baking sheet with parchment paper. This makes cleaning up much easier. In a medium bowl, mix the sugar, cinnamon, and salt. Set this bowl aside for later. Now, in a large bowl, whisk the egg white. Add the vanilla extract and water. You want the mixture to be frothy. Next, toss the pecan halves into the egg white mixture. Make sure they are well-coated. This helps the sugar stick. After that, sprinkle the sugar mixture over the pecans. Toss again to coat them evenly. Spread the pecans on the lined baking sheet. Make sure they are in a single layer. Bake them in the oven for 15 to 20 minutes. Stir them every 5 minutes. Keep an eye on them to avoid burning. When the pecans are done baking, take the sheet out of the oven. Let them cool for about 10 minutes. They will get harder as they cool. If you see any clusters, break them apart. Once they are cool, store the pecans in an airtight container. They can last up to 2 weeks at room temperature. For the full recipe, check the previous section. Enjoy your tasty snack! To get the best cinnamon sugar pecans, you need a good coating. First, whisk your egg white well. It should look frothy. This frothiness helps the sugar mix stick to the pecans. After mixing the pecans in the egg white, sprinkle the sugar mixture over them. Toss gently to cover every piece. Each pecan should be shiny and sweet. One common mistake is not mixing the egg white enough. If it’s not frothy, the coating won’t stick. Another mistake is to skip tossing the pecans. If you don’t coat them well, some pecans will not have enough flavor. Lastly, watch the baking time closely. Overcooking can lead to burnt pecans. Stir them every five minutes for even cooking. Want to spice things up? Try adding a pinch of nutmeg to the sugar mix. You can also use maple syrup instead of vanilla for a richer taste. For a kick, add a bit of cayenne pepper. This will give your pecans a nice heat. You can even mix in some chocolate chips after baking for a sweet treat. These simple enhancements will make your pecans even more exciting. For the full recipe, check out the [Full Recipe]. {{image_2}} Want a kick? Add spice! Mix in cayenne pepper or chili powder. Start with 1/4 teaspoon and taste. Adjust to make it as spicy as you like. This adds heat and flavor to the sweet mix. It makes a fun snack for those who love bold tastes. For a twist, try sweet and savory! Mix in a pinch of sea salt or a dash of herbs. Rosemary or thyme works well with the cinnamon. This adds depth and complexity. You can even drizzle some maple syrup before baking. It gives a gooey, sweet layer that is hard to resist. Use different nuts for variety! Walnuts, almonds, or cashews can replace pecans. Each nut has its own unique taste and texture. Mixing them creates a great snack mix. You can also combine nuts with dried fruits like cranberries or raisins. This gives a sweet and chewy contrast to the crunchy nuts. For more ideas and tips, check out the Full Recipe! To keep your cinnamon sugar pecans fresh, store them in an airtight container. A glass jar or a plastic container with a tight lid works well. This helps prevent moisture from getting in. Place the container in a cool, dry place, away from sunlight. A pantry or cupboard is perfect. Avoid storing them in the fridge, as this can make them lose their crunch. When stored properly, the pecans can last up to two weeks at room temperature. After that, their taste and texture may change. If you notice any off-flavors or softness, it is best to toss them out. Always check for signs of spoilage before eating. You can freeze cinnamon sugar pecans for longer storage. To do this, place the cooled pecans in a freezer-safe bag or container. Remove as much air as possible before sealing. They can last up to three months in the freezer. When you want to enjoy them, simply take out the amount you need and let them thaw at room temperature. They will still taste great! You can find the full recipe to enjoy this snack anytime. Pecans are great for your health. They are full of good fats that can help lower bad cholesterol. They also have lots of vitamins and minerals, like vitamin E and magnesium. Eating pecans can help with heart health, weight control, and even your brain. They give you energy and help you feel full. Plus, they are tasty and crunchy, making them a perfect snack. Yes, you can use other nuts for this recipe! Almonds, walnuts, or cashews all work well. Each nut has its own taste and texture, which can change the flavor of your snack. Just remember to adjust the cooking time if you choose a different nut. Some nuts may cook faster, so keep an eye on them while baking. You can find pre-made cinnamon sugar pecans at many grocery stores or online. Check the snack aisle or the nuts section. Stores like Whole Foods or Trader Joe's often carry them. You can also find them at specialty nut shops. If you want a fresh batch, I recommend trying the Full Recipe at home for a warm, homemade treat. You now know how to make cinnamon sugar pecans with ease. We explored all the key ingredients, from measuring tips to optional add-ins. I shared step-by-step instructions for baking and storing these tasty snacks. You learned valuable tips and tricks for perfect coating and flavor enhancements. We also discussed variations and storage options. Enjoy your cinnamon sugar pecans as a snack or gift. With these skills, impress your friends and family with your tasty treats!

Cinnamon Sugar Pecans Simple and Tasty Snack Recipe

Craving a snack that’s easy to make and full of flavor? You’re in the right place! In this guide, I’ll

To make Lemon Ricotta Cookies, you will need some simple, fresh ingredients. Here’s a quick list of what you'll need: - 1 cup ricotta cheese - 1 cup granulated sugar - 1/3 cup unsalted butter, softened - 1 large egg - Zest of 2 lemons - 2 tablespoons fresh lemon juice - 2 cups all-purpose flour - 1 teaspoon baking powder - 1/2 teaspoon baking soda - 1/4 teaspoon salt - 1 teaspoon vanilla extract - Powdered sugar for dusting (optional) Using fresh lemon juice and zest gives these cookies a bright flavor. Ricotta cheese adds a soft texture that makes the cookies light and fluffy. If you can, use high-quality ingredients. This choice can really make a difference in the taste. For the best results, measure your ingredients carefully. Baking is a science, and precise measurements lead to great cookies. If you want to try something different, you can even add chocolate chips or nuts to the mix. Remember, this is just a snapshot of what you'll need. For the full recipe, follow the steps outlined later in the article. Enjoy your baking journey with these delightful cookies! Start by preheating your oven to 350°F (175°C). This ensures a perfect bake. While the oven heats, prepare your baking sheets. Line them with parchment paper for easy cleanup. Next, we need to cream the butter and sugar together. In a large bowl, mix the softened butter and granulated sugar. Beat them until the mixture is light and fluffy. This takes about 3 to 4 minutes. Now, let's combine the wet and dry ingredients. Add ricotta cheese, egg, lemon zest, lemon juice, and vanilla extract to the bowl. Mix everything until well blended. In another bowl, whisk together the flour, baking powder, baking soda, and salt. Gradually add the dry mix to the wet mix. Stir gently until just combined. Be careful not to overmix. The dough should be soft and sticky. Use a cookie scoop or a tablespoon to drop rounded teaspoons of dough onto your prepared baking sheets. Make sure to space them about 2 inches apart. This gives them room to spread while baking. Bake the cookies for 12 to 15 minutes. They should be lightly golden at the edges but still soft in the center. Once baked, remove them from the oven. Let them cool on the baking sheets for 5 minutes. After that, transfer the cookies to a wire rack to cool completely. Following these steps will help you create soft, delightful lemon ricotta cookies. Enjoy this delicious treat! For the complete recipe, check out the Full Recipe. To get that soft and fluffy texture, be careful when mixing. Overmixing can make your cookies tough. Mix just until the dough comes together. This keeps your cookies light and airy. Letting the cookies cool properly is key. After baking, leave them on the sheet for about 5 minutes. This helps them set and avoid breaking. Then, move them to a wire rack to cool completely. This way, they stay soft and chewy. Want to boost flavor? You can add more lemon zest. Just a teaspoon more can make a big difference. Or try a splash of almond or vanilla extract for a twist. Dusting with powdered sugar adds a nice touch. Use a fine mesh sieve to sprinkle it evenly. This gives your cookies a pretty finish and extra sweetness. For a fun twist, add some lemon zest on top after dusting. It looks great and tastes even better. {{image_2}} You can make Lemon Ricotta Cookies even better! Try adding chocolate chips or nuts. Just fold them into the dough before you scoop the cookies. This adds a nice crunch and richness. You can also switch up the flavors. Instead of lemon, try orange zest and juice. Almond extract can add a nice twist too. These small changes can make your cookies unique! If you need a gluten-free version, you can use almond flour or a gluten-free all-purpose blend. Just replace the regular flour with your chosen alternative. Make sure to check the blend for baking powder and soda. Some mixes already have these ingredients. This way, you will still get those fluffy cookies you love! To keep your Lemon Ricotta Cookies fresh, store them in an airtight container. You can keep them at room temperature for up to three days. If you want them to last longer, put them in the fridge. The cold air helps maintain their soft texture. Just remember to let them come to room temperature before eating. This makes them taste great again! If you want to freeze these cookies, it's easy! First, let them cool completely. Then, place them in a single layer on a baking sheet. Freeze them for about an hour until they are firm. After that, transfer the cookies to a freezer-safe bag or container. Make sure to label it with the date. They can stay in the freezer for up to three months. When you're ready to eat them, take out the cookies. Let them thaw in the fridge overnight or at room temperature for a few hours. This way, they will taste fresh and soft again. Enjoy your Lemon Ricotta Cookies anytime! For the full recipe, check the original instructions above. Can I make these cookies ahead of time? Yes, you can make these cookies ahead of time. Prepare the dough and scoop it onto baking sheets. Cover with plastic wrap and chill for up to 24 hours before baking. This method helps the flavors meld and keeps the dough fresh. How can I prevent my cookies from spreading too much? To prevent spreading, chill the dough for 30 minutes before baking. Also, avoid overmixing the dough. This keeps your cookies thick and soft. Use a cookie scoop to keep them uniform in size, which also helps with even baking. What are the best ways to serve Lemon Ricotta Cookies? Serve these cookies on a lovely platter. You can dust them with powdered sugar for a sweet touch. Pair them with fresh lemon slices or a scoop of vanilla ice cream. These cookies shine at gatherings and are great with tea or coffee. Can I use low-fat ricotta cheese? Yes, you can use low-fat ricotta cheese. This change will still yield soft cookies. The texture may be slightly different, but they will taste great. What are some dairy-free alternatives? For a dairy-free option, try using almond or coconut yogurt instead of ricotta. Ensure the yogurt is thick to maintain the cookie’s soft texture. You can also use a dairy-free butter substitute in the recipe. This blog post detailed the ingredients, steps, and tips for making Lemon Ricotta Cookies. You learned how to achieve the perfect texture and enhance flavor with easy tricks. I offered variations, including gluten-free options and delicious add-ins. Proper storage methods help keep cookies fresh. With these insights, you can bake delightful cookies that impress guests and satisfy your sweet tooth. Enjoy your baking journey!

Lemon Ricotta Cookies Delightful and Soft Treat

Ready to bake something special? Lemon Ricotta Cookies are your answer! These delightful, soft treats are bursting with bright lemon

- 1 cup jasmine rice (cooked and cooled) - 12 oz shrimp, peeled and deveined - 2 tablespoons vegetable oil - 2 eggs, lightly beaten - 1 cup mixed vegetables (peas, carrots, and corn) - 3 green onions, finely sliced - 2 cloves garlic, minced - 2 tablespoons soy sauce - 1 tablespoon sesame oil - 1 teaspoon ginger, grated - Salt and pepper to taste - Fresh cilantro for garnish (optional) To make shrimp fried rice, you need fresh and tasty ingredients. Using jasmine rice gives the dish a lovely smell and texture. Make sure your rice is cooked and cooled before you start. This helps avoid sticky rice. The shrimp adds protein and flavor. You can buy pre-peeled shrimp for ease. The mix of peas, carrots, and corn brings color and nutrients. Green onions add a fresh crunch. Garlic and ginger give a nice kick. Soy sauce and sesame oil are key for flavor. They make the rice savory and rich. Don’t forget to season with salt and pepper. If you like, use fresh cilantro to garnish your dish. This adds a pop of color and freshness. - Large skillet or wok - Spatula - Measuring cups and spoons Having the right tools is important. A large skillet or wok helps cook everything evenly. A spatula will help you stir well. Make sure you have measuring cups and spoons to get the amounts just right. The shrimp fried rice is a balanced meal. Each serving has roughly 350 calories. You also get about 20 grams of protein and 40 grams of carbs. The fats are around 10 grams, mostly from the oil. This dish is filling and tasty, perfect for lunch or dinner. For the full recipe, check out the detailed steps to make your shrimp fried rice. First, heat 1 tablespoon of vegetable oil in a large skillet over medium-high heat. Add the shrimp to the pan. Cook the shrimp for about 2-3 minutes until they turn pink and opaque. Once they are ready, remove the shrimp from the skillet and set them aside. In the same skillet, pour in the beaten eggs. Scramble the eggs well until they are fully cooked. Once done, take the eggs out and set them with the shrimp. Now, add the remaining tablespoon of vegetable oil to the skillet. Toss in minced garlic, grated ginger, and one cup of mixed vegetables. Sauté them for around 3-4 minutes until the veggies are tender and bright. Next, reduce the heat to medium. Add the cooked and cooled jasmine rice to the skillet. Stir everything well to mix, breaking up any clumps of rice as you go. Pour in 2 tablespoons of soy sauce and 1 tablespoon of sesame oil over the rice mixture. Stir well to coat the rice evenly. Add the cooked shrimp and scrambled eggs back into the pan. Mix everything thoroughly to combine all the flavors. Finally, stir in the sliced green onions. Season with salt and pepper to taste. Cook for another 2-3 minutes until everything is hot. Now you have a delicious shrimp fried rice ready to serve. For the full recipe, check out the previous sections. Using cooled, cooked rice is key. Freshly cooked rice has too much moisture. This moisture makes the rice sticky. Sticky rice does not fry well. You want dry rice for the best texture. Cook your rice a day before, if possible. Spread it out on a tray to cool. This method helps the rice dry out faster. You can change up the proteins or veggies. If you don’t have shrimp, try chicken or tofu. They both work well in fried rice. For veggies, use bell peppers, broccoli, or snap peas. Mix and match to suit your taste. You can even add nuts for crunch. Think about fun side dishes. A light salad can balance the meal. You might want to serve it with spring rolls. For a great look, use vibrant bowls. Garnish the rice with fresh cilantro and extra green onions. This adds color and freshness. You can also add lime wedges for a zesty kick. {{image_2}} If you want a meat-free option, try using tofu instead of shrimp. Tofu soaks up flavors well and adds protein. You can also add more veggies like bell peppers, broccoli, or snap peas. This makes your dish colorful and healthy. Just cut the tofu into cubes and sauté it until golden. Mix it in when you add the rice. You’ll love the taste! For those who enjoy heat, add chili sauce or jalapeños to your fried rice. Start by mixing in a tablespoon of chili sauce when you add the soy sauce. If you prefer fresh heat, chop a few jalapeños and sauté them with the garlic and ginger. This will give your dish a fiery kick! Adjust the amount to match your spice level. Want a sweet twist? Add pineapple! Chop fresh pineapple or use canned chunks. Stir in the pineapple when you combine the rice. The sweetness pairs nicely with the savory flavors. This variation is great for summer or when you crave something different. It brings a tropical vibe to your meal! These variations keep your shrimp fried rice exciting and allow you to play with flavors. Check out the Full Recipe for the basic steps to make your perfect dish. To keep your shrimp fried rice fresh, store it in an airtight container. Make sure it cools down to room temperature first. Place it in the fridge within two hours of cooking. This helps prevent bacteria growth. Leftovers can last about three to four days in the fridge. When reheating, you want to keep the rice fluffy and tasty. Use a skillet over medium heat for the best results. Add a splash of water or soy sauce to keep it moist. Stir often to heat evenly. You can also use the microwave. Cover the dish with a damp paper towel to keep the moisture in. Heat in short bursts, stirring in between. If you want to save your fried rice for later, freezing is a great option. Let it cool completely before freezing. Use freezer-safe bags or containers, and remove as much air as possible. It can stay fresh in the freezer for up to three months. To thaw, place it in the fridge overnight. Reheat it in a skillet for the best taste and texture. Yes, you can use frozen shrimp. Just make sure to thaw them first. Place the shrimp in a bowl of cold water for about 15-20 minutes. This helps to keep them firm. Once thawed, pat them dry with a paper towel before cooking. This step prevents excess moisture in your fried rice. To make shrimp fried rice gluten-free, use tamari instead of soy sauce. Tamari is a gluten-free soy sauce. You can also check the labels on other ingredients. Ensure they do not contain gluten. Most frozen mixed vegetables are gluten-free, but always read the package. The best rice for fried rice is jasmine rice. It has a nice fragrance and a great texture. You can also use long-grain rice or basmati rice. Just make sure the rice is cooked and cooled before you start. This helps to prevent mushiness in your dish. Yes, you can prepare shrimp fried rice in advance. Cook the rice and shrimp ahead of time. Store them separately in the fridge. When ready to eat, just stir-fry everything together. This makes for a quick meal on busy days. This shrimp fried rice recipe combines simple ingredients and easy steps. You learned to cook shrimp, scramble eggs, and sauté vegetables for a tasty dish. We explored variations like vegetarian options and spicy versions. Storing and reheating tips help keep your meal fresh. Enjoy experimenting with your favorite flavors. Make this dish your own and impress your family or guests with your skills. Cook and savor each bite with confidence!

Shrimp Fried Rice Recipe Simple and Savory Delight

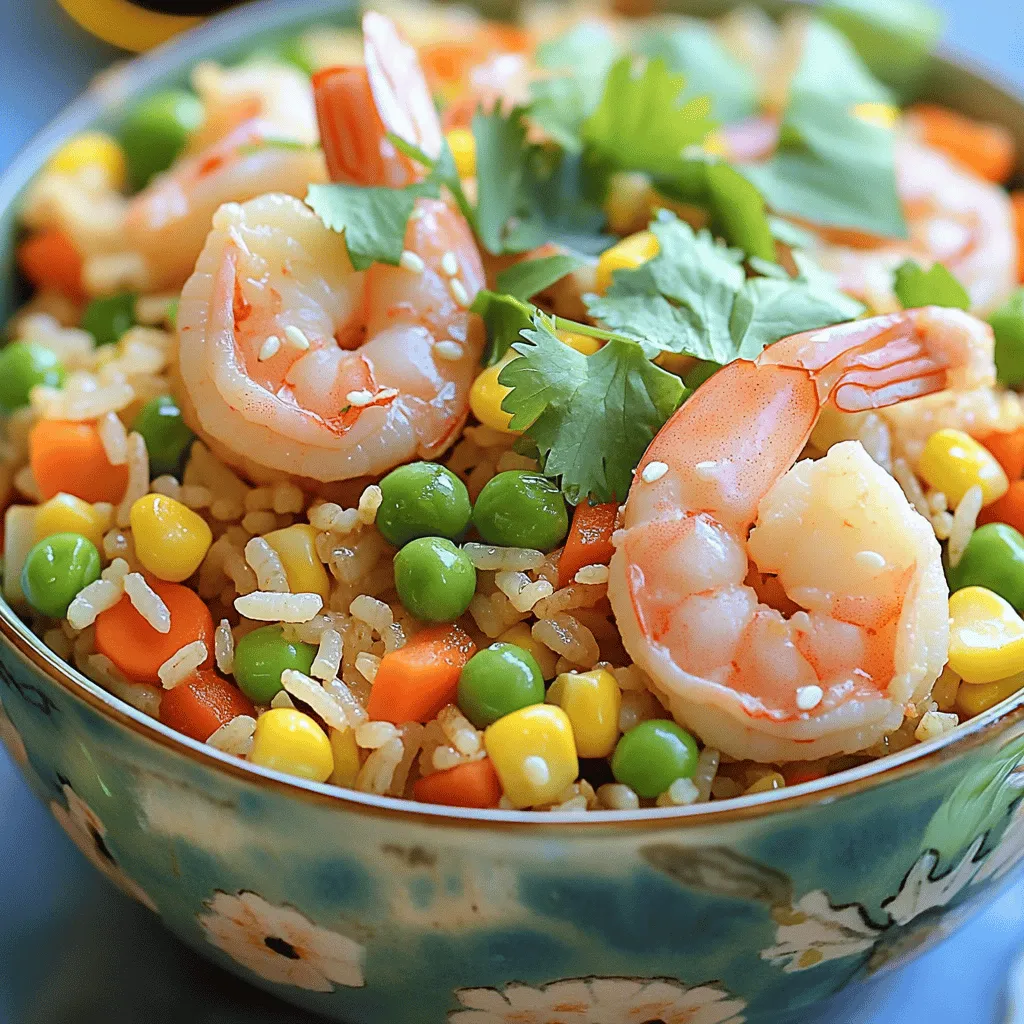
Dive into a bowl of comfort with my Shrimp Fried Rice recipe! This simple yet satisfying dish packs bold flavors

- 2 cups fresh apples, peeled, cored, and diced - 1 cup caramel sauce (store-bought or homemade) - 1 package (15.25 oz) yellow cake mix - 1/2 cup unsalted butter, melted - 1 teaspoon cinnamon - 1/2 cup chopped pecans (optional) - 1 cup chopped walnuts (optional) - Vanilla ice cream for serving (optional) When making Caramel Apple Dump Cake, the right ingredients make a big difference. Fresh apples are key. Use crisp varieties like Honeycrisp or Granny Smith. They add sweetness and tartness. Caramel sauce brings rich flavor. You can buy it or make your own. You will need a yellow cake mix. This makes the cake layer easy and fast. Melted butter helps it bake up nicely. Cinnamon adds a warm touch. If you like nuts, use chopped pecans or walnuts. They add crunch and flavor. For serving, vanilla ice cream is a great choice. It melts into the warm cake and adds creaminess. - 9x13 inch baking dish - Mixing bowl - Whisk You will need a 9x13 inch baking dish to hold all the ingredients. A mixing bowl helps you combine the apples and caramel. A whisk makes mixing easy. - Prep Time: 15 mins - Cook Time: 45-50 mins - Servings: 8 This dessert is quick to prepare. It takes only 15 minutes to get ready. After baking, it serves 8 people. You can enjoy it with family or friends. For the full recipe, refer to the earlier details. - Preheat your oven to 350°F (175°C). - Grease the 9x13 inch baking dish. To start, you need to preheat your oven. This helps the cake cook evenly. While the oven heats, grease your baking dish. This step keeps the cake from sticking. - Combine diced apples and sprinkle with cinnamon. - Drizzle half of the caramel sauce over the apples. - Spread the dry cake mix evenly over the apple mixture without mixing. Now, let’s layer the ingredients. Take your diced apples and put them in the dish. Next, sprinkle cinnamon over the apples. The cinnamon adds a warm flavor. Then, drizzle half of the caramel sauce on top. Make sure the apples are evenly coated. Finally, spread the dry cake mix over the apples. Do not mix it in; this keeps the layers separate. - Pour melted butter over the entire cake mix layer. - Optional: Scatter chopped pecans and walnuts on top. - Bake for 45-50 minutes until golden brown and bubbly. Next, melt some butter. Pour it over the cake mix. This adds moisture and flavor. If you want more crunch, scatter chopped pecans or walnuts on top. Now, it’s time to bake! Place the dish in the oven. Bake it for 45 to 50 minutes. You want it to be golden brown and bubbly. This means your cake is done and ready to enjoy. For the full recipe, check the ingredients and steps above. - Ensure even spreading of butter for best results. This helps the cake cook evenly. - Check for doneness by looking for a golden top and bubbly edges. This shows it is ready. - Serve warm topped with vanilla ice cream and additional caramel sauce. The warm cake pairs well with ice cream. - Garnish with extra chopped nuts for added texture. This gives your dessert a nice crunch. - You can prepare the cake in advance and reheat it before serving. Just store it in an airtight container. - It tastes best fresh but can stay good for a few days in storage. Just remember to keep it sealed. {{image_2}} - Try adding chopped pecans or walnuts for extra crunch. This will give your cake a nice texture. The nuts add a rich flavor that pairs well with the apples and caramel. - Experiment with different apple varieties for unique flavors. Sweet apples like Honeycrisp work well. Tart apples like Granny Smith can add a fun twist. Mix and match to find your perfect blend! - Use gluten-free cake mix for a gluten-free version. This way, everyone can enjoy this treat. Look for a mix that tastes great and has good texture. - Substitute butter with coconut oil for a dairy-free option. It keeps the cake moist and adds a hint of coconut flavor. This works well for those with lactose issues. - Top with whipped cream instead of ice cream. Whipped cream adds a light texture and sweet flavor. It’s a simple change that many will love. - Drizzle with chocolate sauce for a chocolatey twist. This adds a rich flavor that complements the caramel. You can also mix it in for a fun surprise! These variations can make your caramel apple dump cake even more exciting. Try them out and find your favorites! Store your leftover caramel apple dump cake in an airtight container. It stays good at room temperature for up to 3 days. For longer storage, place it in the fridge. It can last about a week when refrigerated. When you want to enjoy a slice again, reheat individual portions in the microwave. Just heat them for 30 to 60 seconds. If you prefer the oven, warm it up at 350°F for about 10 to 15 minutes. This method brings back that fresh-baked taste. You can also freeze any leftovers if you want to keep them for later. They can last up to 3 months in the freezer. When you're ready to eat, thaw the cake in the refrigerator overnight. Then, simply reheat it before serving. This way, you can enjoy this delightful treat anytime! A dump cake is a simple dessert where all ingredients are layered and baked without mixing. You just add ingredients in layers, and the oven does the rest. It saves time and effort. This method makes it fun and easy for all bakers, young and old. Yes! You can use pears, peaches, or berries as alternatives to apples. Each fruit brings its own flavor and texture. For example, pears add a soft touch, while berries give a pop of tartness. Feel free to mix fruits for a unique taste! Combine sugar, butter, and cream in a saucepan over medium heat, stirring until thickened. Keep stirring so it does not burn. Once it turns a nice golden color, it’s ready to use. Homemade caramel adds a rich taste to your dump cake. Sweet apples like Honeycrisp or Granny Smith work best for a balance of flavor. Honeycrisp apples add sweetness and crunch, while Granny Smith offers a nice tartness. Mixing both can create great depth in taste. Yes, prepare the cake ahead of time and bake it right before serving for best taste and texture. You can layer it and cover it in the fridge. Just pop it in the oven when you are ready to enjoy! For the full recipe, check out the Caramel Apple Dump Cake section above. This blog post shows you how to make an easy dump cake with apples. You learned about the simple ingredients and steps, which take only 15 minutes to prep. Don't forget to try out the tasty variations and tips for the best results. This dessert is fun to make, and it tastes great warm. You can enjoy it right away or save some for later. No matter how you serve it, this apple dump cake is sure to please everyone. Enjoy your delicious creation!

Caramel Apple Dump Cake Delightful and Easy Treat

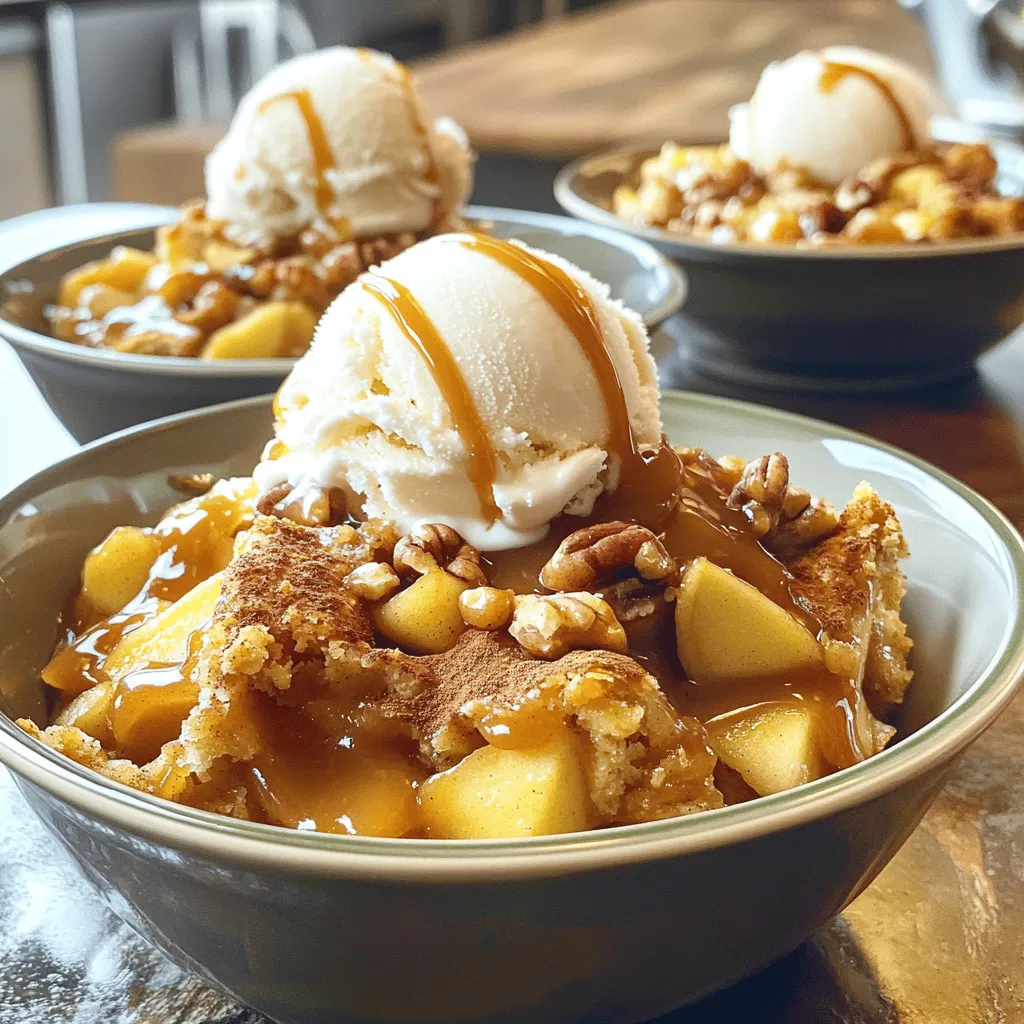
If you’re craving a quick and delightful dessert, you’ve stumbled upon the perfect recipe! Caramel Apple Dump Cake combines warm,

You need four boneless, skinless chicken breasts for this recipe. Choose fresh chicken for the best taste and texture. Look for chicken that is pink and firm. Avoid any that has dark spots or an off smell. The marinade gives the chicken its creamy flavor. You will need: - 1/4 cup plain Greek yogurt - 1/4 cup mayonnaise - 2 tablespoons Dijon mustard - 1 teaspoon garlic powder - 1 teaspoon onion powder - 1/2 teaspoon smoked paprika - Salt and pepper to taste This mix keeps the chicken moist and adds a tangy kick. The yogurt and mayo create a smooth base that coats the chicken well. For a crunchy topping, gather these ingredients: - 1/4 cup grated Parmesan cheese - 1/4 cup breadcrumbs (panko or regular) - Fresh parsley, chopped (for garnish) The cheese and breadcrumbs create a golden crust that contrasts nicely with the soft chicken. Garnish with parsley for a fresh touch. Make sure to check the Full Recipe for detailed steps to prepare this delicious meal! Start by mixing the marinade. In a medium bowl, combine the Greek yogurt, mayonnaise, and Dijon mustard. Then add garlic powder, onion powder, smoked paprika, salt, and pepper. Stir until it is smooth and creamy. This marinade keeps the chicken moist and gives it great flavor. Take each chicken breast and dip it into the marinade. Make sure to cover each piece fully. This helps the chicken absorb all the tasty flavors. Next, mix the grated Parmesan cheese and breadcrumbs in a small bowl. After coating, press this mixture on top of each chicken breast. The breadcrumbs add a lovely crunch. Now, preheat your oven to 375°F (190°C). Place the coated chicken breasts in a greased baking dish. Cover them loosely with foil to keep them moist while baking. Bake for 25 minutes. After that, remove the foil and bake for another 10-15 minutes. Check with a meat thermometer to make sure they reach 165°F (74°C). Let the chicken rest for 5 minutes before slicing. This allows the juices to settle. Enjoy your Melt In Your Mouth Chicken Breasts with a side of roasted veggies or a crispy salad. For the complete recipe, check the Full Recipe section. To keep chicken breasts tender, start with good quality meat. Look for fresh, plump chicken. Before cooking, marinate the chicken for at least 30 minutes. Use the creamy marinade made from Greek yogurt and mayonnaise. This helps lock in moisture. You can also pound the chicken to an even thickness. This ensures even cooking. To boost flavor, add fresh herbs to the marinade. Chopped rosemary or thyme works well. You can also try adding lemon zest for a bright taste. If you like spice, include a pinch of cayenne pepper. For a tangy kick, mix in a splash of lemon juice. This will make your chicken even more delicious. Cooking times may vary based on your oven and chicken size. Always check the internal temperature. It should reach 165°F (74°C). If your breasts are thicker, they may need more time. Tent them with foil if they brown too fast. This will keep them moist while cooking. Adjust your cooking time to ensure a perfect meal every time. {{image_2}} You can switch up the flavor of your chicken breasts. For a zesty kick, add lemon juice or lime zest to the marinade. If you love spice, mix in some hot sauce or cayenne pepper. For an herbaceous touch, try fresh herbs like thyme or rosemary. Each choice will give your chicken a new twist and keep meals exciting. You can change the topping for more variety. Instead of breadcrumbs, use crushed cornflakes for a crunchier texture. Mix in some herbs into your breadcrumb mix for added flavor. You could even top the chicken with sliced tomatoes and mozzarella cheese before baking. This makes a delicious caprese-style dish that is sure to impress. If you can’t find an ingredient, don’t worry! You can swap Greek yogurt for sour cream. Mayonnaise can be replaced with avocado for a healthier option. Use any type of cheese you have on hand instead of Parmesan. This recipe is flexible, allowing you to create your version of Melt In Your Mouth Chicken Breasts. For the full recipe and more detailed steps, check out the Full Recipe section. To keep your melt in your mouth chicken breasts fresh, place them in an airtight container. Make sure they cool down first to avoid steam buildup. Store them in the fridge for up to three days. If you want to enjoy them later, consider freezing. When reheating, use the oven or microwave. For the oven, preheat to 350°F (175°C). Place the chicken in a baking dish and cover it with foil. Heat for about 15-20 minutes, or until warm. If you use a microwave, heat on medium power for 2-3 minutes, checking to avoid overcooking. To freeze, wrap each chicken breast in plastic wrap. Then place them in a freezer-safe bag. Remove as much air as possible. They can stay good for up to three months. When you’re ready to eat, thaw them overnight in the fridge before reheating. For quick meals, this is a great option! You can find the full recipe and more tips to enjoy this dish. To make chicken breasts more tender, marinate them. Use a mix of yogurt, mayo, and spices. The acid in yogurt helps break down proteins. This makes the meat juicy and soft. You can also pound the chicken breasts gently with a meat mallet. This evens out the thickness and helps cook them evenly. Another tip is to cook them at a lower heat for a longer time. This reduces the risk of drying them out. Yes, you can use frozen chicken. Just make sure to thaw it properly first. The best way is to leave it in the fridge overnight. If you need it quick, submerge the sealed chicken in cold water for about an hour. Never cook chicken from frozen. It can cook unevenly and may not reach safe temperatures. For the Melt In Your Mouth Chicken Breasts recipe, thawed chicken works best for the marinade to stick well. Many sides go great with Melt In Your Mouth Chicken Breasts. Here are a few ideas: - Roasted vegetables like carrots, broccoli, or Brussels sprouts - A fresh garden salad with a light vinaigrette - Creamy mashed potatoes or garlic mashed potatoes - Quinoa or rice pilaf for a hearty option - Steamed green beans or asparagus for a light touch These sides complement the flavors of the chicken and make a complete meal. For a full meal plan, feel free to explore more recipes that match well! This article detailed how to create melt-in-your-mouth chicken breasts. We covered the key ingredients, from chicken and marinades to toppings. I provided step-by-step instructions and shared tips for better texture and flavor. You can explore variations to match your taste and learn how to store leftovers properly. Chicken can be a simple dish that turns into something special with the right care. Enjoy trying these techniques and make your meals memorable!

Melt In Your Mouth Chicken Breasts Easy Family Meal

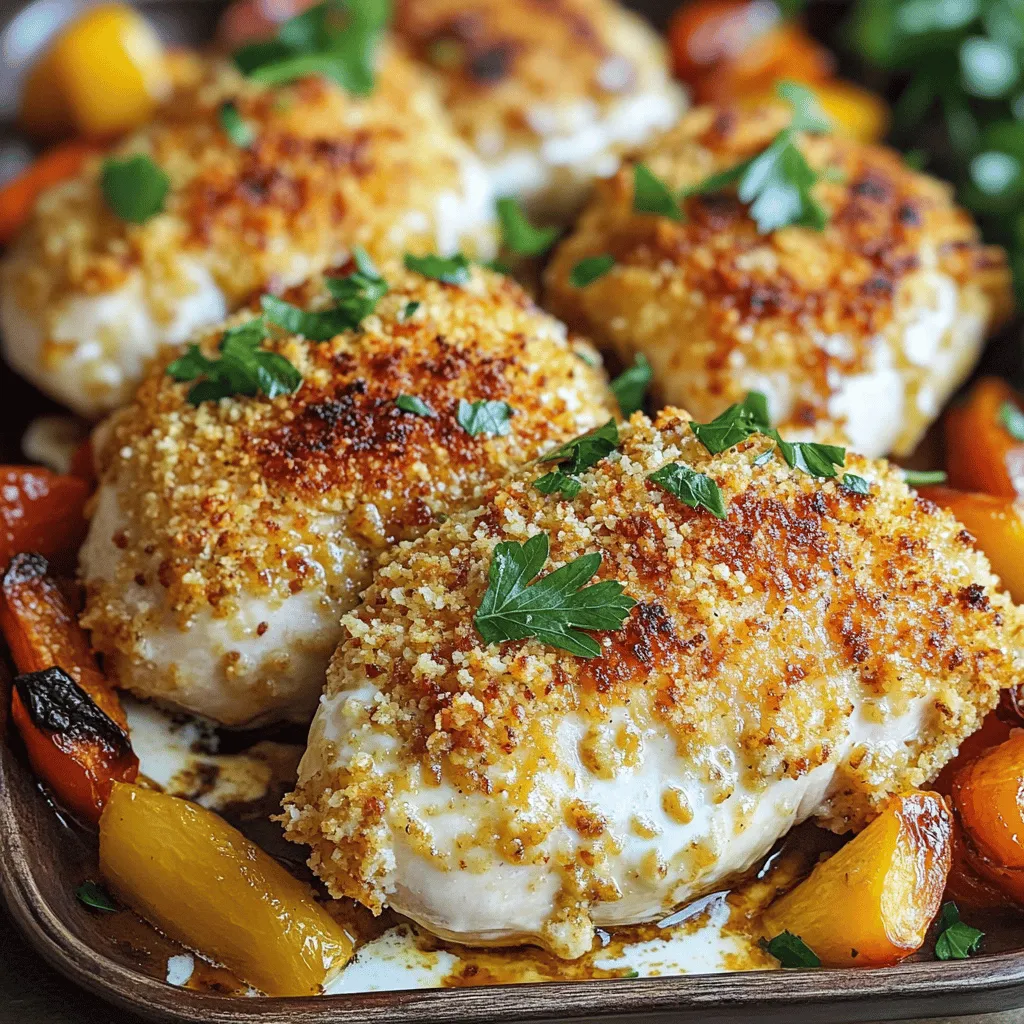
Are you ready to impress your family with a simple and delicious meal? Melt-in-your-mouth chicken breasts will become your new

For a tasty Chinese Chicken & Broccoli Stir-Fry, gather these main ingredients: - 2 chicken breasts, thinly sliced - 2 cups broccoli florets - 1 red bell pepper, sliced - 2 cloves garlic, minced - 1 inch ginger, grated - 3 tablespoons soy sauce - 1 tablespoon oyster sauce (or hoisin sauce for vegetarian) - 1 tablespoon cornstarch - 1 tablespoon sesame oil - 1 tablespoon vegetable oil - Salt and pepper to taste - Cooked rice or noodles for serving I always like to use fresh produce. It really enhances the flavor. Here are my top picks: - Broccoli florets add crunch and nutrients. - Red bell pepper brings sweetness and color. - Fresh garlic and ginger provide a bold taste. The right sauces and seasonings make this dish shine. Consider these: - Soy sauce gives a savory umami flavor. - Oyster sauce adds depth and richness. - Sesame oil adds a nice nutty aroma. For more details, check the Full Recipe. This ensures you have all the steps and tips for a successful stir-fry. First, take your chicken breasts and slice them thinly. This helps them cook fast and evenly. In a bowl, mix the chicken with cornstarch, half of the soy sauce, and a pinch of salt and pepper. This step adds flavor and keeps the chicken tender. Let this marinate for about 15 minutes. This is a simple way to infuse flavor. Heat the vegetable oil in a large skillet or wok over medium-high heat. Once the oil is hot, add the marinated chicken. Stir-fry for about 5-7 minutes until the chicken turns golden and is cooked through. It’s important to stir often to avoid burning. Remove the chicken from the skillet and set it aside. In the same skillet, add sesame oil. This oil gives a great taste. Next, add minced garlic and grated ginger. Sauté them for about 30 seconds. When they smell good, you know it’s time to add the veggies. Add the broccoli and sliced red bell pepper to the skillet. Stir-fry these for 3-4 minutes until they are tender-crisp. Now, return the cooked chicken to the skillet. Pour in the rest of the soy sauce and the oyster sauce. Toss everything together so it's well coated. Stir-fry for another 2 minutes until it’s all heated through. Once done, take the skillet off the heat. Taste the stir-fry and adjust the seasoning if needed. Serve this hot over cooked rice or noodles. For a nice presentation, use a large bowl. Garnish with sesame seeds and sliced green onions. This adds color and crunch. Enjoy your meal with chopsticks for a fun touch. For the full recipe, check out the detailed instructions above. To get the best texture, start with dry chicken. Pat it with a paper towel. This helps it brown well. Cut the chicken into thin slices. Thin pieces cook fast and stay juicy. Use high heat when you cook. This keeps the chicken and veggies crisp. Avoid overcrowding the pan. Cook in batches if needed. This allows even cooking and nice color. You can change the flavor to fit your taste. Add more garlic for a stronger kick. You can also use different sauces. Try adding a splash of rice vinegar for tang. If you like heat, add chili paste or flakes. For a sweeter touch, mix in a bit of honey. Experiment with these options to find your favorite combo. To save time, prep your ingredients first. Chop all veggies and chicken before cooking. You can even marinate the chicken ahead of time. It can sit in the fridge for hours or overnight. Use pre-cooked rice or noodles to cut down on cooking time. These tips help you make a quick and tasty meal. For the detailed steps, check out the Full Recipe. {{image_2}} You can make a tasty vegetarian version easily. Swap the chicken for tofu. Use firm tofu and press it to remove extra water. Cut it into cubes and marinate it like you would the chicken. For a vegan option, replace oyster sauce with hoisin sauce. This change keeps it rich and savory without animal products. If you want to change up the protein, there are many choices. Shrimp and beef work well in this stir-fry. Simply adjust the cooking time. Shrimp cooks fast, while beef needs a bit longer. You can also use tempeh for a nutty flavor that fits a vegetarian diet. Each option brings a unique taste to your dish. Seasonal vegetables can enhance your stir-fry. In spring, try snap peas or asparagus for crunch. Summer is great for bell peppers and zucchini. Fall can bring in carrots or butternut squash for sweetness. In winter, use hearty greens like kale or bok choy. These veggies not only add color but also boost nutrition. Mix and match for fun flavors and textures. Explore the Full Recipe for more ways to enjoy this dish! To keep your Chinese Chicken & Broccoli Stir-Fry fresh, let it cool first. Place it in an airtight container. It can stay in the fridge for about three to four days. Make sure to store it away from heat and light. When you're ready to eat leftovers, use the stovetop for the best taste. Heat a little oil in a pan over medium heat. Add your stir-fry and cook for about 5 minutes. Stir it often until it's hot. You can also use a microwave. Just cover it and heat for 1-2 minutes or until hot. If you want to keep your stir-fry longer, freezing works well. Use a freezer-safe container. Let the dish cool, then pack it tight. It can stay frozen for up to three months. When ready to eat, thaw it overnight in the fridge before reheating. You can make this dish gluten-free by choosing gluten-free soy sauce. Look for brands that are specifically labeled as gluten-free. You can also replace oyster sauce with a gluten-free version or use hoisin sauce, which is often gluten-free. Always check the labels to be sure. Yes, you can use frozen broccoli. Just make sure to thaw it first. Drain any excess water to avoid a soggy stir-fry. Frozen broccoli cooks faster than fresh, so stir-fry it for about 2-3 minutes instead of 3-4 minutes. Great side dishes include steamed rice, fried rice, or noodles. You can also serve a simple cucumber salad for a fresh touch. If you want, add egg rolls or spring rolls for extra crunch. You can find the full recipe [here](#). The detailed steps and ingredient amounts will help you create this tasty dish at home. In this blog post, we explored the key ingredients for a great stir-fry. You learned about chicken prep and cooking steps. I shared tips to achieve the perfect texture and ways to customize flavors. We also discussed tasty alternatives like vegetarian options and how to store leftovers properly. Remember, with simple changes, you can make this dish your own. Get creative in the kitchen, and enjoy every bite!

Chinese Chicken & Broccoli Stir-Fry Tasty and Easy Recipe

Craving a delicious meal that’s quick and easy to whip up? Look no further! My Chinese Chicken & Broccoli Stir-Fry

Older posts
Newer posts
← Previous Page1 … Page55 Page56 Page57 … Page62 Next →

dsad

© 2025 easycookingbite • Built with GeneratePress

Our Policies

  • Copyright Policy
  • Cookie Policy
  • GDPR Policy
  • Privacy Policy
  • Disclaimer
  • Terms Of Use

More Information

  • Home
  • About
  • Contact
  • Appetizers
  • Dessert
  • Dinner
  • Drinks
©2025, easycookingbite About Back To Top