Skip to content
DisclaimerTerms Of UseGDPR PolicyCookie Policy

easycookingbite

  • Home
  • Drinks
  • Appetizers
  • Dinner
  • Dessert
  • About
  • Contact
  • Privacy Policy
DisclaimerTerms Of UseGDPR PolicyCookie Policy

Lily

- 3 medium apples, peeled, cored, and diced (preferably Granny Smith) - 1 teaspoon lemon juice - 1/2 cup brown sugar - 1 teaspoon ground cinnamon - 1/4 teaspoon nutmeg - 1 tablespoon cornstarch - 1 tablespoon unsalted butter For the apple pie filling, I recommend using Granny Smith apples. They add a nice tartness that balances the sweetness. The lemon juice keeps the apples fresh and bright. The brown sugar, cinnamon, and nutmeg bring warmth and depth to the flavors. - 2 cups cream cheese, softened - 1 cup granulated sugar - 1 teaspoon vanilla extract - 3 large eggs - 1 cup sour cream The cream cheese is key for a rich, smooth texture. Be sure to let it soften so it blends well. The granulated sugar adds sweetness, while the vanilla extract gives a lovely aroma. Sour cream adds creaminess and a slight tang. - 1 1/2 cups graham cracker crumbs - 1/4 cup granulated sugar - 1/2 cup unsalted butter, melted For the crust, graham cracker crumbs create a nice crunch. Mixing them with sugar and melted butter makes a great base. Press it firmly into the pan to ensure it holds together after baking. Following the full recipe will guide you through each step for this delightful dessert. Enjoy making your apple pie stuffed cheesecake! To make the apple pie filling, start by melting the butter in a saucepan over medium heat. Once melted, add in the diced apples, lemon juice, brown sugar, cinnamon, nutmeg, and cornstarch. Stir everything well to mix the flavors. Cook this mixture until the apples become tender, which takes about 5 to 7 minutes. After that, set the filling aside to cool. This step is key, as it keeps the apples from cooking too much in the oven. Next, it's time to make the crust. In a medium bowl, combine the graham cracker crumbs, granulated sugar, and melted butter. Mix these ingredients until they are well combined. Press this mixture evenly into the bottom of a 9-inch springform pan to create a solid layer. Bake the crust in your preheated oven for 10 minutes, then remove it and let it cool slightly. A good crust holds everything together and adds a nice crunch. Now, we move on to assembling the cheesecake. First, pour half of the cheesecake batter over the cooled crust. Next, spoon the cooled apple pie filling evenly on top of this layer. Pour the remaining cheesecake batter over the filling, smoothing the top with a spatula. Finally, place the cheesecake in the oven and bake it for about 60 to 70 minutes. The center should be set but still have a slight jiggle. After baking, turn off the oven and crack the door open. Letting the cheesecake cool in the oven for 1 hour helps prevent cracks. Once cooled, cover it with plastic wrap and refrigerate for at least 4 hours, or overnight for the best results. This chilling step enhances the flavor and texture. For the full recipe, check out the details above. To get a smooth and creamy cheesecake, use room-temperature cream cheese. Cold cream cheese makes lumps. Beat the cream cheese until it is fluffy. This takes about three minutes. Add sugar slowly while mixing. This helps mix better, too. Don't overmix once you add the eggs. You want a smooth batter, but overmixing adds air. Too much air causes cracks when baking. One big mistake is not measuring your ingredients. Use a kitchen scale for accuracy. Another error is baking at the wrong temperature. Make sure your oven is at 325°F. This is key for even cooking. Also, don’t skip the cooling steps. Cooling in the oven helps avoid cracks. Lastly, don't rush the chilling process. A full chill makes your cheesecake firm and creamy. Let your cheesecake cool in the oven first. After baking, crack the door and let it cool for an hour. This helps prevent cracks. Then, wrap it well and chill it for at least four hours. Overnight chilling gives the best flavor and texture. Before serving, let it sit at room temperature for about 30 minutes. This makes each slice easier to cut and enjoy. For extra flair, drizzle caramel sauce on top before serving. For the full recipe, check the details above. {{image_2}} You can switch up your stuffed cheesecake by using other fruits. Try peaches, cherries, or blueberries. These fruits add unique flavors and colors. Each fruit has its own taste profile, so feel free to mix and match. For example, combine apples and cranberries for a tart twist. Just adjust the sugar to balance the flavors. This way, you keep your cheesecake exciting and fresh. Get creative with themes for special occasions. For a holiday, add spices like ginger and nutmeg for a warm flavor. A fall theme can use pumpkin puree mixed with the apple pie filling. For summer, think about a tropical vibe with coconut and pineapple. You can even create a fun birthday cheesecake with colorful sprinkles and chocolate. Themed variations let you express your creativity and impress your guests. If you need gluten-free options, swap regular graham crackers for gluten-free ones. You can use almond flour or oat flour for the crust. For a low-sugar version, replace sugar with natural sweeteners like stevia or monk fruit. These options keep the taste rich without the extra sugar. Always check the labels to ensure everything fits your dietary needs. This way, everyone can enjoy a slice of your delicious cheesecake! For the full recipe, check out the [Full Recipe]. To store leftover cheesecake, first, let it cool completely. Then, cover it tightly with plastic wrap. You can also use an airtight container. This keeps the cheesecake fresh for up to five days in the fridge. If you want to keep it longer, freezing is a great option. You can freeze the cheesecake for up to three months. To do this, slice the cheesecake and wrap each piece in plastic wrap. Then, place the wrapped pieces in a freezer-safe bag. Make sure to label the bag with the date. This helps you know when to enjoy your delicious dessert. To reheat a frozen slice, take it out and let it sit in the fridge overnight. This helps it thaw slowly. If you're in a hurry, you can use the microwave. Heat it on low power for 20-30 seconds. Be careful not to overheat. Enjoy your tasty treat at room temperature or slightly warm. Apple Pie Stuffed Cheesecake can last in the fridge for about 5 to 7 days. Store it in an airtight container to keep it fresh. If you want to save it longer, you can freeze it. In the freezer, it can last up to 3 months. Just wrap it well to prevent freezer burn. Yes, you can make this cheesecake a day or two ahead of time. It actually tastes better after chilling overnight. Just make sure to cover it tightly with plastic wrap. This helps keep it moist and flavorful. You can serve this cheesecake with whipped cream on top. A drizzle of caramel sauce makes it even better. You can also add a sprinkle of cinnamon or serve it with vanilla ice cream. Fresh apple slices can add a nice touch too. For more ideas, check out the Full Recipe for Apple Pie Stuffed Cheesecake. You now know how to make a tasty Apple Pie Stuffed Cheesecake. We covered the key ingredients, step-by-step baking, and useful tips to avoid mistakes. Remember to try different flavors and options, like gluten-free versions. Proper storage helps keep your cheesecake fresh longer. Enjoy sharing this sweet treat! It’s perfect for any gathering. Happy baking!

Irresistible Apple Pie Stuffed Cheesecake Delight

Welcome to a dessert lover’s dream! Today, I’m sharing my recipe for Irresistible Apple Pie Stuffed Cheesecake Delight. Imagine creamy

To make the best homemade cinnamon rolls, you need the right ingredients. The perfect blend creates soft and fluffy rolls. Here’s what you need: - 4 cups all-purpose flour - 1/4 cup granulated sugar - 1 packet (2 1/4 teaspoons) instant yeast - 1/2 teaspoon salt - 1 cup whole milk, warmed - 1/4 cup unsalted butter, melted - 2 large eggs - 1 tablespoon ground cinnamon - 1/2 cup brown sugar, packed - 1/4 cup unsalted butter, softened (for filling) - 1 cup powdered sugar (for icing) - 2 tablespoons milk (for icing) - 1 teaspoon vanilla extract (for icing) Each ingredient plays a key role in creating that delightful taste and texture. Flour gives body, while sugar adds sweetness. Yeast helps the rolls rise. The milk and butter keep them moist. Eggs provide richness. Ground cinnamon delivers that warm flavor we love in cinnamon rolls. For the icing, powdered sugar, milk, and vanilla create a creamy topping. This icing makes the rolls even more tempting. You can find the full recipe to guide you step by step. Enjoy baking! - Activate the Dough: In a large bowl, mix the warm milk, melted butter, and sugar. Sprinkle the yeast over this mix. Let it sit for about 5-10 minutes until it froths. - Mix the Dough: Add the eggs and salt, then slowly mix in the flour. Stir until a soft dough forms. Knead the dough on a floured surface for 5-7 minutes until smooth. - First Rise: Place the dough into a greased bowl. Cover it with a towel and let it rise in a warm spot for about 1 hour until it doubles in size. - Prepare the Filling: In a small bowl, mix the softened butter, brown sugar, and cinnamon until well blended. This will create a sweet layer for your rolls. - Roll Out the Dough: After the dough rises, punch it down. Roll it out on a floured surface into a rectangle, about 16x12 inches. - Spread and Roll: Evenly spread the filling over the dough, leaving a small edge. Starting from one end, roll the dough tightly into a log. Cut the log into 12 equal slices. - Second Rise: Place the rolls in a greased 9x13 inch baking dish. Cover them and let rise again for about 30 minutes. - Preheat Oven: Set your oven to 375°F (190°C) so it's hot and ready. - Bake: Bake the cinnamon rolls for 25-30 minutes. They should turn golden brown. This method creates soft and fluffy cinnamon rolls. For the complete experience, check out the Full Recipe. Enjoy the process and the delightful smell that fills your kitchen! - Kneading Techniques: Kneading is key to soft rolls. You should knead the dough for about 5 to 7 minutes. The dough should feel smooth and elastic. If it sticks to your hands, add a little flour. Use the heel of your hand to push the dough, then fold it back. This method develops gluten, which helps the rolls rise. - Rise Conditions: The best place for dough to rise is a warm, draft-free spot. An ideal temperature is around 75°F to 80°F (24°C to 27°C). If your kitchen is cool, you can turn on the oven for a minute, then turn it off. Place the bowl in there to help the dough rise. Humidity also helps, but if it’s dry, cover the dough with a damp cloth. - Making the Icing: For the icing, mix powdered sugar, milk, and vanilla extract. The icing should be smooth, not runny. If it’s too thick, add a bit more milk. For a twist, you can add a pinch of cinnamon or even some maple syrup for added flavor. - Applying Icing: Wait until the rolls are warm but not too hot. Drizzle the icing over the rolls for a nice finish. Use a spoon or whisk for even coverage. This gives a professional look and adds that sweet touch everyone loves. - Dense Rolls: If your rolls are dense, it’s often due to not kneading enough. Also, check if the dough rose properly. If it didn’t double in size, it might be due to old yeast or a cold environment. Always check the yeast’s expiration date before using it. - Over-baking Tips: To avoid dry cinnamon rolls, keep an eye on the time. Bake until they are golden brown, usually 25 to 30 minutes. You can also cover them with foil if they brown too quickly. A toothpick inserted in the center should come out clean, but not too dry. {{image_2}} You can make your cinnamon rolls even better with a few tasty twists. Here are some fun options: - Nutty Options: Add walnuts or pecans for a delicious crunch. Chop them up and sprinkle them on the filling. This will add a nice texture and flavor. - Fruit Fillings: Want a fruity taste? Try adding raisins, cranberries, or even diced apples. Mix them into the filling or layer them with the cinnamon sugar. They will bring a sweet and tangy flavor. The icing can change the whole feel of your cinnamon rolls. Here are two popular ideas: - Cream Cheese Icing: For a richer taste, mix 8 oz of cream cheese with 1 cup of powdered sugar, 2 tablespoons of milk, and 1 teaspoon of vanilla extract. This icing will make your rolls feel extra special. - Chocolate Icing: If you love chocolate, try this! Melt 1/2 cup of chocolate chips. Stir in 1 tablespoon of butter and 2 tablespoons of milk until smooth. Drizzle this over your warm rolls for a sweet twist. You can still enjoy cinnamon rolls if you have special dietary needs. Here are some tips: - Gluten-Free Options: Use a gluten-free flour blend instead of all-purpose flour. Make sure to add 1 teaspoon of xanthan gum to help with the texture. - Vegan Options: Substitute the butter with coconut oil or a vegan butter. Use almond or soy milk in place of whole milk. For eggs, use flaxseed meal mixed with water. This can give you soft and fluffy rolls without any animal products. These variations let you enjoy cinnamon rolls that fit your taste and needs! For the full recipe, check out the main section. - Room Temperature: You can keep leftover cinnamon rolls at room temperature for 1-2 days. Just wrap them in plastic wrap or store them in an airtight container. This keeps them soft and fluffy. - Refrigeration: If you want to store them longer, refrigerate the rolls. Place them in a container with a lid. They can last up to a week in the fridge. Just remember, cold air can dry them out. - Freezing Directions: To freeze baked rolls, let them cool completely. Then, wrap each roll tightly in plastic wrap. Place them in a freezer bag. They can last for about 2-3 months in the freezer. - Reheating Tips: When you are ready to enjoy them again, take the rolls out of the freezer. Let them thaw in the fridge overnight. To reheat, place them in a preheated oven at 350°F (175°C) for about 10-15 minutes. This keeps them soft and warm. - Ideal Pairings: Cinnamon rolls go great with coffee or tea. A glass of milk also makes a tasty drink. You can serve them with fresh fruit or yogurt for a nice balance. Each bite of sweet roll pairs well with a hot drink. Enjoy your rolls warm for the best taste! How to store leftover cinnamon rolls? You can store leftover cinnamon rolls at room temperature. Place them in an airtight container. They will stay soft for 1 to 2 days. For longer storage, refrigerate them. Just remember to warm them up before eating. Can I make cinnamon rolls ahead of time? Yes, you can make cinnamon rolls ahead of time. Prepare the rolls, then cover them tightly. Place them in the fridge for up to 24 hours. When you're ready to bake, let them rise for about 30 minutes at room temperature before baking. What can I substitute for instant yeast? You can use active dry yeast as a substitute. Just use the same amount. But you need to activate it in warm water first. Let it sit for about 5 to 10 minutes until it bubbles. Can I use active dry yeast instead of instant yeast? Yes, you can use active dry yeast. The rolls will still rise well. Just remember to activate it first in warm water. Why are my cinnamon rolls not rising? Your rolls may not rise due to old yeast. Always check the expiration date. Also, ensure your dough is in a warm spot. If it's too cold, it won’t rise. How can I make the dough softer? To make the dough softer, add more milk or butter. Knead it until smooth and elastic. Avoid adding too much flour, as this can make it dry. What’s the best way to ensure even baking? To ensure even baking, rotate your baking dish halfway through. This helps the rolls bake evenly. Also, check that your oven is properly calibrated. How do I know when my cinnamon rolls are done? Your cinnamon rolls are done when they are golden brown. You can also test them with a toothpick. If it comes out clean, they are ready to enjoy! For the full recipe, refer back to the earlier section. You now have all the steps to make perfect cinnamon rolls. From gathering ingredients to baking, each part is key. Remember, the right rise makes a big difference. Don't forget to try different flavors and icings to find your favorite. Storing and reheating properly will keep them fresh. With these tips, you can enjoy soft, sweet rolls anytime. Happy baking!

Best Homemade Cinnamon Rolls Soft and Fluffy Delight

Welcome to the world of homemade cinnamon rolls, where each bite is like a warm hug! In this post, I’ll

Here’s what you need for the best strawberry pie. Gather these fresh ingredients: - 2 cups fresh strawberries, hulled and sliced - 1 ½ cups strawberry preserves or jam - 1 tablespoon lemon juice - 2 tablespoons cornstarch - 1 tablespoon sugar - 1 teaspoon vanilla extract - 1 pre-made pie crust (store-bought or homemade) - Whipped cream for serving (optional) Using fresh strawberries makes a big difference in flavor. Choose bright red ones. They should feel firm. For the preserves, look for a brand with real fruit. This adds sweetness and depth. Lemon juice brightens the pie and balances the sweetness. Cornstarch helps thicken the filling. Sugar adds a touch of sweetness, and vanilla gives a warm flavor. You can use a store-bought pie crust for ease or make your own. If you make your own, roll it out to fit a 9-inch pie plate. The whipped cream is optional but adds a nice touch when serving. For the full recipe, check out the Best Strawberry Pie section. - Preheat oven to 425°F (220°C). - Roll out the pie crust into a 9-inch pie plate. Starting with the crust is key. If you use a store-bought crust, just unroll it. If you make your own, roll it out evenly. Place it in the pie plate and crimp the edges. This gives your pie a nice look. - Combine strawberry preserves, lemon juice, cornstarch, sugar, and vanilla extract in a saucepan. - Fold sliced strawberries into the thickened mixture and pour into the pie crust. Next, grab a medium saucepan. Mix strawberry preserves, lemon juice, cornstarch, sugar, and vanilla extract. Heat it over medium heat. Stir until it bubbles and thickens. This takes about 5 to 7 minutes. Then, gently fold in your sliced strawberries. Make sure they get coated well. Pour this mixture into your pie crust. Spread it evenly for the best taste. - Bake for 20-25 minutes until golden brown. - Let cool on a wire rack for 1 hour before serving. Now it's time to bake! Place your pie in the oven and bake for 20 to 25 minutes. You want the crust to be golden brown. The filling should be bubbling. Once it’s done, take it out and let it cool on a wire rack for at least 1 hour. This helps it set up nicely. After that, it’s ready to slice and serve! Enjoy this best strawberry pie with a scoop of whipped cream if you like. For the full details on how to make this pie, check out the Full Recipe! To make the best strawberry pie, you need great strawberries. Look for bright red and firm strawberries. These will give your pie a nice color and texture. Avoid strawberries with blemishes or soft spots. These can spoil your pie and ruin the flavor. To bring out the sweet taste of strawberries, add a pinch of salt to your filling. This small step makes a big difference. Also, consider adjusting sugar based on how ripe your strawberries are. Ripe strawberries taste sweeter, so you might need less sugar. Taste the mixture as you go to find the right balance. Getting a flaky crust is key to a great pie. Use cold ingredients when making your crust. Cold butter and water help create layers in the dough. Blind baking the crust is another trick for extra crispiness. This means baking the crust alone for a short time before adding the filling. It helps keep the crust from getting soggy. For the full recipe, check the details provided earlier. {{image_2}} You can switch things up with the fruit in this pie. Consider using peaches or blueberries instead of strawberries. This change gives a new taste while keeping the pie sweet and juicy. Another fun idea is to mix strawberries with rhubarb. The tartness of rhubarb adds a nice balance to the sweetness of strawberries. This combo makes for a refreshing twist. If you want a healthier pie, you can try using honey or agave syrup instead of regular sugar. These natural sweeteners add flavor without as many calories. You can also use a whole grain crust. This crust adds fiber and nutrients, making the pie a bit more nutritious without losing taste. To add a new layer of taste, consider a splash of balsamic vinegar. This may sound odd, but it deepens the sweet strawberry flavors. You can also play with fresh herbs like basil or mint. A small amount of these herbs can brighten the pie and make it stand out. These unique touches can impress your family and friends while keeping the recipe fun. For the full recipe, check out the Best Strawberry Pie section. You should store your strawberry pie in the fridge. Cover it well. It will stay fresh for up to 3 days. If you want to keep it longer, freeze it. Wrap the pie tightly in plastic wrap. It can last in the freezer for up to 2 months. To reheat slices, use your oven. Set it to a low temperature. Heat for a few minutes until warm. You can also enjoy the pie cold from the fridge. Both ways are delicious! A: Pre-bake the pie crust before adding the filling. This step helps keep the crust crisp. When you bake the crust alone for a short time, it forms a barrier. This barrier stops moisture from the filling from soaking into the crust. I recommend baking it for about 10 minutes at 425°F (220°C). Keep an eye on it to prevent burning. A: Yes, but thaw and drain excess moisture before using them. Frozen strawberries can work well when fresh ones are not available. After thawing, press the strawberries gently to remove extra liquid. This step is important. Too much liquid can make your pie runny. A: Whipped cream, vanilla ice cream, or fresh mint make great accompaniments. Whipped cream adds a light touch. Vanilla ice cream pairs well with the pie's sweetness. Fresh mint gives a nice contrast and enhances the flavor. You can serve all three for a delightful treat. You can make a delicious strawberry pie with simple steps and fresh ingredients. Start with ripe strawberries and a pre-made crust. Follow the easy cooking and baking instructions to achieve a perfect golden pie. Don't forget to try variations like adding peaches or herbs for more flavor. Store leftovers well, and you'll have tasty treats for days. I hope you enjoy making this pie as much as I do! It’s a fun and rewarding process, and you’ll impress your friends and family with your baking skills.

Best Strawberry Pie Flavorful and Easy Recipe Guide

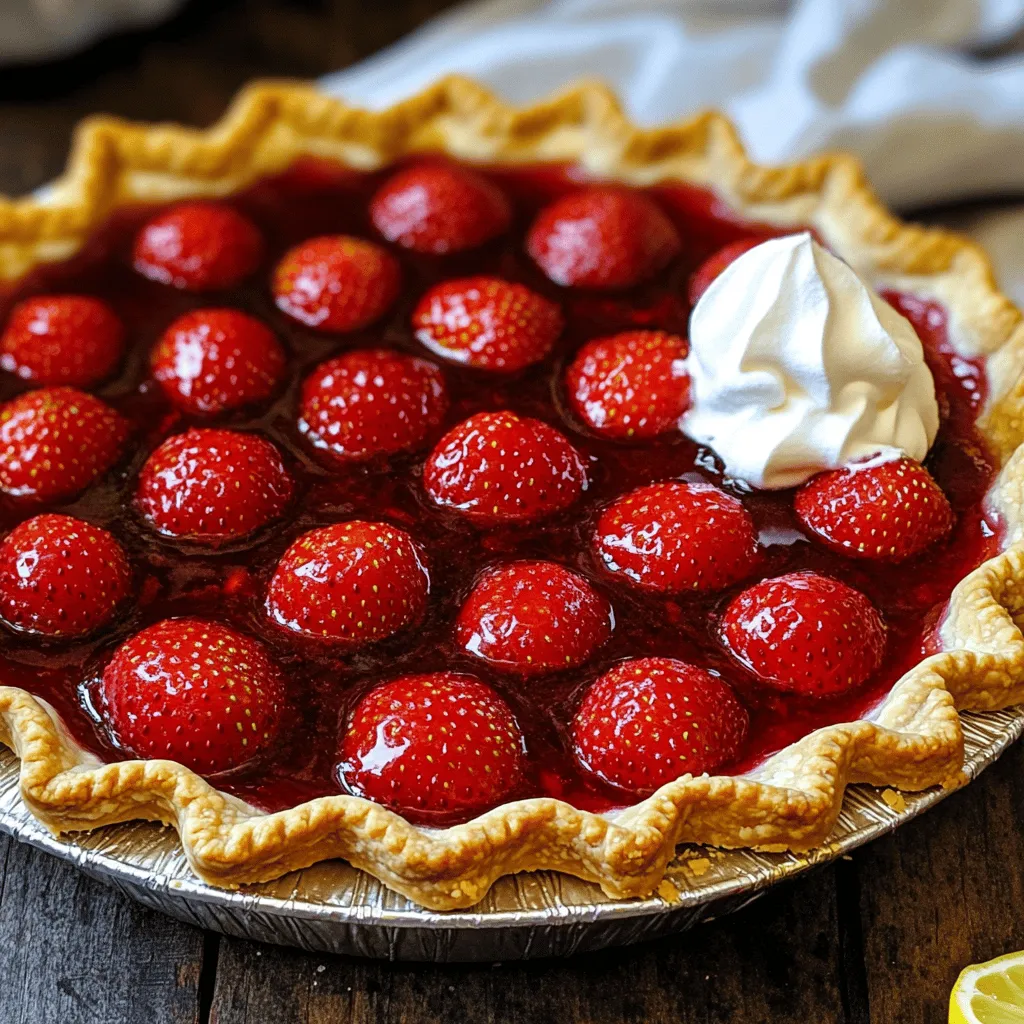
Looking for the best strawberry pie recipe? You’re in the right place! This easy guide covers everything, from fresh ingredients

- 1 ½ cups graham cracker crumbs - ⅓ cup granulated sugar - ½ cup unsalted butter, melted - 16 oz cream cheese, softened - ¾ cup granulated sugar - 2 large eggs - 2 tablespoons all-purpose flour - Zest of 1 lemon - ⅓ cup fresh lemon juice - 1 cup fresh raspberries (plus extra for garnish) - 1 teaspoon vanilla extract The ingredients for Raspberry Lemon Cheesecake Bars are simple yet essential. Each one plays a key role in creating that perfect balance of flavors. The graham cracker crumbs form a crunchy, sweet crust. They mix with sugar and melted butter to create a base that holds everything together. Cream cheese gives the filling its rich, smooth texture. Lemon zest and juice add that bright, tangy flavor. Fresh raspberries burst with sweetness and color. This combination makes each bite refreshing and delightful. If you want a little extra flair, consider adding some powdered sugar for dusting and whipped cream for serving. These optional ingredients can elevate your bars to a new level of deliciousness. For the full recipe, follow the detailed steps to make these tasty treats! 1. Preheat your oven to 325°F (160°C). Line an 8x8-inch baking pan with parchment paper. Make sure to leave some paper hanging over the sides. This will help you lift the bars out later. 2. In a medium bowl, combine: - 1 ½ cups graham cracker crumbs - ⅓ cup granulated sugar - ½ cup unsalted butter, melted Mix these ingredients until they blend well. 3. Press the crust into the baking pan. Use your fingers or a flat tool to make it even. Bake the crust for 10 minutes. After baking, set it aside to cool slightly. 1. In a large mixing bowl, beat together: - 16 oz cream cheese, softened - ¾ cup granulated sugar Mix until the mixture is smooth and creamy. This takes about 2-3 minutes. 2. Add 2 large eggs, one at a time. Mix well after adding each egg. Scrape down the sides of the bowl if needed. 3. Blend in: - 2 tablespoons all-purpose flour - Zest of 1 lemon - ⅓ cup fresh lemon juice - 1 teaspoon vanilla extract Mix just until combined. Avoid overmixing to keep it light. 4. Gently fold in: - 1 cup fresh raspberries Be careful not to crush them too much. 1. Pour the filling over the crust. Spread it evenly across the top. 2. Bake in the preheated oven for 25-30 minutes. The edges should be set, but the center can have a slight jiggle. Do not overbake. 3. Cool the bars at room temperature for about 30 minutes. After that, transfer them to the fridge. Chill for at least 2 hours, until they are completely set. 4. Cut into bars. Garnish with extra fresh raspberries if you like. You can find the full recipe above to guide you through the steps. Enjoy making these tasty treats! To get a creamy cheesecake, use softened cream cheese. Beat it well with sugar. This helps to blend them smoothly. Mix for about 2-3 minutes. Add eggs one at a time. This keeps your cheesecake from being lumpy. To avoid cracks, don’t overbake your bars. Bake until the edges set but the center jiggles. Let them cool slowly. First, cool at room temperature, then chill in the fridge. This helps the texture stay smooth and creamy. You can serve raspberry lemon cheesecake bars with many toppings. Try a dusting of powdered sugar for a sweet touch. Whipped cream adds a nice creamy layer. Fresh raspberries on top make it look pretty and taste even better. These bars pair well with drinks too. A cup of tea or a glass of lemonade works great. You can also serve them with a scoop of vanilla ice cream. This adds a nice contrast to the tangy cheesecake. For the full recipe, check out the details above. Enjoy making these delicious treats! {{image_2}} You can change the flavor of these bars easily. If you want a new taste, try other berries. Strawberries, blueberries, or blackberries work great. Just swap the raspberries for your berry of choice. This adds a fun twist to the recipe. You can also add chocolate. Mix in some chocolate chips or chunks. White chocolate works well too! Just fold them in with the raspberries. This gives your cheesecake a rich and creamy flavor. If you need a gluten-free option, use gluten-free graham cracker crumbs. They work just like regular crumbs in the crust. You can find these at most grocery stores. This way, everyone can enjoy the treat. For those watching their sugar, try using less sugar in the filling. You can also use a sugar substitute like stevia. Both options keep the taste great while cutting calories. Adjust as needed for your taste. Want more ideas? Check out the Full Recipe for tips on customizations! You can store your Raspberry Lemon Cheesecake Bars in the refrigerator. First, let them cool completely. Then, cover them tightly with plastic wrap or store in an airtight container. This keeps them fresh for about 5 days. To enjoy the best taste, eat them within this time. If you want to keep them looking nice, use parchment paper between layers. For long-term storage, freezing is a great option. Cut the bars into squares before freezing. Wrap each piece in plastic wrap, then place them in a freezer-safe bag. This helps prevent freezer burn. They can last up to 3 months in the freezer. To thaw, take the bars out and leave them in the fridge overnight. This keeps their texture smooth. When ready to serve, you can add fresh raspberries or a dusting of powdered sugar for a special touch. Enjoy every bite! Raspberry Lemon Cheesecake Bars last about 5 days in the fridge. Keep them in an airtight container. This will help keep them fresh and tasty. Yes, you can make these bars a day or two before you need them. This gives the flavors time to blend. Just store them in the fridge until you are ready to serve. You can use Greek yogurt or mascarpone cheese as a substitute for cream cheese. Both will give a creamy texture. However, the taste will be slightly different. Low-fat cream cheese also works if you want a lighter option. Yes, these bars freeze well. Wrap each bar in plastic wrap and then in foil. They can last up to three months in the freezer. When you want to eat them, thaw them in the fridge overnight. Yes, you can use frozen raspberries. Just make sure to thaw them first and drain any excess liquid. This will help keep your cheesecake bars from getting too watery. Using frozen raspberries can also save you time and still give great flavor. In this blog post, we explored the delicious Raspberry Lemon Cheesecake Bars. We covered the key ingredients, step-by-step instructions, and useful tips. You learned how to make a creamy filling and a perfect crust. We also discussed variations and storage solutions. Remember, these bars are versatile and easy to customize. Enjoy experimenting with flavors and toppings! Don't be afraid to share your own creations. Happy baking!

Raspberry Lemon Cheesecake Bars Simple and Delicious

Are you ready to indulge in a sweet and tangy treat? These Raspberry Lemon Cheesecake Bars are simple, delicious, and

To create the best banana pudding, you need a few key ingredients. Here’s a simple list: - 4 ripe bananas, sliced - 1 cup granulated sugar - 1/4 cup cornstarch - 1/4 teaspoon salt - 2 3/4 cups whole milk - 4 large egg yolks - 2 tablespoons unsalted butter - 2 teaspoons pure vanilla extract - 1 box (about 12 oz) vanilla wafers - Whipped cream for topping - Optional: crushed vanilla wafers for garnish Each ingredient plays a vital role. The ripe bananas add natural sweetness and creaminess. Granulated sugar enhances the flavor. Cornstarch thickens the pudding, giving it that perfect texture. Whole milk makes it rich and creamy, while egg yolks help bind everything together. Unsalted butter adds a velvety finish, and pure vanilla extract gives a warm flavor. Vanilla wafers provide a crunchy layer and contrast to the smooth pudding. Finally, whipped cream adds a light and airy touch on top. For added flair, use crushed vanilla wafers as a garnish. This gives your pudding an extra crunch and looks pretty too. You can find the full recipe to guide you through the steps for making this delicious treat. 1. Mixing dry ingredients In a medium saucepan, combine the granulated sugar, cornstarch, and salt. Use a whisk to mix these dry ingredients well. This step sets the base for your pudding. 2. Incorporating the milk Slowly add the whole milk to the dry mix. Keep whisking to prevent lumps. This will create a smooth mixture that is essential for a creamy pudding. 3. Tempering the egg yolks In a separate bowl, whisk the egg yolks until they become slightly thick. Gradually add a few spoonfuls of the heated milk mixture into the egg yolks. Whisk as you add to avoid cooking the eggs. This process, called tempering, helps keep the pudding smooth. 1. Combining mixtures on the stove Pour the tempered egg mixture back into the saucepan with the remaining milk. Place it on medium heat. Keep stirring constantly to ensure it cooks evenly. 2. Achieving the right thickness Continue to cook until the mixture thickens and starts to bubble, about 5-7 minutes. This is when your pudding transforms into a rich, creamy delight. 1. Layering ingredients in a serving dish In a 2-quart serving dish or individual cups, start layering your ingredients. Begin with a layer of vanilla wafers. Then, add a layer of sliced bananas. Pour a layer of the creamy pudding over the top. Repeat this process until all ingredients are used, finishing with pudding on top. 2. Covering and refrigerating Cover the dish with plastic wrap. Make sure the wrap touches the pudding to avoid a skin. Refrigerate for at least 4 hours, or overnight for best results. This chilling time allows the flavors to meld beautifully. Choosing ripe bananas for flavor Use ripe bananas for the best taste. They should be yellow with a few brown spots. These bananas are sweet and soft, which enhances the pudding's flavor. Avoiding lumps in the pudding To avoid lumps, whisk the dry ingredients well before adding milk. When you add milk, do it slowly and keep whisking. This helps create a smooth mixture. Techniques for optimal layering Layering is key for a beautiful pudding. Start with vanilla wafers at the bottom. Then, add sliced bananas and creamy pudding. Repeat these layers until you reach the top. End with pudding for a nice finish. Creative serving ideas Serve banana pudding in parfait cups for a fun twist. This makes it easy for guests to enjoy. You can also layer it in a glass dish for a stunning view. Pairing with beverages Banana pudding pairs well with sweet tea or coffee. A light dessert wine can also enhance the flavors. Choose a drink that complements the sweetness. Enhancing presentation with garnishes Top your pudding with whipped cream and crushed vanilla wafers. Add a few banana slices on top for color. This makes your banana pudding not just tasty but also pretty to look at. For the full recipe, check the details above. {{image_2}} Want to jazz up your banana pudding? You can easily add flavors. Chocolate or peanut butter can take your dessert to new heights. Just mix in chocolate pudding or smooth peanut butter into the creamy base. These flavors blend well with the bananas and make it unique. You might also think about nuts or dried fruits. Adding chopped walnuts or pecans gives a nice crunch. Dried fruits like raisins or cranberries add sweetness. These add-ins create layers of flavor and texture. If you need a vegan version of banana pudding, you can swap out a few ingredients. Use plant-based milk like almond or coconut. Instead of eggs, try silken tofu or vegan pudding mix. This way, you keep it creamy and delicious. For gluten-free options, look for gluten-free vanilla wafers. You can also thicken your pudding with gluten-free cornstarch. This way, everyone can enjoy this delightful dessert without worry. Explore these variations to find your favorite twist on the classic banana pudding. Check out the full recipe to make this treat your own! To keep your banana pudding fresh, store it in the fridge. Use an airtight container. If you have leftovers, cover them tightly with plastic wrap. This keeps moisture in and prevents drying out. Make sure the wrap touches the pudding’s surface. This stops a skin from forming on top. When storing assembled pudding, layer it just like you would for serving. Start with vanilla wafers, then bananas, and finish with pudding. Cover it well. This method keeps all flavors intact and ready for later. In the fridge, your banana pudding stays good for about 3-4 days. After this, the bananas may brown and the texture can change. For the best taste and look, enjoy it fresh. You can freeze banana pudding, but it changes in texture. If you freeze it, eat it within a month. To thaw, place it in the fridge overnight. Stir gently before serving to smooth it out. Remember, once thawed, do not refreeze. Enjoy the deliciousness of your banana pudding! For the full recipe, check it out here: [Full Recipe]. How to prevent browning of bananas? To stop bananas from turning brown, you can use lemon juice. Just squeeze a little over the sliced bananas. The acid helps keep them fresh and bright. Can I make banana pudding ahead of time? Yes, you can make banana pudding a day before serving. Just layer it and chill it in the fridge. This gives the flavors time to blend together, making it even better. What are the best alternatives for vanilla wafers? If you don’t have vanilla wafers, try using graham crackers or shortbread cookies. Both add a nice crunch and flavor to your pudding. Is it possible to make banana pudding without eggs? Absolutely! You can skip the eggs by using a cornstarch-based pudding. This keeps the texture creamy without using eggs. What makes this the best banana pudding recipe? This recipe brings together fresh bananas, creamy pudding, and crunchy wafers. The balance of flavors makes it a crowd favorite. Plus, it’s easy to make! How do I adjust the recipe for larger servings? To make more servings, simply double the ingredients. For instance, use 8 bananas instead of 4. Make sure you have a larger dish to hold everything. You can follow the Full Recipe for the complete guide. We covered all the key elements to make the best banana pudding. You learned about essential ingredients, step-by-step instructions, and creative variations. Remember to pick ripe bananas and layer carefully for the best flavor. With a few simple tips, like avoiding lumps, your pudding will shine. Don't forget about storage; properly refrigerating keeps it fresh longer. Enjoy making this treat, and feel free to get creative with flavors. Your homemade banana pudding will impress everyone!

Best Banana Pudding Delightful and Easy Recipe Guide

Welcome to my guide for the best banana pudding! This delightful treat is creamy, sweet, and oh-so-easy to make. You’ll

To make a delightful strawberry shortcake, gather these ingredients: - 2 cups all-purpose flour - 1 tablespoon baking powder - 1/4 teaspoon baking soda - 1/2 teaspoon salt - 1/3 cup granulated sugar - 1/2 cup unsalted butter, cold and cubed - 3/4 cup heavy cream, plus extra for brushing - 1 teaspoon vanilla extract - 1 pound fresh strawberries, hulled and sliced - 2 tablespoons powdered sugar (for strawberries) - Whipped cream (for serving) When picking strawberries, look for bright red ones. They should be firm, not mushy. The green tops should look fresh. Avoid berries with dark spots or bruises. If you can, smell the berries. A sweet scent means they are ripe. Try to buy local strawberries. They taste better and are often fresher. You’ll need some basic tools to make this treat: - Mixing bowls (large and medium) - Measuring cups and spoons - Pastry cutter or fork - Baking sheet - Parchment paper - Round cutter or glass (for biscuits) - Spatula (for mixing) - Whisk (for wet ingredients) With this ingredient list and tips, you're ready to start your strawberry shortcake adventure! For the full recipe, check out the details in the complete section. Start by preparing the strawberries. You need one pound of fresh strawberries. First, hull and slice them. Then, place them in a medium bowl. Add two tablespoons of powdered sugar to the bowl. Toss the strawberries gently until they are well coated. Let them sit for 15 to 20 minutes. This process is called macerating. It helps release the juices and creates a sweet syrup. You will love how fragrant and juicy they become! Next, let’s make the biscuit dough. In a large bowl, whisk together two cups of all-purpose flour, one tablespoon of baking powder, and 1/4 teaspoon of baking soda. Add 1/2 teaspoon of salt and 1/3 cup of granulated sugar. Mix these dry ingredients well. Now, cut in 1/2 cup of cold, cubed unsalted butter. You can use a pastry cutter or your fingers for this. Work until the mixture looks like coarse crumbs. In a separate bowl, whisk together 3/4 cup of heavy cream and one teaspoon of vanilla extract. Pour this mixture into the dry ingredients. Stir gently with a spatula. Be careful not to overmix; you want a slightly sticky dough. Turn the dough onto a floured surface. Pat it gently into a rectangle about one inch thick. Use a round cutter or glass to cut out biscuits. Place them on a baking sheet lined with parchment paper. It’s time to assemble the shortcakes! First, preheat your oven to 425°F (220°C). Brush the tops of the biscuits with a little extra heavy cream. Bake them for 12 to 15 minutes. They should be lightly golden when done. Once the biscuits cool slightly, slice them in half horizontally. Spoon the macerated strawberries onto the bottom half of each biscuit. Make sure to add some of the syrup too! Top with a generous dollop of whipped cream. Finally, place the top half of the biscuit over the cream. Serve your strawberry shortcakes right away. You can add extra strawberries and whipped cream on the side. Enjoy this simple and delicious treat! For more details, check the Full Recipe. To make fluffy biscuits, start with cold butter. Cold butter creates steam while baking, which helps the biscuits rise. Be gentle when mixing the dough; overworking it can lead to tough biscuits. Use a light hand and stop mixing once you see no dry flour. Cut the biscuits thick, around one inch. This thickness helps them stay soft inside. Bake them until golden brown for a nice crust. If you have extra strawberries, store them in the fridge. Keep them dry and in a container with a lid. Do not wash them until you are ready to use them. For leftover biscuits, place them in an airtight container. They will stay fresh for about two days. Reheat them in the oven for a few minutes to bring back their softness. Vanilla extract adds a lovely touch to your strawberry shortcake. It boosts the flavor of both the biscuits and the whipped cream. Use pure vanilla extract for the best taste. Just one teaspoon can make a big difference. Mix it in with the heavy cream before adding it to your dough. The fragrant notes will elevate your dessert. For an extra kick, you can also add a bit to the strawberries. This creates a rich blend of flavors that everyone will love. For the full recipe, check out the details above. {{image_2}} You can easily make a gluten-free version. Substitute the all-purpose flour with a gluten-free blend. Look for one that measures cup-for-cup. The rest of the recipe stays the same. This swap lets everyone enjoy the treat, even those avoiding gluten. Add more fruit for a berry medley shortcake. Mix strawberries with blueberries, raspberries, or blackberries. Use the same method to prepare the berries. The mix of flavors adds a nice twist. You can even adjust the sugar based on the berries you choose. Each bite bursts with sweetness and color. To make this dish vegan, swap butter and cream with plant-based options. Use coconut oil instead of butter and almond milk or coconut cream for the whipped topping. This change keeps the dish creamy and delicious. You can still enjoy that lovely texture and flavor without the dairy. For specific instructions, check the Full Recipe. To keep your strawberry shortcake fresh, store it in the fridge. Place the assembled shortcakes in an airtight container. This helps prevent the biscuits from getting soggy. Enjoy them within two days for the best taste. If you need to keep them longer, consider separating the components. You can freeze the biscuits before baking. After cutting out the biscuits, place them on a baking sheet. Freeze them for about one hour until firm. Then, transfer them to a freezer bag. You can store them for up to three months. When ready to bake, just add a few extra minutes to the baking time. - Fresh strawberries: Store in the fridge for up to 3 days. - Heavy cream: Lasts about one week after opening. - Biscuit ingredients: Keep dry ingredients like flour and sugar in a cool, dry place for six months or more. Using quality ingredients helps your shortcake taste its best. For the full recipe, check the earlier section. Making Easy Strawberry Shortcake takes about 40 minutes total. You spend 20 minutes prepping and baking. The other 20 minutes go to assembly and serving. It's a quick treat! Yes, you can use frozen strawberries. Just remember to thaw them first. Drain any extra liquid before mixing with sugar. This keeps your shortcake from getting soggy. Fresh strawberries are best, but frozen works too! Serve your strawberry shortcake right after you assemble it. This keeps the biscuits soft and tasty. Place the bottom biscuit on a plate first. Top it with strawberries and whipped cream. Then, add the biscuit top. Enjoy immediately for the best flavor! You can find the Full Recipe for more details. We covered everything you need for easy strawberry shortcake. You learned about the best ingredients, selecting fresh strawberries, and essential kitchen tools. I shared step-by-step instructions for preparing, making, and assembling your shortcake. Tips helped you achieve fluffy biscuits and store leftovers effectively. You explored variations like gluten-free and vegan options. With these ideas, I hope you feel ready to make delicious shortcakes. Enjoy the sweet reward of your hard work!

Easy Strawberry Shortcake Simple and Delicious Treat

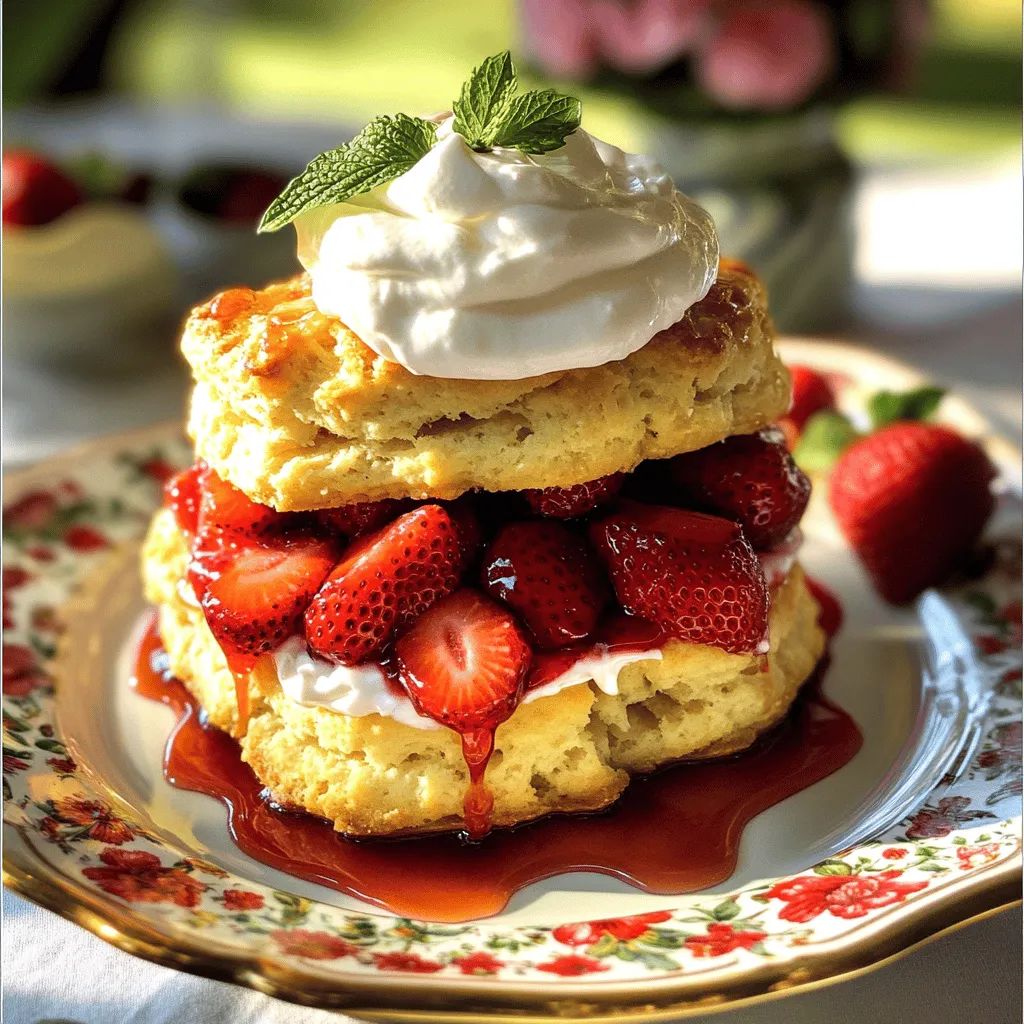
Looking for a simple and tasty dessert? You’re in the right place! My Easy Strawberry Shortcake is a game-changer for

To make Chicken Spaghetti, gather these fresh ingredients: - 8 ounces spaghetti - 1 pound boneless, skinless chicken breasts, diced - 1 tablespoon olive oil - 1 small onion, finely chopped - 2 cloves garlic, minced - 1 bell pepper (red or yellow), diced - 1 can (14.5 ounces) diced tomatoes - 1 cup chicken broth - 1 teaspoon Italian seasoning - ½ teaspoon paprika - Salt and pepper to taste - 1 cup shredded mozzarella cheese - 1 cup grated Parmesan cheese - Fresh basil leaves for garnish These ingredients come together to create a dish that is both tasty and filling. You can swap out some ingredients if needed: - Spaghetti: Use any pasta shape you like, such as penne or fusilli. - Chicken: Rotisserie chicken or cooked turkey works well. - Olive oil: Canola oil or butter can replace olive oil. - Onion: Shallots or green onions can add a different flavor. - Bell pepper: Zucchini or mushrooms can add great taste. - Diced tomatoes: Fresh tomatoes can be used if you prefer. - Chicken broth: Vegetable broth is a good option for a lighter taste. - Cheese: Use cheddar or a dairy-free cheese for variety. These swaps can help you use what you have at home. Each serving of Chicken Spaghetti offers a balanced meal. Here’s what you can expect: - Calories: About 450 - Protein: 30 grams - Carbohydrates: 45 grams - Fat: 20 grams - Fiber: 3 grams This dish provides a good mix of protein and carbs. It can serve as a hearty meal for the whole family. Enjoy the flavors and the ease of making it! For the complete cooking steps, check out the Full Recipe. To start, fill a large pot with water and add salt. Bring it to a boil over high heat. Once boiling, add 8 ounces of spaghetti. Cook according to the package instructions until it's al dente. This usually takes about 8-10 minutes. After cooking, drain the spaghetti in a colander and set it aside. Now, take 1 tablespoon of olive oil and heat it in a large skillet over medium heat. Add 1 pound of diced chicken. Season this with salt, pepper, paprika, and Italian seasoning. Cook the chicken for about 5-7 minutes. You want it to be golden brown and fully cooked. Once done, remove the chicken from the skillet and set it aside. In the same skillet, add the finely chopped onion and diced bell pepper. Sauté these for 3-4 minutes until they soften. Then, add 2 cloves of minced garlic and cook for one more minute. This will make your kitchen smell amazing! Next, pour in 1 can of diced tomatoes and 1 cup of chicken broth. Stir to mix everything well and let it simmer for about 5 minutes. This step helps all the flavors blend together nicely. For the full recipe, be sure to check out the complete instructions to combine all the elements perfectly! To make a great sauce, focus on layering flavors. Start with fresh garlic and onions. Sauté them until they are soft and fragrant. This builds a rich base for your sauce. Use diced tomatoes with juices. They add moisture and flavor. Let the sauce simmer for a few minutes. This step helps all the flavors mix well. If you like spice, add a pinch of red pepper flakes. It gives the sauce a nice kick. For the best cheese melt, use fresh cheese. Shredded mozzarella works great. Add it when the heat is low. Cover the pan to trap the heat. This helps the cheese melt evenly. Let it sit for a few minutes after cooking. The cheese will become bubbly and golden. This adds a lovely texture to your dish. Don’t forget to sprinkle more Parmesan on top before serving. It adds flavor and looks nice! Cooking time can change based on your stove and pot. Always monitor your chicken closely. It should cook until golden brown and no longer pink inside. If you use thinner spaghetti, it may cook faster. Check the package for exact times. For the sauce, let it simmer longer if you want deeper flavors. Just be careful not to burn it! If you need to speed things up, cover the pot. This keeps the heat in and cooks food faster. {{image_2}} Adding vegetables to chicken spaghetti makes it even more delightful. You can toss in veggies like zucchini, mushrooms, or spinach. These add color and flavor. Simply chop them up and add them to the skillet when cooking the onions and bell peppers. This extra step boosts nutrition and taste. Feel free to swap the chicken for other proteins. You can use turkey, shrimp, or even tofu for a vegetarian option. If you choose shrimp, cook it until it turns pink. For turkey, follow the same steps as with chicken. Each protein brings its own unique flavor, making the dish your own. If you need a gluten-free meal, choose gluten-free pasta. Many brands offer great options that taste just like regular spaghetti. Cook it just like regular pasta. Also, double-check that the broth and other ingredients are gluten-free. This way, everyone can enjoy delicious chicken spaghetti without worry. For the full recipe, check out the details above! To keep your chicken spaghetti fresh, place it in an airtight container. Make sure to cool it first. Storing it this way helps prevent spoilage. You can keep leftovers in the fridge for 3 to 4 days. If you want to save it for longer, consider freezing it. When you're ready to enjoy your leftovers, reheat them gently. You can use a microwave or a stove. If using a microwave, place the spaghetti in a bowl. Add a splash of water to keep it moist. Cover the bowl and heat for 1-2 minutes. Stir halfway through to heat evenly. On the stove, warm it over low heat. Stir often to avoid burning. Freezing chicken spaghetti is easy. First, let it cool completely. Then, portion it into freezer-safe bags. Remove as much air as you can before sealing. Label the bags with the date and contents. You can freeze it for up to 3 months. When ready to eat, thaw it overnight in the fridge. Then, reheat as mentioned above. For the best taste, try to eat it within a month. To make Chicken Spaghetti from scratch, start by cooking the spaghetti. In a big pot, boil salted water and add the spaghetti. Cook it until it’s al dente, then drain it. Next, in a large skillet, heat olive oil. Add diced chicken, season it, and cook until golden brown. Remove the chicken and add onions and bell pepper to the skillet. Sauté for a few minutes, then add minced garlic. Pour in diced tomatoes and chicken broth, letting it simmer. Return the chicken to the skillet, add the spaghetti, and mix. Finally, sprinkle mozzarella and Parmesan cheese on top and cover until melted. For the full recipe, check the [Full Recipe]. Yes, using rotisserie chicken is great for this recipe. It saves time and adds flavor. Just shred the chicken and add it to the skillet after cooking the vegetables. This way, you can skip the step of cooking raw chicken. Chicken Spaghetti pairs well with a fresh green salad. You can also serve garlic bread or cheesy breadsticks on the side. For a light touch, consider a simple cucumber salad. These sides balance the richness of the dish and add freshness to your meal. This blog post covered how to make delicious chicken spaghetti. You learned about the key ingredients, their substitutions, and nutritional facts. I shared step-by-step cooking instructions and helpful tips for the perfect dish. We also discussed tasty variations and smart storage methods. Chicken spaghetti is easy to make and versatile. Feel free to experiment with your favorite veggies and proteins. Enjoy the comfort of this meal tonight!

Chicken Spaghetti Flavorful and Easy Family Meal

Looking for a meal that your whole family will love? Chicken spaghetti is the answer! This dish blends tender chicken,

- 4 slices of whole grain bread - 1 cup natural creamy peanut butter - 1 ripe banana, sliced - 2 tablespoons honey or maple syrup - 2 tablespoons chia seeds - 1 teaspoon cinnamon - A pinch of sea salt - Optional toppings such as dark chocolate shavings, shredded coconut, or fresh berries Gathering the right ingredients is key to making perfect peanut butter toast. Whole grain bread is a great choice. It adds fiber and a nice crunch. Natural creamy peanut butter gives you rich flavor without added sugars or oils. You want ripe bananas for sweetness and creaminess. Honey or maple syrup adds extra sweetness, making your toast irresistible. Chia seeds give a nice crunch and boost your nutrition. Cinnamon adds warmth and flavor. A pinch of sea salt brings out the taste of the peanut butter. Feel free to get creative with toppings! Dark chocolate, shredded coconut, or fresh berries can take your toast to the next level. For the full recipe, check out the Peanut Butter Paradise Toast 🥜 section. Enjoy your tasty snack! 1. Toasting the bread: Start by taking your four slices of whole grain bread. Place them in a toaster or on a baking sheet. Toast until they are golden brown and crispy. This step adds a nice crunch to your peanut butter toast. 2. Preparing toppings: While the bread toasts, slice the ripe banana. Measure out your honey or maple syrup, chia seeds, and cinnamon. Having everything ready makes the next steps easier. 1. Spreading peanut butter: Once the bread is toasted, take your natural creamy peanut butter. Use a butter knife to spread a thick layer on each slice. Be generous! This adds flavor and creaminess. 2. Adding banana slices: Now, take the banana slices and arrange them evenly on top of the peanut butter. Make sure to cover the bread well. This adds sweetness and a nice texture. 1. Drizzling honey or maple syrup: Next, drizzle honey or maple syrup over the banana slices. This adds extra sweetness and makes it feel special. 2. Adding chia seeds and cinnamon: Sprinkle chia seeds and cinnamon evenly across each toast. The chia seeds add crunch and nutrition, while cinnamon gives a warm flavor. 3. Optional toppings and sea salt: If you want to get fancy, add optional toppings like dark chocolate shavings, shredded coconut, or fresh berries. Finish with a light sprinkle of sea salt to enhance all the flavors. Now, you have a delicious peanut butter toast ready to enjoy! For the detailed steps and ingredients, refer to the Full Recipe. When making peanut butter toast, the choice of bread matters. Whole grain bread is a top pick. It adds fiber and nutrients. It also gives a nice texture. White bread is softer but lacks these benefits. If you need gluten-free options, try gluten-free bread. Many brands taste great and work well with peanut butter. Peanut butter toast is fun to customize. You can mix flavors to keep it exciting. Try adding sliced fruits like apples, strawberries, or peaches. You can also switch up the nut butter. Almond or cashew butter can be great swaps. For serving, enjoy it as a breakfast or snack. It’s quick to make and fills you up nicely. Peanut butter is more than tasty. It packs a lot of nutrition. One serving has protein, healthy fats, and fiber. These nutrients help with energy and fullness. Peanut butter also has vitamins and minerals. It’s a great part of a balanced diet. Just remember to enjoy it in moderation. Adding it to your meals boosts flavor and health. {{image_2}} Peanut butter toast is simple to make and fun to change up. Here are some tasty ideas. - Peanut butter and apple slices: Slice a crisp apple and layer it on your peanut butter toast. The crunch mixes well with the creaminess of the peanut butter. - Peanut butter with jelly or preserves: Spread a layer of your favorite jelly or preserves over the peanut butter. This adds sweetness and a fruity kick. - Peanut butter with avocado: Mash some avocado and spread it on top of peanut butter. This combo is creamy and rich, making a filling snack. - Adding spices for a savory twist: Sprinkle spices like chili powder, garlic powder, or even a touch of cumin on your peanut butter. This creates a unique flavor that surprises your taste buds. - Fall favorites (e.g., pumpkin spice): In the fall, mix pumpkin spice into your peanut butter. This warm flavor brings a cozy feel to your toast. - Summer fruit combos: In summer, try topping your toast with fresh berries or peaches. These fruits add brightness and sweetness, perfect for warm days. Explore these variations and make your peanut butter toast even more exciting! For the full recipe, check out the Peanut Butter Paradise Toast. How to store leftover toast If you have leftover peanut butter toast, store it in an airtight container. This keeps the toast from getting soggy. You can also wrap it in foil or plastic wrap. Toast is best eaten fresh but can last for one day in the fridge. Storing prepared ingredients To store prepared ingredients, keep your peanut butter in its jar. Seal it tightly to keep it fresh. Slice bananas can go in a small container in the fridge. If you prepare chia seeds or honey, store them in separate jars. Always use clean spoons to avoid contamination. Prepping ingredients for quick breakfasts You can save time by prepping your toppings in advance. Slice bananas and store them in a container. Measure out chia seeds and cinnamon into small bags. This makes breakfast quick and easy. Just grab your bread and peanut butter, and you're ready to go! Freezing bread for convenience Freezing bread is a smart way to keep it fresh. Place slices in a freezer bag. Remove as much air as possible before sealing. When you're ready to eat, just toast the slices straight from the freezer. They will taste great! How long does peanut butter last? Unopened peanut butter can last for 6 to 12 months in the pantry. Once opened, it stays good for about 3 to 6 months. Always check for oil separation or an off smell. If you see either, toss it out. Tips for keeping peanut butter fresh To keep peanut butter fresh, store it in a cool, dry place. If you use natural peanut butter, stir it well before each use. This helps keep the oils mixed. If you want, you can also refrigerate it, but that may make it harder to spread. Yes, you can use crunchy peanut butter! The main difference is texture. Crunchy peanut butter has bits of peanuts, giving a fun crunch. Creamy peanut butter spreads smoothly and is easier to spread. If you love texture, go for crunchy. If you want a smooth bite, stick with creamy. Peanut butter toast can be very healthy! It offers protein, healthy fats, and fiber. Whole grain bread adds extra fiber, which helps your gut. Peanut butter gives you energy and keeps you full. Bananas add vitamins and potassium too. Just watch the sugar in toppings. Keep it simple for the best health benefits. Making peanut butter toast vegan is easy! Use natural peanut butter without honey. Swap honey for maple syrup or agave nectar. Choose vegan bread, like whole grain or sourdough. You can add fruits like bananas or berries. These options make your toast tasty and vegan-friendly! For the full recipe, check out the Peanut Butter Paradise Toast. Peanut butter toast offers simplicity and flavor. We covered how to make it with whole grain bread, natural peanut butter, and ripe bananas. You saw tips to customize your toast and learned about healthy options. Remember, this recipe can be sweet or savory, and it’s a great snack or meal. With the right storage and preparation, you can enjoy it anytime. Dive in and explore these variations to find your favorite!

Peanut Butter Toast Simple and Tasty Recipe Guide

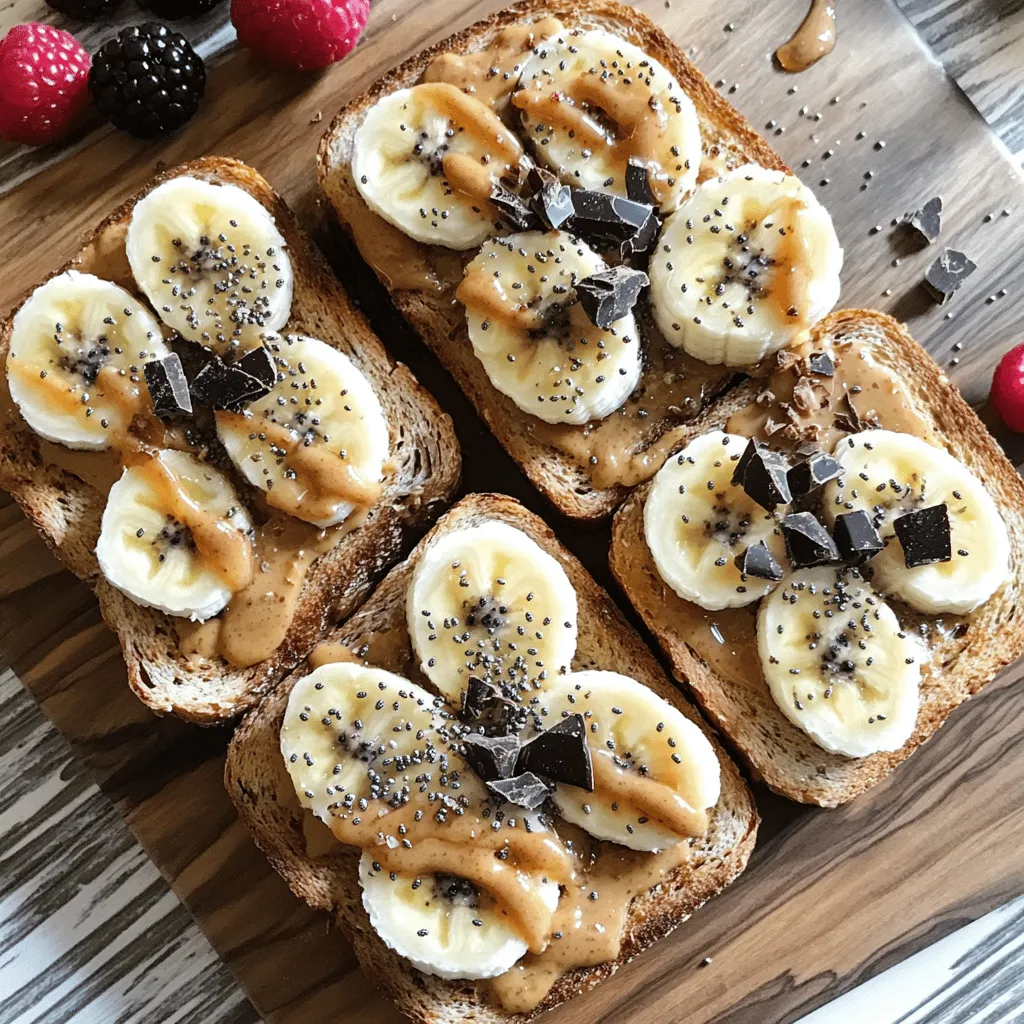
Peanut butter toast is a delicious and simple treat you can enjoy anytime. In this guide, I’ll show you how

- 12 oz bowtie pasta - 1 lb ground beef - 1 medium onion, diced - 2 cloves garlic, minced - 1 can (14.5 oz) diced tomatoes with green chilies - 1 cup beef broth - 2 cups shredded cheddar cheese - 1 teaspoon Italian seasoning - 1 teaspoon paprika - Salt and pepper to taste - 1 tablespoon olive oil - Fresh parsley for garnish (optional) Each ingredient plays a key role in flavor. The bowtie pasta adds fun shape and texture. Ground beef gives richness, while onion and garlic create a savory base. Diced tomatoes add brightness and spice. You can swap ground beef for ground turkey or chicken for a lighter option. For a vegetarian version, use lentils or mushrooms. Cheddar cheese is classic, but feel free to try mozzarella or pepper jack for a twist. If you like heat, use diced tomatoes with jalapeños. Beef broth can be replaced with vegetable broth for a veggie-friendly dish. Choose high-quality ground beef for the best taste. Look for 80/20 lean-to-fat ratio for flavor. Fresh onions and garlic will enhance the dish, so avoid pre-diced options. Always check the expiration date on canned goods, especially tomatoes. For cheese, buy block cheese and shred it at home for better melting. Fresh parsley adds a nice touch; opt for it if you can! For more recipes and cooking tips, check out the Full Recipe. To make cheesy beef and bowtie pasta, you need to gather your ingredients. The key items include bowtie pasta, ground beef, onion, garlic, diced tomatoes, beef broth, and cheddar cheese. You will also need some spices like Italian seasoning and paprika. Having everything ready makes cooking easier. This dish takes about 30 minutes to prepare and cook. 1. Cook the Pasta: Start by boiling water in a large pot. Add salt to the water. Once boiling, add 12 oz of bowtie pasta. Cook it until it's al dente, according to the package instructions. Drain the pasta and set it aside. 2. Sauté the Onion and Garlic: In a large skillet, heat 1 tablespoon of olive oil over medium heat. Add 1 medium diced onion and 2 minced garlic cloves. Cook them for about 3-4 minutes until the onion turns clear. 3. Brown the Beef: Add 1 lb of ground beef to the skillet. Break it apart with a spatula. Cook it until it turns brown and is no longer pink. This should take about 5-7 minutes. If there is extra fat, drain it off. 4. Mix in Tomatoes and Spices: Stir in 1 can of diced tomatoes (14.5 oz) with green chilies, 1 cup of beef broth, 1 teaspoon of Italian seasoning, 1 teaspoon of paprika, and salt and pepper to taste. Bring this to a simmer and let it cook for about 5 minutes. 5. Combine Pasta and Sauce: Lower the heat and add your cooked bowtie pasta to the skillet. Stir everything together well. 6. Add Cheese: Gradually sprinkle in 2 cups of shredded cheddar cheese. Stir until the cheese melts and the sauce becomes creamy. If the sauce is too thick, add a bit more beef broth until it's just right. 7. Season to Taste: Taste your cheesy beef and bowtie pasta. Adjust the seasoning with more salt and pepper if you like. 8. Serve and Enjoy: Serve hot, with fresh parsley on top if desired. This dish is a warm, family-friendly meal that everyone will love! - Pasta Too Sticky: If the pasta clumps together, it may have been overcooked or not drained well. Make sure to cook it al dente and rinse it lightly after draining. - Sauce Too Thick: If the sauce seems too thick, just add a little more beef broth. Stir until you reach your desired consistency. - Beef Not Browning: Ensure your skillet is hot enough. If it's not, the beef will steam instead of brown. Increase the heat slightly if needed. For more details, check the full recipe. Enjoy your cooking adventure! To make the best cheesy beef and bowtie pasta, start with fresh ingredients. Fresh vegetables and quality beef give your dish great flavor. Always read the recipe first. This helps you gather all your ingredients. Measure everything before cooking. This saves time and makes cooking easier. For a creamy sauce, slowly add the cheese. Stir the mixture constantly as you add cheese. This helps it melt evenly. If your sauce is too thick, add a splash of beef broth. This will make it creamier and easier to mix. Taste your sauce as you go. Adjust the seasoning to your liking. You will need a large pot for the pasta. A skillet is key for cooking the beef. Use a spatula to break up the meat easily. A measuring cup helps with broth and cheese. A sharp knife and cutting board are great for chopping onions and garlic. These tools ensure a smooth cooking process. For the Full Recipe, refer to the earlier section in this article. {{image_2}} You can switch up the cheese in this dish. While cheddar is a favorite, mozzarella gives a nice stretch. Try using pepper jack for a spicy kick. Gouda adds a smoky taste. Mix them for a fun blend. Each cheese brings its own flavor and texture. Adding veggies can enhance both flavor and nutrition. Spinach, bell peppers, or zucchini work great. You can sauté them with the onion. If you want extra protein, try adding cooked chicken or sausage. This makes the meal more filling and colorful. You can even add beans for a different twist. For spice lovers, chili peppers are a must. Add chopped jalapeños or crushed red pepper flakes to the beef. This will give your meal a nice heat. You can also use spicy diced tomatoes instead of regular ones. Don’t forget to taste as you go, so you get the heat just right! For the full recipe, check out the detailed steps in the [Full Recipe]. After enjoying your cheesy beef and bowtie pasta, store leftovers in an airtight container. Make sure to cool the dish to room temperature first. This keeps the flavors fresh and prevents spoilage. Keep the leftovers in the fridge for up to three days. Label the container with the date for easy tracking. To reheat, place your pasta in a skillet over medium heat. Add a splash of beef broth or water to help keep it creamy. Stir frequently to ensure even heating. You can also use the microwave. Cover the dish and heat it in short bursts, stirring in between. This keeps the cheese smooth and delicious. If you want to save some for later, freezing is a great option. Place the cooled pasta in a freezer-safe container or bag. Remove as much air as possible to prevent freezer burn. You can freeze it for up to three months. When ready to eat, thaw it overnight in the fridge. Reheat it in a skillet, adding a bit of broth for creaminess. Enjoy your cheesy beef and bowtie pasta even when time is tight! Yes, you can! Bowtie pasta works well for this dish, but you can swap it with others. Try penne, fusilli, or even elbow macaroni. Each will give a unique twist. Just ensure you cook them according to the package instructions. This keeps the pasta tender and tasty. To make Cheesy Beef and Bowtie Pasta gluten-free, simply replace the bowtie pasta. Use gluten-free pasta instead. Many brands offer great options that taste good. Check the ingredients on the package to confirm they fit your diet. The rest of the ingredients are naturally gluten-free, so you're all set! Absolutely! You can cook the pasta and prepare the beef mixture in advance. Store them separately in the fridge. When you're ready to eat, just combine them and heat through. This saves time on busy nights and still gives you a tasty meal. For the best results, eat within two days for freshness. For the full recipe, check out the main article! In this post, we explored how to make Cheesy Beef and Bowtie Pasta successfully. We covered key ingredients, cooking steps, and helpful tips to enhance your dish. You learned about ingredient swaps and variations to suit your taste. Proper storage and reheating techniques ensure delicious leftovers. With these insights, you can create a creamy, cheesy meal that delights every time. Enjoy cooking and feel free to try new flavors!

Cheesy Beef and Bowtie Pasta Flavorful Family Meal

Are you looking for a quick, tasty dinner that the whole family will love? My Cheesy Beef and Bowtie Pasta

- 1 pound ground beef - 1/2 cup breadcrumbs - 1/4 cup grated Parmesan cheese - 1 large egg - 1 teaspoon garlic powder - 1 teaspoon onion powder - Salt and pepper to taste - 1 tablespoon Worcestershire sauce - 1 medium onion, sliced - 2 cups beef broth - 2 cups sliced mushrooms - 2 tablespoons cornstarch mixed with 2 tablespoons water (for thickening) The heart of this dish is the meatball mixture. Using ground beef gives it a rich flavor. The breadcrumbs and Parmesan cheese add the perfect texture. The egg binds everything together. Garlic powder and onion powder boost the flavor. Worcestershire sauce adds a nice depth. - Fresh parsley for garnish - Other herbs and spices You can add fresh parsley to brighten up the dish. Feel free to use your favorite herbs and spices. They can add a personal touch to the meatballs. - Slow cooker - Mixing bowl - Measuring cups and spoons Having the right tools is key. A slow cooker makes cooking easy and hands-off. A mixing bowl helps combine the ingredients well. Measuring cups and spoons ensure you get the right amounts for each ingredient. For the full recipe, head to the main section. Enjoy creating this tasty dish! First, grab a large bowl. In this bowl, combine the ground beef, breadcrumbs, Parmesan cheese, egg, garlic powder, onion powder, Worcestershire sauce, salt, and pepper. Use your hands to mix everything until it's well blended. This helps the flavors come together. Next, form the mixture into meatballs. Aim for golf ball sizes, about 1.5 inches in diameter. This size cooks evenly and stays juicy. Now it's time to prepare the slow cooker. Start by layering the sliced onions and mushrooms at the bottom. This creates a flavorful base for the meatballs. Once the veggies are ready, place the meatballs on top. Try to space them out evenly. This way, they cook properly and soak up all the great flavors. Pour the beef broth over the meatballs. Make sure they are mostly submerged. This broth adds moisture and flavor while cooking. Next, cover the slow cooker with its lid. You can cook on low for 6-8 hours or on high for 3-4 hours. Both options yield tender meatballs. When they’re done, the meatballs should be fully cooked and soft. About 30 minutes before serving, mix cornstarch with water until smooth. Stir this into the slow cooker to thicken the sauce. Cover and let it finish cooking. Once done, carefully remove the meatballs and vegetables. Enjoy your delicious meal! For the full recipe, refer to the earlier section. For the best taste, season your meatball mixture well. Use salt, pepper, and Worcestershire sauce. This sauce adds a rich, savory note. Garlic and onion powder also boost flavor. Be sure to mix well, so the flavors blend together. To enhance the gravy flavor, add more beef broth. You can also stir in a bit of soy sauce. A splash of red wine works wonders too. These small tweaks can elevate your dish, making it truly special. To ensure even cooking, arrange the meatballs in a single layer. This helps them cook uniformly and soak up flavor. Avoid overcrowding the slow cooker. If you have many meatballs, cook them in batches. To thicken the sauce properly, use cornstarch mixed with water. Stir it in about 30 minutes before serving. This will give your gravy the right consistency. A good sauce clings to the meatballs and adds richness. For the best sides, try creamy mashed potatoes or buttered noodles. These dishes complement the rich gravy well. Roasted vegetables also pair nicely for a balanced meal. For presentation, serve the meatballs on a bed of potatoes or noodles. Drizzle the thickened gravy over the top. Finish with a sprinkle of fresh parsley for color. This makes your dish look inviting and appetizing. {{image_2}} You can easily swap ground beef for ground turkey or chicken. These lean meats still pack flavor, but they are lighter. If you prefer a vegetarian or vegan meal, use lentils or black beans. These options create hearty meatballs that are just as satisfying. Want to change up the flavor? Add BBQ sauce for a sweet twist. Tomato sauce gives a classic taste. You can also play with spices like paprika or chili powder for a kick. Each sauce can transform your dish and keep it exciting. Feel free to get creative with the veggies. Carrots, bell peppers, and zucchini work well. You can adjust your choices based on what’s in season. This makes your meal fresh and vibrant while adding more nutrients. To store your homemade meatballs, let them cool first. Place the meatballs in an airtight container. Add a bit of the gravy to keep them moist. You can keep them in the fridge for up to three days. If you want to save them longer, freezing works great. Portion the meatballs into freezer bags, removing as much air as possible. Freeze them for up to three months for the best taste. When it's time to enjoy your leftovers, you have a couple of choices. The microwave is quick and easy. Heat the meatballs in short bursts, stirring in between. If you want to keep them juicy, use the slow cooker. Place the meatballs in on low heat with a splash of broth. This method takes longer but keeps them tender and flavorful. For safe storage, meatballs last three to four days in the fridge. In the freezer, they can stay good for about three months. Always check for signs of spoilage before you eat. Look for an off smell or a change in color. If anything seems off, it's best to toss them out. For the best results, cook Salisbury steak meatballs for 6-8 hours on low or 3-4 hours on high. This slow cooking allows the flavors to blend well. The meatballs will become tender and soak up the rich broth. Yes, you can prep the meatballs and store them in the fridge. Mix all the ingredients, form the meatballs, and place them in the slow cooker. You can then add the broth and vegetables later. This step saves time when you are ready to cook. Pair these meatballs with a variety of sides. Creamy mashed potatoes are a classic choice. Egg noodles also work great. You might also enjoy them with rice or steamed veggies for a balanced meal. To keep your meatballs intact, make sure to bind them well. Use breadcrumbs and mix everything thoroughly. Avoid overhandling the meat mixture. Cook gently in the slow cooker to maintain their shape. To make this dish gluten-free, replace regular breadcrumbs with gluten-free options. You can use almond flour or crushed gluten-free crackers instead. Just ensure that all other ingredients, like Worcestershire sauce, are gluten-free as well. For the complete recipe, don’t forget to check out the Full Recipe. You learned how to make Salisbury steak meatballs in a slow cooker. We covered the key ingredients, necessary tools, and step-by-step instructions. I shared tips for great flavor and cooking, plus ways to customize your dish. Feel free to experiment with different meats, sauces, and veggies. Don’t forget proper storage and reheating tips to enjoy leftovers. Try this recipe for a tasty, easy meal your family will love!

Slow Cooker Salisbury Steak Meatballs Flavorful Feast

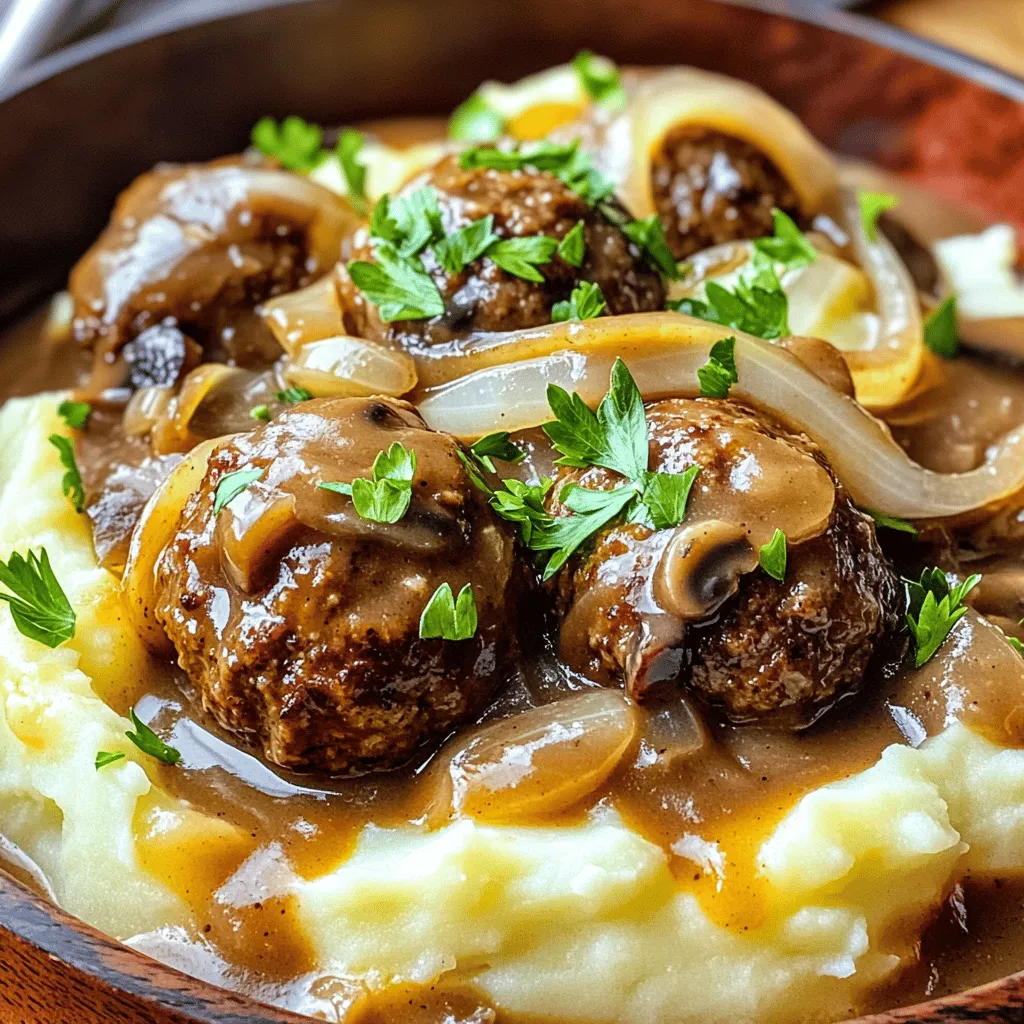
Are you ready for a warm, comforting dish that will wow your family? Slow Cooker Salisbury Steak Meatballs are the

Older posts
Newer posts
← Previous Page1 … Page58 Page59 Page60 … Page62 Next →

dsad

© 2025 easycookingbite • Built with GeneratePress

Our Policies

  • Copyright Policy
  • Cookie Policy
  • GDPR Policy
  • Privacy Policy
  • Disclaimer
  • Terms Of Use

More Information

  • Home
  • About
  • Contact
  • Appetizers
  • Dessert
  • Dinner
  • Drinks
©2025, easycookingbite About Back To Top