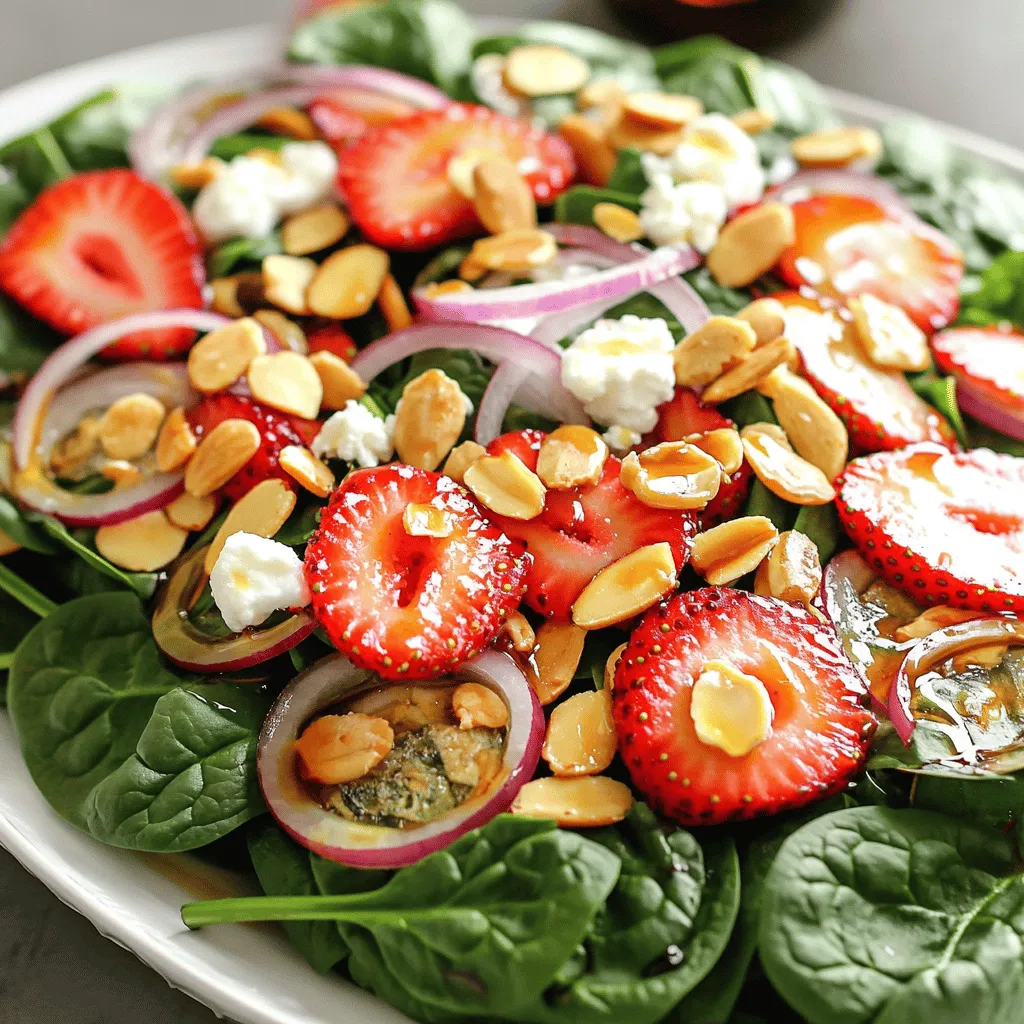
Spinach Strawberry Salad Fresh and Flavorful Delight
Are you ready to brighten up your plate? This Spinach Strawberry Salad promises fresh flavors and a delightful crunch. With
Are you ready to brighten up your plate? This Spinach Strawberry Salad promises fresh flavors and a delightful crunch. With
. To make banana oatmeal pancakes, start by gathering your ingredients. You need rolled oats, a ripe banana, milk, an egg, honey or maple syrup, baking powder, cinnamon, salt, and vanilla extract. First, put the rolled oats in a blender. Then, add the milk, mashed banana, egg, honey or syrup, baking powder, cinnamon, salt, and vanilla extract. Blend everything until it is smooth. If the batter is thick, add a bit more milk. Next, let the batter rest for about 5-10 minutes. This helps the oats soak up the liquid and makes the pancakes fluffier. While waiting, you can prepare your cooking area and toppings. When blending, make sure to scrape the sides of the blender. This ensures all the oats mix evenly. If you want a smoother batter, blend a little longer. However, some texture adds a nice bite. If you prefer a sweeter pancake, add a bit more honey or syrup to your mix. After resting, check the batter's consistency. It should be thick but pourable. If it’s too thick, add a splash of milk. This makes pouring easier. Heat a non-stick skillet over medium heat. Add a small amount of coconut oil or butter. This helps prevent sticking. Once the skillet is hot, pour about 1/4 cup of batter for each pancake. Cook for 2-3 minutes. You’ll see bubbles forming on the surface when it’s time to flip. Carefully turn the pancake over and cook for another 2-3 minutes. Look for a golden brown color on both sides. Keep repeating with the rest of the batter. You can add more oil or butter as needed. Serve warm and enjoy with your favorite toppings. For the complete recipe, check out the full recipe section. To make your pancakes fluffier, let the batter rest. After mixing, wait 5-10 minutes. This helps the oats soak up some liquid. You can also add a bit more baking powder. This will create extra lift in your pancakes. You can change the flavor easily. Try adding chocolate chips for a sweet treat. Mix in chopped nuts for crunch. For a more fruity taste, add blueberries or strawberries. If you like spice, a pinch of nutmeg works well too. Serve your pancakes warm for the best taste. Top them with sliced bananas for extra banana flavor. Drizzle with honey or maple syrup for sweetness. You can also add yogurt for creaminess. Chopped nuts give a nice crunch on top. For a fun twist, try a dollop of peanut butter. Enjoy your pancakes however you like! For the full recipe, check out the recipe section above. {{image_2}} You can easily make these pancakes gluten-free. Just use certified gluten-free oats instead of regular rolled oats. This small swap ensures that you enjoy your banana oatmeal pancakes without gluten. They will still taste great and keep their fluffy texture. To create a vegan version, replace the egg with a flax egg. Mix one tablespoon of ground flaxseed with three tablespoons of water. Let it sit for five minutes to thicken. You can also substitute regular milk with almond or oat milk. This way, you keep the delicious flavor while making it plant-based. Feel free to get creative with your pancakes! You can add blueberries, diced apples, or chopped nuts to the batter. Each fruit gives a new twist to the taste. If you like a little crunch, mix in walnuts or pecans. These additions make your pancakes more fun and nutritious. For the full recipe, check out the main article. After you enjoy your banana oatmeal pancakes, you might have some left. To store them, place the pancakes in an airtight container. You can keep them in the fridge for up to four days. Make sure they cool down before you seal the container. This keeps them fresh and tasty. When you're ready to eat your leftover pancakes, reheating is easy. You can use a microwave, skillet, or toaster. For the microwave, heat for 20-30 seconds. If using a skillet, warm it over low heat for about one minute on each side. The toaster works well too; just pop them in until warm. This helps bring back their soft texture. To freeze your banana oatmeal pancakes, stack them with parchment paper in between each one. Place the stack in a freezer-safe bag or container. You can freeze them for up to three months. When you're ready to eat, thaw them in the fridge overnight. Then, reheat as mentioned earlier. Enjoy fresh pancakes anytime! For the complete recipe, check out the Full Recipe. Yes, you can make these pancakes without eggs. Use a mashed banana instead. This will help bind the ingredients. You can also use a flaxseed meal. Mix one tablespoon of flaxseed meal with three tablespoons of water. Let it sit for five minutes to thicken before adding to the batter. To make your pancakes sweeter, add more banana. You can also try using extra honey or maple syrup. Another option is to mix in a tablespoon of brown sugar. If you like, add a dash of vanilla extract for extra flavor. You can use instant oats, but the texture will change. Instant oats are finer, so they may make the pancakes denser. If you prefer a fluffier pancake, stick with rolled oats. For the best results, check the [Full Recipe] for details on how to blend them. Banana oatmeal pancakes are simple and fun to make. You learned about the ingredients, methods, and tips for better pancakes. You can customize them to fit your taste. Remember, there are options for gluten-free and vegan diets. Storing and reheating leftovers is easy too. Enjoy your pancakes with your favorite toppings. With these steps, you will impress everyone with your cooking skills. Now, grab your ingredients and start making delicious pancakes today!](https://easycookingbite.com/wp-content/uploads/2025/06/ca0d7af1-aa6f-46f7-85b1-c2320c4debd3.webp)
Start your day right with delicious banana oatmeal pancakes! These pancakes are healthy, easy to make, and full of flavor.
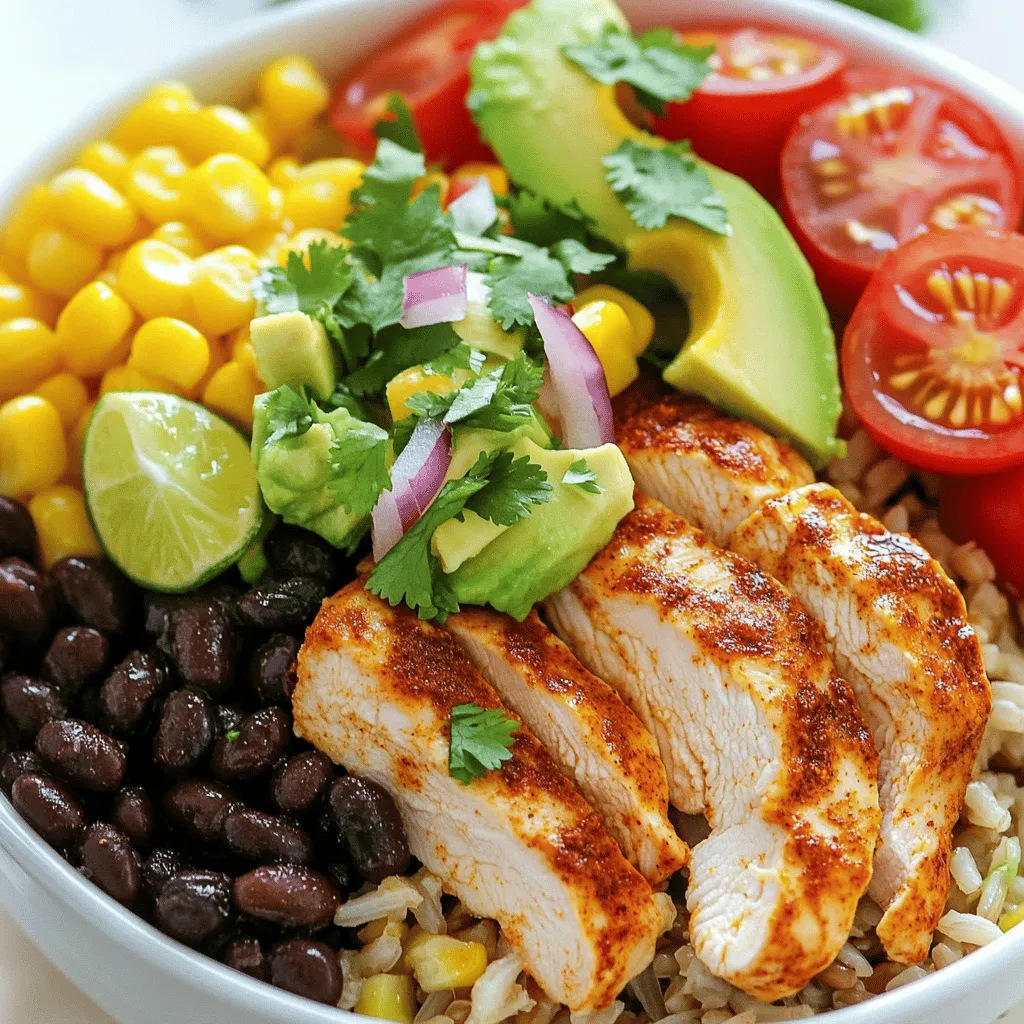
Welcome to my Flavorful Meal Guide for the Chipotle Chicken Burrito Bowl! If you crave a tasty, fun meal to

Are you ready to elevate your breakfast game? Try my Easy Lemon Ricotta Pancakes, where light and fluffy meet tangy
. To start, you need to cook the quinoa. First, combine 1 cup of rinsed quinoa with 2 cups of vegetable broth in a medium saucepan. This broth adds flavor and depth. Bring the mix to a boil over medium heat. Once boiling, reduce the heat to low. Cover the pan and let it simmer for about 15 minutes. You’ll know it’s done when the quinoa is fluffy and the broth is absorbed. While the quinoa cooks, it's time to prepare the dressing. In a small bowl, whisk together 2 tablespoons of olive oil, 2 tablespoons of lemon juice, 1 teaspoon of cumin, and a pinch of salt and pepper. This dressing brightens the bowl and ties all the flavors together. Taste it and adjust the seasoning as needed. Now comes the fun part: assembling your power bowl! In a large bowl, mix the cooked quinoa with 1 can of drained chickpeas, 1 cup of halved cherry tomatoes, 1 diced cucumber, 1/4 cup of finely chopped red onion, and 1 cup of baby spinach. Drizzle your prepared dressing over the top and toss everything gently to mix. This step ensures every bite is packed with flavor. To serve, divide the power bowl into individual bowls. Top each with sliced avocado and fresh herbs, like parsley or cilantro. For a creamy touch, feel free to drizzle with tahini. Enjoy your vibrant and nourishing meal! You can find the full recipe [here](#). - Rinse your quinoa well to remove any bitterness. - Always taste your dressing. Adjust seasoning to make it pop. - Use colorful bowls for a fun presentation. - Add feta cheese or nuts for a crunchy texture. Quinoa and chickpeas pack a powerful punch. They are both rich in protein. Quinoa has all nine essential amino acids. This makes it a complete protein source. Chickpeas are high in fiber, which helps digestion. Together, they keep you full and satisfied. This power bowl is a great way to fuel your day. Enjoy these health benefits while savoring every bite. It's a win-win! {{image_2}} You can boost the protein in your quinoa chickpea power bowl by adding grilled chicken or tofu. Grilled chicken gives a savory taste. Tofu adds a nice texture and absorbs flavors well. Simply cube the tofu or slice the chicken and mix it into the bowl. This makes your meal hearty and satisfying. If you want to switch things up, try other grains. Brown rice is a great substitute. It adds a nutty flavor and is also gluten-free. Farro can also work well. It has a chewy texture and pairs nicely with the other ingredients. Both options provide a different taste while keeping your meal gluten-free. To keep your dish plant-based, focus on flavors that shine. Use roasted red peppers for a sweet and smoky taste. Add nutritional yeast for a cheesy flavor without dairy. You can also mix in some black olives for a briny kick. Fresh herbs, like basil or mint, can brighten the dish too. This way, you keep all the flavor while staying true to vegan principles. For the full recipe, check out the details above! Store leftovers in an airtight container in the fridge. This helps keep the food fresh. You can safely enjoy your quinoa chickpea power bowl for up to four days. Just check for any changes in smell or color before eating. You can freeze the quinoa and chickpeas. However, the fresh veggies and dressing do not freeze well. They lose their crispness and flavor when thawed. For meal prep, consider freezing cooked quinoa and chickpeas separately. This way, you can mix fresh veggies later. To reheat, use the microwave or stovetop. If using a microwave, heat in short bursts. Stir in between to avoid hot spots. For stovetop, add a splash of water or broth. This keeps the quinoa from drying out. Enjoy your meal just like when it was fresh! Quinoa takes about 15 minutes to cook. It should be fluffy and the liquid needs to be fully absorbed. Start by boiling it with vegetable broth. After that, reduce the heat and cover it. You’ll know it’s done when it looks like tiny spirals. Yes, you can use other legumes. Black beans or kidney beans work well too. Each legume brings its own flavor. For instance, black beans add a rich taste, while kidney beans are slightly sweet. You can add spices like paprika or garlic powder for extra zing. Fresh herbs like basil or mint also brighten the dish. A splash of hot sauce can give it a kick. You can even try different dressings, like tahini or yogurt-based sauces. Absolutely! You can make the quinoa and chickpeas ahead of time. Store them in separate containers in the fridge. They stay fresh for about four days. When you’re ready to eat, just mix in your fresh veggies and dressing. This keeps everything crisp and tasty. Check out the Full Recipe for more details! This power bowl recipe combines healthy ingredients like quinoa, chickpeas, and fresh veggies. I showed you how to prepare it step by step, from cooking the quinoa to mixing in your favorite veggies and seasoning. Remember, you can modify it with proteins, grains, or herbs to suit your tastes. It's easy to store leftovers or freeze components for quick meals. Enjoy this nutritious dish, and feel good about making a healthy choice!](https://easycookingbite.com/wp-content/uploads/2025/06/27e231e3-8e96-4768-ae43-e792c7a6f874.webp)
Looking for a meal that’s both vibrant and nourishing? The Quinoa Chickpea Power Bowl is your go-to dish! Packed with
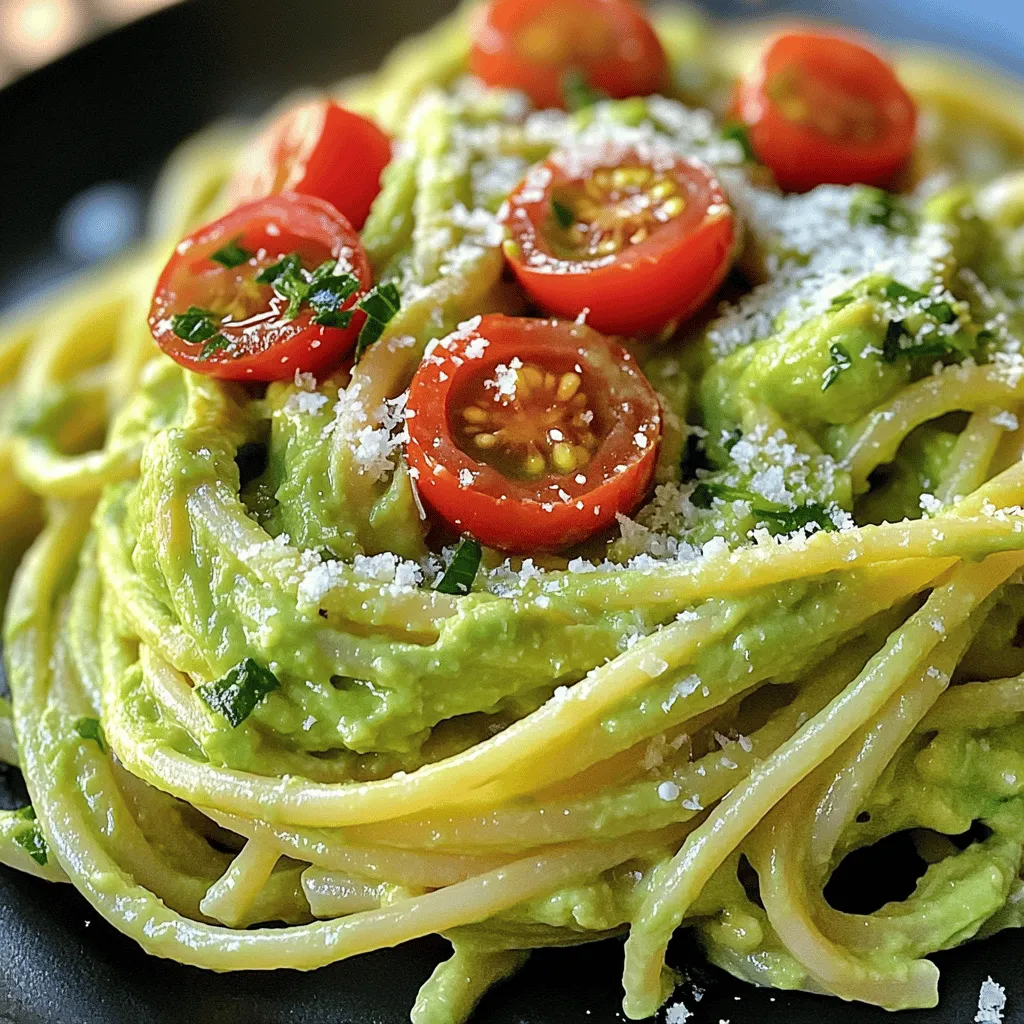
Are you ready for a dish that’s both creamy and simple? Creamy avocado pasta is my go-to recipe when I
![To make Baked Teriyaki Chicken Thighs, you need the following items: - 4 bone-in, skin-on chicken thighs - ½ cup soy sauce (low sodium) - ¼ cup honey - 2 tablespoons rice vinegar - 2 tablespoons sesame oil - 3 cloves garlic, minced - 1 tablespoon fresh ginger, grated - 1 teaspoon cornstarch (optional, for thickening) - 1 tablespoon sesame seeds - 2 green onions, sliced (for garnish) These ingredients come together to create a sweet and savory dish that is easy to prepare. The chicken thighs stay juicy while the marinade gives them a lovely glaze. Each serving of Baked Teriyaki Chicken Thighs has about: - Calories: 320 - Protein: 25 grams - Carbs: 15 grams - Fats: 18 grams This meal is not only tasty but also provides a good balance of protein and carbs. The healthy fats from sesame oil add nice flavor. You can easily swap some ingredients if you need to. Here are a few ideas: - Soy sauce: Try tamari for a gluten-free option. - Honey: Maple syrup works well for a vegan choice. - Rice vinegar: You can use apple cider vinegar for a different flavor. These substitutions won’t change the dish much, but they can fit your diet better. First, wash the chicken thighs. Rinse them under cold water. Pat them dry with paper towels. This step helps remove any extra moisture. It also makes the skin crispier when baked. Place the thighs skin-side up in a baking dish. You want them to fit well without overlapping. Season the chicken with salt and pepper for added flavor. Now, let's make the teriyaki marinade. In a large bowl, mix these ingredients together: - ½ cup soy sauce (low sodium) - ¼ cup honey - 2 tablespoons rice vinegar - 2 tablespoons sesame oil - 3 cloves garlic, minced - 1 tablespoon fresh ginger, grated Whisk them until smooth. This marinade gives the chicken a sweet and savory taste. If you want a thicker sauce, mix 1 teaspoon of cornstarch with a tablespoon of water. Stir this into the marinade. It will help the sauce cling to the chicken better. Preheat your oven to 425°F (220°C). Once it is hot, pour the marinade over the chicken thighs. Make sure each piece is well coated. Reserve some marinade for basting later. Bake the chicken for 30 to 35 minutes. The skin should get crispy and golden. Use a meat thermometer to check the internal temperature. It should reach 165°F (75°C). Halfway through baking, baste the chicken with the reserved marinade. In the last 5 minutes, sprinkle sesame seeds on top. This adds a nice crunch and flavor. Once done, let the chicken rest for a few minutes before serving. You can find the full recipe in the main article. To get crispy skin and juicy meat, follow these tips: - Dry the Chicken: Pat the chicken thighs dry with paper towels. This helps the skin get crispy. - High Heat: Bake at a high temperature, like 425°F (220°C). This crisps the skin fast. - Baste Midway: Halfway through baking, baste the chicken with the reserved marinade. This keeps it moist. - Use a Meat Thermometer: Check that the inside reaches 165°F (75°C). This guarantees safety and juiciness. Watch out for these common errors: - Skipping Drying: Not drying the chicken can lead to soggy skin. - Wrong Temperature: Baking at a low temperature makes the skin rubbery. - Overcrowding: Don’t crowd the baking dish. It can trap steam and affect crispiness. - Ignoring Rest Time: Letting the chicken rest helps the juices settle. Cutting too soon makes it dry. Pair your baked teriyaki chicken with these sides: - Steamed rice: A classic choice that soaks up the sauce well. - Stir-fried vegetables: Bright, crunchy veggies add color and nutrients. - Cucumber salad: Refreshing and cool, it balances the rich flavors. - Noodles: Tossed with sesame oil, they make a filling option. Check out the Full Recipe for more details on making this delicious dish! {{image_2}} You can change the taste of your teriyaki chicken in fun ways. If you like spice, add some red pepper flakes to the marinade. This will give your dish a nice kick. For a sweeter touch, toss in a bit more honey. If you crave tanginess, increase the rice vinegar. Each tweak makes the dish special and suits your taste. While chicken thighs are great, you can use other cuts. Boneless thighs work well and cook faster. Chicken breasts are leaner but still tasty. Drumsticks can add a fun twist, too. Just remember, cooking times might change based on the cut you choose. Baking is easy, but you have other options. You can grill the chicken for a smoky flavor. Just marinate it the same way, then place it on a hot grill. Flip it often to cook evenly. Pan-searing is another method. Use a hot skillet to get a crispy skin, then finish cooking in the oven. Each method brings out different flavors and textures in your chicken. For the complete recipe, check the [Full Recipe]. To keep your baked teriyaki chicken thighs fresh, follow these simple steps: - Let the chicken cool to room temperature. - Place the chicken in an airtight container. - Store it in the fridge for up to 3 days. This method helps maintain flavor and texture, ensuring your leftovers taste great. Reheating your chicken properly keeps it juicy and tasty. Here are a few methods: - Oven: Preheat to 350°F (175°C). Place chicken on a baking sheet. Heat for about 15-20 minutes. - Microwave: Use a microwave-safe dish. Cover with a damp paper towel. Heat on medium for 1-2 minutes, checking often. - Stovetop: Heat a skillet over medium heat. Add a splash of water or broth. Cook for about 5-7 minutes, covered. These methods help the chicken remain moist while warming it up. If you want to save your baked teriyaki chicken for later, freezing is a great option. Here’s how: - Cool the chicken completely. - Wrap each piece tightly in plastic wrap. - Place wrapped chicken in a freezer-safe bag or container. - Label with the date. It can last for up to 3 months. To reheat, thaw in the fridge overnight and follow the reheating tips above. For the full recipe, check out the details provided earlier. Bake chicken thighs at 425°F for 30 to 35 minutes. This ensures they cook through and get crispy. Always check that the skin is golden brown. Cooking time may vary based on the size of the thighs. Yes, you can use boneless chicken thighs or chicken breasts. Adjust the baking time if you use boneless cuts. They usually cook faster, around 20 to 30 minutes. Just watch for that golden color! Pair your chicken with steamed rice or stir-fried veggies. Some great choices are broccoli, bell peppers, or snap peas. You can also add a fresh salad for crunch. For garnish, top with sliced green onions or toasted sesame seeds. Use a meat thermometer to check the internal temperature. It should reach 165°F for cooked chicken. Insert it into the thickest part of the thigh. This ensures it is safe to eat. Always let it rest before serving. For the full recipe, check the ingredients and instructions above! You now have all the tools to make delicious baked teriyaki chicken thighs. We covered the ingredient list, including substitutions, and explored cooking methods. Remember to check the nutritional info for healthy eating. Use the tips to avoid mistakes and enhance flavor. Don't forget the variations to keep things exciting. Store leftover chicken properly for future meals. With these steps, you can serve great dishes every time. Enjoy your cooking and happy eating!](https://easycookingbite.com/wp-content/uploads/2025/06/3cb93de4-3399-48f4-8254-68e01435a7d1.webp)
Are you ready to enjoy a delicious meal that’s also easy to make? My Baked Teriyaki Chicken Thighs recipe is
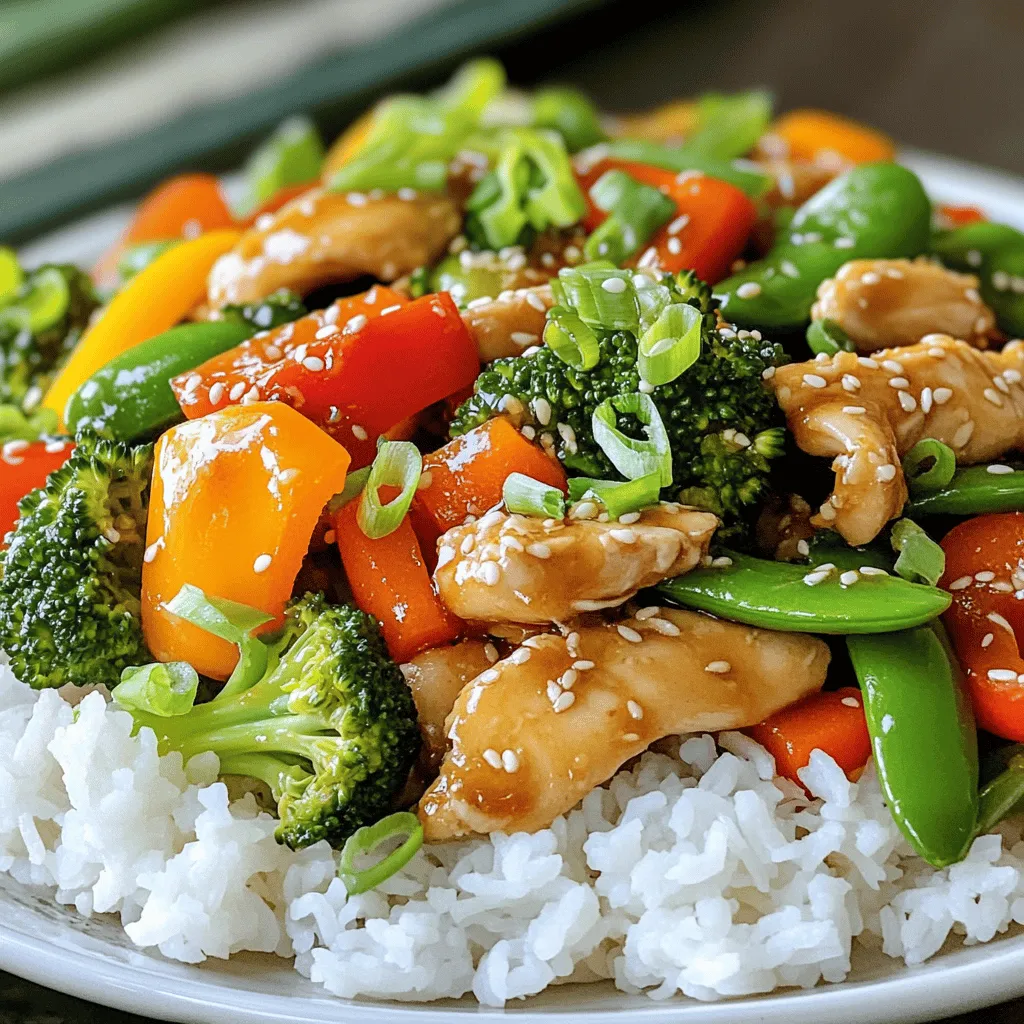
Are you in need of a quick and tasty meal? Look no further! My Chicken and Veggie Stir Fry is

Looking for a quick and tasty treat that’s also healthy? You’re in the right place! This Healthy Chocolate Banana Smoothie

If you crave a taste of Italy, look no further! This Easy Margherita Pizza recipe brings fresh flavors right to
