Cheesy Garlic Breadsticks Simple and Tasty Recipe

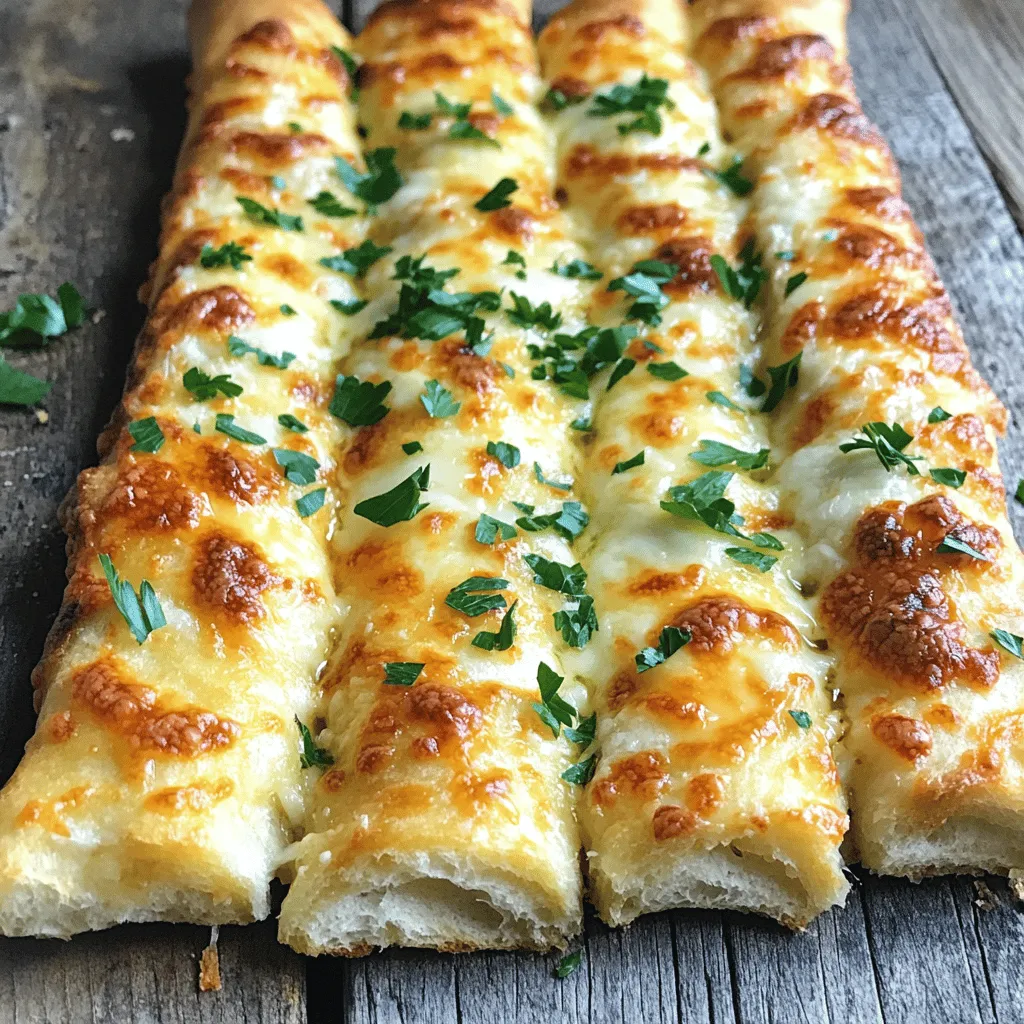
If you love warm, cheesy snacks, you’re in the right place! Cheesy garlic breadsticks are simple to make and oh-so-tasty. In this recipe, I’ll guide you through easy steps to create soft breadsticks loaded with flavor. Whether you’re serving them as a snack or a side, these breadsticks will impress everyone. Let’s dive into the delicious world of cheesy garlic goodness!

Ingredients

Key Ingredients for Cheesy Garlic Breadsticks

To make cheesy garlic breadsticks, you need simple ingredients. Here’s what you will need:

– 2 cups all-purpose flour

– 1 tsp baking powder

– 1/2 tsp salt

– 3/4 cup warm water

– 1 tbsp olive oil

– 2 cloves garlic, minced

– 1 cup shredded mozzarella cheese

– 1/2 cup grated Parmesan cheese

– 1 tsp dried oregano

– 1/2 tsp red pepper flakes (optional)

– Fresh parsley, chopped (for garnish)

These ingredients combine to create a soft, cheesy treat. The flour gives the bread its structure, while the cheese adds creaminess and flavor.

Optional Add-ins and Seasonings

You can get creative with your breadsticks. Here are some add-ins and seasonings that work well:

– Chopped green onions for a fresh touch

– Italian seasoning for a flavor boost

– Garlic powder if you want more garlic flavor

– Cooked bacon bits for a savory crunch

Feel free to experiment with what you have at home. These extras can help make your breadsticks even more tasty.

Best Types of Cheese for Maximum Flavor

While mozzarella and Parmesan are classic choices, you can mix it up. Consider these cheeses for extra flavor:

– Cheddar for a sharp kick

– Gouda for a rich, creamy taste

– Fontina for a melty texture

Using different cheeses can change the flavor profile of your breadsticks. Choose what you like best, and enjoy the cheesy goodness! For the full recipe, check out the recipe section above.

Step-by-Step Instructions

Preparing the Dough

To start, gather your ingredients. In a large mixing bowl, add the flour, baking powder, and salt. Mix these dry ingredients well. Next, slowly pour in the warm water and olive oil. Stir until the dough forms. If it’s too dry, add a little more water. If it’s too wet, add a bit of flour. Once combined, transfer the dough to a floured surface. Knead it for about 2-3 minutes until it feels soft and elastic. This step is key for a nice texture.

Creating the Cheesy Topping

Now, let’s make the cheesy topping. In a small bowl, combine the minced garlic, mozzarella cheese, Parmesan cheese, oregano, and red pepper flakes if you like some heat. Mix well to ensure every bite is cheesy and flavorful. This topping will make your breadsticks shine.

Baking the Breadsticks

Before you bake, preheat your oven to 400°F (200°C). Roll the dough into a rectangle about 1/2 inch thick. Place it on a baking sheet lined with parchment paper. Next, sprinkle the cheesy mixture evenly over the dough. Use a pizza cutter to slice the dough into strips, cutting almost all the way through. This keeps the breadsticks together. Bake for 15-20 minutes until the edges are golden and the cheese bubbles. Once done, take them out and let them cool a bit. Garnish with chopped parsley for a fresh touch. Enjoy your delicious cheesy garlic breadsticks! For more details, check out the Full Recipe.

Tips & Tricks

Achieving the Perfect Texture

To get the best texture, focus on kneading the dough. Knead for about 2-3 minutes. This helps the dough become soft and elastic. If it feels sticky, add a bit more flour. If it’s too dry, add a touch of water. Rolling the dough to the right thickness is key. Aim for about 1/2 inch thick. This thickness allows for a nice rise and keeps the breadsticks soft.

Common Mistakes to Avoid

One common mistake is not measuring the ingredients correctly. Use measuring cups for the flour and water. Too much flour makes the dough dry. Not enough flour makes it too wet. Another mistake is not cutting the dough properly. Cut it almost all the way through but leave it intact. This helps the breadsticks pull apart easily after baking.

Flavor Enhancements for Extra Deliciousness

To amp up the flavor, try adding more garlic! Mix in some minced garlic with the cheese. You can also use fresh herbs like basil or thyme. These add a fresh taste. For a bit of heat, sprinkle in some red pepper flakes. This adds a nice kick. You can also swap out the cheeses for different flavors. Try using cheddar or a blend of cheeses for variety.

Variations

Gluten-Free Options

You can enjoy cheesy garlic breadsticks even if you need gluten-free options. Use a gluten-free flour blend instead of all-purpose flour. Make sure the blend has a good structure for baking. You might also want to add a bit of xanthan gum. This will help bind the dough. Follow the same steps in the recipe, and you’ll have tasty breadsticks for everyone.

Herb-Infused Recipes

Herbs can make your cheesy garlic breadsticks even better. Try adding fresh or dried herbs to the dough. Basil, thyme, or rosemary work well. You can mix them into the dough or sprinkle them on top with the garlic and cheese. This adds a nice flavor that pairs well with the cheese. Experiment with different herbs to find your favorite mix.

Dipping Sauces and Pairings

Dipping sauces can take your cheesy garlic breadsticks to the next level. A classic marinara sauce is always a hit. You can also try garlic butter for an extra garlic punch. For something different, make a ranch dip or a spicy aioli. Pair your breadsticks with a fresh salad or a hearty soup for a complete meal. These options keep your meal fun and exciting.

For the full recipe, check out the recipe section and get started on your cheesy garlic breadsticks today!

Storage Info

Storing Leftovers

After you enjoy your cheesy garlic breadsticks, store any leftovers in an airtight container. This keeps them fresh for about 2-3 days. If you want to save them longer, consider freezing instead.

Freezing Techniques

To freeze cheesy garlic breadsticks, first let them cool completely. Then, wrap each stick tightly in plastic wrap. Place them in a freezer-safe bag or container. They can last up to 2 months in the freezer. This way, you can enjoy them whenever you want!

Reheating for Best Results

For the best taste, reheat your breadsticks in the oven. Preheat your oven to 350°F (175°C). Place the breadsticks on a baking sheet. Heat them for about 10-15 minutes or until warm and crispy. You can also microwave them, but they may get soft. Enjoy your cheesy garlic breadsticks just like fresh!

FAQs

How can I make cheesy garlic breadsticks without yeast?

You can make cheesy garlic breadsticks without yeast by using baking powder instead. Baking powder helps the dough rise without the need for yeast. This method is quick and easy. Just mix your dry ingredients, add water and olive oil, then knead. It will create a soft dough that bakes well.

What can I substitute for mozzarella cheese?

If you want to substitute mozzarella cheese, you have several options. Cheddar cheese adds a sharp flavor. Monterey Jack gives a creamy texture. You can also use a blend of cheeses for more taste. Just make sure to use a cheese that melts well for the best results.

Can I prepare the dough ahead of time?

Yes, you can prepare the dough ahead of time. Make the dough and wrap it tightly in plastic wrap. Store it in the fridge for up to 24 hours. When you’re ready to bake, let it sit at room temperature for about 30 minutes. This way, you’ll have fresh breadsticks ready to go when you need them.

You learned how to make perfect cheesy garlic breadsticks. We covered key ingredients, optional add-ins, and the best cheeses. The step-by-step instructions guide you through dough prep, topping creation, and baking. I’ve shared tips for texture and common mistakes. You can explore variations for gluten-free options and tasty dips. Lastly, proper storage tips ensure your breadsticks last. Enjoy your cheesy creation!

To make cheesy garlic breadsticks, you need simple ingredients. Here’s what you will need: - 2 cups all-purpose flour - 1 tsp baking powder - 1/2 tsp salt - 3/4 cup warm water - 1 tbsp olive oil - 2 cloves garlic, minced - 1 cup shredded mozzarella cheese - 1/2 cup grated Parmesan cheese - 1 tsp dried oregano - 1/2 tsp red pepper flakes (optional) - Fresh parsley, chopped (for garnish) These ingredients combine to create a soft, cheesy treat. The flour gives the bread its structure, while the cheese adds creaminess and flavor. You can get creative with your breadsticks. Here are some add-ins and seasonings that work well: - Chopped green onions for a fresh touch - Italian seasoning for a flavor boost - Garlic powder if you want more garlic flavor - Cooked bacon bits for a savory crunch Feel free to experiment with what you have at home. These extras can help make your breadsticks even more tasty. While mozzarella and Parmesan are classic choices, you can mix it up. Consider these cheeses for extra flavor: - Cheddar for a sharp kick - Gouda for a rich, creamy taste - Fontina for a melty texture Using different cheeses can change the flavor profile of your breadsticks. Choose what you like best, and enjoy the cheesy goodness! For the full recipe, check out the recipe section above. To start, gather your ingredients. In a large mixing bowl, add the flour, baking powder, and salt. Mix these dry ingredients well. Next, slowly pour in the warm water and olive oil. Stir until the dough forms. If it's too dry, add a little more water. If it's too wet, add a bit of flour. Once combined, transfer the dough to a floured surface. Knead it for about 2-3 minutes until it feels soft and elastic. This step is key for a nice texture. Now, let's make the cheesy topping. In a small bowl, combine the minced garlic, mozzarella cheese, Parmesan cheese, oregano, and red pepper flakes if you like some heat. Mix well to ensure every bite is cheesy and flavorful. This topping will make your breadsticks shine. Before you bake, preheat your oven to 400°F (200°C). Roll the dough into a rectangle about 1/2 inch thick. Place it on a baking sheet lined with parchment paper. Next, sprinkle the cheesy mixture evenly over the dough. Use a pizza cutter to slice the dough into strips, cutting almost all the way through. This keeps the breadsticks together. Bake for 15-20 minutes until the edges are golden and the cheese bubbles. Once done, take them out and let them cool a bit. Garnish with chopped parsley for a fresh touch. Enjoy your delicious cheesy garlic breadsticks! For more details, check out the Full Recipe. To get the best texture, focus on kneading the dough. Knead for about 2-3 minutes. This helps the dough become soft and elastic. If it feels sticky, add a bit more flour. If it’s too dry, add a touch of water. Rolling the dough to the right thickness is key. Aim for about 1/2 inch thick. This thickness allows for a nice rise and keeps the breadsticks soft. One common mistake is not measuring the ingredients correctly. Use measuring cups for the flour and water. Too much flour makes the dough dry. Not enough flour makes it too wet. Another mistake is not cutting the dough properly. Cut it almost all the way through but leave it intact. This helps the breadsticks pull apart easily after baking. To amp up the flavor, try adding more garlic! Mix in some minced garlic with the cheese. You can also use fresh herbs like basil or thyme. These add a fresh taste. For a bit of heat, sprinkle in some red pepper flakes. This adds a nice kick. You can also swap out the cheeses for different flavors. Try using cheddar or a blend of cheeses for variety. {{image_2}} You can enjoy cheesy garlic breadsticks even if you need gluten-free options. Use a gluten-free flour blend instead of all-purpose flour. Make sure the blend has a good structure for baking. You might also want to add a bit of xanthan gum. This will help bind the dough. Follow the same steps in the recipe, and you’ll have tasty breadsticks for everyone. Herbs can make your cheesy garlic breadsticks even better. Try adding fresh or dried herbs to the dough. Basil, thyme, or rosemary work well. You can mix them into the dough or sprinkle them on top with the garlic and cheese. This adds a nice flavor that pairs well with the cheese. Experiment with different herbs to find your favorite mix. Dipping sauces can take your cheesy garlic breadsticks to the next level. A classic marinara sauce is always a hit. You can also try garlic butter for an extra garlic punch. For something different, make a ranch dip or a spicy aioli. Pair your breadsticks with a fresh salad or a hearty soup for a complete meal. These options keep your meal fun and exciting. For the full recipe, check out the recipe section and get started on your cheesy garlic breadsticks today! After you enjoy your cheesy garlic breadsticks, store any leftovers in an airtight container. This keeps them fresh for about 2-3 days. If you want to save them longer, consider freezing instead. To freeze cheesy garlic breadsticks, first let them cool completely. Then, wrap each stick tightly in plastic wrap. Place them in a freezer-safe bag or container. They can last up to 2 months in the freezer. This way, you can enjoy them whenever you want! For the best taste, reheat your breadsticks in the oven. Preheat your oven to 350°F (175°C). Place the breadsticks on a baking sheet. Heat them for about 10-15 minutes or until warm and crispy. You can also microwave them, but they may get soft. Enjoy your cheesy garlic breadsticks just like fresh! You can make cheesy garlic breadsticks without yeast by using baking powder instead. Baking powder helps the dough rise without the need for yeast. This method is quick and easy. Just mix your dry ingredients, add water and olive oil, then knead. It will create a soft dough that bakes well. If you want to substitute mozzarella cheese, you have several options. Cheddar cheese adds a sharp flavor. Monterey Jack gives a creamy texture. You can also use a blend of cheeses for more taste. Just make sure to use a cheese that melts well for the best results. Yes, you can prepare the dough ahead of time. Make the dough and wrap it tightly in plastic wrap. Store it in the fridge for up to 24 hours. When you’re ready to bake, let it sit at room temperature for about 30 minutes. This way, you'll have fresh breadsticks ready to go when you need them. You learned how to make perfect cheesy garlic breadsticks. We covered key ingredients, optional add-ins, and the best cheeses. The step-by-step instructions guide you through dough prep, topping creation, and baking. I've shared tips for texture and common mistakes. You can explore variations for gluten-free options and tasty dips. Lastly, proper storage tips ensure your breadsticks last. Enjoy your cheesy creation!

Cheesy Garlic Breadsticks

Indulge in the irresistible flavors of Cheesy Garlic Breadsticks with this easy recipe! Perfect for appetizers or snacks, these delightful sticks combine gooey mozzarella and zesty garlic for a taste sensation that everyone will love. With simple ingredients and straightforward instructions, you'll have these warm, cheesy treats ready in just 35 minutes. Click to explore this mouthwatering recipe and elevate your next meal with delicious homemade breadsticks!

Ingredients
  

2 cups all-purpose flour

1 tsp baking powder

1/2 tsp salt

3/4 cup warm water

1 tbsp olive oil

2 cloves garlic, minced

1 cup shredded mozzarella cheese

1/2 cup grated Parmesan cheese

1 tsp dried oregano

1/2 tsp red pepper flakes (optional)

Fresh parsley, chopped (for garnish)

Instructions
 

In a large mixing bowl, combine the all-purpose flour, baking powder, and salt. Mix well.

    Slowly add the warm water and olive oil to the dry ingredients, mixing until a dough forms. You may need to adjust the flour or water slightly to achieve a smooth dough consistency.

      Transfer the dough to a floured surface and knead for about 2-3 minutes until it’s soft and elastic.

        Preheat your oven to 400°F (200°C).

          Roll the dough into a rectangle about 1/2 inch thick. Transfer it to a parchment-lined baking sheet.

            In a small bowl, mix together the minced garlic, mozzarella cheese, Parmesan cheese, oregano, and red pepper flakes.

              Sprinkle the cheese mixture evenly over the rolled-out dough.

                Using a pizza cutter or knife, cut the dough into strips or into a desired shape, making sure to cut almost all the way through but not completely to maintain the dough intact.

                  Bake in the preheated oven for 15-20 minutes, or until the edges are golden brown and the cheese is bubbly.

                    Once done, remove from the oven and let cool slightly. Garnish with chopped fresh parsley before serving.

                      Prep Time: 15 minutes | Total Time: 35 minutes | Servings: 4-6

                        Leave a Comment

                        Recipe Rating