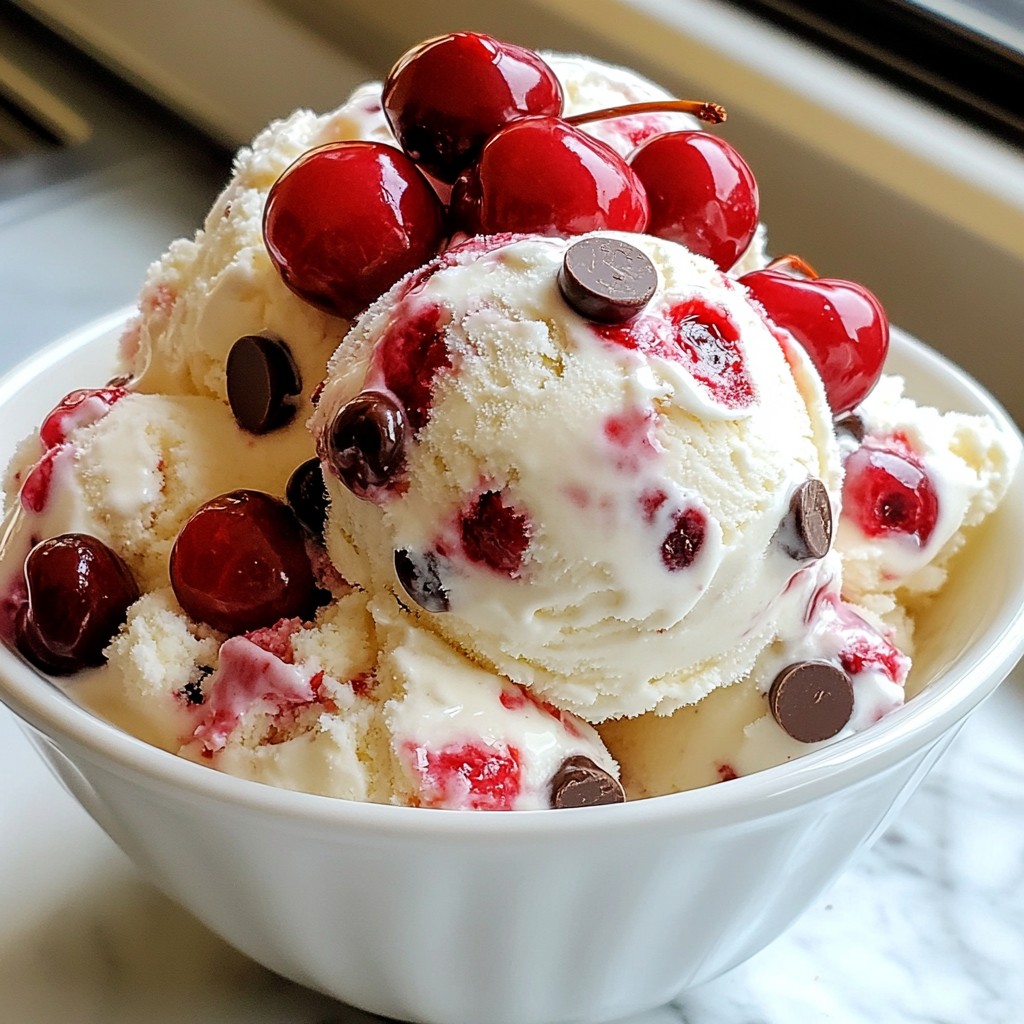
Craving a sweet treat that’s both refreshing and satisfying? Look no further! In this blog post, I’ll guide you through making Cherry Chocolate Chip Ice Cream. This delightful homemade dessert balances tart cherries and rich chocolate for a perfect scoop. Whether you’re an ice cream novice or a seasoned pro, my step-by-step instructions will ensure your treat is a success. Let’s dive into this delicious adventure together!
Why I Love This Recipe
- Fresh and Fruity Flavor: The combination of sweet cherries and rich chocolate creates a delightful balance that is refreshing and indulgent.
- Simple Ingredients: With just a handful of ingredients, this recipe is easy to whip up, making it perfect for any occasion.
- Customizable Toppings: Serve it with your favorite toppings such as nuts or whipped cream to elevate your dessert experience.
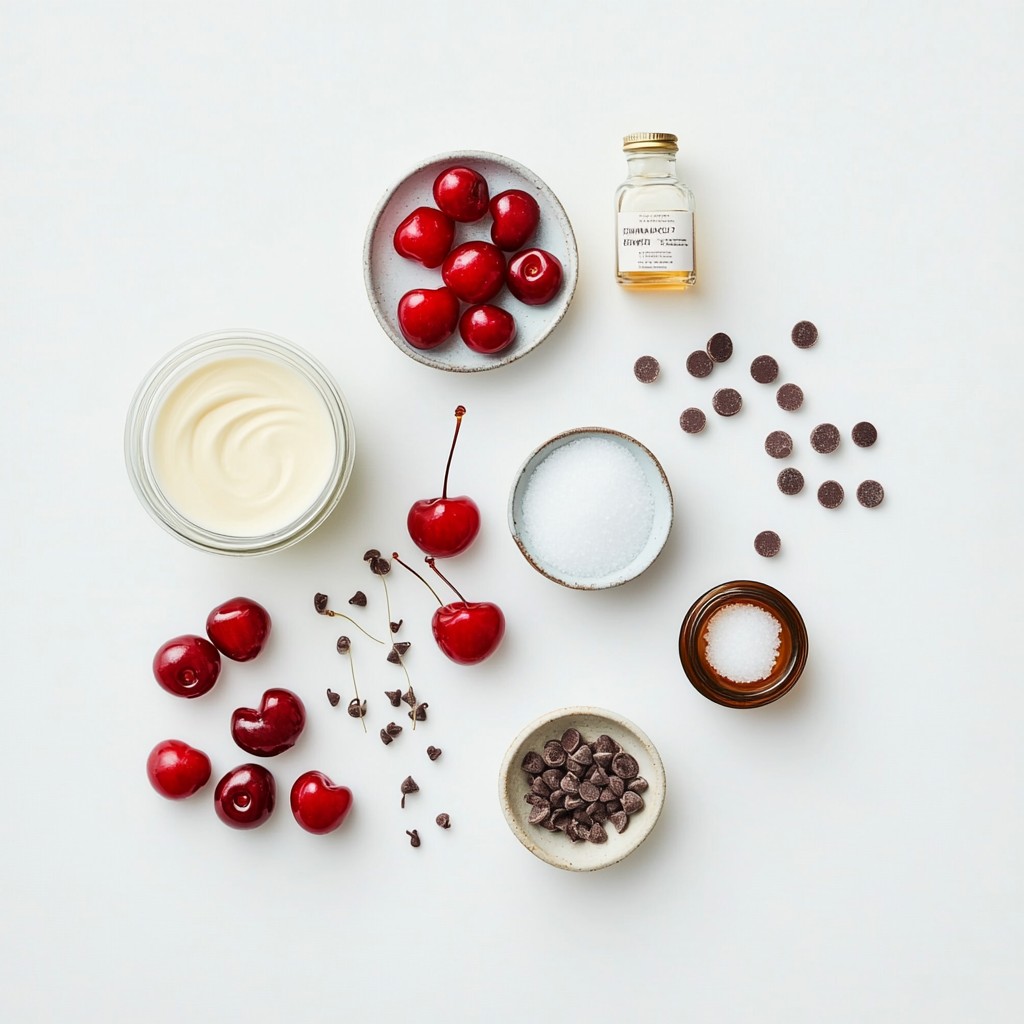
Ingredients
Fresh or Frozen Cherries
You need two cups of cherries for this ice cream. Fresh cherries taste great, but frozen ones work too. If using fresh, make sure to pit and halve them. This helps the cherries mix well into the ice cream. If using frozen cherries, let them thaw before cooking. This makes it easier to release their sweet juice.
Creams and Milk
For the base, you will need one cup of heavy cream and one cup of whole milk. Heavy cream gives the ice cream that rich, creamy texture we all love. Whole milk adds a nice balance and keeps it smooth. Mixing these two forms the heart of the ice cream.
Sweeteners and Flavorings
You will also need three-quarters of a cup of granulated sugar. This sweetens the ice cream and helps it freeze nicely. Add one teaspoon of vanilla extract for a warm flavor that pairs well with cherries. If you want a unique twist, use a quarter teaspoon of almond extract. Finally, add a pinch of salt to enhance the flavors. Don't forget half a cup of chocolate chips for that delightful crunch!
Step-by-Step Instructions
Cooking the Cherry Base
Start by placing the cherries and sugar in a medium saucepan. Heat this over medium heat. Stir well and let the mix cook for about 5 to 7 minutes. This helps the cherries soften and release their juices. If you use frozen cherries, you will want to sauté them until they thaw and become juicy. Afterward, take the saucepan off the heat. Let the cherry mix cool for a bit. Use a fork or potato masher to mash the cherries slightly. Make sure to keep some bigger pieces for texture.
Making the Cream Mixture
Now, grab a large mixing bowl. Pour in the heavy cream, whole milk, and vanilla extract. If you like, add almond extract and a pinch of salt. Whisk these together until they mix well. Next, stir in the cherry sauce from the saucepan. Make sure everything is well combined. You want a pretty pink mixture with chunks of cherry.
Churning the Ice Cream
Prepare your ice cream maker as the instructions say. Pour the cherry-cream mixture into the machine. Churn this for about 20 to 25 minutes. It should reach a soft-serve texture. In the last few minutes, add the chocolate chips to the mix. Once done, transfer the churned ice cream into an airtight container. Freeze it for at least 4 hours, or until it is firm. Enjoy your homemade cherry chocolate chip ice cream!
Tips & Tricks
Choosing the Right Cherries
When making cherry chocolate chip ice cream, pick the best cherries. Fresh cherries are great, but frozen work too. Look for bright red cherries with firm skin. Sweet cherries, like Bing, are perfect. They add a lovely sweetness. If using frozen cherries, ensure they are pitted and halved. This saves time and effort.
Ice Cream Maker Tips
Your ice cream maker is key to a great texture. Chill the bowl overnight for best results. Follow the maker's instructions. Pour in the cherry-cream mix and churn for 20-25 minutes. Don’t rush this. Churning adds air and makes the ice cream light and fluffy. If you see it thickening, it’s ready for the chocolate chips.
Achieving the Perfect Texture
Texture is vital for ice cream. The right balance of cream and milk makes it rich. Use heavy cream for creaminess and whole milk for body. Don’t skip the mashing step with the cherries. It creates a nice blend of chunks and sauce. Lastly, freeze the churned ice cream for at least 4 hours. This will give you that perfect scoopable delight!
Pro Tips
- Use Fresh Cherries: Fresh cherries will give your ice cream a vibrant flavor and better texture compared to frozen ones.
- Chill Your Mixture: For a creamier texture, chill the cherry-cream mixture in the fridge before churning it in the ice cream maker.
- Experiment with Chocolate: Try different types of chocolate chips, like milk or white chocolate, for a unique twist on flavor.
- Let it Firm Up: After churning, allow the ice cream to freeze for at least 4 hours to achieve the best texture before serving.
Variations
Dairy-Free Options
You can make this ice cream without dairy. Use coconut cream instead of heavy cream. For milk, use almond milk or oat milk. This keeps the same yummy flavor while being dairy-free. The texture may change, but it will still taste great.
Additional Flavor Additions
Want to try something new? Add a splash of orange juice for a citrus twist. You can also mix in some almond or mint extract for extra flavor. These small tweaks can make your ice cream even more special!
Toppings and Mix-Ins
Toppings can make your ice cream fun. Try adding crushed nuts or a drizzle of honey. You can also mix in fresh berries or sprinkles. If you like a bit of crunch, use graham cracker crumbs. Always remember to top with some extra chocolate chips for a sweet finish!
Storage Info
Best Storage Practices
To store your cherry chocolate chip ice cream, use an airtight container. This helps keep the ice cream fresh and prevents ice crystals. Make sure to press plastic wrap directly on the surface of the ice cream before sealing the container. This extra step keeps it creamy and delicious.
Freezing Tips
When freezing your ice cream, set your freezer to the coldest setting. This ensures it freezes quickly and maintains a smooth texture. Avoid leaving the ice cream out for too long before serving. It can soften too much if left out, making it hard to scoop.
How Long It Lasts
If stored properly, your cherry chocolate chip ice cream lasts about two weeks in the freezer. After that, it might lose flavor and texture. Label the container with the date you made it. This way, you always know when to enjoy it at its best!
FAQs
Can I use other fruits instead of cherries?
Yes, you can use other fruits! Try strawberries, raspberries, or blueberries. These fruits also taste great with chocolate. Each fruit will change the flavor a bit, so mix and match as you like.
How do I make cherry chocolate chip ice cream without an ice cream maker?
You can make ice cream without an ice cream maker! Start by mixing the cherry and cream mixtures in a bowl. Then, pour it into a shallow dish and freeze it. Every thirty minutes, stir the mixture. Do this for about three hours. This helps break up ice crystals and makes it creamy.
What’s the difference between semi-sweet and dark chocolate chips?
Semi-sweet chocolate chips are sweeter and have a balanced taste. Dark chocolate chips contain more cocoa and less sugar, making them richer. Use semi-sweet for a sweeter treat and dark for a bold flavor. Choose based on your taste preference for this ice cream.
This blog post covered how to make cherry ice cream. We discussed key ingredients like fresh cherries, creams, and sweeteners. I provided step-by-step instructions to guide you through cooking the cherry base and churning the ice cream. I offered tips for choosing cherries and achieving the right texture. We explored fun variations like dairy-free options and toppings. Finally, I shared best practices for storage.
Making cherry ice cream is fun and easy. Try it to impress your family and friends! Enjoy your tasty treat!