Are you ready to create a delightful snack that’s both fun and easy? Chicken onigiri, a tasty rice ball, is the perfect blend of flavor and texture. In this post, I’ll guide you through simple steps to make your own chicken onigiri at home. We’ll cover essential ingredients, tips for perfect rice, and creative variations. Let’s dive in and whip up this delicious treat!
Why I Love This Recipe
- Comforting Flavor: The combination of sushi rice and savory chicken creates a delightful balance of textures and tastes that feels like a warm hug in every bite.
- Customizable Filling: You can easily switch up the filling by using different proteins or veggies, making it a versatile recipe that can adapt to whatever you have on hand.
- Perfect for On-the-Go: Onigiri makes an excellent snack or lunch option, perfect for packing in bento boxes, picnics, or quick meals during busy days.
- Fun to Make: Shaping the onigiri into fun triangles or rounds is a hands-on activity that can be enjoyed with kids or friends, turning cooking into a fun experience.
Ingredients
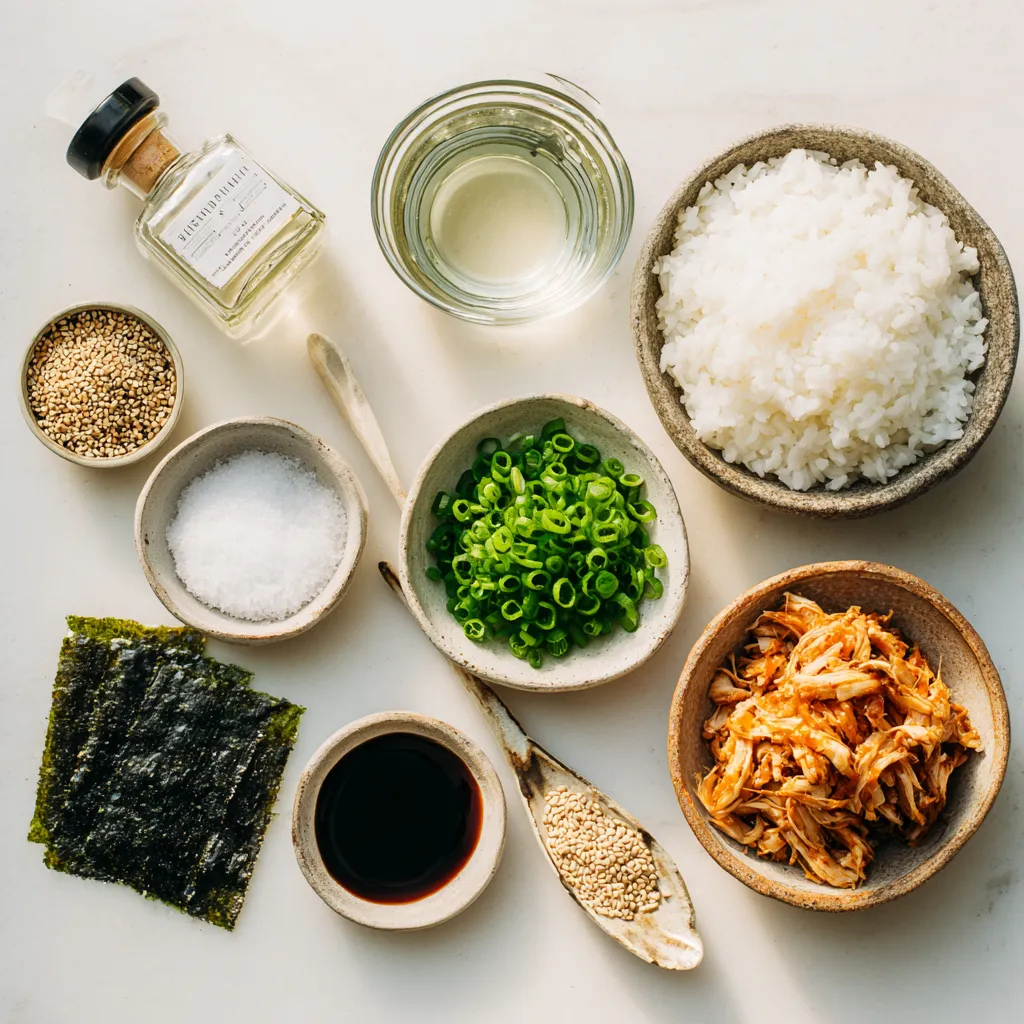
Essential Ingredients for Chicken Onigiri
To make Chicken Onigiri, you need these key items:
– 2 cups sushi rice
– 2 1/2 cups water
– 1 teaspoon salt
– 1 tablespoon rice vinegar
– 1 tablespoon sugar
– 1 cup cooked chicken, shredded
– 1/4 cup green onions, finely chopped
– 2 tablespoons soy sauce
– 1 sheet nori, cut into strips (optional)
– Sesame seeds for garnish (optional)
These ingredients create a tasty and filling rice ball.
Optional Garnishes and Enhancements
You can add fun flavors and textures to your onigiri with these optional items:
– Nori strips add a nice crunch.
– Sesame seeds give a nutty taste.
– Fresh herbs like cilantro or shiso enhance flavor.
These extras make your onigiri unique and beautiful.
Ingredient Substitutions
Don’t have an ingredient? Here are some easy swaps:
– Use brown rice instead of sushi rice for a nuttier flavor.
– Replace cooked chicken with tofu for a plant-based twist.
– Any soy sauce can work. Try tamari for a gluten-free option.
These substitutions let you customize your onigiri to your taste.
Step-by-Step Instructions
Preparing the Sushi Rice
To start, rinse 2 cups of sushi rice under cold water. Do this until the water runs clear. This step helps to remove excess starch. It will make your rice less sticky. Next, combine the rinsed rice and 2 1/2 cups of water in a rice cooker or a pot. Let the mixture soak for 30 minutes. This soak helps the rice cook evenly. If you’re using a rice cooker, turn it on and let it cook. If you don’t have a rice cooker, bring the pot to a boil. Cover it and reduce the heat. Cook for 18 to 20 minutes. Once cooked, let the rice sit covered for 10 minutes. This resting time makes the rice fluffier.
Mixing the Chicken Filling
In a bowl, mix 1 cup of shredded chicken with 2 tablespoons of soy sauce and 1/4 cup of finely chopped green onions. You can use teriyaki-flavored or grilled chicken for extra taste. Make sure everything combines well. This chicken filling gives the onigiri its savory flavor. Set this mixture aside while you prepare the rice.
Shaping the Onigiri
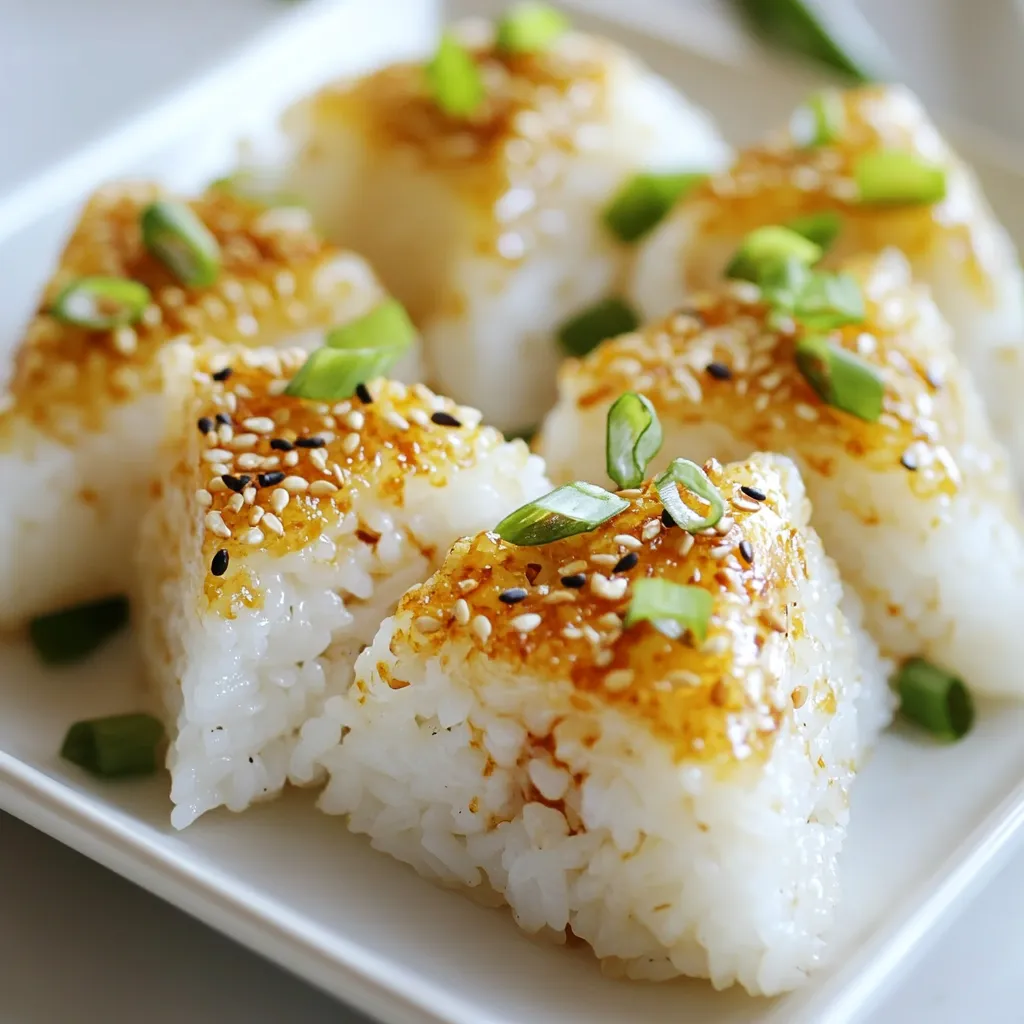
Once the rice is cool enough to touch, wet your hands with water. This helps prevent the rice from sticking. Take about 1/4 cup of rice and flatten it in your palm. Leave a small dip in the center. Now, place a spoonful of the chicken mixture into this dip. Mold the rice around the filling to form a shape. You can choose between a triangle or a round shape. Press gently but firmly to hold the onigiri together. If you like, wrap a strip of nori around the base or sprinkle sesame seeds on top. This adds flavor and looks nice too. Repeat this process until all your onigiri are shaped. Enjoy these tasty treats fresh or pack them for a snack!
Tips & Tricks
How to Avoid Sticky Rice
To keep your rice from sticking, rinse it well. Rinse the sushi rice under cold water until the water runs clear. This step helps remove excess starch. Use a rice cooker if you can; it makes cooking easier. If you cook in a pot, let the rice soak for 30 minutes. This allows the grains to absorb water and cook evenly. After cooking, let it sit covered for 10 minutes to finish steaming.
Best Practices for Shaping Onigiri
Shaping onigiri can be fun. First, wet your hands with water to stop the rice from sticking to your skin. Take about 1/4 cup of rice and flatten it in your palm. Create a small indentation in the center. Next, spoon in some chicken filling. Mold the rice around it carefully. Press gently to form a nice triangle or round shape. This helps keep your onigiri strong and intact.
Serving and Storage Tips
Onigiri is best served fresh, but you can store it too. Arrange your onigiri on a platter, garnished with herbs or cucumber slices. For storage, keep them in an airtight container. If you want to eat them later, wrap them in plastic wrap. This keeps the rice moist. You can also freeze them for later. When ready to eat, just reheat them gently in the microwave.
Pro Tips
- Perfectly Cooked Rice: Always rinse sushi rice thoroughly to remove excess starch, ensuring each grain remains distinct and fluffy after cooking.
- Flavorful Chicken Filling: Use teriyaki-flavored or grilled chicken for a richer taste; marinating the chicken beforehand can also enhance the flavor.
- Shaping Onigiri: Wet your hands with water before handling the rice to prevent sticking, making it easier to shape the onigiri without making a mess.
- Presentation Matters: Garnish your onigiri with fresh herbs or colorful vegetable slices to make the dish visually appealing, enhancing the overall dining experience.
Variations
Different Fillings for Chicken Onigiri
You can switch up the filling in your chicken onigiri. Instead of shredded chicken, try tuna or salmon. For a vegetarian option, use avocado or sautéed mushrooms. You can even mix in some cream cheese for a rich flavor. Just keep it simple and tasty.
Alternative Shapes and Presentation Ideas
Onigiri don’t have to be just triangular. You can form them into rounds or squares. This makes them fun for kids or parties. For a great look, stack them in a bento box. Add colorful veggies or fruit around them for a nice touch.
Dietary Modifications (Gluten-free, Vegan Options)
If you need gluten-free options, use tamari instead of soy sauce. For vegans, replace chicken with tofu or chickpeas. You can also use vegetable broth when cooking the rice for extra flavor. These tweaks keep the dish tasty and still enjoyable for all diets.
Storage Info
How to Store Leftover Onigiri
To keep your leftover onigiri fresh, wrap each one in plastic wrap. This helps to lock in moisture and keeps them from drying out. Place the wrapped onigiri in an airtight container. Store it in the fridge for up to three days. Remember, the rice will harden when cold.
Freezing Chicken Onigiri
You can freeze onigiri for later. First, wrap each onigiri tightly in plastic wrap. Then, place them in a freezer bag. Remove as much air as possible before sealing. You can freeze onigiri for up to a month. When ready to eat, let them thaw in the fridge overnight.
Best Practices for Reheating
Reheat onigiri in the microwave for about 30 seconds on medium power. Make sure to unwrap them first. Adding a damp paper towel helps keep them moist. If you prefer, you can also reheat them on a skillet over low heat. This gives them a nice crispy outside. Enjoy your tasty onigiri warm!
FAQs
What is Chicken Onigiri?
Chicken Onigiri is a Japanese rice ball. It is made with sushi rice and filled with chicken. You can use cooked chicken, like teriyaki or grilled chicken. The rice is seasoned with vinegar and sugar, giving it a unique taste. You can shape it into triangles or balls. It’s often wrapped in nori, which adds flavor and crunch.
Can I make Chicken Onigiri in advance?
Yes, you can make Chicken Onigiri ahead of time. Prepare the onigiri and store them in the fridge. Keep them in an airtight container to stay fresh. They taste best when eaten within one or two days. If you want to enjoy them later, add the nori just before eating. This keeps the nori crispy.
Where can I buy Chicken Onigiri?
You can find Chicken Onigiri at Japanese grocery stores or sushi shops. Some Asian markets also sell pre-made onigiri. Check local convenience stores; they might have them in the refrigerated section. If you can’t find them, you can easily make your own at home with this recipe!
In this blog post, we explored making chicken onigiri from scratch. We covered essential ingredients, preparation steps, and helpful tips. You can use various fillings and even find options for special diets. Remember, store leftover onigiri properly to keep it fresh. Making these rice balls is fun and tasty. Now, gather your ingredients and try it out! Enjoy each bite and get creative with your flavor