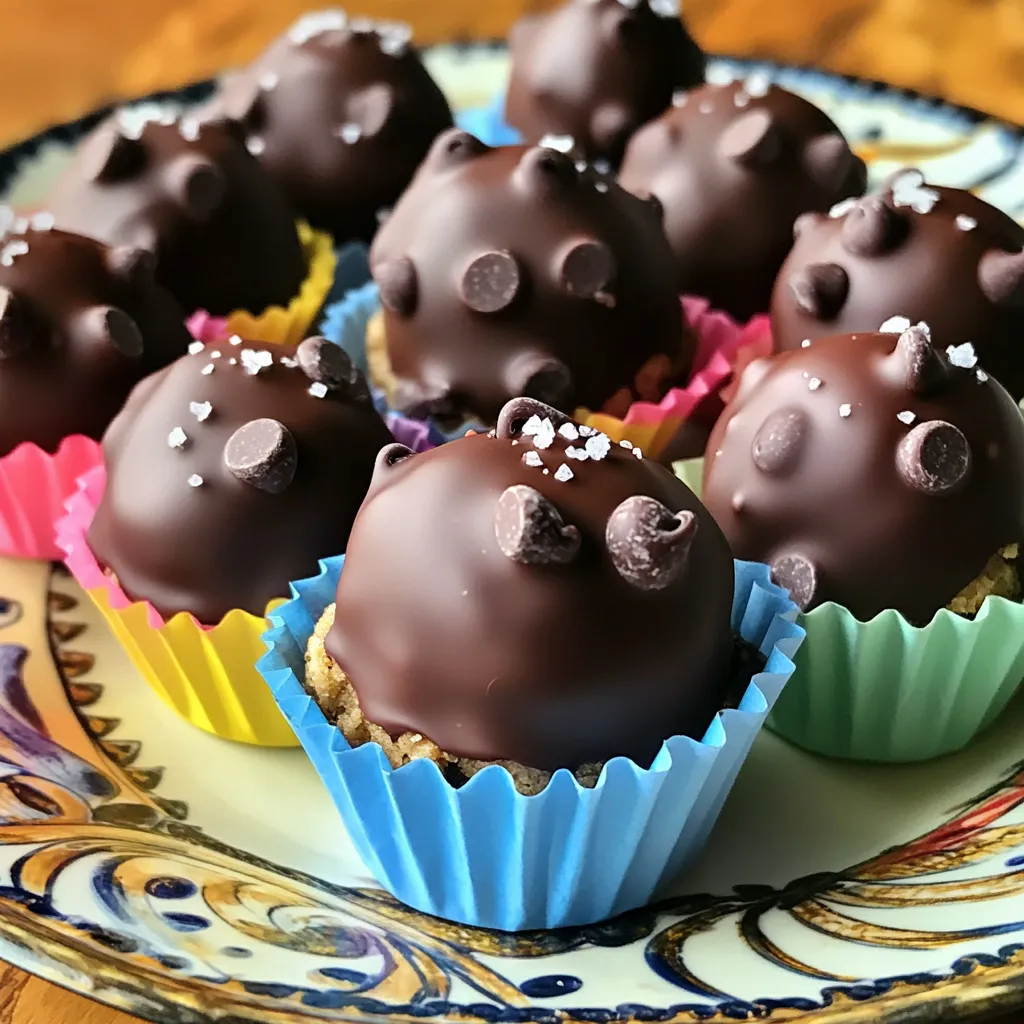
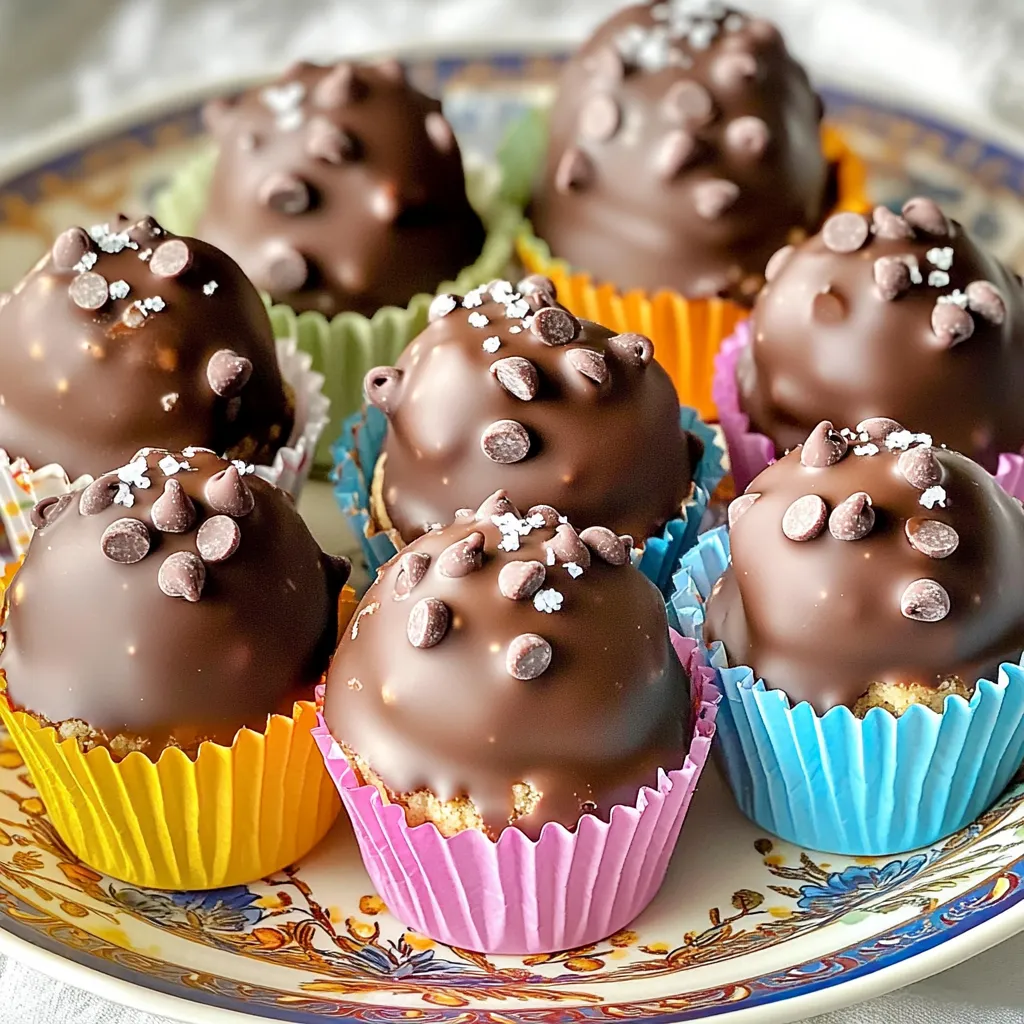
Are you ready to indulge in a sweet treat that requires no baking? In this post, I’ll show you how to make Chocolate Chip Cookie Dough Truffles that are creamy, delicious, and safe to eat. We’ll cover everything from heat-treating your flour to shaping the perfect truffles. Trust me, with just a few simple steps, you can create a delightful dessert that your friends and family will love. Let’s get started!
Ingredients
Complete List of Ingredients
To make these tasty truffles, gather these simple items:
– 1 cup all-purpose flour (heat-treated for safety)
– 1/2 cup unsalted butter, softened
– 1/3 cup granulated sugar
– 1/3 cup brown sugar, packed
– 2 tablespoons vanilla extract
– 1/4 teaspoon salt
– 1/2 cup mini chocolate chips
– 1 cup chocolate chips (for coating)
– 2 tablespoons coconut oil (for chocolate coating)
Importance of Heat-Treating Flour
You must heat-treat the flour for safety. Raw flour can contain harmful bacteria. To heat-treat, spread flour on a baking sheet. Bake it at 350°F (175°C) for just 5 minutes. Let it cool before mixing it into your dough. This step helps make the truffles safe to eat.
Suggested Substitutes for Ingredients
If you need substitutes, here are some great options:
– Use oat flour or almond flour in place of all-purpose flour.
– Swap unsalted butter for coconut oil for a dairy-free option.
– Use coconut sugar instead of brown sugar for a healthier twist.
– Replace mini chocolate chips with chopped nuts for extra crunch.
– For a vegan version, use a plant-based butter and nut milk instead of regular milk.
These swaps keep the flavor while meeting different dietary needs.
Step-by-Step Instructions
Preparing the Flour Safely
To make this treat safe, we need to prepare the flour. Start by spreading one cup of all-purpose flour on a baking sheet. Bake it at 350°F (175°C) for five minutes. This step kills any harmful bacteria. Once done, let the flour cool completely. This ensures our truffles are safe to eat.
Mixing the Dough Ingredients
Next, grab a mixing bowl. Add half a cup of softened unsalted butter. Then, mix in one-third cup of granulated sugar and one-third cup of brown sugar. Cream these together until the mixture looks light and fluffy. Now, stir in two tablespoons of vanilla extract and a quarter teaspoon of salt. Mix these until they blend well.
Shaping and Chilling the Truffles
Now it’s time to shape the dough. Gradually add the cooled flour into the bowl. Mix until it all comes together. Then, gently fold in half a cup of mini chocolate chips. Scoop out tablespoon-sized portions and roll them into smooth balls. Place each ball on a parchment-lined baking sheet. Chill these cookie dough balls in the fridge for at least 30 minutes. This helps them firm up and makes coating easier.
Melting and Coating the Truffles
For the final step, we’ll coat our truffles. In a microwave-safe bowl, combine one cup of chocolate chips with two tablespoons of coconut oil. Microwave this mixture in 30-second intervals. Stir between each interval until smooth and melted. Now, take each chilled cookie dough ball and dip it into the melted chocolate. Make sure they are well-coated. Return them to the parchment-lined baking sheet. For the best results, chill the coated truffles for another 30 minutes to set the chocolate.
Tips & Tricks
How to Achieve the Perfect Truffle Texture
To get the best truffle texture, chill your dough well. After rolling the dough into balls, refrigerate them for at least 30 minutes. This helps them hold their shape when you coat them in chocolate. When melting the chocolate, use a microwave in short bursts. Stir often to avoid burning the chocolate. A smooth coating makes your truffles shine.
Flavor Enhancements and Add-ins
You can add more flavor to your truffles. Try mixing in a pinch of cinnamon or nutmeg for warmth. You can also use dark chocolate chips instead of mini ones for a richer taste. For a fun twist, add chopped nuts, like walnuts or pecans. If you love coconut, shredded coconut makes a great addition too.
Common Mistakes and How to Avoid Them
One common mistake is not heating the flour. Always heat-treat your flour to make it safe. Another mistake is overmixing the dough. Mix until just combined, or the truffles can become tough. Make sure your chocolate is not too hot when coating. If it is, it can melt the truffles. Finally, remember to chill your truffles after coating. This helps the chocolate set properly.
Variations
Alternate Coatings for Truffles
You can play with the coating of your truffles. While I love classic chocolate, you can try white chocolate or dark chocolate. Each type brings a unique taste. For a fun twist, sprinkle crushed nuts or colorful sprinkles on top. These add texture and a pop of color. You can also use melted candy melts for a quick and easy option. Each coating changes the look and taste, so feel free to experiment!
Healthier Ingredient Options
If you want a lighter treat, swap some ingredients. Use almond flour instead of all-purpose flour for a nutty flavor. You can replace butter with coconut oil for a dairy-free version. Instead of sugar, try using maple syrup or honey. These swaps will make your truffles healthier without losing flavor. Remember, the goal is to keep it tasty while being mindful of health.
Flavor Variations
Don’t be afraid to mix in different flavors. Adding peanut butter gives a rich, nutty taste. You can also try peppermint extract for a refreshing twist. For a fun seasonal treat, add pumpkin spice in the fall. You can even fold in dried fruits like cranberries or cherries for extra sweetness. Each flavor change makes your truffles unique and exciting to eat!
Storage Info
Best Practices for Storing Truffles
To keep your truffles fresh, store them in an airtight container. Place parchment paper between layers to avoid sticking. Keep the container in a cool, dry place. If you live in a warm area, refrigerate them. This will help keep the chocolate from melting. Enjoy them within one week for the best taste.
Freezing Options for Longer Shelf Life
If you want to save some truffles for later, freezing works great. Place the truffles in a single layer on a baking sheet. Freeze them for about 30 minutes until firm. Then, transfer them to a freezer-safe bag or container. They can last for up to three months in the freezer. When you’re ready to eat, thaw them in the fridge overnight.
Signs of Spoilage or When to Discard
Always check your truffles before enjoying them. If you see any mold or an off smell, it’s time to toss them. Chocolate can also develop white spots, known as bloom, which happens when it melts and cools. While not harmful, they can change the texture and taste. If you spot these signs, don’t eat them.
FAQs
Can I use regular flour instead of heat-treated flour?
No, do not use regular flour. Regular flour may contain harmful bacteria. Heat-treated flour is safe to eat raw. To heat-treat, bake it at 350°F for five minutes. Let it cool before mixing it into your dough.
How long do these truffles last in the fridge?
These truffles last about one week in the fridge. Store them in an airtight container. This keeps them fresh and tasty. If you want them to last longer, consider freezing them instead.
Is it safe to eat raw cookie dough?
Yes, it is safe if you use heat-treated flour. Regular flour can contain germs that cause illness. Always ensure the flour is heat-treated before using it in recipes. This makes the cookie dough safe for eating raw.
Can I make these truffles dairy-free or vegan?
Yes, you can make these truffles dairy-free or vegan. Use dairy-free butter and dark chocolate chips. Check that all ingredients are vegan-friendly. This way, everyone can enjoy these delicious treats!
This blog post covered everything you need to know about making delicious truffles. We explored key ingredients and the importance of heat-treating flour for safety. You learned step-by-step instructions to mix, shape, and coat your truffles perfectly. Tips helped you avoid common mistakes and customize flavors. Lastly, we discussed proper storage to keep truffles fresh.
With these details, you can create tasty treats that impress everyone. Now, it’s time to gather your ingredients and start your truffle-making journey!