Looking for a tasty and healthy snack? Chocolate Coconut Bliss Balls are your answer! They’re fun to make and perfect for a quick energy boost. With simple ingredients and easy steps, you can whip these up in no time. Plus, they’re a great option for various diets. Join me as I guide you through this delightful treat that's sure to satisfy your sweet tooth without the guilt!
Why I Love This Recipe
- Healthier Indulgence: These bliss balls are a guilt-free treat packed with wholesome ingredients, perfect for satisfying your sweet tooth without compromising your health.
- Easy to Make: With just a few simple steps and no baking required, these bliss balls are a quick and convenient snack option for any time of the day.
- Customizable: You can easily swap out ingredients to suit your taste or dietary needs, making this recipe versatile for everyone.
- Perfect for Meal Prep: These bliss balls store well in the fridge, making them an ideal option for meal prepping healthy snacks for the week ahead.
Ingredients
List of Ingredients
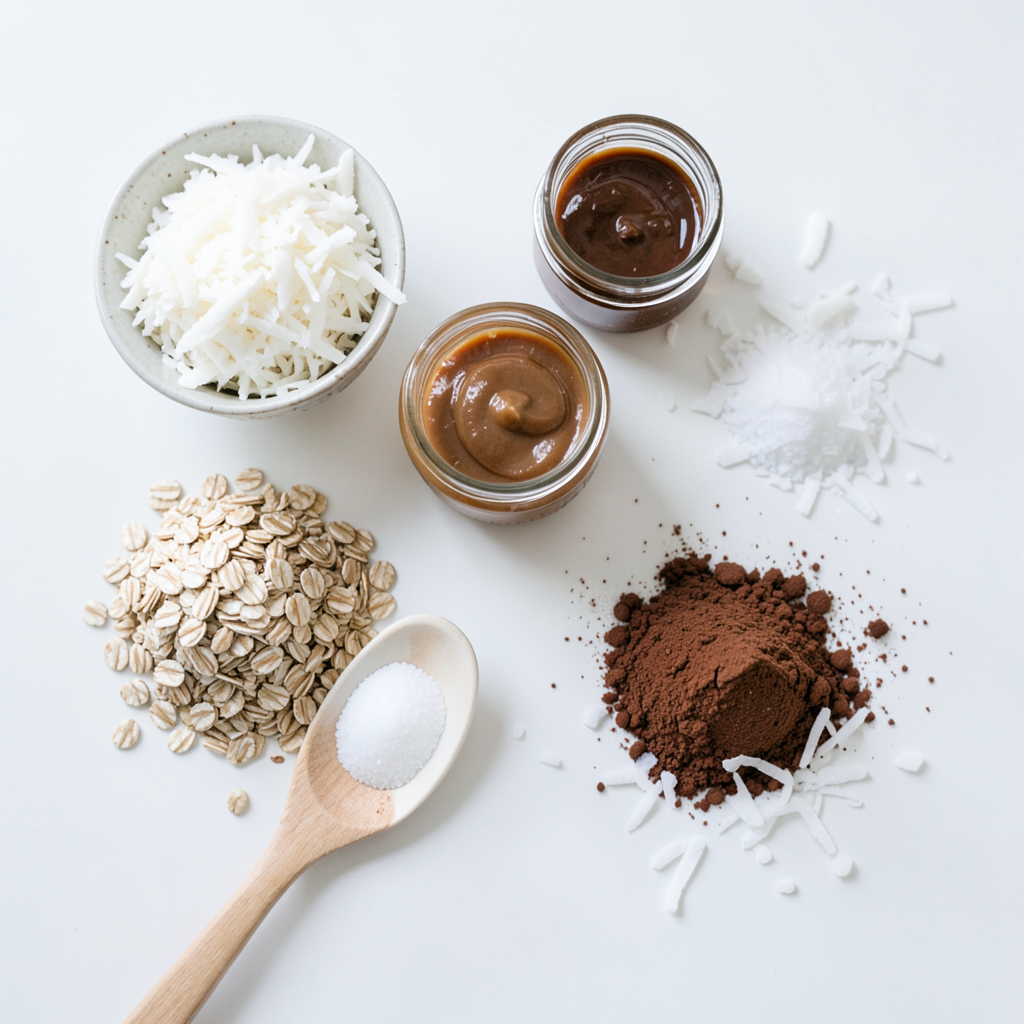
To make the Chocolate Coconut Bliss Balls, you will need:
- 1 cup rolled oats
- 1 cup shredded unsweetened coconut
- 1/2 cup almond butter (or peanut butter)
- 1/2 cup maple syrup
- 1/3 cup cocoa powder
- 1 teaspoon vanilla extract
- A pinch of salt
- Extra shredded coconut (for rolling)
Measurements and Substitutions
You can swap ingredients easily. For the nut butter, peanut butter works well if you prefer. If you want a sweeter treat, add more maple syrup. You can also use honey instead of maple syrup for a different flavor. If you need a gluten-free option, rolled oats labeled gluten-free are a great choice.
Optional Add-ins
You can add fun extras to your bliss balls. Try adding:
- Chopped nuts for crunch
- Mini chocolate chips for extra sweetness
- Dried fruit like raisins or cranberries
- A dash of cinnamon for warmth
Mixing in these add-ins can create unique flavors and textures. Just remember to keep it balanced so the bliss balls stay firm and tasty. Enjoy experimenting!
Step-by-Step Instructions
Preparation Steps
First, gather your ingredients. You need rolled oats, shredded coconut, almond butter, maple syrup, cocoa powder, vanilla extract, and a pinch of salt. In a large mixing bowl, add all the dry ingredients first: the oats, coconut, cocoa powder, and salt. Then, add the almond butter and maple syrup. Now, mix all these together. You can use a spoon or your hands for this. Get in there and combine until it is sticky and well-mixed.
Chilling Process
After mixing, cover the bowl with plastic wrap. This keeps the mixture fresh and helps it firm up. Place the bowl in the fridge and let it chill for about 30 minutes. Chilling makes it easier to roll into balls. If you skip this step, the mixture may be too soft. Trust me, chilling is key to a good texture.
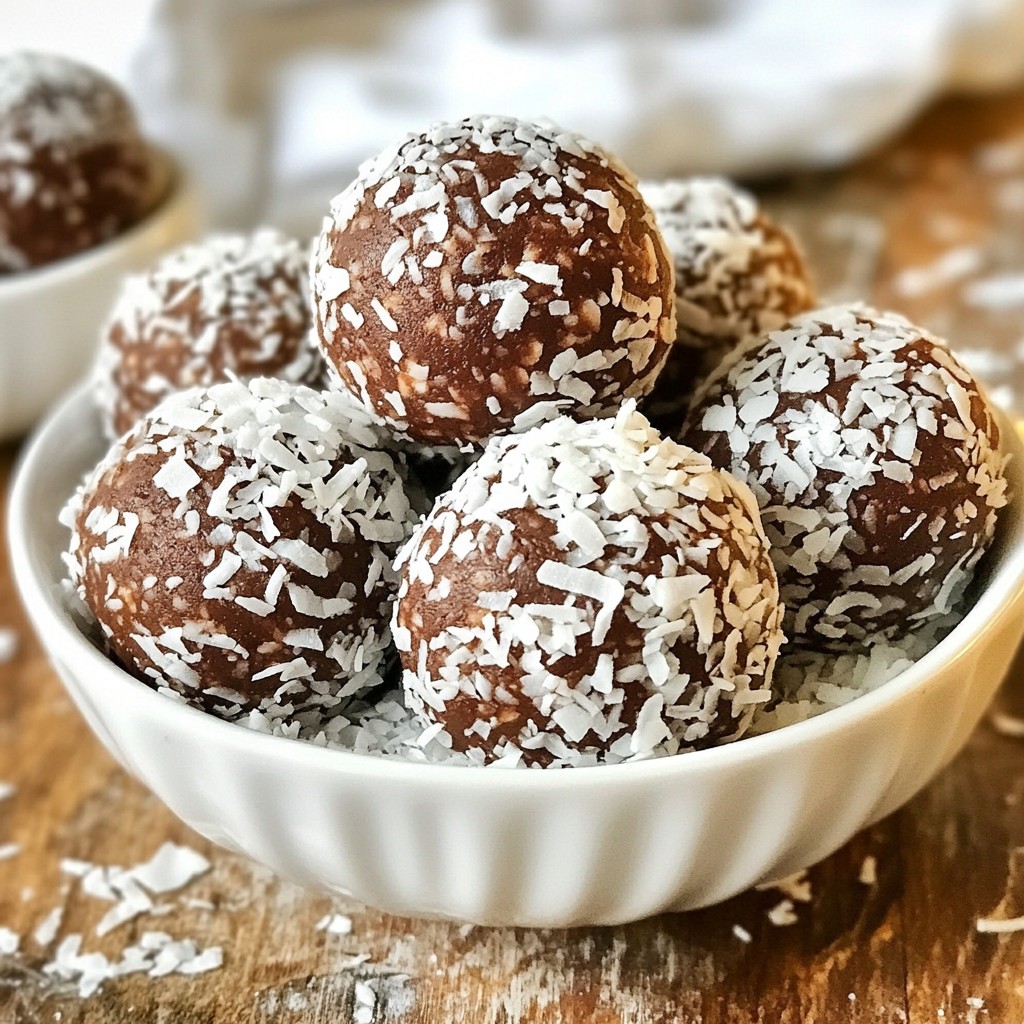
Rolling and Coating the Bliss Balls
Once the mixture is firm, take it out of the fridge. Scoop small portions, about one tablespoon each. Roll them into balls using your palms. Make sure they are smooth and round. Next, pour some extra shredded coconut onto a plate. Roll each ball in the coconut until they are fully coated. This adds a nice texture and look. Place the finished balls on a parchment-lined tray. After making all the balls, return the tray to the fridge for another 15 minutes. This helps them set well. Enjoy your Chocolate Coconut Bliss Balls as a tasty and healthy snack!
Tips & Tricks
How to Achieve the Perfect Texture
To get the right texture for your Chocolate Coconut Bliss Balls, mix well. Combine all ingredients until they feel sticky. Use your hands for this part; it helps blend everything nicely. Chilling the mixture is key. After mixing, let it sit in the fridge for about 30 minutes. This step firms it up, making it easy to roll.
Common Mistakes to Avoid
One common mistake is not chilling the mixture long enough. If it’s too soft, your balls won’t hold shape. Another mistake is not measuring ingredients accurately. Too much cocoa powder can make them dry. Lastly, don’t skip the extra coconut for coating. It adds flavor and a nice texture.
Enhancing Flavor Profile
To make your bliss balls even tastier, consider adding a few extras. You can mix in nuts like almonds or walnuts for crunch. A pinch of cinnamon can bring warmth to the flavor. For a fruity twist, try adding a bit of dried fruit. Remember, balance is key. Too much can overpower the chocolate and coconut taste.
Pro Tips
- Use Natural Nut Butters: Opt for natural almond or peanut butter without added sugars or oils for a healthier option.
- Chill for Better Texture: Chilling the mixture before rolling helps the bliss balls hold their shape and makes them easier to handle.
- Customize Your Coating: Experiment with different coatings like crushed nuts, cacao nibs, or chia seeds for added texture and flavor.
- Storage Tips: Store the bliss balls in an airtight container in the fridge for up to a week, or freeze them for longer-lasting snacks.
Variations
Flavor Enhancements
You can easily change the taste of your Chocolate Coconut Bliss Balls. Here are some fun ideas:
- Nuts: Add chopped walnuts, almonds, or pecans for crunch.
- Spices: Try a dash of cinnamon or nutmeg for warmth.
- Dried Fruits: Toss in some raisins or cranberries for extra sweetness.
These additions make your bliss balls more exciting. You can mix and match to find your favorite flavors.
Dietary Alternatives
If you have special diet needs, you can still enjoy these bliss balls. Here’s how:
- Vegan: Use maple syrup and almond butter to keep it plant-based.
- Nut-Free: Substitute sunflower seed butter for almond or peanut butter.
- Gluten-Free: Ensure your oats are labeled gluten-free to avoid cross-contamination.
These options let everyone enjoy this tasty treat!
Adaptations for Different Serving Sizes
Want to make more or less? It’s easy to adjust the recipe. Here’s how:
- Half Batch: Use half the ingredients to make about 6-8 bliss balls.
- Double Batch: Just double everything for about 24 bliss balls. Perfect for parties!
This way, you can make the right amount for any occasion. Enjoy your Chocolate Coconut Bliss Balls!
Storage Info
Best Practices for Storing Bliss Balls
To keep your Chocolate Coconut Bliss Balls fresh, store them in an airtight container. You can place a piece of parchment paper between layers if you stack them. This keeps them from sticking together. Store them in the fridge for up to a week. For best taste and texture, enjoy them chilled.
Freezing for Long-Term Storage
If you want to save some for later, freezing is a great option. Place the bliss balls on a tray, ensuring they don’t touch. Freeze them for about an hour. Once firm, transfer them to a freezer-safe bag or container. They can last up to three months in the freezer. When you’re ready to eat, let them thaw in the fridge overnight.
Shelf Life and Signs of Spoilage
These bliss balls have a good shelf life when stored properly. If they start to smell sour or change color, toss them out. Also, check for mold. If you see any, it's time to say goodbye to them. Always trust your senses; they will guide you.
FAQs
Can I use other nut butters?
Yes! You can use other nut butters. Almond butter works great, but peanut butter is also a good choice. Sunflower seed butter is a nice nut-free option. Just pick one that you like. Each nut butter will give the bliss balls a unique taste.
How do I make these bliss balls gluten-free?
To make these bliss balls gluten-free, use certified gluten-free rolled oats. Most oats are safe, but some may process with gluten. Check the package to be sure. This small change allows everyone to enjoy these tasty snacks without worry.
What’s the best way to serve Chocolate Coconut Bliss Balls?
Serving these bliss balls is easy! You can place them in a pretty bowl. Sprinkle some extra shredded coconut on top for a nice touch. They make a great snack for parties, picnics, or a quick treat at home. Enjoy them chilled or at room temperature!
This article covered all you need to make delicious bliss balls. We talked about the key ingredients and the right measurements. You learned how to prepare, chill, roll, and coat them perfectly. We gave tips on texture and flavor that keep you from common mistakes. You also found fun variations and smart storage methods.
Remember, these bliss balls can fit any diet and excite your taste buds. Enjoy making them your own!