If you love a sweet treat that's easy to make, chocolate hazelnut crepes are for you! These delightful crepes combine rich chocolate with creamy hazelnut spread for a perfect bite. I’ll guide you through each step, from mixing the batter to cooking and assembling. With a few tips and fun variations, you’ll create a dish that impresses everyone. Let’s dive into this simple yet delicious treat!
Why I Love This Recipe
- Decadent Flavor: The rich combination of chocolate and hazelnuts creates a luxurious taste that is hard to resist.
- Perfect for Any Occasion: Whether it's breakfast, brunch, or dessert, these crepes are versatile enough for any time of day.
- Easy to Make: The simple ingredients and straightforward process make these crepes accessible for cooks of all skill levels.
- Customizable Toppings: Feel free to add your favorite fruits or whipped cream to personalize your crepes and elevate the dish.
Ingredients
Primary Ingredients for Chocolate Hazelnut Crepes
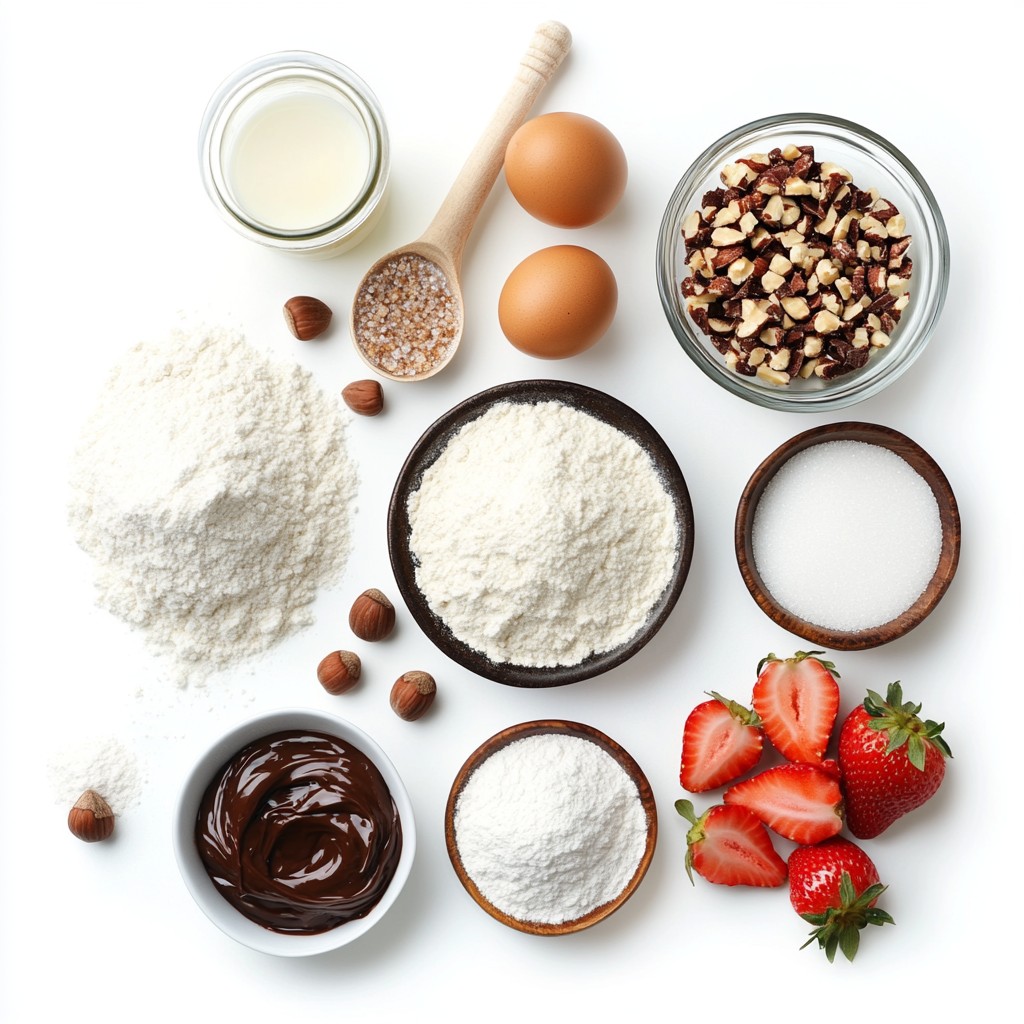
To make these tasty crepes, you need a few key items:
- 1 cup all-purpose flour
- 2 large eggs
- 1 1/2 cups milk
- 2 tablespoons sugar
- 1 teaspoon vanilla extract
- 1/4 cup melted butter
- 1/2 cup chocolate hazelnut spread
- 1/2 cup crushed roasted hazelnuts
These ingredients create a smooth batter and a rich filling. The flour gives the crepes their structure, while the eggs and milk help them stay soft. Sugar and vanilla add sweetness and flavor. Melted butter ensures a nice texture.
Optional Toppings and Garnishes
You can add more fun with some toppings:
- Fresh strawberries, sliced
- Powdered sugar, for garnish
Sliced strawberries bring a fresh taste and a pop of color. A light sprinkle of powdered sugar makes your crepes look fancy.
Equipment Needed
To whip up these crepes, gather some kitchen tools:
- Mixing bowl
- Whisk
- Non-stick skillet
- Spatula
- Ladle or measuring cup
These tools help you mix, cook, and serve your crepes easily. A non-stick skillet is best for cooking, as it helps prevent sticking and makes flipping easier.
Step-by-Step Instructions
Preparing the Batter
Start by gathering your ingredients. In a mixing bowl, add the flour, eggs, milk, sugar, and vanilla extract. Whisk these together until smooth. It should be lump-free. Next, stir in the melted butter. This adds richness to your crepes. After mixing, let the batter rest for 30 minutes. This step helps the flour soak up the liquid, making the crepes tender.
Cooking the Crepes
Heat a non-stick skillet over medium heat. Lightly grease it with butter or cooking spray. Pour about 1/4 cup of batter into the skillet. Tilt the skillet in a circular motion. This spreads the batter evenly. Cook for 2-3 minutes. Watch for the edges to lift and turn golden. Flip the crepe over carefully. Cook for another 1-2 minutes. When done, transfer the crepe to a plate. Stack them as you cook. This keeps them warm and ready.
Assembling the Crepes
Now it’s time to fill the crepes. Take one crepe and spread a tablespoon of chocolate hazelnut spread on one half. Sprinkle with crushed hazelnuts for some crunch. Fold the crepe in half. Then fold it again to make a triangle. Repeat this for all crepes. Serve them warm. Top with fresh strawberries and a dusting of powdered sugar for a sweet touch. Enjoy your delightful treat!
Tips & Tricks
Achieving the Perfect Crepe Texture
To make smooth crepes, start with a lump-free batter. Mix flour, eggs, milk, sugar, and vanilla well. Let the batter rest for 30 minutes. This helps the flour soak up the liquid. Use a non-stick skillet to avoid sticking. Heat the skillet to medium. A well-heated pan gives you a golden brown crepe. Pour the right amount of batter, about 1/4 cup, into the skillet. Tilt the skillet in a circular motion. This helps spread the batter evenly. Cook until the edges lift and the bottom is golden. Flip gently for a perfect cook.
Storage Tips for Leftover Crepes
If you have leftover crepes, store them carefully. Place parchment paper between each crepe. This prevents them from sticking. Put the stack in an airtight container. You can keep them in the fridge for up to three days. To freeze, wrap them tightly in plastic wrap. They can last for up to two months. When ready to use, just thaw them in the fridge.
How to Reheat Crepes
Reheating crepes is easy. You can use a skillet or microwave. For the skillet, heat it over low heat. Place the crepe in the pan for about one minute on each side. If using a microwave, cover the crepe with a damp paper towel. Heat for about 20 seconds. This keeps them soft. Enjoy your warm crepes with fresh toppings!
Pro Tips
- Rest the Batter: Allowing the batter to rest for 30 minutes helps the flour fully hydrate and results in more tender crepes.
- Consistent Heat: Maintain a consistent medium heat on your skillet to ensure even cooking without burning the crepes.
- Perfect Crepe Flip: Use a wide spatula to flip the crepes; gently lifting the edges first can help prevent tearing.
- Creative Fillings: Experiment with different fillings like fruit preserves or whipped cream for a delightful twist on the classic crepe.
Variations
Alternative Fillings and Spreads
You can swap the chocolate hazelnut spread for other tasty options. Try peanut butter for a nutty twist. Almond butter adds a smooth, creamy flavor. For a fruity touch, use strawberry or raspberry jam. These alternatives make each crepe a new treat!
Gluten-Free or Dairy-Free Options
You can easily make gluten-free crepes by using a gluten-free flour blend. Look for one that works well for baking. For a dairy-free option, use almond milk or oat milk. You can also try coconut oil instead of butter. These swaps keep the crepes delicious and suitable for various diets.
Savory Crepe Suggestions
Crepes don’t have to be sweet! For a savory option, fill them with cheese and spinach. You can also add cooked mushrooms and herbs for a gourmet touch. Try ham and cheese for a classic combo. These savory crepes make a great lunch or dinner choice!
Storage Info
How to Store Leftover Ingredients
To store leftover ingredients, keep them in sealed containers. For flour, sugar, and other dry items, use airtight jars. Store eggs in their carton in the fridge. Keep melted butter in a small bowl, covered. For chocolate hazelnut spread, close the jar tightly. Use these tips to keep your ingredients fresh.
Best Practices for Storing Cooked Crepes
Once cooked, let the crepes cool. Stack them with parchment paper in between. Place the stack in a zip-top bag or airtight container. Store in the fridge for up to three days. For longer storage, freeze the crepes. They can last up to a month in the freezer.
Reheating Guidelines
To reheat crepes, use a non-stick skillet over low heat. Heat each crepe for about 30 seconds on each side. You can also use the microwave for quick reheating. Cover the crepe with a damp paper towel to keep it soft. Avoid overheating, as this can make them tough. Reheated crepes taste great with fresh toppings!
FAQs
Can I make the batter in advance?
Yes, you can make the batter in advance. Mix all the ingredients and let it rest. Cover the bowl with plastic wrap. Store it in the fridge for up to 24 hours. This lets the flavors blend well. When you're ready to cook, just stir the batter again. It may thicken, so you might need to add a little milk.
What is the best way to flip crepes?
Flipping crepes can be tricky at first. Use a non-stick skillet for easy flipping. After cooking the first side, gently lift one edge with a spatula. Use your wrist to flip the crepe quickly. If you're feeling brave, try flipping it in the air. With practice, you'll get the hang of it.
How do I know when the crepes are done?
Crepes are done when the edges lift easily. The bottom should be lightly golden. If the crepe feels firm and no longer sticks to the pan, it's ready. You can also peek under the crepe with a spatula. This will help you see the color and texture. Cook the second side for just a minute or two.
You now have a complete guide for making chocolate hazelnut crepes. We covered the ingredients, steps, and tips for perfecting each bite. Remember to try different fillings or toppings to make these crepes your own. Store any leftovers properly and reheating will be simple. With practice, flipping crepes will become easy. Enjoy the fun of cooking and creating delicious meals! Dive into your crepe adventure and savor every moment.