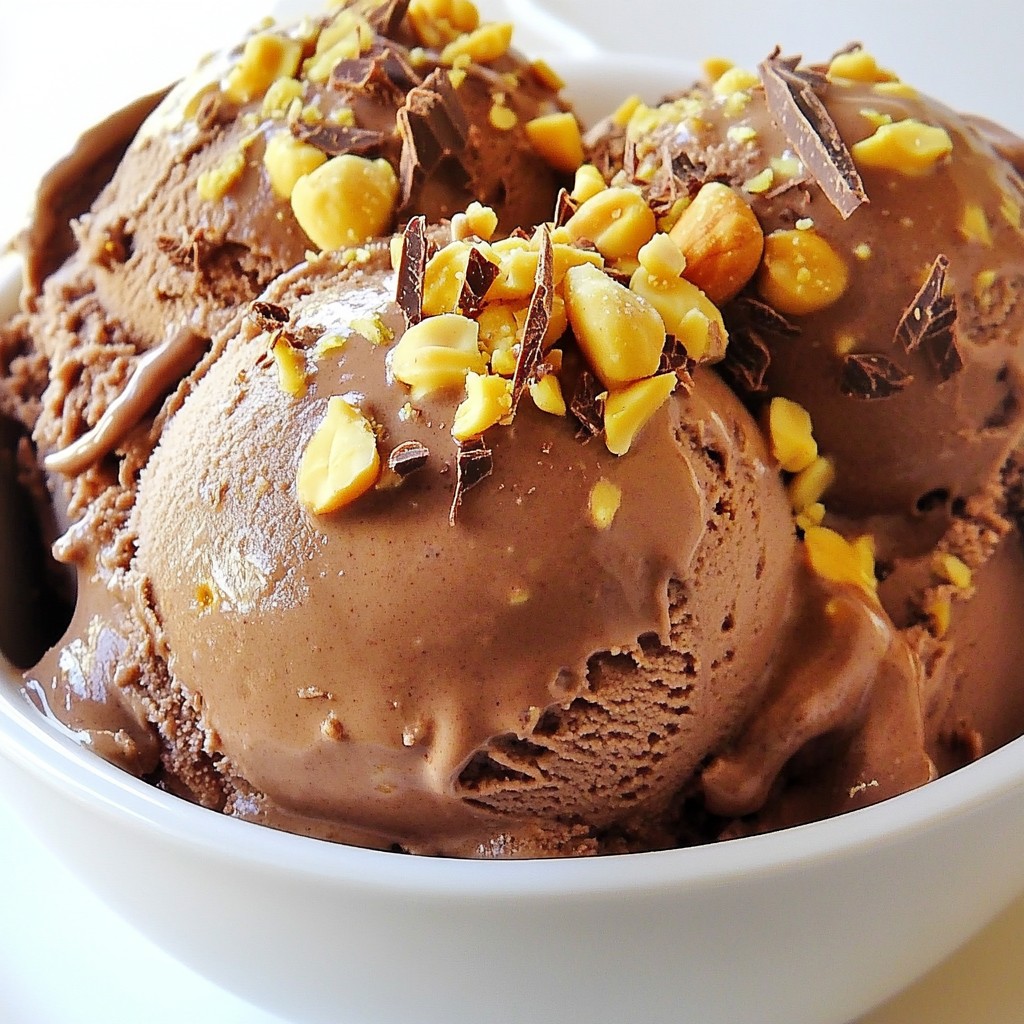
Are you ready to treat yourself to something truly scrumptious? Chocolate Peanut Butter Banana Ice Cream combines rich flavors in a creamy dessert. With ripe bananas, smooth peanut butter, and a hint of cocoa, this treat feels indulgent yet healthy. Plus, making it at home is simple and fun. Let’s dive into how you can whip up this delightful treat in no time!
Why I Love This Recipe
- Delicious Flavor Combination: The rich chocolate and creamy peanut butter create a decadent treat that satisfies any sweet tooth.
- Healthy Ingredients: Made with ripe bananas and natural sweeteners, this ice cream is a guilt-free indulgence.
- Easy to Make: With just a few simple ingredients and a blender, you can whip up this ice cream in no time.
- Customizable: Add your favorite toppings or adjust the sweetness to suit your taste, making it perfect for everyone.
Ingredients
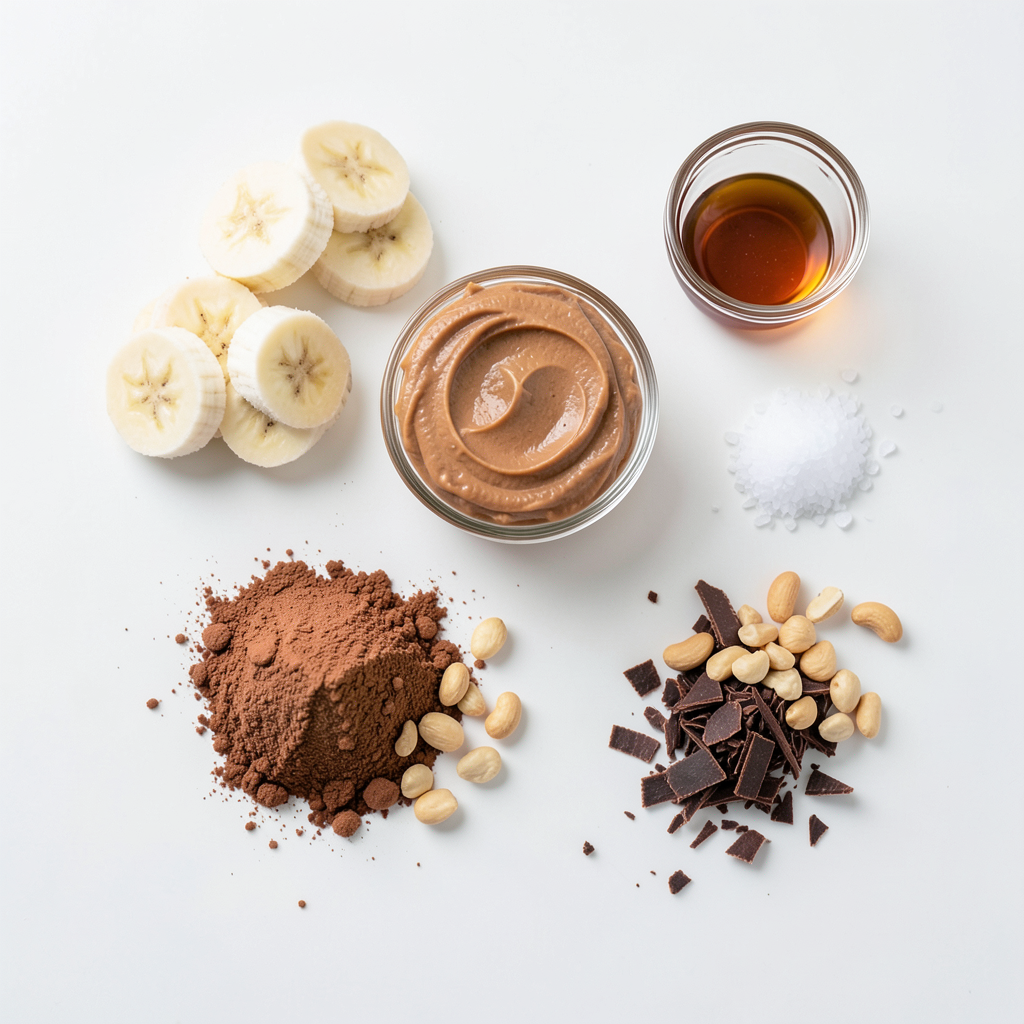
To make Chocolate Peanut Butter Banana Ice Cream, you need a few simple items. Here’s what you'll need:
- 4 ripe bananas, sliced and frozen
- 1/2 cup creamy peanut butter
- 1/4 cup unsweetened cocoa powder
- 1/4 cup maple syrup (or honey)
- 1 teaspoon vanilla extract
- A pinch of sea salt
- Chopped peanuts and chocolate shavings for garnish
Using ripe bananas is key. They bring natural sweetness and a smooth texture. Creamy peanut butter adds richness and flavor. Unsweetened cocoa powder gives that chocolatey taste without extra sugar. Maple syrup or honey will sweeten things up just right.
Vanilla extract enhances all the flavors, while sea salt balances the sweetness. For the final touch, chopped peanuts and chocolate shavings make the ice cream look and taste great.
Gather these ingredients before starting, and you’ll have a delightful treat in no time!
Step-by-Step Instructions
Banana Preparation
To start, you need ripe bananas. Slice them into coins. Lay the slices on a tray. Freeze them for about 2 to 3 hours. This step makes your ice cream creamy.
Blending Ingredients
Once the bananas are frozen, grab a high-speed blender. Add the frozen banana slices to the blender. Next, add 1/2 cup of creamy peanut butter. Then, pour in 1/4 cup of unsweetened cocoa powder. Add 1/4 cup of maple syrup, 1 teaspoon of vanilla extract, and a pinch of sea salt. Blend all the ingredients on high. Stop to scrape down the sides as needed. Blend until the mixture is smooth and creamy.
Freezing Process
After blending, transfer the mixture to a freezer-safe container. Spread it evenly and smooth the top. Place the container in the freezer. Freeze for about 1 to 2 hours. This will help it reach the right texture for scooping.
Tips & Tricks
Perfecting Texture
To get the best texture for your ice cream, adjust the freezing time. If you like it soft, freeze for about 1 hour. For a firmer ice cream, freeze for 2 hours. Check on it after an hour. If it feels too soft, let it freeze longer. It’s all about your taste!
Sweetness Adjustment
You can make this ice cream sweeter or less sweet. After blending, taste your mix. If it needs more sweetness, add a little more maple syrup. Blend again until it mixes well. Remember, everyone’s sweet tooth is different. Make it just right for you!
Choosing the Right Peanut Butter
When picking peanut butter, think about texture. Creamy peanut butter gives a smooth ice cream. Crunchy peanut butter adds fun bits. Choose what you like best. Look for natural options without added sugar or oils. This keeps your ice cream tasty and healthy!
Pro Tips
- Choose Ripe Bananas: The riper the bananas, the sweeter your ice cream will be. Look for bananas with plenty of brown spots for the best flavor.
- Blend in Batches: If your blender struggles, blend in smaller batches. This ensures a smooth consistency without overloading your machine.
- Customize Your Sweetness: Taste the mixture before freezing. If you prefer a sweeter ice cream, add a little extra maple syrup or honey to suit your taste.
- Experiment with Toppings: Get creative with your garnishes! Try different nuts, sprinkles, or even a drizzle of caramel for a unique twist.
Variations
Flavor Additions
You can get creative with your ice cream! Try adding mix-ins to change the flavor. Here are some ideas:
- Chocolate chips: They add a nice crunch.
- Chopped nuts: Almonds or walnuts give a great texture.
- Coconut flakes: They bring a tropical twist.
- Peanut butter swirls: Add extra peanut butter for a richer taste.
These additions make the ice cream even more fun!
Dairy-Free Option
Want a dairy-free treat? You can use almond milk or coconut milk instead of regular milk. For sweeteners, use agave syrup or stevia. These options keep the ice cream creamy and tasty without dairy.
Serving Suggestions
How you serve the ice cream matters! Here are some fun ideas:
- Ice cream sundae: Top with extra chocolate sauce and whipped cream.
- Banana boat: Serve it in a banana peel for a fun look.
- Milkshake: Blend with a bit more milk for a thick shake.
- Dessert cups: Use clear cups to show off the layers.
These ideas will impress your friends and family!
Storage Info
Best Practices for Freezing
To keep your ice cream fresh, store it in an airtight container. Make sure to smooth the top with a spatula. This helps prevent ice crystals from forming. You can also cover the ice cream with plastic wrap before sealing the lid. This extra layer keeps it creamy.
Shelf Life
Enjoy your chocolate peanut butter banana ice cream within two weeks for the best taste. After this time, the flavor may fade. The texture can change too, becoming icy rather than smooth.
Re-freezing Guidelines
If your ice cream gets too hard, you can fix it. Let it sit at room temperature for about 5 to 10 minutes. Once it softens, use a spoon or ice cream scoop to mix it again. This restores the creamy texture, making it easy to serve!
FAQs
Can I use different types of bananas?
Yes, you can use different bananas. Ripe bananas taste sweeter and creamier. They should have brown spots on the peel. This means they are ready for ice cream. Unripe bananas can taste starchy and less sweet. Make sure to choose bananas that are ripe for the best flavor.
Is this recipe suitable for vegan diets?
This recipe is great for vegan diets! It uses only plant-based ingredients. The bananas, peanut butter, cocoa powder, and maple syrup are all vegan. You can enjoy this treat without any animal products. It’s a delicious option for anyone following a vegan diet.
Can I make this ice cream without a blender?
Yes, you can make this ice cream without a blender. You can mash the frozen bananas by hand. Use a fork or a potato masher to break them down. Once they are soft, mix in the other ingredients. This method takes more time, but it works well. Just make sure to mix until smooth.
This blog post showed you how to make easy banana peanut butter ice cream. We covered ingredients, steps, tips, and variations. Use ripe bananas and creamy peanut butter for a rich flavor. Adjust sweetness and texture to match your taste. Try different mix-ins or dairy-free options to get creative. Store your ice cream carefully to keep it fresh. Remember, you can even make this without a blender! Now, go enjoy your tasty treat and feel proud of your new skills.