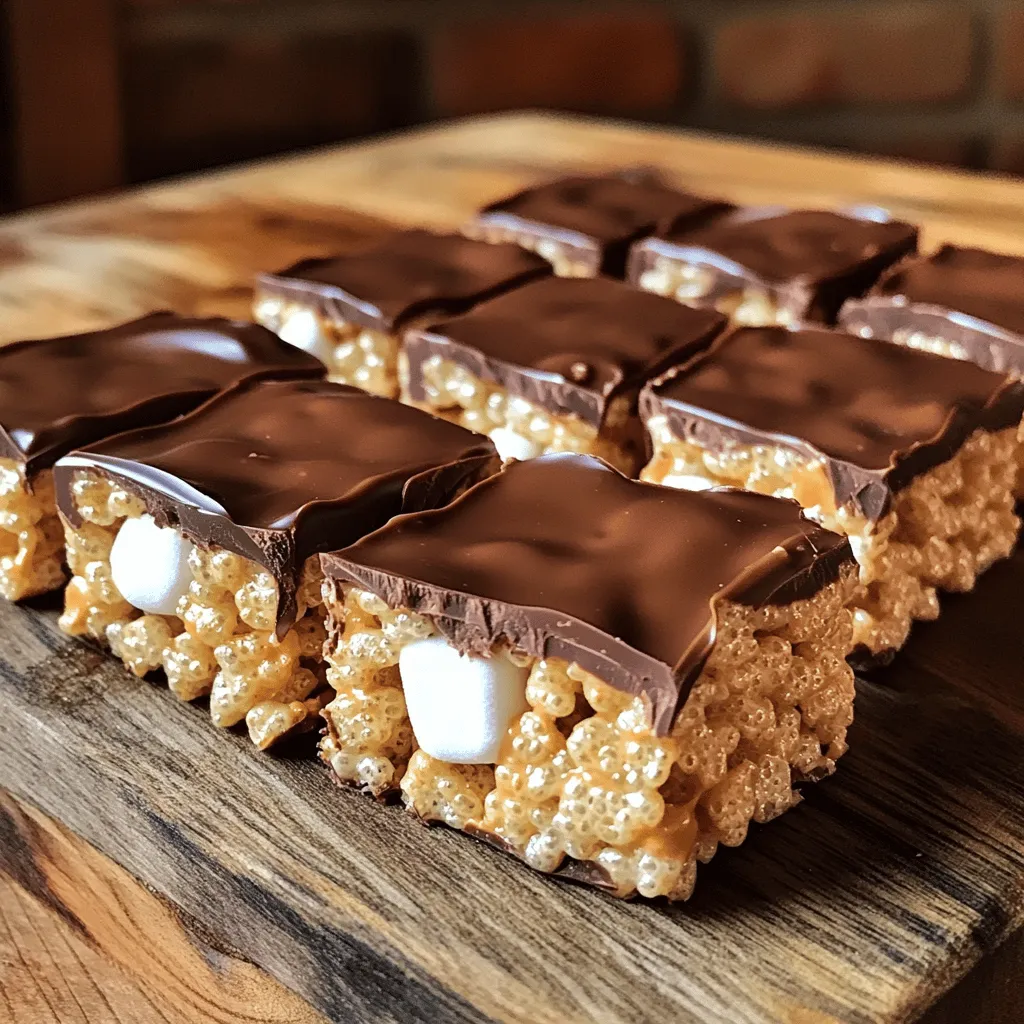
Get ready for a sweet treat that’s easy to make and hard to resist! My Chocolate Peanut Butter Rice Krispie Treats are a classic dessert with a twist. With chewy marshmallows, crunchy cereal, and creamy peanut butter, these treats are perfect for any occasion. I’ll guide you through the simple steps, share tips to make them even better, and offer fun variations. Let’s dive into the delicious world of these tasty delights!
Ingredients
Complete List of Ingredients
– 4 cups Rice Krispies cereal
– 1 cup creamy peanut butter
– 1 cup semi-sweet chocolate chips
– 1/2 cup unsalted butter
– 1 cup mini marshmallows
– 1 teaspoon vanilla extract
– Pinch of salt
Best Ingredient Substitutions
Can you swap ingredients? Yes, you can. Here are some great options:
– Alternative nut butters: If you have a nut allergy, use sun butter or soy nut butter. They work well with the recipe.
– Types of chocolate chips: Dark chocolate or white chocolate chips add fun flavors. You can choose what you like best.
– Marshmallow substitutes: If you want a vegan option, try vegan marshmallows. They taste great and keep the treats sweet.
Using these swaps can help you find the perfect flavor for your treats. Enjoy mixing and matching!
Step-by-Step Instructions
Preparation
How to prepare the baking dish
First, take your 9×13 inch baking dish. You can grease it with butter. Alternatively, use parchment paper for easy removal later.
Melting the butter and chocolate
In a medium saucepan, add the unsalted butter and the semi-sweet chocolate chips. Heat them on low. Stir often until the mixture becomes smooth and glossy. This step is key for a rich flavor.
Mixing the Ingredients
Incorporating peanut butter and marshmallows
After the chocolate mixture melts, remove the saucepan from heat. Stir in the creamy peanut butter. Mix well until it’s fully blended. Then, add the mini marshmallows. Stir gently until they start to soften. They should not fully melt yet.
Combining with Rice Krispies
In a large bowl, place the Rice Krispies cereal. Pour the warm chocolate-peanut butter-marshmallow mixture over the cereal. Use a spatula to fold gently. Ensure every piece of cereal gets coated with the gooey mixture.
Final Steps
Pressing the mixture into the pan
Transfer the mixture into your prepared baking dish. With a spatula or your clean hands, press it down firmly into an even layer. This helps the treats hold together.
Cooling and cutting the treats
Let the treats cool at room temperature for about 30 minutes. Once they are set, cut them into squares or rectangles. Now your delicious chocolate peanut butter rice krispie treats are ready to enjoy!
Tips & Tricks
Achieving the Perfect Texture
To get the best texture in your treats, focus on marshmallow use. You need one cup of mini marshmallows. This amount helps the mixture hold together. If you add too few, your treats can fall apart. If you add too many, they may become too sticky.
Pressing the mixture firmly into the pan is very important. Use a spatula or your hands to make it even. This step helps the treats set well. If you skip it, they may not hold their shape. This makes serving your treats easier and more fun.
Flavor Enhancements
You can add a pinch of cinnamon or sea salt to boost flavor. This small step makes a big difference in taste. It adds depth and balances the sweetness. You can also try optional toppings. Consider crushed nuts or colorful sprinkles for a fun twist.
Troubleshooting Common Issues
If your treats become too sticky, try these tips. First, make sure to grease your pan well. You can also use parchment paper. This helps with removal and keeps them from sticking. If they are still sticky, you can chill them in the fridge for a short time.
If your treats turn out too dry, don’t worry. You can fix this by adding a bit of melted butter or peanut butter. This extra moisture can help bring them back to life. Just mix it in gently to avoid breaking them apart.

Variations
Flavor Variations
You can boost the taste of your treats in fun ways. Try adding shredded coconut or dried fruit. These will add new flavors and textures. You can also use flavored marshmallows, like strawberry or caramel. This simple swap can make your treats special and exciting.
Dietary Adaptations
Many people have different diets. You can make gluten-free treats by using gluten-free Rice Krispies. This is an easy way to keep everyone happy. If you want vegan options, use coconut oil instead of butter. Substitute regular marshmallows with vegan ones to keep it tasty and plant-based.
Themed Treats
Get creative for special events! For holidays, use colored chocolate to match the theme. For example, red and green for Christmas or orange and black for Halloween. You can also make mini versions for parties. These bite-sized treats are perfect for sharing and fun to eat.
Storage Info
Best Storage Practices
To keep your Chocolate Peanut Butter Rice Krispie Treats fresh, store them properly. I recommend placing them in an airtight container. This helps keep them soft and tasty. You can also wrap them tightly in plastic wrap before putting them in the container.
– Use a glass or plastic container with a lid.
– Make sure the container is completely sealed to avoid air exposure.
Shelf Life
When stored at room temperature, these treats last about a week. Keep them in a cool place, away from direct sunlight. If you want to save them longer, you can freeze them. Just wrap each treat individually in plastic wrap, then place them in a freezer bag.
– At room temperature: last about 7 days.
– In the freezer: can last up to 3 months.
Reheating Tips
When it’s time to enjoy your treats again, you might want them soft. To reheat, place them in the microwave for about 10-15 seconds. This warms them up without making them hard. For a fun twist, consider adding toppings after reheating.
– Drizzle melted chocolate on top for extra taste.
– Sprinkle some sea salt or crushed nuts for a crunchy finish.
FAQs
Can I make these treats ahead of time?
Yes, you can make these treats ahead of time. To do this, let them cool completely. Once cool, cut them into squares. Place them in an airtight container. Store them at room temperature for up to 3 days. If you want them fresh, you can freeze them. Just wrap each square in plastic wrap and put them in a freezer-safe bag. When you’re ready to enjoy, let them thaw at room temperature.
Are there any nut-free options?
If you need nut-free options, you can use sun butter or soy nut butter. Both have a similar texture to peanut butter. They add great flavor without nuts. Make sure to check labels to avoid any cross-contamination. You can also use seed butters like pumpkin seed butter for a fun twist.
Can I substitute other cereals?
Yes, you can! If you want to switch cereals, try using Corn Pops or Cheerios. Both will give you a different taste and texture. You can even mix cereals for added fun. Just keep the same amount to ensure the treats hold together. This allows for a new experience every time you make them!
This blog post provided a clear guide on making delicious Rice Krispies treats. We covered essential ingredients, substitutions, and step-by-step instructions for prep. You learned tips for perfect texture and flavor, along with creative variations and proper storage. Remember, making these treats should be fun and easy. Experiment with flavors and enjoy the process. With a little practice, you’ll master this classic recipe and impress friends and family. Enjoy making your treats!