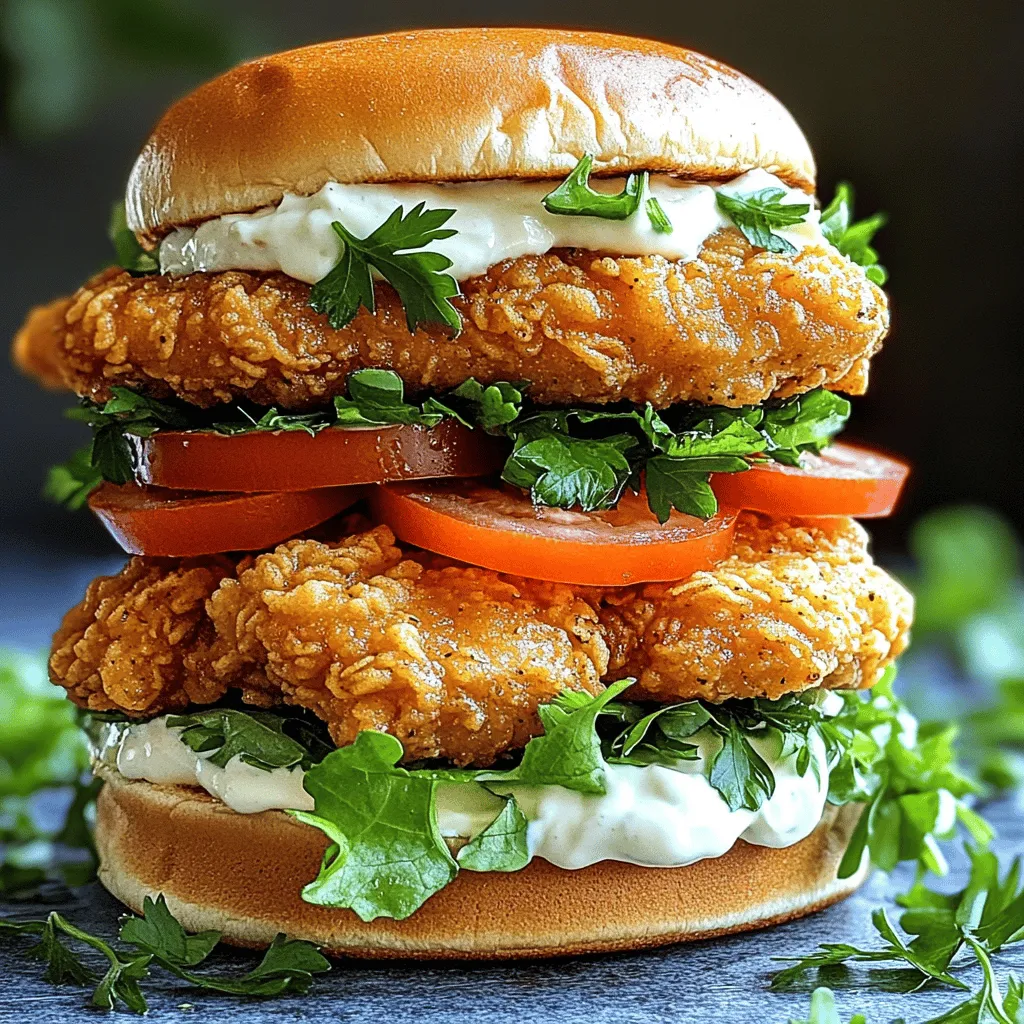
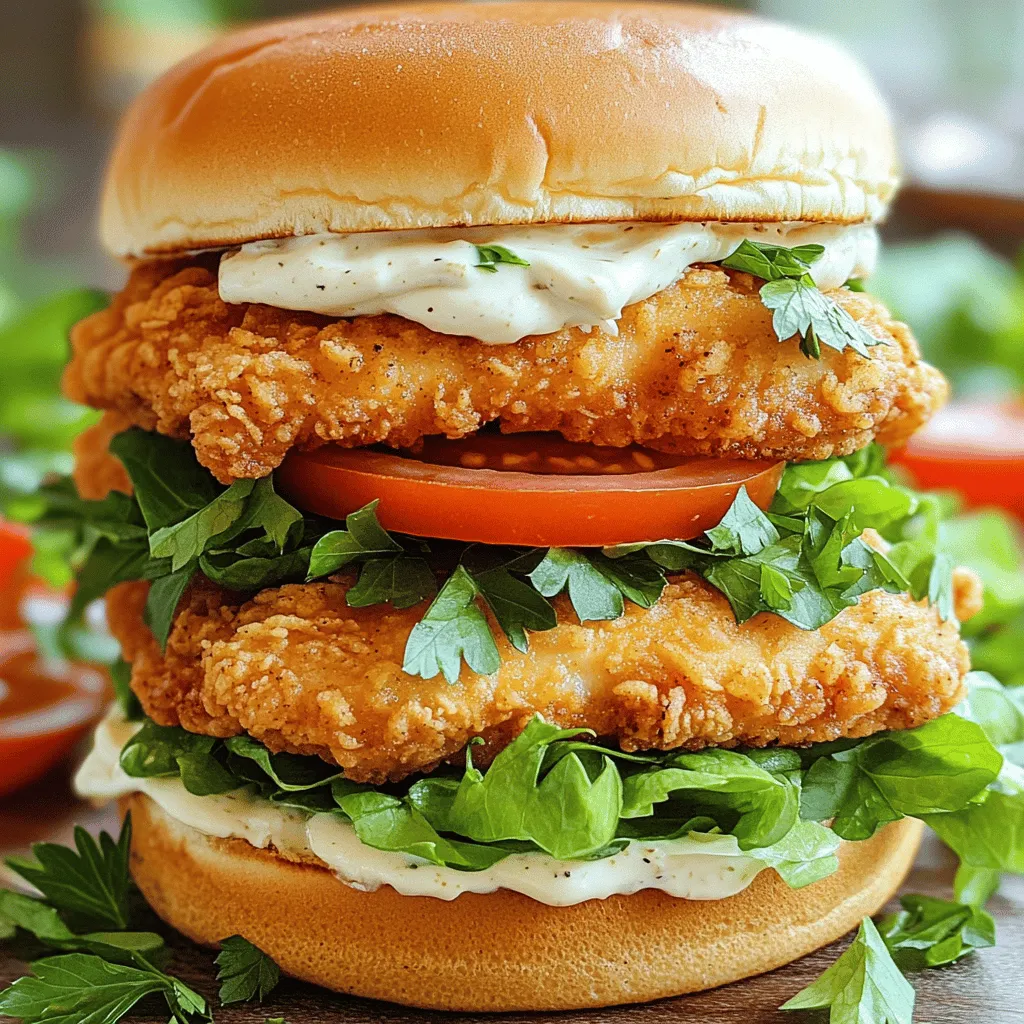
Are you ready to take your sandwich game to the next level? The Crispy Garlic Chicken Sandwich packs a crunch and rich flavor that will make your taste buds dance. In this post, I will show you how to create this tasty treat, covering all the ingredients, step-by-step instructions, and expert tips. Whether you’re a seasoned cook or a beginner, you’ll enjoy every bite. Ready to get started? Let’s dive in!
Ingredients
Main Ingredients for Crispy Garlic Chicken Sandwich
To make the Crispy Garlic Chicken Sandwich, you need a few key items. Here’s what you will need:
– 2 boneless, skinless chicken breasts
– 1 cup buttermilk
– 3 cloves garlic, minced
– 1 cup all-purpose flour
– 1 teaspoon paprika
– 1 teaspoon onion powder
– ½ teaspoon salt
– ½ teaspoon black pepper
– ½ teaspoon cayenne pepper (optional for extra heat)
– 1 cup breadcrumbs (panko for extra crunch)
– Vegetable oil (for frying)
– 4 hamburger buns
– Lettuce leaves
– Tomato slices
– Mayonnaise or garlic aioli for spreading
– Fresh parsley for garnish
These ingredients create a flavorful, crispy chicken that is perfect for any meal.
Optional Add-ins and Toppings
You can customize your sandwich with some fun extras. Here are a few ideas:
– Sliced pickles for a tangy crunch
– Avocado slices for creaminess
– Jalapeños for some heat
– Cheese slices for a rich flavor
– Hot sauce for added spice
Feel free to mix and match these toppings to make your sandwich special.
Recommended Tools and Equipment
Having the right tools makes cooking easier. Here’s what I suggest using:
– A deep skillet to fry the chicken
– Two mixing bowls for breading
– A sharp knife for slicing ingredients
– A cutting board for prep work
– A meat thermometer to check chicken doneness
– Paper towels for draining excess oil
These tools will help you create the perfect Crispy Garlic Chicken Sandwich.
Step-by-Step Instructions
Marinating the Chicken
To start, you need to marinate the chicken. In a bowl, mix buttermilk, minced garlic, salt, and pepper. This mix adds flavor and keeps the chicken juicy. Place the chicken breasts into the bowl, making sure they soak well. Cover the bowl and refrigerate for at least 1 hour. For better taste, marinate overnight.
Preparing the Breading
Next, prepare the breading. Grab two bowls. In the first bowl, combine flour, paprika, onion powder, cayenne pepper, and a pinch of salt. This mix gives your chicken a nice kick. In the second bowl, pour in the breadcrumbs. I suggest using panko for an extra crunch.
Frying the Chicken
Now it’s time to fry the chicken. Heat vegetable oil in a deep skillet over medium-high heat. Once the oil is hot, take the marinated chicken out of the fridge. First, dredge each piece in the flour mix, shaking off the excess. Next, dip the chicken in the breadcrumbs. Press down to help them stick. Carefully add the breaded chicken to the hot oil. Fry for about 5-7 minutes on each side until golden brown and cooked through. The chicken should reach an internal temperature of 165°F.
Assembling the Sandwich
After frying, it’s time to assemble the sandwich. Lightly toast your hamburger buns for extra flavor. Spread a good amount of mayonnaise or garlic aioli on the bottom half of each bun. Place a crispy chicken breast on top. Add some lettuce and tomato slices. Finally, cap it off with the other half of the bun.
Garnishing and Serving
To make your sandwich look even better, sprinkle fresh parsley on top. Serve it hot with your favorite sides, like fries or a fresh salad.
Tips & Tricks
Best Practices for Marinating Chicken
Marinating chicken is key to flavor. Use buttermilk and garlic for great taste. Let the chicken soak for at least an hour. For best results, marinate overnight. This makes the chicken juicy and tender. Always cover the bowl to keep the chicken fresh.
How to Achieve Extra Crispiness
To get that perfect crunch, use panko breadcrumbs. They add a light, crispy texture. Coat the chicken in flour first. Then, dip it in the egg wash before using breadcrumbs. Press firmly to help the crumbs stick. Fry in hot oil for a golden finish.
Cooking Tips for Perfectly Fried Chicken
Heat the oil to the right temperature. It should be around 350°F (175°C). Always test the oil with a small piece of bread. If it bubbles, it’s ready. Fry in small batches to avoid crowding. This helps the chicken cook evenly. Use a thermometer to check doneness. The chicken should reach 165°F (75°C). For a great finish, drain the fried chicken on paper towels. This keeps it crispy.
Variations
Spicy Garlic Chicken Sandwich Option
If you want a kick, try a spicy garlic chicken sandwich. Just add cayenne pepper to the flour mix. This gives your chicken a nice heat. You can also mix hot sauce with the buttermilk for more flavor. This makes every bite a tasty surprise. Add jalapeños or spicy mayo to your sandwich for extra heat. You will love the blend of spice and garlic!
Healthier Baking Method
Want a lighter option? You can bake the chicken instead of frying it. Simply coat the chicken as usual and place it on a baking sheet. Preheat your oven to 400°F (200°C) and bake for 20-25 minutes. Flip halfway through for even cooking. This method cuts down on oil and calories but keeps the crunch. Serve it with a side salad for a full meal.
Vegetarian Alternative: Crispy Cauliflower Sandwich
You can make a crispy cauliflower sandwich if you prefer veggies. Use cauliflower florets instead of chicken. First, coat the florets in the buttermilk mix. Then, bread them in the flour and breadcrumbs like you would the chicken. Fry or bake them until golden brown. This gives you a crunchy, flavorful sandwich that even meat lovers will enjoy. Add your favorite toppings for a tasty twist!
Storage Info
How to Store Leftover Sandwiches
To store leftover sandwiches, wrap them in plastic wrap or foil. Place them in an airtight container. This keeps them fresh and prevents them from drying out. Store them in the fridge for up to two days. If you want to keep them longer, consider freezing.
Best Practices for Reheating
When you’re ready to eat your leftover sandwich, reheating it is easy. Preheat your oven to 350°F (175°C). Place the sandwich on a baking sheet. Heat for about 10-15 minutes until warm. This method keeps the bread crispy. You can also use a microwave, but it may make the bread soft.
Freezing Tips for Chicken Breasts
To freeze chicken breasts, let them cool completely first. Wrap each piece in plastic wrap. Then, place them in a freezer bag. Remove as much air as possible to avoid freezer burn. Frozen chicken can last up to three months. When you’re ready to use it, thaw in the fridge overnight before cooking.
FAQs
What is the best way to make the chicken crispy?
To make the chicken crispy, use panko breadcrumbs. They create a nice crunch. Use a good oil for frying. Heat the oil well before adding chicken. This helps the chicken fry evenly.
Can I use bone-in chicken for this recipe?
You can use bone-in chicken, but it will take longer to cook. The cooking time increases because the bone holds heat. Keep an eye on the internal temperature. It should reach 165°F (75°C) for safety.
What are some tasty side dishes to serve with the sandwich?
I love serving this sandwich with crispy fries or a fresh salad. You can also pair it with coleslaw or sweet potato fries. They add great texture and flavor to the meal.
How can I make this sandwich gluten-free?
To make this sandwich gluten-free, swap regular flour and breadcrumbs for gluten-free versions. You can find gluten-free all-purpose flour and panko at most stores. Ensure that all sauces used are also gluten-free.It guides you through every step to make this delicious meal. Enjoy cooking!
You learned how to make a crispy garlic chicken sandwich with easy steps. We covered important ingredients, cooking tips, and storage methods. You can personalize your sandwich with add-ins or variations, like spicy or vegetarian options.
In the end, enjoy creating a delicious meal that suits your taste. Remember, practice makes perfect, so don’t hesitate to try new ideas. Enjoy your cooking journey!