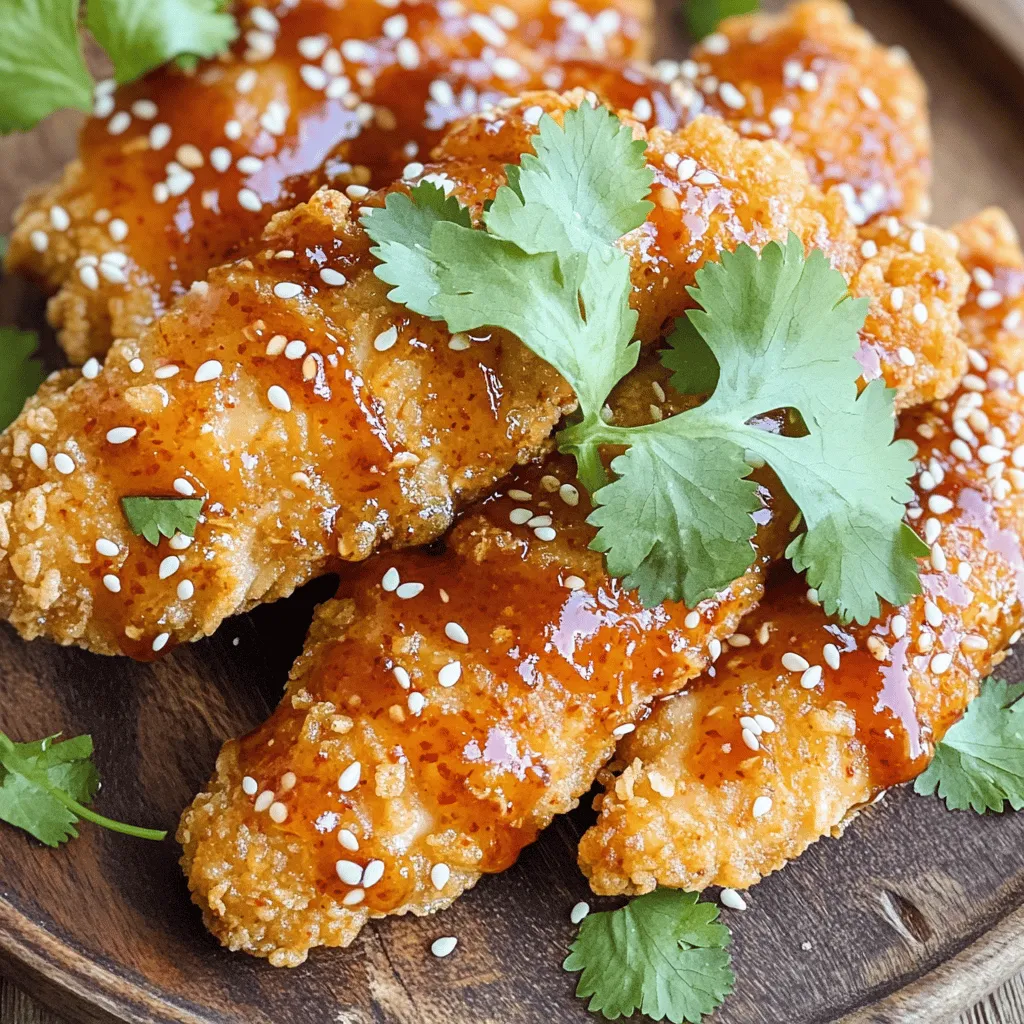
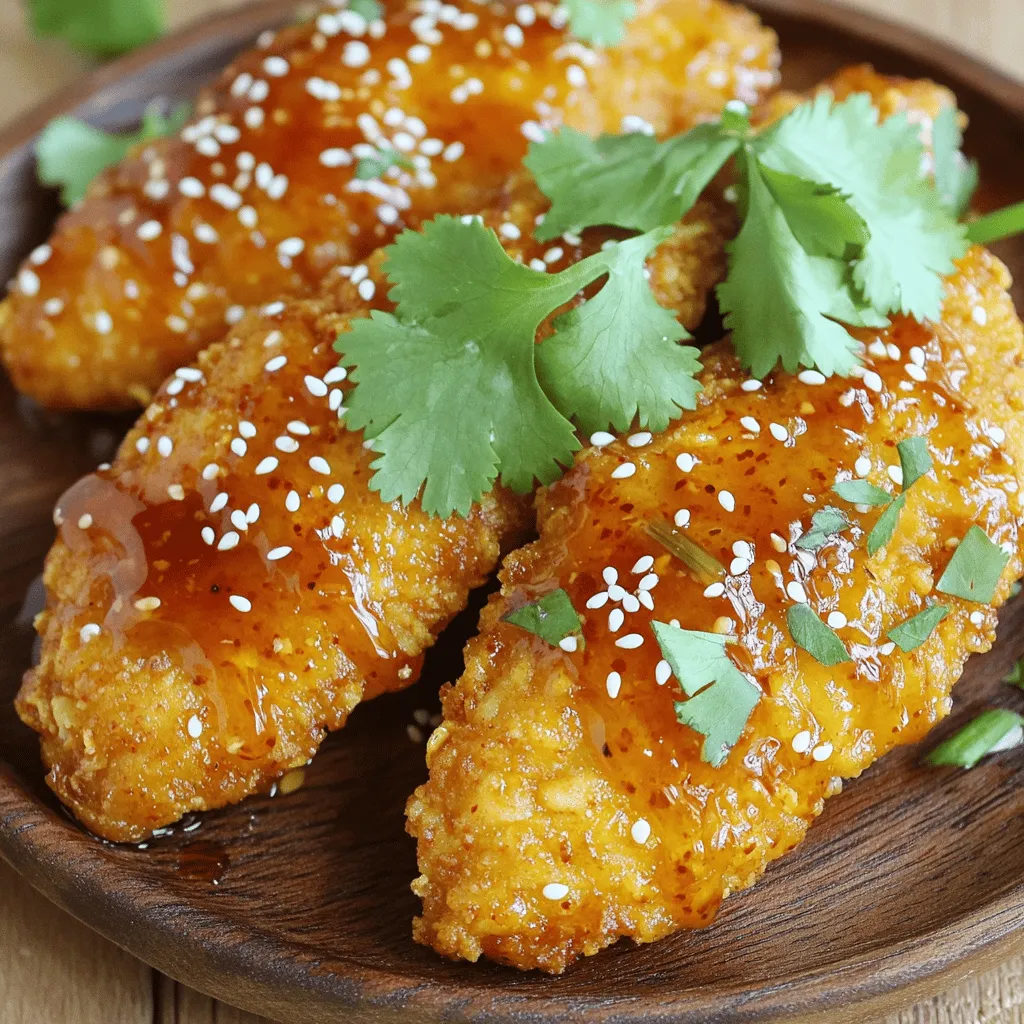
Are you ready to wow your family with a dish that’s both crispy and sweet? My Crispy Sweet Chili Chicken Tenders are not just easy to make; they explode with flavor. In this post, I’ll walk you through every step, from marinating the chicken to frying and coating it in a delicious sauce. You’ll be the star of your kitchen in no time. Let’s dive in!
Ingredients
Chicken and Marinade
– 1 pound chicken tenders
– 1 cup buttermilk
Dry Coating Mixture
– 1 cup all-purpose flour
– 1/2 cup cornstarch
– 1 teaspoon garlic powder
– 1 teaspoon onion powder
– 1 teaspoon paprika
– 1/2 teaspoon cayenne pepper (adjust for spice level)
– Salt and pepper to taste
Sweet Chili Sauce Ingredients
– 1/3 cup sweet chili sauce
– 2 tablespoons honey
– 1 tablespoon soy sauce
– 1 tablespoon rice vinegar
– 1 tablespoon sesame seeds
– Fresh cilantro for garnish (optional)
Gather these ingredients before you start. The chicken tenders need a good soak in buttermilk. This step makes them juicy and tender.
For the dry coating mixture, combine flour and cornstarch. The cornstarch adds extra crispiness. Mix in garlic powder, onion powder, paprika, and cayenne pepper for flavor. Adjust the cayenne to fit your spice level.
To make the sweet chili sauce, you need sweet chili sauce, honey, soy sauce, and rice vinegar. These add a delicious sweet and tangy flavor. Finally, sesame seeds add a nice crunch and garnish the dish with fresh cilantro for color.
With these ingredients on hand, you are ready to create a tasty delight that everyone will enjoy.
Step-by-Step Instructions
Marinating the Chicken
To start, place the chicken tenders in a bowl. Pour in one cup of buttermilk. Make sure all the tenders are coated well. This step is key for flavor and tenderness. Cover the bowl and put it in the fridge. Let the chicken marinate for at least 30 minutes or up to 2 hours. This time allows the chicken to soak in that creamy goodness.
Preparing the Coating
Next, grab a large bowl. In it, mix together one cup of all-purpose flour and half a cup of cornstarch. Add one teaspoon each of garlic powder, onion powder, and paprika. For some heat, include half a teaspoon of cayenne pepper. Don’t forget to add salt and pepper to taste. This mix gives the chicken a crunchy outer layer.
Frying the Chicken
Now, heat about half an inch of vegetable oil in a large skillet. Set the heat to medium-high. You want the oil to reach 350°F (175°C). You can test it by dropping a bit of the flour mix in. If it sizzles, it’s ready! Carefully add the coated chicken to the hot oil. Fry for 4 to 5 minutes on each side. Look for a golden brown color. Once done, use a slotted spoon to take them out. Place them on a paper towel-lined plate to drain off extra oil.
Making the Sweet Chili Sauce
In a small saucepan, combine one-third cup of sweet chili sauce, two tablespoons of honey, one tablespoon of soy sauce, and one tablespoon of rice vinegar. Heat this over low heat. Stir it well until everything is mixed and warmed. Add in some sesame seeds for a nice crunch. This sauce will add a sweet kick to your tenders.
Tossing and Serving
In a large bowl, take your fried chicken tenders. Drizzle the sweet chili sauce over them. Toss gently to coat each tender. Now, plate the tenders. If you like, add fresh cilantro on top for color. Serve with some extra sweet chili sauce on the side for dipping. Enjoy!
Tips & Tricks
Achieving Perfect Crispiness
To get that perfect crispy texture, you need to fry at the right temperature. Heat your oil to 350°F (175°C). This hot oil creates a golden crust. A good test is to drop a bit of the coating mixture into the oil. If it sizzles right away, you are ready to fry!
The coating mixture is also key. I use a blend of flour and cornstarch. The cornstarch adds extra crunch. Combine one cup of flour with half a cup of cornstarch for the best result.
Marination Times
Marination is crucial for flavor and tenderness. I suggest marinating the chicken for at least 30 minutes. But if you have time, go for two hours. This longer marination makes the chicken juicy and full of flavor.
Adjusting Spice Levels
Not everyone enjoys the same spice level. If you want a milder dish, cut back on the cayenne pepper. Use just a pinch or leave it out entirely. For those who love heat, feel free to add more. You can even try adding hot sauce to the sweet chili sauce for extra kick.
Variations
Healthier Alternatives
You can make crispy sweet chili chicken tenders healthier. One way is to switch the buttermilk for yogurt. Yogurt adds a nice tang and is lower in fat. You can also bake the chicken instead of frying it. Just coat the tenders and place them on a baking sheet. Bake them at 400°F for about 20-25 minutes. This method gives you a tasty meal with less oil.
Flavor Customizations
Feel free to get creative with your flavors. You can add spices to the dry coating. Try adding cayenne for more heat or garlic for a robust taste. Want a sweet twist? Mix in a bit of brown sugar. You can also switch the sweet chili sauce for a teriyaki or barbecue sauce. These changes will make your chicken tenders unique.
Serving Suggestions
When serving your chicken tenders, think about sides that pair well. Crispy fries are a classic choice. You can also serve them with a fresh salad or steamed veggies. For a fun twist, try them with rice or a grain bowl. Adding a dipping sauce like ranch or blue cheese can make the meal even better.
Storage Info
Storing Leftovers
To keep your crispy sweet chili chicken tenders fresh, store them properly. First, let the tenders cool down to room temperature. Then, place them in an airtight container. Make sure to layer a paper towel between the layers of chicken. This helps absorb moisture and keeps them crispy. You can store the tenders in the fridge for up to three days.
Reheating Instructions
Reheating chicken tenders can be tricky if you want to keep them crispy. The best way is to use an oven. Preheat your oven to 375°F (190°C). Place the tenders on a baking sheet in a single layer. Heat them for about 10-15 minutes. Check them often so they don’t burn. This method helps keep the outside crispy while warming the inside.
Freezing Tips
If you want to freeze your chicken tenders, start by letting them cool completely. Wrap each tender in plastic wrap or foil. Then, place them in a freezer bag. Squeeze out as much air as possible before sealing. You can freeze them for up to three months. To reheat, take them out and let them thaw in the fridge overnight. Then, follow the oven method to reheat for the best texture.
FAQs
Can I use frozen chicken tenders?
Yes, you can use frozen chicken tenders. However, you need to adjust the cooking time. First, thaw the chicken tenders in the fridge overnight. Then, marinate them in buttermilk as you would with fresh tenders. This helps keep them moist. When frying, add a couple more minutes to ensure they cook through.
What can I substitute for buttermilk?
If you don’t have buttermilk, you can use milk with vinegar or lemon juice. Mix 1 cup of milk with 1 tablespoon of vinegar or lemon juice. Let it sit for about 5 minutes. This creates a similar acidity to buttermilk. You can also use plain yogurt mixed with water for a thicker option.
How do I know when chicken tenders are cooked through?
To check if chicken tenders are cooked, use a meat thermometer. The internal temperature should reach 165°F (75°C). If you don’t have a thermometer, slice one tender open. The meat should be white with no pink inside. Make sure the juices run clear.
This blog post covered how to make delicious chicken tenders with sweet chili sauce. We looked at the ingredients, cooking steps, and key tips to enhance texture and flavor. You can adjust recipes to fit your taste and health goals. Remember, marination adds flavor, and frying gives great crispiness. With these methods, you can impress anyone at your next meal. Enjoy making these easy and tasty chicken tenders!