Looking for a snack that's both crispy and packed with flavor? Garlic Herb Roasted Chickpeas offer a delicious solution! With their crunchy texture and savory herbs, they're perfect for munching any time. I’ll guide you through the simple steps to make these tasty bites. Ready to impress your taste buds? Let’s dive into this easy and healthy recipe!
Why I Love This Recipe
- Quick and Easy: This recipe takes only 10 minutes of prep time and is straightforward, making it perfect for a quick snack or appetizer.
- Healthy Snack: Roasted chickpeas are a nutritious alternative to traditional snacks, packed with protein and fiber while being low in calories.
- Flavorful Seasoning: The combination of garlic, herbs, and spices creates a deliciously savory flavor profile that keeps you coming back for more.
- Versatile Presentation: These chickpeas can be served on their own or with dips, making them a versatile addition to any gathering or meal.
Ingredients
List of Required Ingredients
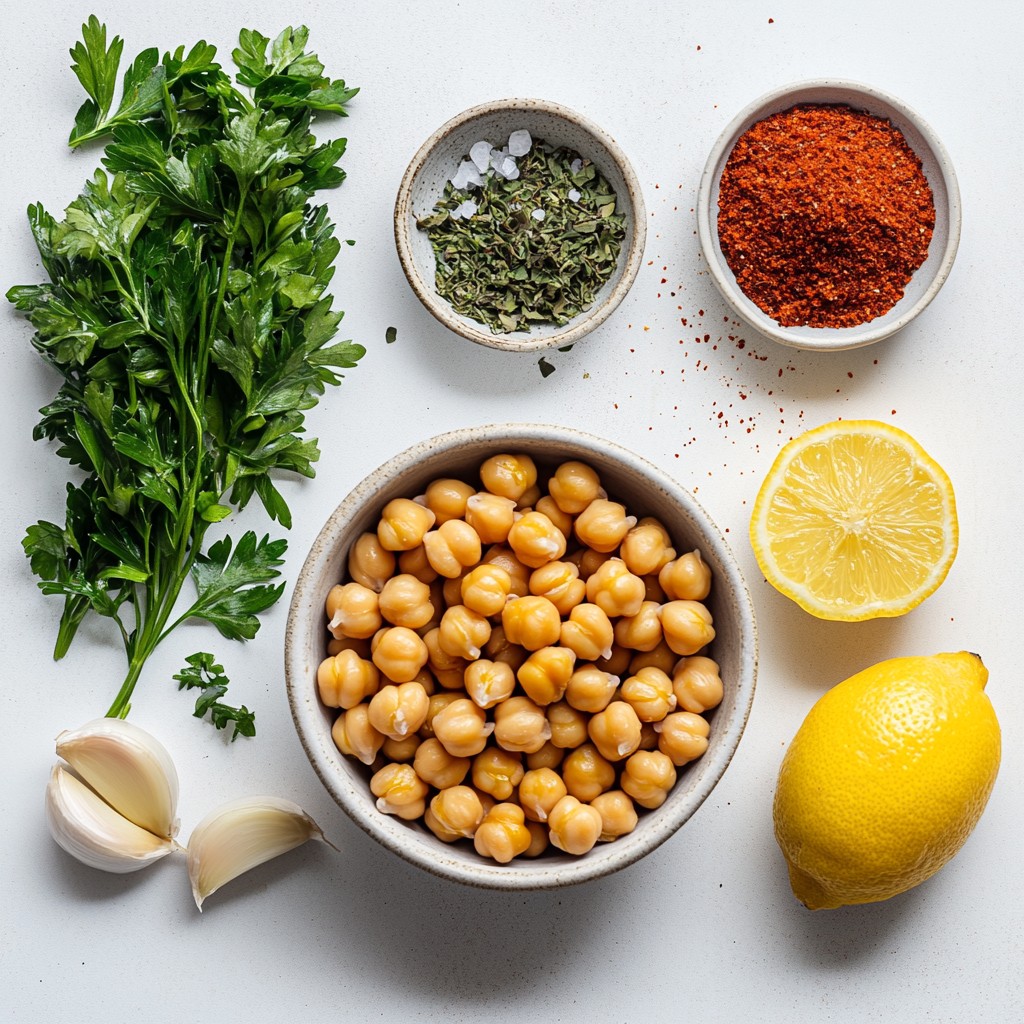
To make garlic herb roasted chickpeas, gather these key ingredients:
- 1 can (15 oz) chickpeas, drained and rinsed
- 2 tablespoons olive oil
- 4 cloves garlic, minced
- 1 teaspoon dried oregano
- 1 teaspoon dried thyme
- ½ teaspoon smoked paprika
- ½ teaspoon salt
- ¼ teaspoon black pepper
- Zest of 1 lemon
- Fresh parsley, chopped (for garnish)
Optional Ingredients for Customization
You can add some fun twists to your roasted chickpeas. Consider these optional ingredients:
- A pinch of cayenne pepper for heat
- Nutritional yeast for a cheesy taste
- Lemon juice for extra zing
- Other herbs, like rosemary or basil
Measurements and Substitutions
If you don’t have an ingredient, here are some easy swaps:
- Use canned beans like black beans or kidney beans instead of chickpeas.
- Swap olive oil for avocado oil, which also works well.
- If fresh herbs aren’t available, dried herbs can be used at half the amount.
- For a vegan-friendly alternative, skip the garnish or use tahini instead of yogurt.
These ingredients set the stage for a delicious snack. You can mix and match to suit your taste!
Step-by-Step Instructions
Preparation Steps Before Roasting
Start by preheating your oven to 400°F (200°C). This will help the chickpeas get crispy. Next, line a baking sheet with parchment paper to prevent sticking. Then, take one can of chickpeas, drain them, and rinse them well. Pat the chickpeas dry with a clean kitchen towel. This step is key for crispiness. If they are wet, they will not roast properly.
Roasting Process for Optimal Crispiness
In a large bowl, mix the dry chickpeas with 2 tablespoons of olive oil. Add 4 cloves of minced garlic, 1 teaspoon of dried oregano, 1 teaspoon of dried thyme, ½ teaspoon of smoked paprika, ½ teaspoon of salt, and ¼ teaspoon of black pepper. Toss everything together until the chickpeas are well coated. Spread the seasoned chickpeas on the baking sheet in a single layer. Make sure they have space between them. This allows for even cooking. Roast the chickpeas for 25-30 minutes. Shake the pan halfway through to promote even browning. They should turn golden brown and crispy.
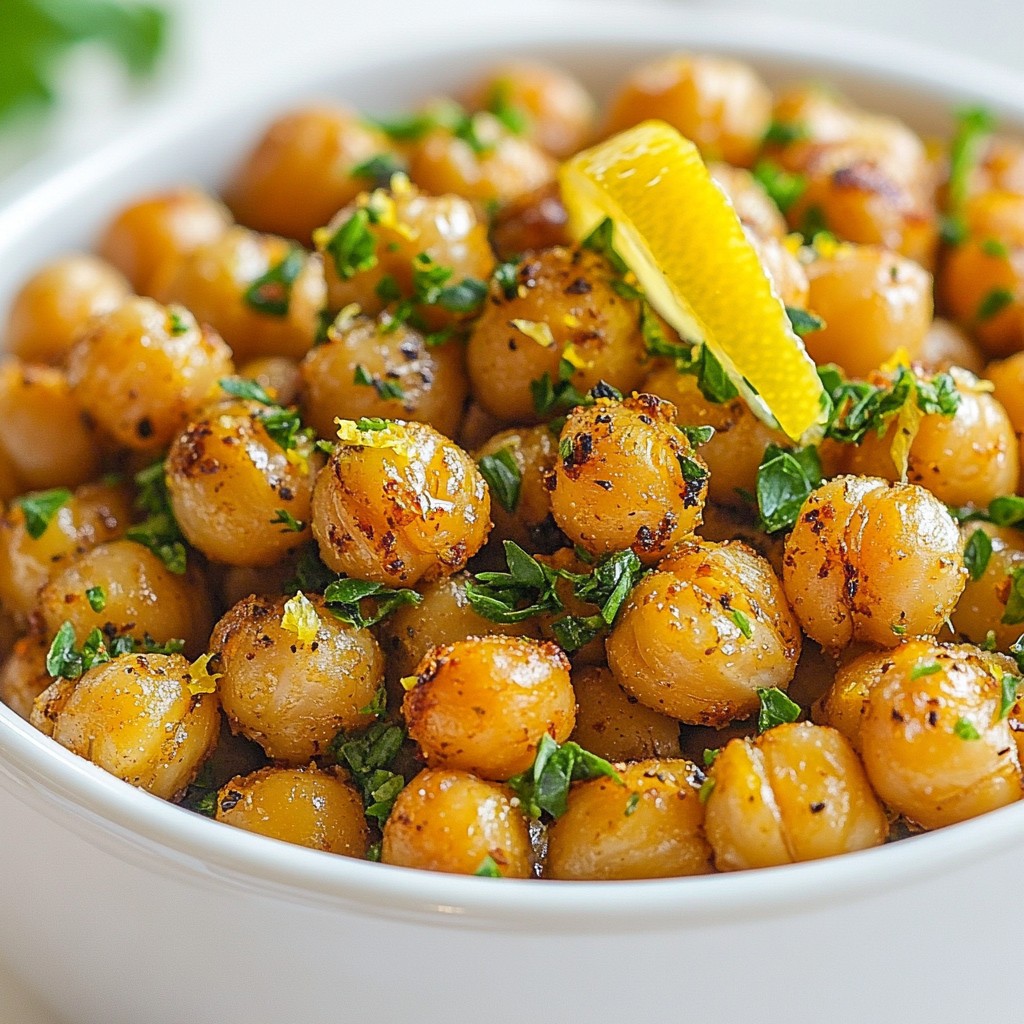
Final Touches and Serving Suggestions
Take the baking sheet out once the chickpeas are done. Right away, sprinkle the zest of one lemon over the warm chickpeas. Toss them gently to mix in the zest. Let the chickpeas cool for a few minutes. For a nice touch, garnish with fresh chopped parsley. Serve them in a rustic bowl for a fun presentation. You can also pair them with a yogurt dip or hummus for extra flavor. Enjoy your crunchy snack!
Tips & Tricks
Importance of Drying Chickpeas Properly
Drying chickpeas is key to the perfect crunchy bite. If they are moist, they won't crisp up. I like to pat them dry with a clean towel. This step helps remove excess water. Remember, the drier the chickpeas, the better they roast.
How to Achieve Maximum Crispiness
To get the best crispiness, spread the chickpeas in a single layer. Crowding them leads to steaming, not roasting. Shake the baking sheet halfway through cooking to ensure even browning. Roast them until they turn golden brown. This usually takes about 25 to 30 minutes at 400°F.
Common Mistakes to Avoid
One big mistake is not seasoning enough. Be generous with the spices; they bring flavor. Another mistake is not checking on the chickpeas while roasting. They can go from golden to burnt quickly. Lastly, don't skip the lemon zest. It adds brightness and enhances the overall taste.
Pro Tips
- Dry Chickpeas Thoroughly: Ensuring the chickpeas are completely dry before roasting is key to achieving that desired crunch. Use a clean kitchen towel to pat them dry well.
- Don't Overcrowd the Pan: For even roasting, make sure the chickpeas are in a single layer with space between them. This allows hot air to circulate and crisp them up nicely.
- Watch the Roasting Time: Keep an eye on the chickpeas as they roast; depending on your oven, they can go from perfectly crispy to burnt in a matter of minutes.
- Experiment with Seasonings: Feel free to mix up the spices and herbs to suit your taste. Try adding cayenne pepper for heat or cumin for a warm, earthy flavor.
Variations
Spicy Garlic Herb Chickpeas
To add some heat, mix in cayenne pepper or chili powder. Start with ¼ teaspoon and adjust to your taste. This spice brings a kick that pairs well with garlic. You can also use fresh chili if you like it spicy. Toss the chickpeas with your spices before roasting.
Mediterranean-Inspired Flavor Additions
For a Mediterranean twist, try adding some chopped sun-dried tomatoes or olives. You can also sprinkle in feta cheese after roasting for a creamy touch. Fresh basil or mint can add bright flavor too. These additions will make the chickpeas even more exciting.
Alternative Cooking Methods (Air Fryer, etc.)
If you want to save time, use an air fryer. Preheat it to 390°F (200°C). Coat the chickpeas with oil and spices, then place them in the basket. Cook for 15-20 minutes, shaking the basket halfway through. They will still come out crispy and delicious! You can also try roasting them on the grill for a smoky flavor.
Storage Info
Best Practices for Storing Leftovers
Store your garlic herb roasted chickpeas in an airtight container. This keeps them fresh longer. Make sure the chickpeas are completely cool before sealing. If you don’t have a container, use a zip-top bag. Squeeze out as much air as you can before sealing. This helps prevent them from getting soggy.
How Long Do They Last?
When stored properly, garlic herb roasted chickpeas last about 3 to 5 days. After that, they may lose their crunch. If you notice them becoming soft, it’s best to eat them soon. For longer storage, consider freezing them. Just remember, freezing may affect their texture.
Reheating Instructions for Retaining Crispy Texture
To reheat your chickpeas, use the oven. Preheat it to 400°F (200°C). Spread the chickpeas on a baking sheet in a single layer. Bake for about 5 to 10 minutes. Keep an eye on them to avoid burning. This will help them regain their crunch, making them tasty again!
FAQs
Can I use dried chickpeas instead of canned?
Yes, you can use dried chickpeas. First, soak them overnight in water. After soaking, cook them until tender. This may take 1 to 2 hours. Then, follow the same steps as you would with canned chickpeas. Just remember to dry them well before roasting.
What can I serve with garlic herb roasted chickpeas?
You can serve these chickpeas as a snack or side dish. They pair well with yogurt dip or hummus. Try them on salads for added crunch. For a fun twist, mix them into grain bowls. You can also enjoy them with veggies or pita bread.
Are roasted chickpeas healthy?
Yes, roasted chickpeas are healthy. They are high in protein and fiber. This makes them a great snack choice. They have healthy fats from olive oil. Plus, they are low in calories compared to chips. Enjoy them in moderation for a tasty, nutritious snack.
This post covered how to make crispy garlic herb roasted chickpeas. We looked at key ingredients, easy steps, and tips for best results. I shared flavor variations and storage methods too.
In closing, these roasted chickpeas add flavor and crunch to your meals. Enjoy experimenting with different spices and cooking methods. Happy cooking!