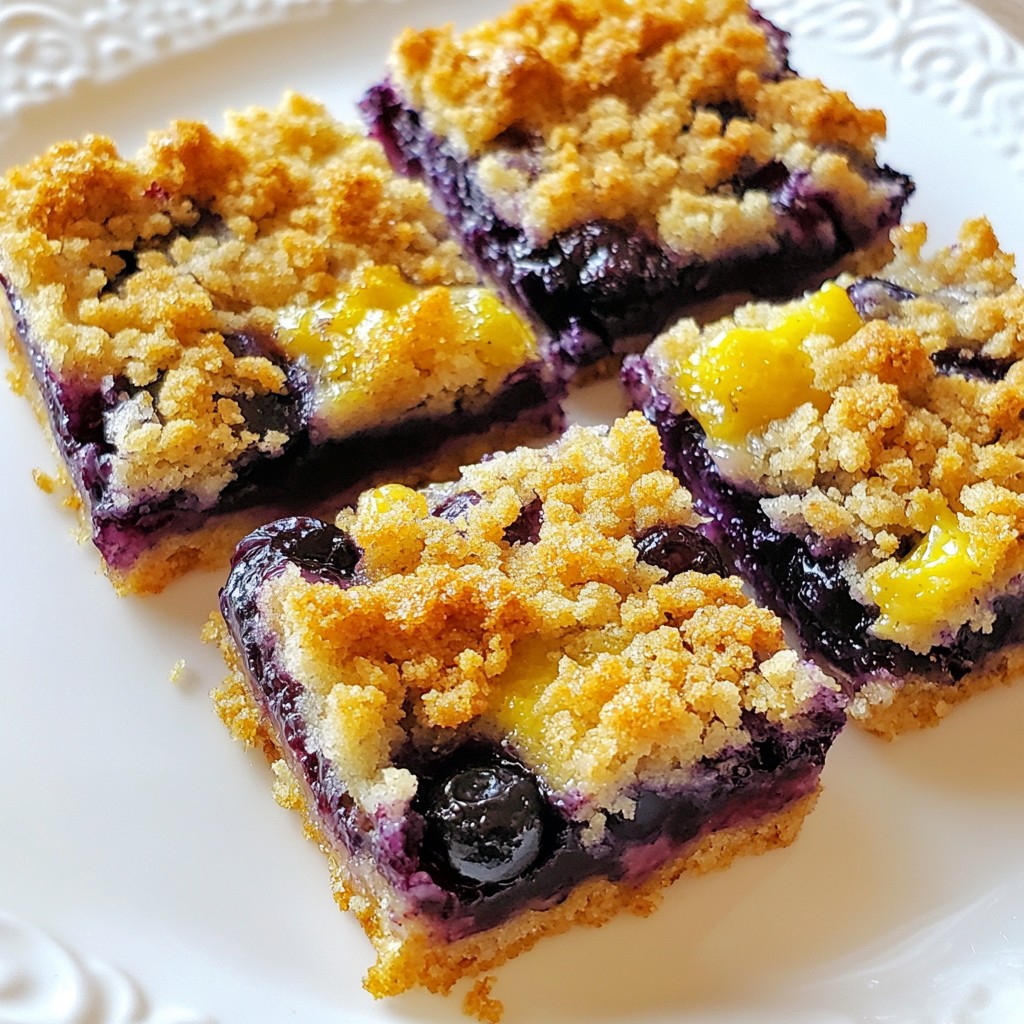
Are you ready to enjoy a sweet treat that’s both gluten-free and delicious? These Gluten Free Blueberry Crumble Bars are simple to make and bursting with flavor. Packed with wholesome oats and fresh blueberries, they provide a perfect balance of crunch and sweetness. In this easy recipe, I’ll guide you step-by-step on how to create these delightful bars. Let’s dive into the ingredients and get baking!
Why I Love This Recipe
- Nutritious Ingredients: This recipe is packed with wholesome ingredients like oats and almond flour, making it a healthier dessert option.
- Easy to Make: The steps are straightforward, making it perfect for both novice and experienced bakers.
- Deliciously Versatile: Feel free to swap blueberries with other fruits like raspberries or cherries for a different flavor experience.
- Perfect for Snacking: These bars are great for on-the-go snacks or a sweet treat after meals!
Ingredients
List of Ingredients
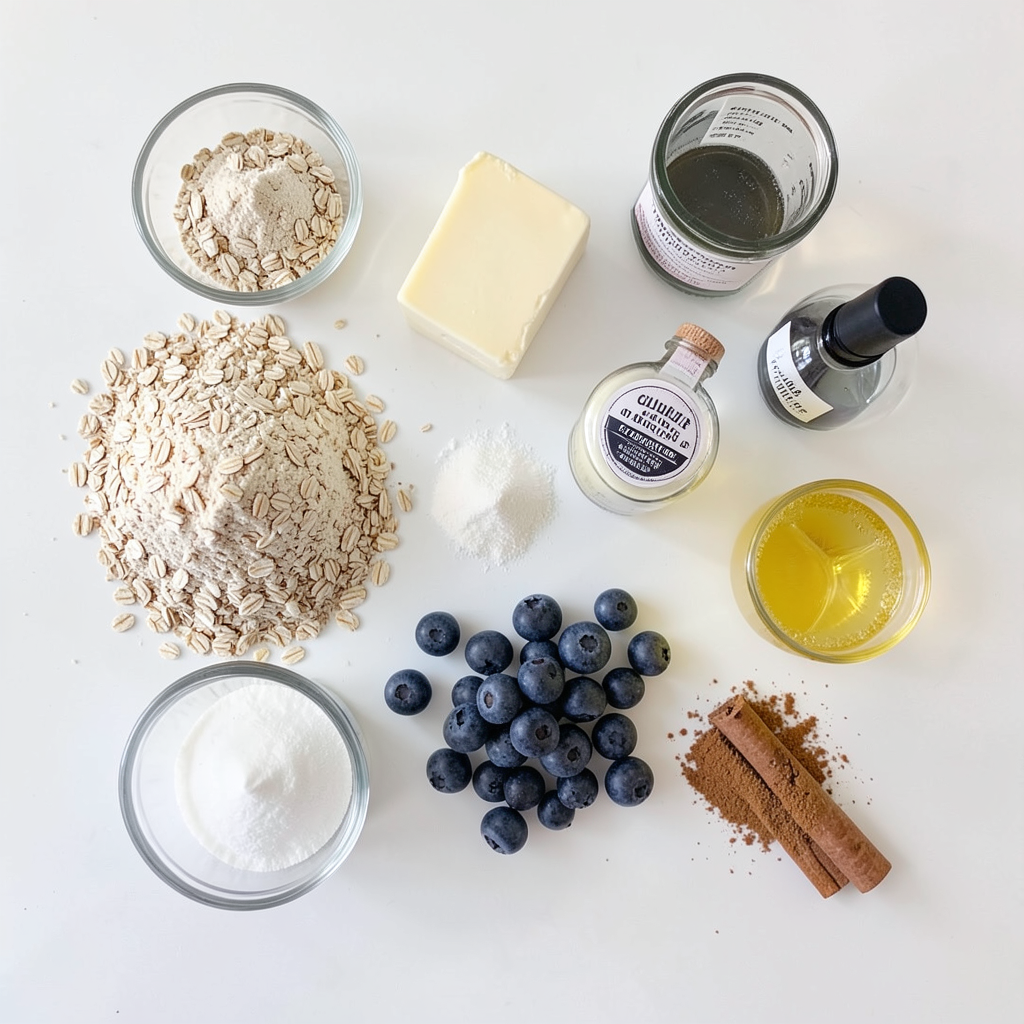
- 2 cups gluten-free oats
- 1 cup almond flour
- 1/2 cup coconut sugar (or brown sugar)
- 1/2 cup unsalted butter or coconut oil, melted
- 1/4 teaspoon salt
- 1 teaspoon vanilla extract
- 2 cups fresh blueberries (or frozen)
- 1 tablespoon lemon juice
- 1 tablespoon cornstarch
- 1 teaspoon cinnamon
These ingredients create a tasty and easy treat. The gluten-free oats give a nice texture. Almond flour adds a nutty flavor. Coconut sugar or brown sugar brings sweetness.
Melted butter or coconut oil helps bind the mixture. The salt enhances all the flavors. Vanilla extract adds warmth and depth. Fresh or frozen blueberries provide a juicy burst. Lemon juice brightens the berry flavor. Cornstarch thickens the filling. Finally, cinnamon adds a cozy spice note.
Choosing fresh ingredients matters. You want the best taste for your bars. Each component plays a role in flavor and texture. So, gather your ingredients and get ready to bake!
Step-by-Step Instructions
Preparation of Baking Pan
First, preheat your oven to 350°F (175°C). This helps the bars to bake evenly. Next, grab an 8x8 inch baking pan. Line it with parchment paper. Leave some paper hanging over the sides. This makes it easy to lift out your bars later.
Mixing the Dry Ingredients
In a large mixing bowl, add 2 cups of gluten-free oats, 1 cup of almond flour, and 1/2 cup of coconut sugar. Then, sprinkle in 1/4 teaspoon of salt and 1 teaspoon of cinnamon. Mix these dry ingredients well. You want them to blend together nicely.
Forming the Crumble Base and Topping
Now, pour in 1/2 cup of melted butter or coconut oil and 1 teaspoon of vanilla extract. Stir until the mixture looks crumbly. Set aside about 1 cup of this mixture for the topping. Then, press the rest evenly into the bottom of your prepared pan. Make sure it is packed down well.
Preparing the Blueberry Filling
Take 2 cups of fresh or frozen blueberries. In a separate bowl, gently toss them with 1 tablespoon of lemon juice and 1 tablespoon of cornstarch. This adds flavor and helps thicken the filling. Spread the blueberry mixture evenly over the base you just made.
Baking the Bars
Now, crumble the reserved oat mixture over the blueberries. Ensure it covers them well but shows some berries. Place the pan in the oven and bake for 30-35 minutes. The top should turn golden brown, and the blueberries will bubble. Enjoy the sweet aroma while they bake!
Tips & Tricks
Ensuring a Perfect Crumble Texture
To get the best crumble, mix your dry and wet ingredients well. Use your hands to combine them. This helps create a nice crumbly texture. You want it to feel like wet sand. If it sticks together, it's just right. If it’s too dry, add a little melted butter or oil.
Baking at Higher Altitudes
If you live high up, your bars may need some changes. Start by raising your oven temperature by 25°F. This helps the bars bake evenly. You might also need to add a bit more liquid. Consider adding an extra tablespoon of butter or oil. This helps keep the mixture moist.
Serving Suggestions
These bars taste amazing warm or cold. If you eat them warm, add a dollop of yogurt on top. It adds a nice creaminess. For a special treat, serve them with ice cream. You can also pack them for a healthy snack on the go.
Pro Tips
- Choose Your Sweetener Wisely: Coconut sugar provides a lovely caramel flavor, but you can substitute it with brown sugar or maple syrup for different taste profiles.
- Fresh vs. Frozen Blueberries: Fresh blueberries yield the best results, but if using frozen, make sure to thaw and drain them first to prevent excess moisture in your bars.
- Cutting Tips: For clean cuts, use a sharp knife and ensure the bars are completely cooled before slicing. This helps maintain their shape.
- Serving Suggestions: Enjoy these bars warm with a scoop of your favorite yogurt or a drizzle of honey for added sweetness!
Variations
Adding Nuts and Seeds
You can easily boost flavor and crunch by adding nuts or seeds. Almond slices give a nice crunch and a hint of sweetness. Chopped walnuts add a rich, nutty taste. For a healthy twist, try mixing in some chia seeds. They add fiber and a slight crunch. Just remember to keep the total amount of dry ingredients balanced.
Seasonal Fruit Alternatives
Feel free to swap blueberries with other fruits. Raspberries offer a tart contrast that pairs well with the sweet crumble. Strawberries add a juicy sweetness, especially in summer. Peaches, with their soft texture, bring a lovely flavor. Each fruit option changes the taste, so pick what you love best.
Vegan and Dairy-Free Adaptations
To make these bars vegan, use coconut oil instead of butter. You can replace the egg by using a flax egg, made with one tablespoon of ground flaxseed mixed with three tablespoons of water. This mixture acts as a great binder. These swaps keep the bars tasty and suitable for a vegan diet.
Storage Info
Best Ways to Store Bars
To keep your gluten free blueberry crumble bars fresh, you have two good options. You can store them at room temperature or in the fridge.
- Room Temperature: If you plan to eat them within a few days, keep them in an airtight container. They will stay fresh for about 3 days.
- Refrigeration: If you want them to last longer, place the bars in the fridge. They can stay fresh for up to a week. The chill also makes them taste great!
Freezing for Long-term Storage
Freezing is a smart way to store these bars for longer. Here’s how to do it right:
1. Cool Completely: Make sure your bars are fully cooled before freezing. This step helps avoid ice crystals.
2. Cut and Wrap: Slice the bars into pieces. Wrap each piece in plastic wrap. Then, place them in a freezer-safe bag or container.
3. Label and Freeze: Don’t forget to label your bags with the date. They can stay in the freezer for about 3 months.
Reheating Instructions
When you’re ready to enjoy your frozen bars, here’s how to reheat them for the best taste:
- Microwave: Place a bar on a microwave-safe plate. Heat for 15-20 seconds until warm.
- Oven: Preheat your oven to 350°F (175°C). Place the bars on a baking sheet for about 10 minutes. This method helps keep the crumble crispy and delicious!
FAQs
Can I use different gluten-free flours?
Yes, you can! Try using oat flour or rice flour. Both work well in this recipe. If you prefer a nut-free option, use a blend of gluten-free all-purpose flour. Just make sure it contains xanthan gum for better texture. You can mix and match flours to find your favorite taste.
How do I know when the bars are done baking?
Look for a golden top. The edges should be slightly crispy. You will also see some bubbling from the blueberries. If a toothpick comes out clean from the center, they are ready! Keep an eye on the baking time, as ovens can vary.
What can I use instead of cornstarch?
You can use arrowroot powder or tapioca starch as a thickener. Both will give a nice texture to the blueberry filling. If you want a more natural option, try using ground chia seeds. Just keep in mind that it may change the texture a bit.
You can now create delicious gluten-free blueberry crumble bars with ease. We covered key ingredients, step-by-step instructions, and helpful tips. You learned how to adjust for storage and variations to fit your taste. Try adding nuts or different fruits for fun twists. Baking these bars is simple, fun, and rewarding. Enjoy your homemade bars warm or chilled, wherever you are. Embrace the joy of baking and share your tasty treats with others. Happy baking!