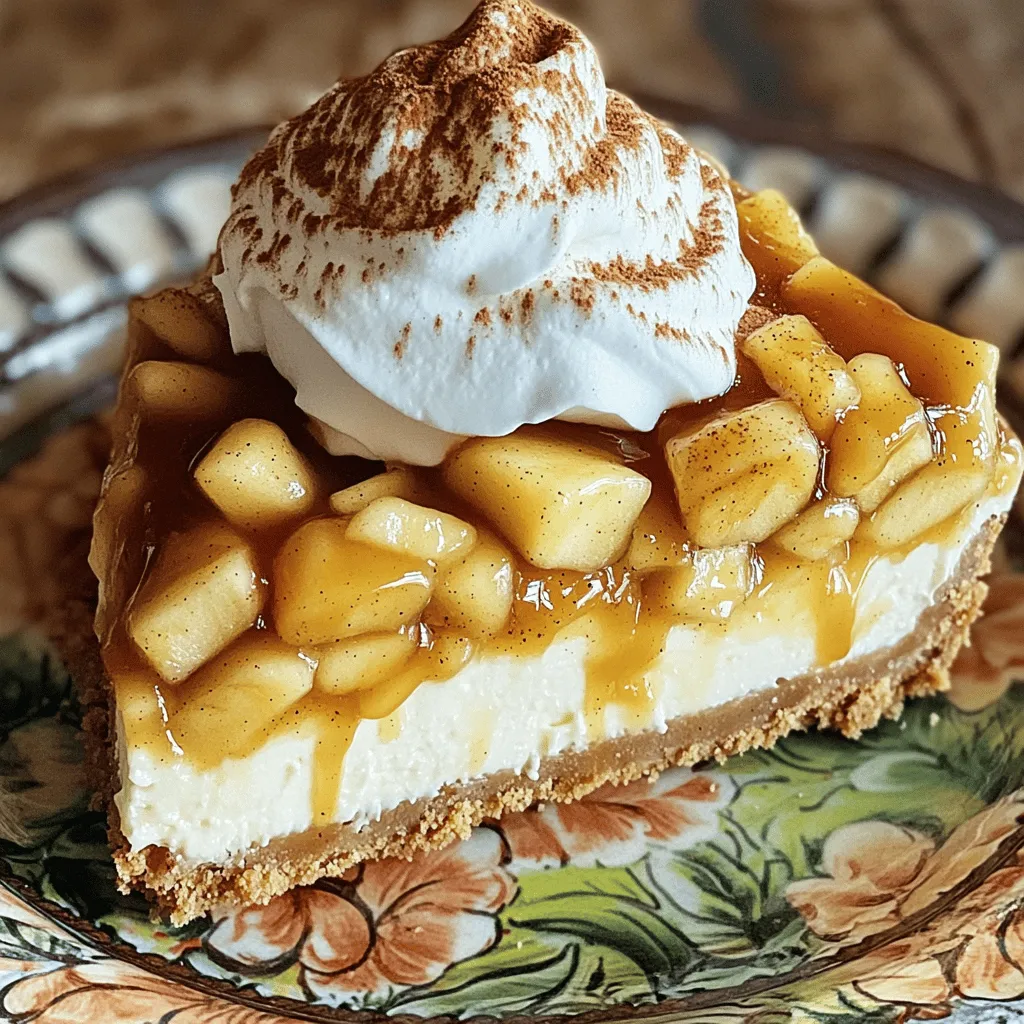
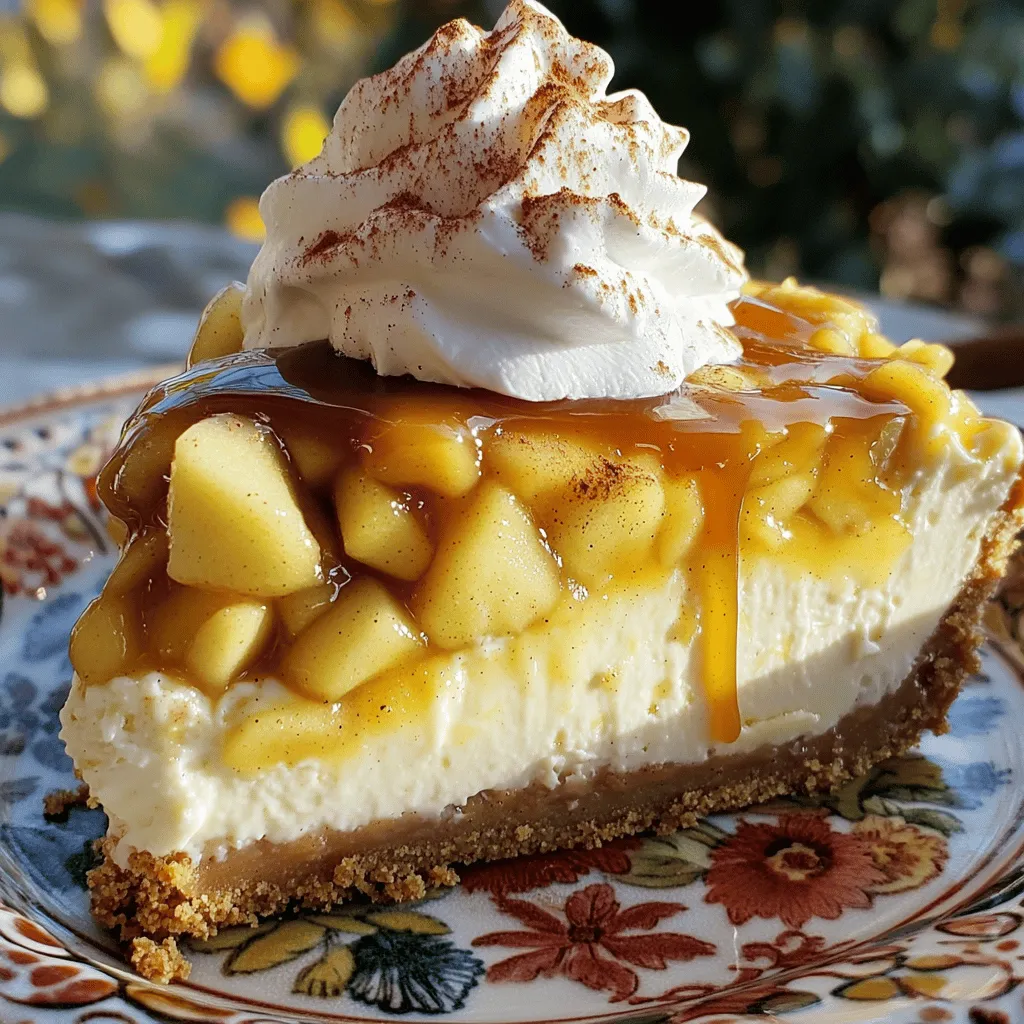
Welcome to a dessert lover’s dream! Today, I’m sharing my recipe for Irresistible Apple Pie Stuffed Cheesecake Delight. Imagine creamy cheesecake blended with warm apple pie filling, nestled in a perfect crust. This dish is not only tasty but also fun to make. You’ll impress your friends and family with each slice. Ready to dive into this sweet adventure? Let’s gather our ingredients and get started!
Ingredients
Apple Pie Filling Ingredients
– 3 medium apples, peeled, cored, and diced (preferably Granny Smith)
– 1 teaspoon lemon juice
– 1/2 cup brown sugar
– 1 teaspoon ground cinnamon
– 1/4 teaspoon nutmeg
– 1 tablespoon cornstarch
– 1 tablespoon unsalted butter
For the apple pie filling, I recommend using Granny Smith apples. They add a nice tartness that balances the sweetness. The lemon juice keeps the apples fresh and bright. The brown sugar, cinnamon, and nutmeg bring warmth and depth to the flavors.
Cheesecake Layer Ingredients
– 2 cups cream cheese, softened
– 1 cup granulated sugar
– 1 teaspoon vanilla extract
– 3 large eggs
– 1 cup sour cream
The cream cheese is key for a rich, smooth texture. Be sure to let it soften so it blends well. The granulated sugar adds sweetness, while the vanilla extract gives a lovely aroma. Sour cream adds creaminess and a slight tang.
Crust Ingredients
– 1 1/2 cups graham cracker crumbs
– 1/4 cup granulated sugar
– 1/2 cup unsalted butter, melted
For the crust, graham cracker crumbs create a nice crunch. Mixing them with sugar and melted butter makes a great base. Press it firmly into the pan to ensure it holds together after baking.Enjoy making your apple pie stuffed cheesecake!
Step-by-Step Instructions
Preparing the Apple Pie Filling
To make the apple pie filling, start by melting the butter in a saucepan over medium heat. Once melted, add in the diced apples, lemon juice, brown sugar, cinnamon, nutmeg, and cornstarch. Stir everything well to mix the flavors. Cook this mixture until the apples become tender, which takes about 5 to 7 minutes. After that, set the filling aside to cool. This step is key, as it keeps the apples from cooking too much in the oven.
Making the Crust
Next, it’s time to make the crust. In a medium bowl, combine the graham cracker crumbs, granulated sugar, and melted butter. Mix these ingredients until they are well combined. Press this mixture evenly into the bottom of a 9-inch springform pan to create a solid layer. Bake the crust in your preheated oven for 10 minutes, then remove it and let it cool slightly. A good crust holds everything together and adds a nice crunch.
Assembling and Baking the Cheesecake
Now, we move on to assembling the cheesecake. First, pour half of the cheesecake batter over the cooled crust. Next, spoon the cooled apple pie filling evenly on top of this layer. Pour the remaining cheesecake batter over the filling, smoothing the top with a spatula. Finally, place the cheesecake in the oven and bake it for about 60 to 70 minutes. The center should be set but still have a slight jiggle. After baking, turn off the oven and crack the door open. Letting the cheesecake cool in the oven for 1 hour helps prevent cracks. Once cooled, cover it with plastic wrap and refrigerate for at least 4 hours, or overnight for the best results. This chilling step enhances the flavor and texture.
Tips & Tricks
How to Achieve the Perfect Cheesecake Texture
To get a smooth and creamy cheesecake, use room-temperature cream cheese. Cold cream cheese makes lumps. Beat the cream cheese until it is fluffy. This takes about three minutes. Add sugar slowly while mixing. This helps mix better, too. Don’t overmix once you add the eggs. You want a smooth batter, but overmixing adds air. Too much air causes cracks when baking.
Common Mistakes to Avoid
One big mistake is not measuring your ingredients. Use a kitchen scale for accuracy. Another error is baking at the wrong temperature. Make sure your oven is at 325°F. This is key for even cooking. Also, don’t skip the cooling steps. Cooling in the oven helps avoid cracks. Lastly, don’t rush the chilling process. A full chill makes your cheesecake firm and creamy.
Tips for Cooling and Chilling
Let your cheesecake cool in the oven first. After baking, crack the door and let it cool for an hour. This helps prevent cracks. Then, wrap it well and chill it for at least four hours. Overnight chilling gives the best flavor and texture. Before serving, let it sit at room temperature for about 30 minutes. This makes each slice easier to cut and enjoy. For extra flair, drizzle caramel sauce on top before serving.
Variations
Adding Different Fruit Fillings
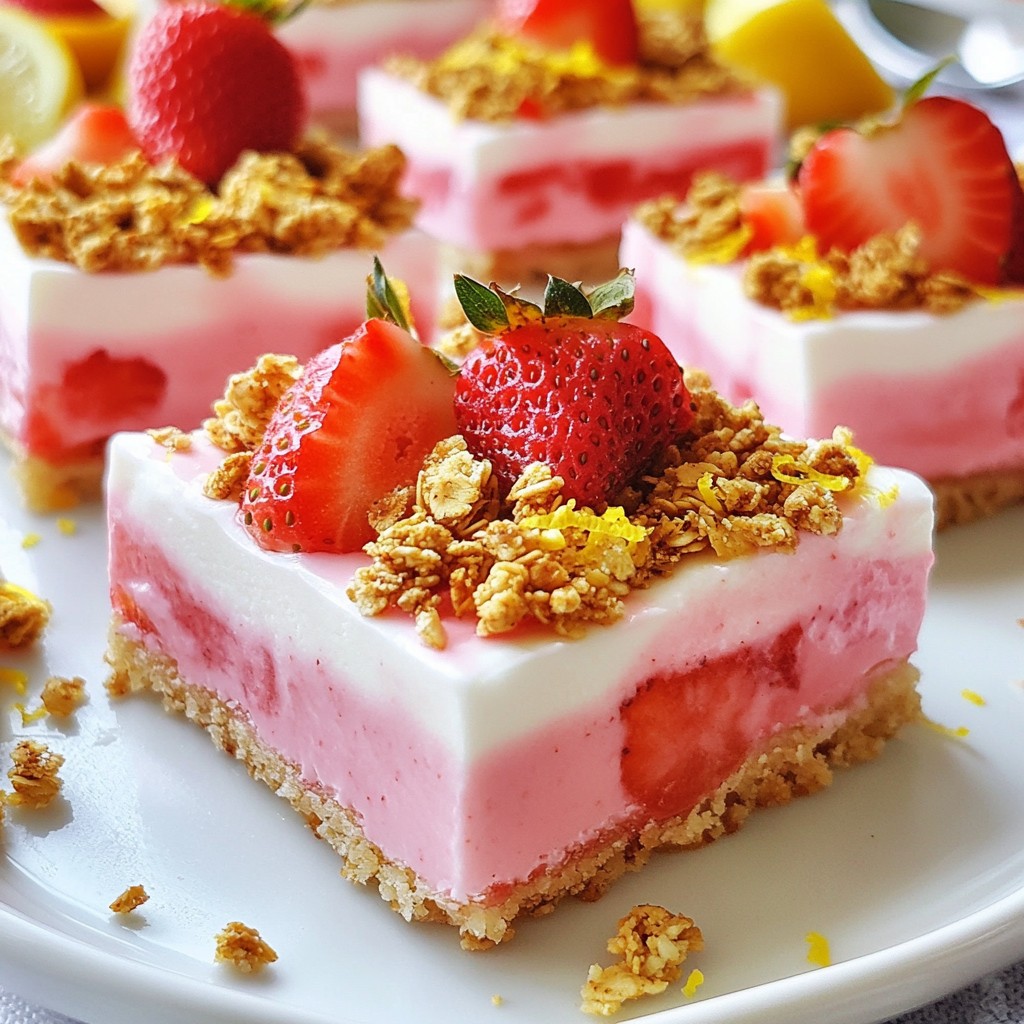
You can switch up your stuffed cheesecake by using other fruits. Try peaches, cherries, or blueberries. These fruits add unique flavors and colors. Each fruit has its own taste profile, so feel free to mix and match. For example, combine apples and cranberries for a tart twist. Just adjust the sugar to balance the flavors. This way, you keep your cheesecake exciting and fresh.
Themed Cheesecake Variations
Get creative with themes for special occasions. For a holiday, add spices like ginger and nutmeg for a warm flavor. A fall theme can use pumpkin puree mixed with the apple pie filling. For summer, think about a tropical vibe with coconut and pineapple. You can even create a fun birthday cheesecake with colorful sprinkles and chocolate. Themed variations let you express your creativity and impress your guests.
Gluten-Free and Low-Sugar Options
If you need gluten-free options, swap regular graham crackers for gluten-free ones. You can use almond flour or oat flour for the crust. For a low-sugar version, replace sugar with natural sweeteners like stevia or monk fruit. These options keep the taste rich without the extra sugar. Always check the labels to ensure everything fits your dietary needs. This way, everyone can enjoy a slice of your delicious cheesecake!
Storage Info
How to Store Leftover Cheesecake
To store leftover cheesecake, first, let it cool completely. Then, cover it tightly with plastic wrap. You can also use an airtight container. This keeps the cheesecake fresh for up to five days in the fridge. If you want to keep it longer, freezing is a great option.
Freezing for Later Use
You can freeze the cheesecake for up to three months. To do this, slice the cheesecake and wrap each piece in plastic wrap. Then, place the wrapped pieces in a freezer-safe bag. Make sure to label the bag with the date. This helps you know when to enjoy your delicious dessert.
Best Practices for Reheating
To reheat a frozen slice, take it out and let it sit in the fridge overnight. This helps it thaw slowly. If you’re in a hurry, you can use the microwave. Heat it on low power for 20-30 seconds. Be careful not to overheat. Enjoy your tasty treat at room temperature or slightly warm.
FAQs
How long does Apple Pie Stuffed Cheesecake last?
Apple Pie Stuffed Cheesecake can last in the fridge for about 5 to 7 days. Store it in an airtight container to keep it fresh. If you want to save it longer, you can freeze it. In the freezer, it can last up to 3 months. Just wrap it well to prevent freezer burn.
Can I make this cheesecake in advance?
Yes, you can make this cheesecake a day or two ahead of time. It actually tastes better after chilling overnight. Just make sure to cover it tightly with plastic wrap. This helps keep it moist and flavorful.
What to serve with Apple Pie Stuffed Cheesecake?
You can serve this cheesecake with whipped cream on top. A drizzle of caramel sauce makes it even better. You can also add a sprinkle of cinnamon or serve it with vanilla ice cream. Fresh apple slices can add a nice touch too.
You now know how to make a tasty Apple Pie Stuffed Cheesecake. We covered the key ingredients, step-by-step baking, and useful tips to avoid mistakes. Remember to try different flavors and options, like gluten-free versions. Proper storage helps keep your cheesecake fresh longer.
Enjoy sharing this sweet treat! It’s perfect for any gathering. Happy baking!